

Page 1
Service Manual
for KIWI/H1915/H1920
HTC Proprietary
Confidential Treatment Requested
Rev. A02
March 12, 2004
HTC Corp.
Engineering Mobility
HTC confidential
© 2001, HTC Corporation. All rights reserved. TOTAL 36 CONT.ON. 2 PAGE NO. 1
HTC Confidential
Page 2

Add shipping mode and
TITLE: Service Manual
REV.
NO.
AX01
A01
A02
DATE CONTENTS DEP. REVISED
Mar,18
2003
Mar,27
2003
Mar,12
2004
Fist Draft
First Release
backup battery inspection
SOP
Technical
Support
Technical
Support
Technical
Support
Vince
Huang
Vince
Huang
Vince
Huang
APP´D
STGE.PER.
HTC confidential
© 2001, HTC Corporation. All rights reserved. TOTAL 36 CONT.ON. 3 PAGE NO. 2
HTC Confidential
Page 3

Table of contents
1. INTRODUCTION
2. PRODUCT CONFIGURATION………………………………………………… 4
3. LABLE PLAN
4. ASSEMBLING AND DISASSEMBLING
4.1 DISASSEMBLING
4.2 ASSEMBLING
5. PROBLEM DIAGNOSTICS
5.1 TOOLS REQUIRED
5.2 HOW TO ENTER DIAGNOSTIC
5.3 LIST OF DIAGNOSTICTEST ITEM
5.4 TEST ITEM OPERATION
5.5 SHIPPING MODE
5.6 BACKUP BATTERY INSPECTION
・・・・・・・・・・・・・・・・・・・・・・・・・・・・・・・・・・・・・・・・・・・・・・・
・・・・・・・・・・・・・・・・・・・・・・・・・・・・・・・・・・・・・・・・・・・・・・・・・・
・・・・・・・・・・・・・・・・・・・・・・・・・・・・・・
・・・・・・・・・・・・・・・・・・・・・・・・・・・・・・・・・・・・・・・
・・・・・・・・・・・・・・・・・・・・・・・・・・・・・・・・・・・・・・・・・
・・・・・・・・・・・・・・・・・・・・・・・・・・・・・・・・・・・・・・・
・・・・・・・・・・・・・・・・・・・・・・・・・・・・・・・・・・・・・・
・・・・・・・・・・・・・・・・・・・・・・・・・・・・・
・・・・・・・・・・・・・・・・・・・・・・・・・・
・・・・・・・・・・・・・・・・・・・・・・・・・・・・・・・・・・
・・・・・・・・・・・・・・・・・・・・・・・・・・・・・・・・・・・・・・・
・・・・・・・・・・・・・・・・・・・・・・・・・・・
4
7
11
11
15
20
20
20
20
21
22
24
6. DIAGNOSTICS PROGRAM
6.1 LIST OF TEST JIGS
6.2 TROUBLESHOOTING AND REPAIR
6.3 FAULTY TREE
7. REFLASH PROCEDURE
8. SPARE PARTS LIST
9. MB MAJOR COMPONENT
・・・・・・・・・・・・・・・・・・・・・・・・・・・・・・・・・・・・・・・
・・・・・・・・・・・・・・・・・・・・・・・・・・・・・・・・・・・・・
・・・・・・・・・・・・・・・・・・・・・・・・・
・・・・・・・・・・・・・・・・・・・・・・・・・・・・・・・・・・・・・・・・・
・・・・・・・・・・・・・・・・・・・・・・・・・・・・・・・・・・・・・・・・
・・・・・・・・・・・・・・・・・・・・・・・・・・・・・・・・・・・・・・・・・・・
・・・・・・・・・・・・・・・・・・・・・・・・・・・・・・・・・・・・・・
26
26
27
30
31
33
32
HTC confidential
© 2001, HTC Corporation. All rights reserved. TOTAL 36 CONT.ON. 4 PAGE NO. 3
HTC Confidential
Page 4

1. Introduction
This manual provides the technical information to support the service activities of the KIWI.This
document contains highly confidential information, so any or all of this document should not be
revealed to any third party.
2. Product Configuration
Platform
• Windows CE Merlin OS – English, French, German, Italian, Spanish, Traditional Chinese, Simplified Chinese, Japanese.
• A low cost PDA built with optimized number of key elements
• Dimensions: Main unit
70mm(W) x 113.6mm(L) x 12.7mm (T)
• Weight (Main Unit) ->115g
Processor
• Intel Cotulla 200MHz
Memory
• ROM:
16MB Nand Flash ROM
Boot ROM :4M Bit (Bootloader)
RAM:
64MB SDRAM (46MB user accessible)
LCD Module
• Philip LCD 3.5” , reflective type TFT Color with 6pcs LED back light & 64K colors
• Touch sensitive screen
ASIC
• HTC ASIC 3 (TC222C56)
Stylus
• Around 100 mm
Hardware Buttons/reset button
• One power button
• One recording button
• One soft reset switch
• Four software programmable AP buttons with wake up function
HTC confidential
© 2001, HTC Corporation. All rights reserved. TOTAL 36 CONT.ON. 5 PAGE NO. 4
HTC Confidential
Page 5

• One 5-way joy stick
Notification
• One bi-color LED for Event Alarm or PDA charging status
• Notification by Sound and Message on the display
Audio
• Microphone
• Speaker
• One 2.5mm Earphone Jack, with stereo sound
• MP3 stereo (through audio jack)
Power
• Battery
Rechargeable 900mAH, Lithium Ion battery
User Swappable Battery
Battery life: >8 hrs
Back up battery
Data retention time: 72 hrs
Battery fully charge time: 4 hours
• AC Adapter
AC input: 100~240 Vac, 50/60Hz
AC input current: 0.2 Aac max.
Output voltage: 5Vdc (typical)
Output current: 2A (typical)
Same as H38XX/H39XX serious
SD Slot
• Support both memory and IO
• Support SD/MMC type standard
Environment
• Operating temp.: 0 ~40 degree C. Humidity : 80% RH
• Storage temp.: -20 ~ 60 degree C. Humidity : 80% RH
Peripheral Interface
• Infrared Port IrDA SIR x 1, Transceiving range: 30cm
• Combo Port for USB and power
• Audio Jack (2.5mm)
• SD slot connector
Accessories
• USB sync. Cable: 22 pins USB connector + DC Jack
HTC confidential
© 2001, HTC Corporation. All rights reserved. TOTAL 36 CONT.ON. 6 PAGE NO. 5
HTC Confidential
Page 6

• AC adapter
• Stylus
• Ear plug
Options
• Stylus
• Battery
• USB Cradle (Battery Charger Included) – 22 pins Combo Port
Regulatory
• EMC / EMI: CE, FCC
• Safety: UL
Main-Battery Charger
PDA + Sled Slot for Active sync. And Battery Charger
Rechargeable 900mAH, Lithium Ion battery
DC-In Jack
LED Indicator
• Pocket PC Logo
Applications
• Power Management
• Data Backup
• Back Light Control
HTC confidential
© 2001, HTC Corporation. All rights reserved. TOTAL 36 CONT.ON. 7 PAGE NO. 6
HTC Confidential
Page 7
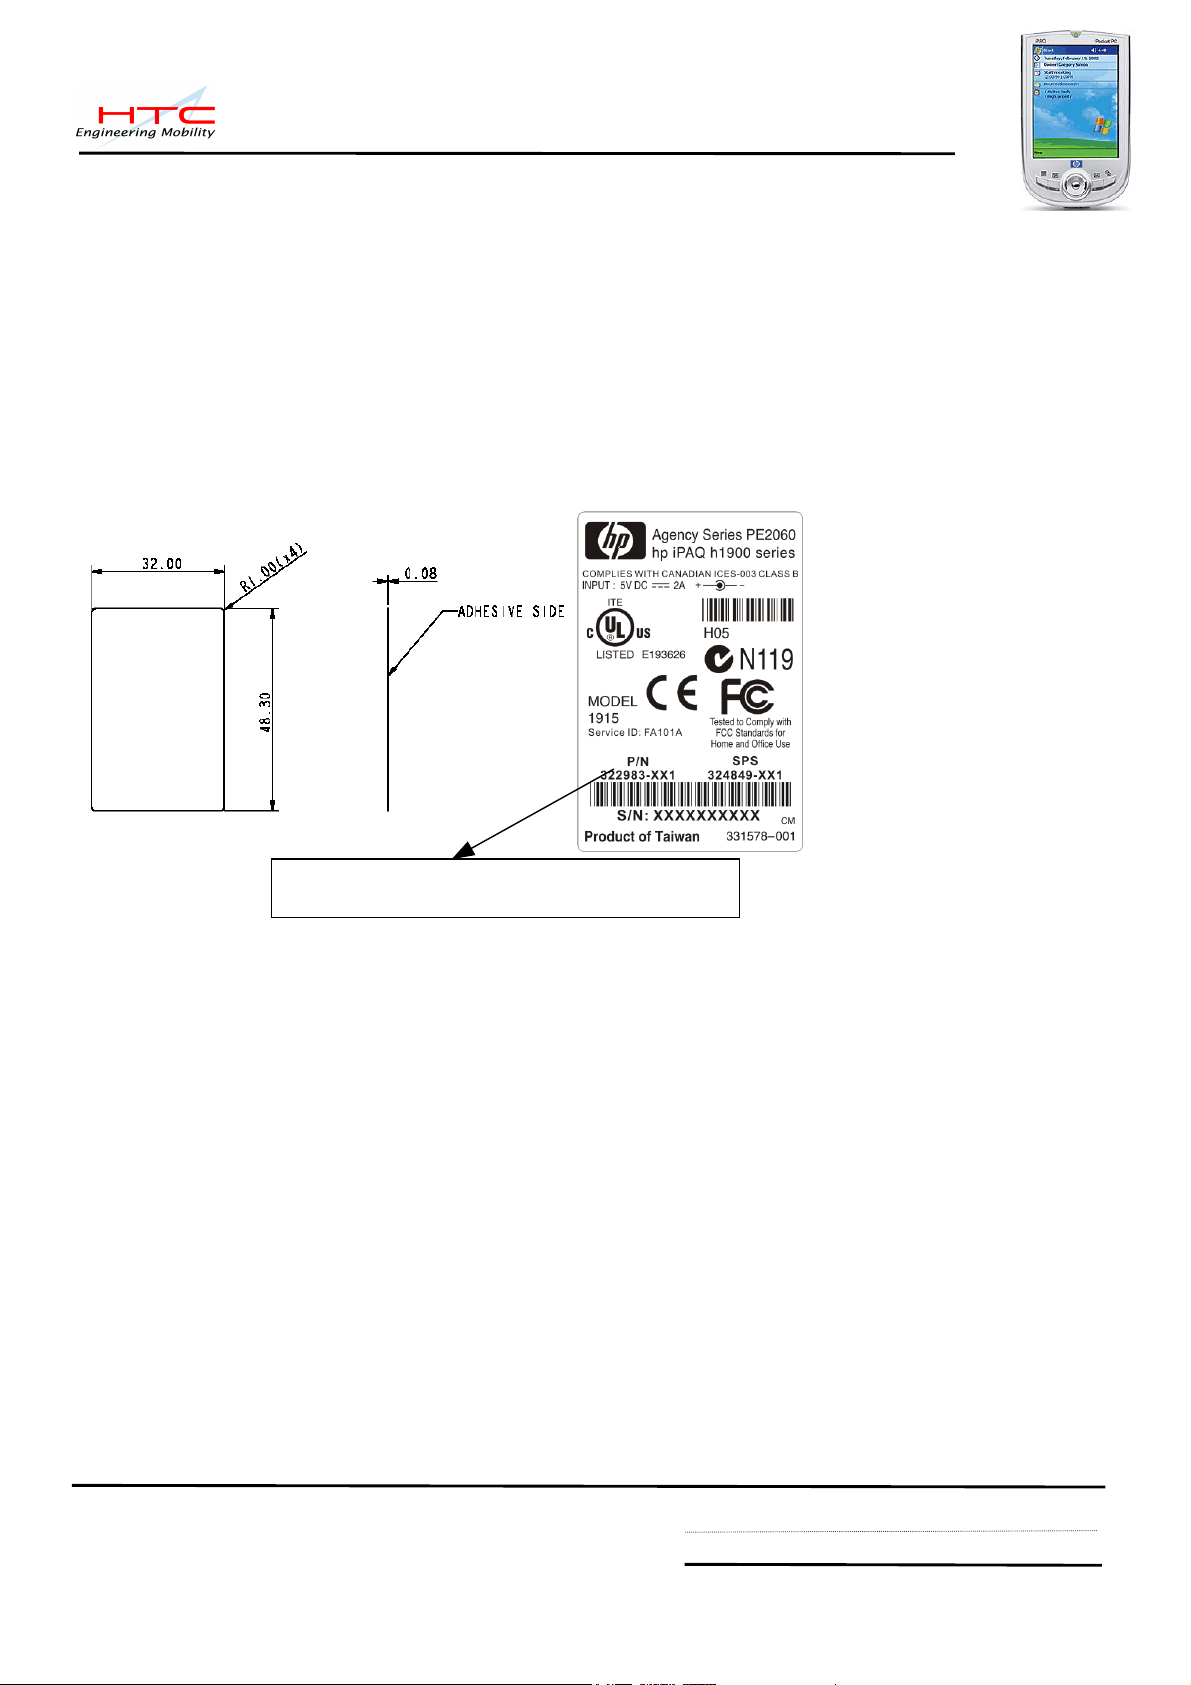
3.Label Plan
3.1 iPAQ H1915 Agency Label (on back housing under battery)
HP P/N: 311578-001
HTC P/N: 77H00067-00
Image file: See below
Size: 32.00 mm x 48.30 mm
Barcode Type: Code 39
MFG barcode printing of area: 32 mm x 12mm
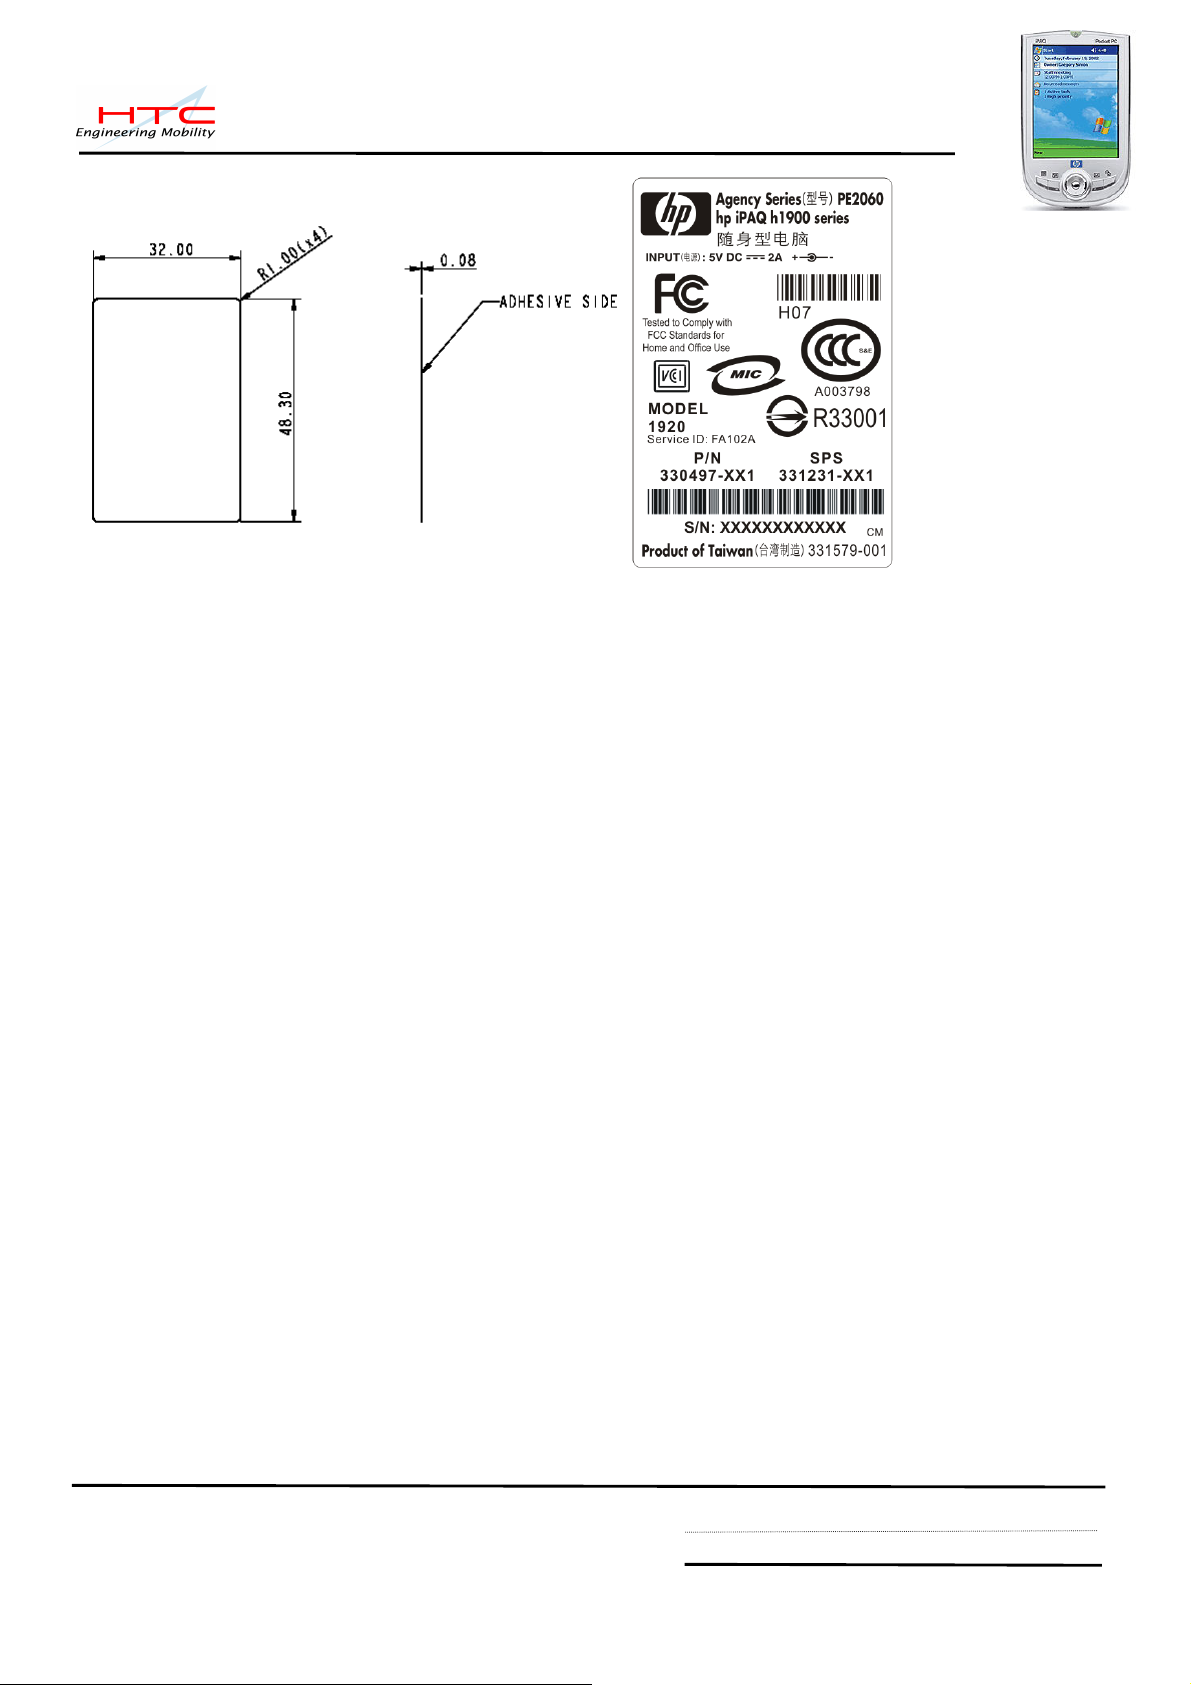
3.2 iPAQ H1920 Agency Label
HP P/N: 331579-001
HTC P/N: 77H00068-00
Image file: See below
Size: 32.00 mm x 48.30 mm
Barcode Type: Code 39
MFG barcode printing of area: 32 mm x 12mm
Reserve for MFG barcode printing of area.
HTC confidential
© 2001, HTC Corporation. All rights reserved. TOTAL 36 CONT.ON. 8 PAGE NO. 7
HTC Confidential
Page 8
3.3 SKU S/N Format (10 digit format)
S/N: CCSYWWZZZZ
CC: Country of Manufacture
2 capital alpha (A-Z) characters, ISO 3166 Alpha-2 Code list. (Ex: TW=Taiwan)
S: Site Code
1character, pre-assigned by HP (ex: C=HTC TW)
YWW: Date of Manufacture
The date of manufacture is expressed alpha-numerically by year counting from the base year, 2000, and week of
manufacture
ZZZZ: Sequence Number
Alphanumic, Base 31(0 through 9 and B through Z (A, E, I, O and U are disallowed characters), unique identifier that
identifies the exact unit, which was manufactured in the lot, produced within the date of manufacture. This number is the
serialization identifier which is essential to track the shipped, delivered, invoiced, installed, inventoried, repaired and
possibly returned or written off or scrapped, item itself, throughout the life cycle of unit. (ex: An example of a serial
number using all sub-elements above would be: DE=produced in Germany; B-At the HP Boeblingen/Sindelifingen Plant;
2-In the year 2002; 38-Week of September 9; B2H4-For the actual unit per that weekly lot of number 300, 301 (B=10
which gives 10×313=29,7910; 2=2 which gives 2×312=1,922; H=15 which gives 15×311=465; 4=4 which gives 4×
310=4). Therefore this unit is the 300, 30 1st units produced of this product in week 38 of 2002.
HTC confidential
© 2001, HTC Corporation. All rights reserved. TOTAL 36 CONT.ON. 9 PAGE NO. 8
HTC Confidential
Page 9
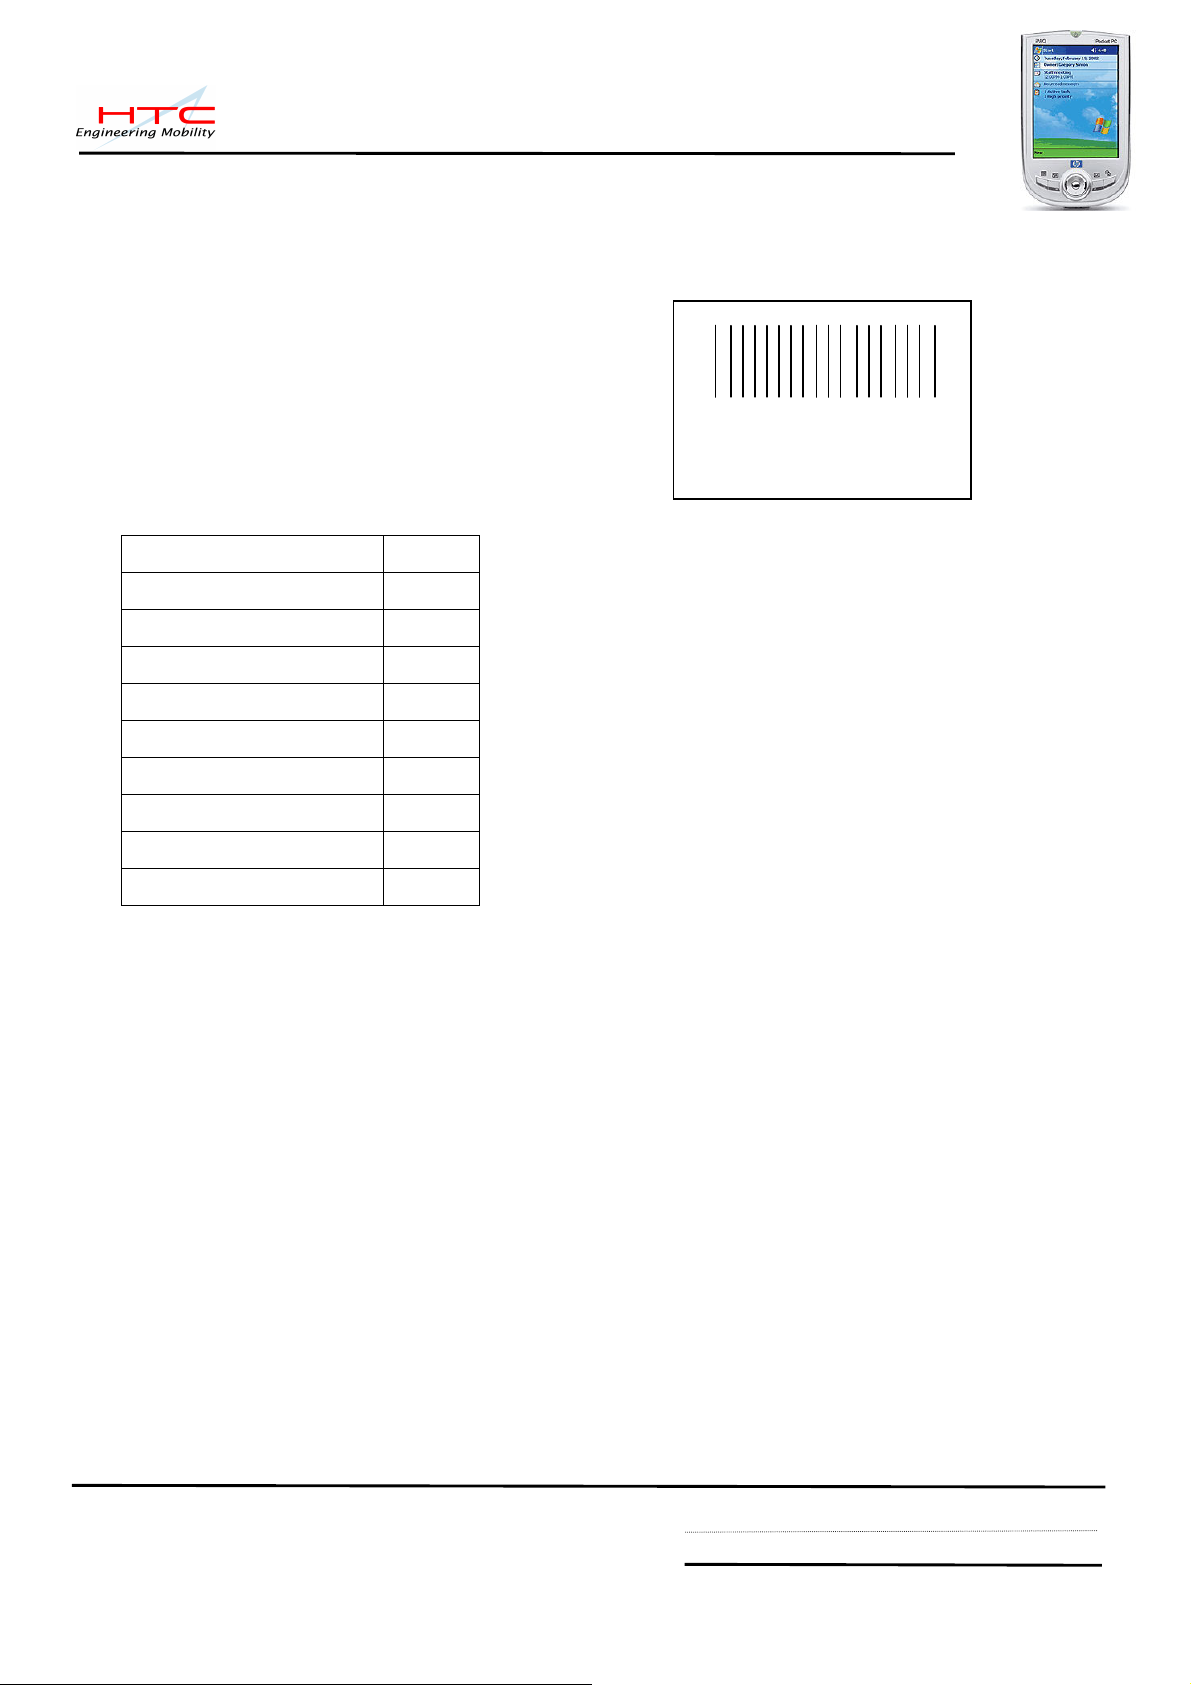
S/N :
P/N :
3.4 Key Component Label Plan (Used for LCM/MB/Battery)
Barcode Serial number requirement (14 digits)
Barcode symbology use Code 128
For S/N: VPPRRYMDZZZZZZ
V: Vendor Code (defined by MFG)
PP: Part Number Code (defined by MFG)
RR: Revision Code
Component revision code RR code
A01 A1
A02 A2
……. …..
AX01 X1
AX02 X2
……. …..
B01 B1
B02 B2
……. …..
Y: Manufacture Year
Lowest one digit of A.D
example: 2002 = 2
M: Manufacture Month
1, 2, 3, …., 9, A, B, C
D: Manufacture Day
1st dight of serial number and represent the DAY
Use base 31 (ex: 1, 2, 3…….., 9, A, B, C……. Z, exclude I, O, Q, U, please note day start from 1)
Z: Remaining 6 digitals of serial number (reset every day)
Use base10 (000001 ~ 999999)
HTC confidential
© 2001, HTC Corporation. All rights reserved. TOTAL 36 CONT.ON. 10 PAGE NO. 9
HTC Confidential
Page 10
1
2
m
m
10mm
3.5 FRU Date Code Label
P/N: 77H30010-10
1 2 3 4 5 6
Digit 1 ,2: Site Code.( t )
Digit 3,4: Year. Manufactured , last 2 digits
Digit 5: Month of production , Jan to Dec(1-9,A-C).
Digit 6: Type of Warranty: ”1”
Date Code Label will apply on following FRU:
1. Main unit.
2. Cradle
Size define by MFG
3.6 Warranty Seal
HTC P/N: 77H00036-00
Dimension: 10.00mm x 12.00mm
Logo: PANTONE 653C
Ink: PANTONE 193C
Warr a nt y vo id
if br o ken .
HTC confidential
© 2001, HTC Corporation. All rights reserved. TOTAL 36 CONT.ON. 11 PAGE NO. 10
HTC Confidential
Page 11
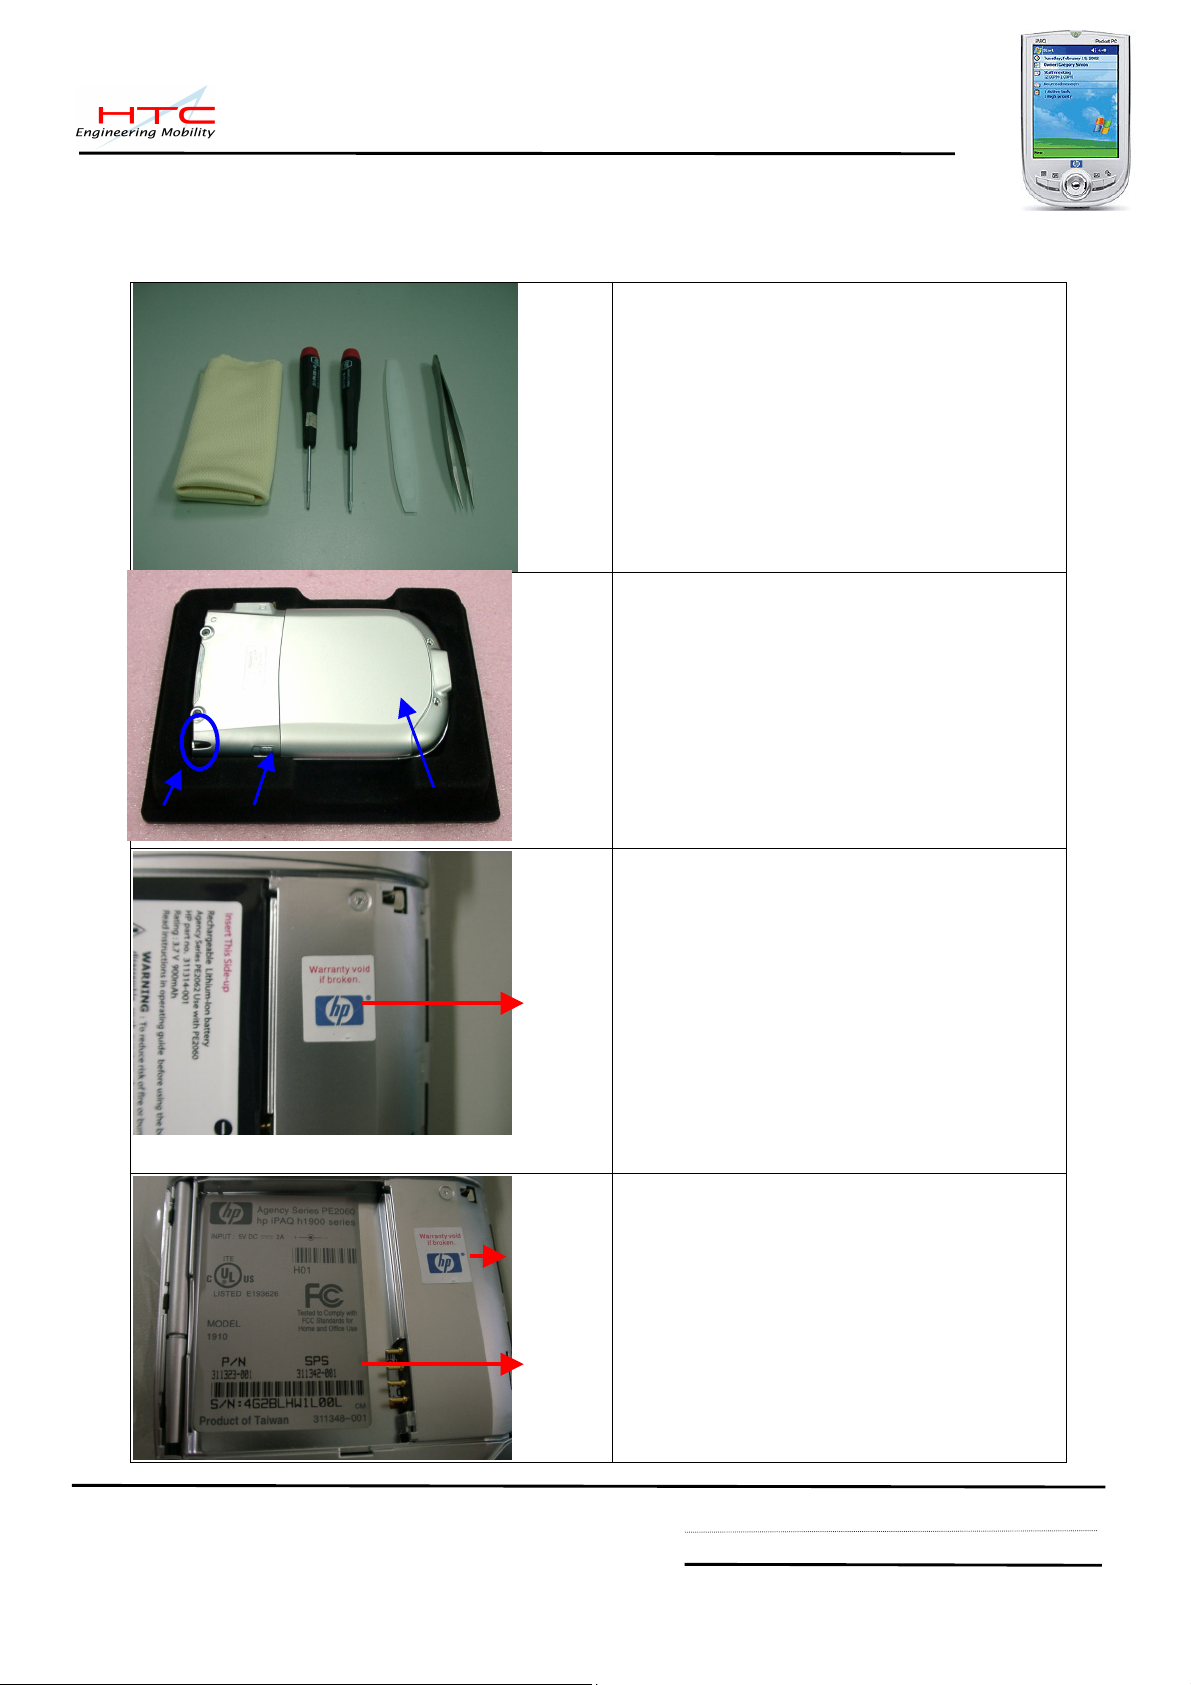
1.Push battery cover latch and remove the
the battery cover before take any repair
treat
If the repair activity need to take off the
warranty seal ,it is required to stick the
Latch
Battery
Stylu
Warranty Seal
Warranty Seal
4.Assembling and Disassembling
4.1 Disassembling
Tools needed for Assembling and Disassembling
the KIWI
1. Lens Cleaning Tissue.
2. Philip Screw Driver 000X40.
3. Torex Screw Driver T5X40
4. Special Made Plastic Stick.
1
2 5
3
4
5. Tweezers.
s
Cover
cover.
2.Pull up to release the stylus.
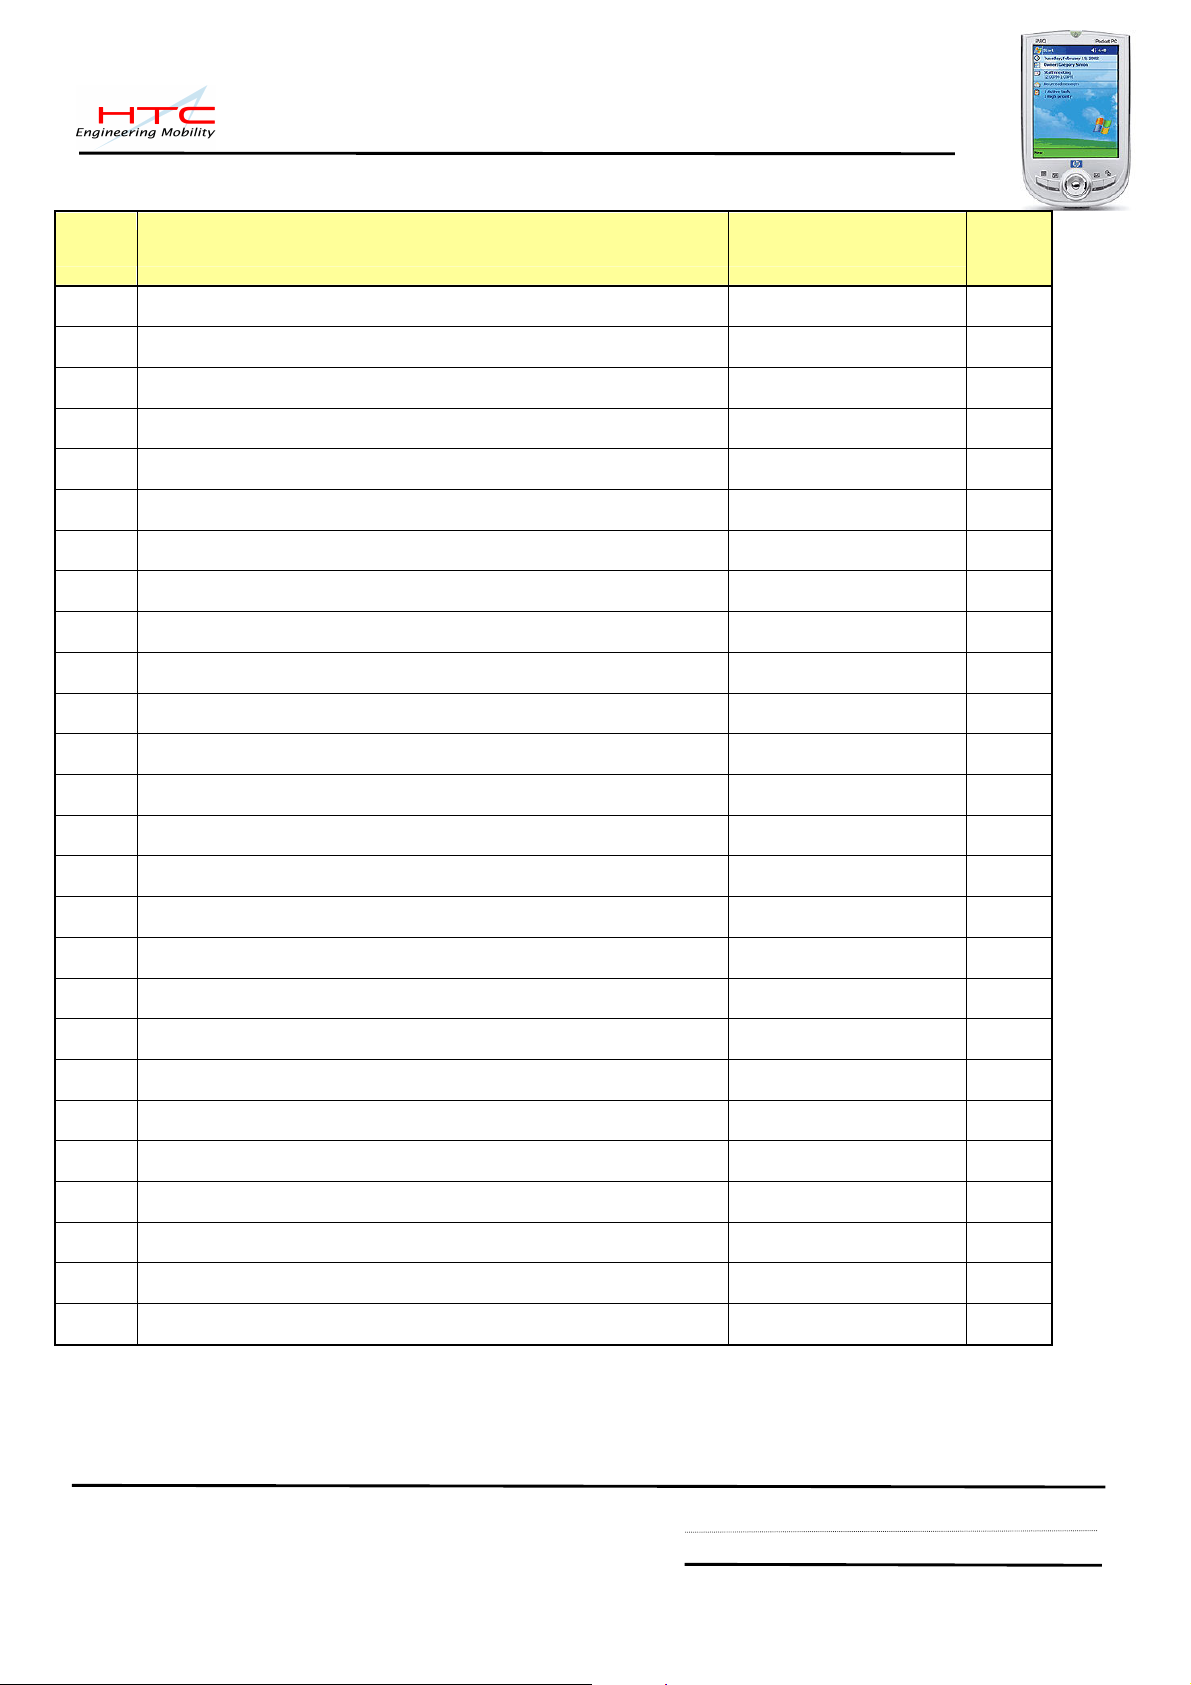
Please check the warranty seal under
activity.
1.Using UV light tool to check fake
warranty seal.(There is light reflection
surround the HP logo)
2.Check If any damage/broken on the
HTC confidential
© 2001, HTC Corporation. All rights reserved. TOTAL 36 CONT.ON. 12 PAGE NO. 11
HTC Confidential
Agency Label
warranty seal, If damaged please
this kind of case as OOW.
warranty seal back as picture
shows.(above the screw hold)
Page 12

Push to release the battery and Remove
the screws as picture shown with screw
driver (T5).
Once the 5 screws has been removed
from the Back Housing, Use the Plastic
Tool to open the housing.
Insert and gently twist into the gap at the
between upper and lower case with the
FLAT side of the tool. From the top side
first.
Separate the left side.
Then the right side.
HTC confidential
© 2001, HTC Corporation. All rights reserved. TOTAL 36 CONT.ON. 13 PAGE NO. 12
HTC Confidential
Page 13

Switch FPC cable
Microphone wire
LCM FPC cable
1.Remove the screw with Philip screwdriver.
2.Disconnect the microphone wire from the
connector of main BD with tweezers.
3.When disconnecting microphone wire
that the angle must be within 20 degrees to
mating axis.
1.Disconnect the LCM FPC cable from MB
with tweezers.
2. Disconnect the switch FPC cable from MB
with tweezers.
3. Remove the screw with Philip screw driver.
Backup battery wire
1.Disassemble and slipover the MB (180
degree) from the top to the bottom.
Caution! Careless handling could be
damaged the back battery or the connector.
2.Disassemble the MB and disconnect the
backup battery wire.
3.When disconnecting the angle must be
within 20 degrees to mating axis.
1.Take out the speaker with tweezers
2.Disassemble the backup battery from upper
cover.
Backup battery
HTC confidential
© 2001, HTC Corporation. All rights reserved. TOTAL 36 CONT.ON. 14 PAGE NO. 13
Speaker
HTC Confidential
Page 14

Microphone
Unhook the LCM from upper cover on the
both sides, and then take out the LCM from
left to the right.
Disassemble the microphone from upper
cover
The disassembly procedure is finished.
Remove the 4 screws with Philip screwdriver.
Disassemble the upper cover, pre-assy
(74H00157-00) to the parts as below;
77H00158-00Key pad, assy, HB
74H00175-00FPC Pre-assy + speaker
holder
74H00199-00upper cover pre-assy
HTC confidential
© 2001, HTC Corporation. All rights reserved. TOTAL 36 CONT.ON. 15 PAGE NO. 14
HTC Confidential
Page 15

4.2 Assembling
Assemble Key pad and FPC cable to upper
cover.
Screw on the 4 screws as picture shown.
Assemble the microphone to the upper cover
with the wire toward upside
Get the backup battery and stick it to the
bottom left corner of upper cover. Route the
wires under the hook.
Hook
HTC confidential
© 2001, HTC Corporation. All rights reserved. TOTAL 36 CONT.ON. 16 PAGE NO. 15
HTC Confidential
Page 16

Mylar
Assemble the LCM to the upper cover. When
assembling get the LCM hooked from the
right side then the left side. Note that is not
allowed to pull LCM FPC cable when
getting the LCM.
It’s required to make the Mylar to LCM as
picture show.
Assemble the speaker to the upper cover.
Please note that does not press the springs
otherwise it might cause the poor contact
between speaker and MB. The speaker’s
install location must as picture shows (the
bottom of the spring is on the upside).
76H00339-00(Sponge, MPCB)
76H00340-00(Sponge, Battery Connector)
76H00353-00(Sponge, Speakerholder)
HTC confidential
© 2001, HTC Corporation. All rights reserved. TOTAL 36 CONT.ON. 17 PAGE NO. 16
HTC Confidential
Page 17

he connector
and
Connect backup battery wire to the MB
connector as well.
2
1
Connect the microphone wire to t
Assemble MB to the front bezel and screw
them to the position follow the sequence as
pictures shown. Please note that when
assembling, only allow to hold the M/B on
the audio jack at upper right corner and
the cradle connector at the bottom
and use tape to fix it. Please note that the wire
must be placed under the SD connector
audio jack.
HTC confidential
© 2001, HTC Corporation. All rights reserved. TOTAL 36 CONT.ON. 18 PAGE NO. 17
HTC Confidential
Page 18

confirm the correct position first then press
Switch BD FPC cable
M1.6*5.
M1.6*3
1.Connect LCM FPC cable to the connector.
LCM FPC cable
Assemble the bottom cover to the upper
When connecting the FPC cable, must
down.
2.Connect SWB FPC cable to the connector.
Please ensure the white line of SWB
FPC cable must be aligned with
connector as well.
Please note when connecting LCM FPC
cable, please make sure the connector is
installed to the correct position.
cover. Please note the cradle connector at the
bottom fully inserted into the bottom cover
first, then connect other side.
Insert the screws and tight screw as
picture shown.
Assemble the main battery to the bottom
cover.
HTC confidential
© 2001, HTC Corporation. All rights reserved. TOTAL 36 CONT.ON. 19 PAGE NO. 18
HTC Confidential
Page 19

Assemble battery cover to the bottom cover.
Put the warranty seal back after finish all the
testing. The correct position as attached
picture.
The Unit Assembly is done ready for further test and outlook inspection.
HTC confidential
© 2001, HTC Corporation. All rights reserved. TOTAL 36 CONT.ON. 20 PAGE NO. 19
HTC Confidential
Page 20

5.Diagnostic Program
5.1 Tools required
(1) SD card with Diagnostic program loaded.(provide by HTC)
(2) Mtty1.4 (only need when a unit need to key-in serial number and Country ID)
5.2 How to enter Diagnostic Program
(1) Insert SD card with Diagnostic program loaded to the unit.
(2)Press and hold Power Button+ Reset until HTC copyright display appear, then press action to
perform the HB diagnostic test.
5.3 List of Diagnostic Test Items
No.
1
2
3
4
5
6
7
8
9
10
11
12
13
14
Item Description Remark
Run-In Test
Auto Test
Button Test Test every most of button.
TouchPan Test Touch screen alignment test. Suggest to test in WinCE
Audio Test Record and playback.
Display Test Test the LCD display quality.
Blight&LED Test Blight ON with in different brightness level and LED test.
Upload to SD
SDRAM Test SDRAM Check Size/Write/Read/Comparison test
SD card Test SD card Write/Read/Write Protect test.
SIR Test Test SIR RX/TX communication between two devices.
Checksum Test
USB Test USB test
Asset Viewer Asset data check
Unit run-in test.
All function test for 1 loop
Upload ROM or bootloader to SD card
Verifies the checksum of the code
HTC confidential
© 2001, HTC Corporation. All rights reserved. TOTAL 36 CONT.ON. 21 PAGE NO. 20
HTC Confidential
Page 21

5.4 Test Items Operation
How to select test item: Using navigation button -"Up" or "Down" to select the test items
How to execute the test program: Press “Action” to start each of test item.
No.
Run-in Test
1
Auto Test
2
Button Test
3
Touch Test
4
Audio Test
5
Display Test
6
BLight & LED Test
7
Upload to SD
8
SDRAM SD card Write/Read/Write Protect test.
9
SD Card Test
10
Item Description Remark
Runs all test items listed here. To stop the program when end
of every cycle. A cycle is around 65 secs.
Runs all test items listed here for 1 loop.
Press each button to know if it works. Follow up the instruction
shown on the screen to finish the test item Stop on fail.
Tap the cross mark (+) with stylus on the correct location. Fail if
no reaction. If get fail suggest to test again under WinCE for
double check.
Record and Playback Test, must test with the ear plug
Unit prompts for different display page to detect the defect of
LCD, lines or dots. Press eft/up/right/down to carry on/choose
the different mode.
Follow up the instruction shown on the screen to finish the test
item
Upload bootloader or Rom image to SD card
Insert SD card (Enable Write Protect) and start test. Pull out the
SD card if you see the message “ Plugged OK Protected”.
Adjust lock switch to unlock site (Disable Write Protect, and
insert it. Return to test menu if pass.
SIR Test
11
Checksum
12
USB Test
13
Asset viewer Asset data check for SN and country ID
14
Prepare another unit as ‘supporting’ site. On test unit, please
choose ‘Test Target’ and press action button to start test.
Before test, make the IR ports of them face to each other. If get
fail suggest to test again under WinCE for double check.
Verifies the checksum of the code.
Plug USB cable to connect PDA to PC then and check if USB
OK or not.
HTC confidential
© 2001, HTC Corporation. All rights reserved. TOTAL 36 CONT.ON. 22 PAGE NO. 21
HTC Confidential
Page 22

ttery into the
Special made battery cover into the
5.5 Shipping Mode (It is required before ship the repaired unit to EU)
Description:
* The purpose is to prevent over-discharge of backup battery.
* This SA w ill guide you how to perform shipping mode for repaired device
Fixture contain :
A. Contact stick.
B. Special made battery cover
A
B
Step 1 :
Assemble charged main ba
device.
Step 2 :
Assemble
device.
Step 3 :
Set the device to be pow er-on.
HTC confidential
© 2001, HTC Corporation. All rights reserved. TOTAL 36 CONT.ON. 23 PAGE NO. 22
HTC Confidential
Page 23

Apply contact stick to the 2 holes of special
off after step 4.
* Press power button, make sure the device
Step 4 :
made battery cover.
Step 5 :
*The unit should be power-
can’t power-on.
Step 6 :
*Remove the special made battery cover
*Replace with the original battery cover.
* Ready to ship back to customer.
HTC confidential
© 2001, HTC Corporation. All rights reserved. TOTAL 36 CONT.ON. 24 PAGE NO. 23
HTC Confidential
Page 24

unit and check on backup battery
Make sure the main battery is in the unit, and
5 minutes for the
battery to reach to 100% capacity.
In case the returned unit is left unused for a
long time, the power may drain away and the
t power on or backup battery bar is
all empty. As a result of B, the device should
t be charged or 100%
capacity does not reach to 100% in 1 hour), the backup
Replace the M/B if new backup battery still does not
Step 3. Check backup battery function
t turn off the device. (Keep the unit power on
5.6 Backup Battery Inspection
Description:
* HB backup battery is a chargeable part (it is different from old models).
* This SA will guide you how to judge backup battery.
A
B
Step 1. Check remaining capacity
Turn on HB
status.
There will be one of three results.
3.1.1 100% capacity
Go to Step 4
3.1.2 Less than 100% capacity
Go to step 2
C. Can’t boot.
Go to step 2
Step 2. Charge batteries
then
plug in AC adapter for charging.
1. Normally It takes about 1 backup
And then go to Step 3.
2.
unit can’
be recharged for an 1 hour.
1. If battery display is 100%, go to step 3
2. If it is NG (backup battery can’
battery has to be replaced.
1.
work.
1. Don’
with the power management screen)
2. Remove the AC adapter from the device.
HTC confidential
© 2001, HTC Corporation. All rights reserved. TOTAL 36 CONT.ON. 25 PAGE NO. 24
HTC Confidential
Page 25

seconds, and then reinstall the main
A. If the display stays on original screen and the
backup battery is 100%, the backup battery is
Note: if the backup battery is less than 100%, please
B. If the unit boots from soft reset with showing
the screen as seen on photo B, the backup battery
Note: please look into the status of backup battery
ure it is kept on 100%, if the backup
battery is less than 100%, please charge for 1 hour
C. If the unit boots from hard reset with showing
the screen as seen on photo C, the backup battery
A
Step 5. Reinstall the main battery
Wait for 60
battery and power cover to the device.
Step 6. Check the Screen
Turn on the device. There will be three results.
considered good.
charge for the other 1 hour and then
testing again.
Usually the backup battery could reach 100%,
otherwise, please replace backup battery.
C
is OK and leave no further action.
and make s
then testing again.
B
is NG and need to be replaced.
HTC confidential
© 2001, HTC Corporation. All rights reserved. TOTAL 36 CONT.ON. 26 PAGE NO. 25
HTC Confidential
Page 26

6.Problem Diagnostics
6.1 List of Test Jigs
Item Name Usage Remark
USB Cable For data port test
Special Plastic Tool For unit disassembly
AC Adapter For battery recharge and power related tests
Earphone For audio test
SD Card or MMC Card For write protect, read and write test
<Hardware Requirement for PC>
O.S.: Windows 2000 or above.
CPU: Pentium 166MHz or above.
Memory: 64MB
PC Link: ActiveSync 3.5 or above.
6.2 Troubleshooting & Repair
1-A.
1-A.Main Unit Does Not Respond to Power Button
1-A.1-A.
(1) Connect the AC adapter, maybe the battery pack is exhaust and wait for few mins if unit boot.
(2) Check if the battery cover closed properly, check the micro switch under the battery cover if any damage.
(3) Check the Power Button if any damage.
(4) Try with another battery pack.
(5) Replace battery pack if necessary.
(6) Check all connections including LCD FPC to Main Board. Try with another Main Board.
(7) Replace Main Board if necessary.
(8) Once the defective part has been identified, verify it again with the defective part whether the
symptom could be duplicated.
2222----AAAA....Touch Panel Does Not Respond to Screen Tap
(1) Check the connection of LCM FPC cable whether is properly connected.
(2) Try with another LCM.
(3) Try with another Main Board.
(4) Replace LCM if necessary
HTC confidential
© 2001, HTC Corporation. All rights reserved. TOTAL 36 CONT.ON. 27 PAGE NO. 26
HTC Confidential
Page 27

(5) Replace Main Board if necessary.
(6) Once the defective part has been identified, verify it again with the defective part whether the
2222----B....Buttons Do Not Respond
(1) Dismantle the unit, check the status of switches on the Main Board and the plastic parts of
(2) Try with another Main Board or Front Bezel.
(3) Replace Main Board or Front Bezel if necessary.
(4) Once the defective part has been identified, verify it again with the defective part whether
3333----A....Unusual Vertical / Horizontal lines or partial display
(1) Check the connection of LCM FPC whether is properly connected.
(2) Try with another LCM.
symptom could be duplicated.
button of the Button not responding.
the symptom could be duplicated.
(3) Try with another Main Board.
(4) Replace LCM if necessary
(5) Replace Main Board if necessary.
(6) Once the defective part has been identified, verify it again with the defective part whether the
symptom could be duplicated.
3333----B....Back Light Does Not Turn ON/OFF
(1) Check the connection of LCM FPC whether is properly connected.
(2) Try with another LCM.
(3) Try with another Main Board.
(4) Replace LCM if necessary
(5) Replace Main Board if necessary.
(6) Once the defective part has been identified, verify it again with the defective part whether the
symptom could be duplicated.
4444----A....SD Card cannot be used
(1) Check whether SD or MMC Card is fully inserted to the slot until you hear a click.
(2) Try with another SD / MMC Card and Check whether it is Write Protected.
(3) Try with another Main Board.
(4) Replace Main Board if necessary.
(5) Once the defective part has been identified, verify it again with the defective part whether the
HTC confidential
© 2001, HTC Corporation. All rights reserved. TOTAL 36 CONT.ON. 28 PAGE NO. 27
HTC Confidential
Page 28

5555----A....PC Connection not possible
(1) Check whether “Connection Settings” in the MS ActiveSync is properly set.
(2) Check whether it connects with other cables or cradle, customer’s cable might be damaged.
(3) Check the external appearance of the connector on the unit whether it is physically damaged.
(4) Replace Main Board if necessary.
(5) Once the defective part has been identified, verify it again with the defective part whether the
5555----B....IrDA Connection not possible
(1) Make sure the IrDA port settings on the Notebook or the other device are properly set.
(2) Make sure the IrDA function is properly activated on the Pocket PC and on the other device.
(3) Make sure there’s no obstruction between the two devices in connection and within the distance.
(4) Check the IrDA window whether it is broken or cracked.
symptom could be duplicated.
symptom could be duplicated.
(5) Replace Bezel if necessary.
(6) Replace Main Board if necessary.
(7) Once the defective part has been identified, verify it again with the defective part whether the
symptom could be duplicated.
6----A....Battery Pack does not start
(1) Make sure the battery cover is closed properly.
(2) Connect to the AC Adapter and see if it takes charge. Also check AC Adapter condition.
(3) Check whether AC Adapter is functioning properly.
(4) Check whether the condition of Battery Charging status is correct.
(5) Check the appearance of Battery Pack if any abnormal..
(6) Try with another Battery Pack or Replace Battery Pack if necessary
(7) Try with another Main Board or Replace Main Board if necessary.
(8) Once the defective part has been identified, verify it again with the defective part whether the
symptom could be duplicated.
.
6----B....Battery discharges quickly even after fully charged
(1) Make sure the Battery Pack takes fully charge with AC Adapter.
(2) Check whether the condition of Battery Charging status is correct.
(3) Dismantle the unit and check the appearance of Battery Pack.
HTC confidential
© 2001, HTC Corporation. All rights reserved. TOTAL 36 CONT.ON. 29 PAGE NO. 28
HTC Confidential
Page 29

(4) Try with another Battery Pack or Replace Battery Pack if necessary
(5) Try with another Main Board or Replace Main Board if necessary.
(6) Once the defective part has been identified, verify it again with the defective part whether the
6666----C....Battery Pack does not recharge
(1) Make sure the Battery Pack takes fully charge with AC Adapter.
(2) Check whether the condition of Battery Charging status is correct. Charge should be done
(3) Dismantle the unit and check the appearance of Battery Pack.
(4) Try with another Battery Pack or Replace Battery Pack if necessary
(5) Try with another Main Board or Replace Main Board if necessary.
(6) Once the defective part has been identified, verify it again with the defective part whether the
symptom could be duplicated.
no more than 4 hours.
symptom could be duplicated.
7----A....No Sound from Speaker or Distorted sound
(1) Check “Sound & Notifications” Settings in the unit for Sound Enabling.
(2) Make sure it’s not MUTED.
(3) Clean up the speaker connection side on MB if there is any contamintion.
(4) Dismantle and Check whether the Speaker is properly installed (Orientation)
(5) Replace Speaker if necessary.
(6) Replace Main Board if necessary.
(7) Once the defective part has been identified, verify it again with the defective part whether the
symptom could be duplicated.
7----B....No Recorded Sound or Distorted sound
(1) Check “Sound & Notifications” Settings in the unit for Sound Enabling.
(2) Make sure it’s not MUTED.
(3) Dismantle and Check whether the Microphone is properly installed.
(4) Replace Microphone if necessary.
(5) Replace Main Board if necessary.
(6) Once the defective part has been identified, verify it again with the defective part whether the
symptom could be duplicated.
HTC confidential
© 2001, HTC Corporation. All rights reserved. TOTAL 36 CONT.ON. 30 PAGE NO. 29
HTC Confidential
Page 30

6.3 Faulty Tree
HTC confidential
© 2001, HTC Corporation. All rights reserved. TOTAL 36 CONT.ON. 31 PAGE NO. 30
HTC Confidential
Page 31

7. Re-flash procedure
Tools required : 1) AC adapter. 2) PC with Windows2000 or above. 3) SD card
Software: 1) Mtty1.4.exe 2) Boot-loader 3) O.S image
A.OS image or Boot-loader re-flash (From PC to iPAQ):
4) USB cable.
1) Enter Boot-loader (Press and hold Pwr+App1+App4 then press reset button) until
HP logo appears. Connect Hummingbird to PC through USB sync cable.
2) Execute Mtty1.4.exe and choose USB port then choose OK.(Figure I)
Figure I Figure II Figure III
3) Enter l(L small letter) O.S image or boot-loader file name then Enter. (Figure II)
4) Wait a while the program will show the process complete, once complete please cold
boot the unit(Press Power button and reset) (Figure III)
B. Download boot-loader or O.S image (from iPAQ to SD card):
1) Enter SD card with diagnostic program loaded and choose the item of upload to SD card.
2) Remove the SD card loaded with diagnostic program. Put another SD card in it,download
boot-loader and O.S image follow the diagnostic program instruction from unit to SD card. SD
card size 32MB at least is required.
3) It’s strongly required to build master by using the ROM image that provided by HTC
(following the item A first), it’s not allowed to build the ROM image master SD card from
unit to unit.
HTC confidential
© 2001, HTC Corporation. All rights reserved. TOTAL 36 CONT.ON. 32 PAGE NO. 31
HTC Confidential
Page 32

C. Download boot-loader or O.S image (from SD card to iPAQ):
1) Insert SD card loaded with boot-loader and O.S image to Unit.
2) Press and hold Power key then Reset.
3) Wait a while then proceeds the re-flash process.
4) After the re-flash done, please take out the SD card. It will take approx 6 minutes then cold boot
your unit (Power button + reset).
D. Key-in Serial number and Country ID
1) Insert SD card with Diag program loaded, press and hold power button then reset.
2) Wait until HTC copyright appears and press action to enter the Diag program.
3) Press power button to enter the item of “key-in S/N and country ID”.
4) Connect USB sync cable between PC and your iPAQ.
5) Execute Mtty1.4 on PC and Choose the USB port and press “OK”. < Figure I>
6) Enter the original S/N and country ID <Figure II>
7) You can check the asset viewer under diag program if it works.
Figure I Figure II I
HTC confidential
© 2001, HTC Corporation. All rights reserved. TOTAL 36 CONT.ON. 33 PAGE NO. 32
HTC Confidential
Page 33
8.Spare parts list
Item Description HTC P/N
1
Main Battery assy,ICP553450R 35H00014-00 1
2
Stereo Earphone,2.5mm,EP-122,Tachima 36H00113-00 1
3
Stylus, PRE-ASSY, Hummingbird 74H00148-00 1
4
Connector, DC jack adapter 75H00153-00 1
5
Backup battery Assy,V20HR-02SUR-32S 35H00011-00 1
6
Speaker Assy 36H00091-00 1
7
Microphone Assy 36H00137-00 1
8
PCBA, KIWI,16/64 MB 51H00178-00 1
9
LCM,3.5" color TFT LCD,PHILIP 60H00012-00 1
10
Battery Cover 71H00436-00 1
11
Screw,Trox,FD,M1.6*3,BLACK 72H00265-00 1
12
Screw,Trox,FD,M1.6*5.5,NICKLE 72H00266-00 4
13
Screw,PH,FD,T1.6*4,BLACK 72H30055-00 6
Using
Q'ty
A
Upper cover, assy, KIWI 74H00177-00 1
14
Upper cover, pre assy 74H00199-00 1
15
FPC Ass’y + Speaker holder 74H00175-00 1
16
Key Pad 77H00158-00 1
17
Bottom cover, pre assy 74H00164-00 1
18
Sponge, Mylar,LCD 76H00354-00 1
19
Sponge, MPCB 76H00339-00 1
20
Sponge, Battery Connector 76H00340-00 1
21
Sponge, Speaker holder 76H00353-00 1
22
Mylar, LCD 76H00396-00 1
23
Agency Label,331578-002,H1915,FRU,Kiwi(SKU-00;FRU-01) 77H00067-00/01 1
23
Agency Label,331579-002,H1920,FRU,Kiwi(SKU-00;FRU-01) 77H00068-00/01 1
24
Disassembling prevent label (warranty seal) , Main unit 77H00036-00 1
Notice***Item A is assembled by item 14,15 and 16.
HTC confidential
© 2001, HTC Corporation. All rights reserved. TOTAL 36 CONT.ON. 34 PAGE NO. 33
HTC Confidential
Page 34

1.Main Battery
4.DC jack connector
2.Earphone
5.Backup battery
3.Stylus
6.Speaker
7.Microphone
10.Battery Cover
HTC confidential
© 2001, HTC Corporation. All rights reserved. TOTAL 36 CONT.ON. 35 PAGE NO. 34
8.PCBA,KIWI
11.Screw,Trox,black
9.LCM,Philip
12.Screw,Trox,nickle
HTC Confidential
Page 35

13.Screw,Philip,black
16.Key Pad assy
14.Upper cover,Pre-assy
17. Bottom cover
15.FPC assy + Speaker holder
18.Sponge,LCD Mylar
19.Sponge,MPCB
22.Mylar,LCM
20.Sponge,Battery connector
23.Agency Label
21.Sponge,speakerholder
24.Warranty seal
HTC confidential
© 2001, HTC Corporation. All rights reserved. TOTAL 36 CONT.ON. 36 PAGE NO. 35
HTC Confidential
Page 36

9.MB Major Component
RA M
CP U
Au dio
Co d ec
HTC
ASIC
PCB Top Side
Ba tt er y
Co n ne c to r
LC D T -Co n
HT C C o nf id entia l
PCB Bottom Side
Battery Door Switch
LCD Connector
Sp e ak er
Pa d s
SD Slot
NAND
Flash
EEPROM
HTC Confidential
HTC confidential
© 2001, HTC Corporation. All rights reserved. TOTAL 36 CONT.ON. F PAGE NO. 36
HTC Confidential
 Loading...