

HSU HC-1 MK2 Owner's Manual
HC-1 MK2 Center Channel
Owner’s Manual
The HC-1
and imaging under real world conditions that few other transducers can match without
the typical horn sound.
The HC-1 MK2 is both efficient and high power handling. It provides effortless dynamics
to handle high-definition audio programs and home theater.
MK2
utilizes a controlled-directivity horn that gives excellent micro dynamics
Works Perfectly with Subwoofers
The HC-1 MK2 was designed specifically to work best in systems using a subwoofer or
mid-bass module plus low-bass subwoofer.
High-Definition Audio Speakers by HSU Research.
Designed and engineered in the U.S.A.
Features
High Definition
Wide Dynamic Range
A. UNPACKING
Carefully remove your new HSU speaker from its box, avoiding staples
which can cause damage to the cabinet. If you discover damage, contact
us and the shipper immediately.
Save your cartons – they are the best possible protection for your
speakers should you ever need to move them.
Using the HC-1 MK2 as
Left and Right Speakers
Although designed primarily as a center channel, many customers
have used it as main speakers. You can stand it up vertically, rotate the
horn 90 degrees, take out the rubber Crescents (part of the tilting
base that is attached to the speaker), and use it like you would with
the HB-1 MK2.
B. PLACEMENT
Note: For optimum bass performance, the addition
of a subwoofer,or a mid bass module plus a low
bass subwoofer is highly recommended.
Positioning Your Subwoofer
See the subwoofer owner’s manual.
Positioning Your Center Channel
For best imaging, the HC-1 MK2 should be placed close to ear level when
seated. This may be somewhat limited by the position of the TV, since
the center channel usually has to be above or below the TV. To the
extent that the TV height is flexible, try to position the TV so the center
channel speaker can be at the right height. If the position of the TV is
fixed, place the center channel so it is as close to ear level as the situation allows. The HC-1 MK2 comes with a base that allows you to tilt it so
the speaker aims at the listener.
If you prefer an in-wall alternative, get the in-wall version of the HB-1MK2.
Positioning Your Satellites
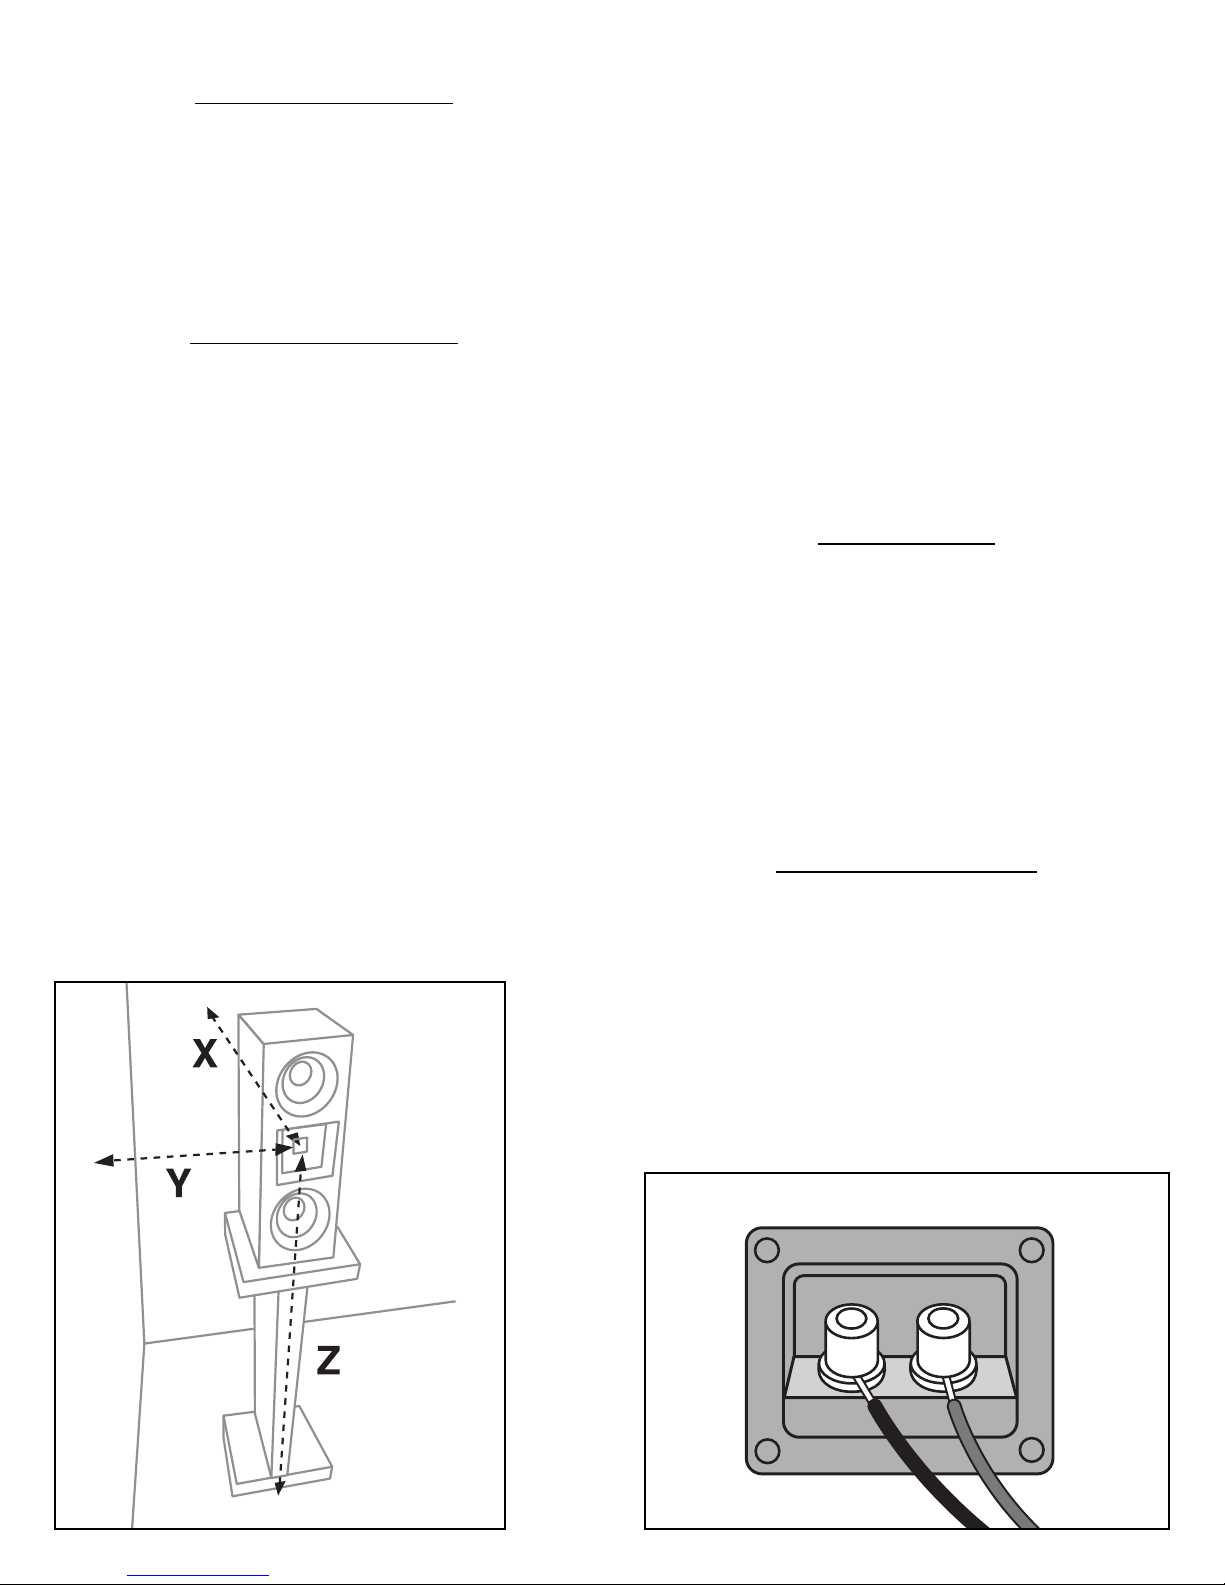
For best imaging, the HC-1 MK2 should be placed such that the tweeter
is at ear level when seated, aimed directly at the primary listener. The
distances to the three nearest solid surface should be in the ratio
1:1.26:1.60. When you have the distance to the floor the greatest, for
a typical ear height of 40˝ , this translates into 25 and 32˝ from the two
nearest walls (Figure 1).
C. WIRING
The HC-1 MK2s do not come with wires. We suggest getting 16 AWG for
runs under 10 feet, 14 AWG for runs of 10 - 25 feet, and 12 AWG for
runs of 26 - 50 feet.
Strip 1/2˝ of insulation from each end of the wire to expose the bare
metal. Insert this into the 5-way gold plated binding posts on the back
of the HC-1 MK2 (Figure 2). Alternatively, you can use banana plugs.
If you are connecting using bare wires, make sure the binding posts
are tight, and no stray wires strands are causing a short.
D. SETTING UP
The HC-1 MK2 is not magnetically shielded. This should not be an issue
with all the new TVs (DLP, LCD, plasma).
Most speaker wire is polarity coded. This means that each conductor
is labeled either (+) positive or (-) negative. The (+) positive side may
be a different color or texture than the (-) negative side. On the back of
your amplifier, each channel is probably labeled (+) and (-) as well as
color coded red for (+) positive and black for (-) negative. HSU speaker terminals are color coded red for (+) positive and black for (-) negative. Be sure to hook (+) to (+), (red to red), and (-) to (-), (black
to black).
Figure 1
Figure 2
 Loading...