

HSS Hire 609 Operating & Safety Manual
Portable Band
Saw
©HSS Hire Service Group Plc 1997 No. 609/01
Group Office: 25 Willow Lane, Mitcham, Surrey CR4 4TS
Hire Shops
For cutting wood, steel or alloy,
with a choice of 100mm or 150mm
depth of cut.
Operating & Safety Guide 609
To start the unit, push the green button, if the unit
does not start, reset the red STOP button by turning it
clockwise and try again.
To STOP the unit press the red STOP button (reset
by turning clockwise).
Always start the saw and let it get up to speed
before bringing the workpiece into contact with
the blade.
Adopt a stable stance that gives a good view of
the off-cut while keeping you clear of the saw
blade. In particular, avoid placing your hands and
fingers close to the blade.
Holding the workpiece firmly, guide it into the
blade using any pre-marked cutting line, supplying
just enough pressure to ensure reasonable progress.
If the workpiece is narrow or small, push it through the
blade using a piece of waste timber. Never allow your
hands or fingers to get close to the blade.
Remove the work from the cut before switching
OFF and wait for the blade to stop before clearing
any waste off-cut.
Never force the work through the saw. If it jams in
the cut, switch OFF, free it and check the blade for
damage before going on.
Regularly clean out the tool’s ventilation slots. If
these clog with dust, the tool’s motor could burn out.
Never work with a blunt or dirty blade. It not only
produces poor work but could overload the saw’s motor.
When cleaning or changing blades, though, do
remember to switch OFF and unplug the machine.
When not in use store the equipment somewhere
clean, dry and safe from thieves.
Never over-tighten nuts, knobs and screws when
making adjustments, particularly when adjusting
guides and guards, you could damage the unit.
Never use the saw to cut through timber
containing nails, screws and other obstacles, unless
the blade fitted is designed to do so.
Switch the unit OFF and unplug from the power
supply, remove the table and the legs.
Give the unit a final clean then neatly coil the
cable ready for return to your local HSS Hire Shop.
FINISHING OFF
EQUIPMENT CARE
Quick Tip
Because band saws cut on the ‘down stoke’, the
workpiece’s lower face may be marred by chipping
or splintering. Marking cut lines with a knife may
reduce damage, but it is still best to saw with the
work face up.
Code 03512
Contact your local
0990 282828
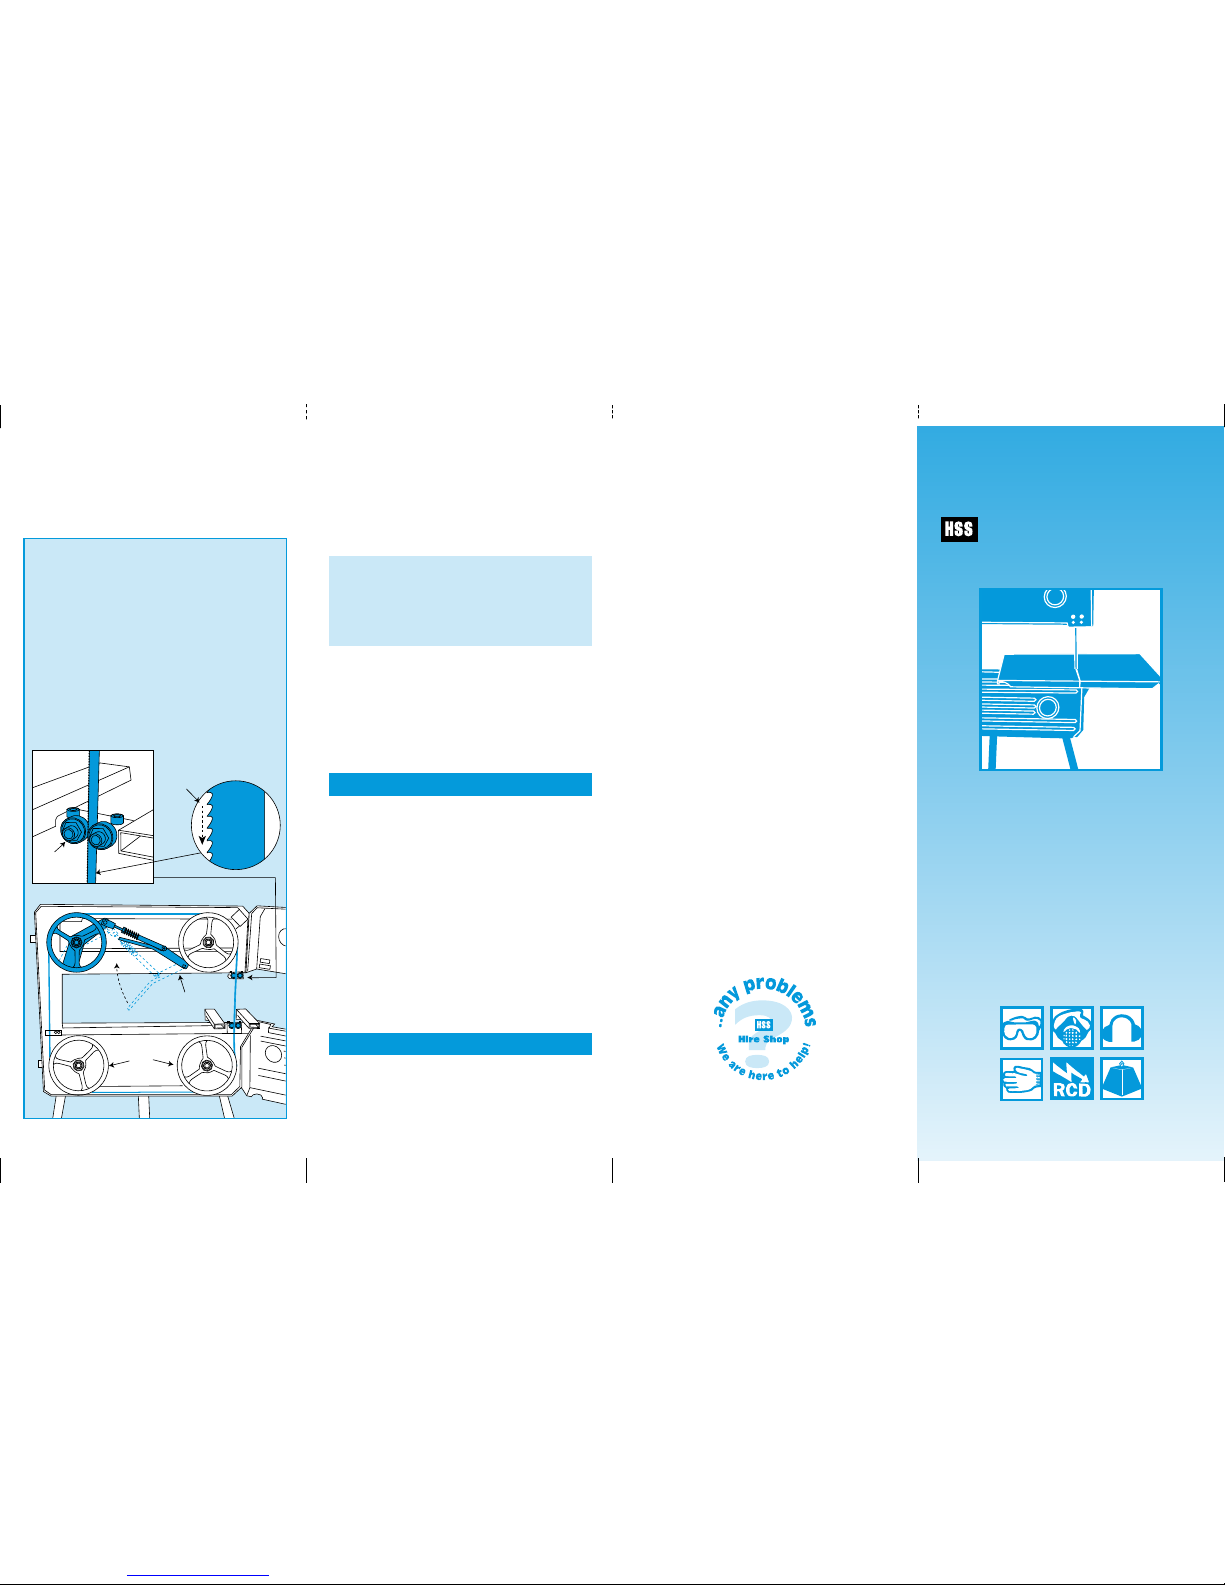
Guide
Wheels
Tension
Lever
Guide
Bearings
Direction
of Cut
Replacing the Blade
Having double-checked that it is unplugged and
switched OFF, fit the band saw with the appropriate
blade for the job.
Undo the 2 clips on the left hand side of the body
and swing the front cover fully back, to reveal the
4 guide wheels.
Lower the tension lever (situated between the two
top wheels), then slip the blade on to the wheels,
ensuring the direction of cut is correct (teeth facing
down) and that it passes between both upper and
lower guide bearings.
Raise the tension lever and check again that the
blade is correctly positioned. Then close and lock the
front cover.
For advice on the safety and suitability of this
equipment contact your local HSS Hire Shop.
This equipment is designed for operation by an
able-bodied adult. Anyone with either temporary
or permanent disability must seek expert advice
before using it.
Keep children, animals and bystanders away from
the work area.
Never use this equipment if you are ill, feeling
tired, or under the influence of alcohol or drugs.
This equipment should only be used by a
competent person who has read and understood
these instructions.
There is a serious risk of personal injury if you do
not follow all instructions laid down in this guide.
Safety Goggles MUST be worn by everyone in
the work area.
Some materials when cut contain substances
which, when inhaled, can be harmful to
health. A suitable mask must be worn when using
this equipment.
This equipment generates potentially harmful
noise levels. To comply with health and safety at
work regulations, ear defenders must be worn by
everyone in the vicinity.
Wear practical, protective clothing, gloves and
footwear. Avoid loose garments and jewellery that
could catch in moving parts, tie back long hair.
This equipment is heavy, never attempt to lift
a bandsaw by yourself. Always get help.
Make sure you know how to switch this machine
OFF before you switch it ON, in case you get
into difficulty.
Always unplug the saw before moving it or making
adjustments to it.
NEVER start the saw with the blade in contact with
the workpiece.
Ensure the work area is well lit and adequately
ventilated. Dust extraction and ventilation
equipment is available for hire, contact your local
HSS Hire Shop for information and advice.
Do not work near flammable gasses or liquids.
Always switch OFF and unplug the equipment
when not in use. Never leave it switched ON
and unattended.
Never carry or pull the equipment by its flex.
Never remove or otherwise interfere with any
safety guards fitted to the saw.
Never use the saw to cut asbestos sheeting, it may
yield hazardous dust.
GENERAL SAFETY
Keep the work area tidy, do not work in areas where
you are forced to stand on loose debris or on a slippery
uneven surface.
Ensure all guards are correctly adjusted and secure
before starting work.
And take care when fitting blades – they are sharp.
Information on COSHH regulations is available from your
local HSS Hire Shop.
Most HSS Band Saws plug into a standard 13amp
power socket. However, 110V models (with a round
yellow plug) must be provided with a suitable 110V
generated supply, or powered from the mains via a
suitable 110V transformer.
If the equipment fails, or if its flex or plug gets
damaged, return it. Never try to repair it yourself.
Keep flexes out of harm’s way, and clear of the
work area.
Extension leads should be fully unwound and
loosely coiled, away from the equipment.
Never run leads through water, over sharp edges
or where they could trip someone. Don’t let them
disappear under a pile of off cuts.
Keep the equipment dry, using electrical
equipment in very damp or wet conditions can
be dangerous.
To reduce the risk of electric shock, use a
suitable RCD (Residual Current-Operated Device)
available from your local HSS Hire Shop, or power the
equipment from a mains circuit with a built-in RCD.
Ensure the band saw and power socket
are switched OFF before plugging into the
power supply.
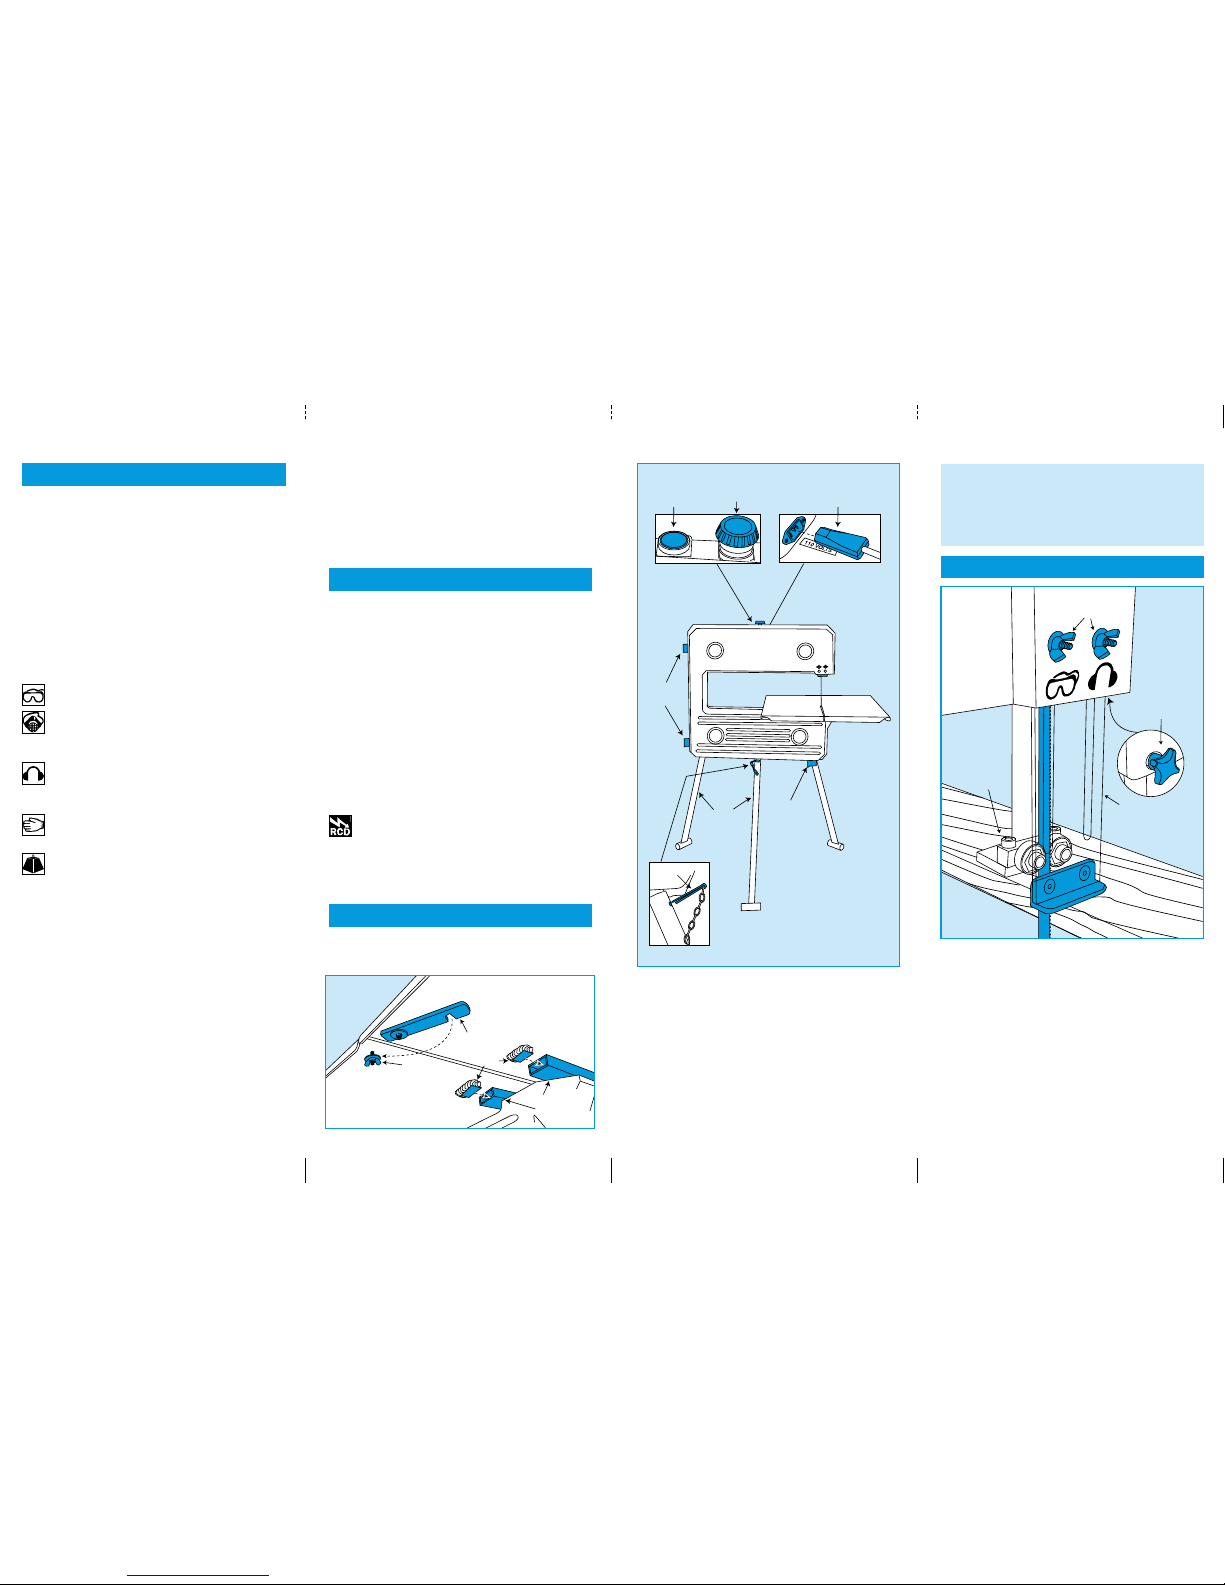
Lay the saw on its side and insert the 3 legs into
their respective slots, ensuring the split-pins are
correctly located.
GETTING STARTED
ELECTRICAL SAFETY
Lift the unit up onto its legs and make sure it
is level.
To fit the table, loosen and swing the table bar clear,
then slide the table from the back of the unit, making
sure you don’t twist the blade.
Slide the table forward and over the two lugs so
that they are inserted into the table support tubes,
then secure in place with the 2 rear catches.
Now re-position the table bar and tighten the wing nut.
All that now remains is to plug the supply lead into
the rear of the saw, then plug in and switch ON
the power.
The unit is fitted with an NVR (no volt return) switch,
if the power supply is interrupted the unit will
switch OFF and will need to be switched back ON
once the power is restored.
If this should occur during a cutting operation
DO NOT switch back ON until the workpiece has
been removed.
Lower the upper blade guide (by loosening the
thumb screw at the rear of the head stock) so that it is
about 5 mm above the thickest part of the material
to be cut then tighten securely in position.
Lower the safety guard by loosening the 2 wing
nuts at the front of the head stock, to leave the
minimum amount of blade necessary to make the cut.
BASIC TECHNIQUES
Blade Choice
If in doubt, ask at your local HSS Hire shop about the
right blade for the job. Blade selection may depend
on the material you are cutting, its thickness, whether
you are cutting wood along or across the grain.
Thumb
Screw
Wing
Nuts
Safety
Guard
Upper
Blade
Guide
Table
Bar
Wingnut
Lugs
Support
Tubes
Clips
Table
Legs
Dust
Extraction
Port
Mains Lead
Supply
Split
Pin
Green
ON
Red
OFF
 Loading...