

Page 1
1
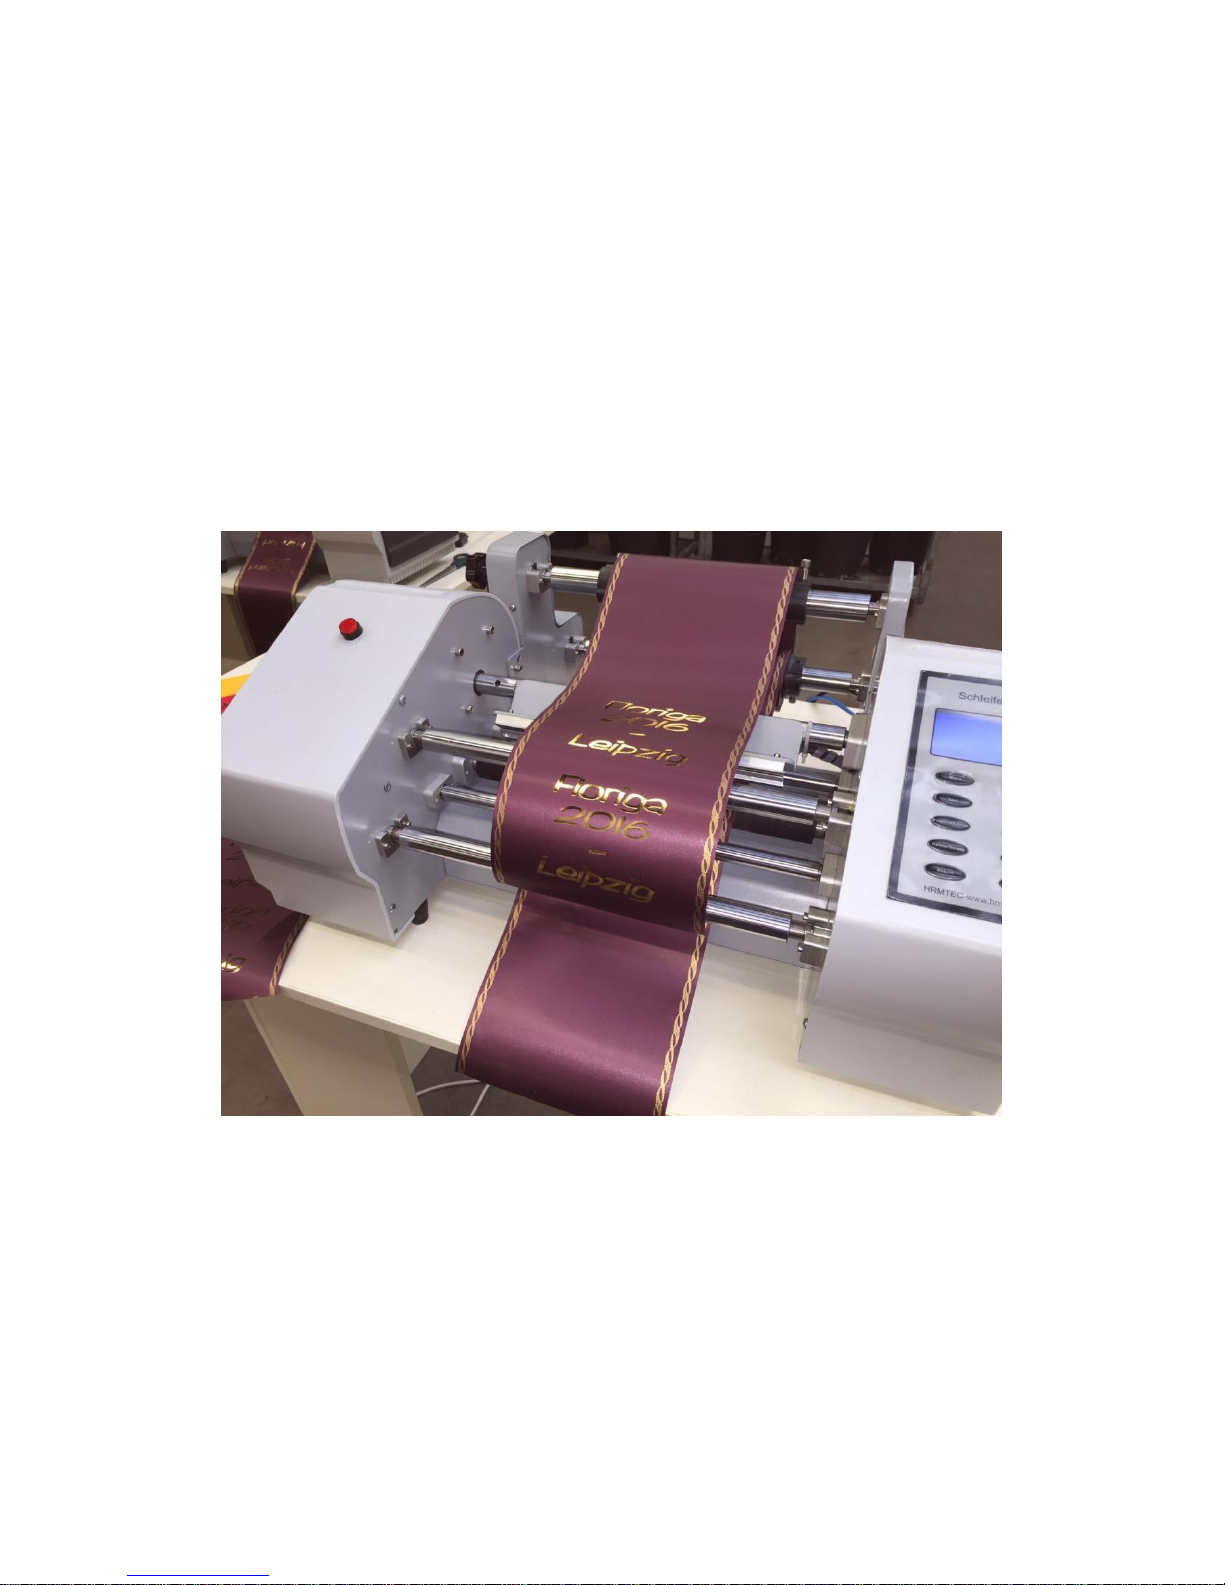
MANUAL FOR 123 RIBBON PRINTER
Page 2

2
CONTENTS
1. Machine Settings .................................................................................................................... 3
1.1 Configuration and calibration ........................................................................................... 3
2. Software setup ........................................................................................................................ 6
2.1 Driver ................................................................................................................................... 6
3. Use Instructions ...................................................................................................................... 9
3.1 Run Foil Control Center .................................................................................................... 9
3.2 Prepare 123 Ribbon Printer.............................................................................................. 9
3.2.1 Check parts..................................................................................................................... 9
3.2.2 Enter Ribbon................................................................................................................... 9
3.2.3 Enter Foil ....................................................................................................................... 10
3.2.4 Adjustments .................................................................................................................. 11
3.3 Prepare “Schleifenprofi” Software ................................................................................. 12
3.3.1 Prepare Shortcuts ........................................................................................................ 12
3.3.2 Release copy protection (“Freischaltung”) ............................................................... 12
3.3.3 Prepare Layout ............................................................................................................. 15
3.3.4 Specialties in use with 123 Ribbon Printer .............................................................. 16
3.4 Design ................................................................................................................................ 19
3.4.1 “Schleifenprofi” Software ............................................................................................ 19
3.4.2 Printing Parameters in Foil Control Center .............................................................. 19
3.4.3 Standard Parameters per Ribbon/Foil ...................................................................... 20
4. Preventive Maintenance ..................................................................................................... 23
4.1 Clean the Print head ........................................................................................................ 23
4.2 Storage of printing foils ................................................................................................... 23
5. Technical Data ...................................................................................................................... 24
Page 3

3
1. Machine Settings
Ribn Dog:V3.22 version don't support
Heads: the quantity of the print head
IP Addr: Equipment network IP address
NIC Type: Equipment network card type Numbers
Date: the current date
Clock: the current time
HeadType: the type of the print head
Save: The distance of the saving foil
1.1 Configuration and calibration
Lang: support CHS, CHT, ENGLISH, adjust though "V-"
DataCrct: general to the default, for example, print a "color lump" in 500mm x 500mm, and
the actual size is 500mm x 600mm, can adjust it, if the actual length is longer than the target
length, increase this value, conversely, decrease the value.
BlnkCrct: the distance between the text/image and text/image, the adjustment is the same
as "DataCrct"
HeatMode: can choose "Normal" or "Fast"
HeadByte: the width of the print head, 330A choose 256
Pulse: Default for 46
Cool: open it or not by "V+/V-"
Pre-heat: set the preheat of the print head, usually use it below 10, please used carefully, if
abused, the printing result will be not good or the print head will be damaged.
PrHeatST: set the heating speed of the "Pre-heat", usually use it below
10, please used carefully, for if misemploy, the printing result will be not good or the print
head will be damaged.
Contrast: Adjust LCD screen brightness
Heads: the main board supports 3 print head
Heat Intv: Default for 100, please don't adjust this value at will, otherwise, the printing result
will be not good or the print head will be damaged.
Motor Acc: Default for 80, please don't adjust this value at will, otherwise, the printing result
will be not good or the print head will be damaged.
Upgrade Mode: press "Enter" and upgrade the main board.
Test Printing: click “Enter"
Page 4

4
Restore CFG: if click “Enter", the main board goes back to default value.
FormatS: use to format SD card or USB,
Pressing "test" can adjust the printing settings, and can
change for the memory device.
When the machine works, the machine will stop printing after
printing the text/image, repress, the machine will continue to work, in "Suspend" and press
"return", the printing stops.
Can delete the file in the memory device; if press it, the
machine will stop working in the process of printing, repress it and the machine continues to
print.
Return to previous menu.
Adjust the settings
Page 5
5
Choose the menu
Menu choice and file printing
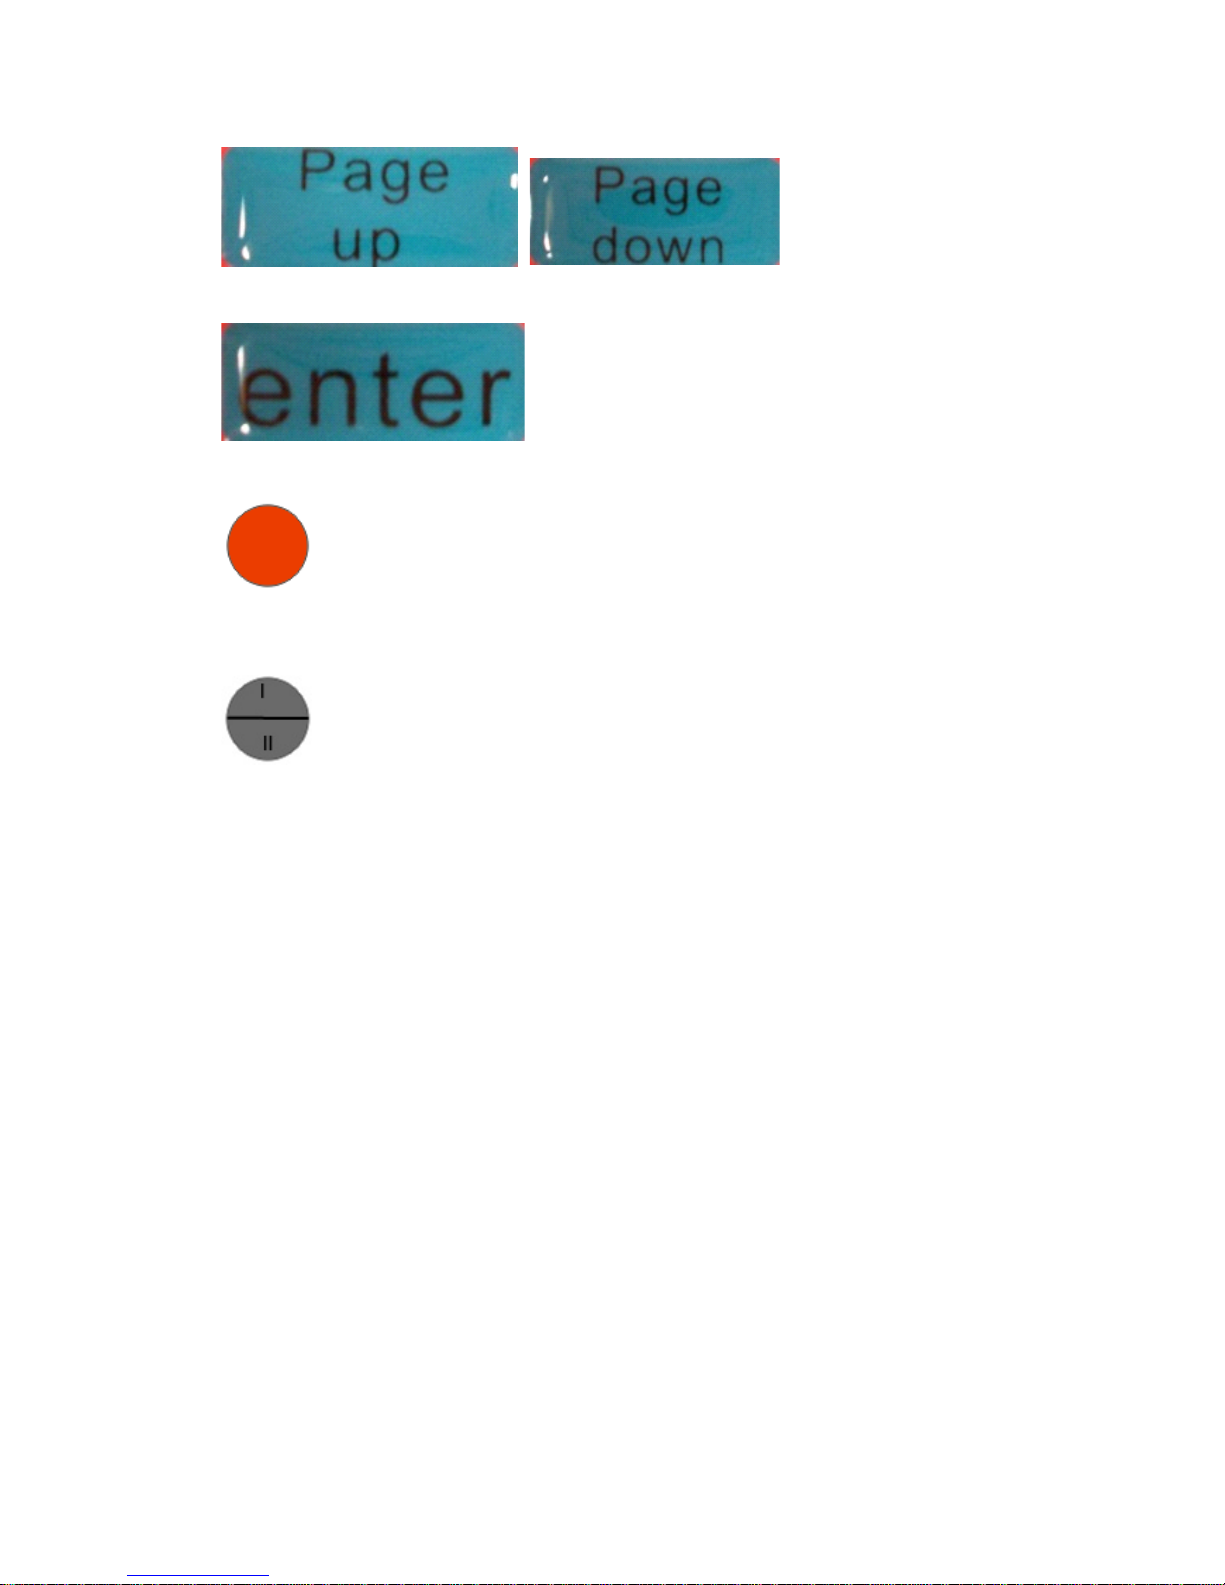
Control the run or stop of the receiving motor
This button must be pressed down when you printing.
This switch controls the print head up/down position.
Position I: print head moves up
Position Middle: print head remains stationary in position (without pressure)
Position II: print head moves down. When it reaches the rubber roll with ribbon and foil, it
remains there with pressure. Before printing, set switch to position II.
Output print
Equipment adjustment
When install the foil, make sure it is in the middle
Set print head switch to position II
Press down the red button to make sure the foil flat
Press "test" to find the printing result, if not good, please adjust the settings and print head
position.
Output printing way Use USB
Online printing way Use Windows Driver
Page 6
6
2. Software setup
2.1 Driver
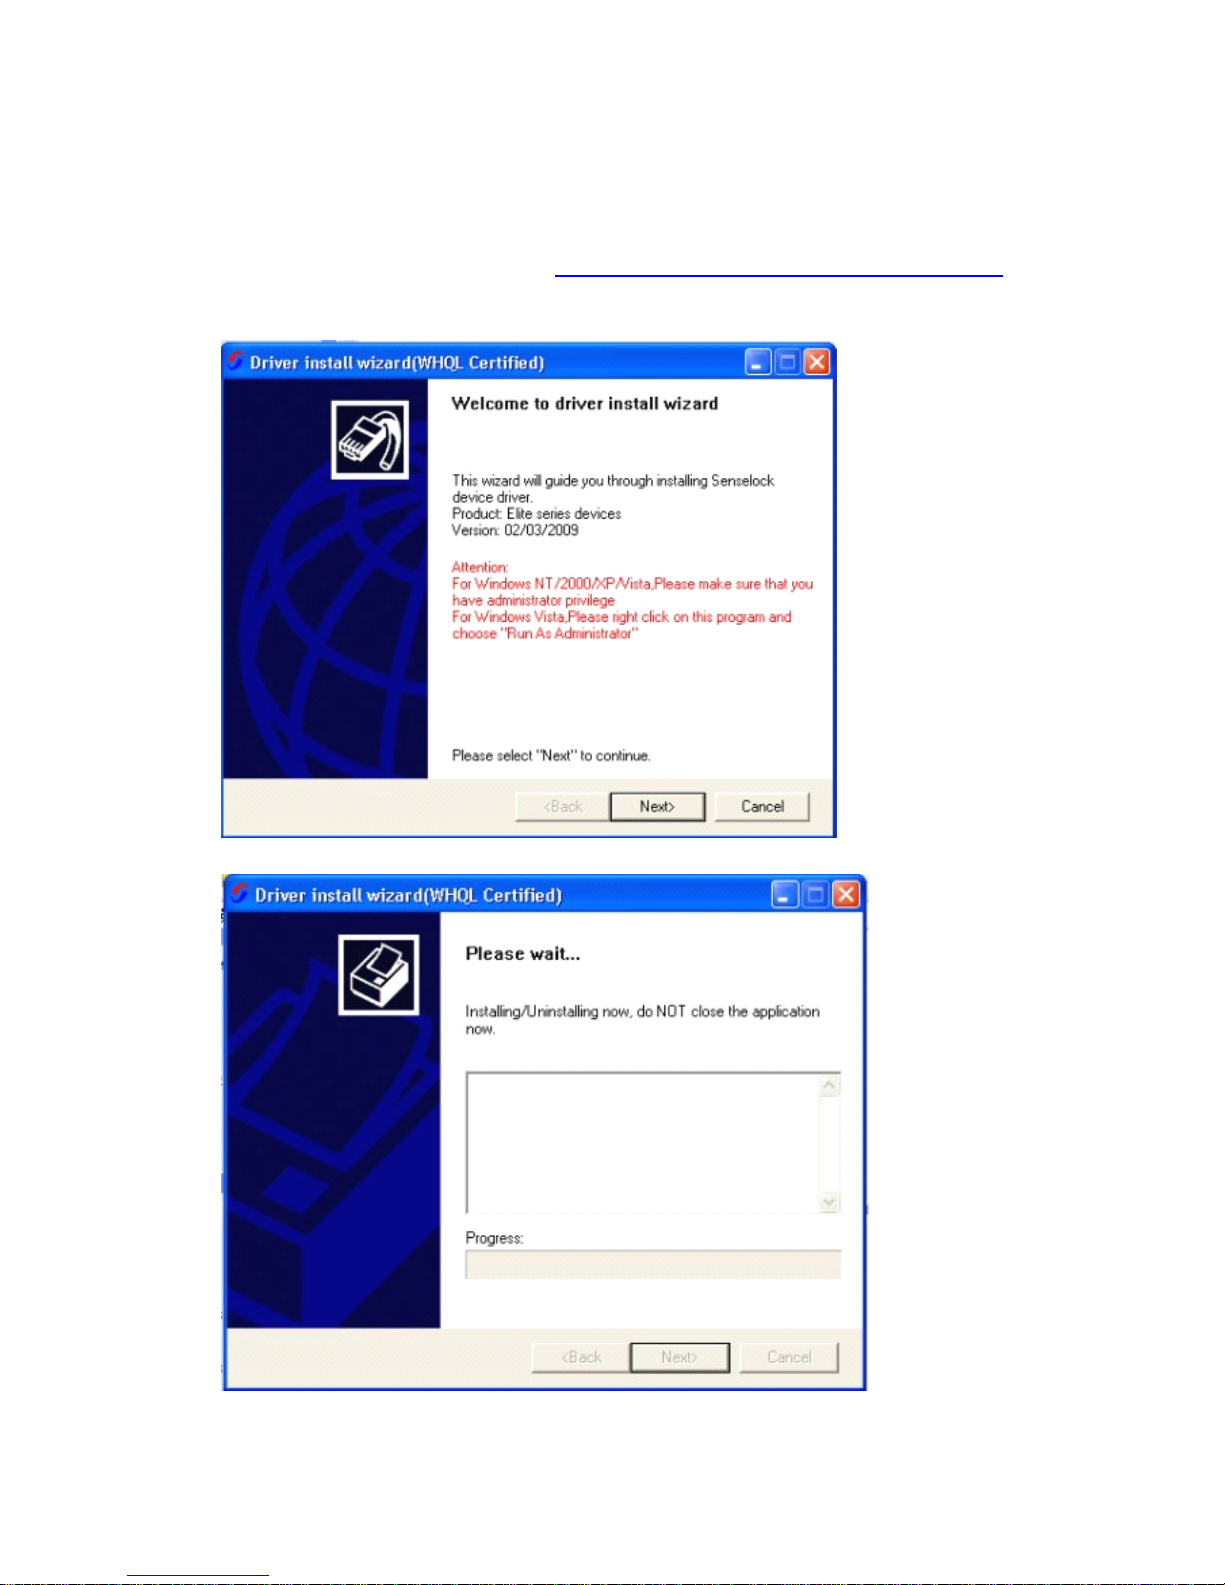
Execute the file setup.exe in the folder ftp://hrmtec.com/Printer_Schleifenprofi_v1/ISIX_setup
(User: f00a54fc, Password: fcc123...).
Configure the driver as follows:
Click "Next"
Page 7
7
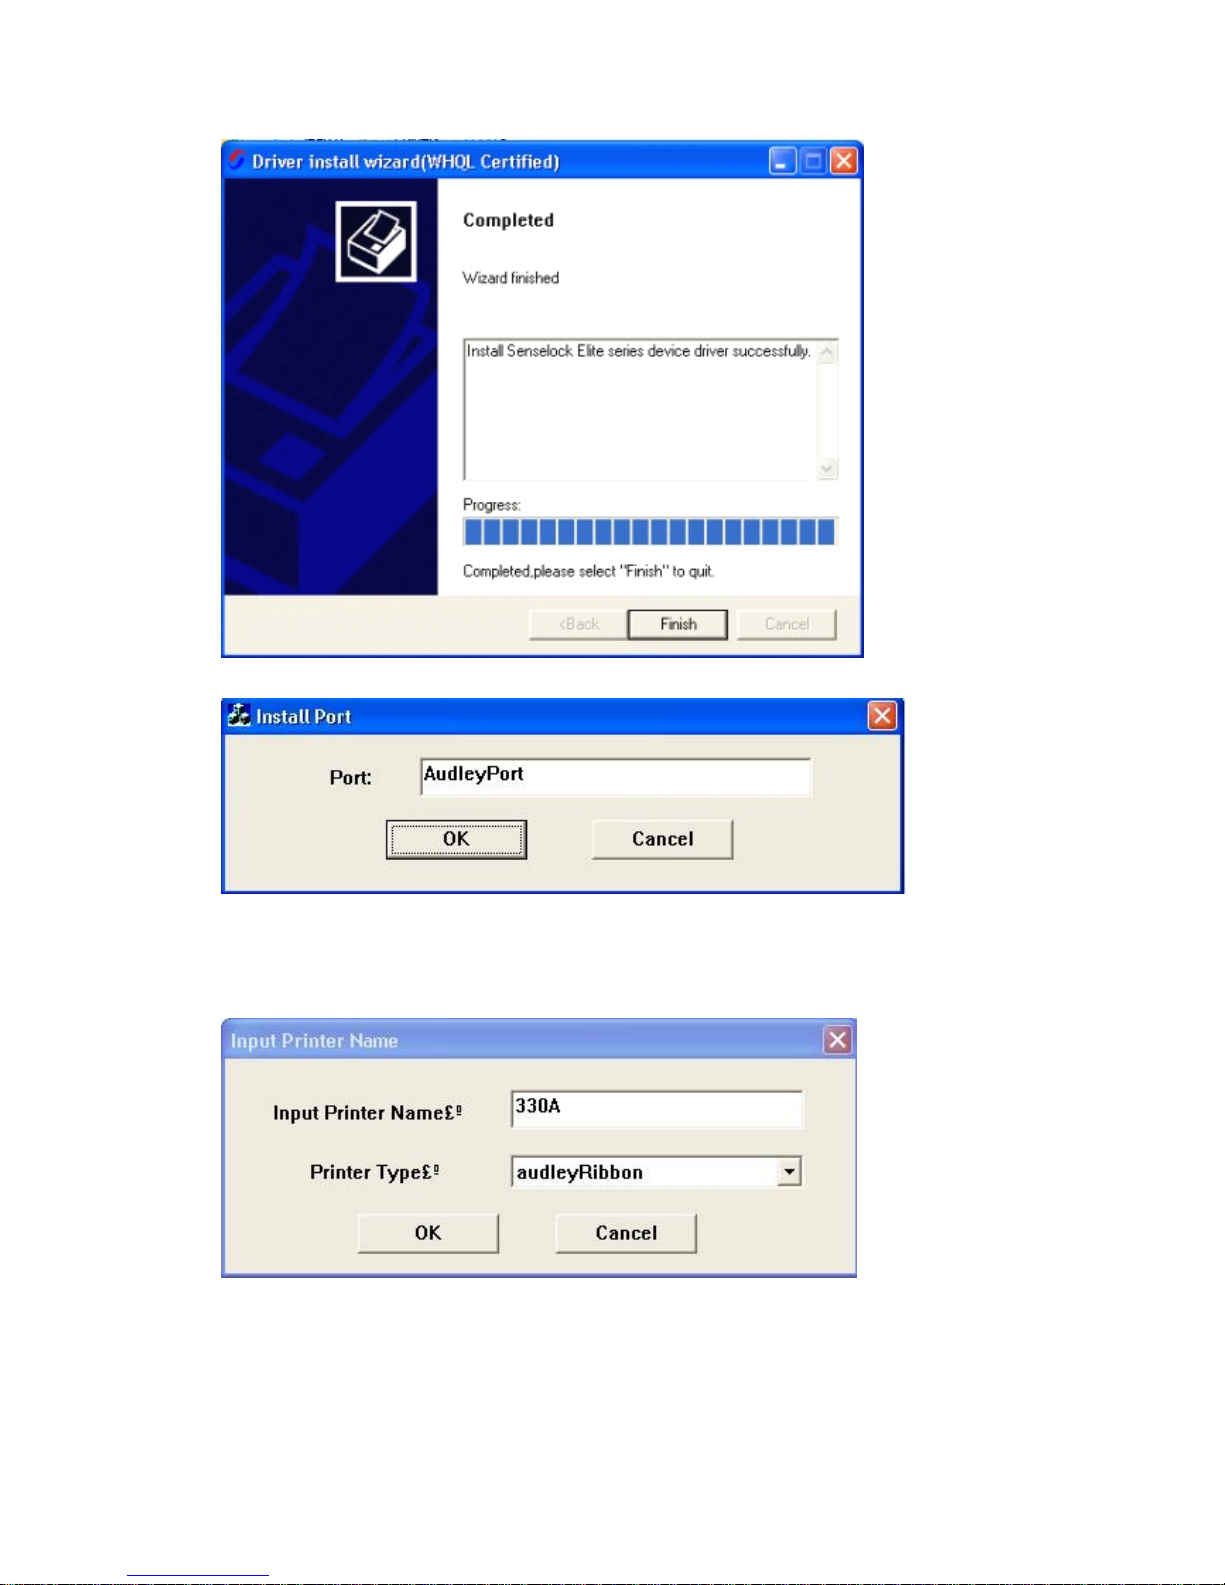
Click "Finish"
Enter a printer name, e.g.. "SchleifenProfi2" choose "RF_Xpress", and press "OK"
Click "OK"
Page 8
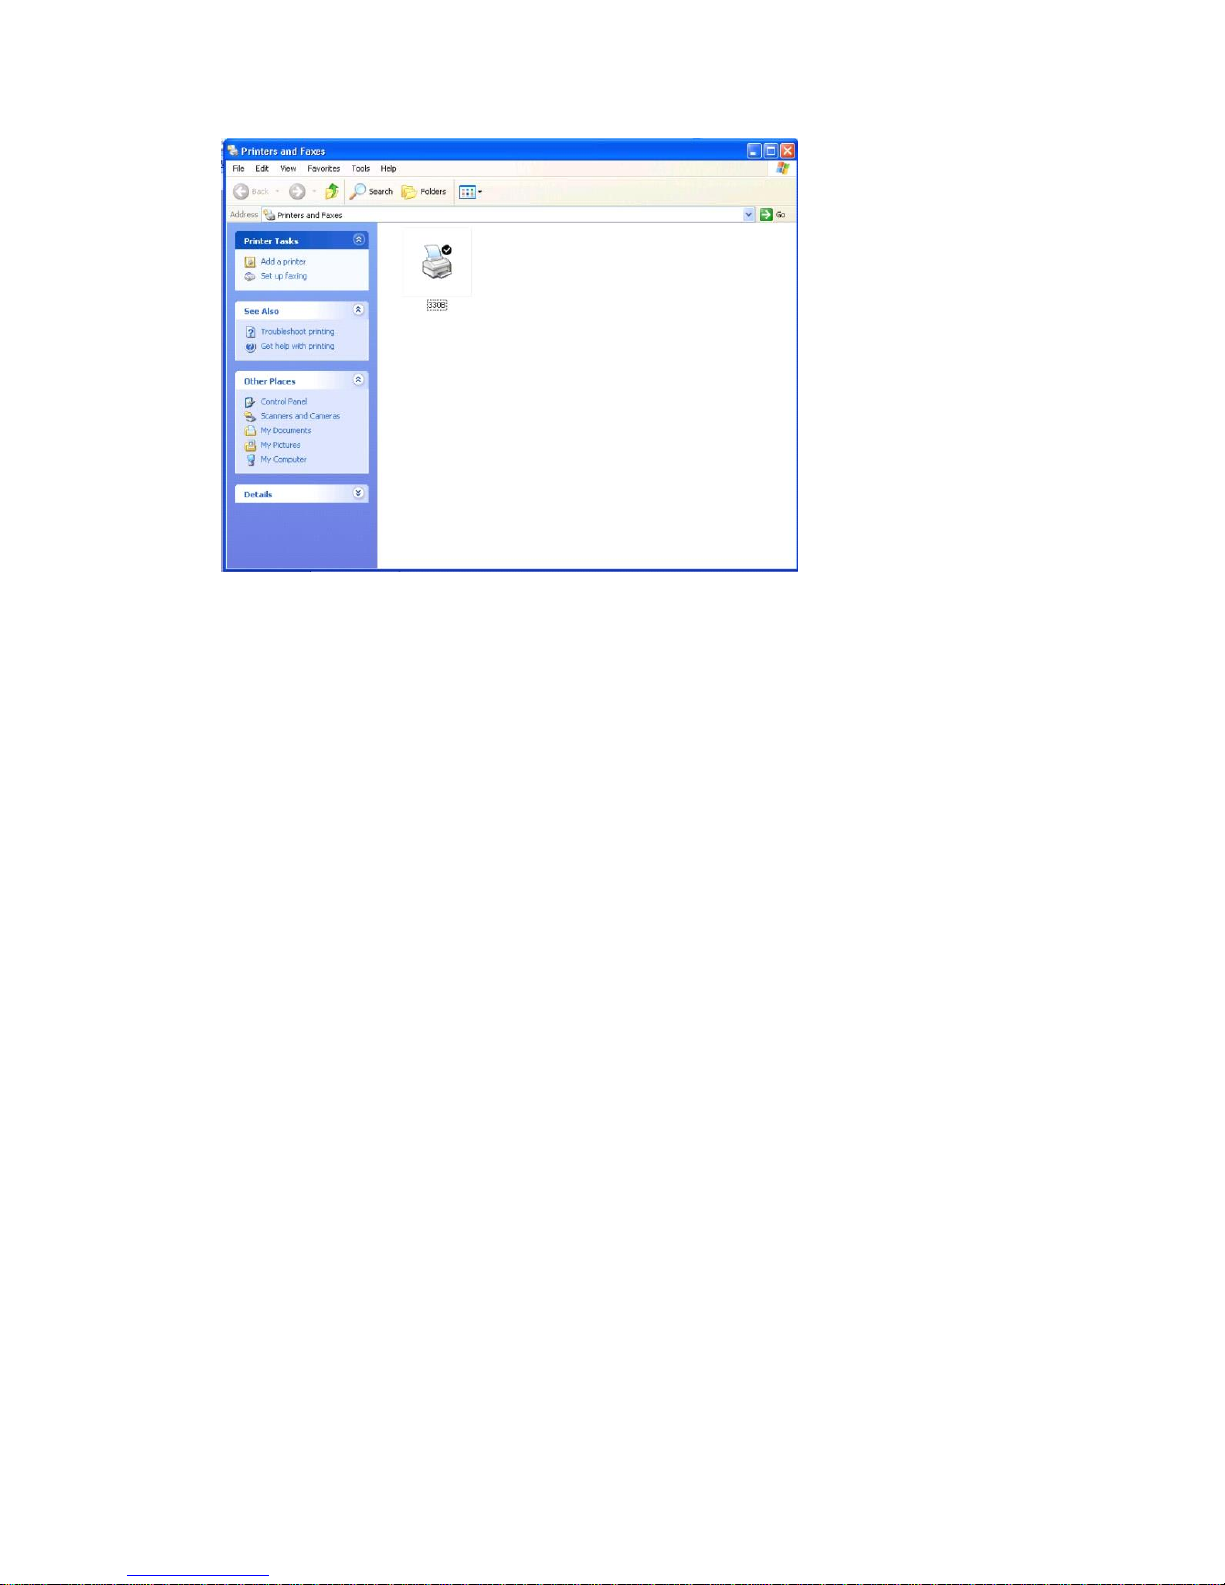
8
The printer was installed
Page 9
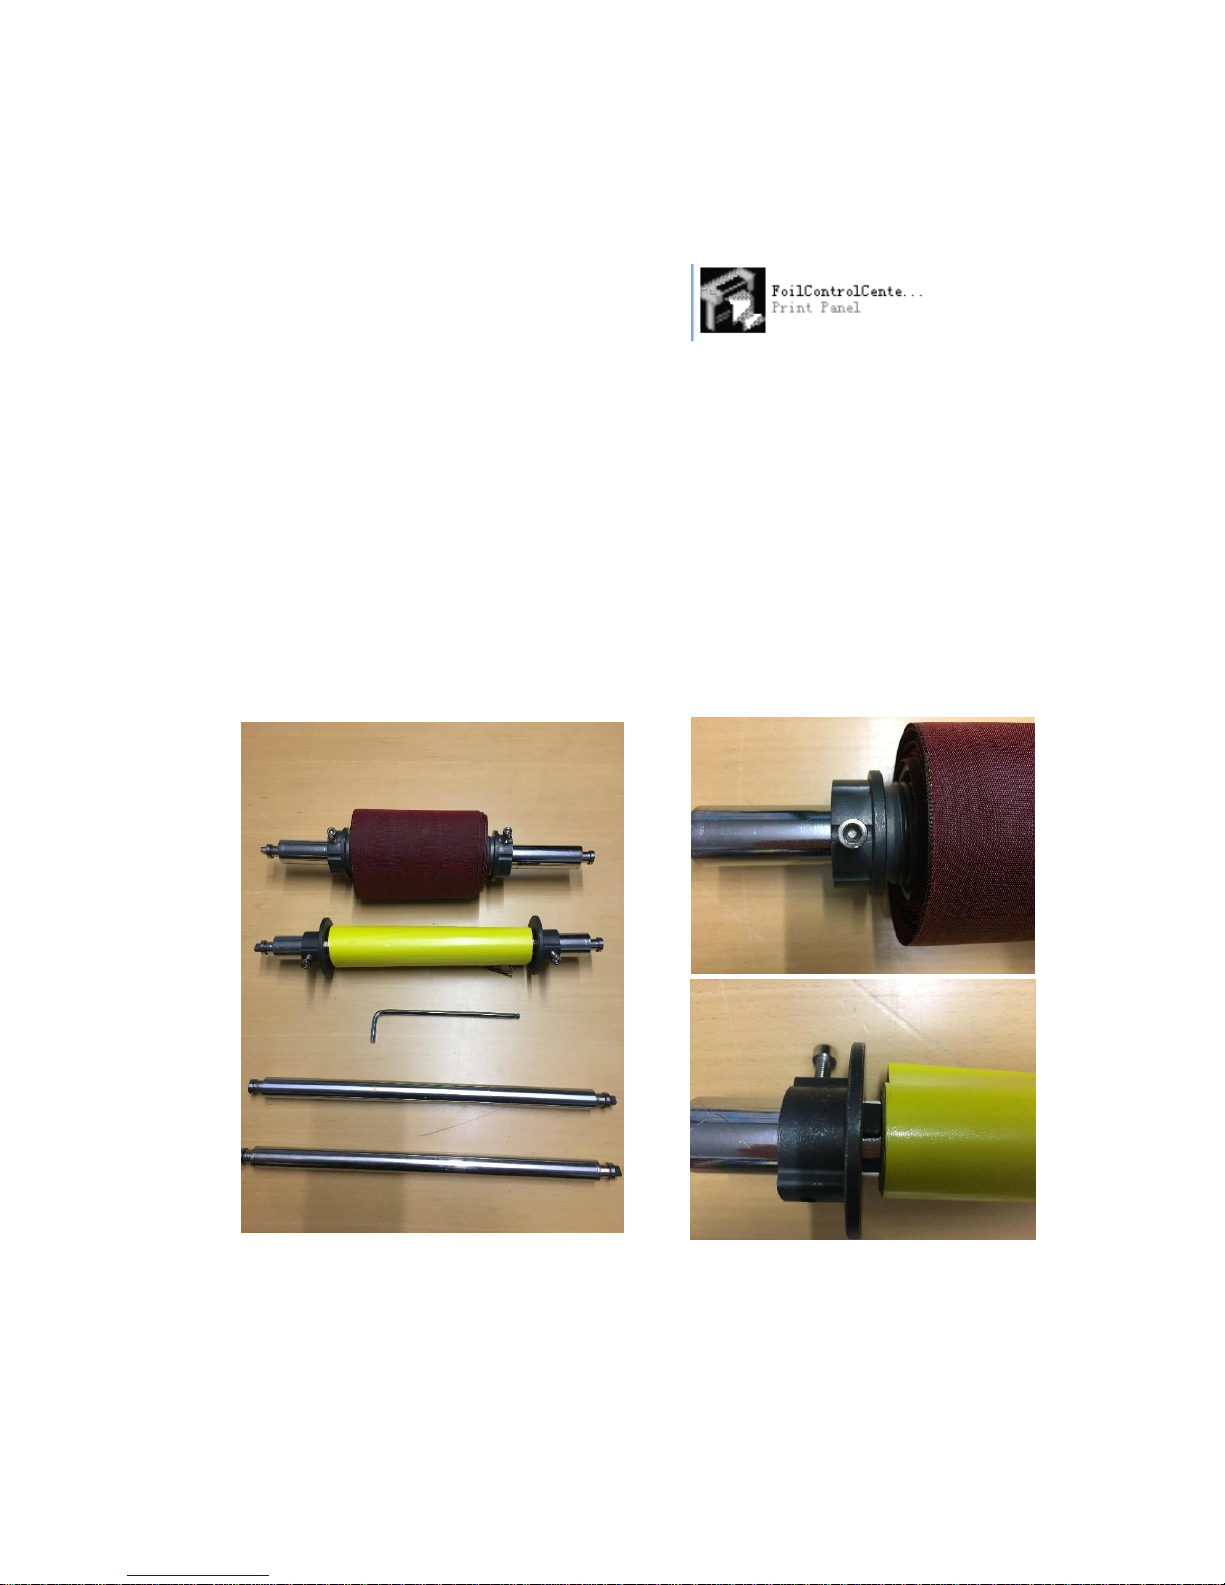
9
3. Use Instructions
3.1 Run Foil Control Center
Open the file "FoilControlCenter" and Run the
Normally, when installation is done by ISIX, the FoilControlCenter is already running in
the background.
3.2 Prepare 123 Ribbon Printer
3.2.1 Check parts
The 123 Ribbon Printer consists of two feeding axes (one for the foil and one for the
ribbon) with four mounting sleeves, two waste axes for the foil, the printer itself, the
power cable and the network cable. The delivery also includes a tool to fix the mounting
sleeves, plus cotton pads to clean the print head.
3.2.2 Enter Ribbon
Move the print head manually up, so that the area to the main printing axis and the two
defection axes is easy accessible.
Position the ribbon centralized on the feeding axle (thicker axis) and fix it with the
mounting sleeves.
Page 10
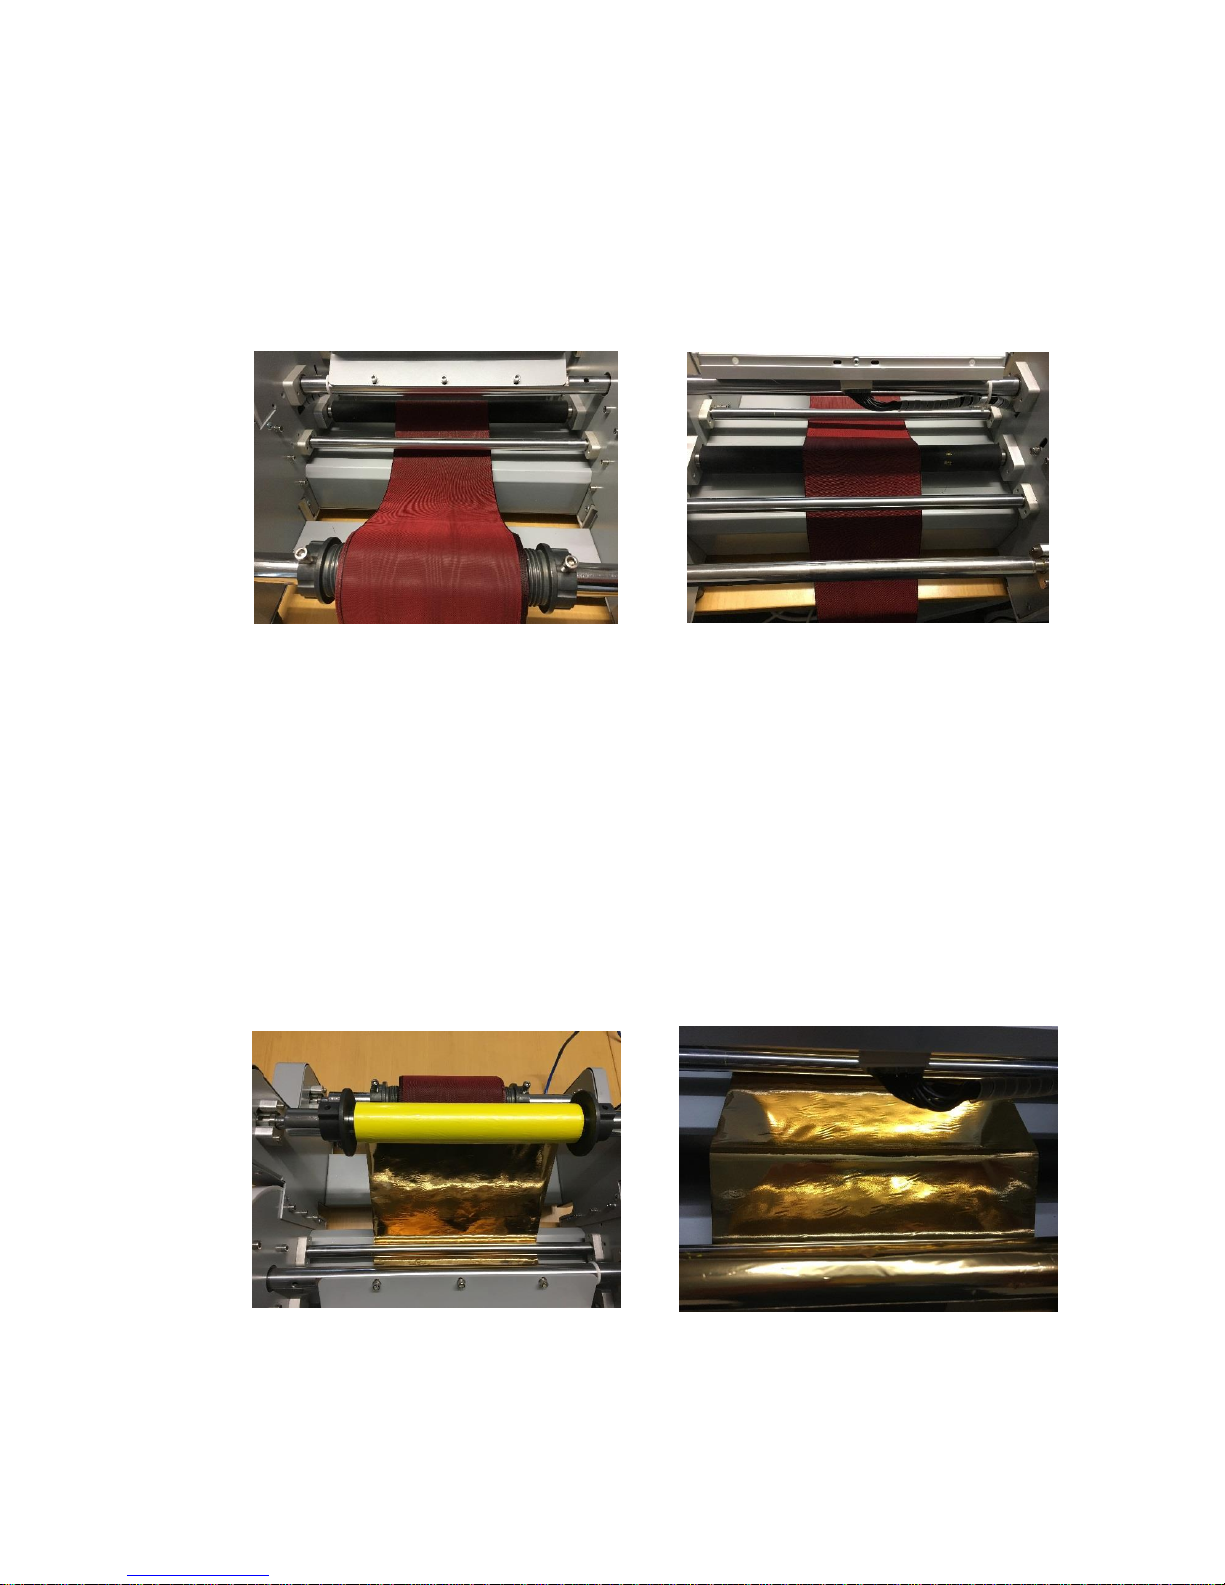
10
The printing section consists of three axles: the main printing axles (black rubber) and
two deflection axles just before and after the printing axle.
Enter the ribbon in the order “down”, “up”, “down”:
1. Below the first deflection axis (“down”)
2. Above the main printing axis (“up”)
3. Below the second deflection axis (“down”)
Hint: to change the ribbon, you can let the foil installed (just ease it to have enough
space to enter the new ribbon). E.g. if you want to print different ribbons with the same
foil (e.g. gold on black ribbon and gold on white ribbon).
3.2.3 Enter Foil
First make sure the foil is entered the way you have the material on top that should be
finally on top of the ribbon. E.g., the gold foil will have to golden part on top, while the
yellow part looks towards the ribbon.
The foil follows the ribbon, so the order “down”, “up”, “down” applies. After the second
deflection roll, the foil needs to be fixed at the upper waste roll.
You might want to fix the foil with a small tape to the waste axis.
Page 11
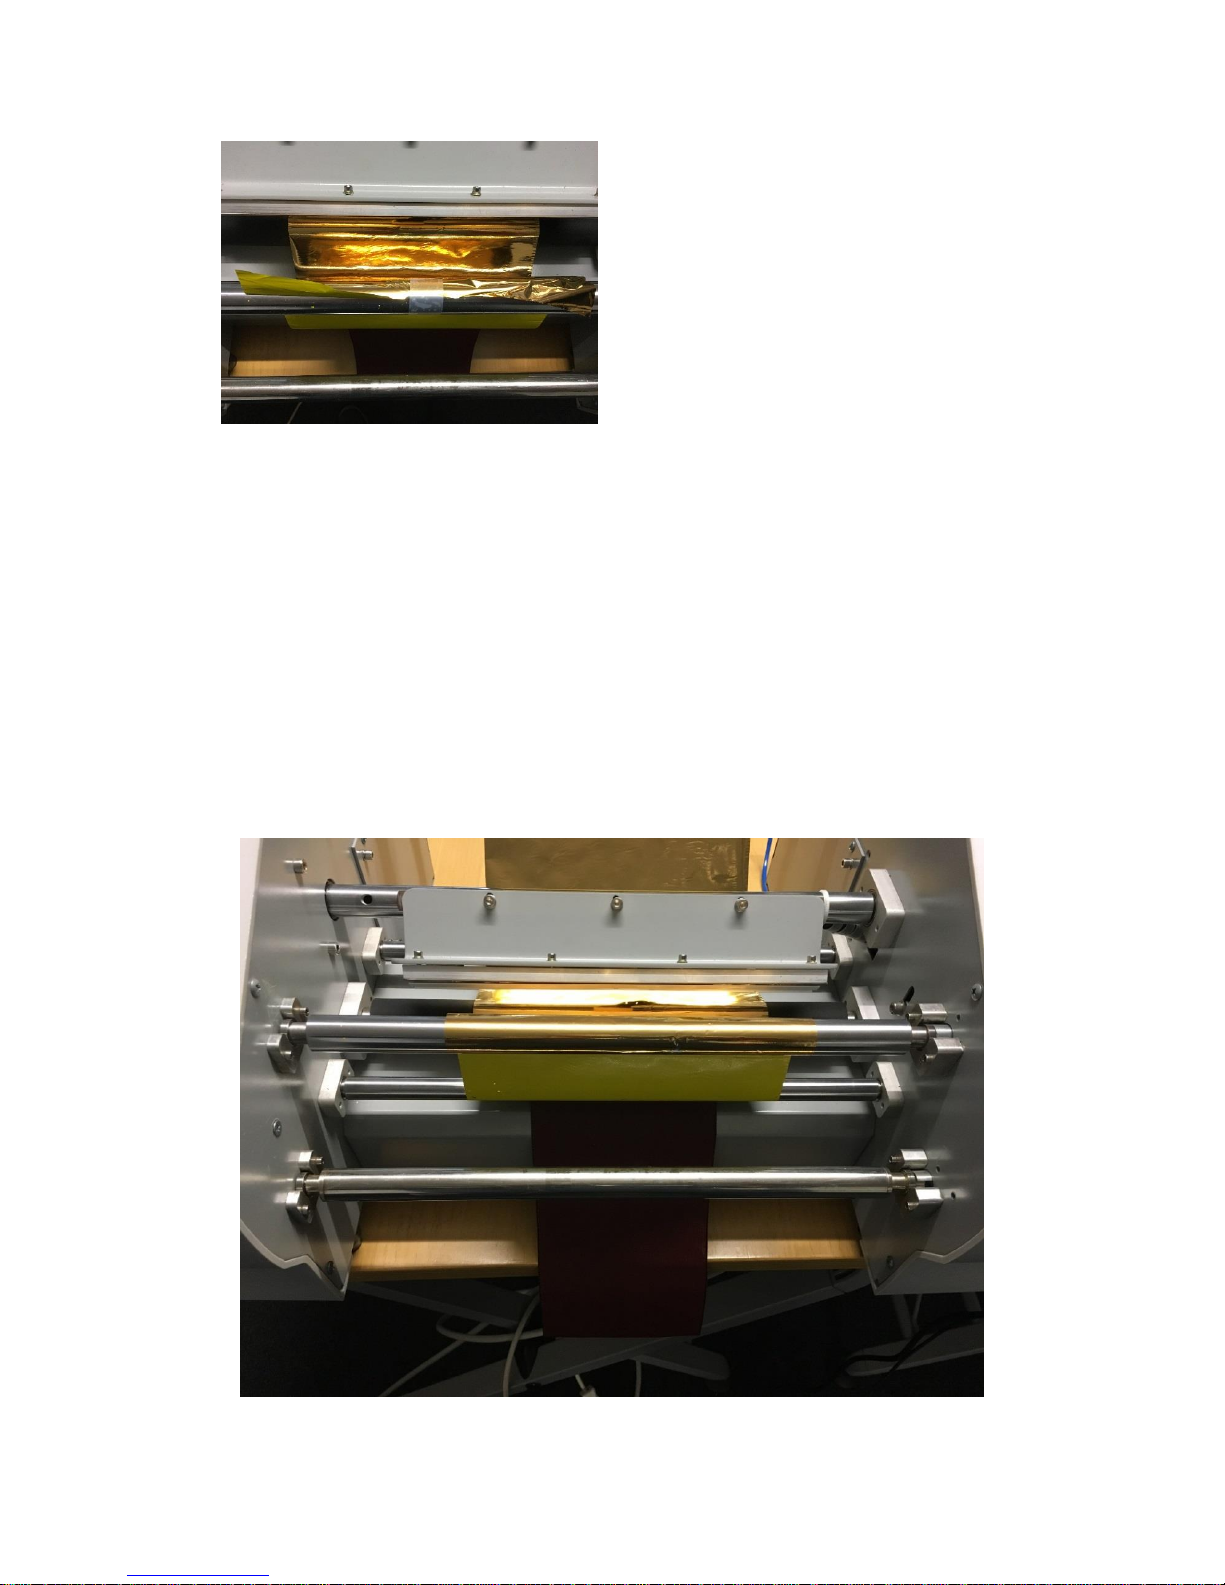
11
Hint: to change the foil, you can let the ribbon installed. E.g. if you want to print different
colors on the same ribbon (e.g. gold on white ribbon and black on white ribbon).
Hint: it’s also possible to use the lower waste axis. This makes sense, when a smaller
angle to release the foil is required. That might be the case for the black foil, the white
foil or the silver foil and depends on the resulting printing quality.
3.2.4 Adjustments
Ensure that the ribbon is centralized and runs through the system without wrinkles.
Ensure that the foil is centralized, it’s fixed at the upper waste axis (in some cases it’s
fixed at the lower waste axis, see hint under 3.2.3), and runs through the system
without wrinkles.
Page 12
12
3.3 Prepare “Schleifenprofi” Software
3.3.1 Prepare Shortcuts
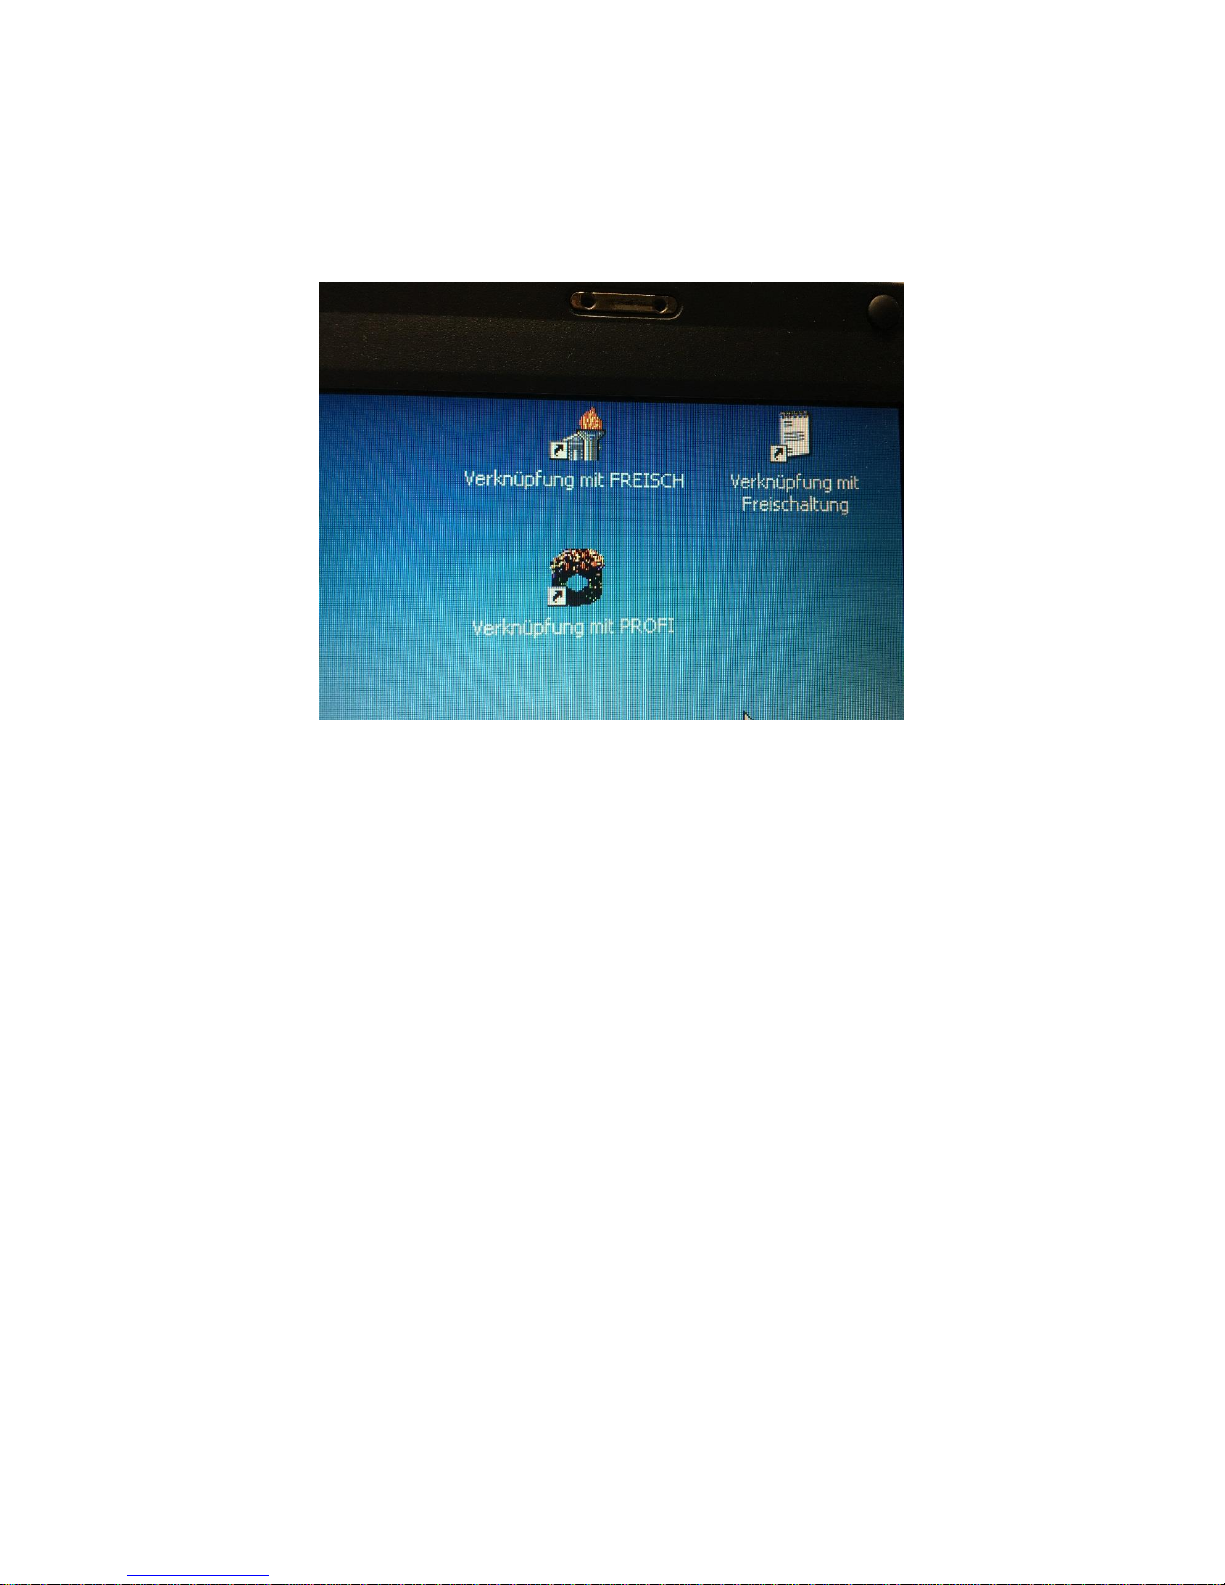
In order to easy access the required software, it’s suggested to use shortcuts and place
them on the screen:
Here you see:
FREISCH: software to release the copy protection
Freischaltung: Text file that contains the password used for FREISCH
PROFI: the “Schleifenprofi” software
3.3.2 Release copy protection (“Freischaltung”)
The “Schleifenprofi” software was historically copy-protected by a hardware dongle.
When the hardware dongles became unavailable in the market, the copy-protection
mechanism has been replaced by a code. Earlier, this code had to be asked by phone
at the reception of FCC. Since there’s no reception anymore, this is no longer possible.
HRMTEC provides the software to release the copy-protection in exchange to a nondisclose agreement.
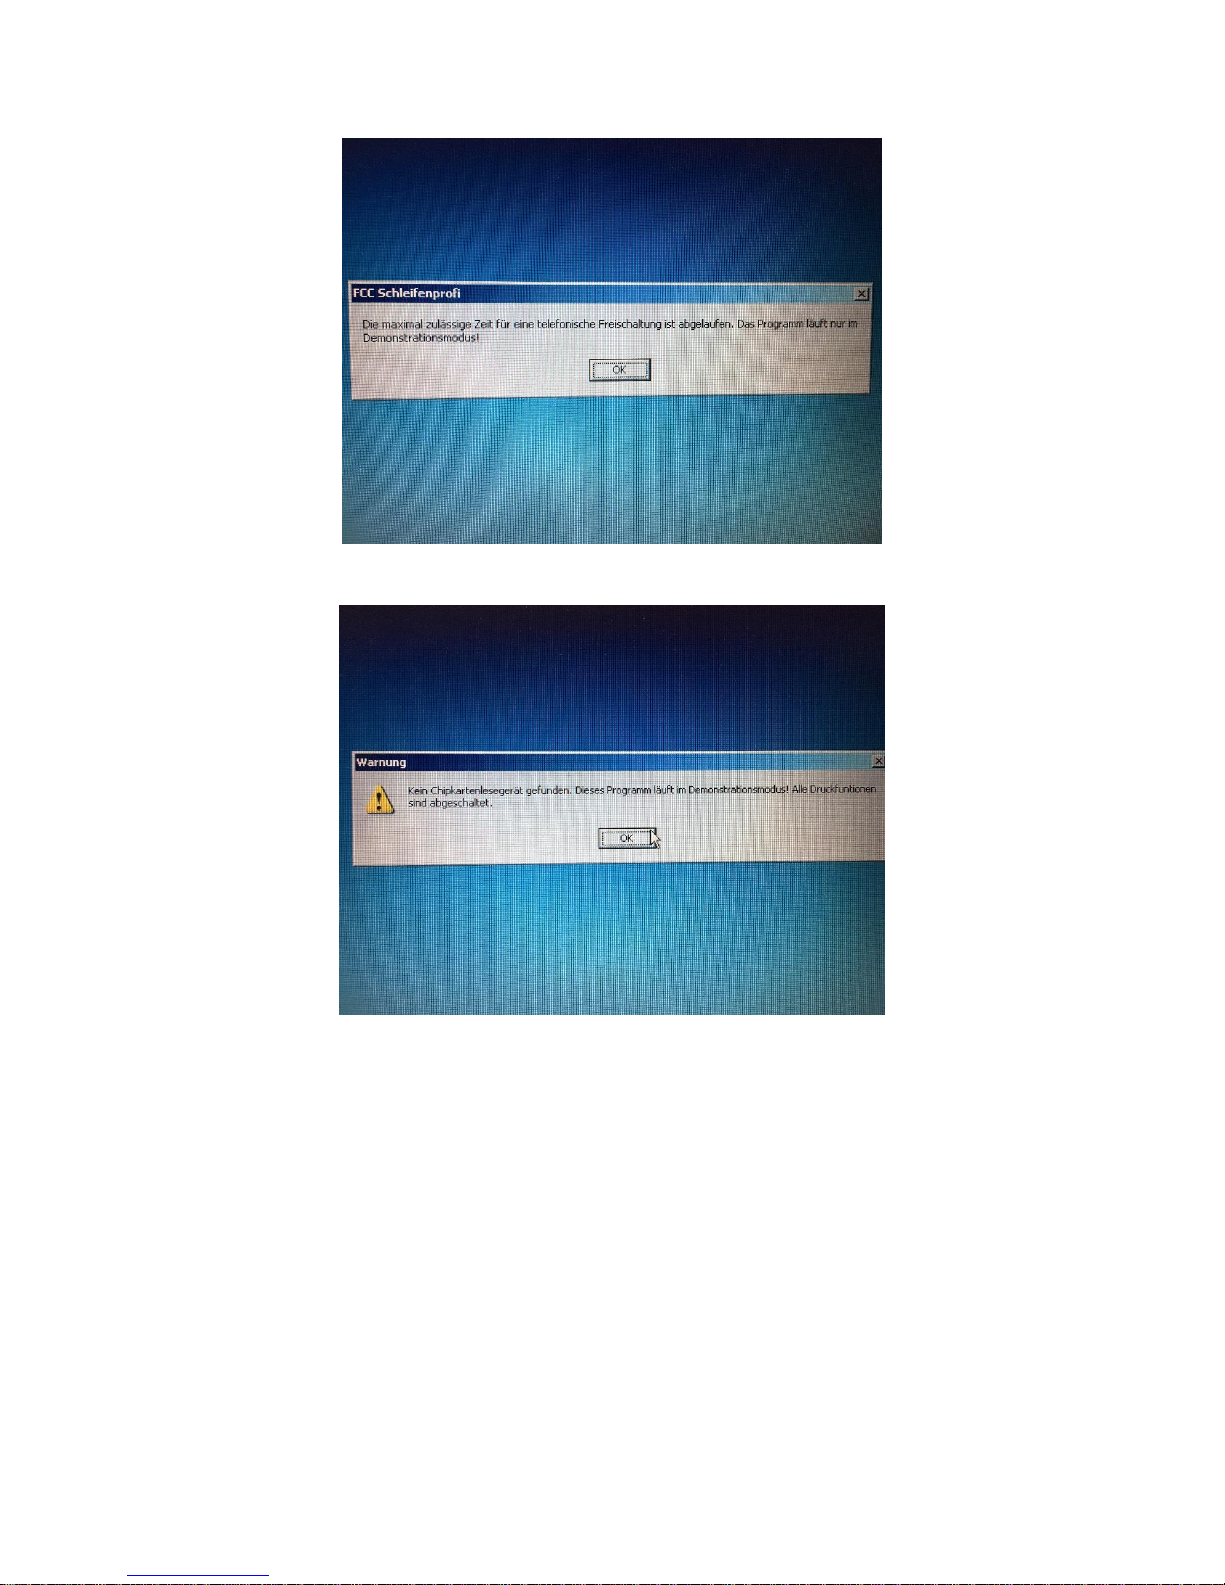
When you first start the “Schleifenprofi” software after installation, the release of the
copy protection is required. The software shows the following messages, which you
just accept:
Page 13
13
Press OK, then see:
After accepting these messages (press OK), the “Schleifenprofi” software starts and is
fully functional, except of the printing function (printing is not possible).
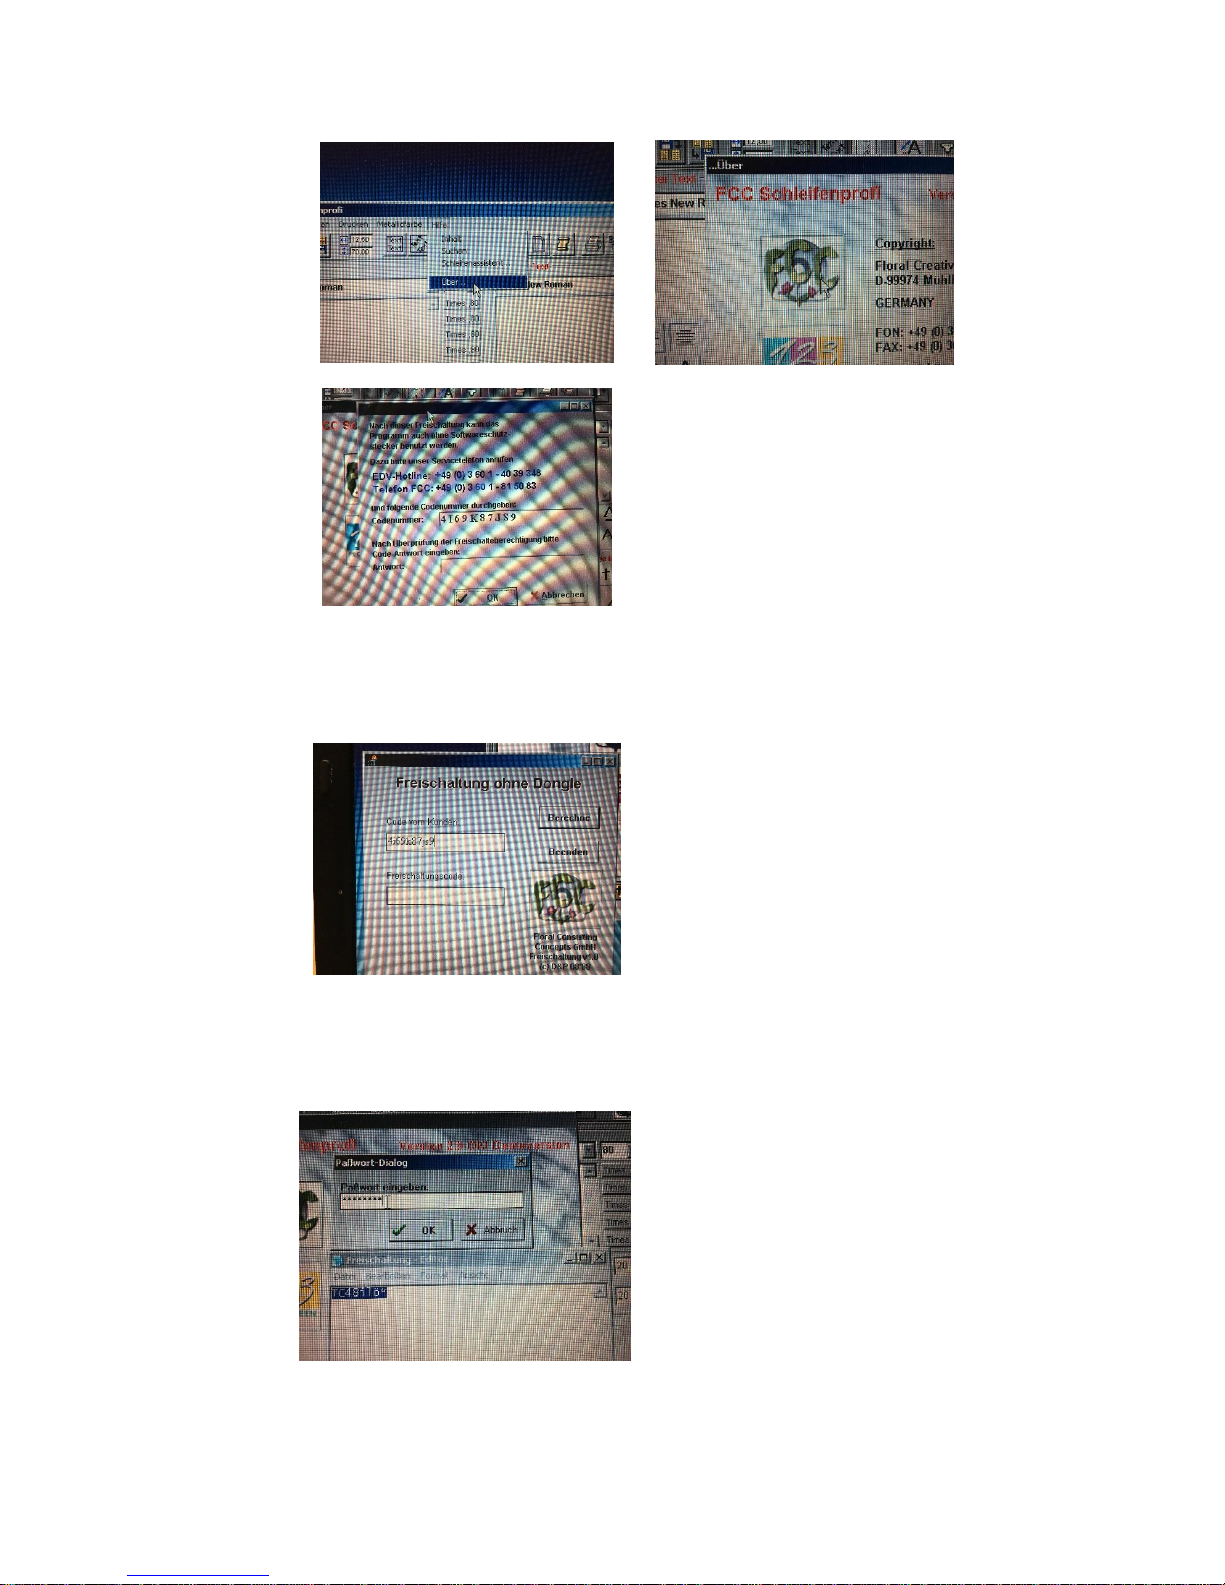
To release the copy-protection and to enable printing again, you follow these steps:
1. Open menu item „Hilfe/Über“ and do a double click on the FCC Logo -> the
“Schleifenprofi code” appears (Kundencode); this functionality works only,
when the „Schleifenprofi“ software requires a copy-protection release.
Page 14
14
2. Start "FREISCH.EXE" and enter the „Schleifenprofi Code“ in the field "Code
vom Kunden" (please type, don’t use copy/paste)
3. Press the button "Berechne" -> a password is required
4. Open "Freischaltung.txt" with a Text Editor (e.g. Notepad), copy the password
(no typing necessary) and paste it in the password dialog of "FREISCH.EXE"
5. "FREISCH.EXE" calculated the release code „Freischaltcode“.
Page 15
15
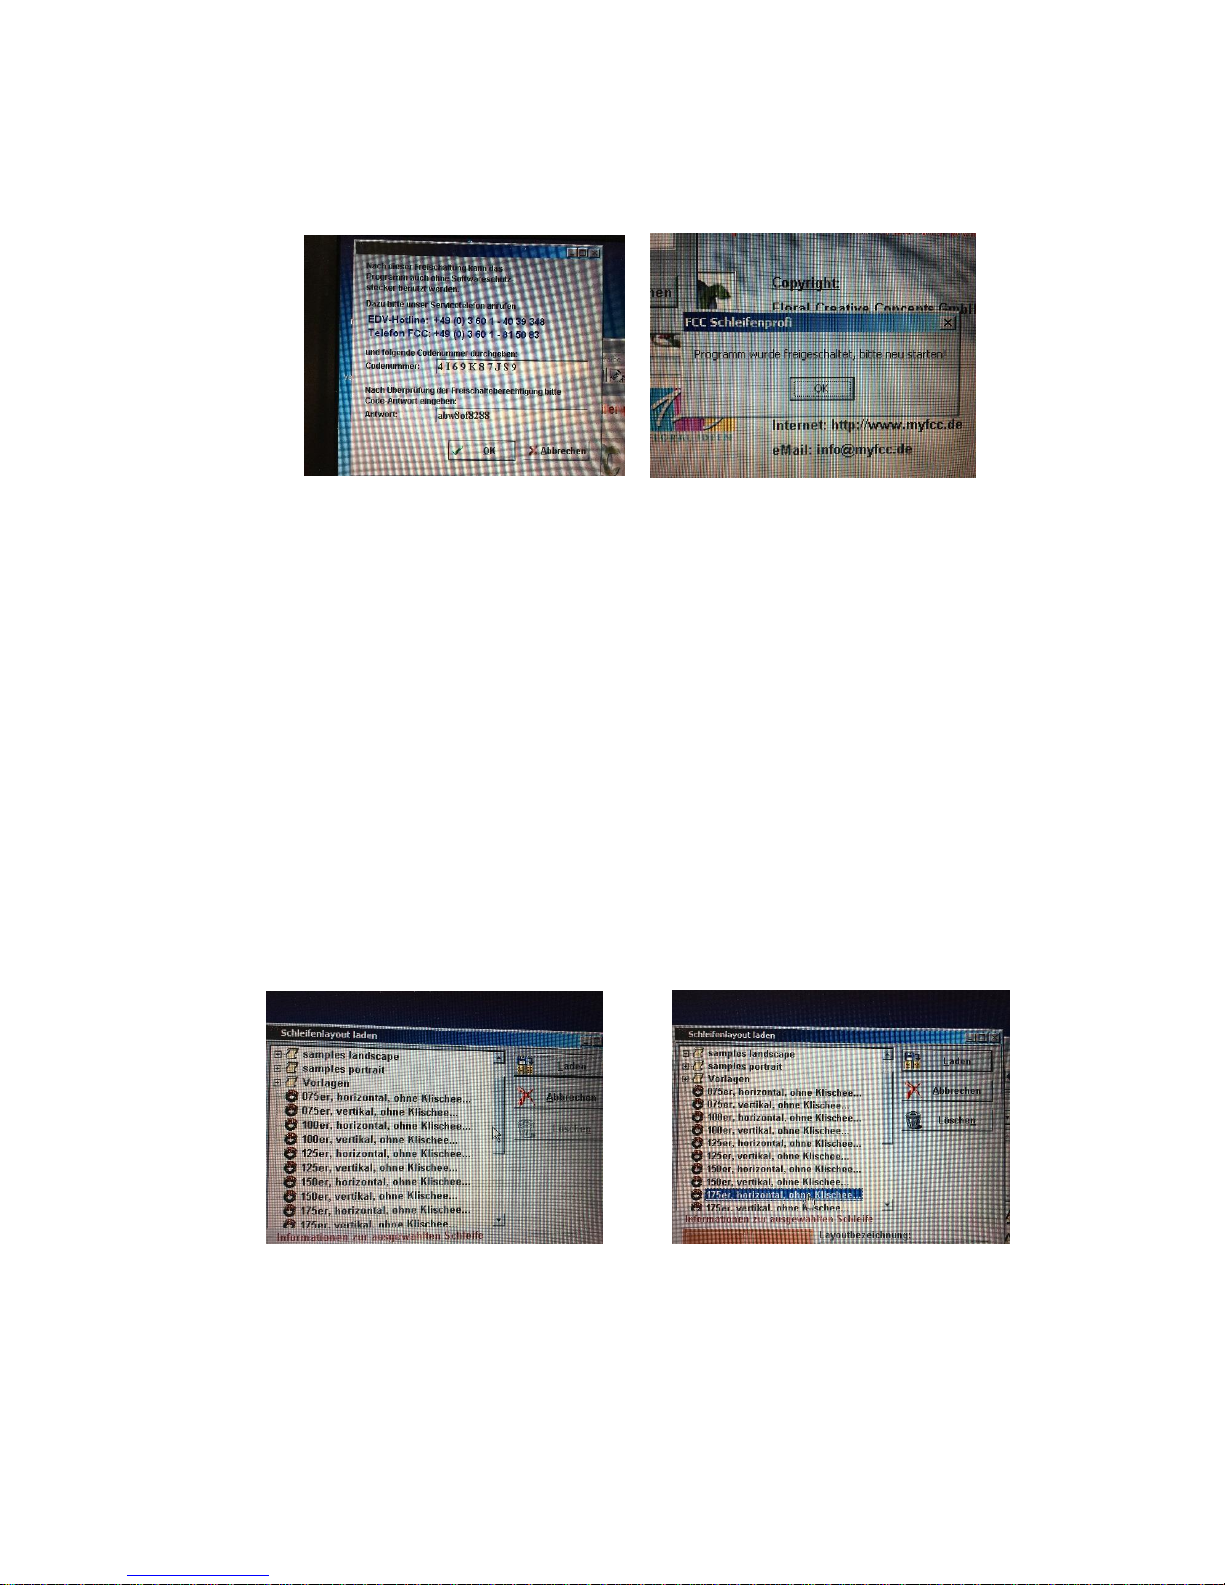
6. Enter the calculated code (Freischaltungscode) in the windows of the
„Schleifenprofi“ Software (please type, don’t use copy/paste) -> the
„Schleifenprofi” software confirms success.
7. Restart the “Schleifenprofi” Software
If not successful, then it’s because of a typing error. Repeat the procedure from step 1
and make sure not to mismatch 0 (figure zero) and O (large character O) or I (large
character i) and l (small character L).
Large/small character or the spaces are not relevant.
Note: The "Schleifenprofi" software requires periodic release of the copy-protection.
This is without prior notice. An algorithm calculates the period, depending on last start
of the software, the number of printing processes, etc.
3.3.3 Prepare Layout
We are suggesting to prepare the layouts of the ribbons that you use normally. In
normal operation, one need only to open the layout, enter the text and print.
The preparation of a layout is described in the manual of the “Schleifenprofi” software.
The “Schleifenprofi” software contains lots of features, which are designed for the
microdry printers (OKI, Citizen Printiva etc.), but not work anymore, or work different
when using the 123 Ribbon Printer.
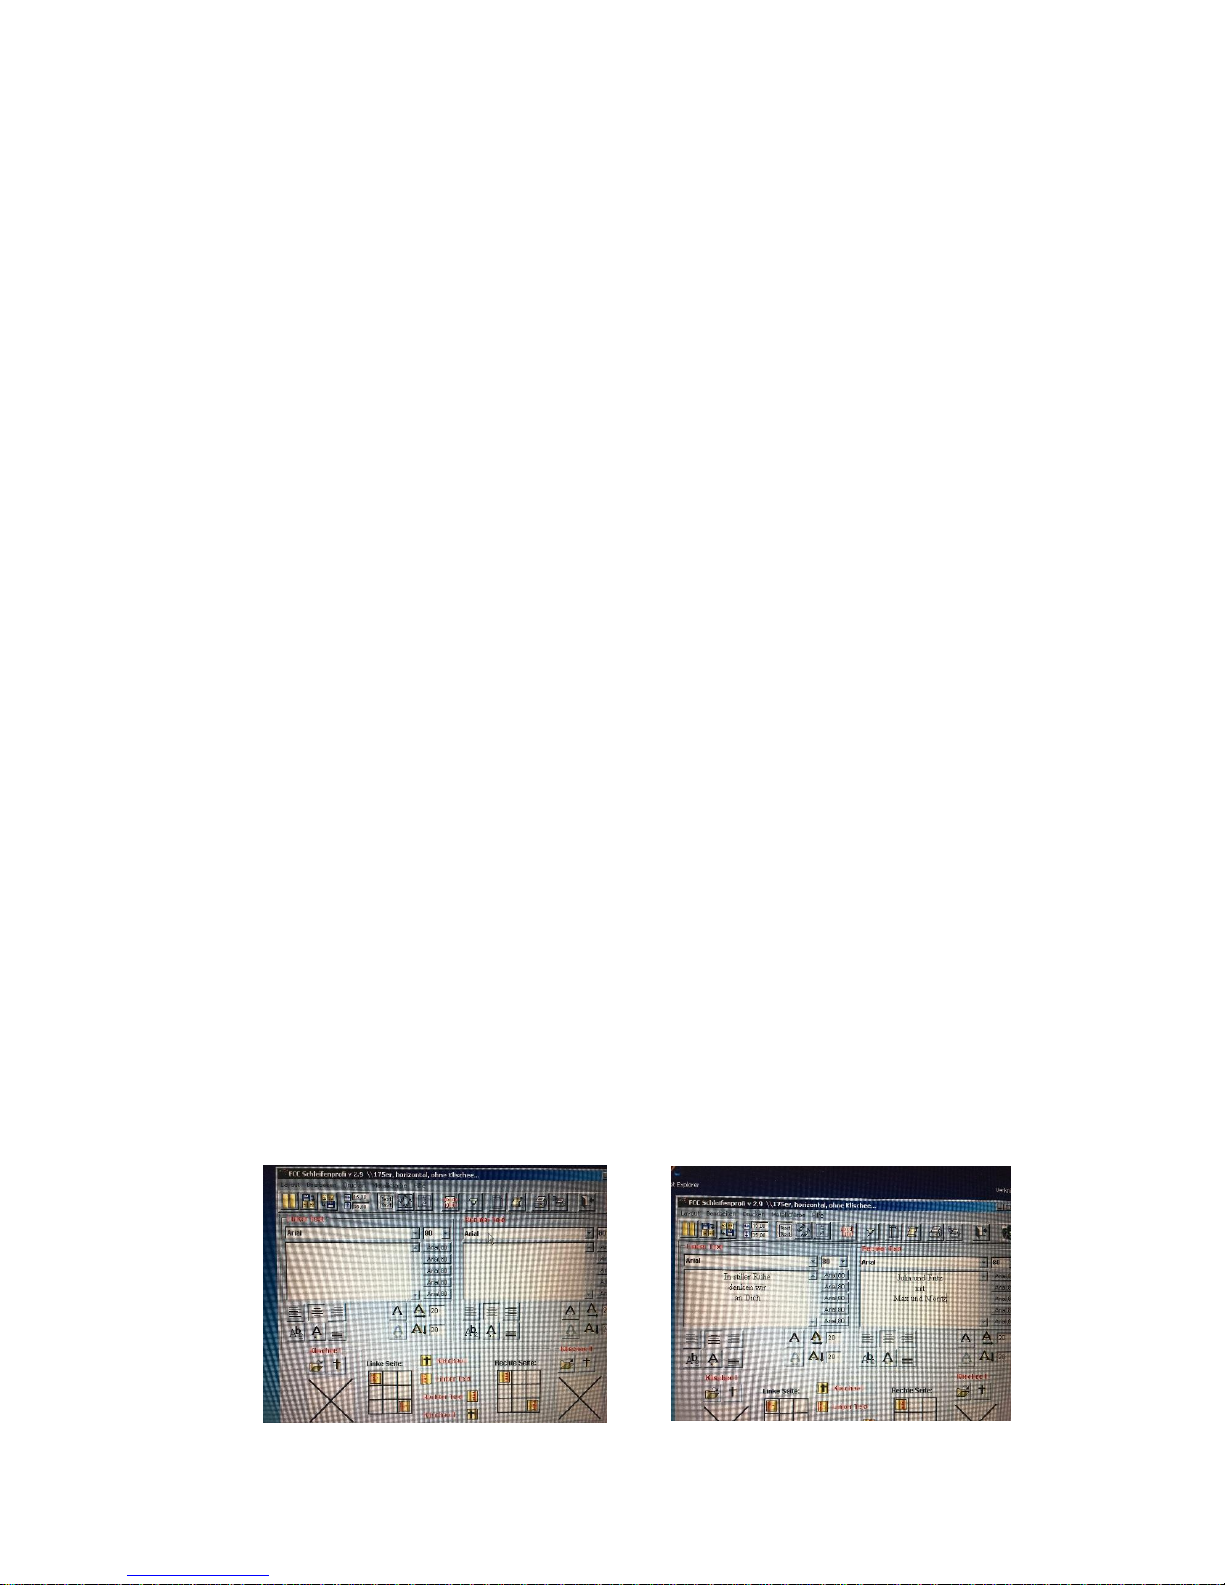
With the 123 Ribbon Printer, the following applies (use this when creating layouts):
Page 16
16
The layout is defining the printing area and not the ribbon itself. The standard
printing area for ALL ribbons is:
o Width (Breite): 15 cm (always !!)
o Length (Länge): 35cm (variable. Adjust according to the required length
of the printing area)
o Upper margin (Oberer Rand): 9 cm (always, minimum)
o Lower margin (Unterer Rand): 5 cm (always, minimum)
o Remove the variable font adjustment (variable Schriftgrössen
Anpassung)
o Remove shadows (font and cliché)
For vertical printing (Längsdruck), we recommend the font size 80 points, smaller when
multiline. Adjust the Length of the printing field accordingly, use the printing preview
(Druckvorschau).
For horizontal printing (Querdruck), we recommend the following font sizes:
175 mm ribbon: 80 points
150 mm ribbon: 65 points
125 mm ribbon: 50 points
For smaller ribbons you should use vertical printing (Längsdruck)
3.3.4 Specialties in use with 123 Ribbon Printer
Let’s see the use of the above explained setup in a real example. We want to print on
175 mm ribbon, horizontal, the following text:
Left ribbon:
In stiller Ruhe
denken wir
an Dich
Right ribbon:
Julia und Fritz
mit
Max und Moritz
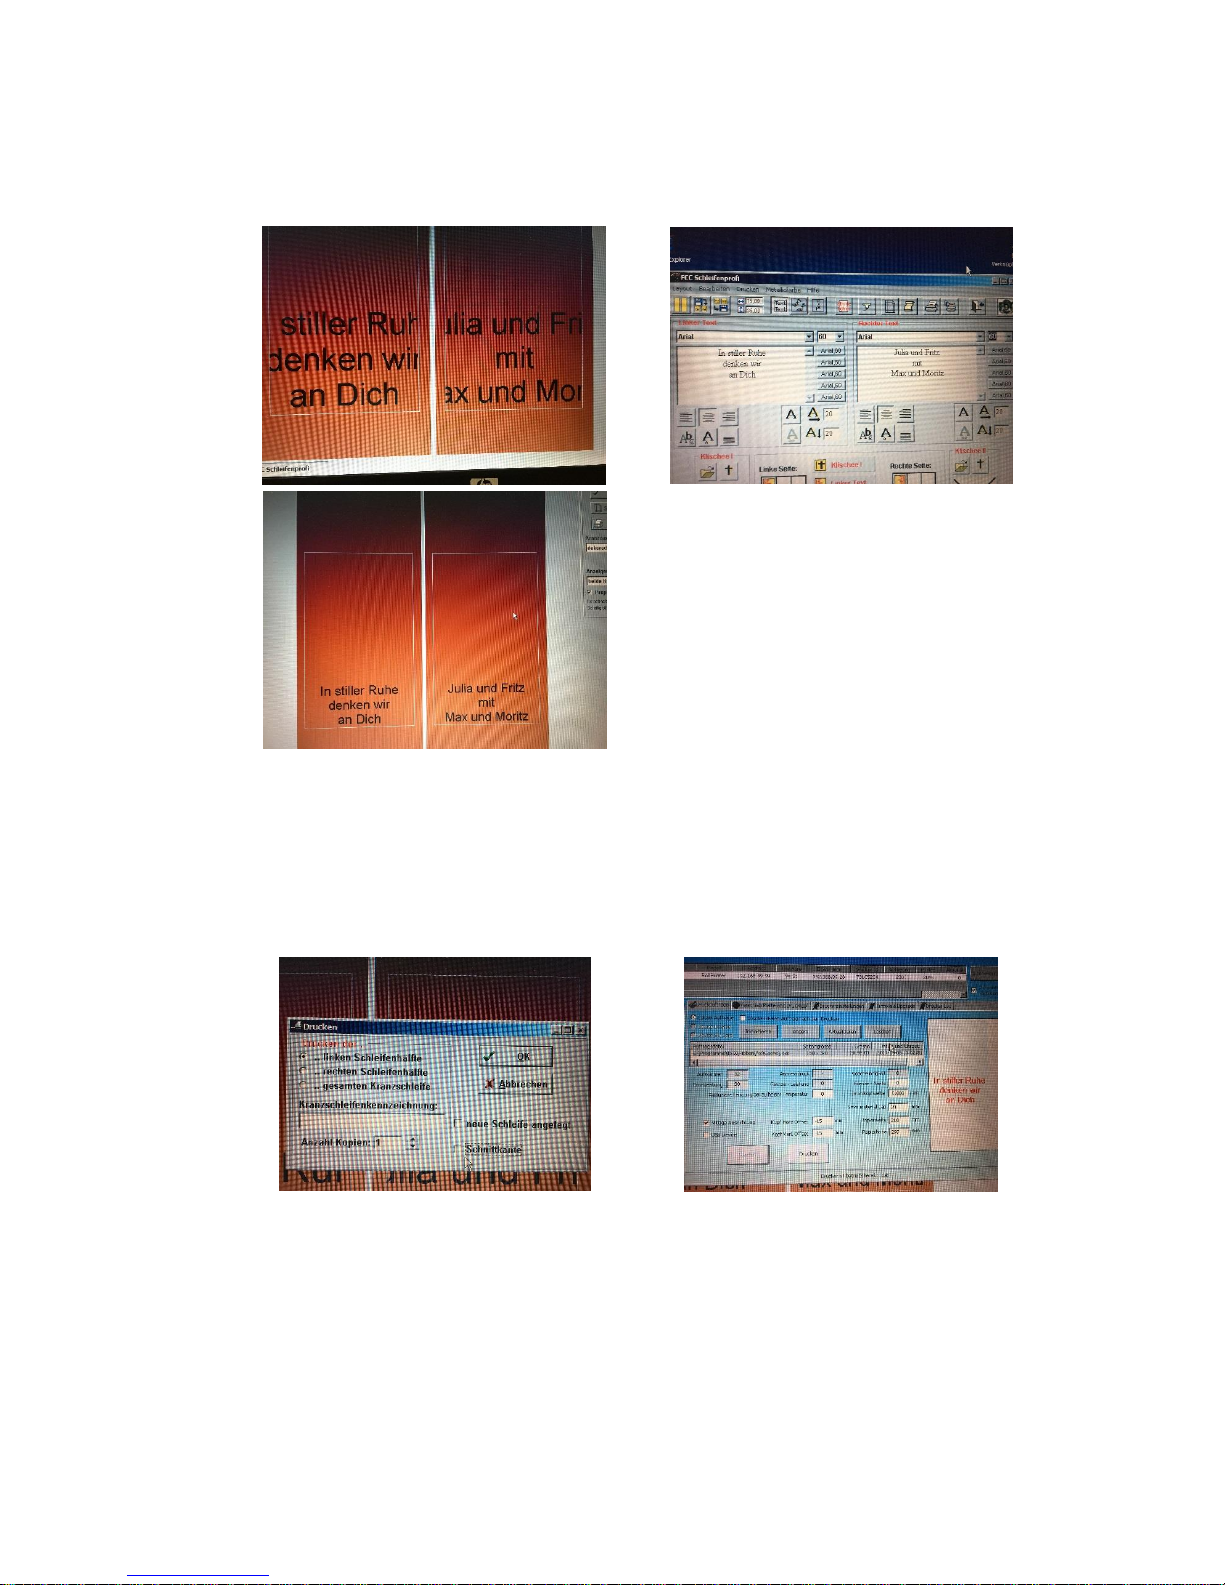
We open the layout “175er, horizontal, ohne Klischee” and enter the text:
Page 17
17
We check it in the printing preview. We have found the text is too large and doesn’t fit
on the ribbon. We decide to reduce the font size until we are happy with the result:
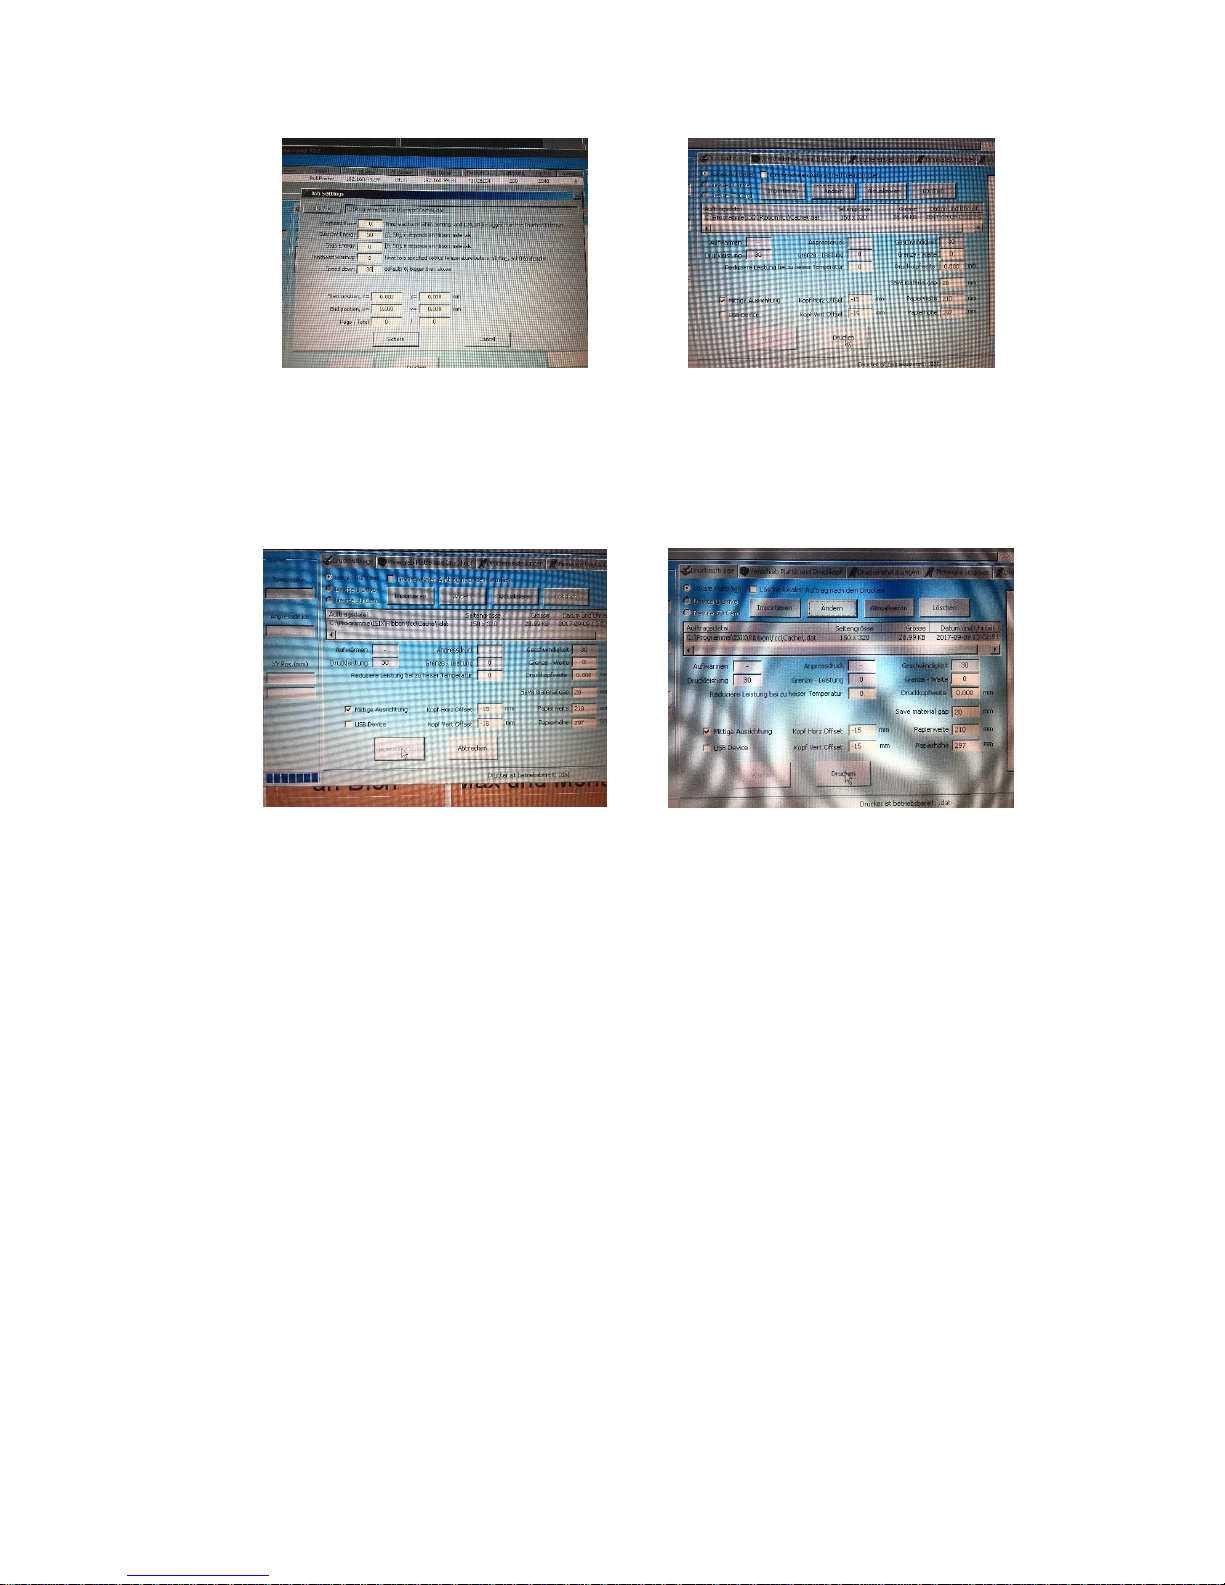
Now we are ready to print. Press the print (Drucken) button and decide which ribbon
you want to print now (left or right). With the 123 Ribbon printer you have to print one
side after the other, it’s not possible to print both sides the same time.
Unselect (untick √) cutting edge (Schnittkante), to save printing foil. With the 123 ribbon
printer, you don’t need the cutting edge.
Press OK and the printing image is sent to the foil control center.
In the foil control center, you have to adjust the printing parameters as described in
3.4.1.
Page 18
18
In this example we use “cold dot energy” (temperature) 30 and “speed down” (Prining
speed) 30.
Put the print head down (switch on II) and start the receiving motor (press the red
button) to prepare the 123 ribbon printer, then press “Drucken” in the foil control center.
The printing starts.
Press the “Warten” button, which then changes to “Wieder aufnehmen”. This means,
that the printing will not stop right after the print head. It will proceed until you press
the button “Abbrechen”. This is recommended to let the printer forward the ribbon and
the foil in order to release the foil properly from the ribbon.
Without pressing the button “Warten”, the printing will stop automatically right after the
print head. Although this saves some foil, you have to pull the ribbon manually and the
foil might not release properly from the ribbon.
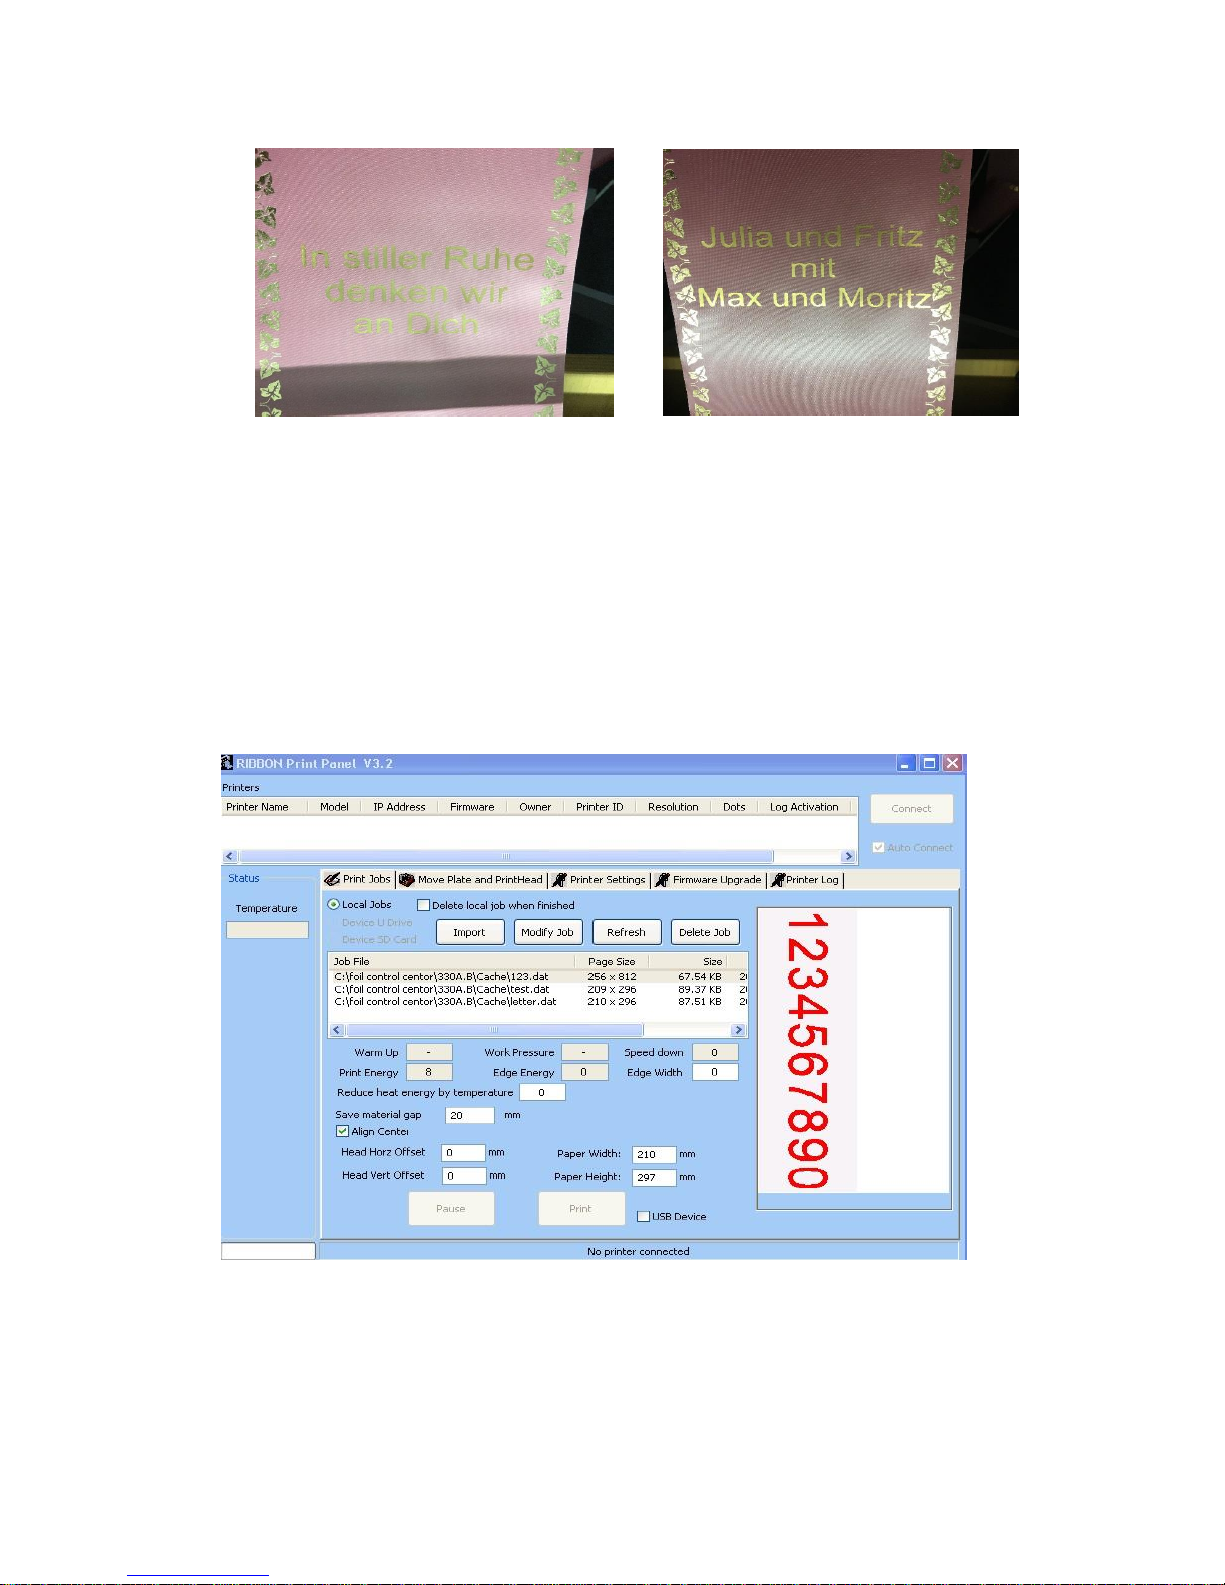
After printing the left ribbon, you can print the right ribbon, using the same steps,
including the adjustment of the printing parameters (temperature, speed). These
parameters need to be adjusted each time the foil control center receives a new image.
Page 19
19
3.4 Design
3.4.1 “Schleifenprofi” Software
Please refer to the manual of “Schleifenprofi” Software, to create a ribbon design or to
use the cliché library.
3.4.2 Printing Parameters in Foil Control Center
Click "Print", then see the interface “foil control center”.
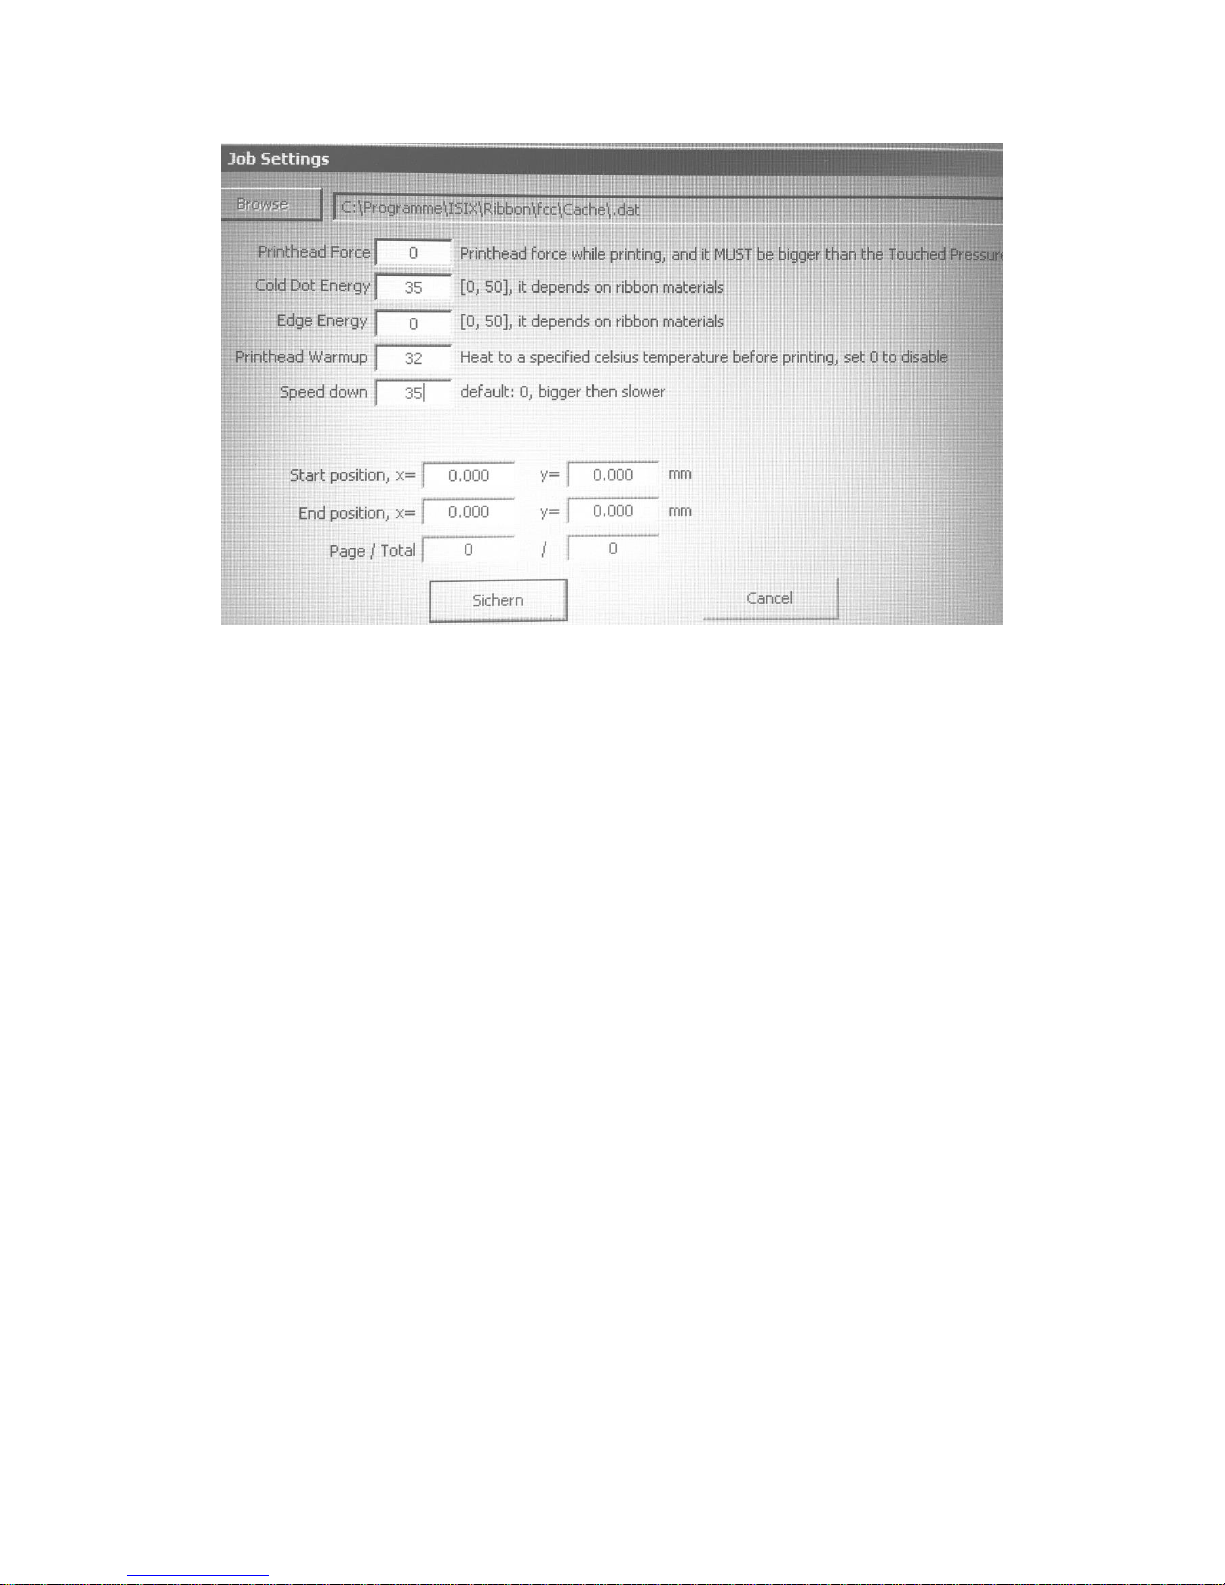
Then click "modify Job", pop up the frame like following:
Page 20
20
Then click the modify job, setting the cold dot energy is "20-55 (this means the print
head temperature when printing, if this parameter is too big, maybe it will cut the foil).
The edge energy is 0, the print head warmup is 0, the speed down is “1-35” (this
means the print speed, if the value is bigger, the speed is slower). Keep all the other
parameter default.
Click “save job”, "Yes" and "Yes" and then click "Print", machine can work, and can
print out your file.
These parameters need to be adjusted each time the foil control center receives a
new image.
3.4.3 Standard Parameters per Ribbon/Foil
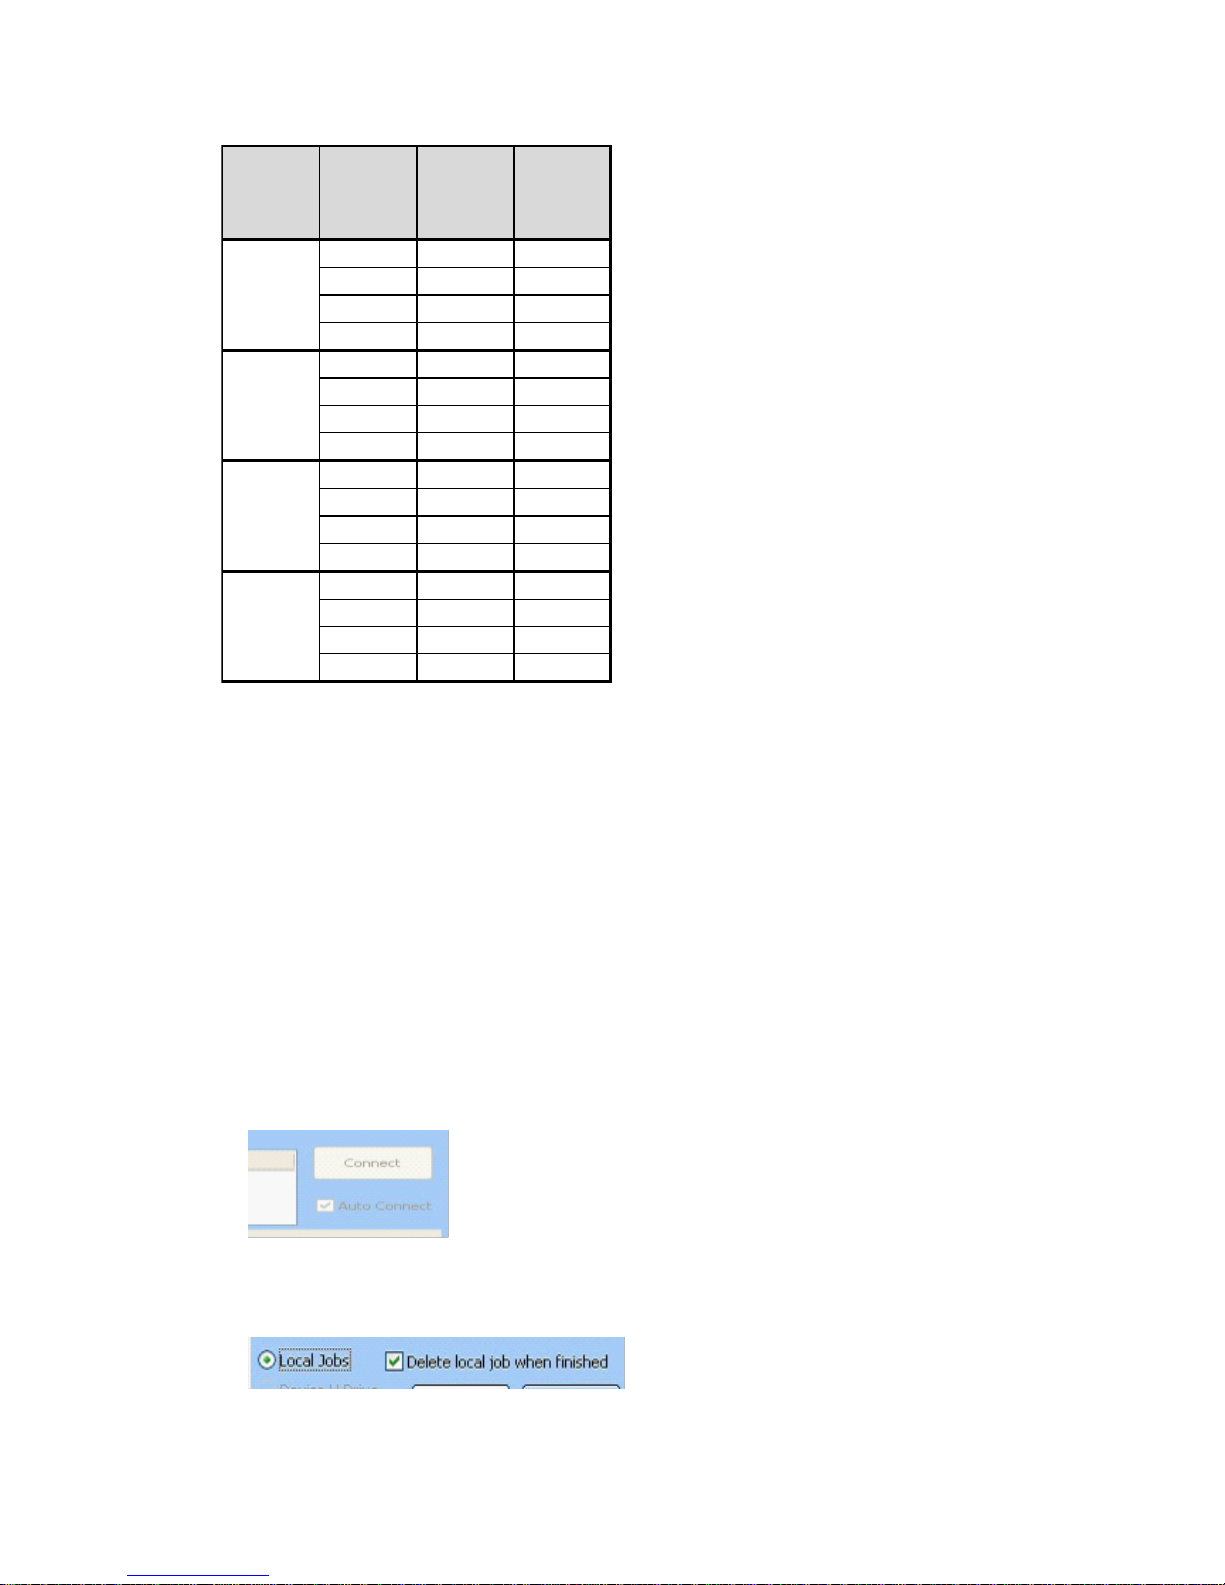
Recommended parameter setting (depends on printer, ribbon, foil and room
temperature/humidity):
Page 21
21
Ribbon Foil
Cold dot
energy
(Temper
ature)
Speed
down
(Speed)
Gold 28 10
Silber 28 10
Schwarz 50 3
Weiss
Gold 28 10
Silber 28 10
Schwarz 50 3
Weiss
Gold 25 30
Silber 25 30
Schwarz 50 3
Weiss
Gold 28 30
Silber
Schwarz
Weiss
Supersatin
Premium
Supersatin
Satin
Moiré
These parameters need to be modified depending on the room temperature and the
humidity.
Generally, if the print temperature is too hot, the foil will cut. Adjusting printing
temperature and speed for the optimal printing result is essential.
Note:
1. Delete job if you don't want the job in the foil control center, you can choose the
job, and click " delete job" to delete it.
2. Import if your file save on your computer, you can click "import" to import the file
in the foil control center.
3. Move plate and print head you can click this, choose "Move Mode" then can move
the plate to right and left, forward and backward, by your hand.
4. This option set √ when appropriate, and computer and this
product in the current situation, the equipment will be attached to the network. This
option not √ when appropriate, need to manually click the "connected", the
equipment can be attached to the network.
5. This option set √ when appropriate,
when finished the print job will be deleted automatically.
Parameter is set
Page 22

22
Must connect the printer with computer by the cable, IP address selected to be
automatic get IP. If connect the printer to an exchange box with the cable, must make
sure only one computer run the foil control center.
Page 23

23
4. Preventive Maintenance
The print head is a precise and sensitive electronic device. It may get damaged by
hardware or static.
Also in der Arbeitssituation, um das Risiko zu reduzieren und die Lebensdauer zu
erhöhen, bitte genug Feuchtigkeit behalten.
The surface of print head is made up of a kind of thin hardness of high silica protective
film, but it may also be broken by hardware. So please operate it as below:
1. Do not directly touch the hot area of the print head.
2. To keep the level of print media, without hard particles and droplet.
3. Do not touch the surface of the print head with metal ware.
4. To keep the work place clean and tidy as far as possible.
5. To guarantee the printing quality, try to minimize print pressure as far as possible.
4.1 Clean the Print head
After printing tasks 100 times, please clean the print head as follow:
1. Disconnect the power equipment, and pull out the network cable.
2. Take off the foil.
3. Use a swab with alcohol to wipe the print head heating element gently.
4. After cleaning out the surface, dry up the volatile alcohol with no alcohol swab.
5. Load on the foil, then continue to print.
4.2 Storage of printing foils
The printing foils, as well as the ribbons, need to be stored with care. Store the printing
foils and the ribbons in a place where the room temperature should range from 5-30o
C and the humidity should range from 20%-80%. It’s strictly prohibited to store the foils
in direct sunlight, or in a moist place.
The printing foils and the ribbons should be stored standing on their faces.
Page 24
24
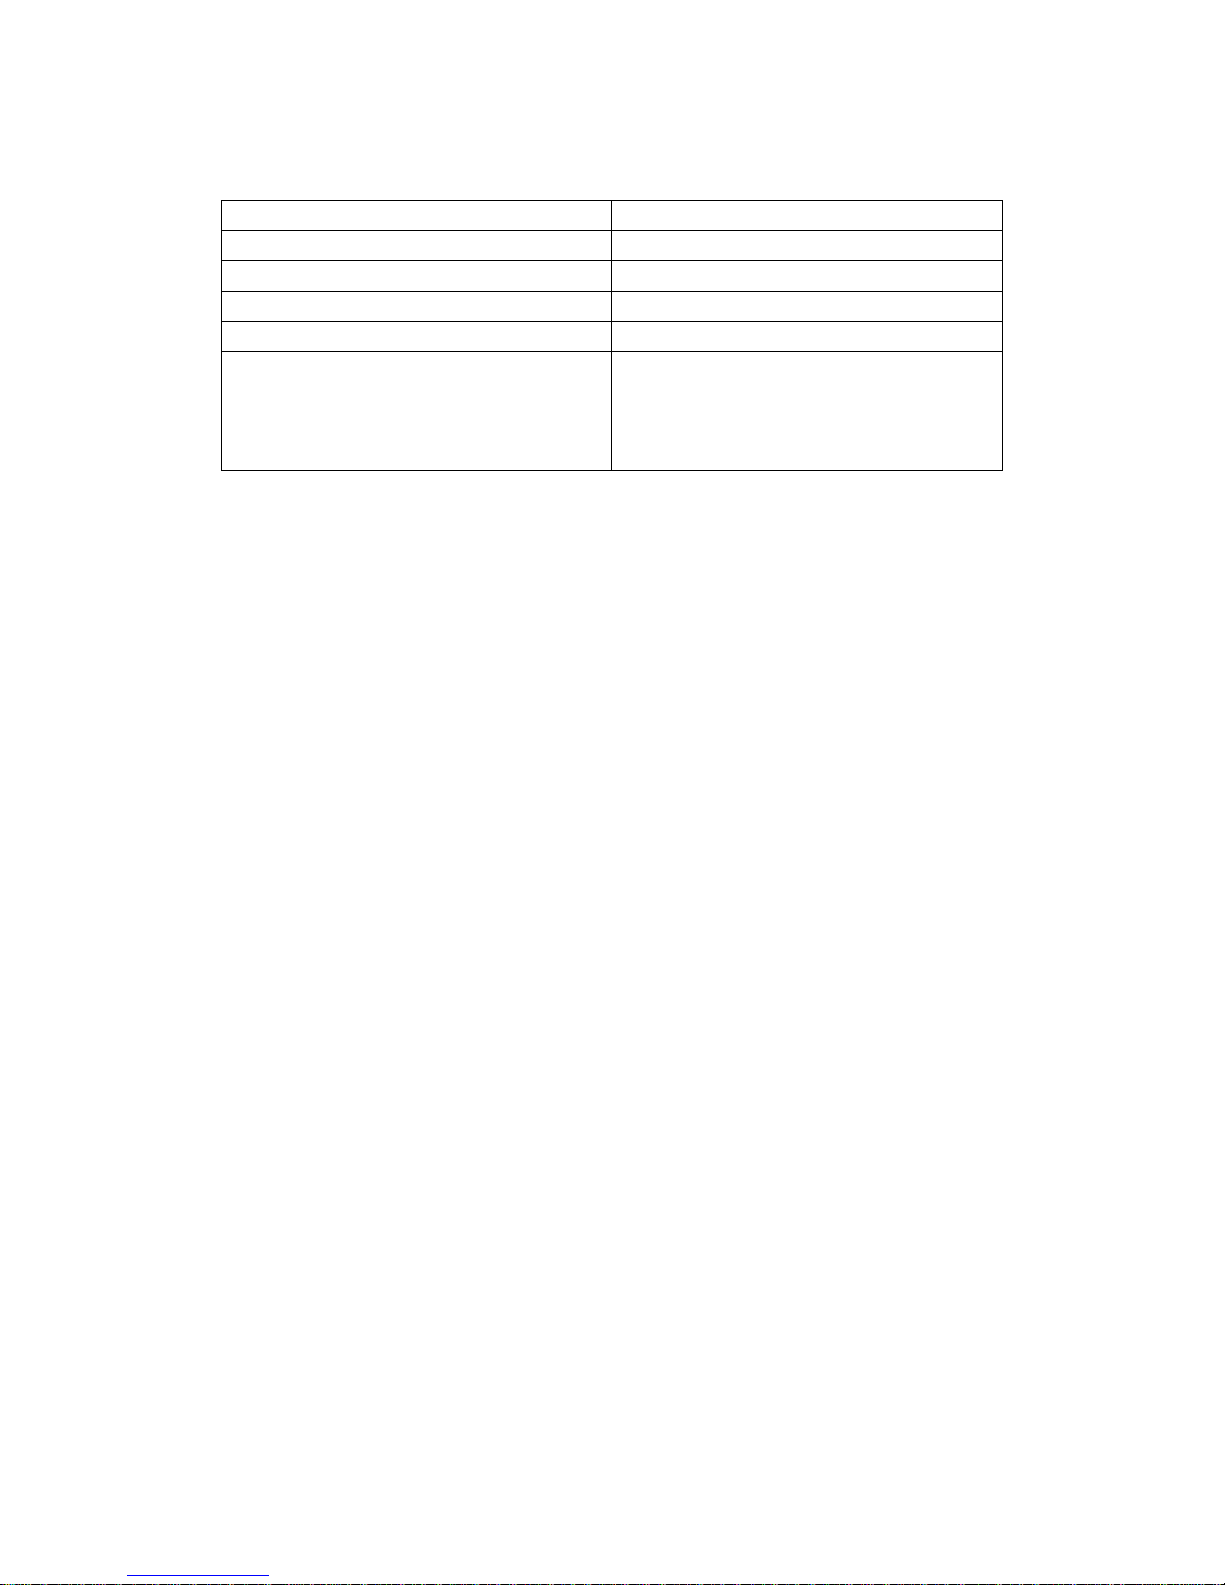
5. Technical Data
Operating system
Windows XP / Windows 7 (32 bit)
Size
68cm x 47cm x 29cm
Resolution
200x200 dots per inch
Software compatibility
Schleifenprofi (v2.9)
Input port, Output port
Network (RJ45 cable)
Power supply
110 VAC – 220 VAC 50-60 Hz 150 W
The factory equipment configuration
voltage for 220 VAC, in you have special
voltage requirements. please contact us
 Loading...