

Page 1
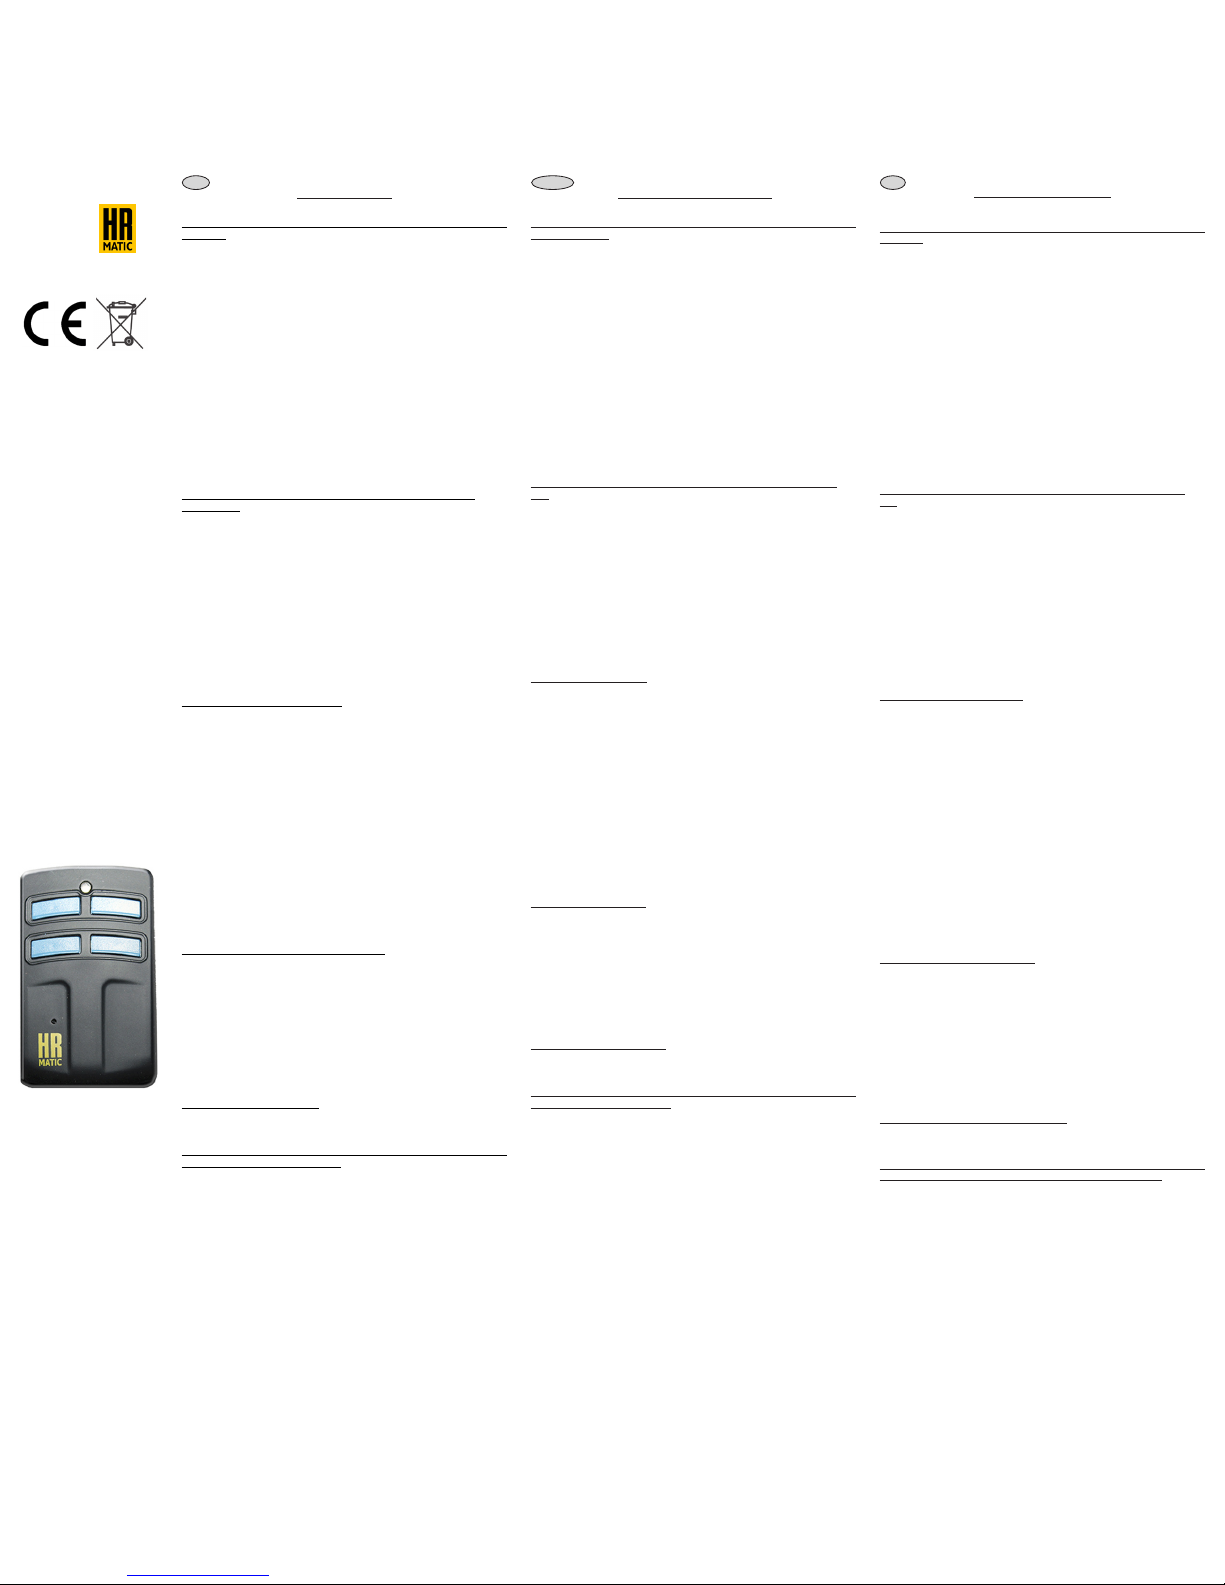
MANDO HR MULTI 2
Mando pluri-frecuencia
1. Instrucciones para la memorización de FIX CODE y ROLLING CODE
standard:
1. Colocar el mando a copiar frente al “MULTI 2”, aprox. a 2-4 centimetros
de distancia.
2. Presionar y tener pulsada la tecla 1 (izquierda) del “MULTI 2”, y sin soltar
pulsar 4 veces la tecla 2.
3. Liberar ambas teclas y observar que el LED del “MULTI 2” parpadea
lentamente.
4. A continuación pulsar la tecla del mando original que queremos copiar
y esperar que el LED del “MULTI 2” cambia parpadeo (parpadea más
rapidamente), para conrmar la correcta programación del código. Esta
operación puede necesitar algunos segundos.
5. Mientras el LED parpadea, pulsar la tecla del “MULTI 2” sobre la cual
se desea insertar el código apenas programado y mantenerlo presionado
hasta que se apague el LED.
6. La copia se ha realizado correctamente.
Notas:
• Si el LED parpadea solo 3 veces y se apaga el código no ha sido
programado correctamente. Repetir la operación desde el punto 1.
• La memoria del “MULTI 2” se puede escribir completamente.
• Para programar la segunda tecla del “MULTI 2”, repetir la operación desde
el punto 1.
2. Instrucción para la programación ROLLING CODE compleja:
BFT o Erreka
1. Colocar el mando a copiar frente al “MULTI 2”, aprox. a 2 - 4 centimetros
de distancia.
2. Presionar y tener pulsada la tecla 1 del “MULTI 2”, y sin soltar pulsar 4
veces la tecla 2.
3. Liberar ambas teclas y observar que el LED del “MULTI 2” parpadea
lentamente.
4. A continuación pulsar la tecla del mando original a copiar y esperar que el
LED del “MULTI 2” se encienda con una luz ja para luego pasar a un doble
parpadeo cada 2 segundos aprox.
5. Ahora transmitirá el código del mando original (presionar la tecla
escondida o bien las teclas 1 y 2 simultáneamente en los nuevos modelos).
6. El LED del “MULTI 2” ahora parpadea rapidamente, pulsar la tecla donde
se quiere memorizar el código y mantenerlo presionado hasta que se
apague el LED.
7. La copia se ha realizado correctamente.
OTROS MANDOS ROLLING CODE:
Algunos mandos Rolling code durante el proceso de duplica igual que
sucede con BFT Erreka Faac y Genius el led hará doble parpadeo. En este
caso y para cualquier otra marca que no sea una de estas 4 se procederá
del siguiente modo.
1. Colocar el mando a copiar frente al “MULTI 2”, aprox. a 2-4 centimetros
de distancia.
2. Presionar y tener pulsada la tecla 1 del “MULTI 2”, y sin soltar pulsar 4
veces la tecla 2.
3. Liberar ambas teclas y observar que el LED del “MULTI 2” parpadea
lentamente.
4. A continuación pulsar la tecla del mando original a copiar y esperar que el
LED del “MULTI 2” se encienda con una luz ja para luego pasar a un doble
parpadeo cada 2 segundos aprox.
5. Ahora transmitirá de nuevo el código del mando original presionando de
nuevo el mismo botón una segunda vez.
6. El LED del “MULTI 2” ahora parpadea rapidamente, pulsar la tecla donde
se quiere memorizar el código y mantenerlo presionado hasta que se
apague el LED.
7. La copia se ha realizado correctamente.
3. Procedimientos de clonación especiales:
1. Para forzar la generación de un codigo jo o copiar la parte ja de un
codigo evolutivo: presionar y mantener pulsada la tecla 1 y sin soltar pulsar
4 veces la tecla 3.
2. Para forzar la generación de un codigo variable o evolutivo con el mismo
numero de serie que el original: presionar y mantener pulsada la tecla 2 y
simultáneamente presionar 4 veces la tecla 1.
NOTA: el código semilla del MULTI 2 se emite como sigue a continuación:
1. Pulsar simultáamente las teclas 1 y 2 del mando por 8 segundos y
liberarlas cuando parpadea el LED.
2. Mientras el LED parpadea pulsar la tecla que se necesita el código
semilla.
4. Sistema de alta automática
El sistema de alta automática solo funcionará si está activado el via radio
o alta a distancia, la memoria del receptor no está llena o si este tiene un
sistema de bloqueo.
NO USAR EL MANDO ORIGINAL HASTA HABER FINALIZADO EL
PROCESO DE ALTA AUTOMATICA.
El procedimiento es el siguiente:
Situese en frente de su puerta de garage con el MULTI 2 ya programado.
Apretar el boton del MULTI 2 que desemos dar de alta hasta que el led
empiece a parpadear, este proceso dura casi 10 segundos, a partir de ese
momento soltar dicho botón, cuando el led deje de parpadear su mando
está ya dado de alta.
GARANTIA - La garantia del fabricante tiene validez en terminos legales a
partir de la fecha impresa y se limita a la reparacion o sustitucion gratuita de
las piezas reconocidas como defectuosas por falta de cuidados esenciales
en los materiales o por defectos de fabricacion. La garantia no cubre
danos o defectos debidos a agentes externos, defectos de mantenimiento,
sobrecarga, desgaste natural, eleccion inexacta, error de montaje u
otras causas no imputables al fabricante. Los productos manipulados
no seran objeto de garantia y no seran reparados. Los datos expuestos
son meramente indicativos. No podra imputarse ninguna responsabilidad
por reducciones de alcance o disfunciones debidas a interferencias
ambientales. La responsabilidad a cargo del fabricante por danos derivados
a personas por accidentes de cualquier tipo ocasionados por nuestros
productos defectuosos, son solo aquellos derivados inderogablemente de
la ley europea.
HR MULTI 2
HR NEWTEC, S.L.
C/ Església 50/Centre 14
08901 L’Hospitalet De
Llobregat - Barcelona
SPAIN
www.hrmatic.es
email: [email protected]
6-1621667 rev.9 12/06/2017 SW 7.2
HR MULTI 2 REMOTE CONTROL
Multifrequency remote control
1. Instructions for the programming of standard FIX CODE and
ROLLING CODE:
1. Place the original remote control in front of the “MULTI 2”, at about 2-4
centimeters of distance.
2. Press and keep pressed the button 1 (left) of the “MULTI 2” and at the
same time press 4 times the button 2.
3. Release both buttons. At this point, the LED of the “MULTI 2” ashes
slowly.
4. Press and keep pressed the button of the original remote control to be
copied. Wait until the LED of the “MULTI 2” will change the lighting mode
(ashing faster), as a conrmation of the correct copy of the code.
5. While the LED is ashing, press the button of the “MULTI 2” where you
want to memorize the code and keep it pressed until the LED will turn off.
6. The copy was successful.
Notes:
• If the LED ashes only 3 times and then turns off, it means that the code
was not copied properly. In this case, please repeat the operation from the
point 1.
• The memory of the “MULTI 2” is completely re-writable.
• To program a second button of the “MULTI 2”, please repeat the operation
from the point 1.
2. Instructions for the programming of complex ROLLING CODE:
BFT
1. Place the original remote control in front of the “MULTI 2”, at about 2-4
centimeters of distance.
2. Press and keep pressed the button 1 (left) of the “MULTI 2” and at the
same time press 4 times the button 2.
3. Release both buttons. At this point, the LED of the “MULTI 2” ashes
slowly.
4. Press and keep pressed the button of the original remote control to be
copied. Wait until the LED of the “MULTI 2” will turn on with a x light and
then will emit a double ash every 2 seconds.
5. Transmit the master code of the original remote control (press the hidden
button or press the buttons 1 and 2 simultaneously in new model).
6. Now the LED blinks fast: press the button of the “MULTI 2” where you
want to memorize the code and keep it pressed until the LED will turn off.
7. The copy was successful.
FAAC SLH & GENIUS 868
WARNING: check that the remote control to be copied is a MASTER
one.
By pressing any button, the LED must emit a double ash rather than
turning on immediately as x light.
1. Place the original remote control in front of the “MULTI 2”, at about 2-4
centimeters of distance.
2. Press and keep pressed the button 1 (left) of the “MULTI 2” and, at the
same time press 4 times the button 2.
3. Release both buttons. At this point, the LED of the “MULTI 2” ashes
slowly.
4. Predispose the FAAC/GENIUS remote control for the emission of the
master code (by pressing the buttons 2 and 3 simultaneously).
5. Press and keep pressed the button to be copied until the LED of the
“MULTI 2” will start to ash quickly.
6. Press the button of the “MULTI 2” where you want to memorize the code
and keep it pressed until the LED will turn off.
7. The copy was successful.
3. Special cloning mode:
1. In order to force the generation of a x code of a transmitter: press and
keep pressed the button 1 and, at the same time, press 4 times the button 3.
2. In order to force the generation of a rolling code of a transmitter with
the same serial number than the original one: press and keep pressed the
button 2 and, at the same time, press 4 times the button 1.
NOTE: the master code of the “MULTI 2” transmitter is emitted as follow:
1. Press simultaneously the buttons 1 and 2 of the remote control for 8
seconds and release them when the LED ashes.
2. While the LED ashes, press the button for which you need the master
code.
4. Automatic Storage System
The automatic system to memorise the MULTI 2 on receiver will only work
if the remote storage is activated, the memory is not full or the receiver has
not a system to block the function.
DO NOT USE THE ORIGINAL REMOTE CONTROL BEFORE THE END
OF THE STORAGE PROCESS.
The procedure is the following:
With the MULTI 2 already programmed in front of your garage door, press
and keep pressed the button you desire to activate until led start ashing.
This process takes around 10 seconds. Once the led start ashing release
the button and wait until the led stops ashing. Your MULTI 2 is ready to
be used.
GUARANTEE - In compliance with legislation, the manufacturer’s
guarantee is valid from the date stamped on the product and is restricted
to the repair or free replacement of the parts accepted by the manufacturer
as being defective due to poor quality materials or manufacturing defects.
The guarantee does not cover damage or defects caused by external
agents, faulty maintenance, overloading, natural wear and tear, choice of
incorrect product, assembly errors, or any other cause not imputable to
the manufacturer. Products that have been misused will not be guaranteed
or repaired. Printed specications are only indicative. The manufacturer
does not accept any responsibility for range reductions or malfunctions
caused by environmental interference. The manufacturer’s responsibility for
damage caused to persons resulting from accidents of any nature caused
by our defective products, are only those responsibilities that come under
European law.
ENG
ESP
Batt. 3V CR2032
In compliance
with Directive
2014/53/UE
RADIOCOMANDO HR MULTI 2
Trasmettitore multifrequenza
1. Istruzioni per la programmazione di FIX CODE e ROLLING CODE
standard:
1. Posizionare il radiocomando da clonare di fronte al “MULTI 2”, a circa 2-4
centimetri di distanza.
2. Premere e tenere premuto il tasto 1 (sinistra) del “MULTI 2” e
contemporaneamente premere 4 volte il tasto 2.
3. Rilasciare entrambi i tasti. A questo punto il LED del “MULTI 2” lampeggia
lentamente.
4. Premere e tenere premuto il tasto da copiare del radiocomando originale e
attendere che il LED del “MULTI 2” cambi lampeggio (lampeggio più veloce),
a conferma del corretto apprendimento del codice.
5. Mentre il LED lampeggia, premere il tasto del “MULTI 2” sul quale si
desidera inserire il codice
appena appreso e mantenerlo premuto no a quando il LED non si spegne.
6. La copia è avvenuta con successo.
Note:
• Se il LED lampeggia solo 3 volte e si spegne il codice non è stato appreso
correttamente. Ripetere l’operazione dal punto 1.
• La memoria del “MULTI 2” è completamente riscrivibile.
• Per programmare il secondo tasto del “MULTI 2”, ripetere l’operazione dal
punto 1.
2. Istruzioni per la programmazione di ROLLING CODE complesso:
BFT
1. Posizionare il radiocomando da clonare di fronte al “MULTI 2”, a circa 2-4
centimetri di distanza.
2. Premere e tenere premuto il tasto 1 del “MULTI 2” e contemporaneamente
premere 4 volte il tasto 2.
3. Rilasciare entrambi i tasti. A questo punto il LED del “MULTI 2” lampeggia
lentamente.
4. Premere e tenere premuto il tasto da copiare del radiocomando originale e
attendere che il LED del “MULTI 2” si accenda a luce ssa per poi passare ad
un doppio lampeggio ogni 2 secondi circa.
5. Trasmettere ora il codice sorgente del radiocomando originale (premendo
il tasto nascosto oppure i tasti 1 e 2 contemporaneamente nei nuovi modelli).
6. Il LED del “MULTI 2” ora lampeggia velocemente, premere il tasto dove
si vuole memorizzare il codice e mantenerlo premuto no allo spegnimento
del LED.
7. La copia è avvenuta con successo.
FAAC SLH 433/868, GENIUS 868
1. Posizionare il radiocomando da clonare di fronte al “MULTI 2”, a circa 2 -4
centimetri di distanza.
2. Premere e tenere premuto il tasto 1 del “MULTI 2”, e contemporaneamente
premere 4 volte il tasto 2.
3. Rilasciare entrambi i tasti. A questo punto il LED del “MULTI 2” emetterà un
lampeggio breve circa ogni 2 sec.
4. Premere e tenere premuto il tasto da copiare del radiocomando originale e
attendere che il LED del “MULTI 2” si accenda a luce ssa per poi passare ad
un doppio lampeggio ogni 2 secondi circa.
ATTENZIONE: Vericare che il radiocomando da copiare sia un MASTER.
Premendo un tasto qualsiasi, il LED deve emettere un doppio lampeggio
anziché accendersi subito a luce ssa.
5. Predisporre il radiocomando FAAC/GENIUS per l’uscita del codice sorgente
(pressione contemporanea dei tasti 2 e 3).
6. Mentre il LED del radiocomando FAAC/GENIUS lampeggia, posizionarlo di
fronte al “MULTI 2” ad una distanza di 2-4 cm circa e premere il tasto da copiare
no a che il LED del “MULTI 2” non inizierà a lampeggiare velocemente.
7. Premere il tasto dove si vuole memorizzare il codice e mantenerlo premuto
no allo spegnimento del LED.
8. La copia è avvenuta con successo, vericare sull’automazione il corretto
funzionamento del nuovo radiocomando MULTI 2.
3. Modalità di clonazione speciale:
1. Per forzare la generazione di un codice sso di un trasmettitore: premere e
mantenere premuto il tasto 1 e contemporaneamente premere 4 volte il tasto
3.
2. Per forzare la generazione di un codice variabile di un trasmettitore con
lo stesso numero seriale del trasmettitore originale: premere e mantenere
premuto il tasto 2 e contemporaneamente premere 4 volte il tasto 1.
NOTA: il codice sorgente del MULTI 2 viene emesso come segue:
1. Premere contemporaneamente i pulsanti 1 e 2 del radiocomando per 8
secondi e rilasciarli quando il LED lampeggia.
2. Mentre il LED lampeggia premere il tasto del quale si necessita il codice
sorgente.
4. Sistema automatico di memorizzazione
Il sistema automatico per memorizzare il MULTI2 nel ricevitore funzionerà solo
se la funzione di memorizzazione a distanza è attiva, la memoria non è piena
o il ricevitore è senza un sistema di blocco per le funzioni.
NON USARE IL RADIOCOMANDO ORIGINALE PRIMA DI AVER
TERMINATO IL PROCESSO DI MEMORIZZAZIONE DEL MULTI2.
La procedura è la seguente:
Posizionarsi di fronte alla porta del garage con il MULTI2 già programmato,
premere e mantenere premuto il tasto che si desidera attivare no a quando il
led comincia a lampeggiare. Questo processo dura circa 10 secondi. Quando
il led comincia a lampeggiare rilasciare il tasto e aspettare no a quando il
led nisce di lampeggiare. Il trasmettitore MULTI2 è pronto per essere usato.
GARANZIA - La garanzia del produttore ha validità a termini di legge dalla
data stampigliata sul prodotto ed è limitata alla riparazione o sostituzione
gratuita dei pezzi riconosciuti dallo stesso come difettosi per mancanza di
qualità essenziali nei materiali o per decienza di lavorazione. La garanzia
non copre danni o difetti dovuti ad agenti esterni, decienza di manutenzione,
sovraccarico, usura naturale, scelta del tipo inesatto, errore di montaggio, o
altre cause non imputabili al produttore. I prodotti manomessi non saranno
né garantiti né riparati. I dati riportati sono puramente indicativi. Nessuna
responsabilità potrà essere addebitata per riduzioni di portata o disfunzioni
dovute ad interferenze ambientali. La responsabilità a carico del produttore
per i danni derivati a chiunque da incidenti di qualsiasi natura cagionati da
nostri prodotti difettosi, sono soltanto quelle che derivano inderogabilmente
dalla legge europea.
ITA
Page 2

RADIOCOMANDE HR MULTI 2
Émetteur multifréquence
1. Instructions pour la programmation FIX CODE et ROLLING CODE
standard:
1. Positionnez la télécommande à cloner en face du “MULTI 2”, à environ
2-4 centimètres de distance.
2. Appuyez et gardez appuyé le bouton 1 (gauche) du “MULTI 2” et appuyez
simultanément 4 fois sur la touche 2.
3. Relâchez les deux boutons. À ce point, la LED du “MULTI 2” clignote
lentement.
4. Appuyez et gardez appuyé le bouton de la télécommande originelle qui
doit être copié, et attendez jusqu’à quand la LED du “MULTI 2” change
de clignotement (clignotement rapide), à conrmation de l’apprentissage
correct du code. Cette opération peut prendre quelques secondes.
5. Pendant que la LED clignote, appuyez sur la touche du “MULTI 2” sur
laquelle vous souhaitez insérer le code qui vient d’être mémorisé et gardez-
la appuyée jusqu’à quand la LED s’éteint.
6. La copie a bien réussi.
Notes:
• Si la LED clignote seulement trois fois et ensuite s’éteint, le code n’a pas
été appris correctement. Répétez l’opération à partir de l’étape 1.
• La mémoire du “MULTI 2” est entièrement réinscriptible.
• Pour programmer la deuxième touche du “MULTI 2”, recommencez
l’opération à partir de l‘étape 1.
2. Instructions pour la programmation ROLLING CODE complexe:
BFT
1. Positionnez la télécommande à cloner en face du “MULTI 2”, à environ
2-4 centimètres de distance.
2. Appuyez et gardez appuyé le bouton 1 (gauche) du “MULTI 2” et appuyez
simultanément 4 fois sur la touche 2.
3. Relâchez les deux boutons. À ce point, la LED du “MULTI 2” clignote
lentement.
4. Appuyez et gardez appuyé le bouton de la télécommande originelle qui
doit être copié, et attendez jusqu’à quand la LED du “MULTI 2” s’allume
à lumière xe pour passer ensuite à un double clignotement toutes les 2
secondes.
5. Transmettre maintenant le code source de la télécommande originelle
(en appuyant sur la touche cachée ou, dans les nouveaux modèles, sur les
touches 1 et 2 simultanément).
6. La LED du “MULTI 2” clignote alors rapidement : appuyez donc sur la
touche où vous souhaitez mémoriser le code et gardez-la appuyée jusqu’à
ce que la LED s’éteint.
7. La copie a bien réussi.
FAAC SLH & GENIUS 868
AVERTISSEMENT: assurez-vous que la télécommande qui doit être
copiée soit un MASTER.
En appuyant sur un bouton quelconque, la LED devrait émettre un
double clignotement, plutôt que s’allumer tout de suite à lumière xe.
1. Positionnez la télécommande à cloner en face du “MULTI 2”, à environ
2-4 centimètres de distance.
2. Appuyez et gardez appuyé le bouton 1 (gauche) du “MULTI 2” et appuyez
simultanément 4 fois sur la touche 2.
3. Relâchez les deux boutons. À ce point, la LED du “MULTI 2” clignote
lentement.
4. Préparez la télécommande FAAC / GENIUS pour la sortie du code
source (en appuyant simultanément sur les boutons 2 et 3).
5. Appuyez sur le bouton à copier jusqu’à ce que la LED du “MULTI 2”
commence à clignoter rapidement.
6. Appuyez sur la touche où vous souhaitez mémoriser le code et gardez-la
appuyée jusqu’à ce que la LED s’éteint.
7. La copie a bien réussi.
3. Modalité de clonage spéciale:
1. An de forcer la génération d’un code xe d’un émetteur : appuyez et
gardez appuyé le bouton 1, tout en appuyant 4 fois sur le bouton 3.
2. An de forcer la génération d’un code variable d’un émetteur avec le
même numéro de série de l’émetteur d’origine: appuyez et gardez appuyée
la touche 2, tout en appuyant 4 fois sur le bouton 1.
REMARQUE: vous pouvez avoir accès au code source du MULTI 2 comme il suit:
1. Appuyez simultanément sur les boutons 1 et 2 de la télécommande
pendant 8 secondes et relâchez- les lorsque la LED clignote.
2. Pendant que la LED clignote, appuyez sur le bouton dont vous avez
besoin du code source.
4. Système automatique de mémorisation
Le système automatique pour mémoriser le MULTI 2 dans le récepteur
fonctionnera seulement si la fonction de mémorisation à distance est active,
la mémoire n’est pas pleine ou le récepteur est sans un système de blocage
pour les fonctions.
NE PAS UTILISER LA TÉLÉCOMMANDE ORIGINELLE AVANT D’AVOIR
TERMINÉ LE PROCESSUS DE MEMORISATION DU MULTI 2.
La procédure est la suivante:
Positionnez-vous en face de la porte du garage avec le MULTI 2 déjà
programmé. Appuyez et gardez appuyé le bouton que vous désirez activer,
jusqu’à ce que la LED commence à clignoter. Ce processus prendra
environ 10 secondes. Lorsque la LED commence à clignoter, relâchez le
bouton et attendez jusqu’à ce que la LED arrête de clignoter. L’émetteur
MULTI2 est prêt à être utilisé.
GARANTIE - La garantie du fabricant est valable aux termes de la loi à compter
de la date estampillée sur le produit et est limitée à la réparation ou substitution
gratuite des pièces reconnues comme défectueuses par manque de qualité
essentielle des matériaux ou pour cause de défaut de fabrication. La garantie
ne couvre pas les dommages ou défauts dus à des agents externes, manque
d’entretien, surcharge, usure naturelle, choix du produit inadapté, erreur
de montage, ou autres causes non imputables au producteur. Les produits
traqués ne seront ni garantis ni réparés. Les données reportées sont purement
indicatives. Aucune responsabilité ne pourra être attribuée pour les réductions
de portée ou les dysfonctionnements dus aux interférences environnementales.
Les responsabilités à la charge du producteur pour les dommages causés
aux personnes pour cause d’incidents de toute nature dus à nos produits
défectueux, sont uniquement celles qui sont visées par les lois Européennes.
HR MULTI 2
1. ИНСТРУКЦИЯ КОПИРОВАНИЕ ПУЛЬТОВ С СТАТИЧНЫМ И ДИНАМИЧНЫМ
КОДОМ:
1. Поднесите пульт, который хотите скопировать, к передней части “MULTI 2”, на
расстояние около 2-4 см.
2. Нажмите кнопку 1 на пульте “MULTI 2”, светодиод загорится ровным светом. После
этого нажмите 4 раза кнопку 2. Светодиод погаснет.
3. Отпустите обе кнопки. Теперь светодиод моргает быстро каждые 2 секунды.
4. Нажмите и держите нажатой кнопку у копируемого пульта. На “MULTI 2” в этот
момент ничего нажимать не нужно. Дождитесь пока индикатор на “MULTI 2” начнет
быстро мигать. После этого отпустите кнопку на копируемом пульте.
5. Во время как индикатор мигает, нажмите кнопку на “Multi 2”, где вы хотите сохранить
копируемый код. Код скопирован, дождитесь, пока индикатор погаснет.
После процедуры копирования Вам нужно записать пульт в память приемника
или блока управления, если пульт с динамичным кодом. Чтобы это сделать
следуйте указаниям инструкции к данной модели автоматики.
Примечание:
• Если светодиод, во время копирования, мигнёт только 3 раза и погаснет, это
означает, что код не был скопирован. В этом случае повторите операцию с
начала.
• Чтобы копировать другую кнопку, повторите операцию копирования с
первого пункта.
2. КОПИРОВАНИЕ ПУЛЬТОВ С ДИНАМИЧНЫМ КОДОМ КОМПАНИИ BFT:
1. Поднесите пульт, который хотите скопировать, к передней части “MULTI 2”, на
расстояние около 2-4 см.
2. Нажмите кнопку 1 на пульте “MULTI 2”, светодиод загорится ровным светом. После
этого нажмите 4 раза кнопку 2. Светодиод погаснет.
3. Отпустите обе кнопки. Теперь светодиод моргает быстро каждые 2 секунды.
4. Нажмите и держите нажатой кнопку у копируемого пульта. На “MULTI 2” в этот
момент ничего нажимать не нужно. Дождитесь пока индикатор на “MULTI 2” после
ровного света будет моргать каждые 2 секунды. Отпустите кнопку на копируемом
пульте.
5. Теперь нужно передать код секретной кнопки. Для этого нажмите секретную кнопку
на оригинальном пульте (на старых моделях) или одновременно кнопку 1 и 2 на новых
моделях. Дождитесь пока индикатор на “MULTI 2” не начнет быстро мигать. После
этого отпустите все кнопки на копируемом пульте.
6. В то время как индикатор мигает, нажмите кнопку на “Multi 2”, где вы хотите
сохранить копируемый код. Код скопирован, дождитесь, пока индикатор погаснет.
7. После процедуры копирования Вам нужно записать пульт в память приемник а
или блока управления. Чтобы это сделать следуйте указаниям инструкции к данной
модели автоматики BFT.
КОПИРОВАНИЕ ПУЛЬТОВ FAAC SLH и GENIUS 868
Внимание, пожалуйста: Убедитесь, что пульт дистанционного управления
MASTER.
Нажатие любую кнопку, светодиод должен выдать двойную вспышку, если
двойной вспышки нет, а светодиод горит ровным светом, то это не МАСТЕР
пульт. Скопировать такой пульт не получится.
1. Поднесите пульт FACC “ Мастер” не более 2-4 см. к пульту Multi 2, кнопку которую
хотите скопировать. Светодиод на Multi 2 загорится ровным светом.
2. Нажмите кнопку 1 на пульте “MULTI 2”, светодиод загорится ровным светом. После
этого нажмите 4 раза кнопку 2. Светодиод погаснет.
3. Отпустите обе кнопки. Теперь светодиод моргает быстро каждые 2 секунды.
4. Затем на пульте FAAC/GENIUS нужно нажать кнопки 2 и 3. После этого светодиод
на пульте FAAC/GENIUS начнет мигать.
5. В то время как светодиод на пульте FAAC/GENIUS мигает, поднесите пуль FAAC/
GENIUS к передней части “MULTI 2”, на расстояние около 2-4 см. и снова нажмите
копируемую кнопку. На “MULTI 2” в этот момент ничего нажимать не нужно. Дождитесь
пока индикатор на “MULTI 2” не начнет быстро мигать. После этого отпустите кнопку
на копируемом пульте.
6. В то время как индикатор мигает, нажмите кнопку на “Multi 2”, где вы хотите
сохранить с копируемый код. Код скопирован, дождитесь, пока индикатор погаснет.
7. Чтобы точно убедиться, что копия сделана правильно, пульт нужно проверить на
автоматике. Если пульт не работает, проведите процедуру копирования еще раз.
3. КЛОНИРОВАНИЕ ПУЛЬТОВ С ДИНАМИЧНЫМ КОДОМ (Doorhan, AN-Motors и
т.д.):
1. Клонирование некоторых китайских пультов с динамичным кодом, у которых
приемник работает со статичным кодом. Нажмите кнопку 1 на пульте “MULTI 2”,
светодиод загорится ровным светом. После этого
нажмите 4 раза кнопку 3. Светодиод погаснет.
2. Кл онирование пультов с динамичным кодом с тем же серийным номером, что
оригинальный пульт. Нажмите кнопку 2 на пульте “MULTI 2”, светодиод загорится
ровным светом. После этого нажмите 4 раза кнопку 1. Светодиод погаснет.
СЕКРЕТНАЯ КНОПКА У ПУЛЬТА MULTI 2:
1. Нажмите одновременно кнопки 1 и 2 на пульте, примерно на 8 секунд, отпустите их,
когда светодиод замигает.
2. В то время как светодиод мигает, нажмите кнопку, для которой требуется нажатие
секретной кнопки.
4. АВТОМАТИЧЕСКАЯ (ИНТЕЛЛЕК ТУАЛЬНАЯ) ЗАПИСЬ ПУЛЬТОВ С
ДИНАМИЧНЫМ КОДОМ В АВТОМАТИКУ.
Автоматическая запись пультов MULTI 2 в приемник будет работать только в том
случае если у данной автоматики есть функция удаленного программирования,
если память в автоматике полностью не заполнена, если функция дистанционного
программирования не отключена.
ОРИГИНАЛЬНЫЙ ПУЛЬТ ДЛЯ ПРОГРАММИРОВАНГИЯ НЕ ТРЕБУЕТСЯ!
Процедура программирования:
1. Скопируйте рабочий (оригинальный) пульт на MULTI 2 (см.
копирование пультов с статичным и динамичным кодом до пункта 6)
2. Нажмите и удерживайте кнопку, которую Вы желаете записать в
автоматику, пока светодиод не начнет мигать, держать примерно 10 секунд.
3. После того, как светодиод начал мигать, отпустите кнопку и подождите
пока светодиод не перестанет мигать.
Все Ваш MULTI 2 готов к использованию.
ГАРАНТИЯ - Гарантия действует с момента продажи пульта согласно кассовому или
товарному чеку. Гарантийная замена пульта или деталей распространяется только на
производственные дефекты.
Гарантия не распространяется на повреждения или дефекты:
• Которые вызваны внешними факторами,
• Неправильным обслуживанием,
• Естественным износом,
• Если Вы неправильно выбрали пульт,
• Если автоматика (для которой куплен пульт) не исправна,
На продукты, которые используются не по назначению, гарантия на ремонт не
распространяется. Заявленные характеристики являются лишь ориентировочными.
Производитель не несет ответственности уменьшение дальности или неисправности
вызванные окружающим радио фоном. Производитель не несет ответственность за
ущерб, причиненный в результате несчастных случаев, любого характера, вызванных
использование наших продуктов, кроме тех, которые регламентируются законами
Российской Федерации.
FRA
RUS
 Loading...