


All rights reserved to HQT. Pictures shown in this manual are for your reference
only, if there is fluctuation, according to the real object, please.
Digital portable radios
Hello
We appreciate your purchasing DH-9100 digital portable radio!
We believe that the quality and function of this radio will bring
you stable performance and smooth communication.
As a product built to the DMR standard, DH-9100 is gifted with
ergonomic design, all round digital functions and remarkable
quality to refresh your experience and enable you to be responsive
to critical situations.
Please read this manual before use.
FCC RF EXPOSURE COMPLIANCE REQUIREMENTS FOR OCCUPATIONAL USE ONLY
The Federal Communications Commission (FCC), with its action in General Docket 93-62, November 7, 19 9 7,
has adopted a safety standard for human exposure to Radio Frequency (RF) electromagnetic energy emitted
by FCC regulated equipment. Proper operation of this radio will result in user exposure fa r below t he
Occupational Safety and Health Act (OSHA) and Federal Communications Commission limits.
transmit for more than 50% of total radio use time (50% duty cycle). Transmitting more than 50% of the
DO NOT
time can cause FCC RF exposure compliance requirements to be exceeded.
This radio is NOT approved for use by the general population in an uncontrolled environment. This radio is
restricted to occupational use, work related operations only where radio operator must have the knowledge to
control the user’s exposure conditions for satisfying the higher exposure limit allowed for occupational use.
When transmitting, hold the radio in a vertical position with its microphone 1 inch (2.5cm) away from your mouth.
The radio is transmitting when the red LED on the front of the radio is illuminated. You can cause the rad io to
transmit by pressing the PTT bar on the radio.
These are required operating configurations for meeting FCC RF exposure compliance. Failure to observe these
restrictions mean violation.
FCC Caution
Any Changes or modifications not expressly approved by the party responsible for compliance could void user's
authority to operate the equipment.
This device complies with part 15 of the FCC Rules. Operation is subject to the following two conditions:
(1) This device may not cause harmful interference, and (2) this device must accept any interference received,
including interference that may cause undesired operation.
More detailed product
information
More plentiful
product models
More professional
technique support
More optional
accessories
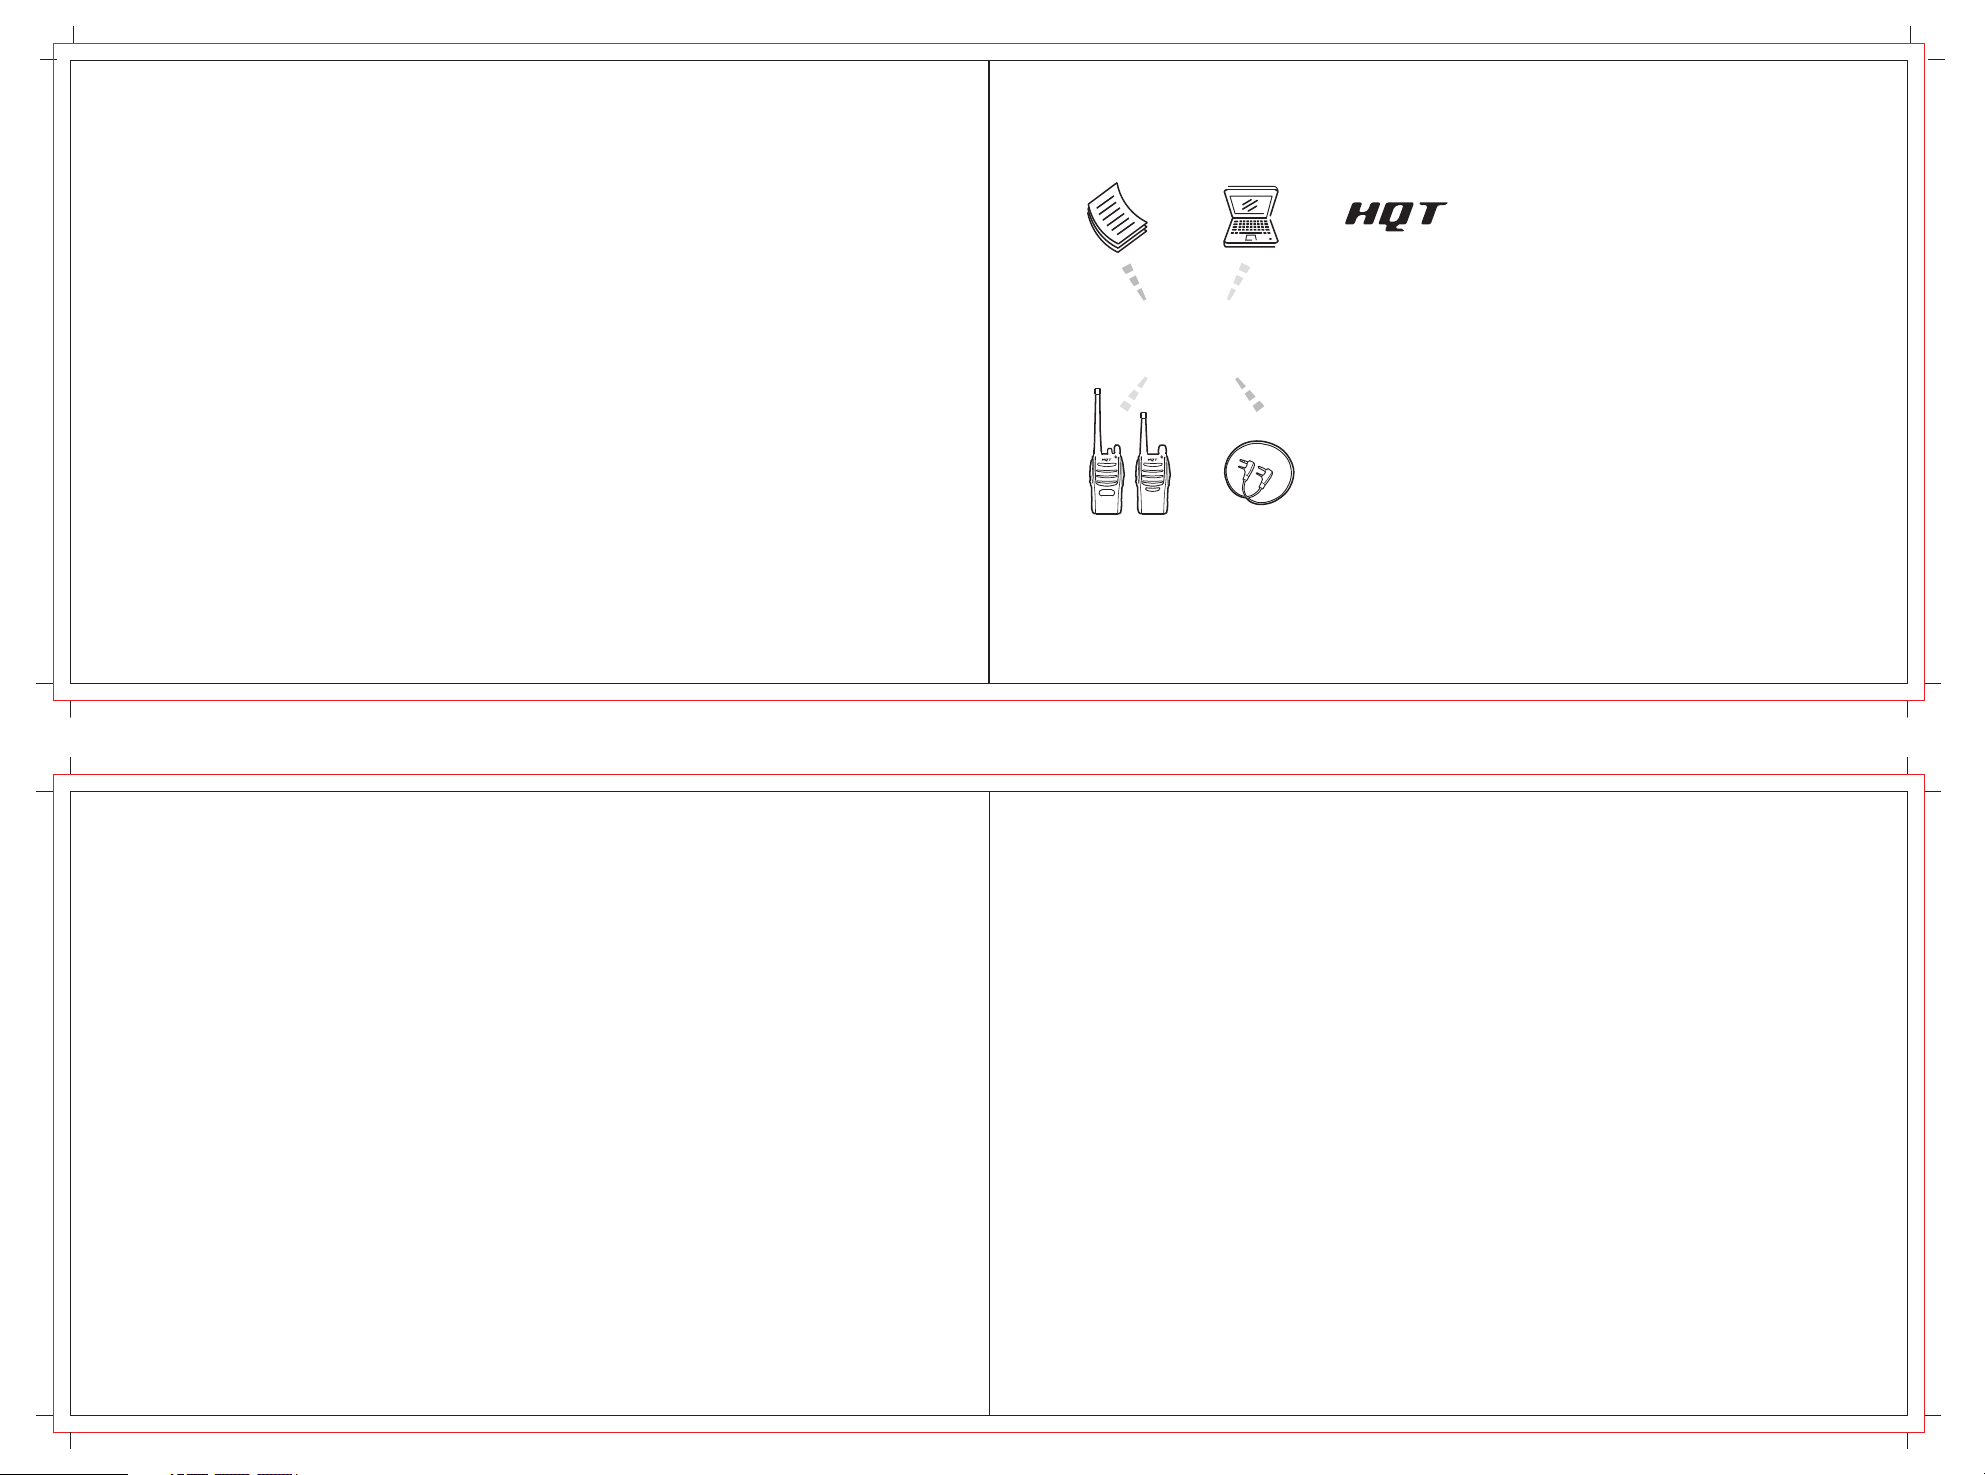
On-line Service Center
v
HQT ser ice network provides more information about
on-line service of HQT two-way radio.
More detailed product information
To deepen your understanding of the functions of this radio.
More plentiful product models.
To display more plentiful product models, so that you can understand
the details of these products in advance and make decisions cor re ctly
according to the requirement of work.
For more details, please visit: www.hqt-tech.com.cn
More professional technique support
User manual and brochures
To provide download or on-line reading of the latest user manuals and brochures in covering detailed information
of two-way radios.
software download
To provide downloading of the latest programming software from HQT website. Your two-way radio can be
connected to the computer with programming cable to manage or edit the parameters of channel frequency and
other items.
On-line learning
To offer guidelines for detailed setting of the two-way radio.
More optional accessories
To provide various kinds of accessories, which can offer more comfortable operation an more remarkable
performance of the radio to you.
Statement
HQT endeavors to achieve the accuracy and completeness of this manual. As
fo r a ny inacc ur ac ie s a n d omissions that may possibly occur, the ri gh t t o
interpretation is reserved to Shenzhen HQT Science & Technology Co., Ltd.
The design or specification of this product is subject to be modified by Shenzhen
HQT Science & Technology Co., Ltd. Without prior notice.
It is prohibited to copy, transmit, excerpt and store in any retrieval system, or
translated to any languages without written authorization of HQT.
Contents
Safety Matters
Contents
Product Inspection
Get Acquainted
Battery Information
Cautions in Charging
Attaching and Removing
Attaching/Removing the battery
Attaching/Removing the antenna
Installing/Removing the Belt Clip
03
04
05
05
06
07
07
08
09
Installing Hand Strap
Attaching the Audio Accessory /Removing
Radio Overview
LED Indicator
Programmable Keys
Basic Operations
Calling on Digital Channel
Man Down (Optional)
09
10
11
13
14
16
17
18
Talk Around
Monitor
Squelch Off
Emergency Alarm
Busy Channel Lockout
Time-out Timer (TOT)
Invalid Channel Indication
Squelch
Transmission Management
18
18
18
19
19
19
20
20
20
Optioanl Accessories
Care and Maintenance
Maintenance
Service and Support
Service Commitment
Warranty
Cautions
Terms of Warranty
Appendix
21
22
23
24
24
24
24
25
25
01 02
Contents
Safety Matters
Please read rules below. Nonobservance of these rules
may cause danger or violation of law.
Safety Matters
The use this radio must comply with regulations of
local government.
Turn off the radio before you enter places of flammable
or explosive environment.
Do not replace or charge battery pack in places of
flammable or explosive environment.
Turn off the radio before you approach blast area and
detonator area.
Do not use the damaged antenna which may cause
lightly burn on skin.
Only qualified technician are allowed to maintain this
two-way radio. Do not disassemble the radio by
yourself.
To avoid problems caused by electromagnetic
interference or electromagnetic compatibility,
please turn off the radio in places with “Wireless
Communication Transmit Equipment Prohibited”
mark, such as hospitals or other health care places.
When taking a plane, turn off the radio if required.
In a c ar wi th ai r b ag , d o n ot pl ac e t he ra di o
within possibly involved area when air bag expands.
Do not expose the radio to di rect sunlight or
near heating devices for a long time.
Keep the radio vertical and speak near the
microphone during transmitting.
Make sure that the antenna is 2.5 cm away from
the body during transmitting if you carry the radio
on your body.
Product Inspection
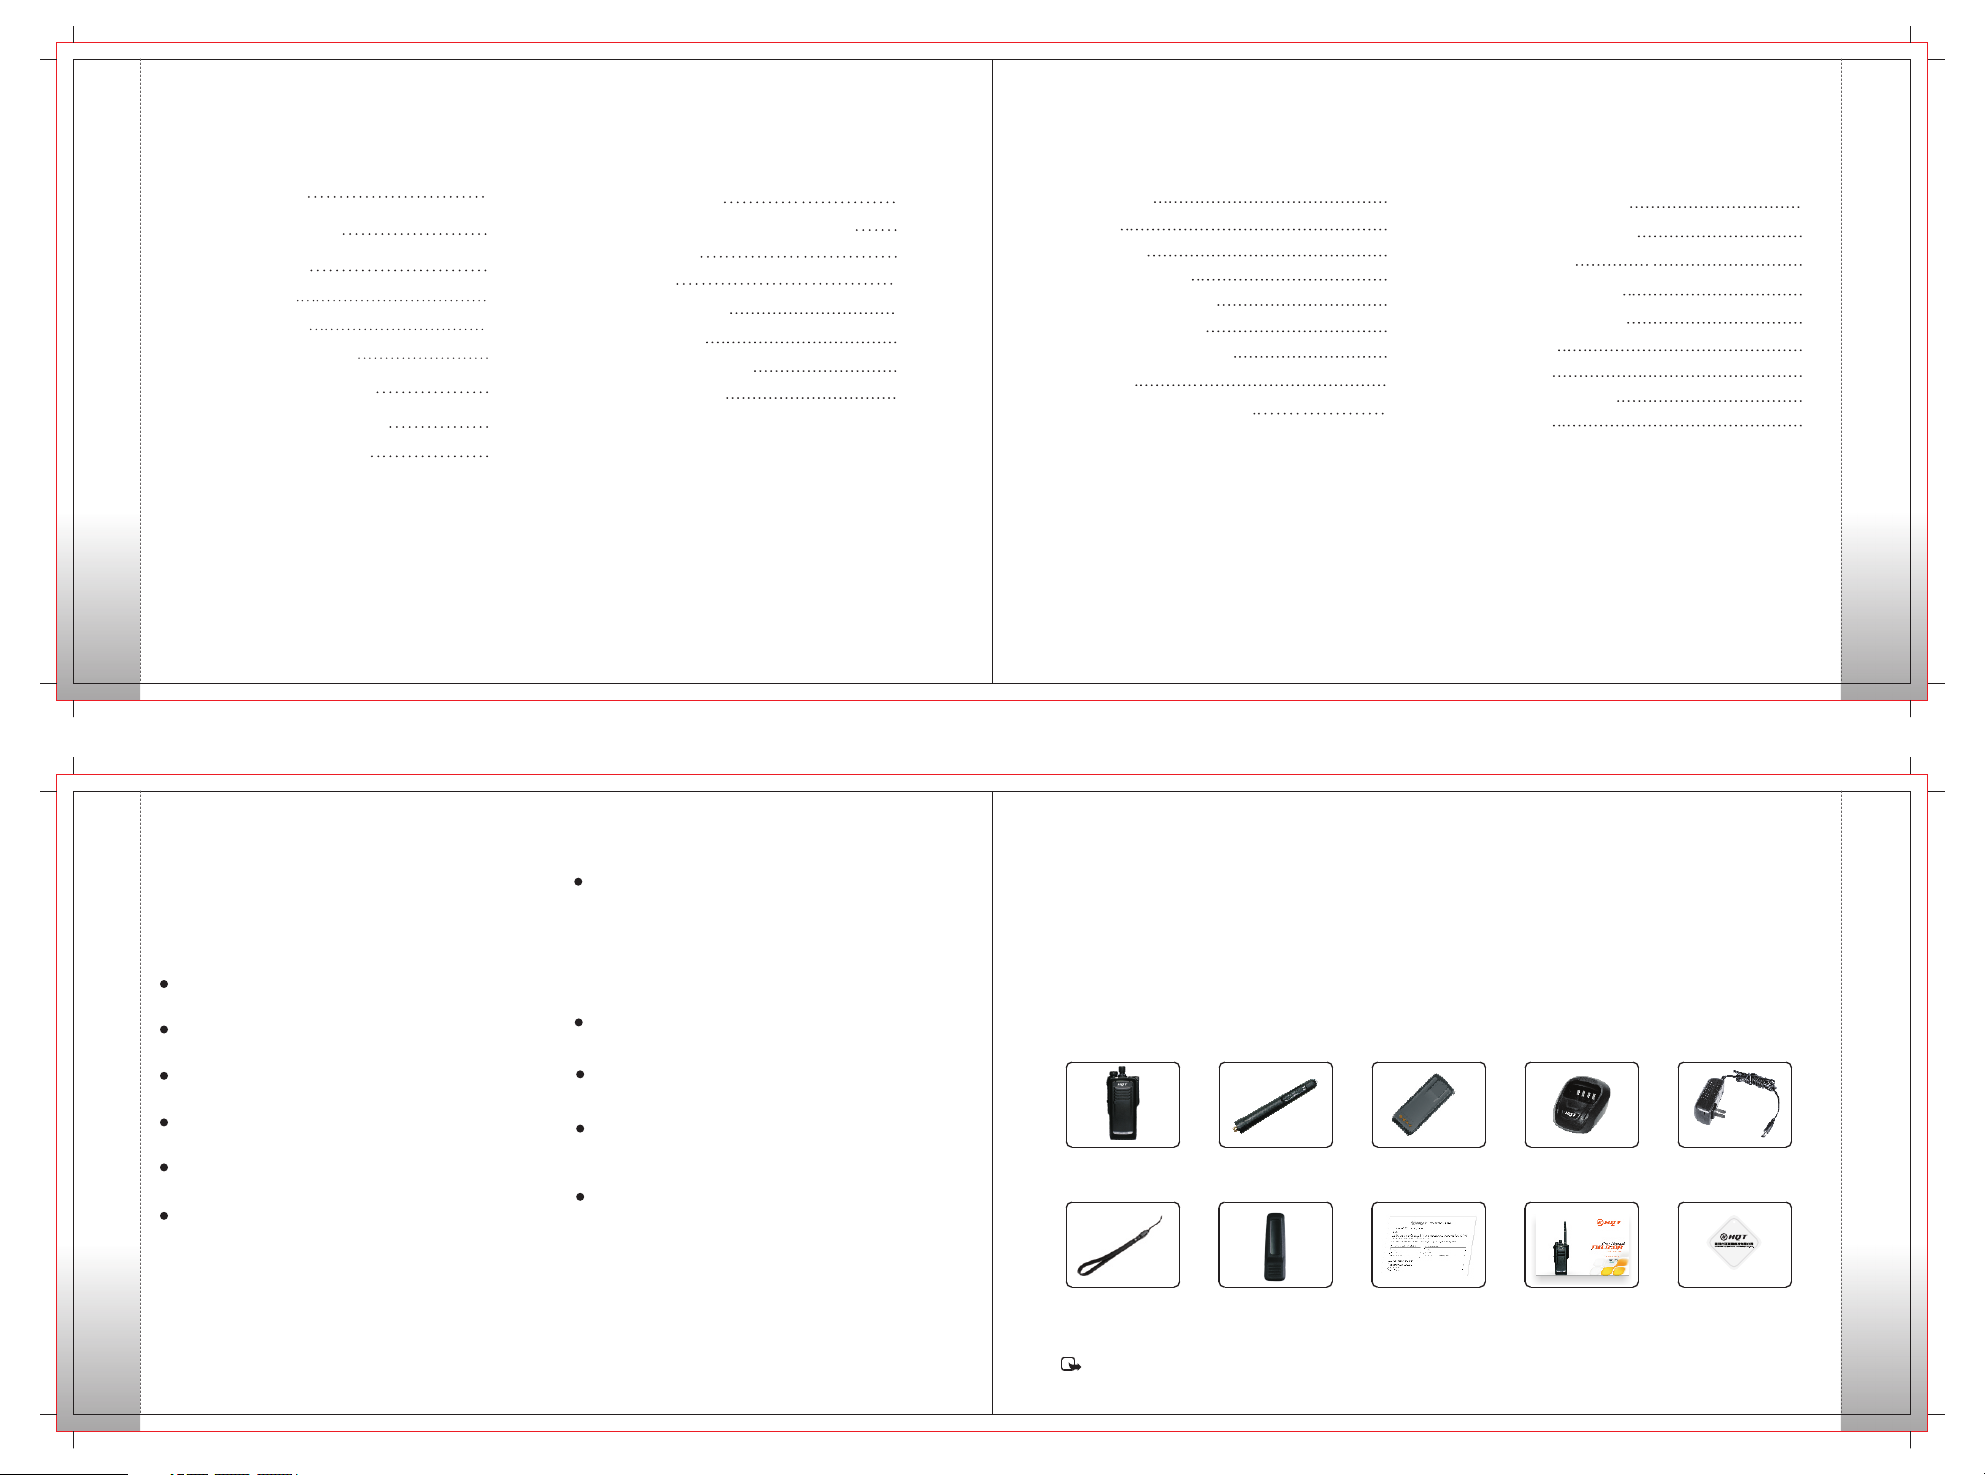
Thanks for using DH-9100 Digital portable radio. Before use, we recommend that:
First check the package for any signs of damage;
Carefully open the package and identify the items listed below;
If any items are missing or damaged during shipment, please contact your dealer.
Items
Radio DH-9100
Qty:1
Lanyard Strap
Qty:1
Note: Frequency is marked on the color circle at the bottom of the antenna.
Antenna
Qty:1
Belt Clip
Qty:1
Li-Ion Battery
Qty:1
Warranty Card
Qty:1
Charger
Qty:1
User Manual
Qty:1
Adapter
Qty:1
Certificate
Qty:1
03 04
Product Inspection
Get Acquainted
Battery Information
Applicable Battery Model:
lease charge with HQT ap pro ved b att ery ; Usi n g
Get Acquainted
other batteries may burst and cause personal damage.
Note:
1. Do not short-circuit the battery terminals or dispose
the battery in fire. Never attempt to disassemble
the battery pack.
2. Charge the battery in 0-45℃ temperature.
Otherwise the battery may not be fully charged.
3. Turn off the radio equipped with battery before
charge. Us e the rad io while charg ing may
interfere with charging.
4. Do not pull/plug the adapter and the battery during
charging to avoid interfere with the charging
procedure.
5. When the battery power consumes quickly even
if it is fully and correctly charged, that means the
battery life is over and please replace with new
battery.
6. Do not charge if the battery or radio is wet. Before
charge, you should dry it with cloth to avoid danger.
Warning:
Co nd uc ti ve me ta ls s u c h a s j e welry, key o r
decorating lace may result in short c i r c u i t a n d
generate a large quantity of heat when coming to
contact with battery ele ctr odes. Treat any battery
carefully especially when placing it into pocket, wallet
or other metal container.
Charge Operation
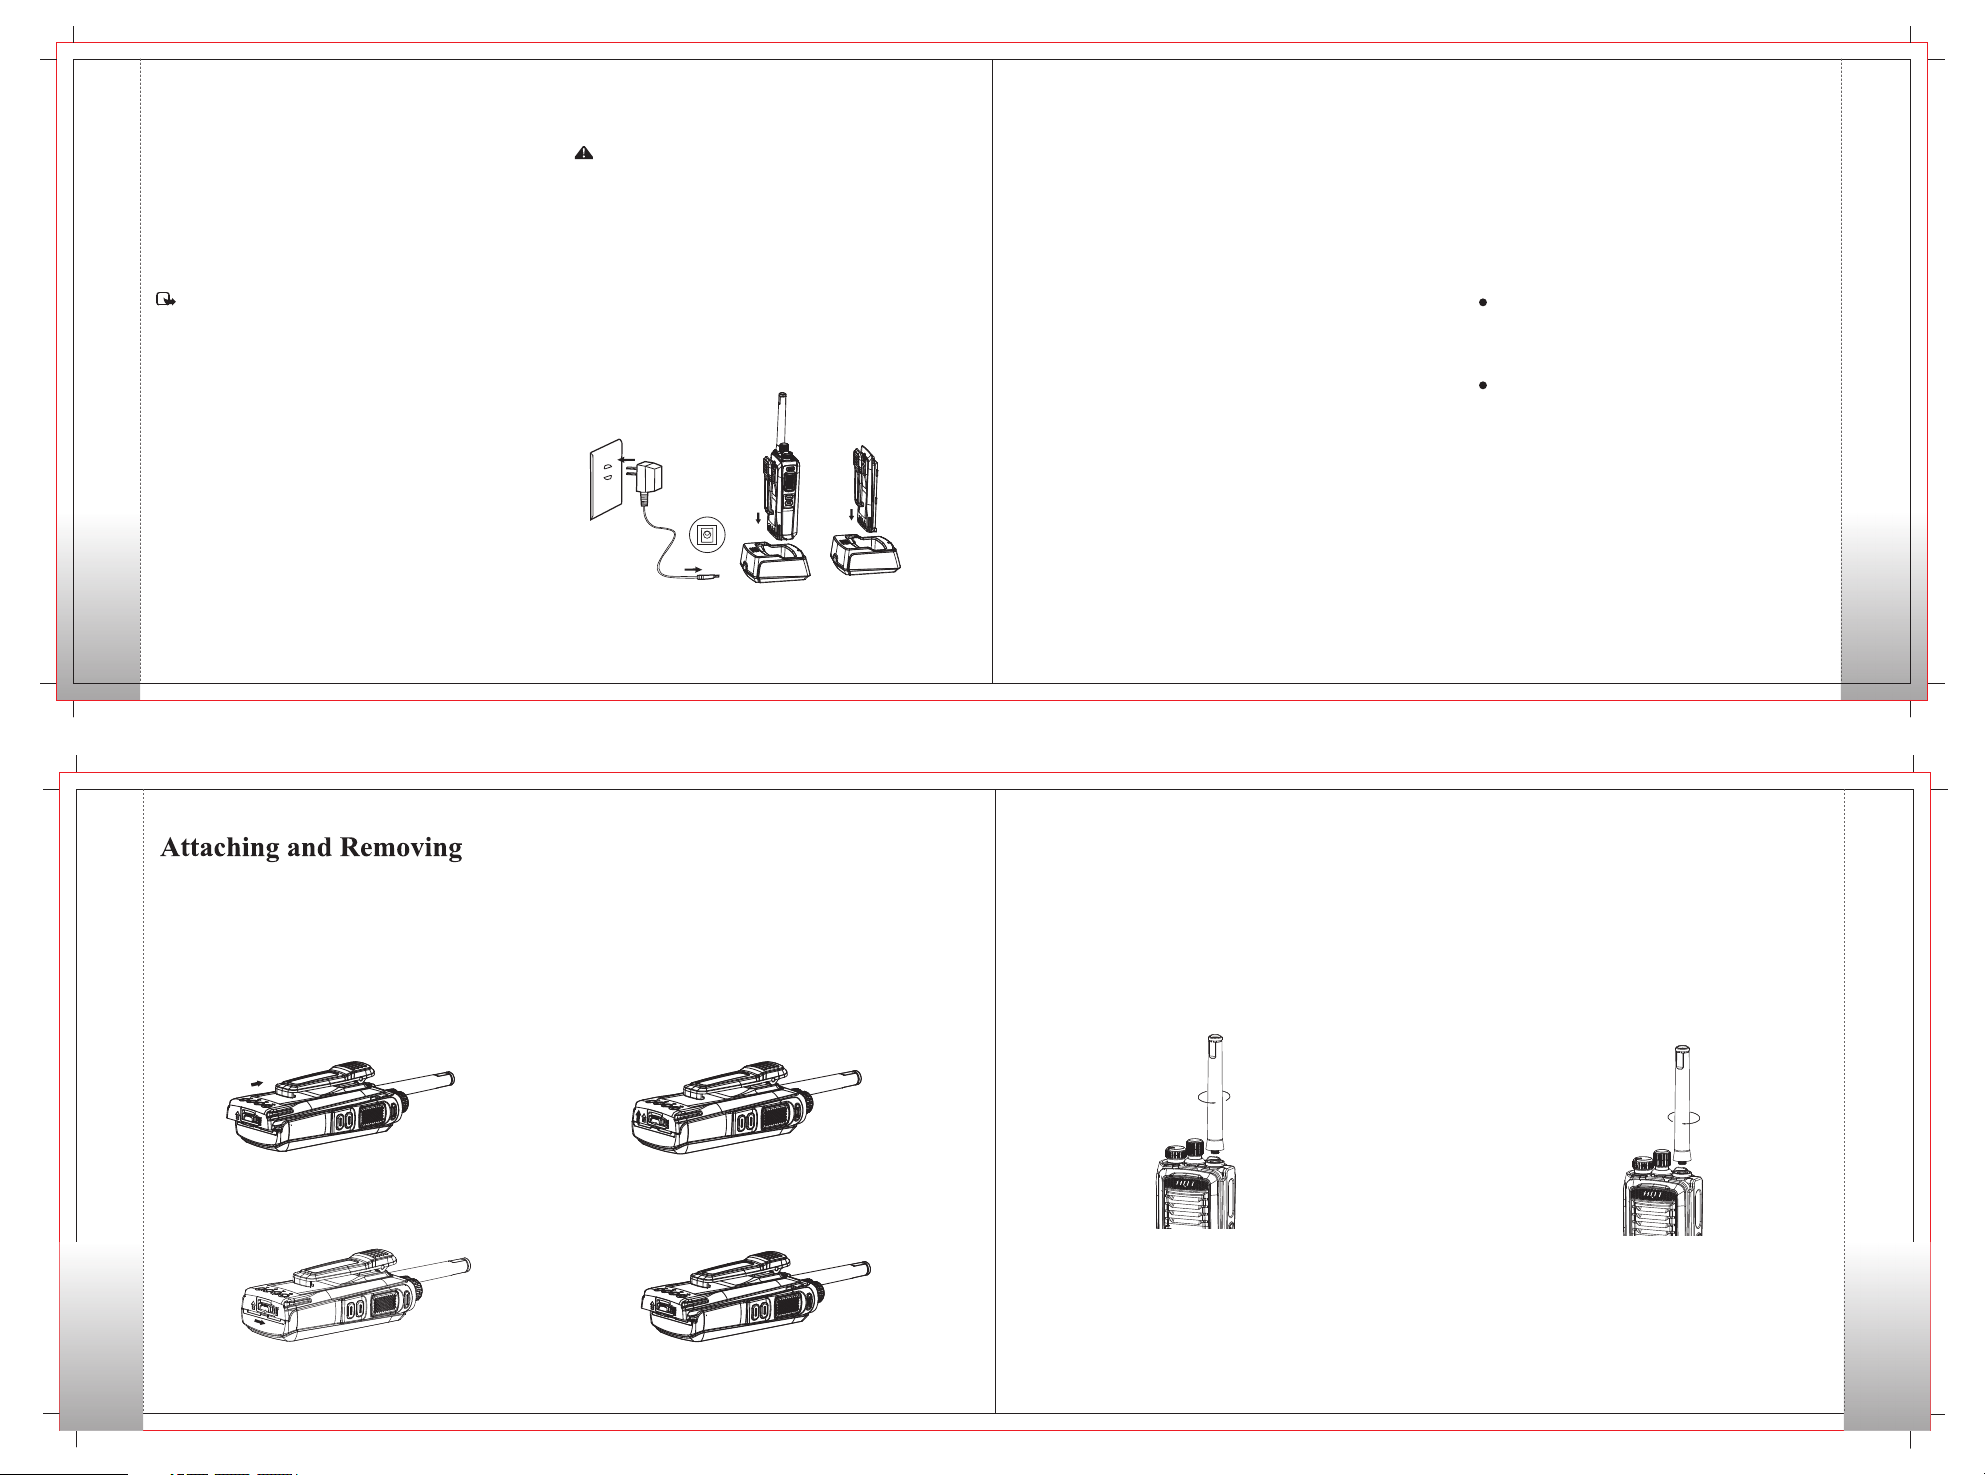
Please charge as follows:
1. Turn off the radio. Plug the DC connector of adapter
into the DC jack on the rear of the charger.
2. Plug the AC connector of adapter into an AC outlet.
3. After the charger is electrified, the LED glows red for
1 second and goes out. That means the charger is
ready for normal charging. If the LED flashes red, it
means the charger is not ready for battery charging.
4. Insert the battery or radio equipped with battery into
the charger. Make sure th e b at tery is in good
connection with the charger electrode.
5. LED glows red during charging and flashed during
trickle charging because of very low battery power.
And after the battery power reached a certain mount
during trickle charge, the charger automatically turns
to normal charge mode.
6. The battery is fully charged when LED glows green.
The charger stops charging automatically.
Cautions in Charging
1. The battery is not charged in factory. Please charge
the battery before initial use or after long-time
storage.
2. Repeat charging 2 to 3 times will make the battery
reach its best capacity. Please replace or charge
the battery if battery power is low.
3. When the battery power consumes quickly even
if it is fully and correctly charged, that means the
battery life is over and please contact your dealer
and buy new HQT approved battery.
Antenna Information
Stubby antenna is suitable for short-distance
communi cation; th in and lo ng anten na will
provide best communication effect. Also it is
comfortable to carry on the waist.
The communication range may be shortened in
rainy days or in forest. Please make preparations
for that .
05 06
Get Acquainted
Attaching/Removing the Antenna
Attaching the Battery
Match the two grooves of battery with corresponding
guides on the back of the radio. And make sure the full
contact and parallel between the battery and aluminum
chassis.
Then push the battery along the guide until the battery
latch locks.
Attaching and Removing
(Figure 1)
Push the battery latch towards the mark “Lock” to
lock it.
07 08
(Figure 2)
Removing the Battery
To remove the battery,first make sure the radio is
turned off, then push the battery latch in the opposite
direction of the mark “LOCK” to unlock it,and push
the battery latch downwards.
(Figure3)
Slide the battery away from the radio.
(Figure 4)
Attaching the antenna:
1.Insert the antenna into the connector on the top
of radio by holding the antenna at its base.
2.Rotate the antenna clockwise to fasten it.
(Figure 5)
Removing the Antenna:
Rotate the antenna counter clockwise until you
can remove it.
(Figure 6)
Attaching and Removing

Installing/Removing the Belt Clip
Installing Belt Clip
Match the grooves of belt clip with those on the rear of
radio and press the belt clip downwards until it is locked.
Removing Belt Clip
Use your nail or a tool to lift the metal spring pi ece in
the belt clip from topside and pull the belt clip upward
from the battery pack.
Note:
Attaching and Removing
1. To use belt clip, please install the belt clip onto the
battery before the installing of battery pack.
2. Remove the battery from the radio before the
removing of belt clip.
Installing Hand Strap
Thread the strap into the hole at the back of the
radio and fasten it.
Attaching the Audio Accessory
Programming Cable
1.Remove the screw on the accessory jack cover,
open the accessory jack cover as figure show below.
2.Align the plug with the accessory jack.
3.Tighten the screw on the plug.
Removing the Accessory
To remove accessories, loosen the
screw as figure shown below.
Attaching and Removing
09 10
(Figure 1) (Figure 2)
Radio Overview
1. PTT Key
2. Sk1(SideKey 1)
Radio Overview
3. SK2(Side Key 2)
4. SK3(Side Key 3)
5. Speaker
6. Microphone
7. Body Case
8. Radio On-Off/Volume Control Knob
9. LED Indicator
10. Channel Selector
11. Top key
12. Antenna
13. Name Plate
14. Accessory Jack
15. Accessory Screw
16. Battery Latch
17. Strap Hole
18. Belt Clip
19. Battery
Radio Overview
11 12

LED lndicator
The top LED indicator will help you easily identify current radio status.
LED lndicator
flash es r ed.
flash es g reen.
For enhanced convenience, you may request your dealer to program the keys SK1,SK2,SK3,P1,P2,TK as
shortcuts to the functions listed below:
No.
1
2
3
4
5
6
7
8
9
10
11
12
13
Shortcut Keys
None
Zone Down
Zone Up
Scan
Nuisance Temporary Delete
Emergency On
Emergency Off
Adjust Power Level
Adjust Squelch Level
One Touch Call1
One Touch Call2
One Touch Call3
One Touch Call4
No feature will be assigned.
Description
To select a desired zone quickly
To select a desired zone quickly
To receive signals on other channels
To temporarily ignore unwanted channel activity
To summon help in emergent situations
Emergency function is off
To adjust power level
To adjust the squelch threshold required for the speaker to unmute
To transmit a call, short message or other service to a preset contact quickly
To transmit a call, short message or other service to a preset contact quickly
To transmit a call, short message or other service to a preset contact quickly
To transmit a call, short message or other service to a preset contact quickly
13 14
Programmable Keys
Basic Operations
No.
14
15
16
Programmable Keys
17
18
19
20
Shortcut Keys
OneT ouc h Call 5
Squ elch O ff Mo men tar y
Squ elch O ff
Mon itor
TalkA ro und
Scr amble /Encr ypt
VOX
To transmit a call, short message or other service to a preset contact quickly
Description
To momentary open the speaker
To always open the speaker
To adjust the condition for incoming signal match
To directly communicate with other radios
Scramble: To encrypt your voice so as to guarantee privacy of your communication
Encrypt: To encrypt your voice and message so as to guarantee privacy of your communication
To enable or disable the VOX function
Note: (1) Long and short press of a key can be assigned with different functions by your dealer.
(2) The TK is programmed as the Emergency key by default, and is programmable by your dealer.
Turning the Radio On/Off
Rotate the Radio On -Off/Volume Control knob clockwise/
counter-clockwise until a click is he ar d t o t urn the r ad io
on/off.
Adjusting the Volume
After turning the radio on, rotate the Radio On-Off/Volume
Control knob clockwise to increase the volume, or counterclockwise to decrease the volume.
Selecting a Zone
You can include a group of channels with the same property
in to a zone for convenient management. The radio supports
three zones, each of which consists of up to 16 channels.
You can switch to the appropriate zone by pressing the
programmed Zone Up or Zone Down key preset by your dealer.
Selecting a Channel
After the radio is powered on, you can rotate the Channel
Selector knob to select an appropriate channel. You can
also switch to the designated channel directly by pressing
the programmed Preset Channel key preset by your dealer.
If the Channel Notify feature is enabled by your dealer, the
radio will play the channel number upon channel switching.
After the radio is powered on, you can make different kinds
of calls. To ensure optimal volume of the receiving radio,
keep the microphone about 2.5 to 5 centimeters away from
your mouth when transmitting. The types of calls you may
initiate are listed below:
Private call: A call made to a private contact.
Group call: A call made to the group contacts.
All call: A call made to all the contacts on the current channel.
15 16
Basic Operations

Calling on Digital Channel
You can initiate a private call, group call or all call (your radio
must be programmed to allow you to use the all call service)
through the same operations on digital channel. When calling
back, the radio will make a call to the calling party in private call
and all call (your radio must be programmed to allow you to call
back in an all call); but in group call, the radio will make a call to
all parties involved when calling back.
Here we take the private call as example to illustrate the call
process:
Calling on Digital Channel
1. User A and B select the same digital channel.
2. User A holds down the PTT key to initiate a call.
You preset a regular private call/group call/all ca ll co ntact
for each digital channel via your dealer.
3. User A can talk to the microphone when the LED indicator on
the radio glows red.
4. User A releases the PTT key to finish talking.
User A can hold down the PTT key to talk when the LED
indicator on the radio is glowing orange.
When receiving, the LED indicator on the radio glows green.
5. User B can receive the call without any operation. When
receiving, the LED indicator glows green.
6. User B can hold down the PTT key to talk when the LED
indicator on the radio is glowing orange.
Note: The duration of LED indicator glowing orange (Call Hold
Time) is preset by your dealer. If neither one talks before this
duration expires, the call will end.
Calling on Analog Channel (No Signaling)
On the analog channel without signaling, the calling operations
are the same as on the digital channel. The difference is that
the called parties are all the users on the channel, rather
than the preset contact for the channel.
Please refer to the corresponding Feature Book for calling
operations on the analog channel with signaling.
Scan On/Off
The function “Scan” allows you to listen to communication
activities on other channels so that you can keep a close
track of your team members. This option is used to enable
or disable the function.
Zone
This radio supports up to 64 zones. You can set it by CPS.
LED
All LEDs: to enable /disable all LED indications.
TX LED: to set whether the Tx LED indicates during
transmission.
RX LED: to set whether the Rx LED indicates during
reception.
Scan LED: to set whether the Scan LED indicat es in
Scan mode.
Low Battery LED: to set whether the Low Battery LED
indicates when the battery is low.
Carrier LED: to set whether Carrier LED indicates when
receiving carrier.
VOX
If enabled, the VOX function allows users to transmit
every time the user speaks into the radio directly without
pressing the PTT key.
Man Down (Optional)
With this feature, your radio will alarm automatically t o
summon help from your companion when it is tilts to
a certain gradient for a certain time period.
Talk Around
You can continue to communicate in DM mode by pressing
the programmed Talk Aro und key, when your repeater
malfunctions, or when your terminal is out of the repeater’s
range but within talking range of other terminals.
Operation:
Press the programmed Talk Around key to switch between
DM mode and RM mode.
Monitor
To adjust match conditions for signal receiving, you
can enable the feature “Monitor”.
Operation:
Press the programmed Monitor key to enable
the feature, To disablethe feature, press this
key again.
Squelch Off
If the feature “Squelch Off” is enabled, your radio’s
speaker will keep unmuted no matter whether carrier is
present.
Operation:
Press the programmed Squelch Off key to enable
the feature. Then the radio sounds background
noise. To disable the feature, press this key again.
Man Down (Optional)
1817
Press the programmed Squelch Off Momentary key
to enable the feature. Then the radio sounds background
noise. To disable the feature, release this key.
Emergency Alarm
In case of emergency, you can use this feature to inform
Emergency Alarm
your colleagues or control center for help. The Emergency
Alarm has the highest priority which can terminate the
ongoing activities on the current channel.
You can make emergency call even when your radio is
transmitting or receiving.
Emergency Alarm feature needs to be configured and
enabled by your dealer. Please refer to the corresponding
Feature Book for details.
Busy Channel Lockout
If enabled via the progr ammin g s oftwa re , t his
feature can prevent your radio interfering with other
transmitting terminals on the same channel. If you
hold down the PTT key while the channel is in use,
your radio will keep beeping and display text information
“Channel Busy”,alerti ng you to t ra ns mission
prohibition. To stop beeping, please release the
PTT key. When the channel is free, you can press
and hold down the PTT key to transmit.
Time-out Timer (TOT)
The purpose of TOT is to prevent any user from
occupying a channel for an extended period.
If the preset time expires, the radio will automatically
terminate transmission and keep beepi ng.
To s t o p be eping, please release the PTT key.
Invalid Channel Indication
If current operati ng channel is invalid channel, the
radio will send continuous “Dududu” as alert tone,
which means current channel is unable to transmit or
receive.
Squelch
Through setting squelch level to decide how strong the
signal is to unmute the speaker.The lower the squelch
level the stronger the background noise to ummute the
speaker, the larger the talk range and the weaker the
Rx anti-interference ability. Setting r ang e is 0~9 ,
selecting “0” causes the squelch open. th e hi gh er
the squelch level, the harder to open the squelch.
Transmission Management
This feature can prevent your radio interfering with
other transmitting radios on the same channel. If you
hold down the PTT key while the channel is in use,
your r ad io wil l keep beeping, alerting you to
transmission prohibition. It can be programmed via
the CPS.TX Admit includes the followings:
Always Allow: The User can transmit all the time by
holding down the PTT key, regardless the channel
is being interfered or not.
Channel Free: The radio is allowed to transmit
when the channel is not being interfered.
CTCSS/CDCSS Match: the radio can transmit
when CTCSS/CDCSS is matched.
CTCSS/CDCSS Mismatch: the radio can transmit
when CTCSS/CDCSS is mismatched.
You must wait for a certain time period (preset
by your de ale r ) before you can press and hold
down the PTT key to transmit again. If the pre-alert
function is set by your dealer, your radio will alert
you to the TOT expiration in advance.
Note: This feature is null in Emergency mode.
19 20
Transmission Management

Optioanl Accessories
Care and Maintenance
Question and Answer
Phenomena
The battery may be improperly installed.
The equipment can
Optioanl Accessories
not be powered on.
During receiving
signals, the voice
is weak,
discontinuous or
totally inactive.
You can not
communicate with
other members.
Irrelevant
communications or
noises are heard
on the channel.
The battery may run out.
The battery may suffer from poor contact
caused by dirtied or damaged battery
contacts.
The battery strength may be too low.
The volume may be set to a low level.
The antenna may get loose or may be
improperly installed.
The speaker may be blocked or damaged.
The frequency or signaling may be
inconsistent with that of other members.
The channel type (digital/analog) may be
set inconsistently.
You may be too far away from the group
members.
You may be interrupted by radios using the
same frequency.
The radio may not be set with any signaling.
Analysis
Solution
Remove the battery and attach it again.
Recharge or replace the battery.
Clean the battery contacts. If the problem can not
be solved, contact your dealer or authorized service
center for inspection and repair.
Recharge or replace the battery.
Increase the volume.
Power off the radio, and re-install the antenna.
Clean surface of the speaker. If the problem can not
be solved, contact your dealer or authorized service
center for inspection and repair.
Set your TX/RX frequency and signaling to the same
as that of other members.
Make sure all members are on the same digital/
analog channel.
Move towards other members.
Change the frequency, or adjust the squelch level.
Set signaling for all member radios to avoid
interference at the same frequency.
21 22
Care and Maintenance
Maintenance
Your radio is a product with excellent design
and technology, please treat it with care.These
recommendations
use the radio.
Keep the radio dry. Rain, moisture or other liquid
Care and Maintenance
may cause damage to the radio.
Do not throw, hit or vib ra te t he radio. Brutal
treatment.
May damage the inner IC or other elements.
Do not hold the radio by the antenna or external
MIC.
Please use the original or s ta ndard antenna.
Unapproved.
accessories may cause
Note:
All recommendations above also refer to your
battery,
works abnormally,
service center.
can help you ef f e c t i v ely
an ten na o r modifi cat ions of
damage to the radio.
charger and accessories. If any of them
pl e ase se nd i t t o n ear est
Use lint-free cloth to clean the dust or stains on
the radio.
Cover the earphone/microphone pad when not
using the radio.
Use mild detergent (not corrosive chemicals)
and cloth to clear the casing, control knob and
keyboard after long-time use.
Service and Support
Shenzhen HQT Science & Technology Co., Ltd.
provides long-time support for its products, including
repair and supply of the radio and its parts.
Service Commitment
1. HQT two-way radio body has an 18-month guarantee;
accessories (battery, charge adapter, charger and
antenna)6 months; earphone 3 months.
2. Replacement is available subject to the presentation
of fully-filled warranty card or original purchasing
invoice in case that the radio cannot work normally
due to non-personal cause within the guarantee.
3. Replacement and repair is available subject to the
presentation of fully-filled warranty card or original
purchasing invoice in case that the radio or accessories
cannot work normally within 30 days from the purchase
date.
4. The repaired part has its own guaranty or 90-day
guaranty from the repair date. The longer one is valid.
Warranty
1. The guaranty is only valid under normal use. And
guarant y is unavailable under su ch condit ions
outside force, water let-in, fire burning, and usage
of unapproved accessories or antenna, not according
to unapproved accessories or antenna, not according
to the instruction manual and so on.
2. The guaranty is in effect from the purchase date on
the invoice.
3. Free repair is unavailable if the HQT mark or Serial
Number mark is torn off.
4. Only the fully-filled warranty card and original
purchasing invoice with HQT’s seal or dealer’s seal
affixed is valid for identifying the guarantee.
Cautions
1. Read the user manual before use.
2. Do not use the radio with damaged antenna. Use
the radio only with standard antenna.
3. Tu rn o ff th e rad i o in po ten tia l dan ger ous
environment.
4. Avoid the contact between the battery and the
metal oily or corrosive objects.
5. Do not dip the radio or battery into water or throw
them in fire.
6. Use the radio only with standard battery, adapter
charger and earphone.
dissembling or modifications, damages caused by
23 24
Service and Support

Terms of Warranty
1. HQT two-way radio body has an 18-month guarantee;
accessories (battery, adapter, charger and antenna)
6 months; earphone 3 months.
2. Only the fully-filled warranty card or original purchasing
invoice with HQT 's seal or dealer's seal affi xed
is valid for identifying the guarantee.(The invoice
should give clear indication of accessories, radio,
serial-numver, purchasing date, purchasing price
Terms of Warranty
and other items.)
3.If the radio body went wrong within the guarantee,it
should be ensured to work normally over 30 days
after the repair.
4.Replacement and repair is available su bj ec t to
th e presentat io n of fully- fil le d wa rranty ca rd
or original purchasing invoice in case that the radio
cannot work normally as the instruction says within
30 days from the purchase date.(Not that there
must not be visible abrasion on radio body and
accessories.)
5.Re place ment of the sa me mo del is av ail abl e
sub jec t t o t he pr ese nta tio n o f 3 - tim e r epa ir
re ceipt in cas e that the r a di o b ody stil l wo r k
abnormally after 3- time-or- above repairs within
the guarantee.
6.Repair of accessories(battery, adapter, charger
and antenna) is available to the original purchasing
invoice.
7.The cost of ma ter ial s a nd re pai r a re c o v e r e d
during the time of guarantee.
25 26
8. Guarantee is unavailable in case that the HQT
mark or the serial-number mark is torn off.
9. Guarantee is unavailable in cases below:
1) Beyond the warranty period;
2) Defects or damages under abnormal use;
3) Defects or damages because of misoperation,
accident, water penetration and carelessness;
4) Defects or damages because of incorrect
testing, operation, repair, installation, reconfiguration
or adjustment;
5) Defects or damages to antenna because of
non-material or nin-processing problems;
6) Defects or damages because of unauthorized
repair and disassembling;
7) Product that the serial-number mark is torn
off or unable to identify;
8) Product with unclear purchasing date;
9) Battery under such conditions;
a. Any damages or unsealing to the battery
pack;
b. Defects or damages to battery because of
charging with improper equipment use beyond
regulated maintain condition;
10) Abrasion under normal use.
Note: The warranty ordinance, with is in accord wit Chinese
warranty regulations, will be modified properl according to
marking. If modified, the warranty ordinanc is subject to our
latest updating notice issued by HQT service center.
Appendix 1: Specification
Item
Frequency
Range
Channel Capacity
Modulation Type
Frequency Stability
Operating
Temperature
Antenna Impedance
Operating Voltage
FCC Caution:
DH-9100
VHF : 13 6~1 74M Hz
UHF: 35 0~3 90M Hz
400 ~4 70M Hz
450 ~5 20M Hz
1024
FM/4FSK
-30 60
7.4V
Item
RF Output Power
Audio Distortion
Sensitivity
Max Audio Output
Power
Weight (with antenna
& battery)
Battery
DH-9100
UHF:4W/1W
VHF:5W/1W
5%
0.22u
1.5W
130X55X34mm
320g
2000mAh
Appendix
Appendix : Frequency Chart (Used to record the frequency.)
Model:
Serial number:
Appendix
Tx FrequencyChannel Tx CTCSS/CDCSS Rx Frequency Rx CTCSS/CDCSS
1
2
3
4
5
6
7
8
9
10
11
12
13
14
15
16
Optional Signaling
Any Changes or modifications not expressly approved by the party responsible for compliance could void the user's
authority to operate the equipment. This device complies with part 15 of the FCC Rules. Operation is subject to the
following two conditions: (1) This device may not cause harmful interference, and (2) this device must accept any
interference received, including interference that may cause undesired operation. This equipment complies with FCC
radiation exposure limits set forth for an uncontrolled environment .
27 28

Important Information
RF Energy Exposure Information
RF Energy E xp osure Awar en ess And Contro l
Informa ti on For Fcc Oc cu pationa l Use Requi re ments
Ibefore using the Digital portable radio, review the following important RF energy awareness and control information and operational
instructions. Comply with this information and instructions in order to ensure compliance with RF exposure guidelines.e the capability to
access information in that form.
This radio is intended for use in occupational/controlled conditions, where users have full knowledge of their exposure
!
WARNIN G
and can exercise control over their exposure to remain below RF exposure limits. This radio is NOT authorized for
general population, consumer, or any other use.
!
CAUTI ON
This Digital poartable radio uses electromagnetic energy in the radio frequency (RF) spectrum to provide communications between two or more
users over a distance. It uses RF energy or radio waves to send and receive calls. RF energy is one form of electromagnetic energy. Other
forms include, but are not limited to, electric power, sunlight, and x-rays. RF energy, however, should not be confused with these other
forms of electromagnetic energy, which, when used improperly, can cause biological damage. Very high levels of x-rays, for example, can
damage tissues and genetic material.
Experts in science, engineering, medicine, health, and industry work with organizations to develop standards for exposure to RF energy.
These standards provide recommended levels of RF exposure for both workers and the general public. These recommended RF exposure
levels include substantial margins of protection. All two-way radios marketed in North America are designed, manufactured, and tested to
ensure they meet government-established RF exposure levels. In addition, manufacturers also recommend specific operating instructions
to users of digital portable radios. These instructions are important because they inform users about RF energy exposure and provide simple
procedures on how to control it. Refer to the following websites for more information on what RF energy exposure is and how to control
exposure to assure compliance with established RF exposure limits:
http://www.fcc.gov/oet/rfsafety/rf-faqs.html
http://www.osha.gov./SLTC/radiofrequencyradiation/index.html
Changes or modifications not expressly approved by Shenzhen HQT Science&Technology Co., Ltd.could void the user's
authority to operate the equipment.

Important Information
Federal C om municat io ns Commis si on Regu la tions
Before it was marketed in the United States, the Digital portable radio was tested to ensure compliance with FCC RF energy exposure
limits for two-way portable radios. When digital portable radios are used as a consequence of employment, the FCC requires users to be fully
aware of and able to control their exposure to meet occupational requirements. Exposure awareness can be facilitated by the use of a
label directing users to specific user awareness information. The radio has an RF exposure product label.
Also, the Product Safety Manual and this Operator’s Manual include information and operating instructions required to control RF exposure
and to satisfy compliance requirements.
Operation Safety Recommendations
Occupat io nal Safet y Gu ideline s And S af ety Traini ng Inform at ion
To ensure bodily exposure to RF electromagnetic energy is within the FCC allowable limits for occupational use. Always adhere to the
following basic guidelines:
• The push-to-talk button should only be depressed when intending to send a voice message.
• The radio should only be used for necessary work-related communications.
• The radio should only be used by authorized and trained personnel. It should never be operated by children.
• Do not attempt any unauthorized modification to the radio. Changes or modifications to the radio may cause harmful interference and/or
cause it to exceed FCC RF exposure limits. Only qualified personnel should service the radio.
• Always use only authorized accessories (antennas, control heads, speakers/mics, etc.). Use of unauthorized accessories can cause the
FCC RF exposure compliance requirements to be exceeded.
The information listed above provides the user with information needed to make him or her aware of a RF
exposure, and what to do to assure that this radio operates within the FCC exposure limits of this radio.
 Loading...