

Page 1

Dear customer,
The original GO SwissDrive operating instructions describe all specifications offered.
These supplementary instructions give
you an overview of the variants that can
be used with HP Velotechnik as well as
additional installation instructions.
This manual does not replace the original
GO SwissDrive manual, but complements
it.
Please also refer to the original HP Velotechnik operating manual for your recumbent model.
Pushing aid backwards
HP Velotechnik tricycles are equipped
with the reverse gear. It is activated by
pressing and holding the[-] key in driving
mode (cf. chapter 6.1. Using the grip controls).
Light
Depending on the headlamp model installed, the light is switched on automatically
together with the electric drive system or
separately on the headlamp.
The light on HP Velotechnik recumbents
cannot be switched on and off via the GO
SwissDrive display.
Display languages:
You can select the languages German, English or French on the display. (See chapter 6.3.1 System settings)
Remo
ving the rear wheel
In the event of a tyre defect or to service
the shift components, it may be necessary
to remove the rear wheel.
Since the engine is installed in the rear
wheel, proceed as follows:
1.Turn off the system at the control and
disconnect the plug from the battery.
2.After disconnecting the battery, turn
the display on and off again while the rear
wheel is stationary to completely deenergize the system.
3. Set up the pedelec so that the rear
wheel can be removed. Ideally, you should
clamp it in an appropriate mounting stand.
Due to the high weight of your pedelec, it
makes sense to lift the bike together with
a second person.
Danger!
Before removing a rear wheel, please
read the corresponding chapters of
your general bicycle operating instructions. If you are unsure or have questions, contact your dealer.
HP Velotechnik recumbents with
GO SwissDrive
HP VELOTECHNIK GmbH & Co. KG
Kapellenstrasse 49
65830 Kriftel ●Germany
Phone +49 61 92 - 97 99 2-0
Fax +49 61 92 - 97 99 22 99
E-mail mail@hpvelotechnik.com
Internet www.hpvelotechnik.com
Page 2
Installing the rear wheel
1. shift to the highest gear so that the rear derailleur is completely on the outside. Now you
can insert the rear wheel into the dropouts,
note the following points:
a. Pay attention to the order of the parts on
the axle. Make sure that the torque arm sits
on its toothing on the axle.
b.Turn the torque arm so that it engages the
support screw or Speedbone.
Figure 2: Speedbone (black) with torque support
(steel). If a disc brake is mounted, the torque
support comes from the Speedbone and not
by the support screw.The
Speedbone is used on the outside of the
Brake mount fixed with 2 screws.
4. Shift gears on your derailleur system
on the smallest sprocket on the rear
wheel, which simplifies removal and installation.
5. In the case of mechanical rim brakes
unhook the cable from the brake arm.
6. Open the Velcro straps that secure the
motor cables to the frame. Open the Velcro of the neoprene hose and disconnect
the connector.
7. Loosen the M10 axle nuts with a 17
mm open-ended wrench, note the following:
On the left side you will find the torque
support, it is essential to set it in place
when reinstalling the wheel.To facilitate
the removal of the rear wheel, pull the rear derailleur slightly backwards.
Danger! If both nuts are loose-
ned, the rear wheel may fall out. Secure
the rear wheel with one hand in the frame or get help from a second person
due to its heavy weight.
Attention! Do not remove the
nuts completely from the axle. Loosen it
so that you can remove the rear wheel.
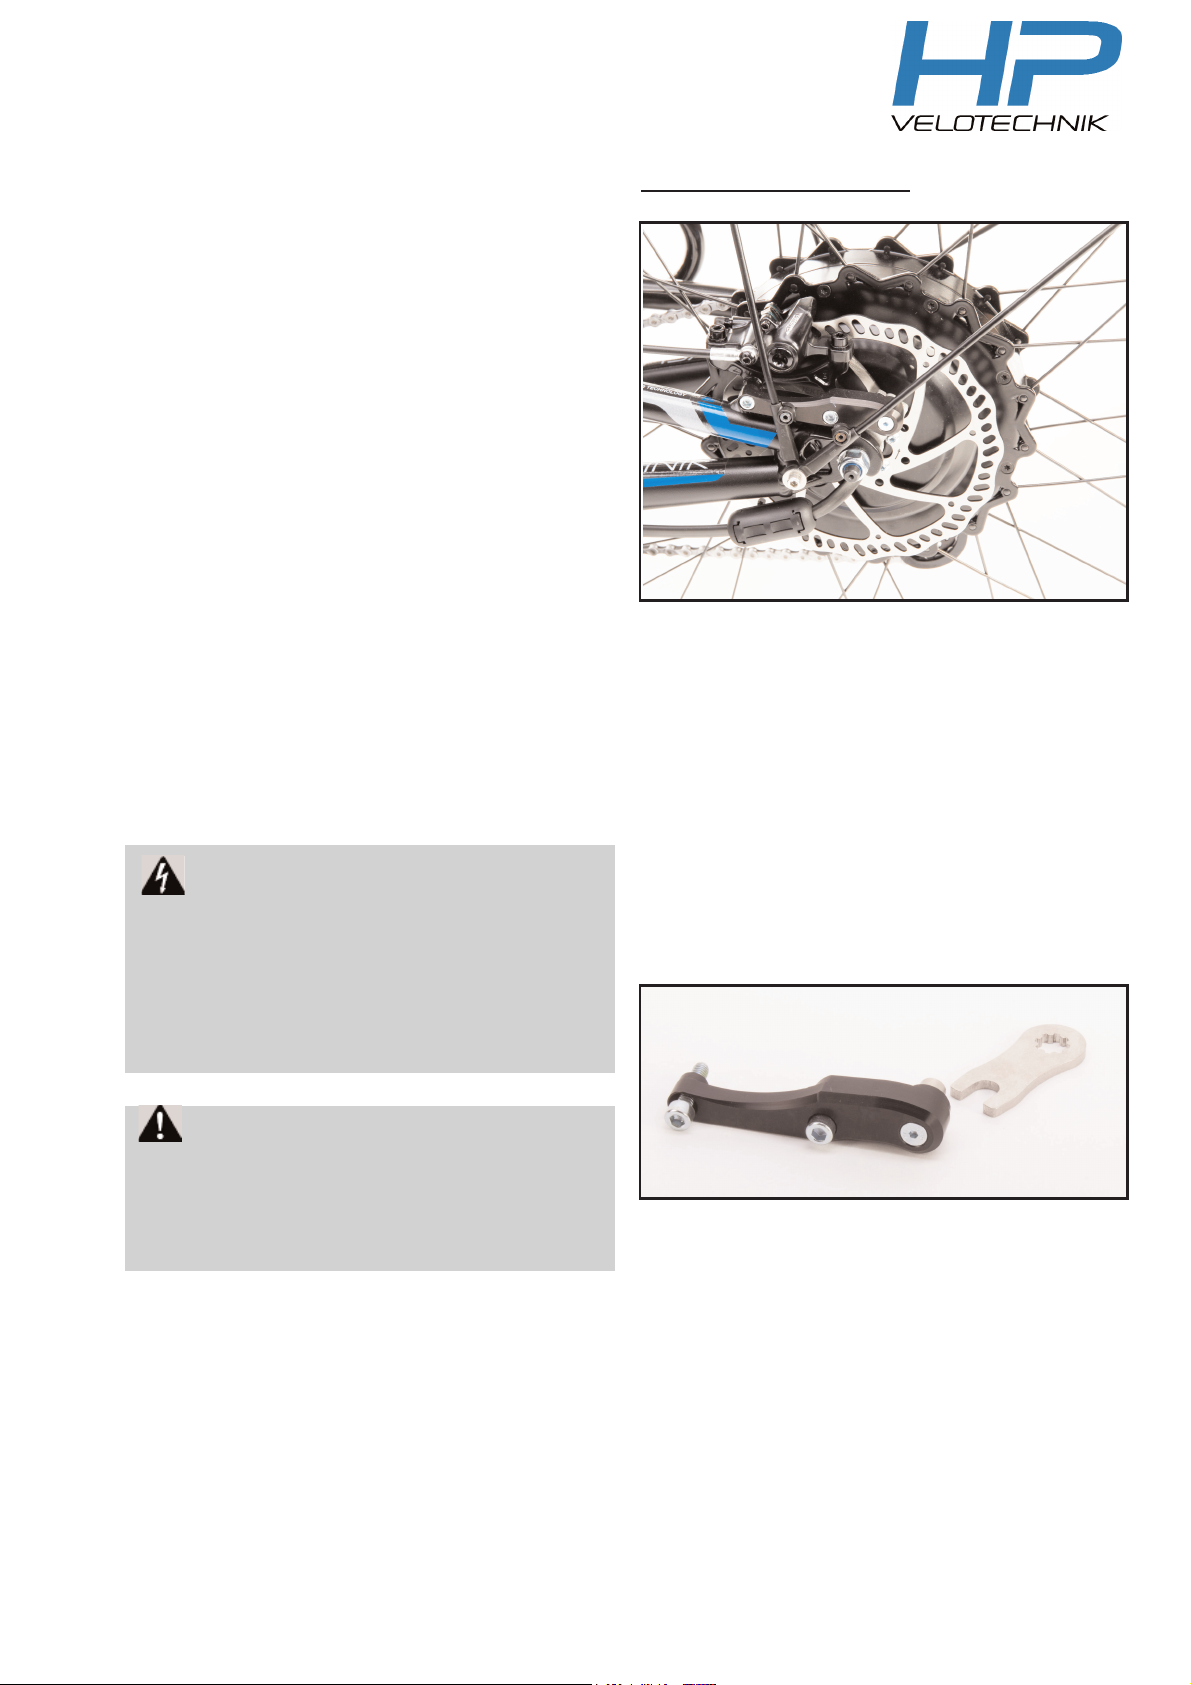
Figure 1: rear wheel with GO SwissDrive motor
Page 3

freehub bodyr
The freehub body can be replaced. Use
only the original GO SWISSDRIVE replacement part.Tighten the freewheel body
with max. 8 Nm.
Juli 2018
c.The wiring harness is to be installed at
an angle so that he can later be attached
in a
bow to the seat stay.
d. If a disc brake is fitted insert the brake
disc carefully in the brake calliper.
e. Now tighten the M10 axle nuts
evenly. Pay attention to the
Washers between frame and
Axle nuts.These must rest flat.
2. If a rim brake is fitted,
reattach the brake cable and
check if the rear wheel runs freely.
Also read the instructions in your bike
manual.
3. Check the display whether the system
is switched off. Connect the motor with
cable plug to the cable harness.
Danger! When using a disc brake,
pull the brake lever until a solid pressure
point is reached. It must not be possible to
pull the brake lever all the way to the handlebars.
Danger! Use only self-locking
M10x1 nuts. Original replacement nuts are
available from your dealer as
GO SWISSDRVE spare parts.
Danger! Always tighten the axle
nuts with a torque wrench and 45 Nm.
Attention! Pay attention to the
reverse polarity protection (geometric alignment) on the plug. Insert the plugs slowly
and sensitively and under no circumstances
by force.
Also pay attention to the seal on the plug.
When plugged in, this must be located
exactly in the socket provided for this purpose in order to guarantee tightness.
Attention! Make sure that the
cables are not under tension and are not cut
by cable ties when mounting.
 Loading...