

HPU Rehab EZee Life Rover 3, EZee Life Rover 4 User Manual

Rover 3 and 4
Scooters
User's Manual
Original instructions

Rover 3 and 4 2 User Manual (E) - Rev. Feb. 2012
Dear User,
Factory Direct Medical would like to thank you for choosing the Rover 3 and
4 scooter and wishes you safe and enjoyable journeys.
For proper operation and to maintain the scooter’s operational readiness, we
recommend that you read this user manual prior to using the scooter.
220 Wildcat Rd
Toronto, Ontario
M3J 2N5
Tel: 416-739-1267, Fax: 416-739-7171
Internet Mail: info@hpurehab.com
Internet Address: www.hpurehab.com

Rover 3 and 4 3 User Manual (E) - Rev. Feb. 2012
Table of Contents
Components ………………………………………………...
7
Safety Instructions ………………………………………….
9
Assembly Instructions ……………………………………...
13
Adjustments for Seating Comfort …….……………………
18
Operating the Scooter ………….…………………………..
19
Batteries and Charger ……………………………………...
23
Maintenance and Repairs …………………………………
27
Troubleshooting ………………………………………….…
29
Technical Specifications ……………………………………
31
Rover 3 and 4 4 User Manual (E) - Rev. Feb. 2012
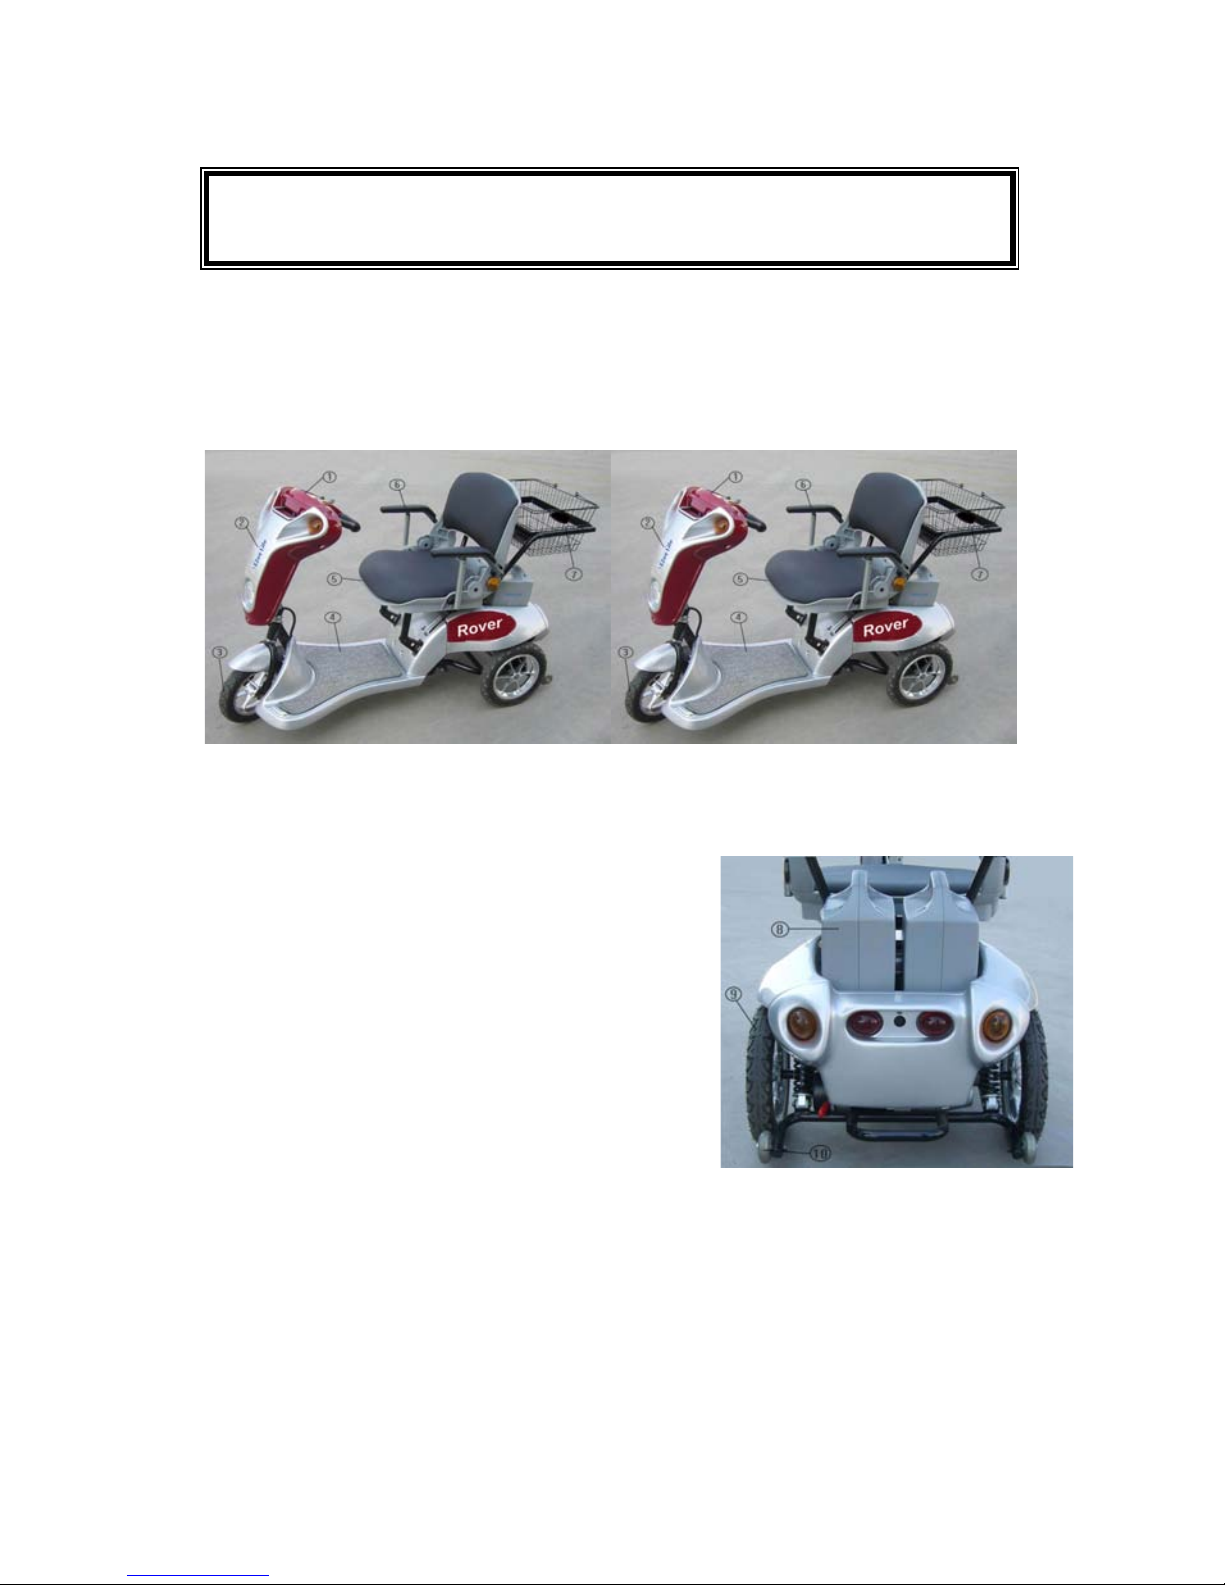
Components
Your power scooter comes partially disassembled for protection during
shipment. After unpacking, please familiarize yourself with the following
components (see Figs. 1, 2 and 3)
Figure 1 (Rover 4W) Figure 2 (Rover 3W)
6. Foldable armrests
7. Basket and support tube
8. Battery packs (detachable)
9. Rear Wheels Figure 3
10. Anti tip Wheels
11. Battery Charger
1. Control Panel
2. Tiller
3. Front Wheel
4. Foot Platform
5. Foldable Seat

Rover 3 and 4 5 User Manual (E) - Rev. Feb. 2012
Safety Instructions
Operation
These safety considerations and tips will help you operate the scooter safely.
The Scooter is a powerful electric vehicle, and the following rules will help
you prevent personal injury and damage to your scooter.
Make sure that your weight does not exceed the recommended weight
limit of the scooter (see Technical Specifications).
Do not carry passengers.
Always ensure that the power is switched off, when getting on or off of
the scooter.
When getting on and off the scooter, do not step on the foot rest.
At all times while driving, keep your feet on the foot rest.
Be aware of the environment around you when choosing a desired
speed. For indoor environments, we recommend that you select the
slowest speed setting. For outdoor operation select a speed that is
comfortable for you to control it safely.
Reduce speed when making sharp turns.
Do not switch off the power when the scooter is still moving forward.
This will bring the scooter to an extremely abrupt stop.
Avoid jerky stop/start motions as it will result in excessive battery drain
and increased tire wear. To break in an emergency, simply release the
forward/reverse lever.
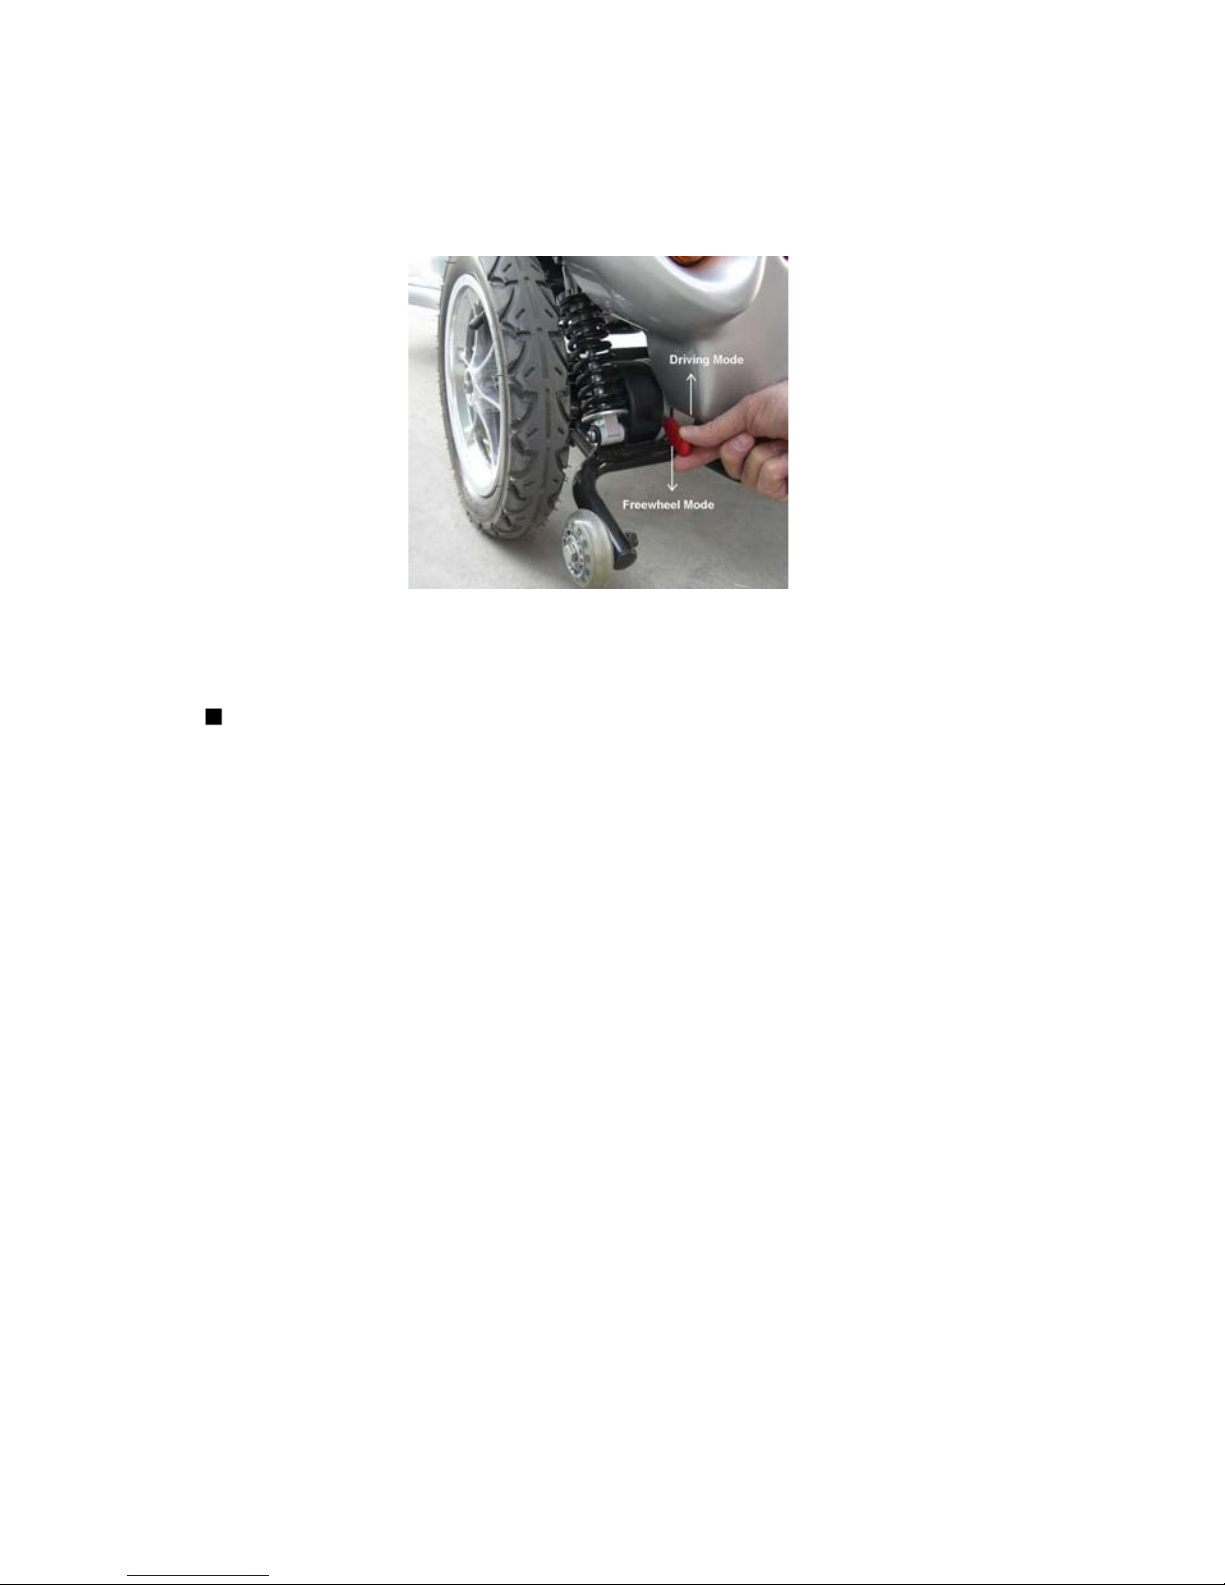
Make sure the wheel release lever is in driving mode prior to operation
(see Fig. 4).
Rover 3 and 4 6 User Manual (E) - Rev. Feb. 2012
Make sure the wheel release lever is in driving mode prior to operation
(see Fig. 4).
Figure 4
Make sure the forward/reverse lever is in the proper position according
to your desired direction.
Ramps and Curbs (Sidewalks)
Use extra caution when driving down a slope.
Never drive across a slope.
Do not turn sharply on a slope.
Do not drive in reverse on a slope or on a bumpy surface.
When driving over a curb or raised surface, make sure that the bottom
of the scooter has sufficient clearance (see Technical Specifications).

Rover 3 and 4 7 User Manual (E) - Rev. Feb. 2012
General Instructions
Do not attempt to lift or move a power scooter by any of its removable
parts. Personal injury and damage to the power scooter may result.
Do not drive the scooter on a major roadway.
Avoid driving in the dark or in times of limited vision.
Do not connect any electrical or mechanical devices to the scooter.
Doing so may cause personal injury or damage to equipment, and
voids the manufacturer’s warranty.
Do not operate your vehicle if it is not functioning properly. Contact
your service center immediately.
Influence of Medication or Alcohol
Check with your physician if you are taking any medication that may
affect your ability to operate your power scooter safely.
Do not operate your vehicle while you are under the influence of
alcohol, as it impairs your ability to operate your power scooter in a
safe manner.
Rover 3 and 4 8 User Manual (E) - Rev. Feb. 2012
Assembly Instructions
It is very easy to assembly your scooter. Please follow the steps below.
Contact your service center in any problems occur.
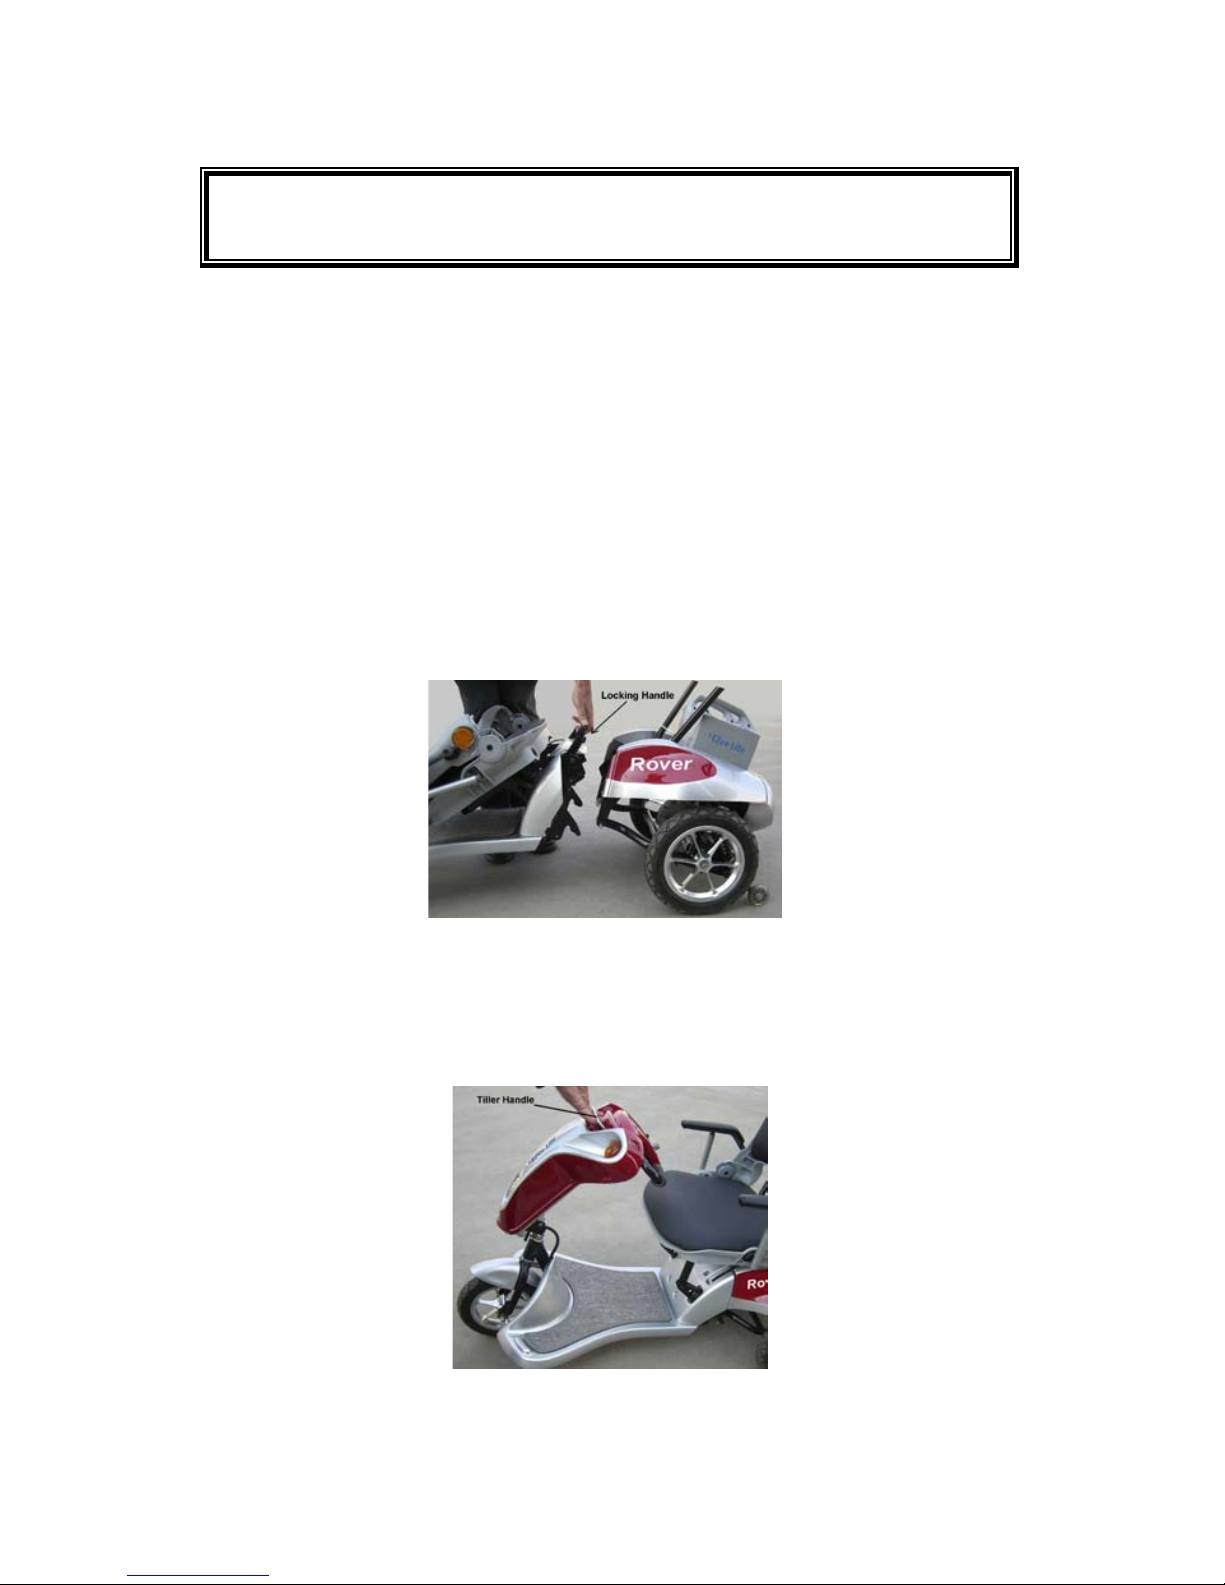
Chassis Installation
1. Insert both batteries into the back chassis (see Fig. 8).
2. Using the handle located behind the seat, raise the front chassis and
connect it to the back chassis. Make sure they are aligned and locked
(see Fig. 5).
Figure 5
Tiller Positioning
1. Pull up the tiller handle, in order to release the position lock (see Fig 6).
2. Adjust the tiller to a driving position, according to your own preference.
Figure 6
 Loading...