

HPI AZURE Installation And User Manual
Installation and User Manual
™
AZURE
By HPI
The fan should only be installed and used indoors. Not
suitable for outdoor use and not recommended for
coastal locations.
Isolation switch and wall plate required. To suit the location and décor
these parts must be supplied by the installing electrician.
CEILING FAN MUST BE INSTALLED
BY A LICENSED ELECTRICIAN
(NO OTHER PERSONS SHOULD ATTEMPT TO INSTALL THIS FAN)
*After installation, electricians must tick off all items on the
quick checklist and fill out their details towards the back of this
Installation Manual
ELECTRICIANS - TO PROTECT YOUR CUSTOMER’S WARRANTY, PLEASE READ
PAGE 2 OF THIS BOOKLET PRIOR TO THE INSTALLATION OF THIS PRODUCT.
For online warranty bookings visit: www.hunterpacific.com.au (24hours, 7 days)
For technical advice call: 1300 360 280 (Monday to Friday from 9am to 5pm EST)
Warranty Procedure*
* Warranty only available within Australia

IMPORTANT INFORMATION
ELECTRICIANS MUST READ PRIOR TO INSTALLATION
1. Distributor and installer details and purchase receipts are essential for on-site warranty claims
and must be presented to repair personnel. A page towards the back of this manual has been
allocated to allow you to record these details.
2. Fans and fixed wiring products must only be installed by persons who are appropriately licensed
by the applicable State regulatory body. Therefore, to protect our repair personnel, on-site
warranty claims will not be accepted if products have been installed by unlicensed persons.
3. Damage caused by incorrect installation, force-majeure, electrical surges, lightning, power grid
fluctuations, water or by connection to alternative power supply sources (such as solar inverters,
etc.) is not eligible for warranty repair.
4. Blades must be replaced only as a complete set. Blades are supplied only as a pre-balanced set
and the replacement of individual blades may void the warranty by causing mechanical damage
to the motor, excessive noise or premature wear.
5. When products are installed in a location requiring special access equipment (such as
scaffolding or scissor lifts, etc) the cost of providing, installing and operating special access
equipment must be borne by the site owner.
6. “This appliance is not intended for use by persons (including children) with reduced physical,
sensory or mental capabilities, or lack of experience and knowledge, unless they have been given supervision or instruction concerning use of the appliance by a person responsible for their
safety. Children should be supervised to ensure that they do not play with the appliance.” (AS/
NZS 60335.1 C1.7.12)
consumer protection against defects or poor workmanship in provision of services (such as
installing a ceiling fan). To protect yourself and the consumer these instructions must be
followed. Failure to do so may result in the consumer making a claim against you for
consequential loss or damage.
7. A double pole isolation switch providing full disconnection of both fan and light must be fitted in
accordance with the wiring rules (AS/NZS 60335.1 C1.7.12.2).
DANGER: Contact with ceiling fan blades can cause serious injury or death.
To electricians and installers. The Australian Competition and Consumer Law 2010 mandates
For safety, and to protect your customers warranty, the following must be taken into
account when installing and operating the product(s):
(a) DO NOT USE SOLID-STATE WALL CONTROLLERS. Neither leading nor lagging edge
controllers will give satisfactory performance. Wall controls must only be types approved
for use by HPI.
(b) The fan, light and bracket must be earthed.
(c) Fan and light must be run from the same final circuit.
(d) Mounting bracket must be firmly screwed to a solid structure such as a concrete ceiling,
steel structure or timber framing. If additional bracing is added it must be firmly secured to
the rafters and not left floating on the ceiling. Special mounts, such as T-hooks, are
available for certain types of installation. DO NOT USE COUNTERSUNK SCREWS.
(e) After installation, fan blades must be at least 2.1 m (7 feet) above floor level.
(f) The use of these products by children and the infirm must be under supervision.
IF THERE ARE ANY PROBLEMS WITH THE PRODUCT AT TIME OF
INSTALLATION THE INSTALLER MUST CONTACT THE WARRANTY
HOT LINE NUMBER 1300 360 280 BEFORE LEAVING THE JOB
SITE. PLEASE DO NOT REMOVE THE FAN FROM THE CEILING
ONCE INSTALLED UNLESS INSTRUCTED TO DO SO.
2
™
Installation &
AZURE
By HPI
IMPORTANT INFORMATION
The table below contains information that can help you quickly identify the product you are
installing. If you have any difficulties installing our product we recommend you to call our
technical advice line on 1300 360 280.
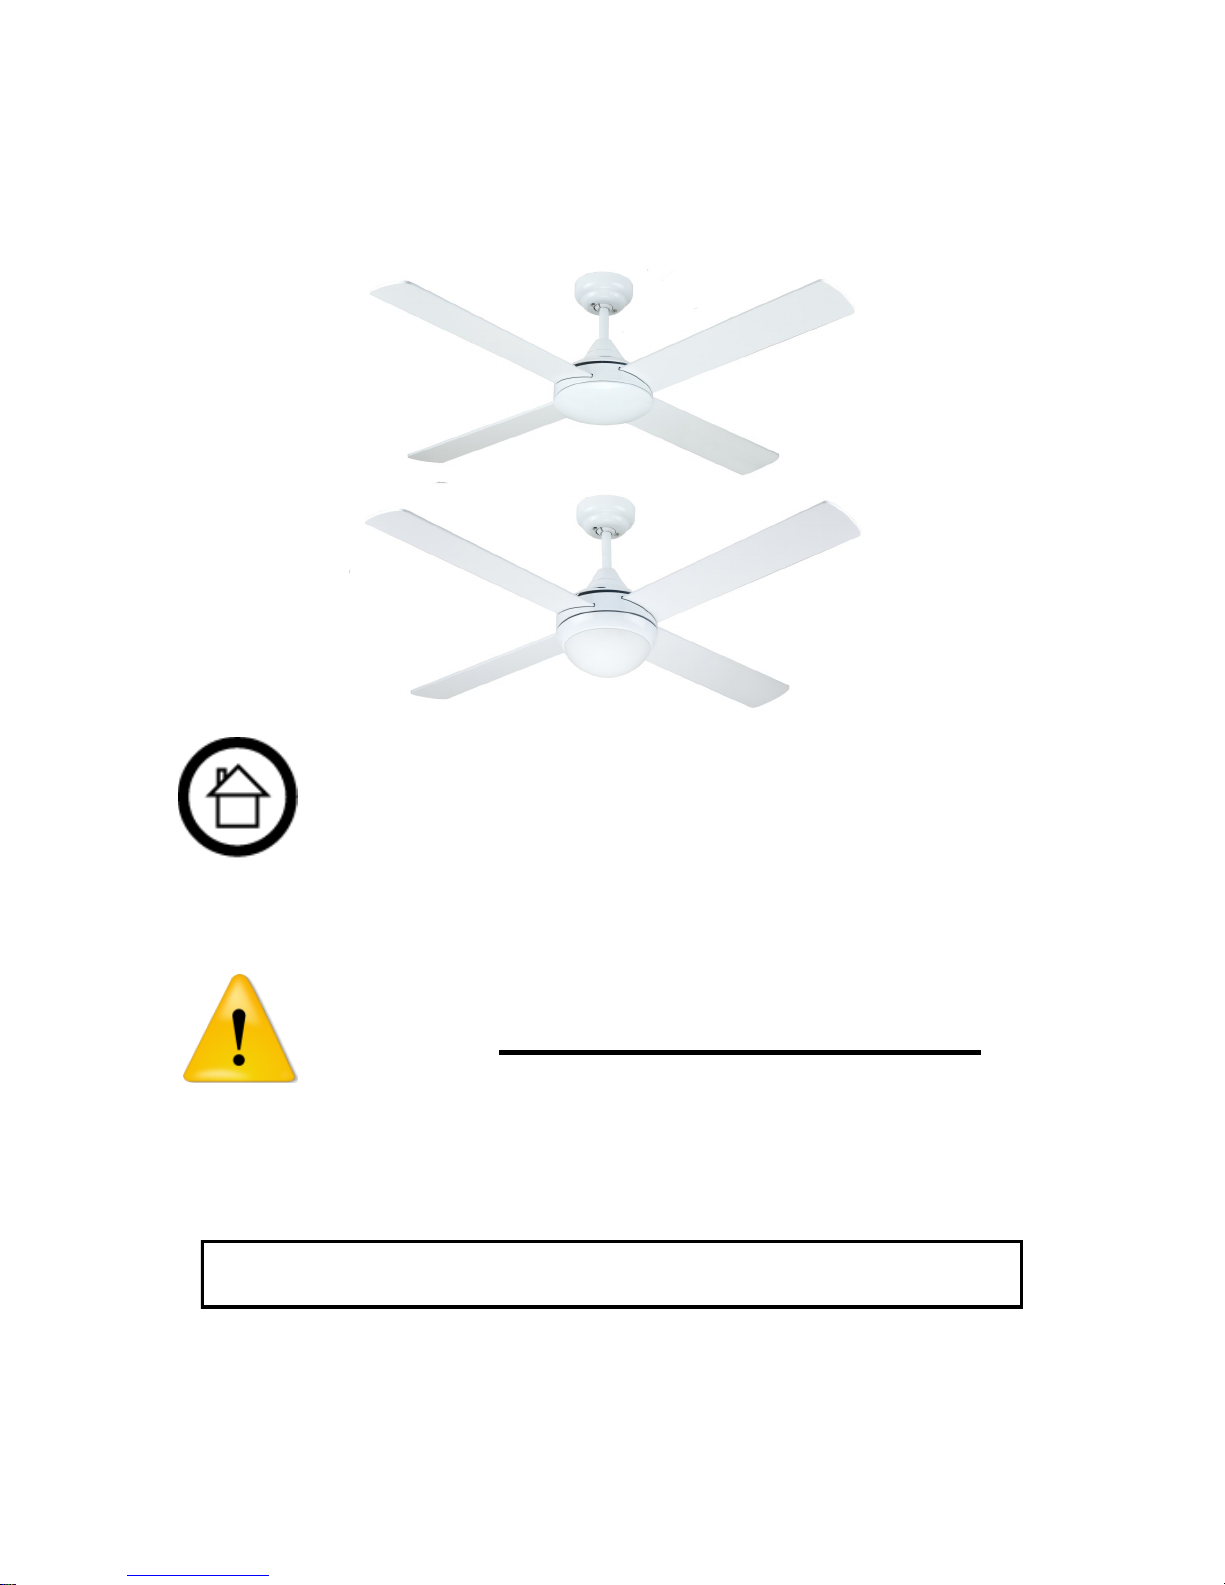
CODE SIZE FAN MODEL NAME COLOUR
User Manual
A2322 122cm (48”) Azure without light
A2323 122cm (48”) Azure without light
A2324 122cm (48”) Azure without light
A2325 122cm (48”)
A2326 122cm (48”)
A2327 122cm (48”)
A2328 122cm (48”)
A2329 122cm (48”)
* Lamps for E27 Lamp Holders not supplied.
Azure with light
(E27 Lamp Holders)*
Azure with light
(E27 Lamp Holders)*
Azure with light
(18W CCT LED Light)
Azure with light
(18W CCT LED Light)
Azure with light
(18W CCT LED Light)
Matt Black motor &
Matt Black Blades
White Motor & White
Blades
Brushed Nickel Motor &
Brushed Silver Blades
White Motor & White
Blades
Brushed Nickel Motor &
Brushed Silver Blades
White Motor & White
Blades
Brushed Nickel Motor &
Brushed Silver Blades
Matt Black Motor &
Matt Black Blades
* Do not exceed maximum rated lamp capacities:
E27: 40W incandescent or 20W CFL/or LED (each lamp holder)
3
AZURE
By HPI
™
Installation &
User Manual
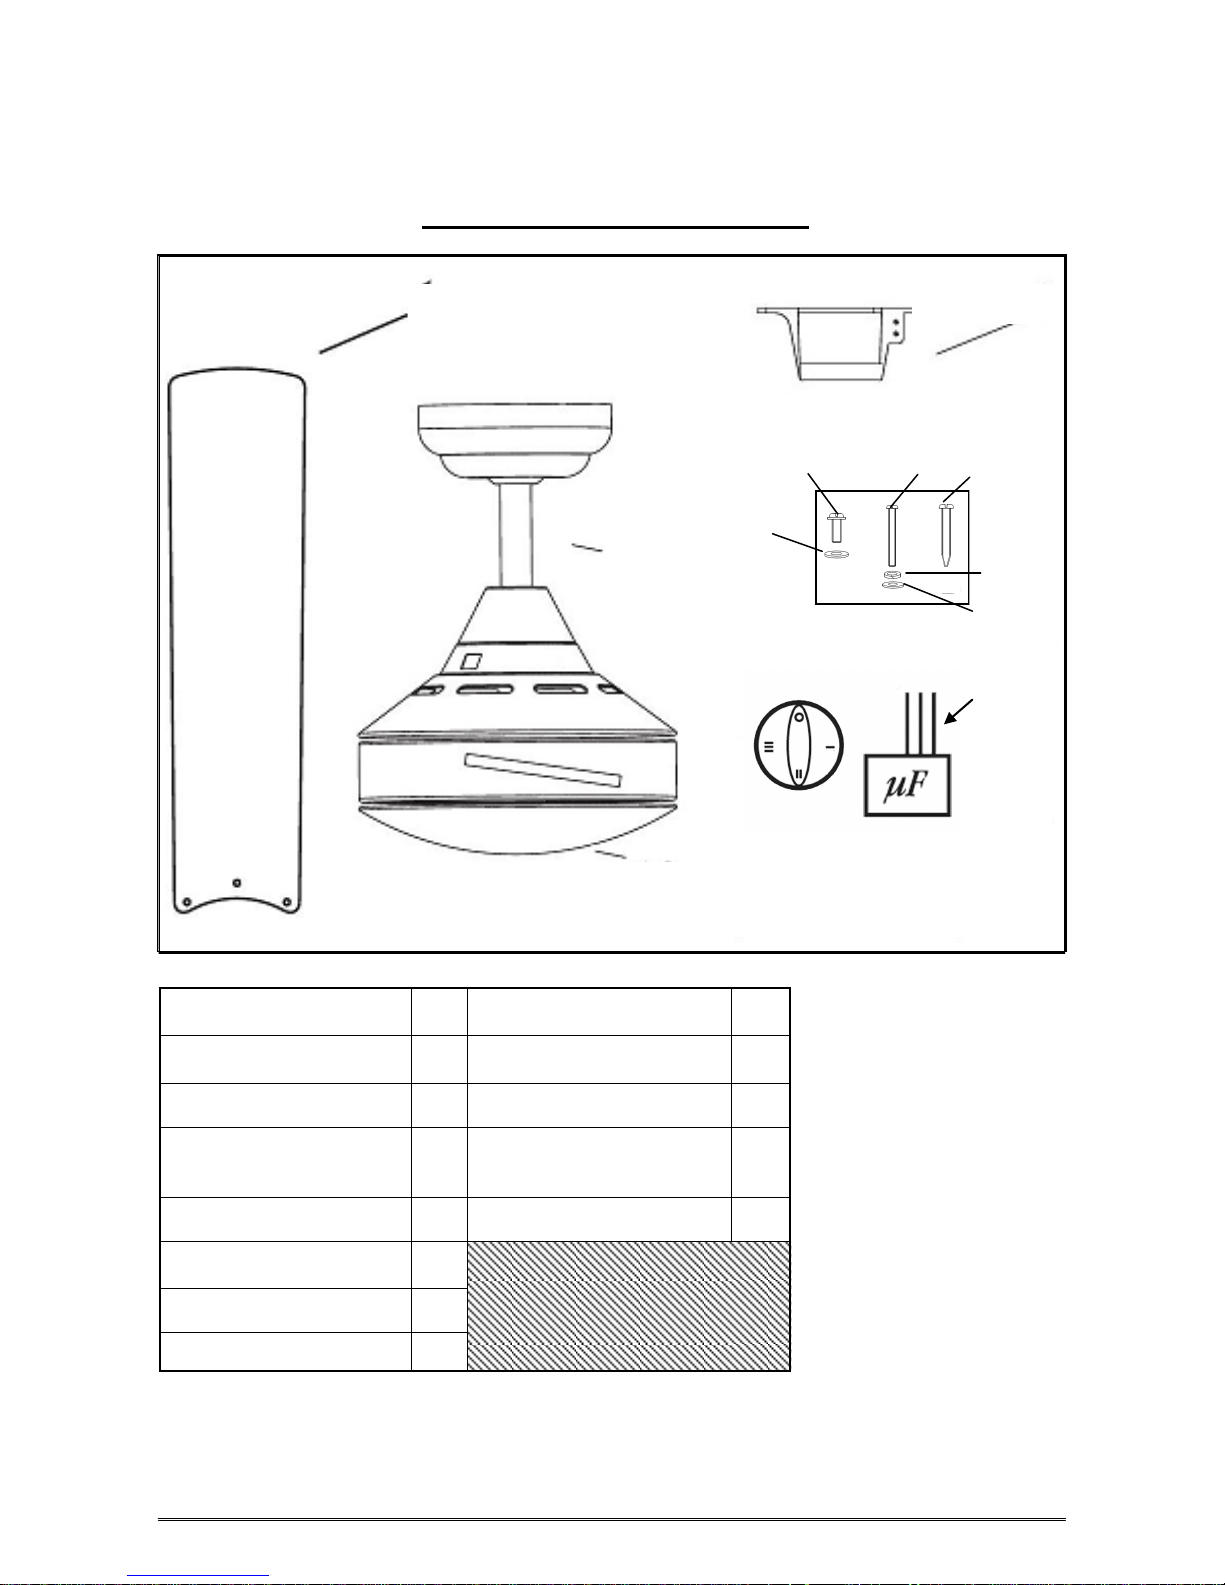
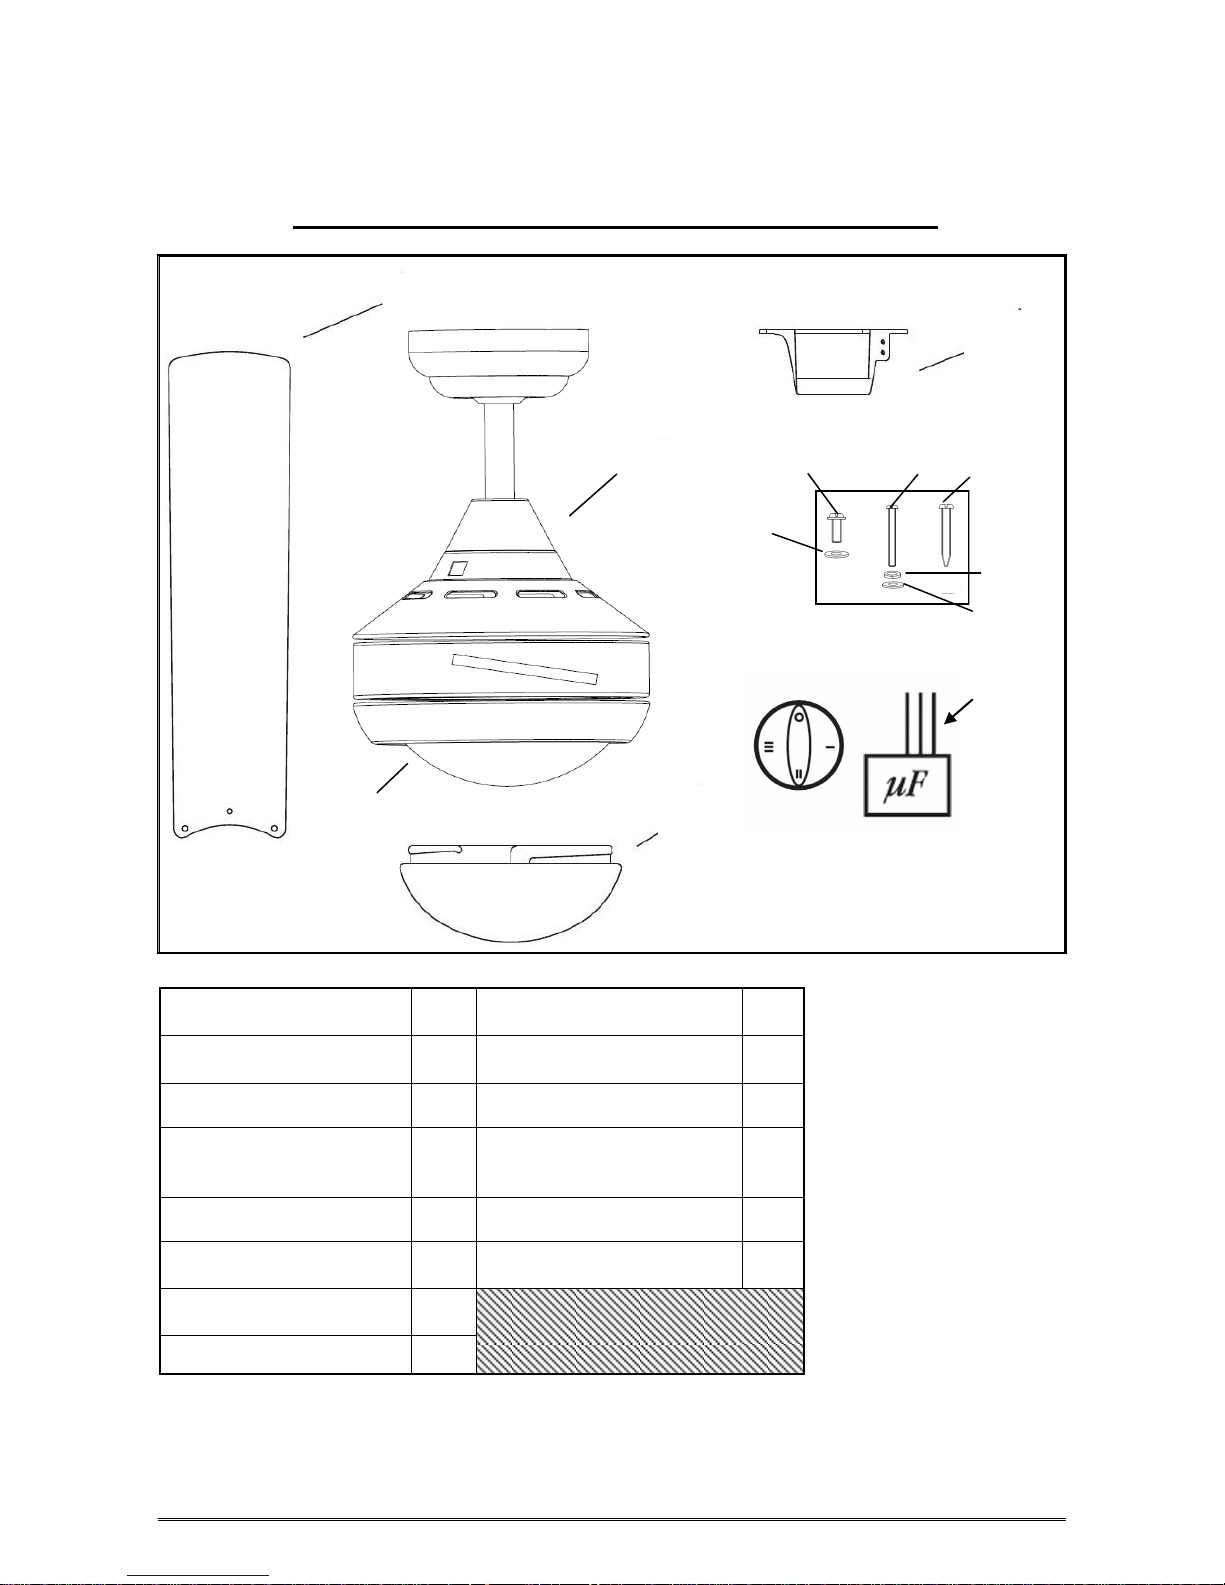
Parts List - Azure no light
Blade
Azure
fan
Base Plate
Blade
Screw
Blade Screw
Washer
Hanger Bracket
Screws
Bracket
Screw
Flat
Washer
Wall
Controller
Spring
Washer
Part Qty Part Qty
Hanger Bracket 1 Spring washer 2
Bracket Mounting Screw 2 Flat washer 2
Azure fan body (Preassembled Fan motor,
down rod, and canopy )
Blades 4 Base Plate 1
Blade screw washer 12
Blade screws 12
Screws 2
Unpack ceiling fan carefully. Place fan motor on a cloth or soft surface to avoid damaging the finish.
Do not lay motor housing on its side as the decorative housing may become bent or damaged.
3 speed Wall Control kit
1
(includes wall mech & capacitor)
4
1
AZURE
By HPI
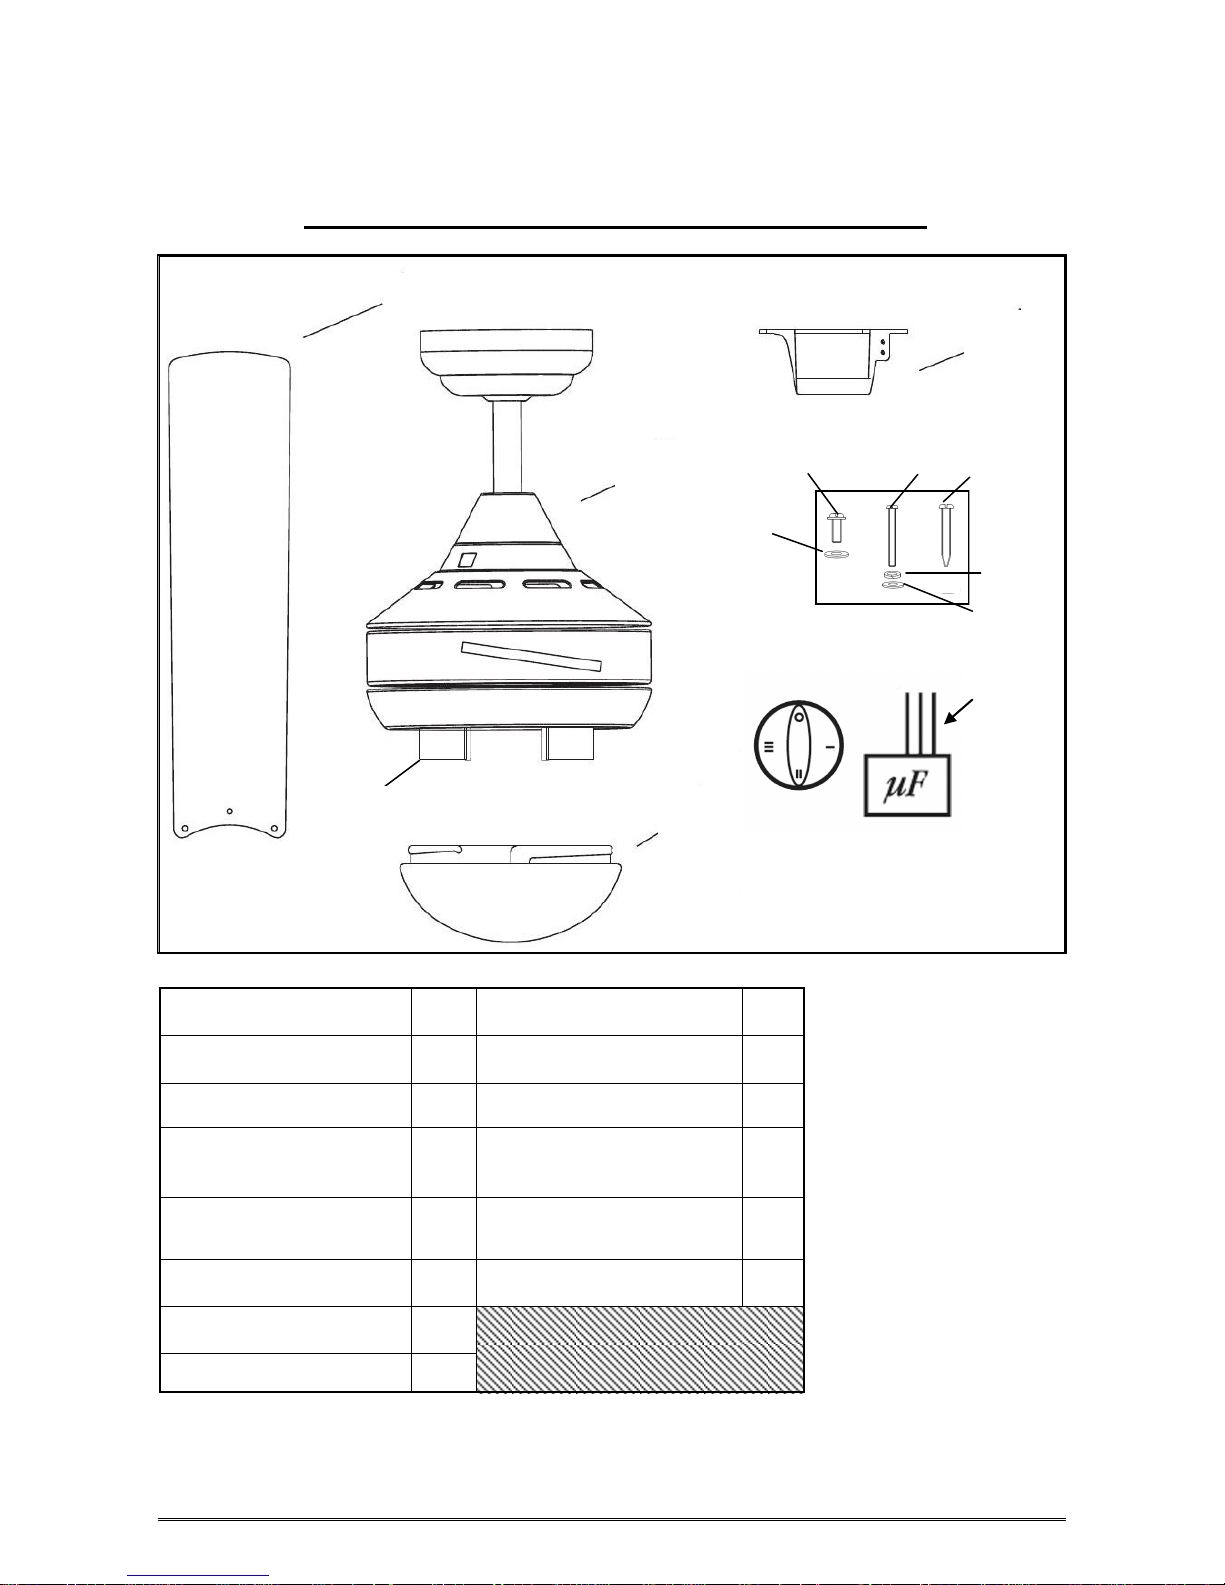
Parts List - Azure with E27 Lamp Holders
Blade
™
Installation &
User Manual
Hanger
Bracket
Azure
fan body
E27 Lamp
Holders
Part Qty Part Qty
Glass
Diffuser
Blade
Screw
Blade Screw
Washer
Screws
Bracket
Screw
Spring
Washer
Flat
Washer
Wall
Controller
Hanger Bracket 1 Spring washer 2
Bracket Mounting Screw 2 Flat washer 2
Azure fan body (Preassembled Fan motor,
down rod, and canopy )
Blades 4 Glass Diffuser 1
Blade screw washer 12
Blade screws 12
Screws 2
Unpack ceiling fan carefully. Place fan motor on a cloth or soft surface to avoid damaging the finish.
Do not lay motor housing on its side as the decorative housing may become bent or damaged.
3 speed Wall Control kit
1
(includes wall mech & capacitor)
Twin E27 Lamp Holders
(Bulbs not supplied)
5
1
1
AZURE
By HPI
Parts List - Azure with 18W CCT LED Light
Blade
™
Installation &
User Manual
Hanger
Bracket
Azure
fan body
18W LED
Light
Part Qty Part Qty
Glass
Diffuser
Blade
Screw
Blade Screw
Washer
Screws
Bracket
Screw
Spring
Washer
Flat
Washer
Wall
Controller
Hanger Bracket 1 Spring washer 2
Bracket Mounting Screw 2 Flat washer 2
Azure fan body (Preassembled Fan motor,
down rod, and canopy )
Blades 4 Glass Diffuser 1
Blade screw washer 12 18W CCT LED Light 1
Blade screws 12
Screws 2
Unpack ceiling fan carefully. Place fan motor on a cloth or soft surface to avoid damaging the finish.
Do not lay motor housing on its side as the decorative housing may become bent or damaged.
3 speed Wall Control kit
1
(includes wall mech & capacitor)
6
1
 Loading...