

Page 1
CRT Monitor s7500mm
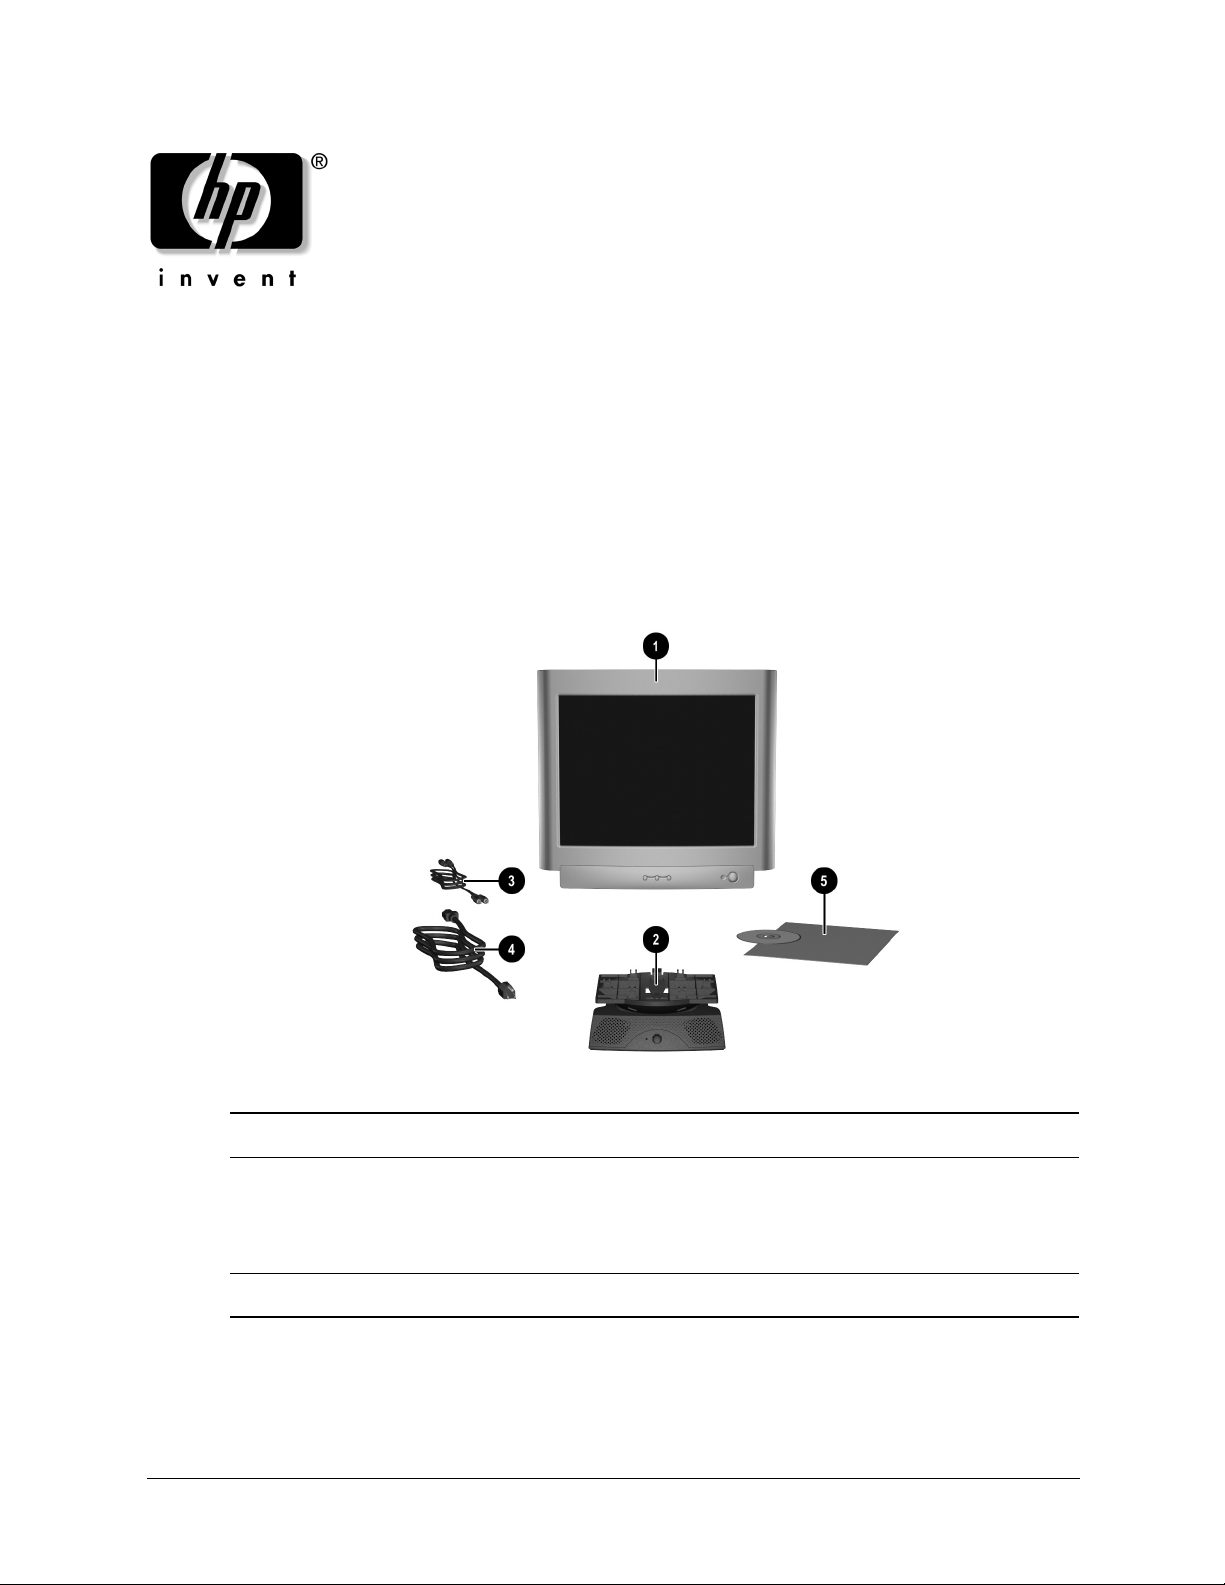
Ensure that the following items are included with the monitor. If any items are missing, contact
your HP authorized service provider.
1 s7500mm 17” monitor 4 Monitor power cable
2 Multimedia speaker stand 5 Documentation kit (Refer to the Reference
Guide on the Software and Reference
Library CD for detailed instructions on
operating the monitor.)
3 Microphone/audio connectors cable
www.hp.com 1
Page 2
CRT Monitor s7500mm
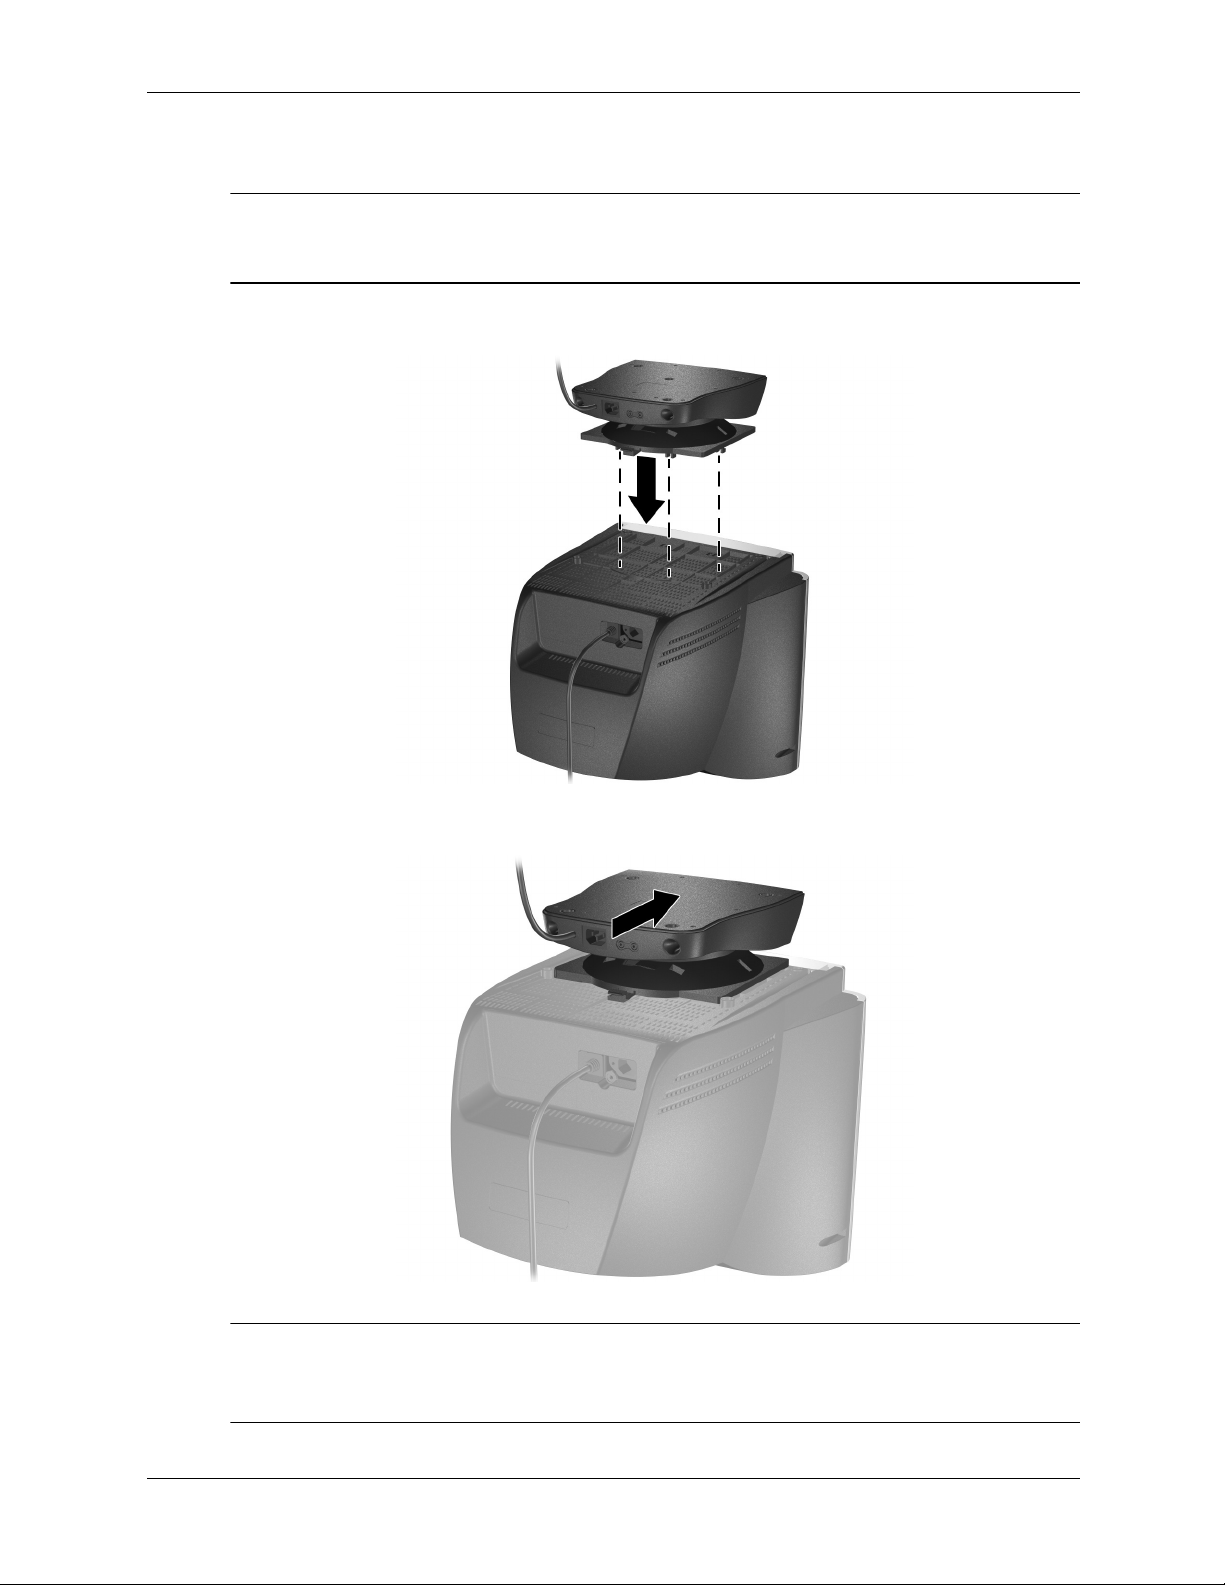
Attaching the Multimedia Speaker Stand
If a monitor base is attached to the monitor, remove it before attaching the multimedia speaker
✎
stand. Refer to “Removing and Reattaching the Stand to a Replacement Monitor” in this
document for instructions on removing the monitor base.
1. Align the hooks on the stand with the sockets on the bottom of the monitor and attach the
stand.
2. Push the stand toward the front of the monitor until it stops.
If repair service is required on the s7500mm monitor, do not return the multimedia speaker stand with the
✎
monitor. A replacement monitor will be sent to you and will not include the multimedia speaker stand.
Before packing the defective monitor remove the multimedia speaker stand from the monitor. Return only
the defective monitor to HP.
2 www.hp.com
Page 3
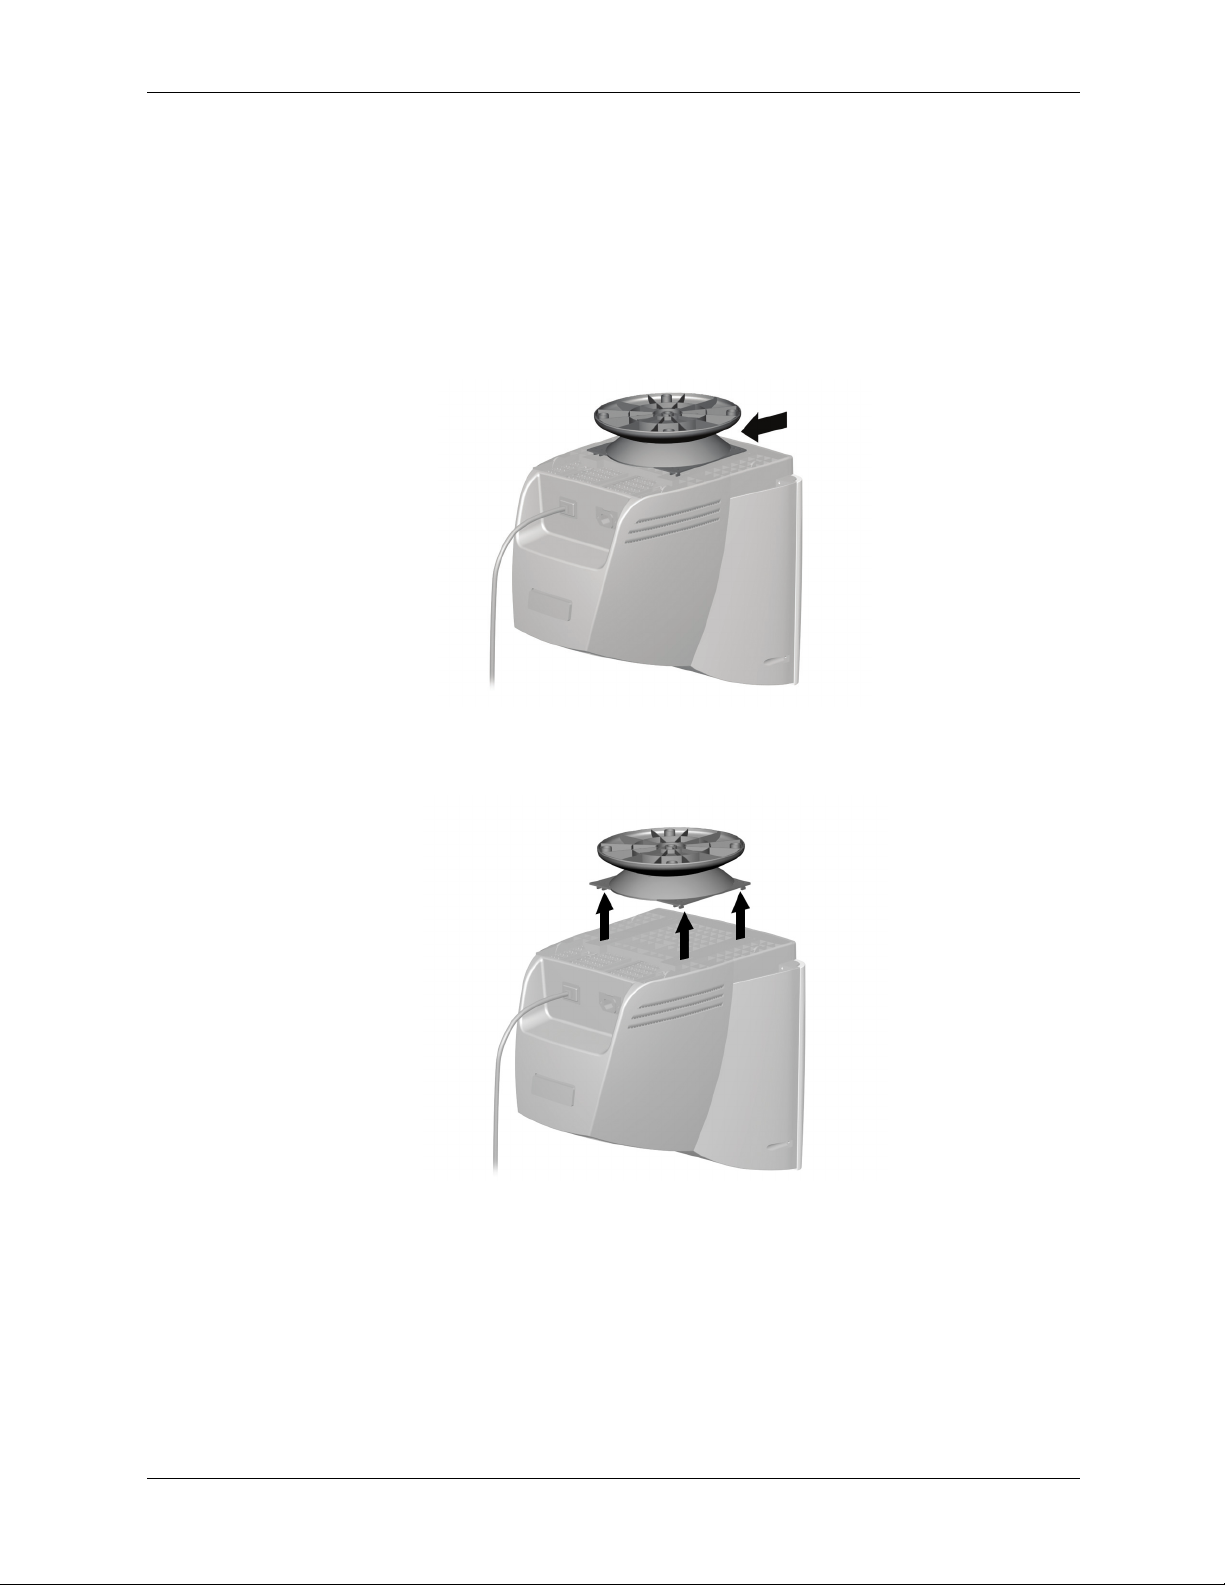
Removing and Reattaching the Stand
to a Replacement Monitor
Use the following procedure to:
■ Remove the monitor base from the replacement monitor.
■ Reattach the multimedia speaker stand to the replacement monitor.
1. To remove the monitor base, push the base toward the rear of the monitor until it stops.
CRT Monitor s7500mm
2. Lift the base from the monitor and either return to it to HP along with the defective monitor
or save the base for future use.
3. To reattach the multimedia speaker stand to the replacement monitor, refer to “Attaching the
Multimedia Speaker Stand” on the previous page for instructions.
www.hp.com 3
Page 4

CRT Monitor s7500mm
Connecting the Monitor and Stand
To identify the components on the multimedia speaker stand, refer to “Identifying the
✎
Multimedia Speaker Stand Components” in this document.
1. Turn off the computer and unplug the power cord.
2. Connect the monitor signal cable 1 to the computer’s video port (video board, video card, or
graphics card).
3. Connect the microphone connector on one end of the microphone/audio connectors cable 2
to the microphone input jack on the computer’s sound card or microphone jack. Connect the
other end of the microphone connector to the micicrophone input jack on the rear of the
multimedia speaker stand.
4. Connect the audio connector on one end of the microphone/audio connectors cable 3 to the
stereo output jack on the computer’s sound card or audio jack. Connect the other end of the
audio connector to the audio input jack on the rear of the multimedia speaker stand.
5. Connect the attached power cable of the multimedia speaker stand 4 to the rear of the
monitor.
6. Connect the monitor power cord 5 to the power connector on the rear of the multimedia
speaker stand and the other end into a nearby wall outlet.
7. Reconnect the computer power cord 6 into the wall outlet.
8. Turn on the computer and monitor. The hardware installation is now complete.
9. On the multimedia speaker stand, turn the on/off volume control clockwise until it clicks to
turn on the sound.
10. Using the computer, start a sound program to play music or sound effects while you slowly
turn the on/off volume control clockwise to adjust to your desired volume level.
4 www.hp.com
Page 5

CRT Monitor s7500mm
Sound distortion may occur when the monitor is placed on top of a mostly hollow cabinet such as
✎
the computer. If this occurs, place a pad underneath the multimedia speaker stand. High sound
volume may also cause sound distortion; lower the volume.
Disconnecting Speaker Cables
1. Turn off the speakers, monitor and computer before removing or connecting cables.
2. Disconnect both the audio and microphone connectors on the microphone/audio connectors
cable from the Multimedia Speaker Stand and from the computer’s sound card or jacks.
Identifying the Multimedia Speaker Stand Components
Front Components
1 Power LED indicator light (green) glows
when the speakers are turned on.
www.hp.com 5
2 On/Off volume control turns the sound on
and off and adjusts sound level.
Page 6

CRT Monitor s7500mm
Rear Components
1 Microphone input jack connects the
microphone connector (pink) of the
microphone/audio connectors cable.
2 Audio input jack connects the audio
connector (green) of the
microphone/audio connectors cable.
3 AC power connector connects the monitor
power cable.
4 Attached power cable plugs into the
monitor’s power connector.
5 Microphone connector
6 Headphones connector
6 www.hp.com
Page 7

CRT Monitor s7500mm
www.hp.com 7
Page 8

CRT Monitor s7500mm
© Copyright 2003 Hewlett-Packard Development Company, L.P. The information contained herein is subject to change without
notice. The only warranties for HP products and services are set forth in the express warranty statements accompanying such
products and services. Nothing herein should be construed as constituting an additional warranty. HP shall not be liable for technical
or editorial errors or omissions contained herein.
8 www.hp.com
 Loading...