

Page 1

HP ProLiant DL140 Server
Setup and Installation Guide
November 2003 (Second Edition)
Part Number 349109-002
This guide provides IT administrators and technici ans setup and installation requirements, precautions, and
instructions pertaining to the servers. The guide explains how to install hardware options for enhanced system
performance, how to install and configure memory, how to install expansion boards, how to install the server
in the rack, and how to cable and configure the servers.
2003 Hewlett-Packard Development Company, L.P.
Microsoft® and Windows NT® are U.S registered trademarks of Microsoft Corporation.
Hewlett-Packard Company shall not be liable for technical or editorial errors or omissions contained herein.
The information in this document is provided “as is” without warranty of any kind and is subject to change
without notice. The warranties for HP products are set forth in the express limited warranty statements
accompanying such products. Nothing herein should be construed as constituting an additional warranty.
HP ProLiant DL140 Server Setup and Installation Guide
November 2003 (Second Edition)
Part Number 3491 09-002
Page 2

Contents
ABOUT THIS GUIDE
I
NTENDED AUDIENCE................................................................................................................................................ V
Important Safety Information................................................................................................................................v
Symbols on Equipment.........................................................................................................................................v
Rack Stability.......................................................................................................................................................vi
Symbols in Text...................................................................................................................................................vi
Text Conventions............................................................................................................................................... vii
Related Documents............................................................................................................................................ vii
Getting Help....................................................................................................................................................... vii
HP Technical Support...................................................................................................................................................... vii
HP Website.......................................................................................................................................................................vii
HP Authorized Reseller...................................................................................................................................................viii
Reader’s Comments .......................................................................................................................................... viii
CHAPTER 1.................................................................................................................................................................1
S
ERVER FEATURES.....................................................................................................................................................1
HP ProLiant DL140 Server Features....................................................................................................................1
Warranties .............................................................................................................................................................1
Server Configuration and Management................................................................................................................1
Security.................................................................................................................................................................1
CHAPTER 2.................................................................................................................................................................2
P
LANNING THE SERVER INSTALLATION .....................................................................................................................2
Server Installation Overview ................................................................................................................................2
Optimum Environment.........................................................................................................................................2
Space and Airflow Requirements.......................................................................................................................................2
Temperature Requirements ................................................................................................................................................3
Power Requirements..........................................................................................................................................................3
Grounding Requirements ...................................................................................................................................................4
Rack Warnings and Cautions................................................................................................................................4
Server Warnings and Cautions..............................................................................................................................5
Server Shipping Contents .....................................................................................................................................6
CHAPTER 3.................................................................................................................................................................7
I
NSTALLING HARDWARE OPTIONS .............................................................................................................................7
Accessing Internal Server Components................................................................................................................7
Identifying System Board Components..............................................................................................................10
Installing Additional Memory.............................................................................................................................11
Installing an Expansion Board............................................................................................................................12
Removing the PCI Riser Board Assembly.......................................................................................................................12
Installing the Expansion Board ........................................................................................................................................13
Installing ATA Hard Drives................................................................................................................................15
Installing a CD-ROM Drive Assembly...............................................................................................................17
Installing a Processor..........................................................................................................................................20
HP ProLiant DL140 Server Setup and Installation Guide ii
Page 3

CHAPTER 4...............................................................................................................................................................24
S
ERVER INSTALLATION............................................................................................................................................24
Server Installation Procedures ............................................................................................................................24
Installing the Rack Rails...................................................................................................................................................24
Connecting the Peripheral Device Cables and the Power Cord..........................................................................26
Powering Up the Server......................................................................................................................................27
Installation Sequence..........................................................................................................................................27
Operating System Purchased Separately.......................................................................................................................... 27
Preconfigured Operating System......................................................................................................................................28
Registering the Server.........................................................................................................................................28
Routine Maintenance..........................................................................................................................................29
Optional Installation Service...............................................................................................................................29
CHAPTER 5...............................................................................................................................................................30
S
ERVER CONFIGURATION AND UTILITIES ................................................................................................................30
BIOS Setup.........................................................................................................................................................30
Starting Setup................................................................................................................. .................................................. 30
Recording Your Setup Settings........................................................................................................................................30
Navigating Setup Utility Screens .....................................................................................................................................30
Setup Screens................................................................................................................................................................... 31
Automatic Server Recovery................................................................................................................................34
Power-On Self-Test ............................................................................................................................................34
System BIOS Update..........................................................................................................................................35
IPMI Event Log..................................................................................................................................................35
BIOS Beep Codes...............................................................................................................................................36
APPENDIX A.............................................................................................................................................................37
REGULATORY COMPLIANCE NOTICES......................................................................................................................37
Regulatory Compliance Identification Numbers.................................................................................................37
Federal Communications Commission Notice....................................................................................................37
Class A Equipment...........................................................................................................................................................37
Class B Equipment........................................................................................................................................................... 38
Declaration of Conformity for Products Marked with the FCC Logo – United States Only............................................38
Modifications................................................................................................................................................................... 39
Cables............................................................................................................................................................................... 39
Canadian Notice (Avis Canadien).......................................................................................................................39
Class A Equipment...........................................................................................................................................................39
Class B Equipment........................................................................................................................................................... 39
European Union Notice.......................................................................................................................................39
Japanese Notice...................................................................................................................................................40
KOREAN NOTICE............................................................................................................................................40
Class A Equipment...........................................................................................................................................................40
Class B Equipment........................................................................................................................................................... 40
BSMI Notice....................................................................................................................................................... 41
Laser Devices......................................................................................................................................................41
Laser Safety Warnings..................................................................................................................................................... 41
Compliance with CDRH Regulations...............................................................................................................................41
Compliance with International Regulations.....................................................................................................................41
Laser Product Label.........................................................................................................................................................42
Laser Information............................................................................................................................................................. 42
Battery Replacement Notice...............................................................................................................................42
Power Cords........................................................................................................................................................43
Mouse Compliance Statement ............................................................................................................................43
HP ProLiant DL140 Server Setup and Installation Guide iii
Page 4

APPENDIX B.............................................................................................................................................................44
E
LECTROSTATIC DISCHARGE ...................................................................................................................................44
Preventing Electrostatic Damage........................................................................................................................44
Grounding Methods............................................................................................................................................44
APPENDIX C.............................................................................................................................................................45
T
ROUBLESHOOTING .................................................................................................................................................45
When the Server Does Not Start.........................................................................................................................45
Diagnosis Steps................................................................................................................................................... 46
Problems After Initial Startup.............................................................................................................................50
Other Troubleshooting Resources.......................................................................................................................51
APPENDIX D.............................................................................................................................................................52
LED
S AND SWITCHES ..............................................................................................................................................52
Status Indicators..................................................................................................................................................52
Front Panel LED Indicators.............................................................................................................................................. 52
Switches..............................................................................................................................................................53
System Configuration Switch (SW1)............................................................................................................................... 53
Clearing and Resetting System Password Settings ........................................................................................................... 54
Clearing and Resetting System Configuration Settings.................................................................................................... 54
Setting the NIC Operating Mode...................................................................................................................................... 55
APPENDIX E.............................................................................................................................................................56
S
ERVER SPECIFICATIONS .........................................................................................................................................56
Operating and Performance Specifications......................................................................................................... 56
HP ProLiant DL140 Server Setup and Installation Guide iv
Page 5
This guide is designed to be used as step-by-step instructions for ins ta llat ion and as a
reference for operation, troubleshoot ing, and fut ure up grade s for the HP
ProLiant DL140 server.
Intended Audience
This guide is intended for anyone configuring a ProLiant DL140 server. A moderate level of
server-based knowledge and experience is assumed.
About This Guide
Important Safety Information
Before installing this product, read the Important Safety Information document provided.
Symbols on Equipment
The following symbols may be placed on equipment to indicate the presence of potentially
hazardous conditions:
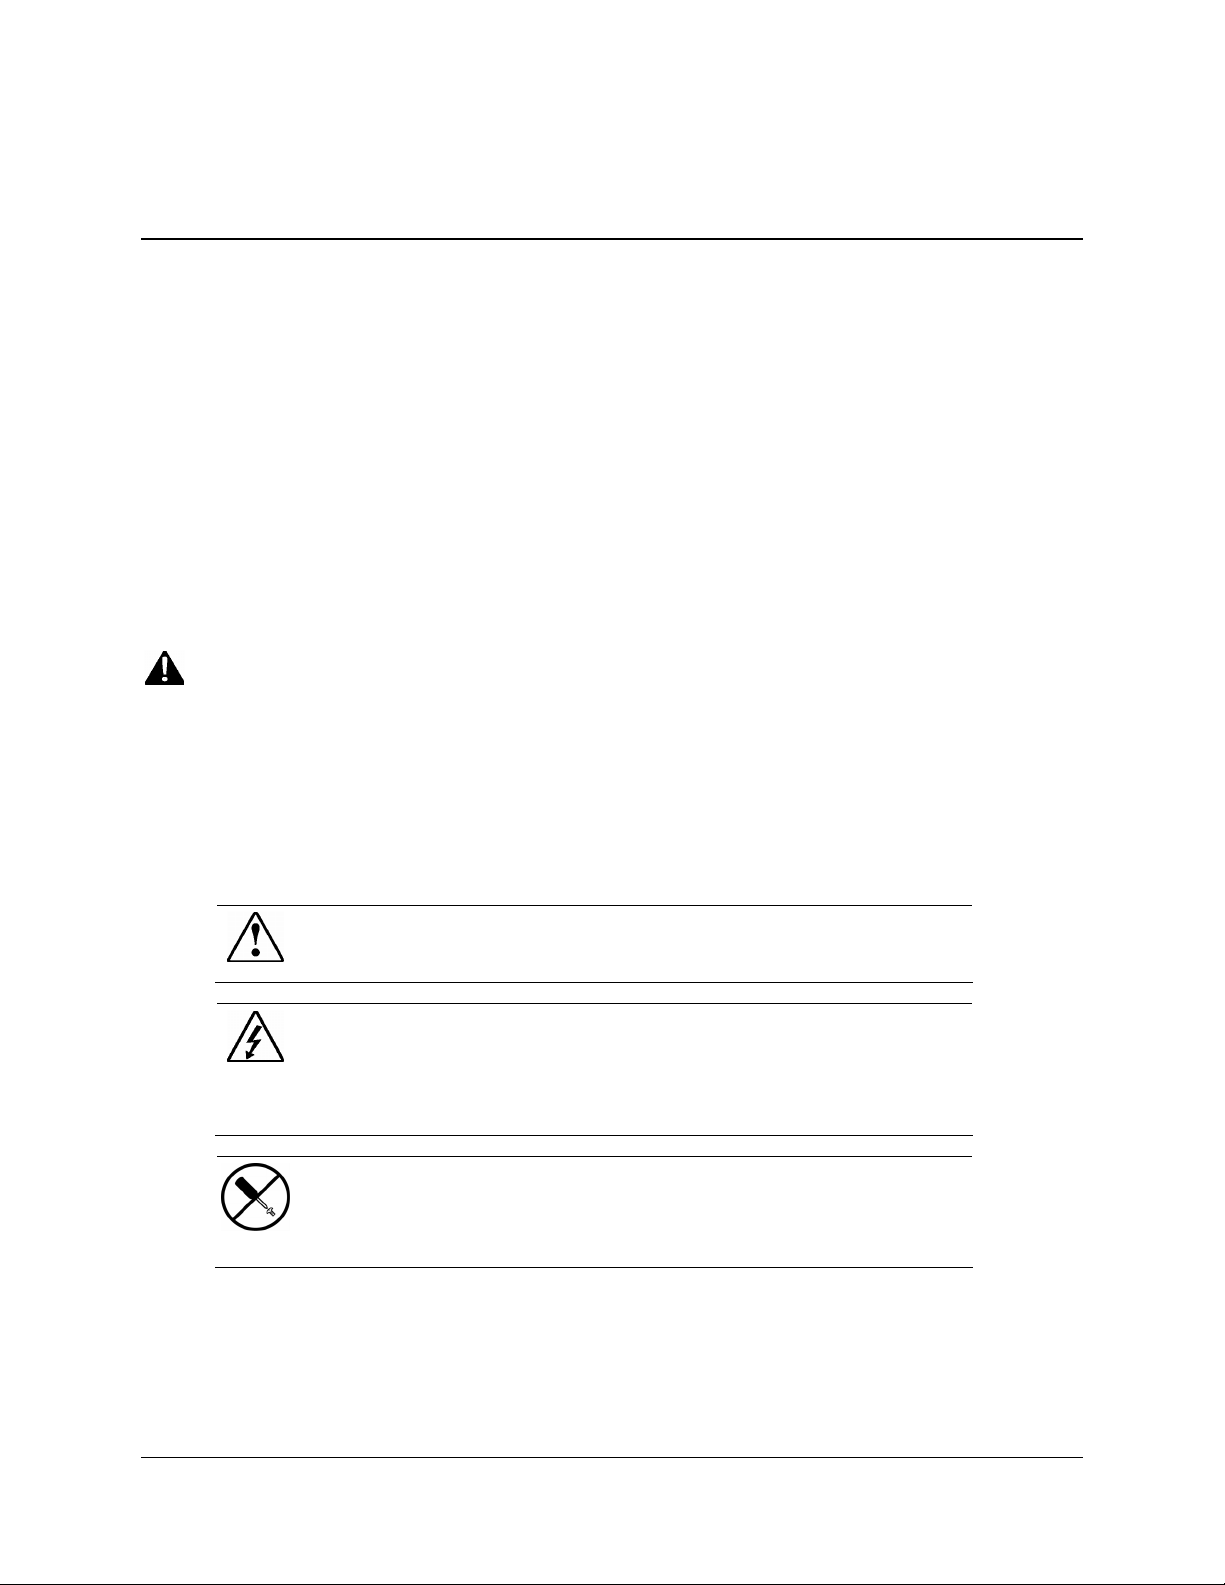
WARNING: This symbol, in conjunction with any of the following symbols,
indicates the presence of a potential hazard. The potential for injury exists if
warnings are not observed. Consult your documentation for specific details.
This symbol indicates the presence of hazardous energy circuits or electric
shock hazards. Refer all servicing to qualified personnel.
WARNING: To reduce the risk of injury from electric shock hazards, do not
open this enclosure. Refer all maintenance, upgrades, and servicing to
qualified personnel.
This symbol indicates the presence of electric shock hazards. The area
contains no user or field serviceable parts. Do not open for any reason.
WARNING: To reduce the risk of injury from electric shock hazards, do not
open this enclosure.
HP ProLiant DL140 Server Setup and Installation Guide v
Page 6
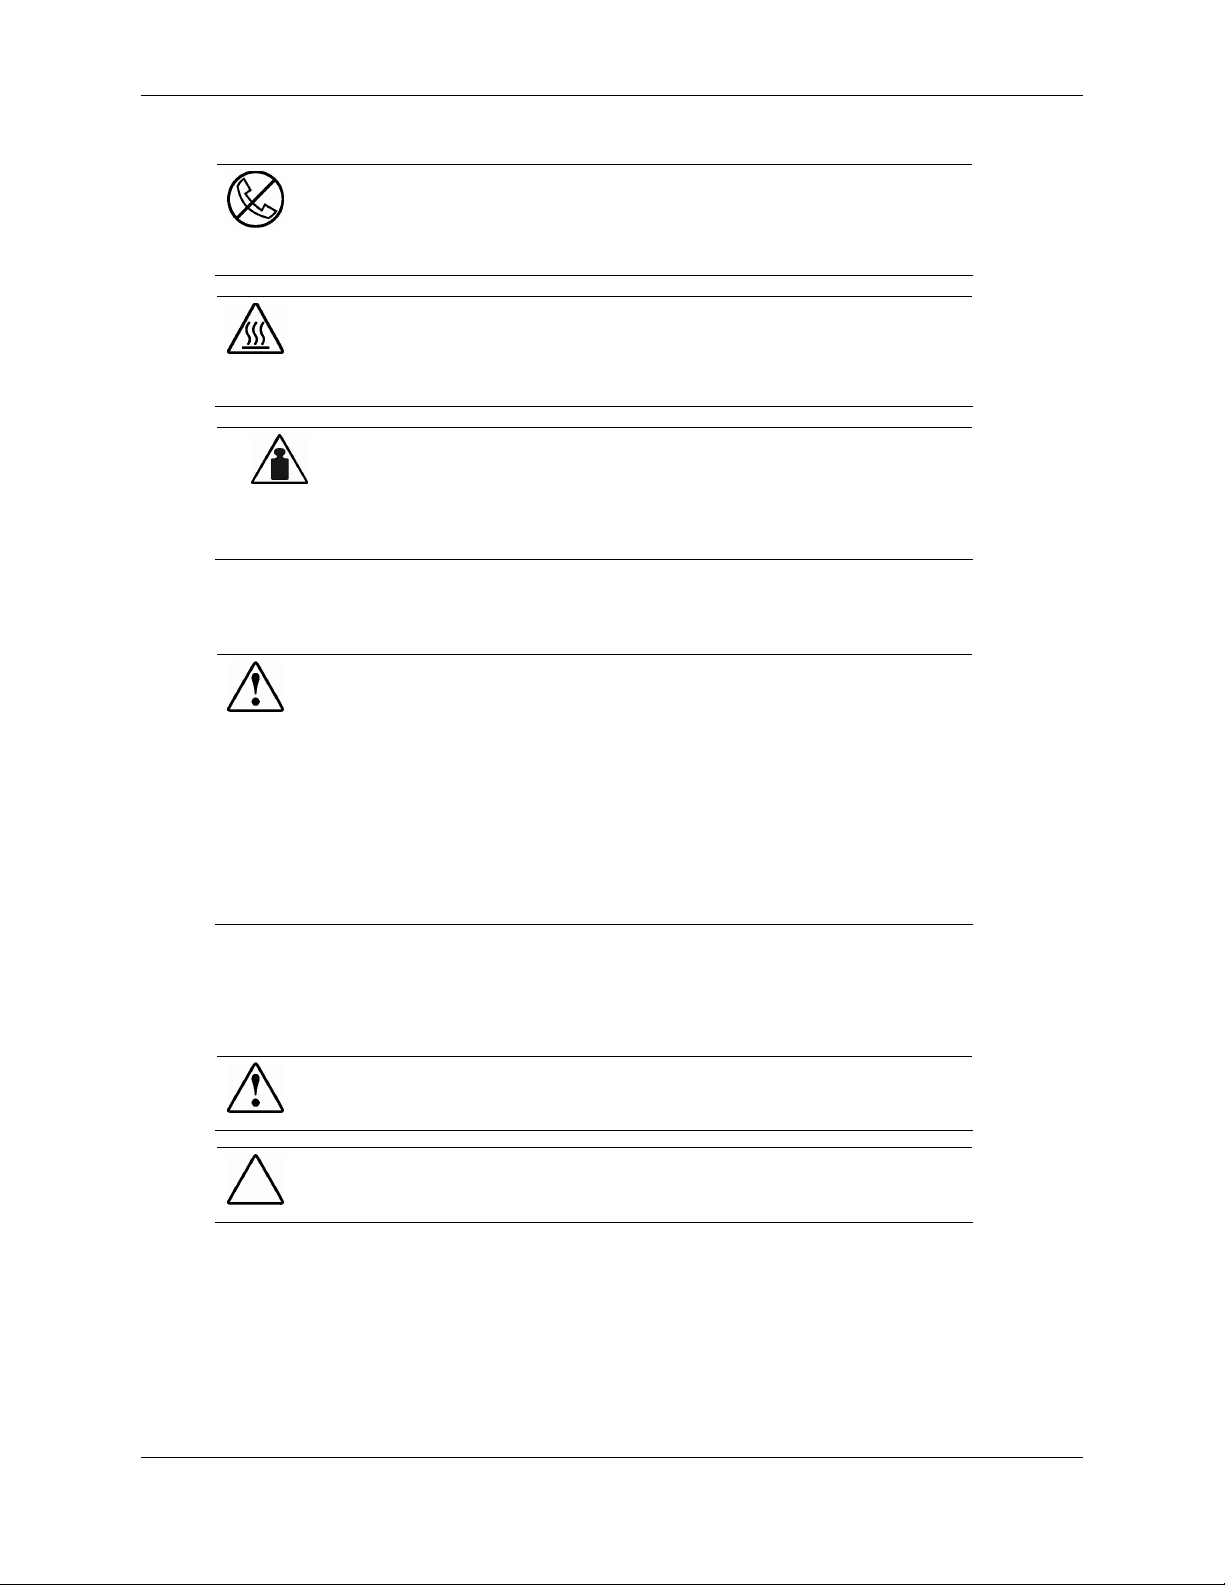
This symbol on an RJ-45 receptacle indicates a network interface connection.
WARNING: To reduce the risk of electric shock, fire, or damage to the
equipment, do not plug telephone or telecommunications connectors into this
receptacle.
This symbol indicates the presence of a hot surface or hot component. If this
surface is contacted, the potential for injury exists.
WARNING: To reduce the risk of injury from a hot component, allow the
surface to cool before touching.
This symbol indicates that the component exceeds the recommended
weight for one individual to handle safely.
Weight in kg
Weight in lb
WARNING: To reduce the risk of personal injury or damage to the
equipment, observe local occupational health and safety requirements
and guidelines for manual material handling.
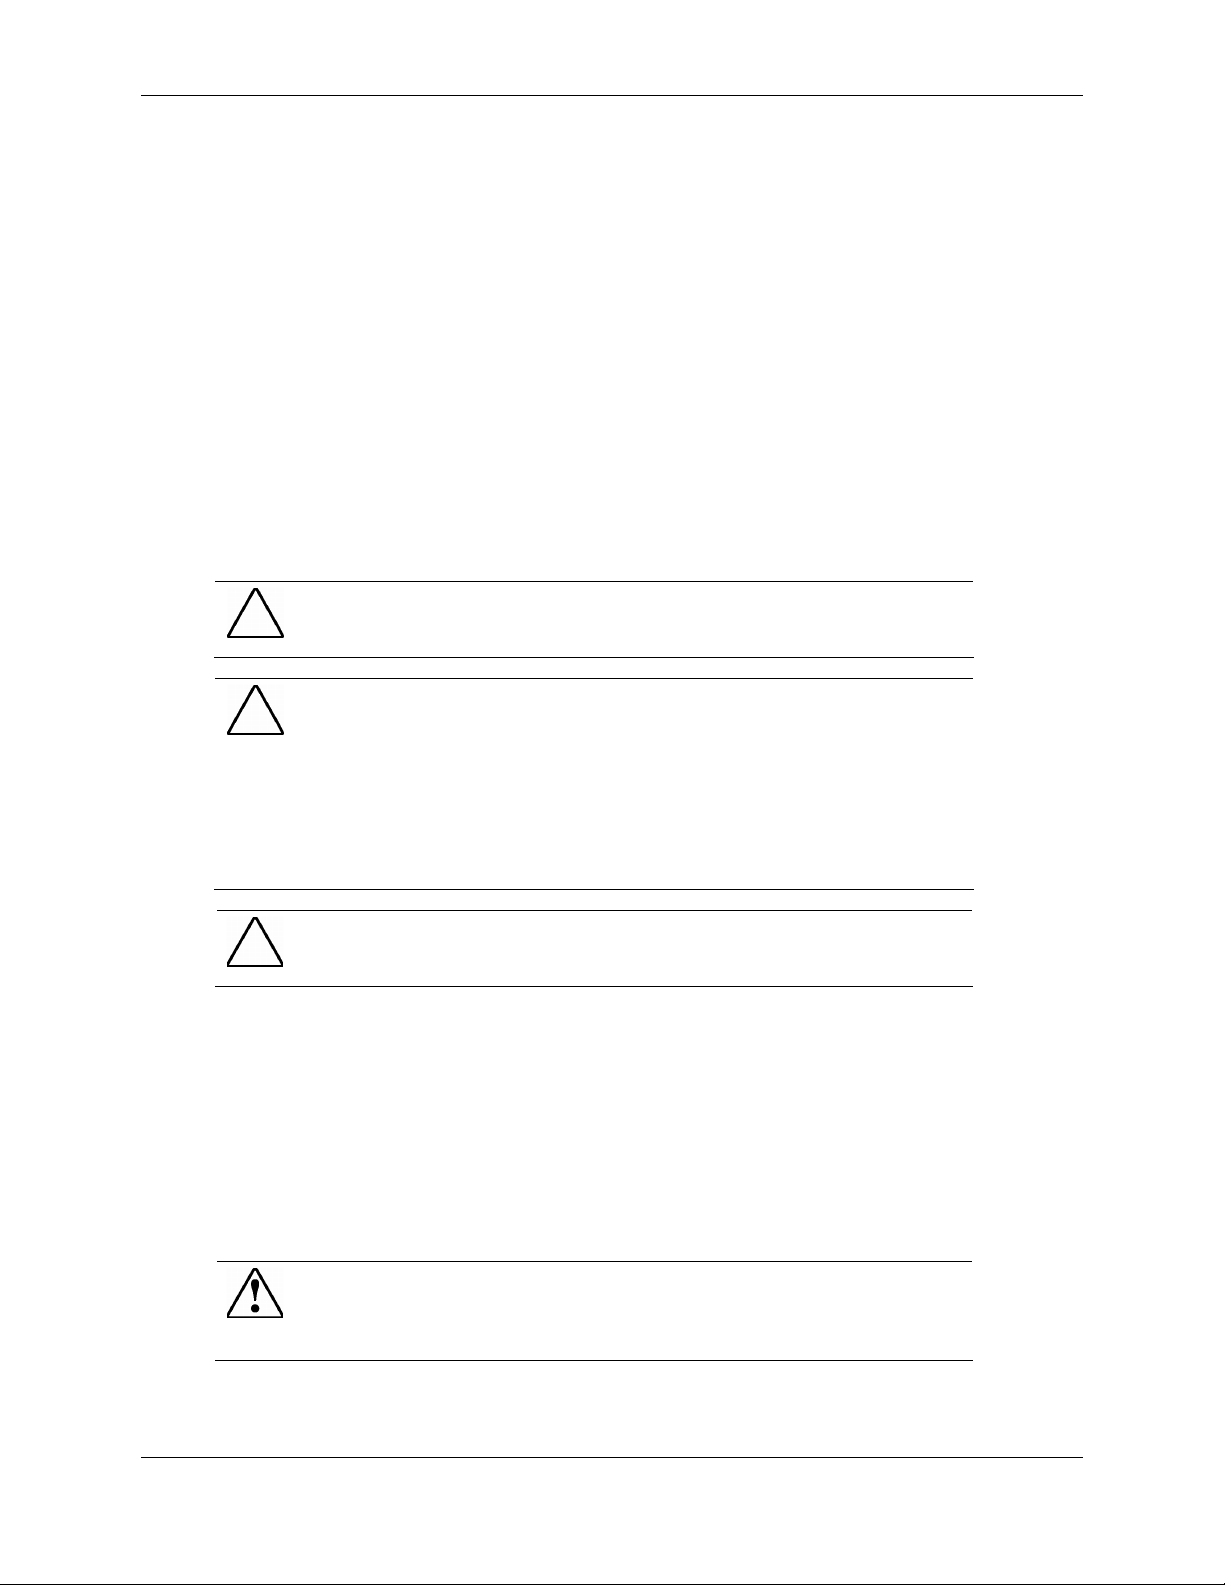
Rack Stability
WARNING: To reduce the risk of personal injury or damage to the equipment,
be sure that:
• The leveling jacks are extended to the floor.
• The full weight of the rack rests on the leveling jacks.
• The stabilizing feet are attached to the rack, if it is a single-rack
installation.
• The racks are coupled together in multiple-rack installations.
• Only one component is extended at a time. A rack may become unstable if
more than one component is extended for any reason.
Symbols in Text
These symbols may be found in the text of this guide. They have the following meanings.
WARNING: Text set off in this manner indicates that failure to follow directions
in the warning could result in bodily harm or loss of life.
CAUTION: Text set off in this manner indicates that failure to follow directions could
result in damage to equipment or loss of information.
IMPORTANT: Text set off in this manner presents clarifying information or specific
instructions.
NOTE: Text set off in this manner presents commentary, sidelights, or interesting points of
information.
HP ProLiant DL140 Server Setup and Installation Guide vi
Page 7

Text Conventions
This document uses the following conventions:
• Italic type is used for complete titles of published guides or variables. Variables include
information that varies in system output, in command lines, and in command parameters in
text.
• Bold type is used for emphasis, for onscreen int erface compo nents (window titles, menu
names and selections, button and icon names, and so on), and for keyboard keys.
Monospace typeface is used for command lines, code examples, screen display s, error
•
messages, and user input.
Sans serif typeface is used for uniform resource locators (URLs).
•
Related Documents
For additional information on the topics covered in this guide, refer to the following
documentation either on the Startup, Documentation and Utilities CD, on the HP website or
included with the server.
• HP ProLiant DL140 Server Maintenance and Service Guide
• HP ProLiant DL140 Server Hardware Installation and Configuration Poster
• General online reference and specifications:
Getting Help
If you have a problem and have exhausted the information in this guide, you can get further
information and other help in the following locations.
HP Technical Support
In North America, call the HP Technical Support Phone Center at 1-800-652-6672. This service
is available 24 hours a day, 7 days a week. For continuous quality improvement, calls may be
recorded or monitored. Outside North America, call the nearest HP Technical Support Phone
Center. For telephone numbers of worldwide Technical Support Centers, go to
www.hp.com
HP Website
For information on this product, as well as the latest drivers and flash ROM images, go to
www.hp.com.
www.compaq.com/quickspecs
HP ProLiant DL140 Server Setup and Installation Guide vii
Page 8

HP Authorized Reseller
For the name of your nearest HP authorized reseller:
• In the United States, call 1-800-345-1518.
• In Canada, call 1-800-263-5868.
• Elsewhere, refer to
www.hp.com for locations and telephone numbers.
Reader’s Comments
HP welcomes your comments on this guide. Please send your comments and suggestions by
email to
ServerDocumentation@hp.com.
HP ProLiant DL140 Server Setup and Installation Guide viii
Page 9

HP ProLiant DL140 Server Features
For a list of features which are standard on the server, refer to
1
Server Features
www.compaq.com/quickspecs
Warranties
The server is equipped with several standard warranties. For more information, refer to the
Important Warranty Inform atio n card shipped with the server.
Server Configuration and Management
The server offers features to support effective server management and configuration. Refer to
Chapter 5 for detailed information on each of these utilities.
Security
Security features for this server include the following:
• Power-on password
• Setup password
Most security features are established through BIOS Setup. Refer to Chapter 5 for detailed
information on BIOS Setup. For additional information concerning server security features, refer
to the documentation CD included in the shipping box.
HP ProLiant DL140 Server Setup and Installation Guide 1
Page 10

Planning the Server Installation
Server Installation Overview
The following steps give an overview of the required procedures for installing the ProLiant
DL140 server:
IMPORTANT: Before beginning the following procedures, refer to the Important Safety
Information guide that shipped with the server.
1. Select an appropriate site for the server.
2. Unpack the server and rack-mounting hardware.
3. Install other options.
Refer to Chapter 3, “Installing Hardware Options.” Other options include additional memory,
hard drives, expansion boards, and external storage devices.
4. Set internal switches, if necessary. For detailed information on relevant switches, refer to
Appendix D, “LEDs and Switch”
5. Install the rack rails. Refer to “Installing the Fixed Rack Rails,” in Chapter 4, “Server
Installation.”
6. Mount the server in the rack. Refer to “Inserting the Server into the Rack,” in Chapter 4,
“Server Installation.”
7. Connect the power cord and peripheral devices. Refer to “Connecting the Per ipheral Devic e
Cables and the Power Cord,” in Chapter 4, “Server Installation.”
2
Optimum Environment
When installing these servers in a rack, select a location that meets the environmental standards
described in the following paragraphs.
Space and Airflow Requirements
To allow for servicing and adequate airflow, observe the following spatial requirements when
deciding where to install an HP, Compaq, Telco, or third-party rack:
• Leave a minimum clearance of 63.5 cm (25 inches) in front of the rack.
• Leave a minimum clearance of 76.2 cm (30 inches) behind the rack.
• Leave a minimum clearance of 121.9 cm (48 inches) from the back of the rack to the rear of
another rack or row of racks.
HP ProLiant DL140 Server Setup and Installation Guide 2
Page 11
HP servers draw in cool air through the rack front door and expel warm air through the rack rear
door. Therefore, the front and rear rack doors must be adequately ventilated to allow ambient
room air to enter the cabinet and warm air to escape from the rear of the cabinet.
IMPORTANT: Do not block the ventilation openings.
NOTE: It is recommended that rows of racks be arranged where front panels on one row face
the front panels of opposite rows and the back panels of racks face the backs of racks in
opposite rows.
When there is any vertical space in the rack not filled by servers or rack components, the gaps
between the components cause changes in airflow through the rack and across the servers. Cover
all gaps with blanking panels to maintain proper airflow.
Compaq branded Rack 9000 and Rack 10000 Series products provide proper server cooling from
flow-through perforations in the front and rear doors that provide 64 percent open area for
ventilation.
CAUTION: When using a Compaq branded Rack 7000 Series rack, the high airflow
rack door insert must be installed [P/N 327281-B21 (42U) and P/N 157847-B21
(22U)] to provide proper front-to-back airflow and cooling.
CAUTION: If a third-party rack is used, observe the following additional
requirements to ensure adequate airflow and to prevent damage to the equipment:
• Front and rear doors: if the 42U server rack includes closing front and rear
doors, 5,350 sq cm (830 square inches) of holes evenly distributed from top to
bottom must be available to permit adequate airflow (equivalent to the required
64 percent open area for ventilation).
• Side panels: The clearance between the installed rack com p onent and the side
panels of the rack must be a minimum of 7 cm (2.75 inches).
CAUTION: Always use blanking panels to fill empty vertical spaces in the rack. This
arrangement ensures proper airflow. Using a rack without blanking panels results in
improper cooling that can lead to thermal damage.
Temperature Requirements
To ensure continued safe and reliable equipment operation, install or locate the system in a
well-ventilated, clim ate -co ntrolled environment.
The maximum recommended ambient operating temperature (TMRA) for this server is 35°C
(95°F). The temperature in the room where the rack is located must not exceed 35°C
Power Requirements
WARNING: To reduce the risk of personal injury, fire, or damage to the
equipment, do not overload the AC supply branch circuit that provides power
to the rack. Consult the electrical authority having jurisdiction over the
facility’s wiring and installation requirements.
(95°F).
HP ProLiant DL140 Server Setup and Installation Guide 3
Page 12
The installation of this equipment shall be in accordance with local/regional electrical regulations
governing the installation of information technology equipment by licensed electricians. This
equipment is designed to operate in instal la tions covered by NFPA 70, 1999 Edition (National
Electric Code) and NFPA 75, 1992 Edition (code for Protection of Electronic Computer/Data
Processing Equipment). For electrical power ratings on options, refer to the product’s rating label
or the user documentation supplied with that option.
When installing more than one server, additional power distribution devices may be required to
safely provide power to all devices. Observe the following guidelines:
• The power load must be balanced between available AC supply branch circuits.
• The overall system AC current load must not exceed 80 percent of the branch circuit AC
current rating.
Grounding Requirements
For proper operation and safety, the server must be properly grounded. In the United States, you
must install the equipment in accordance with NFPA 70, 1999 Edition (National Electric Code)
Article 250, as well as any local and regional building codes. In Canada, the equipment must be
installed in accordance with Canadian Standards Association, CSA C22.1, Canadian Electrical
Code. In all other countries, the installation must follow any regional or national electrical wiring
codes, such as the International Electrotechnical Commission (IEC) 364, parts 1 through 7.
Furthermore, you must ensure that all power distribution devices used in the installation—such as
branch wiring and receptacles—are listed or certifi ed ground ing-typ e dev ices.
Because of the high ground leakage currents associated with multiple servers connected to the
same power source, HP recommends the use of a power distribution unit (PDU) that is either
permanently wired to the building’s branch circuit or includes a non-detachable cord that is wired
to an industrial-style plug. NEMA locking -style plugs or those complying with IEC 60309 are
considered suitable for this purpose. HP does not recommend using common power outlet strips
for this equipment.
Rack Warnings and Cautions
Before installing a rack, carefully review the following warnings and cautions:
WARNING: To reduce the risk of personal injury or equipment damage, always
ensure that the rack is adequately stabilized before extending a component out
of the rack. Extend only one component at a time. A rack may become unstable
if more than one component is extended for any reason.
HP ProLiant DL140 Server Setup and Installation Guide 4
Page 13
WARNING: To reduce the risk of personal injury or equipment damage,
ensure that:
• The leveling jacks are extended to the floor.
• The full weight of the rack rests on the leveling jacks.
• The stabilizers are attached to the rack for single-rack installation.
• The racks are coupled together in multiple-rack installations.
WARNING: When installing the server in a Telco rack, ensure that the rack
frame is adequately secured to the top and bottom of the building structure.
WARNING: To reduce the risk of personal injury or equipment damage, at
least two people are needed to safely unload the rack from the pallet. An
empty 42U rack can weigh as much as 115 kg (253 lb), can stand more than
2.1 m (7 ft) tall, and may become unstable when moved on its casters.
Never stand in front of the rack when it is rolling down the ramp from the
pallet; always handle the rack from both sides.
CAUTION: Always begin by mounting the heaviest item on the bottom of the rack.
Continue to populate the rack from the bottom to the top.
Server Warnings and Cautions
Before installing the server, carefully review the following warnings and cautions :
WARNING: To reduce the risk of personal injury from hot surfaces, allow the
drives and the internal system components to cool before touching them.
WARNING: To reduce the risk of electric shock or damage to the equipment:
• Do not disable the power cord grounding plug. The grounding plug is an
important safety feature.
• Plug the power cord into a grounded (earthed) electrical outlet that is easily
accessible at all times.
• Unplug the power cord from the power supply to disconnect power to the
equipment.
CAUTION: Protect the server from power fluctuations and temporary interruptions
with a regulating uninterruptible power supply (UPS). This device protects the
hardware from damage caused by power surges and voltage spikes and keeps the
system in operation during a power failure.
CAUTION: Do not operate the server for long periods without the access panel.
Operating the server without the access panel results in improper airflow and
improper cooling that can lead to thermal damage.
HP ProLiant DL140 Server Setup and Installation Guide 5
Page 14

Server Shipping Contents
Unpack the server box and locate the materials and documentation for installing the server. All
rack-mounting hardware for installing the server into the rack are included with the rack or the
server.
In addition to these supplied items, the following additional items may be needed:
• Application software diskettes
• Options to be installed
• Phillips screwdriver
HP ProLiant DL140 Server Setup and Installation Guide 6
Page 15

Installing Hardware Options
This chapter provides information and procedures for installing hardware options on ProLiant
DL140 server. For additional instructions, refer to the insta ll ation docu men tat ion s hipped with
each option kit,
To streamline the installation process, read the installation instructions for all of the hardware
options and identify similar steps before beginning installation.
After installing all hardware options, proceed with the server installation procedures in Chapter 4.
Accessing Internal Server Components
3
This section defines standard procedures to access internal server components. Procedures will
vary depending on whether the server is in the rack and powered on.
When the server is not installed in the rack, accessing internal components requires removal of
the access panel.
Shutting down and removing the server from the rack
1. Power down the server and remove it from the rack.
a. Shut down the operating system as directed in the operating sy ste m instru ct ions.
CAUTION: Whenever installing hardware or performing maintenance
procedures requiring access to internal components, it is recommended that all
server data be backed up to avoid loss.
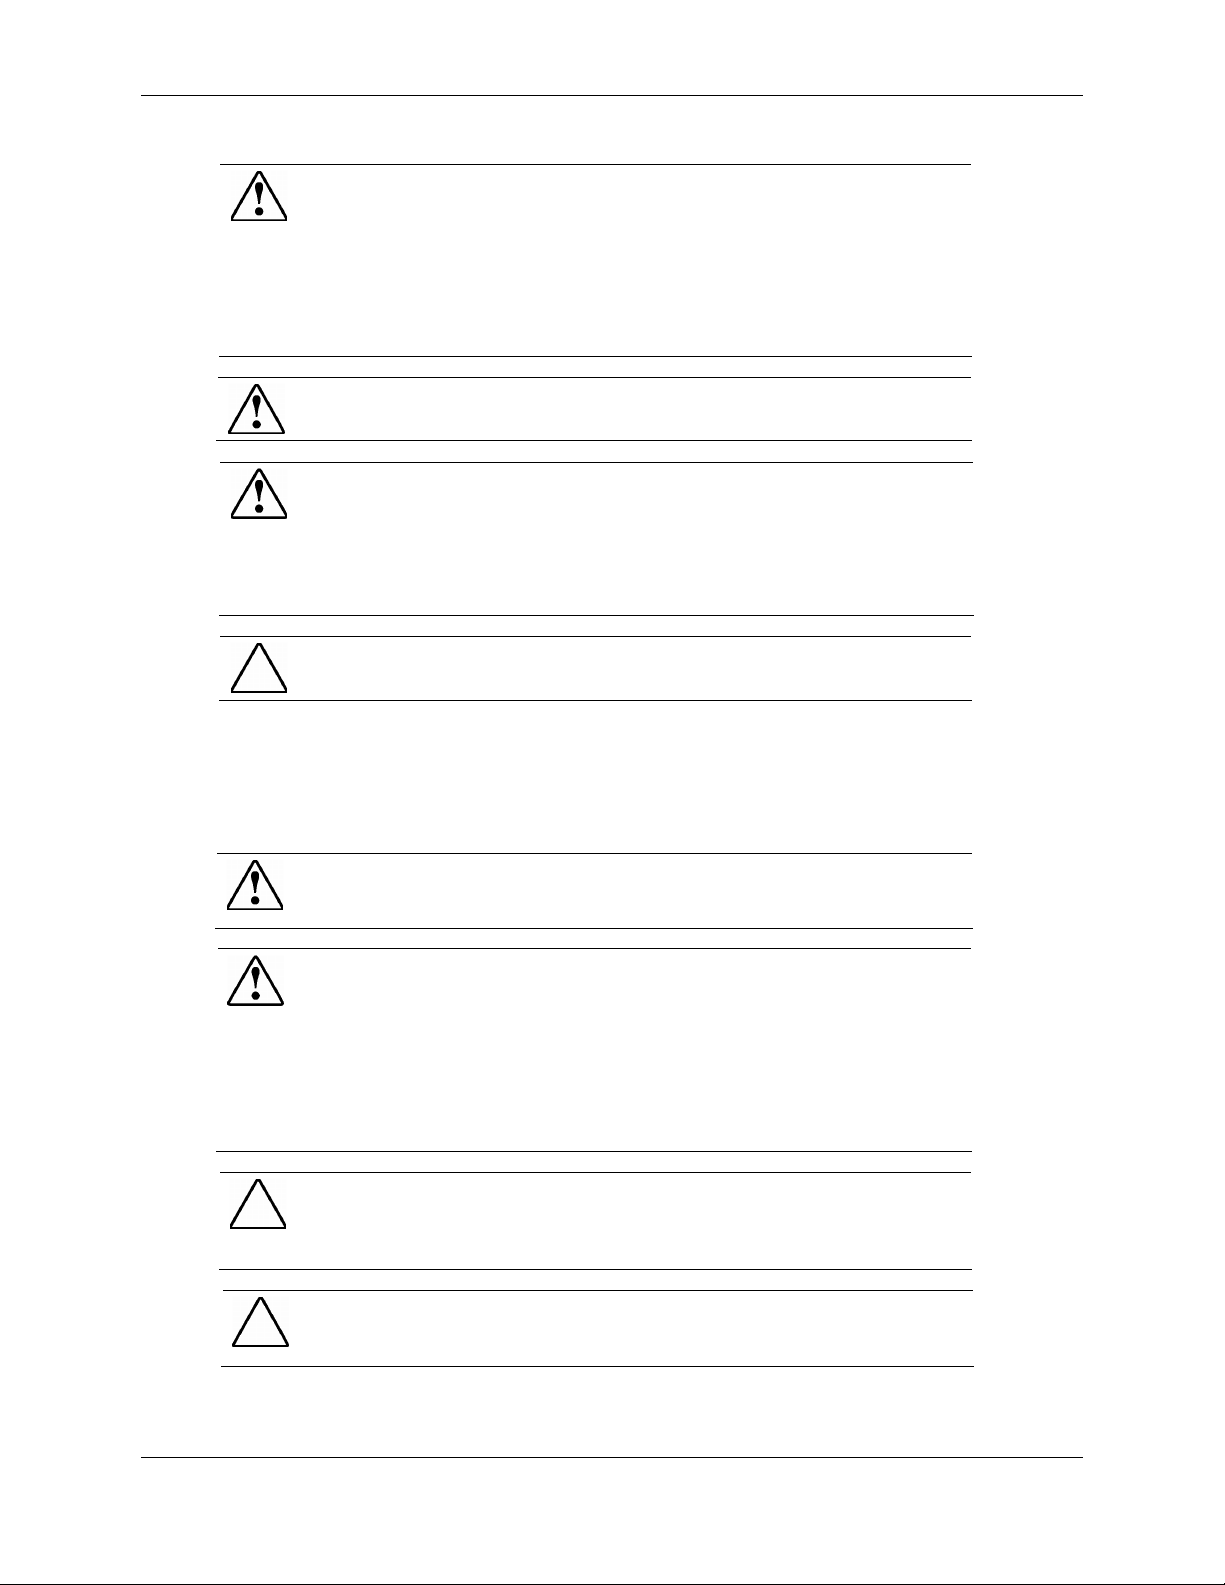
b. Press the server Power On/Off switch (1) to power down the server. The Power On/Off
LED should change from green to off.
HP ProLiant DL140 Server Setup and Installation Guide 7
Page 16
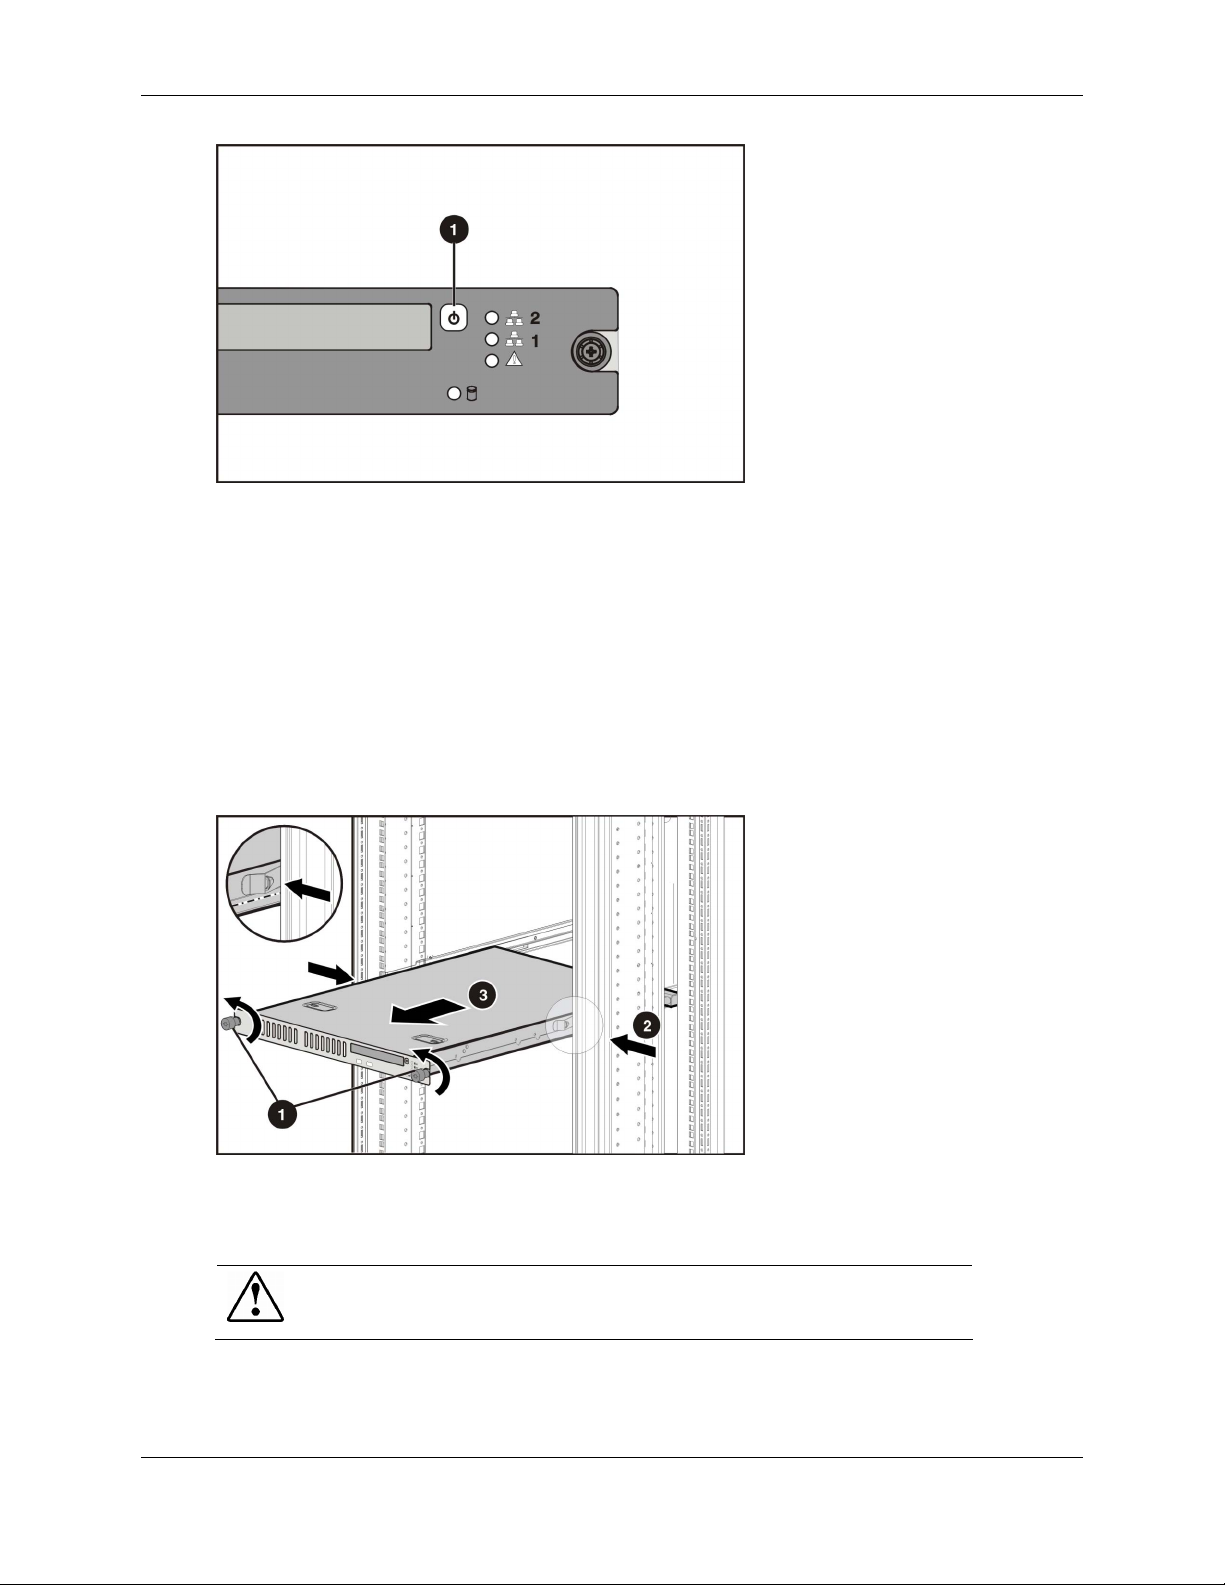
Figure 3-1: Powering down the server
c. Disconnect any cabling attached to the rear of the server.
d. Move to the front of the rack and loosen the thumbscrews securing the server in the rack
(1).
e. Grasp the front panel thumbscrews, and extend the server from the rack. The rail release
latches engage automatically.
f. Press in and hold the rail release latches (2).
g. Holding the rail release latches, extend the server until the latches clear the rack.
h. Pull the server completely out of the rack (3) and set it on a flat, level surface.
Figure 3-2: Removing the server from the rack
Removing the Access Panel
WARNING: To reduce the risk of personal injury from hot surfaces, allow the
internal system components to cool before touching them.
HP ProLiant DL140 Server Setup and Installation Guide 8
Page 17

CAUTION: Before removing the server access panel, be sure that the server is
powered down and that the power cord is disconnected from the server or the
electrical outlet.
CAUTION: Electrostatic discharge can damage electronic components. Be sure you
are properly grounded before beginning any installation procedure.
1. Unscrew the rear access panel retention screw
2. Slide the access panel toward the rear of the unit, about 1.25 cm (0.5 inch), and lift the panel
to remove it.
HP ProLiant DL140 Server Setup and Installation Guide 9
Page 18

Identifying System Board Components
Use the following figure and table to identify the system board connectors and components for
option installation or service events.
Figure 3-3: Identifying system board components
HP ProLiant DL140 Server Setup and Installation Guide 10
Page 19

Table 3-1: System Board Connectors and Components
Location Component Location Component
1 System Battery 12 CPU Power Connector
2 PCI Riser Card Connector 13 System Fan 1 Connecter
3 System Configuration Switch (SW1) 14 System Fan 2 Connecter
4 RJ-45 GbE connectors for NIC 1
(bottom) and NIC 2 (top)
5 Rear USB Connectors 16 System Fan 3 Connecter
6 VGA Connector 17 System Fan 4 Connecter
7 Serial Port 18 CDROM IDE Connector
8 Keyboard (Bottom) and Mouse
(Top) connectors
9 DIMM sockets (1-4) 20 ATA Hard Drive Connector
10 Power Connector 21 Front panel LED Connector
11 Processor 1 socket 22 Front Panel USB Connector
15 Processor 2 socket
19 System Fan 5 Connecter
Installing Additional Memory
Server memory can be expanded by installing Double Data Rate Synchronous DRAM (DDR
SDRAM). The system supports up to four PC2100 ECC registered DDR SDRAM Dual Inline
Memory Modules (DIMMs) installed in four sockets on the system board. Memory can be added
one module at a time.
Refer to Figure 3-3 and to Table 3-1 for DIMM slot location and socket numbers. This
information is also available on the hood label.
The server memory can be expanded to 4 GB. In the maximum memory configuration, all four
DIMM sockets are populated with 1-GB, PC2100 ECC registered DDR SDRAM DIMMs.
Observe the following guidelines when installing additional memory:
• DIMMs installed in the server must be PC2100 registered DDR SDRAM, 2.5 V, 64 bits wide,
and ECC.
• All DIMMs installed must be the same speed. Do not install DIMM modules supporting
different speeds, for example, 266 MHz and 200 MHz.
• Install the DIMMs in descending sequential order, starting with DIMM socket 4.
• Use only HP recommended DIMMs. DIMMs from other sources can adversely affect data
integrity
Refer to
www.compaq.com/quickspecs for DIMM option kits.
CAUTION: Electrostatic discharge can damage electronic components. Be sure you
are properly grounded before beginning any installation procedure. Refer to
Appendix B, “Electrostatic Discharge,” for more information.
HP ProLiant DL140 Server Setup and Installation Guide 11
Page 20

To install a DIMM onto the system board:
1. Access internal server components. Refer to the “Acce ssin g Inte rna l Server Comp onents”
section earlier in this chapter.
2. Open the DIMM socket latches.
3. Align the key slot in the bottom edge of the DIMM with the tab in the DIMM socket.
IMPORTANT: Misaligned DIMMs do not seat.
4. Press down firmly on the DIMM while pushing the latches inward until the latches snap into
place.
5. Reverse the procedures performed in the “Accessing Internal Server Components” section
earlier in this chapter.
Installing an Expansion Board
Server I/O can be expanded by installing PCI or PCI-X expansion boards. The system supports
one full-length PCI or PCI-X expansion board.
Observe the following guidelines when installing expansion boards:
• Expansion boards installed in the server must be PCI or PCI-X, 3.3 V, 32 or 64 bits wide, and
33, 66, 100 or 133MHz frequency.
• Use either half length or full-length expansion boards.
Refer to www.compaq.com/quickspecs
for supported PCI and PCI-X option kits. To install an
expansion board, complete the procedures described in the following subsections.
Removing the PCI Riser Board Assembly
To remove the PCI riser board assembly:
CAUTION: To avoid damaging the system or expansion boards, remove all AC
power cords before installing or removing an expansion board. When the front panel
power switch is in the Off position, auxiliary power is still con nected to the PCI
expansion slot and may damage the card.
1. Access internal server components. Refer to the “Acce ssin g Inte rna l Server Comp onents”
section earlier in this chapter.
2. Lift the PCI riser board assembly from the server chassis.
NOTE: If the PCI slot retention screw located near the slot cover is installed, it must be removed
prior to removal of the PCI riser board.
HP ProLiant DL140 Server Setup and Installation Guide 12
Page 21

Figure 3-4: Removing the PCI riser board assembly (expansion
board removed for clarity)
Installing the Expansion Board
To install an expansion board:
1. Remove the slot cover screw (1).
2. Remove the slot cover (2).
Figure 3-5: Removing the slot cover
CAUTION: Do not discard the slot cover. If the PCI expansion board is removed in
the future, the slot cover must be reinstalled to maintain proper cooling.
HP ProLiant DL140 Server Setup and Installation Guide 13
Page 22

3. Insert an expansion board into the expansion slot by aligning the expansion board with the
board guide and slide the expansion board into the slot until the board seats firm ly (1).
4. Tighten the slot cover screw (2).
Figure 3-6: Inserting an expansion board into the expansion
PCI riser board assembly
5. Install the PCI riser board assembly:
a. Place the PCI riser board assembly in the chassis and align the rear tab into the chassis.
b. Press down firmly above the expansio n slot until the as semb ly is sea ted in the exp ansio n
slot.
c. Replace the access panel.
Figure 3-7: Installing the PCI riser board assembly
HP ProLiant DL140 Server Setup and Installation Guide 14
Page 23

Installing ATA Hard Drives
This server model is designed to support two 1-inch ATA hard drives.
When installing ATA hard drives, observe the following guidelines:
• Access internal server components. Refer to the “Acce ssin g Inte rna l Server Comp onents”
section earlier in this chapter.
• Always populate hard drive bays starting with the lowest ATA device number.
• Verify the jumpers on both ATA drives are set to Cable-Select mode. Doing so enables the
ATA cable to set a unique address, such as Device 0 or Device 1, for each hard drive.
CAUTION: Installing unsupported hard drives may damage the system by
consuming power and generating heat in excess of the serve r’s operating tolerance.
This condition may result in a loss of system and/or data integrity.
CAUTION: Whenever installing hardware or performing maintenance procedures
requiring access to internal components, it is recommended that all server data be
backed up to avoid loss.
• Identify the hard drive tray for ATA hard drive installation. ATA hard drives in the server
appear as Devices 0 and 1, from right to left when viewed from the front of the server. Refer
to Figure 3-11.
To remove an ATA hard drive tray:
1. Loosen the bracket screw (1) and remove the hard drive tray (2).
2. Remove the four ATA hard drive mounting screws (3) from the hard drive tray.
Figure 3-8: Removing the ATA hard drive tray
HP ProLiant DL140 Server Setup and Installation Guide 15
Page 24

To install an ATA hard drive:
1. Align the ATA hard drive on the hard drive tray (1) and secure it with the four hard drive
mounting screws (2).
NOTE: Arrows on the hard drive tray indicate which holes to install the hard drive tray onto
the drive.
Figure 3-9: Installing a drive onto the hard drive tray
To install an ATA hard drive assembly in the chassis:
1. Place the ATA hard drive assembly into the chassis.
2. Align the tabs under the retainers and slide the assembly toward the front of the server until it
is seated in place (1).
3. Tighten the hard drive tray screw (2).
IMPORTANT: When installing the hard drive tray screw, ensure all cables are clear of the
hard drive tray.
Figure 3-10: Installing an ATA hard drive assembly into the
chassis
HP ProLiant DL140 Server Setup and Installation Guide 16
Page 25

4. Connect the ATA hard drive cable as shown below.
Figure 3-11: Cabling the ATA hard drives
5. Connect the ATA hard drive power cable to the ATA hard drives.
IMPORTANT: Make sure the ATA hard drive cables are routed so as to not block airflow
to the fan inlets.
6. Replace the access panel.
Installing a CD-ROM Drive Assembly
CAUTION: Do not operate the server without a bezel blank or the CD-ROM drive
assembly installed. Improper cooli ng can dam age the system.
To Remove the CD-ROM tray from the chassis:
1. Press in and hold the CD-ROM latch (1).
2. Slide the tray toward the rear of the server until the USB connectors are visible (2).
3. Lift the CD-ROM tray out of the server (3).
HP ProLiant DL140 Server Setup and Installation Guide 17
Page 26

Figure 3-12: Removing the CD-ROM tray
To Remove the CD-ROM tray top cover:
1. Lift the top cover (1).
2. Loosen two the CD-ROM blank screws (2) fro m the empt y tray and remove the CD-ROM
blank (3).
Figure 3-13: Removing the CD-ROM tray top cover
To Install the CD-ROM drive in the tray:
1. Align CD-ROM drive (1) and the top cover (2) along the tray and Press down firmly above
the tray until they are seated in place.
2. Tighten tray screws (3).
HP ProLiant DL140 Server Setup and Installation Guide 18
Page 27

Figure 3-14: Installing a CD-ROM drive in the tray
Install the CD-ROM drive assembly in the chassis:
1. Place the CD-ROM drive assembly into the chassis (1).
2. Align the tabs along the chassis with the retainers then depress the CD-ROM latch (2).
3. Slide the assembly toward the front of the server (3) until the CD-ROM latch locks the
assembly.
4. Cable the CD-ROM drive assembly (4).
Figure 3-15: Installing a CD-ROM drive assembly in the
chassis
5. Connect the CD-ROM power cable and the CD-ROM drive data cable to the CD-ROM drive.
IMPORTANT: Make sure the CD-ROM drive cable is routed so as to not block airflow to
the fan inlets.
6. Replace the Access cover.
NOTE: The CD-ROM drive assembly can be removed to prevent unwanted software installation
or for use in another ProLiant DL140 server.
HP ProLiant DL140 Server Setup and Installation Guide 19
Page 28

Figure 3-16: Cabling the CD-ROM drive cable
Installing a Processor
Use these instructions to install a Processor into the server. For additional information about
installing the processor refer to the server hood label.
WARNING: To reduce the risk of personal injury from hot surfaces, allow the internal
system components to cool before touching them.
WARNING: Eliminate the risk of electrical shock by removing all AC power from your
system before installing or replacing any non-hot-plug hardware option to the server.
Disconnect all power cords to completely remove power from the server.
CAUTION: Properly ground yourself before beginning any installation procedure.
Electrostatic discharge can damage electronic components.
CAUTION: Handle the processor and heatsink with care. Damage to either may affect
processor performance.
z Do not bend or damage the pins beneath the processor.
Installation and Upgrade Requirements
Processor socket 1 must always be populated. If the processor is missing from socket 1, the
system will not respond.
Preparing the Server for Installation
Before installing the processor:
• Back up all server data.
• Be sure that the server has the most recent ROM version.
• This procedure assumes that the server is out of the rack and on a bench.
HP ProLiant DL140 Server Setup and Installation Guide 20
Page 29

CAUTION: Failure to flash the ROM before installing processors can cause system
failure.
WARNING: Remove all power from the system, including disconnecting the power cord,
before installing any hardware option to the server.
Installing the Processor
1. Locate the processor socket on the system board.
Figure 3-17: Locating the processor socket
2. Open socket lever completely (1).
3. Insert the processor into the socket (2).
4. Close socket lever (3).
Figure 3-18: Installing the processor into the socket
HP ProLiant DL140 Server Setup and Installation Guide 21
Page 30

WARNING: Observe the processor and socket key markings (4) to assure the processor
is installed in the correct orientation.
5. Remove the protective cover (1) from the heatsink (2).
Figure 3-19: Remove the protective cover from heatsink
WARNING: The thermal interface material (3) on the heatsink must be present and
evenly spread. Missing or damaged thermal interface can lead to processor damage.
6. Install the heatsink onto the processor (1) and engage the retaining clips on each side of the
heatsink (2).
Figure 3-20: Installing the heatsink onto the processor
HP ProLiant DL140 Server Setup and Installation Guide 22
Page 31

Prepare the Server for Operation:
1. Reinstall the access panel.
2. Replace the server back into the rack.
3. Reconnect all external cables.
4. Power up the server.
5. Be sure that the Server Status LED on the front of the chassis is not illuminated, indicating
proper server operation.
NOTE: If the Server Status LED on the front of the chassis is illuminated red, refer to the
troubleshooting section of this docume nt.
HP ProLiant DL140 Server Setup and Installation Guide 23
Page 32

Server Installation Procedures
To install the rack-mounted server int o an HP branded rack, co mpl ete the pro cedu r es described in
the following subsections:
Installing the Rack Rails
Use the following procedures to install the rack rails to the rack:
1. From the rear of the rack, identify the inside front holes that are used to secure the front tabs
of the fixed rack rail.
IMPORTANT: Ensure that the inner side of the rack rail (rail guide) faces the inside of the
rack.
4
Server Installation
2. Carefully align the two front tabs on the front of the fixed rack rail with the holes identified at
the front of the rack.
Figure 4-1: Aligning and inserting the rack rail
3. Insert the front tabs of the rack rail into the rack.
4. Compress the rack rail toward the front of the rack until the rea r tabs are al igned with the
inner holes at the back of the rack
5. Insert the rear tabs into the rear holes, and release the rail. The rail should lock in place
securely.
6. Repeat steps 2 through 6 for the second rack rail.
HP ProLiant DL140 Server Setup and Installation Guide 24
Page 33

Inserting the Server into the Rack
CAUTION: To avoid destabilizing the rack, install multiple servers starting from the
bottom of the rack.
To insert the server into the rack:
1. Align the rear end of the server rails on the sides of the server with the front end of the rack
rails.
WARNING: To avoid personal injury, press the rail release latches and slowly
slide the server into the rack. The rail release latches can pinch your fingertips.
2. Insert the server fully into the rack (1), ensuring that the fixed server rai ls sl ide ins ide the
fixed rack rails.
CAUTION: Keep the server parallel to the floor when sliding the fixed server rails
into the slide rails. Tilting the server can damage the rails.
3. Tighten the thumbscrews on the front panel to secure the server to the rack (2).
Figure 4-2: Aligning the rear end of the server rails with the front
end of the rack rails
After installing the server in the rack, begin the procedure for “Connecting the Peripheral Device
Cables and the Power Cord.”
HP ProLiant DL140 Server Setup and Installation Guide 25
Page 34

Connecting the Peripheral Device Cables and the Power Cord
WARNING: To reduce the risk of electrical shock or fire, do not plug
telecommunications/telephone connectors into the NIC connectors.
Use the following figure and table to identify connectors. Connect the power cord last.
Figure 4-3: Rear panel connectors on the server
Table 4-1: Rear Panel Connectors and Connection Order
Location Connector
1 Power connector
2 Mouse connector
3 Rear USB 1.1 connectors
4 RJ-45 GbE Ethernet connector for NIC 2 (WOL/PXE capable)
5 PCI-X Expansion slot
6 RJ-45 GbE Ethernet connector for NIC 1 (WOL/PXE capable)
7 Video connector
8 Serial connector
9 Keyboard connector
CAUTION: Connect the power cord last or electrical damage to peripheral devices
may occur.
HP ProLiant DL140 Server Setup and Installation Guide 26
Page 35

Powering Up the Server
To power up the server:
1. Press the Power On/Off button.
2. Confirm a successful power on sequence by ensuring that the Power On/Off LED is
illuminated green.
After the server has successfully powered up, begin the configuration process. Refer to Chapter 5,
“Server Configuration and Utilities.”
If the server does not power up successfully, or if it indicates a fault, refer to Appendix D,
“Troubleshooting.”
Installation Sequence
CAUTION: To install an operating system on the server, use the installation
instructions in the following section. Otherwise, follow the instructions in the
“Preconfigured Operating System” section later in this chapter.
Operating System Purchased Separately
If the operating system was purchased separately, install the operating system by following the
instructions provided with your server. Refer to the Startup, Documentation and Utilities CD for
instructions on using the software.
When setting up the server for the first time:
IMPORTANT: To reduce the risk of damage to the server, complete the installation process
by following the procedures provided later in this chapter. When installing other hardware
options as part of the server installation, be sure to follow all procedures as defined in
Chapter 3, “Installing Hardware Options.”
1. Power up the server. Refer to “Powering Up the Server” earlier in this chapter.
IMPORTANT: The Startup, Documentation and Utilities CD or BIOS Setup that is
embedded in the server ROM can be used to configure certain system features.
Step 2 applies only to users who choose to configure their servers with the Startup,
Documentation and Utilities CD.
IMPORTANT: The optional CD-ROM drive assembly or other supported USB storage
device must be installed to use the software.
2. Place the Startup, Documentation and Utilities CD in the CD-ROM drive and power up the
server. Follow the instructions to complete the server initialization process. For Startup,
Documentation and Utilities CD initialization procedures, refer to the Server Setup and
Management pack shipped with the server or refer to Chapter 5, “Server Conf igur a tion and
Utilities.”
HP ProLiant DL140 Server Setup and Installation Guide 27
Page 36

3. Run BIOS Setup by pressing the DEL key when prompted if configura tion is des i red. Use
BIOS Setup to set the date and time and to configure any other BIOS features. For
information on using BIOS Setup to configure other server features, refer to Chapter 5.
4. Install the operating system.
5. Install any application software needed.
6. Register the server. Refer to the “Registering the Server” section later in this chapter.
Preconfigured Operating System
WARNING: To reduce the risk of electric shock or damage to the equipment:
• Do not disable the power cord grounding plug. The grounding plug is an
important safety feature.
• Plug the power cord into a grounded (earthed) electrical outlet that is easily
accessible at all times.
• Disconnect power from the server by unplugging the power cord from
either the electrical outlet or the server.
• Do not place anything on power cords or cables. Arrange them so that no
one can accidentally step on or trip over them. Do not pull on a cord or
cable. When unplugging the cord from the electrical outlet, grasp the cord
by the plug.
If the server was ordered with the operating system factory-installed, everything required to
install the operating system is already on the server. Refer to the steps provided in the HP
Factory-Installed Operating System Software User Guide for more information on using the
operating system.
To complete the installation process with a pre-configured operating system:
1. Power up the server. Refer to “Powering Up the Server” earlier in this chapter.
2. Follow the on-screen instructio ns to comp let e the fact o ry- instal led operat ing sys te m
initialization process. After initialization is complete, the server will automatically reboot.
3. After the server configuration is complete, back up the server.
4. Install any application software.
5. Register the server. Refer to “Registering the Server” later in this chapter.
Registering the Server
For server registration information, refer to the Server Setup and Management pack that ships
with the server, or register the serve r online at
www.hp.com
HP ProLiant DL140 Server Setup and Installation Guide 28
Page 37

Routine Maintenance
For information concerning routine maintenance and safety precautions, refer to the Startup,
Documentation and Utilities CD included in the Reference Information pack shipped with the
server.
Optional Installation Service
HP offers an optional installation service for installing rack products. The installation service can
be customized to meet the specific requirements of the customer, or it can be ordered as an HP
Services Care Pack. The installation service covers the entire hardware installation process, from
unpacking the components to routing the cables and running a system test.
Hardware installation service is available in all countries where HP has a direct or indirect service
presence. Service can be ordered fromand directly provided byan HP authorized service
reseller. In the United States, service can be requested by calling 1-800-652-6672. In the United
States, HP makes all of the arrangements for compl ete rack syste m inst al lation by qual ified
Guaranteed Service Providers. An order form with pricing information is available from PaqFax,
the fax retrieval service, at 1-800-345 -1518.
HP ProLiant DL140 Server Setup and Installation Guide 29
Page 38

5
Server Configuration and Utilities
This chapter provides information about the utilities and support tools included with the HP ProLiant
DL140 server.
BIOS Setup
This section describes the BIOS Setup Utility, which is used to change the server configuration defaults.
You can run the utility with or without an operating system presen t on the server . Setup stores mo st of
the configuration values in battery-backed CMOS and the rest in flash memory. The values take effect
when you boot the server. The BIOS uses these values to configure the hardware. If selected values and
the hardware do not agree, POST generates an error message and you must then run Setup to specify the
correct configuration.
Run Setup to view or modify such server board features as:
• Configuring system devices and installed options
• Viewing system information
• Selecting the boot device and boot order
Starting Setup
To start Setup during the power-on sequence, follow these steps:
1. Press the power on/off button on the front panel of the server. .
2. When POST shows the message “Press <DEL> if you want to run SETUP,” press
Del. If the server has an administrator password configured, the system prompts you to enter
the password. If the server does not have a password configured, the main screen of the BIOS
Setup Utility appears.
Recording Your Setup Settings
Before you make any changes, record the current values. If the default values need to be restored later,
such as after a CMOS clear, you must run Setup again. Referring to recorded original settings could
make your task easier.
Navigating Setup Utility Screens
The BIOS setup utility consists of five primary menus (not all BIOS menus are covered in the guide):
Main: Displays details on BIOS, processor and System Memory, and lets you configure the
system time and date.
Advanced: Lets you configure peripheral devices, SuperIO, IPMI 1.5 and Remote Access, and
disable CPU and USB information.
Boot: Lets you configure Boot settings.
Security: Lets you set a password.
Exit: Exits the utility with or without saving utilities and allows management of custom
settings.
HP ProLiant DL140 Server Setup and Installation Guide 30
Page 39

Each menu occupies a single screen and presents a list of menu items. Some menu items are sub-menus,
while others are settings that you can change from the screen.
Table 5-1 describes how to navigate between the utility screens and menu s.
Table 5-1. Setup Screen Navigation
Press To
←
→
ENTER Select a sub-menu item or accept a drop-down choice.
TAB Select a field within a value (for example, date field).
F9 Select the default value.
F10 Save your changes and exit Setup.
ESC Go back to a previous screen.
↑
↓
Scroll left through the main menu screens.
Scroll right through the main menu screens.
Scroll up through menu items or value lists.
Scroll down through menu items or value lists.
Setup Screens
Main
Table 5-2 describes the menu items available on the Main screen. Default values appear in brackets.
Table 5-2. BIOS Setup Main Screen Menu Items
Primary
Menu Item
AMIBIOS
System
Memory
System Time HH:MM:SS Set the System Time in hour:minute:second format.
System Date MM/DD/YYYY Set the System Date in month/day/year format.
Sub
Menu Items Value
Version N/A
Build Date N/A
ID N/A
Type N/A Processor
Speed N/A
Size N/A The currently loaded System Memory. You cannot
Description
The currently loaded AMIBIOS information. You
cannot change this value. It appears for
informational purposes only.
The currently loaded Processor information. You
cannot change this value. It appears for
informational purposes only.
change this value. It appears for informational
purposes only.
HP ProLiant DL140 Server Setup and Installation Guide 31
Page 40

Advanced
Table 5-3 describes the menu items available on the Advanced screen. Seven menu items exist on this
screen. Each of these items contains sub-menus that in turn can also lead to subsequent sub-menus.
Default values appear in brackets.
Table 5-3. BIOS Setup Advan ced Sc reen Menu Item s
Primary
Menu Item
SuperIO
Configuration
Remote
Access
Configuration
VT-UTF8
Sub
Menu Items
Serial Port 1
Address
Remote Access Enabled
Serial Port
Number
Serial Port
Mode
Flow Control [None]
Redirection
After BIOS
POST
Terminal Type [ANSI]
Combo Key
Support
Value
Disabled
[3F8/IRQ4]
3E8/IRQ4
2E8/IRQ3
[Serial]
[COM1]
COM2
[115200 8, n ,1]
57600 8, n, 1
19200 8, n, 1
Hardware
Software
[Disabled]
Boot Loader
Always
VT100
VT-UTF8
[Disabled]
Enabled
Description
Allows BIOS to select serial port 1 base
addresses.
Select remote access type
Select serial port settings
Select flow control for console redirection.
Disabled: Turns off the redirection after
POST
Boot Loader: Redirection is active during
POST and during Boot Loader.
Always: Redirection is always active. (Some
OSs may not work if set to Always)
Select the target terminal type
HP ProLiant DL140 Server Setup and Installation Guide 32
Page 41

Boot
Table 5-4 describes the menu items available on the Boot screen. Seven menu items exist on this screen.
Each of these items contains sub-menus that in turn can also lead to subsequent sub-menus. Default
values appear in brackets.
NOTE: Setting wrong values in below sections may cause system to malfunct ion.
Table 5-4. BIOS Setup Boot Screen Menu Items
Primary
Menu Item
Boot Settings
Configuration
Boot Device Priority Enabled
Hard Disk Drives Enabled
Removable Drives Enabled
ATAPI CDROM Drives Enabled
Sub
Menu Items Value
Quick Boot [Disabled]
Enabled
AddOn ROM
Display Mode
Bootup NumLock
Typematic
Rate
Wait For ‘F1’ If
Error
Embedded
NIC PXE ROM
Support
Force BIOS
[Keep Current]
Off
[On]
Slow
[Fast]
Disabled
[Enabled]
[NIC 1]
NIC 2
Disabled
Disabled
Disabled
Disabled
Description
Allows BIOS to skip certain tests while
booting. This will decrease the time
needed to boot the system.
Set display mode for option ROM.
Select power-on state for Numlock
Select keyboard typematic rate
Wait for F1 key to be pressed if error
occurs.
Select the current NIC
specifies the Boot Device Priority
Sequence.
Specifies the boot device priority
sequence from available Hard Drives
Specifies the boot device priority
sequence from available Removable
Drives
Specifies the boot device priority
sequence from available ATAPI CDROM
Drives
Security
Table 5-5 describes the menu items available on the Security screen.
Table 5-5. BIOS Setup Security Screen Menu Items
Menu Item Default Value Description
User Password None The currently loaded User Password. You
cannot change this value. It appears for
informational purposes only.
Change User Password [Enter] Install or change the password.
Clear User Password [Enter] Immediately clears the user password
HP ProLiant DL140 Server Setup and Installation Guide 33
Page 42

Exit
Table 5-6 describes the menu items available on the Exit screen. Default values appear in brackets.
Table 5-6. BIOS Setup Exit Screen Menu Items
Menu Item Description
Save Changes and Exit Exit system setup after saving the changes
F10 key can be used for this operation
Discard Changes and
Exit
Discard Changes Discards changes done so for to any of the setup question s.
Load Defaults Load optimal default values for all the setup questions
Exit system setup without saving any change
ESC key can be used for this operation
F7 key can be used for this operation
F9 key can be used for this operation
Automatic Server Recovery
The Watchdog Timer is a feature of these servers that resets the system in the event of a
catastrophic operating system error like a blue-screen, ABEND (abnormal end), or panic. A
system failsafe timer, the Watchdog Timer, is st arted when the Syste m Manage ment d riv er, also
known as the health driver, is loaded. The timer is reset periodically during normal operation, but
in the event of operating system failure, the timer expires and restarts the server. The Watchdog
Timer increases server up time by restarting the server within a predetermined amount of time
after the system stops responding. The System Management driver notifies the user in the event
of an Watchdog Timer restart.
IMPORTANT: The System Management driver must be installed for the Watchdog Timer to
function.
Power-On Self-Test
Power-On Self-Test (POST) is a series of diagnostic tests that checks firmware and assemblies to
ensure that the system is functioning properly. This utility runs automatically every time the
server is powered up.
Refer to Appendix D, “Troubleshooting,” for the normal power-up sequence and diagnosis of
problems encountered during POST.
HP ProLiant DL140 Server Setup and Installation Guide 34
Page 43

System BIOS Update
The server provides three modes for system BIOS upgrade with flash tools
1. DOS mode
2. Recovery Mode
The steps for DOS mode BIOS ROM upgrade
1. Extract the current BIOS ROM image to a 1.44MB bootable floppy disk.
2. Insert the floppy disk into a USB floppy drive and attach drive to the system.
3. Make sure that the floppy drive is the first in the boot priority.
4. Reboot the system.
5. Follow the steps outlined in the accompanying readme.txt file
6. Do not turn off the system or break execution during flash process executing. These
abnormal actions will cause the ROM to become corrupt.
7. After the ROM upgrade is finished, remove power to the system and reboot.
The steps for use of Recovery Mode (general procedure-see readme.txt for specific information)
1. Obtain a floppy disk and format it(i.e. format a:)
2. Copy or extract the .ROM file onto the floppy disk.
3. Set DIP switch SW1-3 to the ON position.
4. Install the recovery diskette into a USB floppy drive.
5. Boot-up the system through the USB floppy drive, the system will automatically execute the
recovery mode ROM flash.
6. When complete, the server will beep 4 times.
7. Set DIP switch SW1-3 back to the OFF position.
8. Cycle AC power and reboot the server.
IPMI Event Log
The IPMI Event Log is a log that is generated by management controllers when they detect
significant or critical system management events. This includes messages for events such as
‘temperature threshold exceeded’, ‘voltage threshold exceeded’, ‘power fault’, etc. The Event
Log generator (the device generating an Event Log) notifies the system of the event by sending an
“Event Request Log” to the Event Receiver Device.
Refer to Intelligent Platform Management Interface (IPMI) Specification v1.0, Document
Revision 1.1, November 15, 1999
HP ProLiant DL140 Server Setup and Installation Guide 35
Page 44

BIOS Beep Codes
The following table describes the beep codes that are used by AMIBIOS:
Number of Beeps Description
1 Memory refresh timer error.
2 Parity error
3 Main memory read / write test error.
4 Motherboard timer not operational
5 Processor error
6 Keyboard controller BAT test error.
7 General exception error.
8 Display memory error.
9 ROM checksum error
10 CMOS shutdown register read/write error
11 Cache memory bad
HP ProLiant DL140 Server Setup and Installation Guide 36
Page 45

Regulatory Compliance Notices
Regulatory Compliance Identification Numbers
For the purpose of regulatory compliance certifications and identification, the HP ProLiant
DL140 server is assigned a regulatory model number. The regulatory model number for this
product is: HSTNS-2100. This server regulatory model number can be found on the product label,
along with the required approval markings and information. When requesting certification
information for this product, always refer to this regulatory model number. This regulatory model
number should not be confused with the marketing name or model number for the ProLiant
DL140 server.
A
Federal Communications Commission Notice
Part 15 of the Federal Communications Commission (FCC) Rules and Regulations has
established Radio Frequency (RF) emission limits to provide an interference-free radio frequency
spectrum. Many electronic devices, inc lud ing compu te rs, gener ate RF energy incidenta l to thei r
intended function and are, therefore, covered by these rules. These rules place computers and
related peripheral devices into two classes, A and B, depending upon their intended installation.
Class A devices are those that may reasonably be expected to be installed in a business or
commercial environment. Class B dev ices are those t hat may rea sonab ly be expe cted to be
installed in a residential environment (i.e., personal computers). The FCC requires devices in both
classes to bear a label indicating the interference potential of the device as well as additional
operating instructions for the user.
The rating label on the device shows which class (A or B) the equipment falls into. Class B
devices have an FCC logo or FCC ID on the label. Class A devices do not have a FCC logo or
FCC ID on the label. Once the class of the device is determined, refer to the following
corresponding statement.
Class A Equipment
This equipment has been tested and found to comply with the limits for a Class A digital device,
pursuant to Part 15 of the FCC Rules. These limits are designed to provide reasonable protection
against harmful interference when the equipment is operated in a commercial environment. This
equipment generates, uses, and can radiate radio frequency energy and, if not installed and used
in accordance with the instructions, may cause harmful interference to radio communications.
Operation of this equipment in a residential area is likely to cause harmful interference, in which
case the user will be required to correct the interference at personal expense.
HP ProLiant DL140 Server Setup and Installation Guide 37
Page 46

Class B Equipment
This equipment has been tested and found to comply with the limits for a Class B digital device,
pursuant to Part 15 of the FCC Rules. These limits are designed to provide reasonable protection
against harmful interference in a residential installation. This equipment generates, uses, and can
radiate radio frequency energy and, if not installed and used in accordance with the instructions,
may cause harmful interference to radio communications. However, there is no guarantee that
interference will not occur in a particular installation. If this equipment does cause harmful
interference to radio or television reception, which can be determined by turning the equipment
off and on, the user is encouraged to try to correct the interference by one or more of the
following measures:
• Reorient or relocate the receiving anten na.
• Increase the separation between the equipment and receiver.
• Connect the equipment into an outlet on a circuit different from that to which the receiver is
connected.
• Consult the dealer or an experienced radio or television technician for help.
Declaration of Conformity for Products Marked with the FCC Logo –
United States Only
This device complies with Part 15 of the FCC Rules. Operation is subject to the following two
conditions: (1) this device may not cause harmful interference, and (2) this device must accept
any interference received, includ ing int er ference th at may caus e undesired oper at ion.
For questions regarding this server, contact:
Hewlett-Packard Company
P. O. Box 692000, Mail Stop 530113
Houston, Texas 77269-2000
or call 1-800-652-6672. (For continuous quality improvement, calls may be recor ded or
monitored.)
For questions regarding this FCC declaration, contact:
Hewlett-Packard Company
P. O. Box 692000, Mail Stop 510101
Houston, Texas 77269-2000
or call 281-514-3333.
To identify this product, refer to the part, marketing name, or regulatory model number found on
the product.
HP ProLiant DL140 Server Setup and Installation Guide 38
Page 47

Modifications
The FCC requires the user to be notified that any changes or modifications made to this device
that are not expressly approved by Hewlett-Packard Company may void the user's authority to
operate the equipment.
Cables
Connections to this device must be made with shielded cables with metallic RFI/EMI connector
hoods in order to maintain compliance with FCC Rules and Regulations.
Canadian Notice (Avis Canadien)
Class A Equipment
This Class A digital apparatus meets all requirements of the Canadian Interference-Causing
Equipment Regulations.
Cet appareil numérique de la classe A respecte toutes les exigences du Règlement sur le matériel
brouilleur du Canada.
Class B Equipment
This Class B digital apparatus meets all requirements of the Canadian Interference-Causing
Equipment Regulations.
Cet appareil numérique de la classe B respecte toutes les exigences du Règlement sur le matériel
brouilleur du Canada.
European Union Notice
Products bearing the CE marking comply with the EMC Directive (89/336/EEC) and the Low
Voltage Directive (73/23/EEC) issued by the Commission of the European Community and if this
product has telecommunication functionality, the R&TTE Directive (1999/5/EC).
Compliance with these directives implies conf or mity t o the following Europea n Norms (in
parentheses are the equivalent international standards and regulations):
• EN 55022 (CISPR 22) – Electromagnetic Interference
• EN55024 (IEC61000-4-2, 3, 4, 5, 6, 8, 11) – Electromagnetic Immunity
• EN61000-3-2 (IEC61000-3-2) – Power Line Harmonics
• EN61000-3-3 (IEC61000-3-3) – Power Line Flicker
HP ProLiant DL140 Server Setup and Installation Guide 39
Page 48

• EN 60950 (IEC 60950) – Product Safety
Japanese Notice
KOREAN NOTICE
Class A Equipment
Class B Equipment
HP ProLiant DL140 Server Setup and Installation Guide 40
Page 49

BSMI Notice
Laser Devices
All HP systems equipped with a laser device comply with safety standards, including
International Electrotechnical Commission (IEC) 825. With specific regard to the laser, the
equipment complies with laser product performance standards set by government agencies as a
Class 1 laser product. The product does not emit hazardous light; the beam is totally enclosed
during all modes of customer operation and maintenance.
Laser Safety Warnings
WARNING: To reduce the risk of exposure to hazardous radiation:
• Do not try to open the laser device enclosure. There are no user-serviceable
components inside.
• Do not operate controls, make adjustments, or perform procedures to the
laser device other than those specified herein.
• Allow only HP authorized service technicians to repair the laser device.
Compliance with CDRH Regulations
The Center for Devices and Radiological Health (CDRH) of the U.S. Food and Drug
Administration implemented regulations for laser products on August 2, 1976. These regulations
apply to laser products manufactured from August 1, 1976. Compliance is mandatory for
products marketed in the United States.
Compliance with International Regulations
All HP systems equipped with laser devices comply with appropriate safety standards including
IEC 825.
HP ProLiant DL140 Server Setup and Installation Guide 41
Page 50

Laser Product Label
f
The following label or equivalent is located on the surface of the HP supplied laser device.
Laser Information
Laser Type Semiconductor GaAIAs
Wave Length 780 nm +/- 35 nm
Divergence Angle 53.5 degrees +/- 0.5 degrees
Output Power Less than 0.2 mW or 10,869 W·m-2 sr-1
Polarization Circular 0.25
This label indicates that the product is
classified as a CLASS 1 LASER PRODUCT.
This label appears on a laser device installed
in the server.
Numerical Aperture 0.45 inches +/- 0.04 inches
Battery Replacement Notice
This server is provided with an internal Lithium battery or battery pack. There is a danger of
explosion and risk of personal injury if the battery is incorrectly replaced or mistreated.
For more information about battery replacement or proper disposal, contact an HP authorized
reseller or your authorized service provider.
WARNING: This server contains an internal Lithium Manganese Dioxide, or a
Vanadium Pentoxide, or an alkaline battery pack. There is risk of fire and
burns if the battery pack is not handled properly. To reduce the risk of
personal injury:
• Do not attempt to recharge the battery.
• Do not expose to temperatures higher than 60°C.
• Do not disassemble, crush, puncture, short external contacts, or dispose o
in fire or water.
• Replace only with the HP spare parts designated for this product.
Batteries, battery packs, and accumulators should not be disposed of
together with the general household waste. To forward them to recycling
or proper disposal, please use the public collection system or return
them to HP, an authorized HP Partner, or their agents.
HP ProLiant DL140 Server Setup and Installation Guide 42
Page 51

Power Cords
The power cord set included in the server meets the requirements for use in the country where the
server was purchased. If this server is to be used in another country, purchase a power cord that is
approved for use in that country.
The power cord must be rated for the product and for the voltage and current marked on the
product's electrical ratings label. The voltage and current rating of the cord should be greater than
the voltage and current rating marked on the product. In addition, the diameter of the wire must
be a minimum of 1.00 mm² or 18 AWG, and the length of the cord must be between 1.8 m (6 feet)
and 3.6 m (12 feet). If you have questions about the type of power cord to use, contact an
authorized service provider.
IMPORTANT: Route power cords so that they will not be walked on or pinched by items
placed upon or against them. Pay particular attention to the plug, electrical outlet, and the point
where the cords exit from the product.
Mouse Compliance Statement
This device complies with Part 15 of the FCC Rules. Operation is subject to the following two
conditions: (1) this device may not cause harmful interference, and (2) this device must accept
any interference received, includ ing int er ference th at may caus e undesired oper at ion.
HP ProLiant DL140 Server Setup and Installation Guide 43
Page 52

To prevent damaging the system, be aware of the precautions needed to follow when setting up
the system or handling parts. A discharge of static electricity from a finger or other conductor
may damage system boards or other static-sensitive devices. This type of damage may reduce the
life expectancy of the device.
Preventing Electrostatic Damage
To prevent electrostatic damage:
• Avoid hand contact by transporting and storing products in static-safe containers.
• Keep electrostatic-sensitive parts in their containers until they arrive at static-free
workstations.
B
Electrostatic Discharge
• Place parts on a grounded surface before removing them from their containers.
• Avoid touching pins, leads, or circuitry.
• Always be properly grounded when touching a static-sensitive component or assembly.
Grounding Methods
There are several methods for grounding. Use one or more of the following methods when
handling or installing electrostatic-sensitive parts:
• Use a wrist strap connected by a ground cord to a grounded workstation or computer chassis.
Wrist straps are flexible straps with a minimum of 1 megaohm ± 10 percent resistance in the
ground cords. To provide proper grounding, wear the strap snug against the skin.
• Use heel straps, toe straps, or boot straps at standing workstations. Wear the straps on both
feet when standing on conductive floors or dissipating floor mats.
• Use conductive field service tools
• Use a portable field service kit with a folding static-dissipating work mat
If the suggested equipment for proper grounding is not available, have an authorized reseller
install the part.
NOTE: For more information on static electricity or for assistance with product installation,
contact an authorized reseller.
HP ProLiant DL140 Server Setup and Installation Guide 44
Page 53

This appendix provides specific troubleshooting information for the HP ProLiant DL140 server.
Use it to diagnose server startup and installation problems.
For information on LEDs, switch settings, and jumpers, refer to Appendix D, “LEDs and
Switch.”
When the Server Does Not Start
This section provides step-by-step instructions when encountering the most common problems
during the initial Power-On Self-Test (POST). Every time the server boots, it must complete
POST before it can load the operating system and start running software applications.
If the server completes POST and attempts to load the operating system, go to “Problems After
Initial Startup” in this appendix.
WARNING: There is a risk of personal injury from hazardous energy levels.
The installation of options and the routine maintenance and service of this
product must be performed by individuals who are knowledgeable about the
procedures, precautions, and hazards associated with equipment containing
hazardous energy circuits.
C
Troubleshooting
When the server does not start:
1. Be sure that the server and monitor are plugged into a working outlet.
2. Be sure that the power source is working properly:
— Confirm status using the Power On/Off LED.
— Refer to “LEDs and Switches” in Appendix D for the location and status of the
Power On/Off LED.
— Confirm that the Power On/Off button was pressed firmly.
3. Restart the server.
HP ProLiant DL140 Server Setup and Installation Guide 45
Page 54

4. Be sure that a normal power up sequence has occurred to confirm that the system meets the
minimal hardware requirements and is powered up under normal operation. The system has
powered up successfully if:
a. The front panel Power On/Off LED illuminates green.
b. The fans start up.
c. The monitor displays messages regarding server initialization.
d. The operating system loads to complete the boot process.
If the problem persists, continue with the section, “Diagnosis Steps,” in this appendix.
Diagnosis Steps
If the server does not power up, or powers up but does not complete POST, answer the questions
in Table C-1 to determine appropriate actions based on the symptoms observed. According to the
answers provided, another table in this appendix will be referenced, which will outline possible
reasons for the problem, options available to assist in diagnosis, possible solutions, and list
references to other sources of information.
Table C-1: Diagnosis Steps
Question The Next Step
Question 1: Is the front
panel Power On/Off
LED on
Question 2: Is the front
panel Server Status
LED red?
Question 3: Is anything
visible on the monitor?
NOTE: If the server attempts to load the operating system, go to “Problems After Initial
Startup” in this appendix.
If no, go to Table C-2, and then continue to Question 2 if
the problem is not solved.
If yes, continue to Question 4.
If no, go to Table C-2, and then continue to Question 3 if
the problem is not solved.
If yes, continue to Question 4.
If no, go to Table C-3.
If yes, video is available for diagnosis. Determine the next
action by observing POST progress and error messages.
HP ProLiant DL140 Server Setup and Installation Guide 46
Page 55

Table C-2: Front Panel Power On/Off LED Is Not On
WARNING: To reduce the risk of electric shock or damage to the equipment,
before opening access panels to reseat components, power down the server, and
then disconnect the power cord.
Note: For LED locations and functions, refer to Appendix D, “LEDs and Switches.”
Possible Reasons The Next Step
There is no AC power connection.
The power on/off button was not firmly
pressed.
The power on/off button connector cable is
not properly connected to the system
board.
A processor has failed or is not properly
seated.
The power supply has failed or is not
connected.
1. Be sure the power cables are fully connected.
2. Press the power on/off button.
3. Be sure the power source is functioning.
4. Reconnect the power on/off button cable to the
system board.
Refer to Chapter 3, “Installing Hardware
Options,” for the location of the power on/off
button connector.
5. Power down the server. Reseat all expansion
boards, DIMMs, processors, and PPMs. Reseat
all cable connections.
Refer to Chapter 3, “Installing Hardware
Options,” for complete instructions.
6. Monitor the diagnostic LEDs on the system board
for failure conditions.
7. If these steps do not correct the problem, the
most likely cause lies either in the power supply
subsystem or a processor. Contact an authorized
service provider for further technical support.
HP ProLiant DL140 Server Setup and Installation Guide 47
Page 56

Table C-3: Server Does Not Have Video
WARNING: To reduce the risk of electric shock or damage to the equipment,
before opening access panels to reseat components, power down the server, and
then disconnect the power cord.
Note: For LED locations and functions, as well as switch setting information, refer to Appendix E,
“LEDs and Switch.”
Possible Reasons The Next Step
Video cable may not be properly
connected.
Switches may not be correctly set on
the system board.
If an optional video board was
installed, the monitor cable may not
be correctly connected.
The monitor may be connected to the
wrong video connector.
Expansion boards or DIMMs may not
be properly connected or seated.
1. Be sure that the monitor has power and that the
monitor cable is securely connected. If more than one
video adapter is installed, make sure that the monitor
is connected to the correct video board.
2. Be sure that the monitor is functional by connecting it
to a known working server.
3. Be sure that the switch settings on the system board
are correctly set.
4. Power down the server. Reseat all expansion boards,
DIMMs, processors, and PPMs. Reseat all cable
connections.
Refer to Chapter 3, “Installing Hardware Options,” for
bezel and side panel removal.
5. Restart the server.
6. Listen for audible indicators, such as a series of
beeps. A series of beeps indicates the presence of a
POST error message.
7. Monitor the diagnostic LEDs on the system board for
failure conditions.
8. If these steps do not correct the problem, contact an
authorized service provider for further technical
support.
HP ProLiant DL140 Server Setup and Installation Guide 48
Page 57

Table C-4: BIOS Beep Codes
Note: The descriptions of BIOS Beep Codes refer to Chapter 5.
Number of Beeps Troubleshooting Action
1, 2 or 3 Reseat the memory, or replace with known good modules.
4-7, 9-11 Fatal error indicating a serious problem with the system.
Remove add-in card to eliminate the possibility of interference.
‧ If the beep codes are generated even when all other expansion cards are
absent, the motherboard has a serious problem.
‧ If the beep codes are not generated when all other expansion cards are
absent, one of the add-in cards is causing the malfunction. Insert the cards back
into the system one at a time until the problem happens again. This will reveal
the malfunctioning add-in card.
8 If the system video adapter is an add-in card, replace or reseat the video
adapter. If the video adapter is an integrated part of the system board, the board
may be faulty.
HP ProLiant DL140 Server Setup and Installation Guide 49
Page 58

Problems After Initial Startup
After the server has passed POST, errors may still be encountered, such as an inability to load the
operating system. Use Table C-5 to troubleshoot server installation problems that occur after the
initial startup.
For updated information on supported operating systems, refer to Appendix E, “Server
Specifications,” or go to
www.hp.com
NOTE: If the server is rebooting repeatedly, be sure that the system is not restarting due to a
Watchdog Timer power up caused by another problem.
Table C-5: Server Does Not Have Video
Problem Possible Cause Possible Solution
Server cannot load
operating system.
Primary hard drive
Hard drive controller order
Encountered problem after
Problem was encountered
Required operating
system step was missed.
controller installation is
incorrect.
is incorrect.
new hardware was added
to the system.
with hardware added to a
system with a
factory-installed operating
system.
Follow these steps:
1. Note at which phase the operating system
failed.
2. Remove any loaded operating system
components.
3. Refer to the operating system
documentation.
4. Reinitiate installation procedures.
Run BIOS Setup by pressing the DEL key and
correct this problem.
Run BIOS Setup by pressing the DEL key and
correct this problem.
Refer to the documentation provided with the
hardware.
Remove the new hardware.
The factory-installed operating system software
installation must be completed before adding
new hardware to the system.
Be sure that all instructions provided in the HP
Factory-Installed Operating System Software
Installation Guide are being followed.
Remove the new hardware and complete the
software installation. Then, reinstall the new
hardware.
Note: Refer to Chapter 5, “Server Configuration and Utilities,” or for complete instructions on the use
of BIOS Setup.
HP ProLiant DL140 Server Setup and Installation Guide 50
Page 59

Other Troubleshooting Resources
Table C-6: ProLiant DL140 Server Troubleshooting Resources
Resource Description
HP Proliant DL140 Server
Maintenance and Service
Guide
This resource provides a complete list of all replacement parts
available, along with step-by-step instructions on installation and
replacement. Find this guide at www.compaq.com/support
Follow the link for maintenance and servi ce guides, and download the
guide provided for the server.
Information on warranties and service and support upgrades (HP Services Care Pack) can be
found by visiting
www.hp.com
HP ProLiant DL140 Server Setup and Installation Guide 51
Page 60

2
Status Indicators
The ProLiant DL140 server contains the set of front panel LED indicators, which indicate the
status of hardware components and settings:
Use the following sections to determine the location and status of LEDs on the server.
Front Panel LED Indicators
The set of five LEDs on the front of the server indicates server status. The following figure and
table identify and describe the location and function of the LEDs.
D
LEDs and Switches
Figure D-1: Identifying the front panel LED indicators
HP ProLiant DL140 Server Setup and Installation Guide
5
Page 61

Table D-1: Front Panel LED Indicators
Location LED Description Status
1 Power On/Off
Button
2 NIC 2 link/activity On (Green) = Link
3 Server Status Off = Good
Green = System has AC power and is turned on.
Off = Standby mode or System is not powered on.
Off = No Link
Blinking Green = Activity
Red = Critical Error as following:
• At least one fan failure
• At least one processor fails
• At least one of the temperature sensors
reaches critical temperature
• At least one processor VRM failure
• At least one memory module exceeds the
max single bit error rate
4 Hard drive activity Blinking Green = Activity
Off = No Activity
5 NIC 1 link/activity On (Green) = Link
Off = No Link
Blinking Green = Activity
Switches
When adding or removing a component or changing a security feature, the server must be
reconfigured to recognize these chang es via syst em bo ard sw it ches. If the system conf igur ation is
System Configuration Switch (SW1)
incorrect, the server may not work properly, and you may receive error messages on the screen.
IMPORTANT: Reserved switches are provided for use by authorized service providers only
and should not be changed from the indicated default settings.
Refer to Figure 3-3 and Table D-3 for location on the system board of the System Configuration
Switch.
The following subsections provide reference info r mati on about sett ing the sys tem board swi tche s
and jumpers, which is part of the reconfiguration process, along with running BIOS Setup.
The system configuration switch (SW1) is a four-position switch used for system configuration.
Refer to the labels attached to the inside of the server access panel for the proper system
configuration switch settings. The following table shows the shipping configuration of SW1.
HP ProLiant DL140 Server Setup and Installation Guide 53
Page 62

Table D-2: System Configuration Switch (SW1) Settings
Position Function Default Description
S1 PASSWORD CLEAR OFF ON = PASSWORD CLEAR
OFF = NORMAL
S2 CMOS CLEAR OFF ON = CMOS CLEAR
OFF = NORMAL
S3 RECOVERY MODE OFF ON = RECOVERY MODE
OFF = NORMAL
S4 CONFIG LOCK OFF ON = CONFIG LOCK
OFF = NORMAL
NOTE: “On” activates the function.
Clearing and Resetting System Password Settings
It may be necessary at some time to clear and reset the system password.
IMPORTANT: This method of clearing and resetting system passwords is only necessary if
the current password is not known.
Otherwise, when prompted, the password can be entered followed by a forward slash (/). This
operation removes the current password and allows one of the following to be performed:
• Enter BIOS Setup and set the password to a new value.
• Leave the password value blank to disable the password feature.
When the system switch position 1 is set to the ON position, the system is prepared to clear the
system password.
1. Power down the server.
2. Set the switch at position 1 to the ON position.
3. Restart the server, and wait for confir ma tio n.
4. Power down the server.
5. Set the switch at position 1 to the default OFF position.
6. Restart the server. The password is cleared.
Clearing and Resetting System Configuration Settings
It may be necessary at some time to clear and reset system configuration settings. When the
system switch position 2 is set to the ON position, the system is prepared to erase all system
configuration settings fro m both CMOS and NVRAM.
IMPORTANT: Clearing CMOS and/or (NVRAM) deletes the configuration information. Refer
to Chapter 5 for complete instructions on configuring the server.
HP ProLiant DL140 Server Setup and Installation Guide 54
Page 63

To clear and reset the system configuration settings, follow the procedures outlined in “Clearing
and Resetting System Password Settings” section earlier in this chapter, except for replacing
switch position 2 for 1 in the process. After completing the steps, press the DEL key to run BIOS
Setup and reset all system configuration settings.
NOTE: For complete instructions on how to use BIOS Setup, refer to Chapter 5.
Setting the NIC Operating Mode
The NIC operating speed does not have to be set because the controllers automatically
differentiate between the 10-Mbit, 100-Mbit and 1000-Mbit environments.
To configure the PXE and WOL options press Cntl-S when prompted during POST.
HP ProLiant DL140 Server Setup and Installation Guide 55
Page 64

Server Specifications
Operating and Performance Specifications
Table E-1: Operating and Performance Specifications
Dimensions/Feature
Height 4.37 cm (1.72 in)
Depth 60.22 cm (23.7 in)
Width 43.0 cm (16.9 in)
Weight (maximum) 11.00kg (24.2 lb)
Input requirements
Rated input voltage 100 VAC to 240 VAC —
Rated input frequency 50 Hz to 60 Hz —
Rated input current 4.5A (100-120 V) / 2.5A (200-240 V)
Rated input power 440 W —
BTUs per hour 1509 —
Power supply output
Rated steady-state power 325 W —
Maximum peak power 422 W (for max. duration of 15
seconds)
Temperature range1
Operating (See note)
Shipping (See note)
Relative humidity (noncondensing)2
Operating (See note) 10% to 90% —
Non-operating (See note) 10% to 95% —
Maximum wet bulb temperature
1
Operating temperature has an altitude derating of 1°C per 308.4 M (1.8°F per 1000 ft). No
direct sunlight.
2
Storage maximum humidity of 95 percent based on maximum temperature of 45°C
(113°F). Altitude minimum for storage is 70 KPa..
10°C to 35°C (50°F to 95°F)
-40°C to 60°C (-40°F to 140°F)
28°C (82.4°F)
E
—
HP ProLiant DL140 Server Setup and Installation Guide 56
 Loading...