

HP ProCurve J8444A User Manual
*5998-0306*
J8441A
*5998-0305*
J8997A
HP ProCurve 7.4dBi Outdoor Omnidirectional Antenna (J8444A) Guide
SAFETY
The HP ProCurve J8444A and all associated equipment should be
installed in accordance with applicable local and national electrical code
guidelines to ensure safe operation.
Before connecting an external antenna to an HP ProCurve Wireless
Access Point, be sure that the access point radio power levels are set
in accordance with local regulatory requirements. For information on
setting radio power levels, see
MSM3xx/4xx Access Points Management and Conguration Guide
For antenna power settings by country/region, visit the online manuals
page for your access point at www.hp.com/go/procurve/manuals.
Please read all instructions carefully before attempting to
install and use this product.
GROUNDING
: System grounding and lightning protection are
essential, especially for exterior-mounted antennas exposed to the
elements. Never install an antenna where it may fall and contact
electrical lines.
SPECIFICATIONS
Item Specication
Frequency, MHz 2400-2500
Gain with specied cable (dBi) 7.4
VSWR nominal 1.5:1
Impedance (Ohms) 50
Weight lb. (kg) 0.8 (0.36)
Dimension, in. (cm) 25 (63.5)
Wind Surface Area ft2 (m2) 0.12 (0.011)
Wind Survival mph (km/hr) 80 (128)
Power Handling (Watts) 50
Radiating Element Plated copper laminate
Enclosure Polycarbonate
RF Connector Reverse SMA (male)
Cable 33-inch Ultralink (CL2)
WARRANTY AND SUPPORT INFORMATION
See the warranty and support information included with this product.
For the latest information, go to www.hp.com/go/procurve/support.
Transmit power control
in the
.
NOTE: Mast top must be
lower than top of metal
Omni base.
MOUNTING
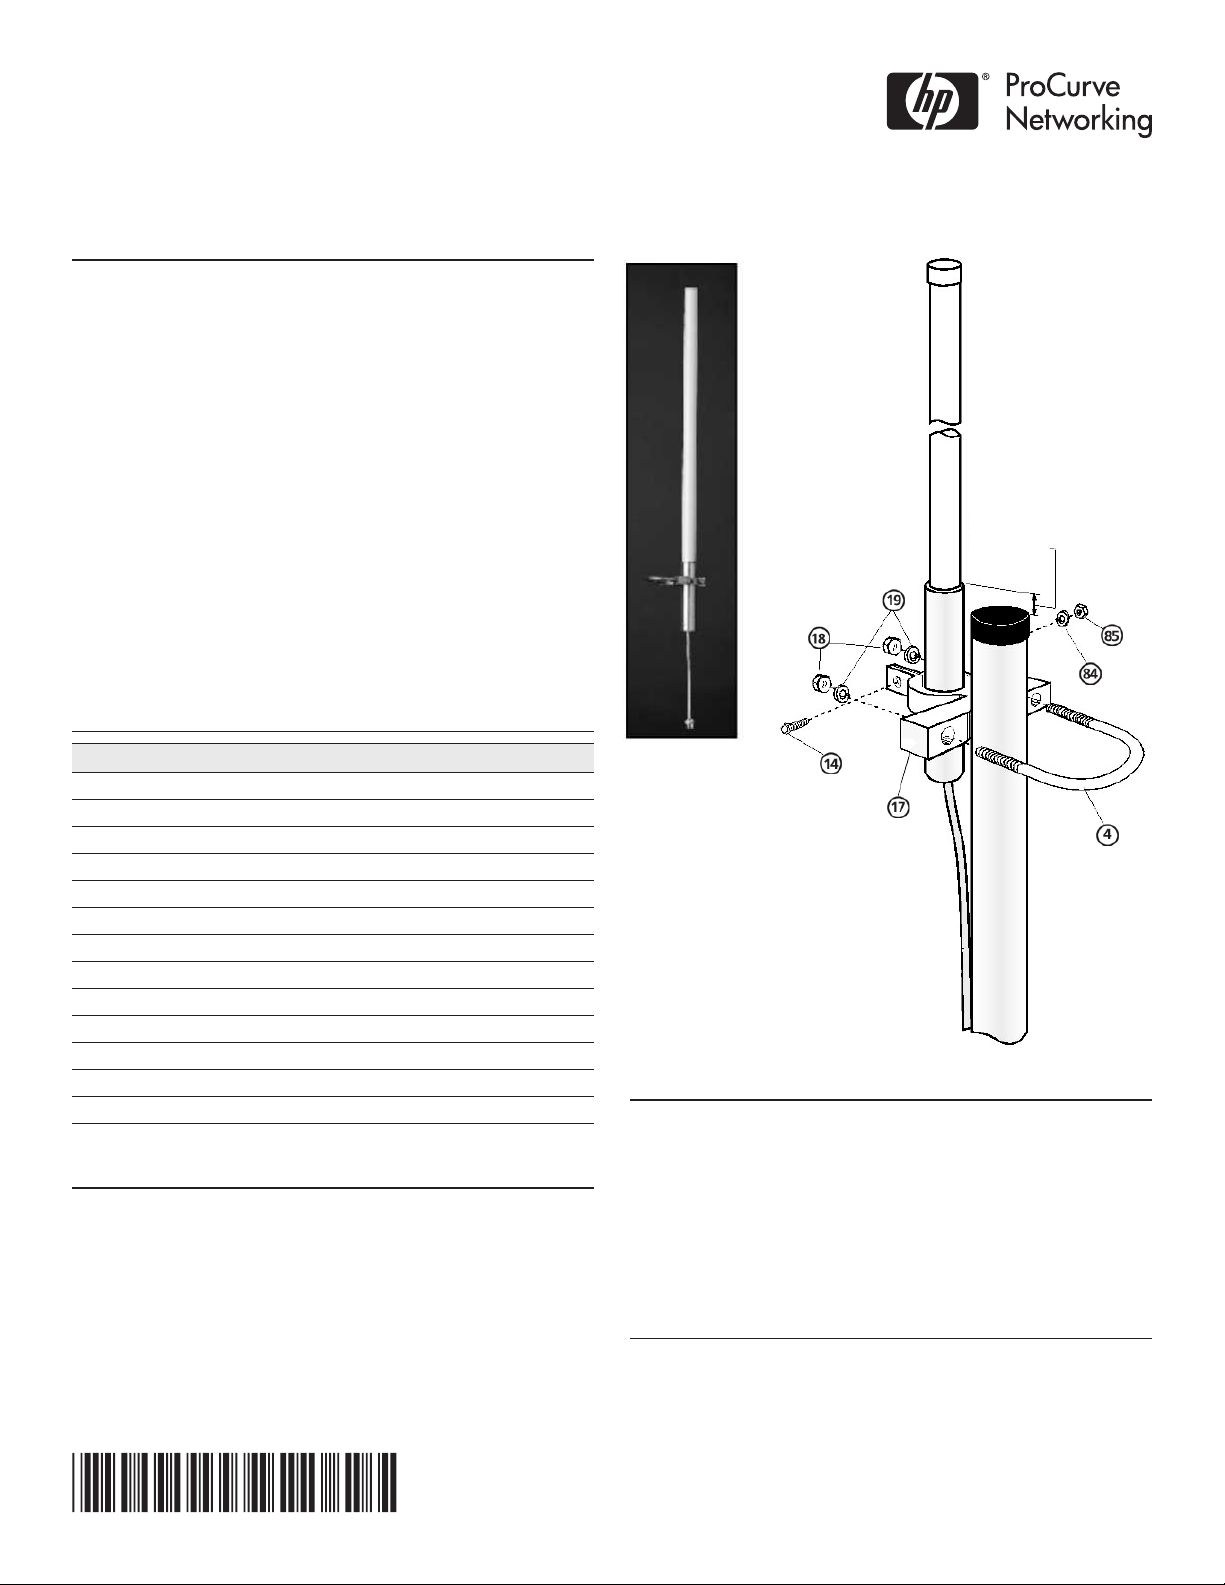
The HP ProCurve J8444A is is suitable for use indoors or outside.
The antenna has been designed to mount to a mast at least 1-3/4 inches
(4.4 cm) but not larger than 2-1/8 inches (5.4 cm) in diameter. To install,
mount antenna clamp (17) to mast using U-bolt (4), lock washers (19),
and nuts (18). Slide antenna into clamp as shown and lock in position
using hex head bolt (14), lock washer (84), and nut (85). Secure cable to
mast using tape or cable tie.
© Copyright 2010, Hewlett-Packard Development Company, L.P.
The information contained herein is subject to change without notice.
Printed in
Part Number: 5998-0307
ANTENNA LOCATION
The location of the HP ProCurve J8444A antenna is important.
Objects such as buildings, trees, power lines, towers, guy wires, glass
walls, and antennas and metallic objects, etc. will reduce efciency.
Best performance is achieved when antennas are mounted at the same
height and in a direct line of sight with no obstructions. If this is not
possible and reception is poor, it is a good idea to try a few different
mounting positions to optimize reception.
LIGHTNING ARRESTER
WARNING: PROFESSIONAL INSTALLATION REQUIRED:
Prior to installing or using this device, consult with a professional
installer trained in RF installation and knowledgeable in local
regulations including building and wiring codes, safety, channel, power,
indoor/outdoor restrictions, and license requirements for the intended
country. It is the responsibility of the end user to ensure that installation
and use comply with local safety and radio regulations.
Warning: Surge protection and grounding: When
connecting an outdoor antenna make sure that proper lightning surge
protection and grounding precautions are taken in accordance with
local electrical codes. Failure to do so may result in personal injury,
re, equipment damage, or a voided warranty. The HP ProCurve
hardware warranty does not cover damage caused by static discharge
or lightning strike.
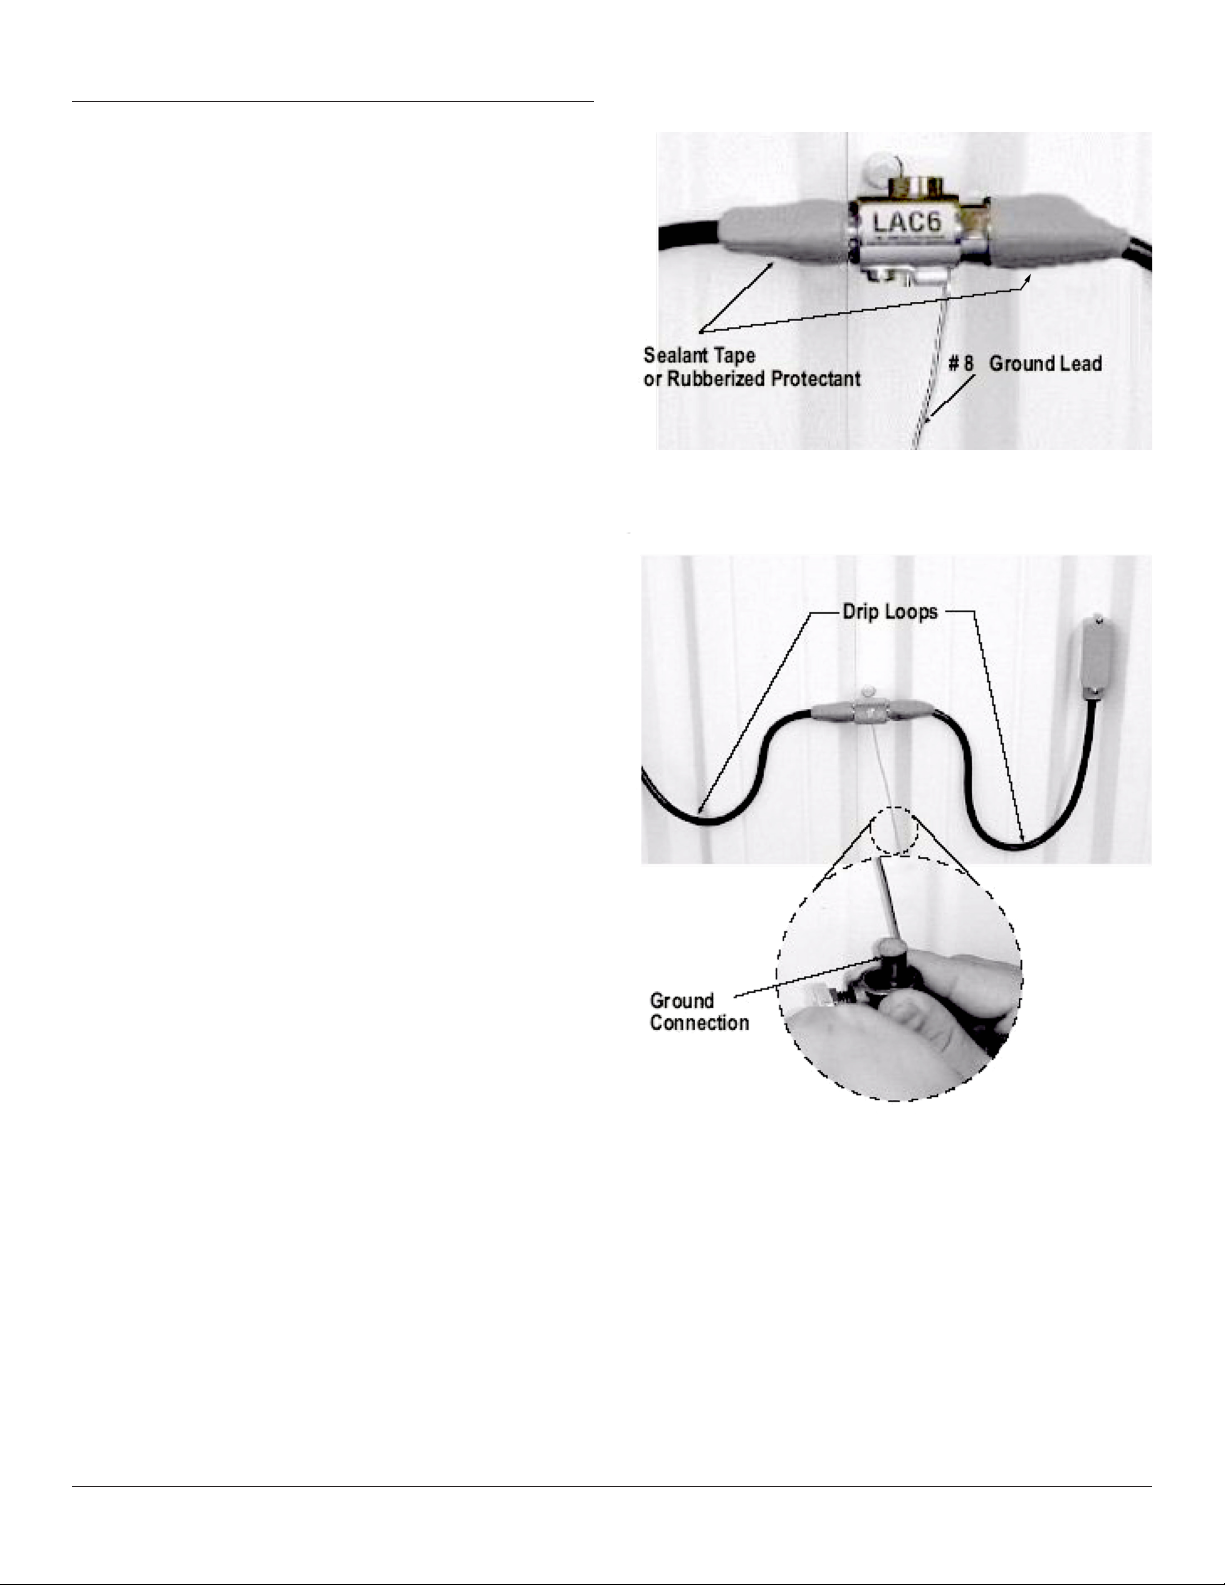
For external applications, it is strongly recommended that you install
a lightning arrester (HP J8996A or equivalent) for each port of the
antenna. Lightning arresters must be purchased separately.
For best results, install the lightning arrester in close proximity to a
low-resistance ground connection near where the coaxial cable
enters the building or attaches to an AP. For exterior installations,
use weatherproof coax connectors with a suitable mastic or
rubberized tape to prevent water incursion. See Photo 1.
To connect the lightning arrester to the ground, use a very short and
direct run of #8 solid copper wire, or equivalent. Ensure that the other
end of the grounding wire connects to a true earth ground according to
the NFPA 70 National Electrical Code and/or all pertinent local codes.
Lightning arresters require periodic inspection and replacement.
Provide drip loops in cables to prevent water from entering the
building or AP. See Photo 2.
Photo 1
Photo 2
HP ProCurve Networking 2 HP ProCurve 7.4dBi Outdoor Omnidirectional Antenna (J8444A) Guide
 Loading...