

HP Presario 1509, Presario 1624 Network Manual

Go Wireless
Open up new possibilities for work and play

Start with 3 pieces
A typical home or small-office wireless LAN requires only 3 pieces of
hardware. With these 3 pieces, you’re ready to get started!
My Network Settings
Point-to-Point over Ethernet
User Name (ID)
Host Name
Password
Service Name
Compatible wireless router (purchased separately). See the “Comparison of Wireless LAN
(WLAN) Technology Standards” table on page 7. During router configuration, use the table
below to record router security level.
My Router Security Level
Wireless Router Security Level Result Action
Disable No security enabled. No action required.
WEP (Wired Equivalent Privacy) Encryption key provided. Record encryption key.
WPA-PSK Pass phrase required. 1 Create pass phrase.
(Wi-Fi Protected Access–Preshared Key) 2 Record pass phrase
3 Download the latest WPA update for
Microsoft Windows XP by visiting
Microsoft Windows Update at
http://windowsupdate.microsoft.com.
Search for “WPA.”
TIP: If you did not buy a
wireless-enabled notebook,
you can buy a wireless
PC Card to add wireless
capability.
TIP: You can buy one
device that acts as both a
wireless router and a
cable/DSL modem.
2
The instructions in this booklet are for wireless computers using Microsoft®Windows®XP
Professional.
Your computer(s) with integrated 802.11 WLAN (wireless local area network) capability.
ISP cable, DSL modem, or other broadband technology (purchased separately). Your Internet
connection should be operational before you begin the procedures in this booklet. Your
Internet service provider (ISP) will provide you with the modem, Internet service, and the
broadband Internet configuration settings needed to set up your wireless router. Use the table
below to record this information.
1
Set up and turn on the computer according to the instructions included with the computer. Ensure
that the computer is connected to AC power during this setup.
Make sure that the blue wireless light next to the wireless
icon is off. If the light is on, turn it off by pressing the
wireless on/off button.
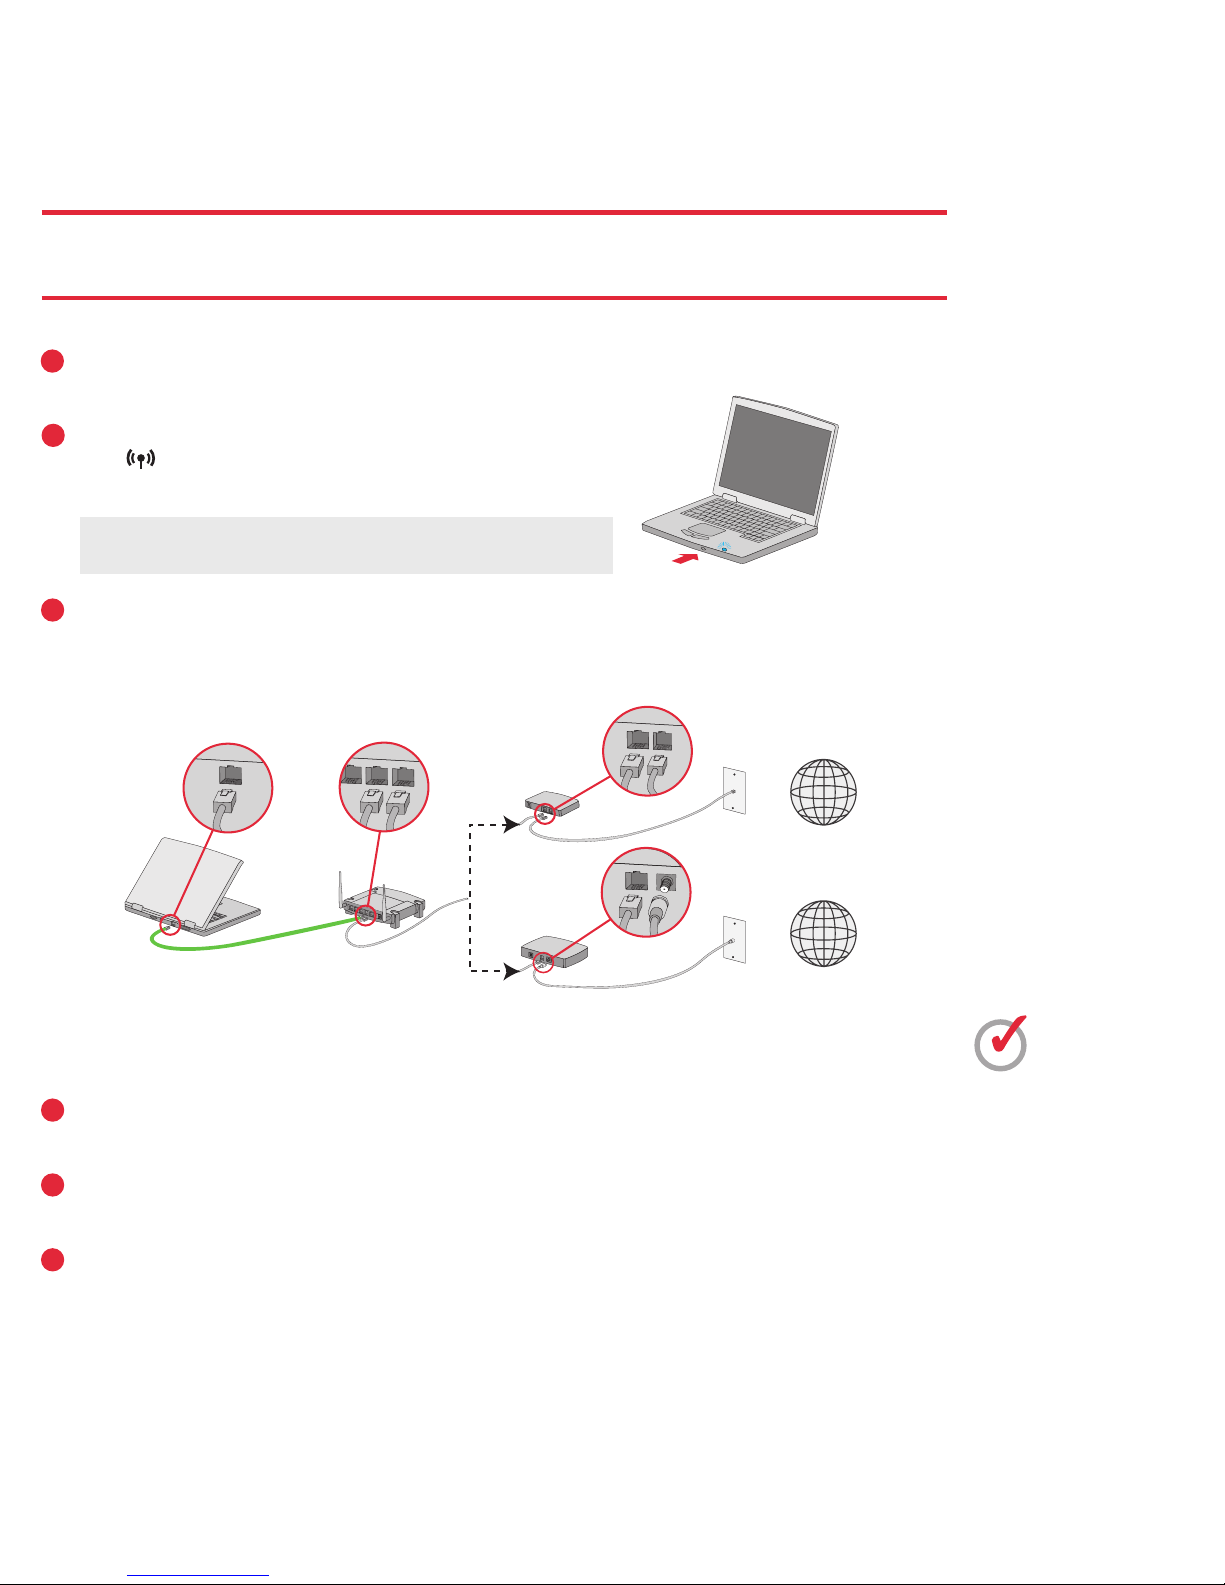
Connect the wireless router according to the manufacturer’s instructions. (During this process your
computer is temporarily connected to the router using the Ethernet cable included with the router.
The router instructions will tell you when to connect and disconnect the cable.)
Set up the hardware and software
Now that you have the necessary components to get started, you’re ready to
connect the pieces of the network and to configure the wireless router.
Configure the wireless router according to the manufacturer’s instructions. Refer to the information
you recorded in the “My Network Settings” table on page 2.
During router configuration, check whether the wireless router security level is set to Disable, WEP,
or WPA-PSK. Record this information in the “My Router Security Level” table on page 2.
Test the Internet connection by opening your Web browser and accessing a Web site. After you
have tested your setup with the wireless router Ethernet cable connected, remove the cable from the
computer and the wireless router.
Network connections with router Ethernet cable temporarily connected (jack locations vary)
Important: If you encounter problems at any time during the router
setup, contact your router manufacturer for technical assistance.
Location of the
wireless button
and light varies
by model.
3
DSL Modem
or
Router Ethernet Cable
(shown in green)
Cable Modem
PROGRESS CHECK
If you successfully complete
step 6, your router is set up
correctly. If you cannot access
a Web site, repeat steps 1
through 5, or contact your
router manufacturer or your
ISP for technical assistance.
Do not continue with these
instructions until you can
successfully access a
Web site.
Internet
Wireless Router
2
3
4
5
6
 Loading...