

Page 1

Poster Designer Pro QuickStart Guide
1
QuickStart Guide
Welcome to Serif Poster Designer Pro for HP, the
software program that provides all the tools and
features you’ll need to create and print your own
custom posters.
Poster Designer Pro has been developed with ease
of use in mind, and you’ll be surprised by how
simple it is to produce superb results.
Whether you want to create a simple sales flyer or
a stylish full-color poster to advertise your business
or promote an event, Poster Designer Pro makes it
all possible.
To get started quickly, follow the steps outlined in
this QuickStart Guide. For more detailed
information, see the online Help, How To tab, and
tutorials (see page 16).
Page 2

Poster Designer Pro QuickStart Guide
2
This document, and the software described in it, is furnished under an end user License
Agreement, which is included with the product. The agreement specifies the permitted and
prohibited uses.
Digital Images ©2008 Hemera Technologies Inc. All Rights Reserved.
Digital Images ©2008 Jupiterimages Corporation, All Rights Reserved.
Digital Images ©2008 Jupiterimages France SAS, All Rights Reserved.
Bitstream Font content © 1981-2005 Bitstream Inc. All rights reserved.
Panose Typeface Matching System ©1991, 1992, 1995-97 Hewlett-Packard Corporation.
Portions graphics import/export technology © AccuSoft Corp. & Eastman Kodak Company &
LEAD Technologies, Inc.
THE PROXIMITY HYPHENATION SYSTEM © 1989 Proximity Technology Inc. All rights
reserved.
THE PROXIMITY/COLLINS DATABASE © 1990 William Collins Sons & Co. Ltd.; © 1990
Proximity Technology Inc. All rights reserved.
THE PROXIMITY/MERRIAM-WEBSTER DATABASE © 1990 Merriam-Webster Inc.; © 1990
Proximity Technology Inc. All rights reserved.
The Sentry Spelling-Checker Engine © 2000 Wintertree Software Inc.
The ThesDB Thesaurus Engine © 1993-97 Wintertree Software Inc.
WGrammar Grammar-Checker Engine © 1998 Wintertree Software Inc.
Extensible Metadata Platform (XMP) Copyright © 2006 Adobe Systems Incorporated. All
rights reserved.
Clipart samples from Serif ArtPacks © Serif (Europe) Ltd. & Paul Harris
TrueType font samples from Serif FontPacks © Serif (Europe) Ltd.
PANTONE® Colors displayed in the software application or in the user documentation may
not match PANTONE-identified standards. Consult current PANTONE Color Publications
for accurate color. PANTONE® and other Pantone, Inc. trademarks are the property of
Pantone, Inc. © Pantone, Inc., 2006
Pantone, Inc. is the copyright owner of color data and/or software which are licensed to Serif
(Europe) Ltd. to distribute for use only in combination with Serif Poster Designer Pro for HP.
PANTONE Color Data and/or Software shall not be copied onto another disk or into
memory unless as part of the execution of Serif Poster Designer Pro for HP.
All Serif product names are trademarks of Serif (Europe) Ltd. Microsoft, Windows, and the
Windows logo are registered trademarks of Microsoft Corporation. All other trademarks
acknowledged.
© 2009 Serif (Europe) Ltd. All rights reserved. No part of this document may be reproduced
in any form without the express written permission of Serif (Europe) Ltd.
Serif Poster Designer Pro for HP © 2009 Serif (Europe) Ltd.
Page 3

Poster Designer Pro QuickStart Guide
3
Installing Poster Designer Pro
You can install Poster Designer Pro automatically using AutoPlay, or
manually from Windows Explorer.
To install using AutoPlay:
1 Insert the Poster Designer Pro DVD into your DVD drive.
2 If AutoPlay is enabled on the drive, the Setup process starts
automatically.
3 Follow the on-screen installation instructions.
If AutoPlay is not enabled (or doesn't start the install automatically),
use the manual installation procedure described below.
To install manually:
1 In Windows Explorer, navigate to the DVD drive in which your
Poster Designer Pro DVD is located and double-click the DVD drive.
2 Double-click the setup.exe file in the displayed folder.
3 Follow the on-screen installation instructions.
To modify or repair the installation:
Microsoft Windows XP:
1 From the Windows Start menu, select Control Panel, and then
double-click on the Add/Remove Programs icon.
2 In the list of installed programs, select Poster Designer Pro.
3 To modify the installation:
· Click Change.
· In the Setup Wizard, click Next, click Modify, and then follow the
on-screen instructions.
To repair the installation:
· Click Repair.
· In the Setup Wizard,
click Next, click
Repair, and then
follow the on-screen
instructions.
Adding and removing content
· Adding content may prompt you to insert
your original Poster Designer Pro DVD.
· Removing content does not require this.
Page 4

Poster Designer Pro QuickStart Guide
4
Microsoft Windows Vista®:
1 From the Windows Start menu, select Control Panel.
2 Double-click Programs and Features.
3 In the list of installed programs, select Poster Designer Pro.
4 To modify the installation:
· Click Change.
· In the Setup Wizard, click Next, click Modify, and then follow the
on-screen instructions.
To repair the installation:
· Click Repair.
· In the Setup Wizard, click Next, click Repair, and then follow the
on-screen instructions.
Page 5
Poster Designer Pro QuickStart Guide
5
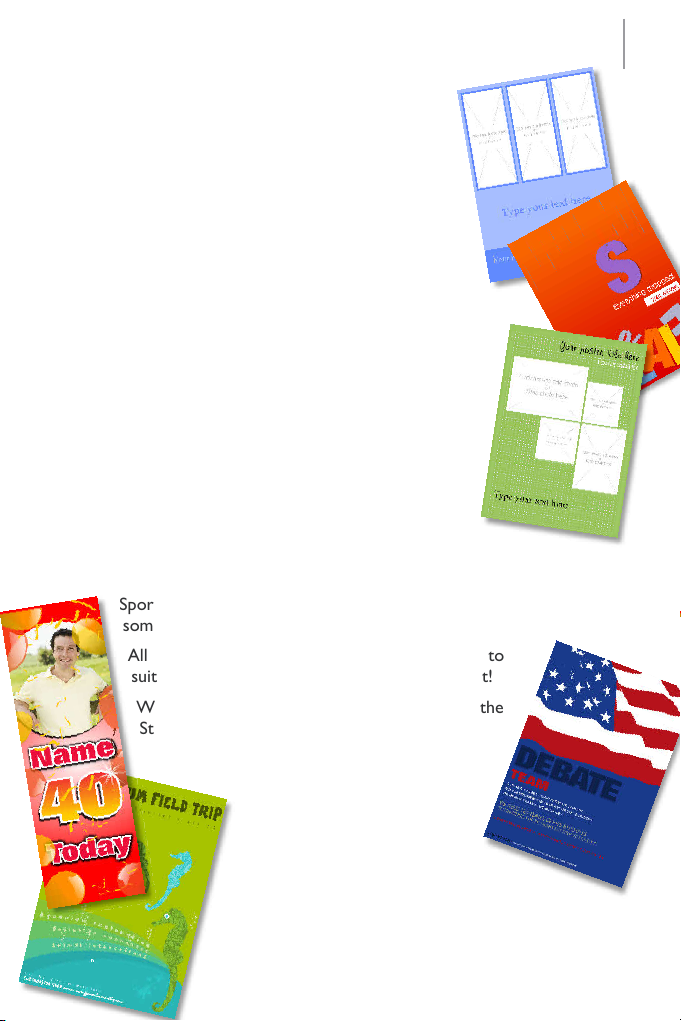
Creating your first poster
Poster Designer Pro provides a wide range of
professionally-designed design templates and
themed layouts, which you can use as starting
points for your own custom posters.
In the following pages, we’ll show you how to
create a poster from a design template and from a
themed layout. You’ll learn how to add your own
pictures and text, and print your finished poster.
We’ll use the sample images installed with Poster
Designer Pro. In a standard installation, you’ll find this
folder in the following location:
C:\Program Files\Serif\Poster Designer
Pro\1.0\Images
You can use your own images if you prefer.
Starting with a design template
Each design template is offered in a poster (choose
from portrait or landscape orientation) and a
banner style, and comes complete with pictures and text.
Design template categories include Education, Retail, Business,
Sports, Travel, Celebrations, and more—you’re sure to find
something you like.
All you need to do is update the text and images to
suit your needs and your poster is ready to print!
We’ll begin by opening a design template from the
Startup Wizard.
The Startup Wizard is displayed
by default when you launch
Poster Designer Pro, but you
can access it at any time from
the File menu.
To open a design template:
1 On the File menu, click New from
Startup Wizard.
Page 6

Poster Designer Pro QuickStart Guide
6
The Startup Wizard offers different routes into the program—create
a new poster, open a saved poster, browse the tutorials, and so on.
Click the
2
Design
Template
option.
In the
3
Template
from the
The center pane updates to show
thumbnails of the templates available
in the category.
Select a thumbnail to view its
4
associated designs in the
pane on the right.
Select the design you want to use.
5
Use
Create New Poster From
dialog, select a category
Templates
list on the left.
Designs
In the upper-right corner
6
of the dialog, in the
Scheme
choose a color scheme on
which to base your poster.
(The first three schemes
are designed specifically to
complement the selected
template.)
drop-down list,
Open.
Click
7
Page 7

Poster Designer Pro QuickStart Guide
7
The template opens as a
new poster in the
workspace.
8 You can replace the
images in the template
with your own photos, or
you can choose from the
selection of template
images included with
Poster Designer Pro.
These images are
displayed by default in the
Media Bar at the bottom
Changing color schemes
Because the themed layouts and design
templates are color schemed, you can swap
the underlying scheme (and consequently the
look and feel of the poster) at any time.
To apply a new color scheme:
1 On the
Swatches tab,
click the Edit
button to open
the Scheme
Manager.
2 Choose a new color scheme and click OK.
For more on color schemes, see online Help.
of the workspace.
· To add a template image, simply drag it from the Media Bar on
top of the image you want to replace.
- or -
· To add your own photo, select the image you want to replace and
click its Replace Picture button. In the Import Picture
dialog, browse to and select your new image and click Open.
For more on working with images, see page 9.
9 To edit text, click and drag to select the text you want to work with
(or triple-click to select all of the text), and then type your own text.
10 To format text, select it, and then use the settings on the Text
context toolbar to change font style, size and formatting options.
For more on working with text, see page 10.
11 When you have finished adjusting your pictures and text, go to page
14 to learn how to preview and print your poster.
Page 8

Poster Designer Pro QuickStart Guide
8
Starting with a themed layout
As an alternative to the design templates, Poster Designer Pro also
provides a wide range of themed layouts. Each theme offers a selection of
layout variations and color schemes.
To open a themed layout:
1 On the File menu, click New from Startup Wizard.
2 Click the Use Themed Layout option.
3 In the Create New Poster From Themed
Layout dialog, scroll the left Themed Layouts
pane and select a theme thumbnail.
The adjacent Layouts pane updates to show
variations of the selected layout.
4 In the upper-right corner of the dialog, in the
Scheme drop-down list, choose a color
scheme on which to base your poster.
(The first three schemes are
designed specifically to
complement the selected
themed layout.)
As you select a scheme, the
layout thumbnails are updated
automatically.
5 In the Layouts
6 Click OK.
pane, select the
layout variation
you want to
use.
The layout
opens in the
workspace.
Page 9

Poster Designer Pro QuickStart Guide
9
Adding pictures to themed layouts
The themed layouts provide one or more placeholder picture frames for
you to add your own photos, or a template image from the Media Bar.
To add a template image from the Media Bar:
· Drag an image from the Media Bar directly onto a picture frame.
To add your own image:
1 Click once inside a picture frame (or select the frame and then click
the Replace Picture icon that displays in the lower-right
corner).
2 In the Import Picture
dialog, browse to locate
the image you want to use,
select it, and click Open.
The picture is added to the
frame and scaled to fit.
3 When the picture is selected, note
that the Picture Frame toolbar
displays in the lower-right corner.
You can use these tools to adjust
your picture inside the frame:
· To reposition the picture inside
the frame, click Pan, and then
click and drag on the picture.
· To rotate the picture, click Rotate.
· To zoom into or out of the picture, click Zoom In or
Zoom Out, and then click on the picture.
· To replace the picture, click Replace Picture, browse to
locate a new picture and click Open.
Page 10

Poster Designer Pro QuickStart Guide
10
Working with text
In this section, we’ll edit and resize the
text placeholders, and apply formatting
and color. We’ll be working with artistic
text and frame text.
To select, edit, and format text:
1 Click inside the text object
containing the words ‘Your poster
title here,’ then triple-click to select
all of the text.
The placeholder text is shaded in
blue for clear editing.
Adding text
Frame text and artistic text
share many attributes, and you
can use the same methods to
perform operations such as
selecting, editing, formatting,
and so on. However, there are
a few differences. For example...
With frame text you can:
· Flow text between frames.
· Wrap text around pictures.
With artistic text you can:
· Stretch or squash the text by
dragging its container.
· Create some interesting
shaped text effects by putting
artistic text on a path.
For details, see the Working
With Text tutorial and online
Help.
2 Type your own poster title.
3 (Optional) If required, resize your title by clicking and dragging a
resize handle (circled in red below).
As you resize the text object, the text is automatically ‘stretched’ or
‘squashed’ to fit inside the text frame. This is unique to artistic text.
Our next task is to apply formatting to the text, and change its color.
4 Triple-click, or click and drag, to select the poster title text.
At the top of the workspace, below the Standard toolbar, the Text
context toolbar displays.
Page 11

Poster Designer Pro QuickStart Guide
11
5 On the Text context toolbar, in the
Fonts drop-down list, select your
preferred font.
6 (Optional) Depending on the font
selected, you may need to resize the
text object to fit the page.
To do this, you can drag a resize
handle to stretch or squash the text (see step 3), or use the point
size drop-down list on the Text context toolbar.
7 Click and drag to select all the text.
8 At the right of the workspace, on the
Swatches tab:
· Make sure that the Text
button is selected.
· Click to expand the Palettes
drop-down list and select the
palette of your choice.
· Click a color swatch to apply it to the text.
9 Repeat the previous steps to edit and format the ‘Poster subtitle’ and
‘Type your text here’ placeholders.
Note: The ‘Type your text here’ placeholder is frame text, and
behaves differently when its container is resized. If you want the text
to fit the frame, on the Text context toolbar, expand the AutoFit
Options drop-down list and select AutoFit.
For more on
working with text,
see the Working
With Text tutorial
and online Help.
Page 12

Poster Designer Pro QuickStart Guide
12
Moving, rotating, and aligning
The following steps show you how to move, rotate, and align objects on
the page.
To move an object:
1 On the Tools toolbar, click the Pointer Tool, and then click to
select the object you want to move.
2 In the upper-left corner of the
object, click the Move
button, and then drag the object
into its new position.
- or -
Click on an object’s
border to select it (the
border color changes to
dark gray to show that
the entire object is
selected). Click and drag
the object with the
Move cursor.
To rotate an object:
1 Select an object with the
Pointer Tool.
2 To rotate in 90° increments:
On the Arrange menu, click Rotate Left or Rotate Right.
- or -
To rotate freely:
Hover the mouse cursor just
outside one of the edge or
corner handles (the cursor
temporarily switches to the
Rotate cursor), then click and
drag to rotate the object.
Page 13

Poster Designer Pro QuickStart Guide
13
To align objects:
1 Hold down the Shift key and, using the Pointer Tool, click to
select the objects you want to align.
2 On the Align tab, click an alignment option
In the example illustrated below, we chose Center
Horizontally and selected the Include margins check box so that
our text objects would be centered relative to the page edges.
3 When you have finished
adjusting your pictures
and text, you’re ready to
preview and print your
poster.
Alignment options
· To align the selected objects with the edges
of the page, select the Include margins
check box.
· To evenly space objects, click Space
Evenly Across or Space Evenly
Down.
· To space by a specific amount, select the
Spaced check box and type a value into
the adjacent box. If you leave this option
unselected, objects are spread evenly
between the two endmost items.
Page 14

Poster Designer Pro QuickStart Guide
14
Previewing your poster
You can preview your poster before printing, to see how it will appear
on the printed page.
To preview your poster:
1 On the Standard toolbar, click Print
Preview.
2 Use the tools in the lower-left corner of the
Preview window to adjust your preview.
Zoom Out: Click to zoom out
of the poster.
Zoom In: Click to zoom into the
poster.
Zoom Tool: Click the tool, and
then click and drag on the area you
want to zoom into.
Actual Size: Click to view your
poster at its actual size (you can then use
the Pan tool to pan around the image).
Fit Page: Click to view the entire
poster in the Preview window.
Pan: Click the tool, and then click and drag on your
poster to view a different area (only applicable when
you have zoomed into the poster, or have chosen to
view it at its actual size).
3 If you are happy with the results, click Print, and then proceed
to step 2 of the following section.
- or
To close the dialog and make any adjustments required, click to
return to the main workspace.
Page 15

Poster Designer Pro QuickStart Guide
15
Printing your poster
Poster Designer Pro supports printing
on paper rolls. You can set print quality
and scale your poster to fit your
selected paper size.
To print your poster:
1 On the Standard toolbar, click to open the Print dialog.
2 On the General tab, in the Name drop-down list, select your HP
Designjet printer.
3 Select your paper size from
the Paper Size dropdown list.
4 Select your print quality
from the Print Quality
drop-down list.
5 Select a scale option from
the Scale drop-down list.
(These options will differ
depending on the paper
Choosing print quality
The default print quality setting is Normal.
For faster printing, choose Fast. This option
reduces the number of print passes,
subsequently reducing the quality of the
printed output.
For the best quality printed output, choose
Best. This option increases the number of
print passes, subsequently increasing the time
it will take to print the poster.
size you selected.)
6 Set the number of copies
to print.
For a list of supported
printers, see online Help.
Page 16

Poster Designer Pro QuickStart Guide
16
7 Depending on your
printer model, the Paper
Type drop-down list may
be enabled or grayed out.
· If enabled, select your
paper type from the list.
· If grayed out, you’ll see
‘Loaded in Printer.’ This
indicates that the paper
type set in your printer
will be used.
8 Click Print.
Well done, you’ve created and printed your first poster! You should now
be feeling familiar with the tools and techniques required to create a
poster from a layout and a template.
While the topics we’ve covered here should be sufficient for many of
your projects, Poster Designer Pro provides numerous other features.
For more details, see the following documentation:
· How To tab, located at the left of the workspace.
· Online Help, accessed from the upper menu bar (click Help >
Poster Designer Pro Help).
· Tutorials, accessed from the Startup Wizard or the upper menu bar
(click Help > Tutorials).
Support details
If you require support, please visit the Poster Designer Pro support web
page at:
http://www.hp.com/go/posterdesignerpro/support
 Loading...