

Page 1

Getting Started
Page 2
The information in this document is subject to change without notice.
Hewlett-Packard® Company makes no warranty of any kindwithregardtothismaterial,including,butnot
limited to, the implied warranties of merchantability and fitness for a particular purpose.
HP shall not be liable for errors contained herein or forincidentalorconsequentialdamagesinconnection
with the furnishing, performance, or use of this material.
HP assumes no responsibility for the use orreliabilityofitssoftwareonequipment that is not furnished by HP.
This document contains proprietary information that is protected by copyright.Allrightsarereserved. No part
of this document may be photocopied, reproduced,ortranslated to another language without the prior written
consent of HP.
Hewlett-Packard Company
Home Products Division
P.O. Box 4010
Cupertino, CA 95015-4010
Printed in the USA.
© Copyright Hewlett-Packard Company, 1998. All rights reserved.
Hewlett-Packard is a registered trademark of Hewlett-Packard CompanyintheUnitedStatesofAmericaand
other countries.
Intel Connect and Intel ProShare are registered trademarks of Intel Corporation.
Microsoft and Windows are registered trademarksofMicrosoftCorporation in the United States of America and
other countries.
Other brand or product names aretrademarksof their respective holders.
Page 3
Contents
Chapter 1 Preparing to Use Your
Computer .............................................................1
Turning On Your Computer For the First Time .......................................2
Working in Comfort with Your HP Pavilion PC....................................... 3
Preparing Your Work Environment................................................................6
Y ourWork Posture................................................................................................. 11
Setting Up YourHP Computing Equipment ...........................................13
Chapter 2 Exploring Your System...........25
Turning On Your Computer...........................................................................26
Turning Off Your Computer...........................................................................26
Suspending Your Computer...........................................................................27
Using the Keyboard...........................................................................................28
Using the Mouse..................................................................................................30
Using Headphones...............................................................................................31
Working with Diskettes......................................................................................32
Using the CD-ROM Drive................................................................................34
Using the Modem................................................................................................36
Chapter 3 Discovering Your Software ....37
Learning about the Windows Desktop..................................................... 38
Finding Your Preinstalled Software.............................................................41
Finding Files...........................................................................................................42
Adding Software..................................................................................................43
Deleting Software...............................................................................................43
Getting Help from the HP Support Center............................................44
Getting Software Help......................................................................................45
Contents
iii
Page 4
Chapter 4 Communicating
with the World ................................................. 47
Connecting to the Internet............................................................................48
Signing Up for Internet Access....................................................................48
Browsing the Internet....................................................................................... 49
Sending and Receiving E-Mail .................................................................... 50
Using the HP Message Board.........................................................................51
Terms and Conditions of the Free Internet Access ............................53
Removing the Channel Bar............................................................................54
Sending and Receiving Faxes .......................................................................55
Glossary............................................................ 57
Regulatory and Safety Information...........63
FCC Regulatory and Safety Information................................................63
Declaration of Conformity.............................................................................67
Additional Safety Information ....................................................................68
Index ...................................................................71
Getting Started
iv
Page 5
1
Preparing to Use Your Computer
Chapter 1 covers the following topics:
Turning your computer on for the first time
•
Preparing your work environment
•
Positioning yourself properly
•
Positioning your computer components
•
Chapter 1•Preparing to Use Your Computer
1
Page 6
Turning On Your Computer For
the First Time
When you first turn on your computer, a series
of startup screens, including a mouse tutorial,
appears. When you get to the Microsoft® Windows®
desktop, you must click the message Click here to
finish setting up your PC.
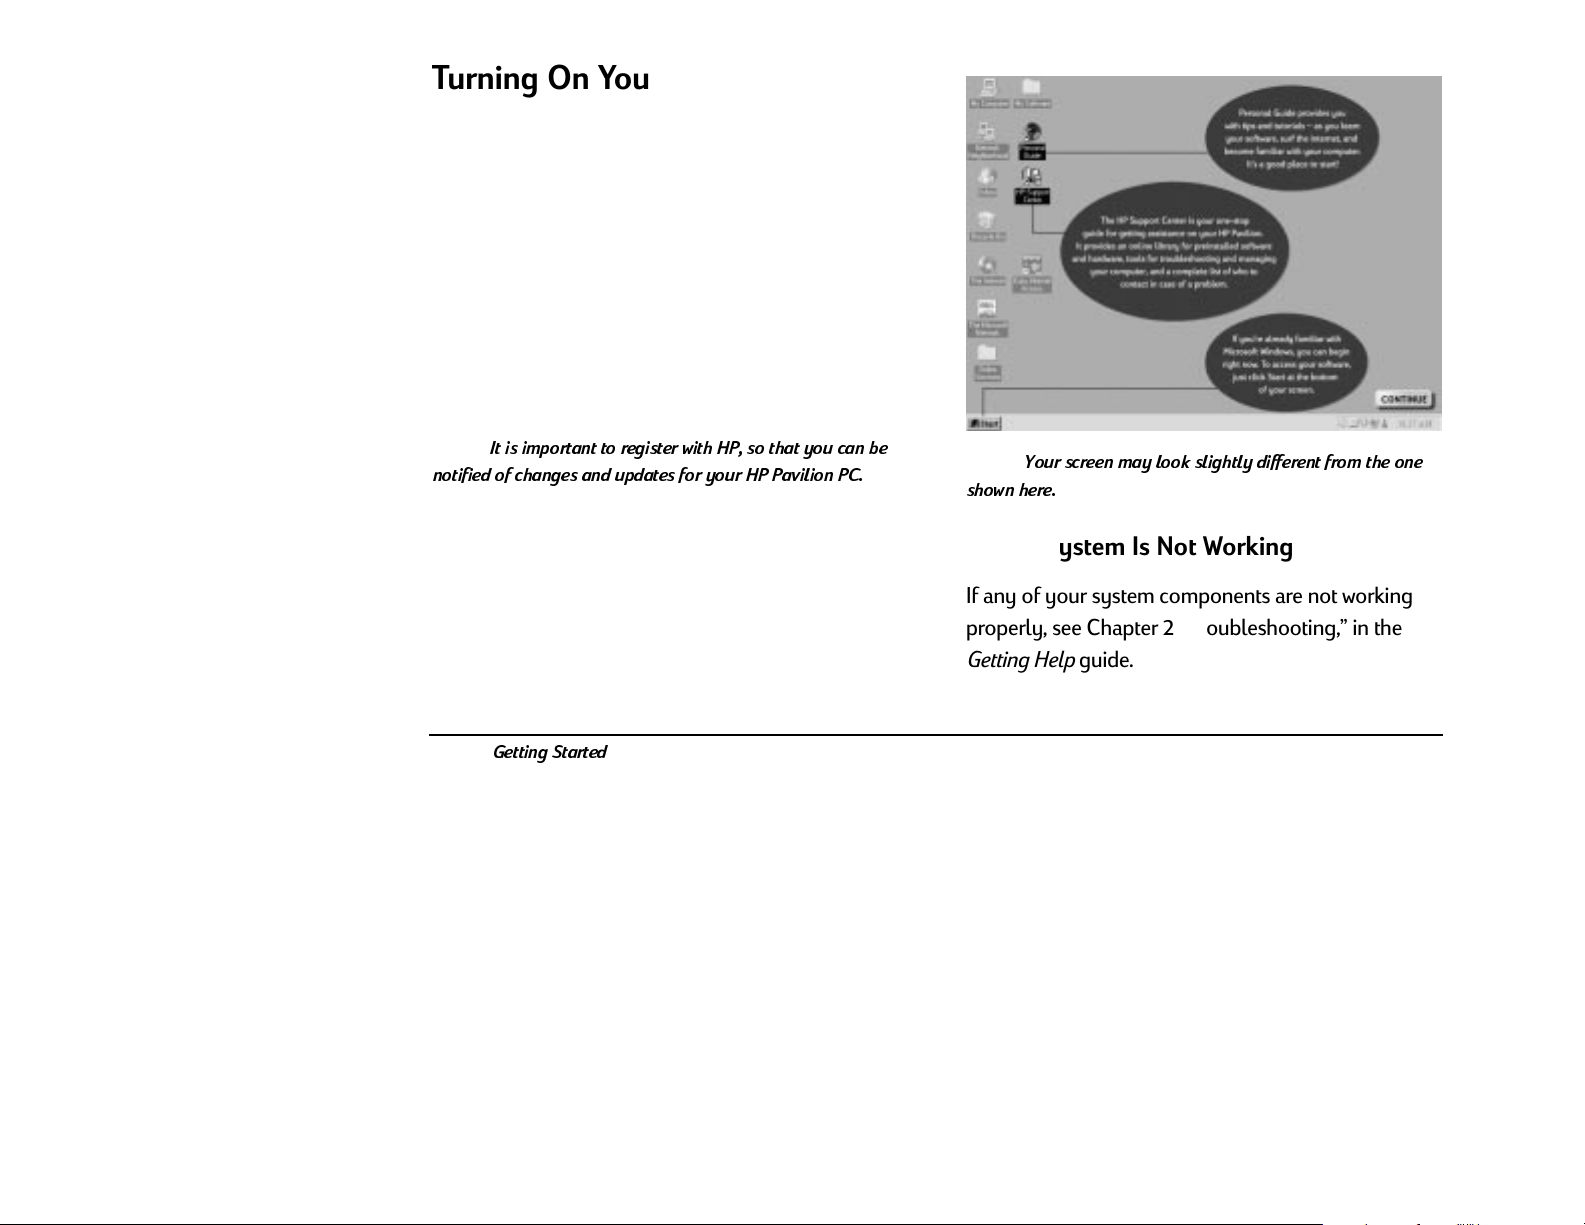
As part of this final setup, you will see a roadmap that
points out and describes several important icons on
your desktop.
Note:
It is important to register with HP, so that you can be
notified of changes and updates for your HP Pavilion PC.
Note:
Your screen may look slightly different from the one
shown here.
If Your System Is Not Working
If any of your system components are not working
properly, see Chapter 2, Troubleshooting, in the
Getting Help guide.
Getting Started
2
Page 7
Working in Comfort with Your HP
Pavilion PC
Thank you for selecting HP computing equipment.
To optimize your comfort and productivity, it is
important that you set up your work area correctly
and use your HP equipment properly. With that in
mind, we have developed some setup and use
recommendations for you to follow, based on
established ergonomic principles.
Improper and prolonged use of keyboards and input
devices are among those tasks that have been
associated with repetitive strain injury (RSI) to soft
tissues in the hands and arms. If you experience
discomfort or pain while using any computing
equipment, discontinue use immediately and consult
your physician as soon as possible. For more
information on RSI, you may wish to consult About
Repetitive Strain Injury on page 4.
Please study the recommendations offered here and
consult the Information Sources listed on page 24.
Included there are references to relevant parts of
international standards, regulations, and guidelines,
such as ISO 9241 and the European Community
Display Screen Equipment directive. You may also
wish to consult your employers human resources
department or other relevant departments for
guidance specific to your company. For a quick
summary of the recommendations, refer to the
Comfort and Safety Checklist on page 21.
Note that the recommendations and quoted
dimensions in this guide are designed to
accommodate a broad range of people. If you fall
outside this range, you may need to adapt the
recommendations accordingly. For example, if you
are very tall, your work surface may need to be
higher than indicated in this guide.
Chapter 1•Preparing to Use Your Computer
3
Page 8
Thank you, again, for choosing HP computing
equipment.
About Repetitive Strain Injury
Because your comfort and safety are our primary
concern, we strongly recommend that you use HP
computing equipment in accordance with established
ergonomic principles and recommendations.
Scientific literature suggests that there may be a
relationship between injury to soft tissues
especially in the hands and arms and prolonged
improper use of keyboards or other equipment
requiring repeated motions of the hands and
forearms. This literature also suggests that there are
many other risk factors that may increase the chance
of such injury, commonly called Repetitive Strain
Injury.
What is RSI?
Repetitive Strain Injury (RSI also known as
cumulative trauma disorder or repetitive motion
injury) is a type of injury where soft tissues in the
body, such as muscles, nerves, or tendons, become
irritated or inflamed. RSI has been a reported
problem for those who perform repetitive tasks such
as assembly line work, meatpacking, sewing, playing
musical instruments, and computer work. RSI also
has been observed in those who frequently engage in
activities such as carpentry, knitting, housework,
gardening, tennis, windsurfing, and lifting children.
Getting Started
4
Page 9
What causes RSI?
What can I do to avoid RSI?
The specific causes of RSI have not been established.
Nevertheless, the incidence of RSI has been
associated with a variety of risk factors, including:
Too many uninterrupted repetitions of an activity
•
or motion.
Performing an activity in an awkward or
•
unnatural posture.
Maintaining static posture for prolonged periods.
•
Failing to take frequent short breaks.
•
Other environmental and psychosocial factors.
•
In addition, there have been reports associating the
occurrence of RSI with the use of computer
keyboards, mice, and other input devices. Also,
certain medical conditions, such as rheumatoid
arthritis, obesity and diabetes, may predispose some
people to this type of injury.
Some people who use computers may experience
physical discomfort during their use. This discomfort
may be a symptom of a repetitive strain injury.
Properly setting up and using computing equipment
can help to minimize your chances of experiencing
this discomfort. Well-designed and properly adjusted
equipment alone may not be sufficient to eliminate
all potential problems. Maintaining good posture and
positioning when working on computers also has a
significant bearing on your comfort.
What if I experience discomfort?
If you are experiencing any discomfort, seek
professional medical advice immediately. Typically,
the earlier a problem is diagnosed and treated, the
easier it is to resolve.
Chapter 1•Preparing to Use Your Computer
5
Page 10
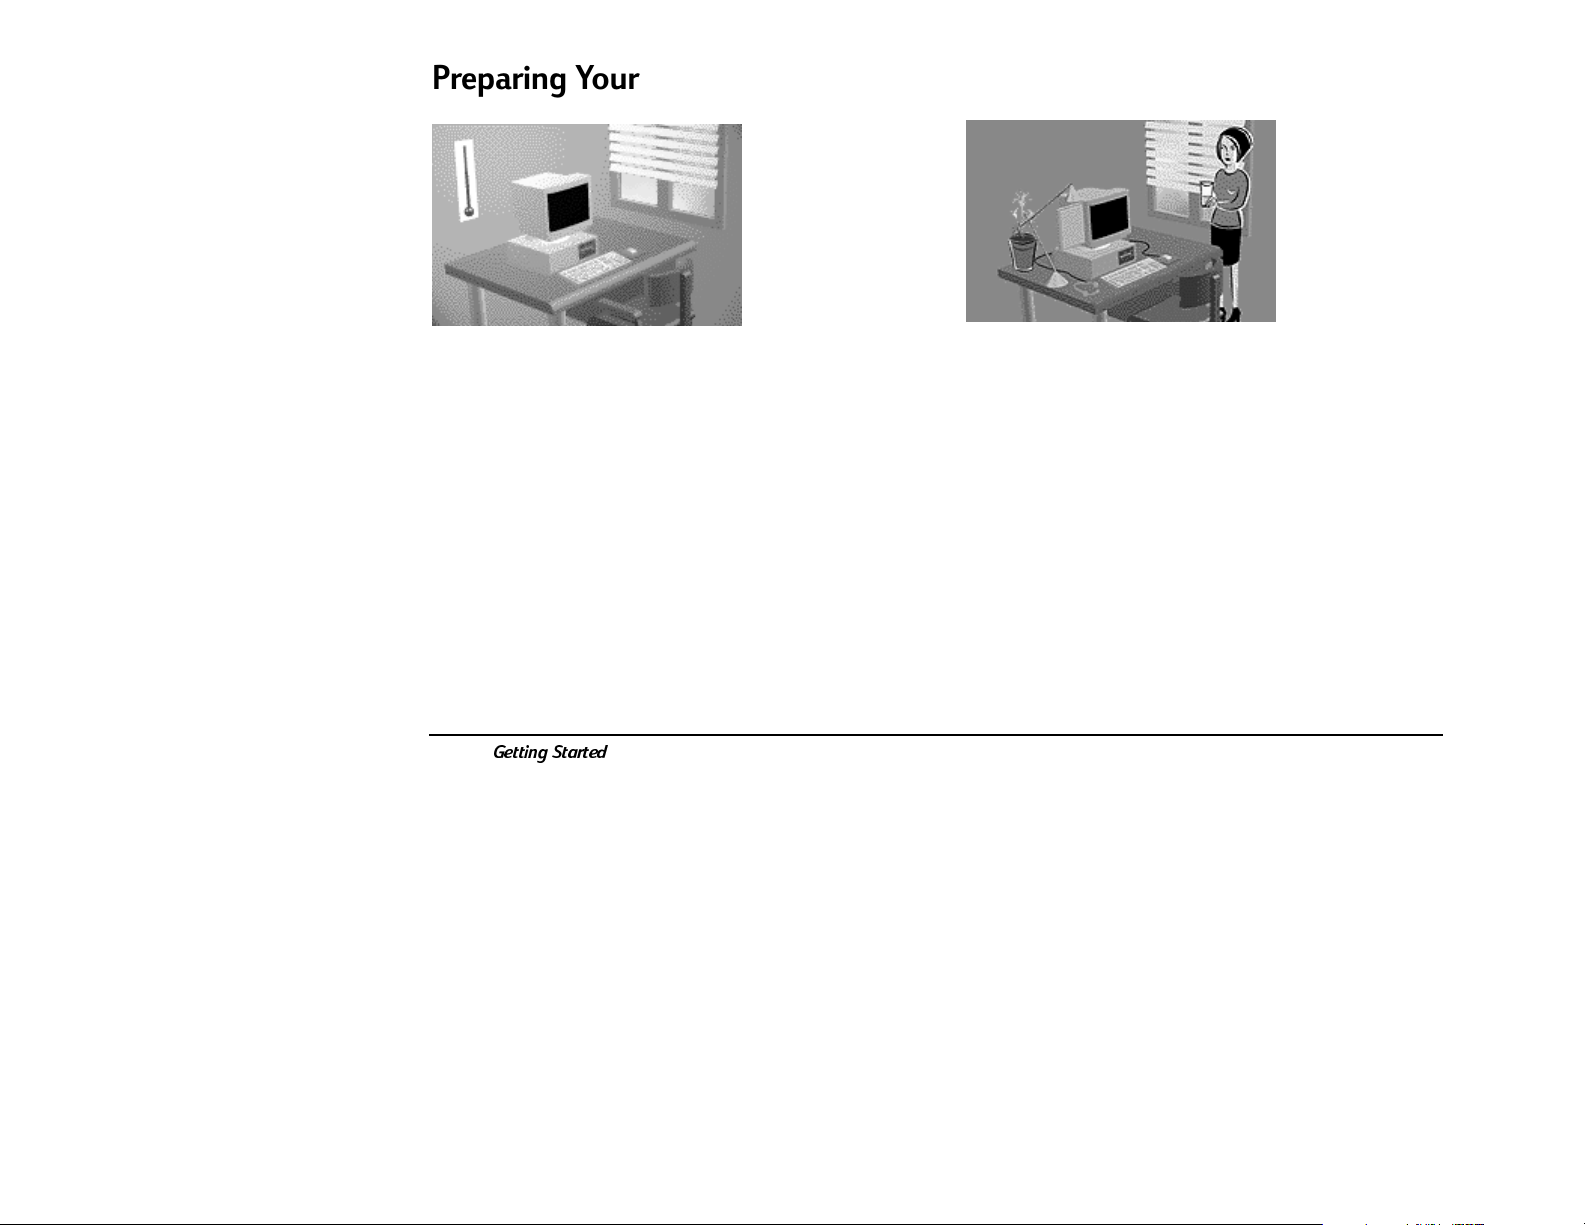
Preparing Your Work Environment
Your Workspace
When using HP computing equipment, its important
that your work environment contribute to your
comfort and productivity. To help you achieve the
proper environment, we have developed
recommendations for optimizing your workspace,
seating, work surface, and lighting arrangements.
You, or both you and your employer, can best
determine your specific needs.
Getting Started
6
Sufficient workspace should be available to allow
you to set up your equipment in a convenient,
comfortable arrangement.
•
The work environment should be as quiet and
free of distraction as possible.
•
For better eye comfort, you should avoid
reflective coverings on the ceiling, walls, and
floor as well as excessive contrast between the
screen and its surroundings.
Page 11
As with any indoor environment, your workspace
•
should be well ventilated. If possible, adjust the
temperature to whatever is comfortable for you.
If you cant adjust the temperature, wear
appropriate clothing. Try to avoid working close
to air-conditioning or heater vents.
To prevent muscle stiffness, you must have
•
enough space to move around and vary your
position. Try not to remain in one position for
extended periods of time.
Your Chai r
Its very important that your chair provides a
comfortable sitting position and offers the following
features:
A stable base, such as five legs with casters.
•
Make sure the casters are designed for the type
of floor you have in your workspace, whether it is
bare or carpeted.
Chapter 1•Preparing to Use Your Computer
7
Page 12

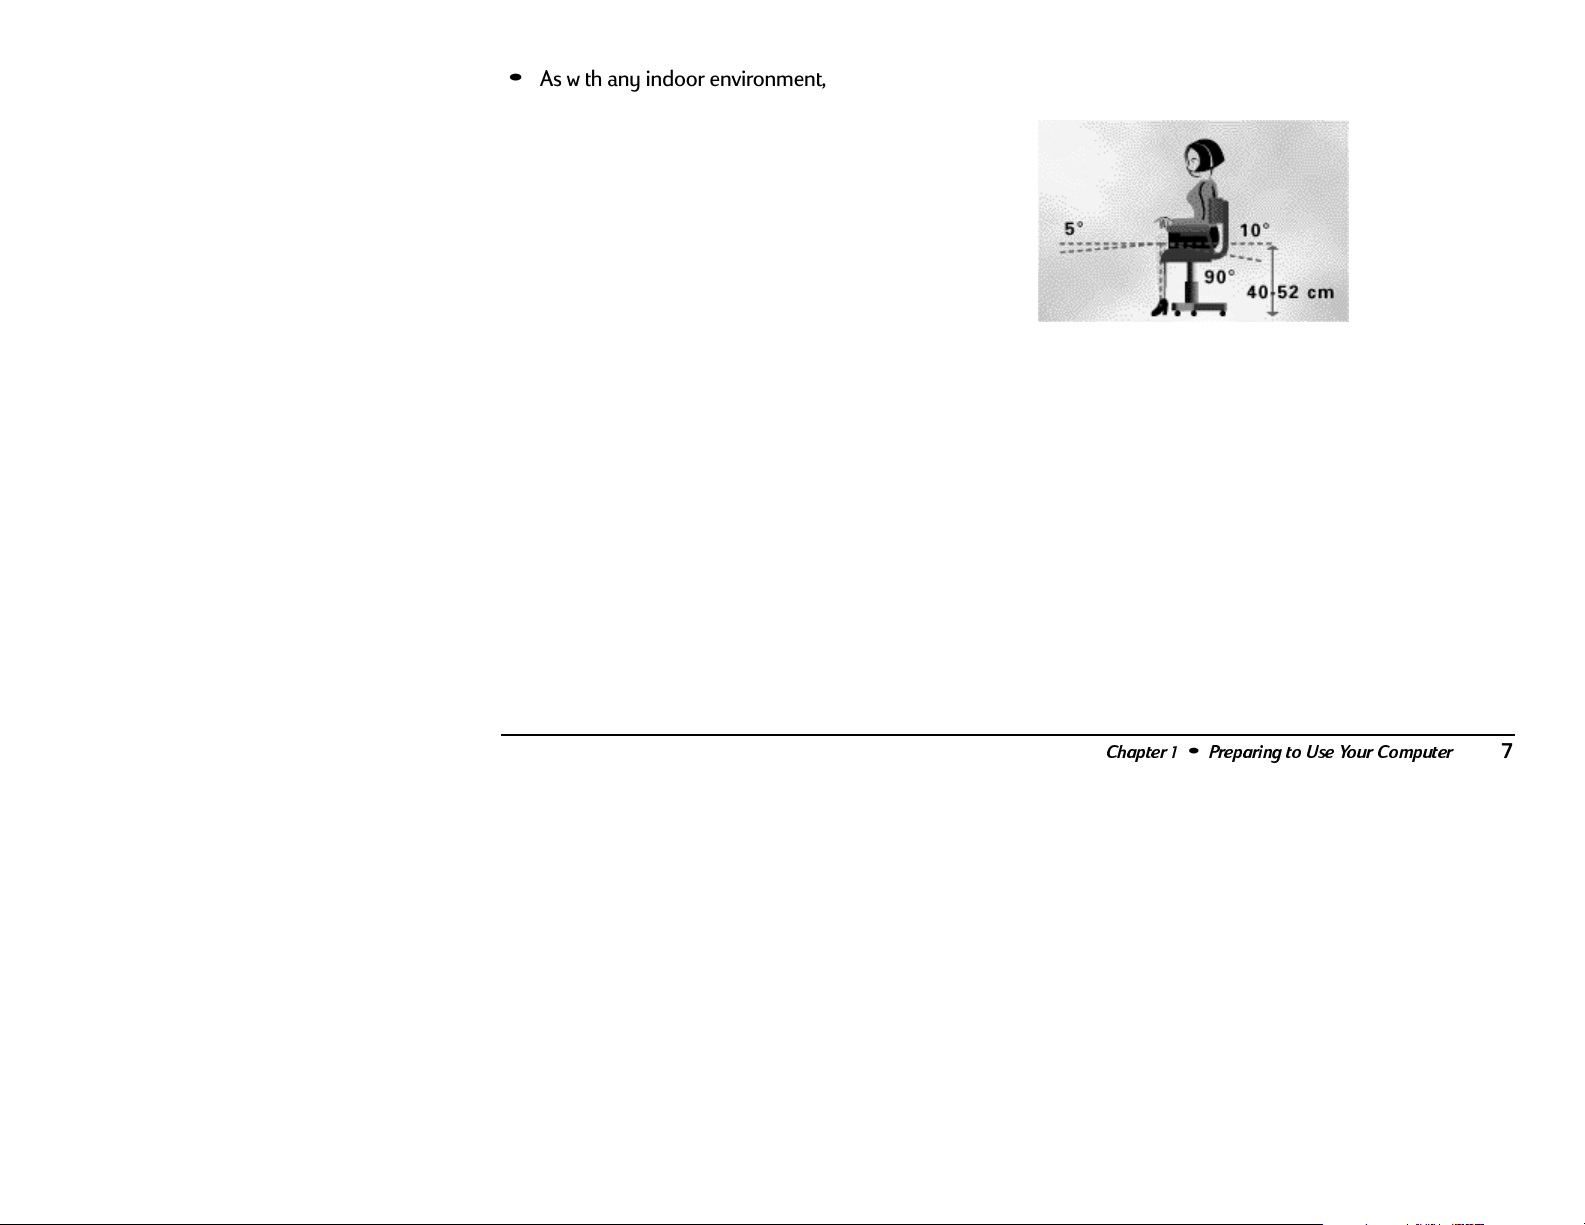
•
A height- and tilt-adjustment feature. It should
be easy to adjust your chair height from 40 cm
to 52 cm (15.5 inches to 20.5 inches) as measured
from the top of the seat pan to the floor. If you
are much taller or shorter than average, you may
need a chair that can be adjusted beyond this
range. Adjust your chair so that the work surface
or keyboard tray is at elbow height and your feet
are flat on the floor with your knees slightly bent
below your hips. Ideally, the seat pan should be
able to tilt both forward (minimum of 5 degrees)
and backward (minimum of 10 degrees). If the
chair has an adjustable seat pan, inclining the
seat slightly forward will transfer some of the
pressure from the spine to the thighs and feet.
This will relieve pressure on your back.
•
A curved seat edge. The front of the seat should
be curved and finished in a waterfall edge.
•
An adjustable back support in both height and
forward and backward tilt. It is important that the
backrest correctly supports the lower part, or
lumbar curve, of the back.
•
A freely rotating swivel so you can move easily
from side-to-side.
•
Fully adjustable and padded armrests. The
chair arms should not interfere with adjusting the
chair or moving it close to your work surface.
Getting Started
8
Page 13
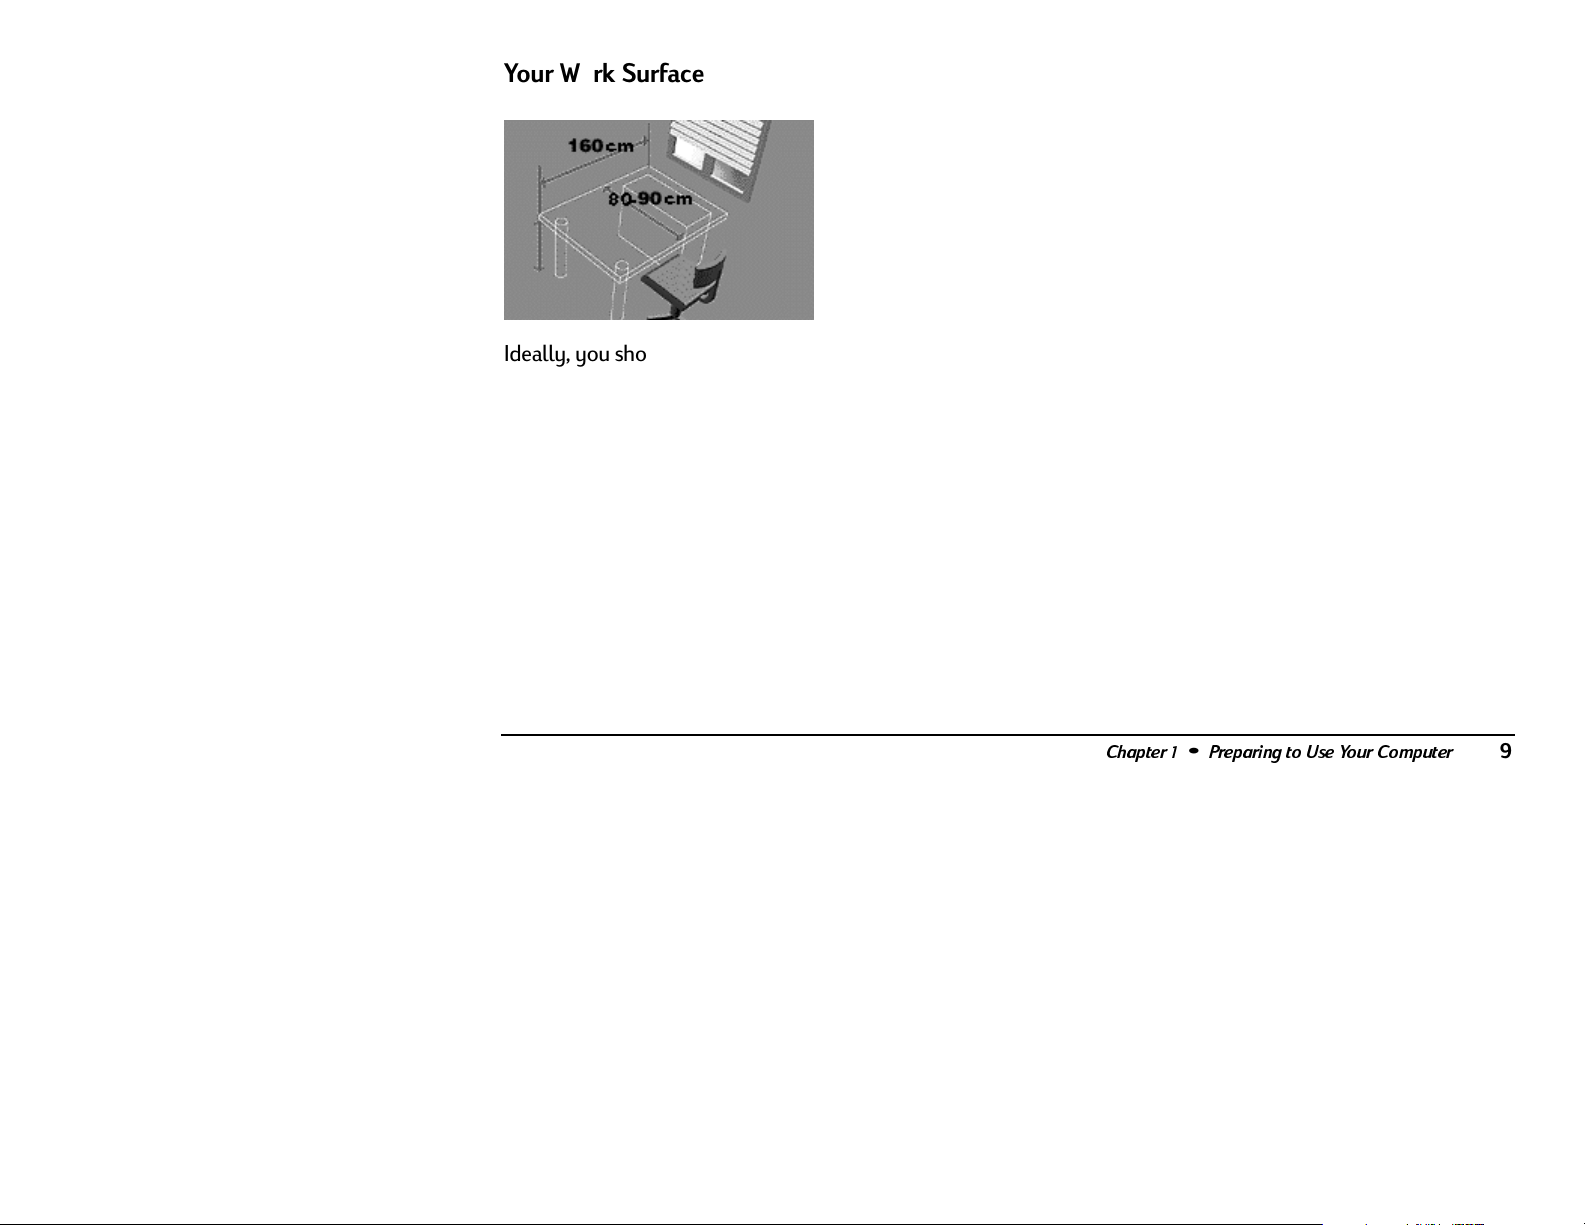
Your Work Surface
Ideally, you should be able to adjust the height of
your work surface.
A simple way to ensure your work surface is at the
correct height is to first adjust the height of the seatpan of your chair. With your chair properly adjusted
and your feet firmly on the floor, adjust the work
surface height until your forearms are parallel to the
floor when you have your fingers on the keyboard or
other input device.
If possible, choose a work surface with cable
management capabilities. This will keep your cables
and wires orderly, off the floor and out of your way.
Its also best to choose a non-reflective work surface
to minimize eye discomfort from reflections and
glare.
Chapter 1•Preparing to Use Your Computer
9
Page 14
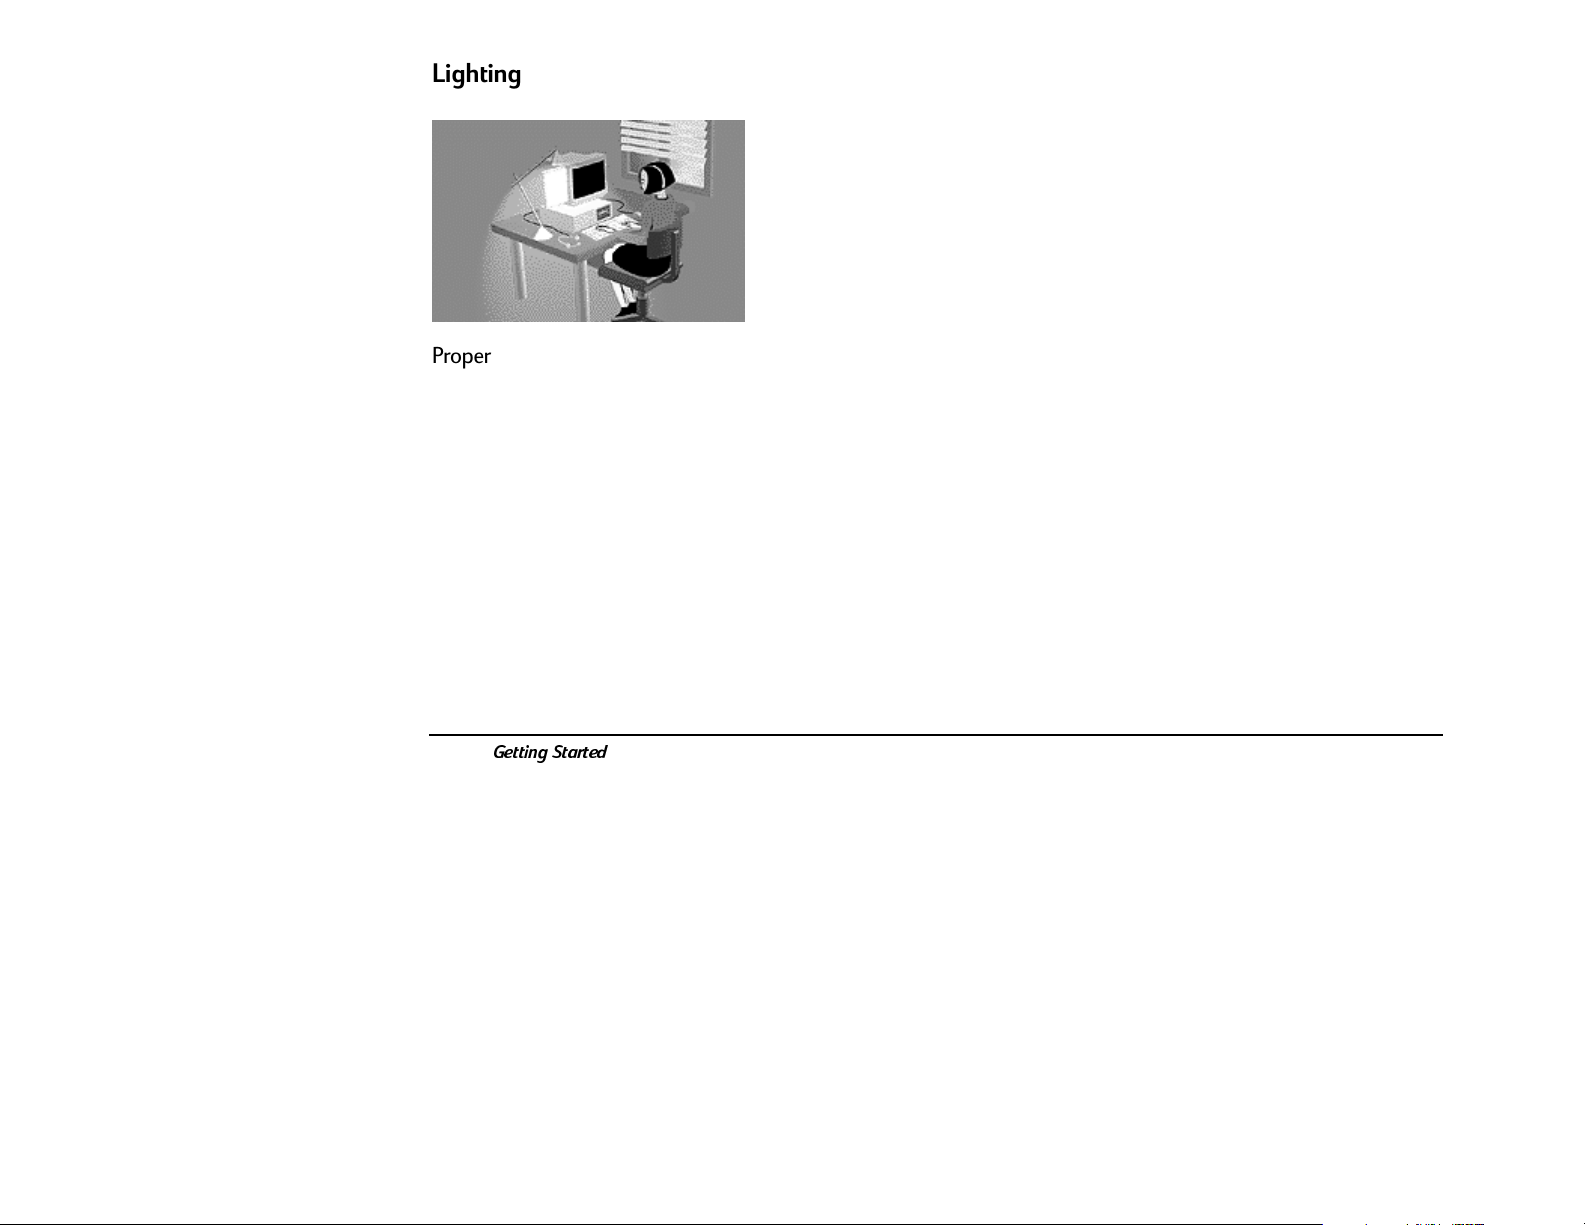
Lighting
Work Environment Specifications
•
For better eye comfort in your work environment,
you should avoid reflective surface coverings.
The ceiling, walls, and floors should have a
medium level of reflectance (approximately
75 percent, 40 percent, and 30 percent,
respectively). Try to avoid excessive contrast
between the screen and its surroundings.
Proper lighting can help you avoid eye discomfort.
Lighting in your area should allow easy reading of
documents and keyboard legends. If more light is
needed for a particular task, use individual task
lighting rather than increasing the general lighting.
Incoming light should be shielded or diffused to
prevent glare and reflection. In cases where strong
sunlight is a problem, curtains, adjustable shades,
anti-glare filters, or monitor hoods are possible
solutions.
Getting Started
10
•
The work environment should be as quiet and
free of distraction as possible, with background
noise below 55 dBA.
•
Where possible, relative air humidity should be in
the range of 40 to 60 percent.
•
The recommendation for room temperature is
19 to 23 degrees C (66 to 73 degrees F). The
workplace should be well ventilated, as with any
indoor environment.
Page 15
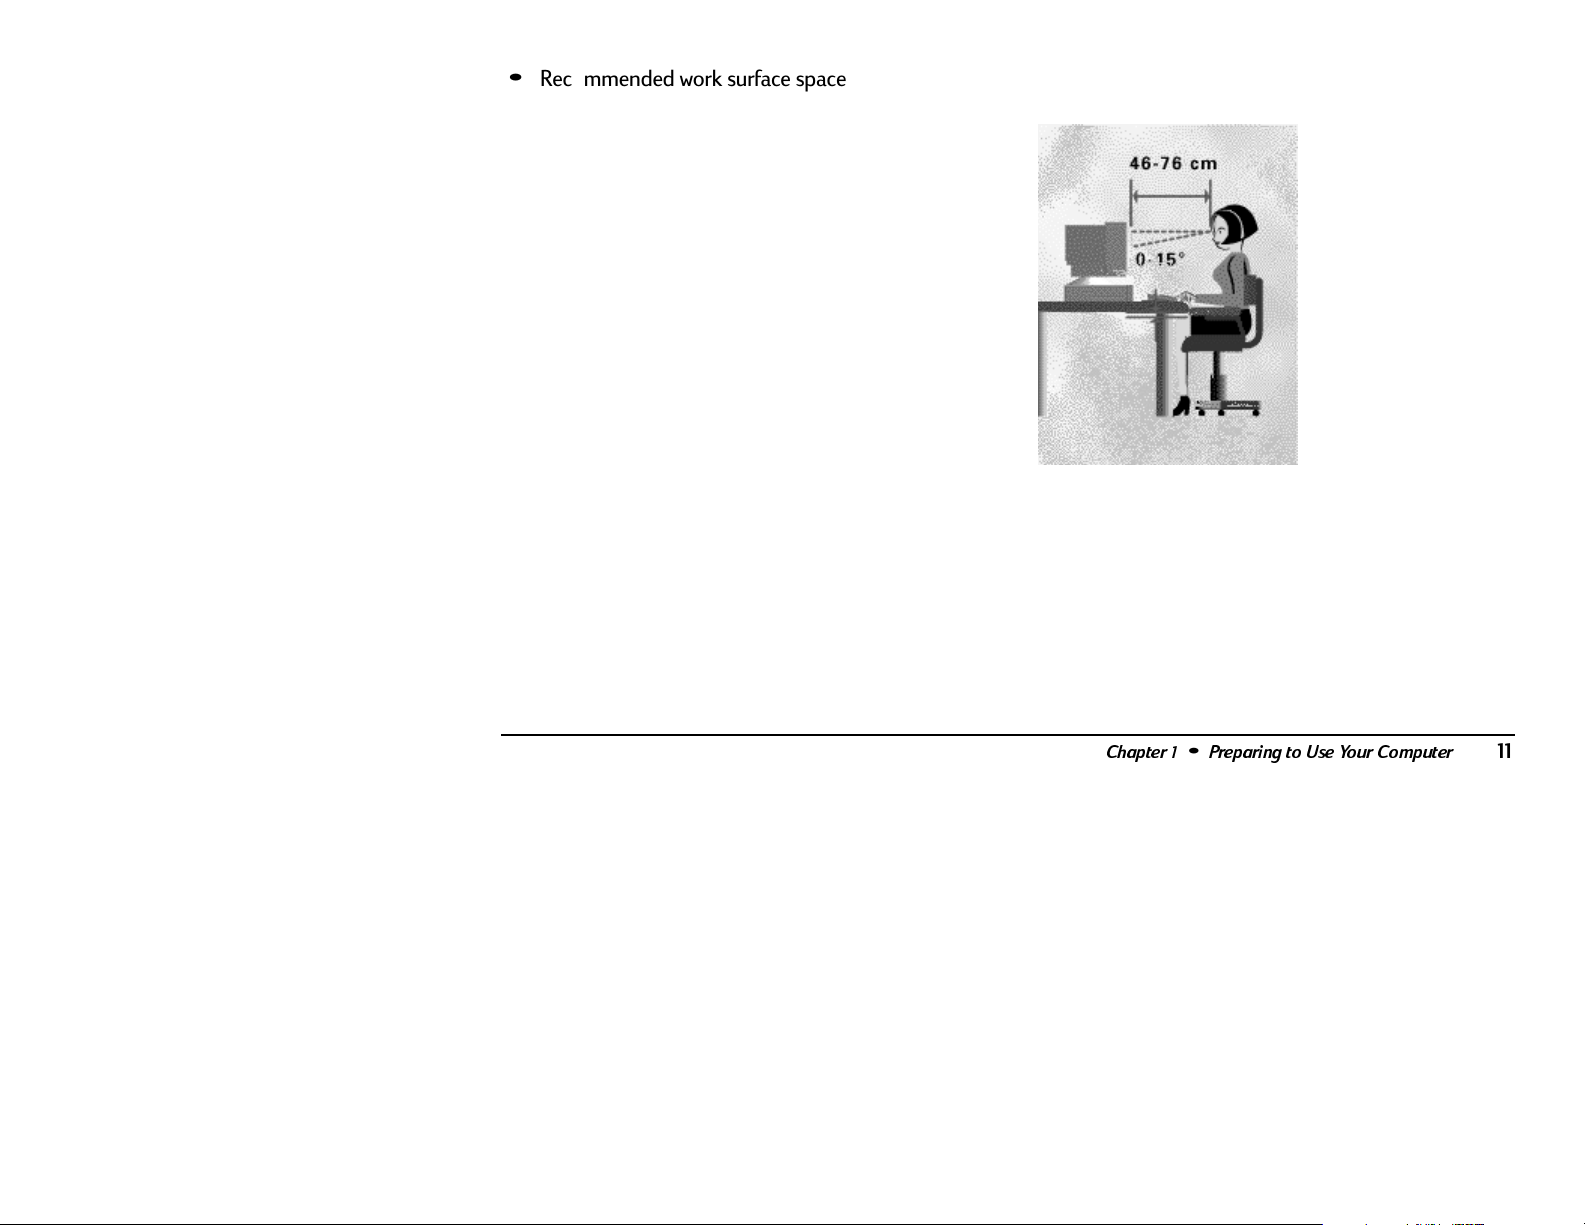
Recommended work surface space is 160 cm
•
wide by 80 to 90 cm deep (63 inches by 32 to
36 inches deep), or a corner unit of 91 to 107 cm
deep (36 to 42 inches). The recommended
vertical adjustment range is 66 to 77 cm (26 to
30 inches). If the height is fixed, it should be
between 72 and 75 cm (28.5 to 29.5 inches).
There should be at least 6 cm (2 inches) between
•
your thighs and the work surface. If the surface
has a kneehole, it should be at least 58 cm
(23 inches) wide, 65 cm (25.5 inches) high, and
60 cm (24 inches) deep.
Recommended lighting levels are between
•
300 and 500 lux (30 to 50 foot-candles). Values
over 1000 lux (100 foot-candles) are considered
to be too bright. For work on the screen, 300 lux
(30 foot-candles) is enough for most work.
When documents are to be read, 500 lux
(50 foot-candles) is recommended.
Your Work Posture
Sitting in one position for long periods can be
uncomfortable. To minimize the potential for
physical discomfort or injury, its important that you
maintain proper posture.
Chapter 1•Preparing to Use Your Computer
11
Page 16
•
Back While sitting at your work surface, make
sure your back is supported by the chairs
backrest in an erect position or angled slightly
backwards.
•
Arms Your arms should be relaxed and loose,
elbows close to your sides, with forearms and
hands approximately parallel to the floor.
•
Wrists Your wrists should be as straight as
possible while using the keyboard, mouse, or
trackball. They should not be bent sideways, or
more than 10 degrees up or down.
•
Legs Your thighs should be horizontal or
angled slightly downward. Your lower legs
should be near a right angle to your thighs. Your
feet should rest flat on the floor. If necessary, use
a footrest, but double check that you have your
seat height adjusted correctly before getting a
footrest.
•
Head Your head should be upright or tilted
slightly forward. Avoid working with your head or
trunk twisted.
•
Overall Change your position frequently and
take regular breaks to avoid fatigue.
12
Getting Started
Page 17

Setting Up Your HP Computing
Equipment
Make sure that all the elements of your HP computer
system monitor, document holder, keyboard,
mice and other input devices, and headphones and
speakers are optimally arranged and adjusted to
meet your personal requirements. The recommendations that follow will help you achieve this.
Note that these recommendations apply only to the
use of HP desktop computers or HP notebook
computers that are used with a full-size keyboard,
monitor and mouse.
Your HP Monito r
It is important that your monitor screen be clean and
positioned correctly to improve readability and help
you work comfortably. Glare, high contrast,
reflections, dirt, and dust will interfere with what you
see on the screen. The recommendations that follow
can help you achieve a comfortable arrangement.
Chapter 1•Preparing to Use Your Computer
13
Page 18
•
The top of your monitor screen should be at or
slightly below eye level. Most HP monitors come
with a tilt-and-swivel feature that makes it easy to
adjust the screen position. If your monitor doesnt
have this feature, consider acquiring an accessory
that provides this capability.
•
To avoid obscuring your view, the screen should
be positioned perpendicular to your line of sight;
that is, straight on.
•
To avoid glare or reflection, try to position the
monitor so the screen is at a right angle to your
window rather than in front of it. If reflection or
glare persists, tilting the screen forward may
help. If this adjustment is not sufficient, it may be
necessary to change either the position of the
monitor on your work surface, or the location of
your work surface. If reflection or glare is still a
problem, find out where it is coming from.
Common sources of glare are overhead lights,
windows, or reflections from shiny surfaces
including pictures or even bright clothing. See if
there is a way to control the source of the
problem (see Lighting on page 10). If that
doesnt work, try a high-quality anti-glare filter or
a screen hood.
•
Maintain a comfortable viewing distance to the
screen. Most people prefer a viewing distance of
approximately 46 to 76 cm (18 to 30 inches),
depending on monitor size. Character size and
the amount of space available on the work
surface can affect this distance.
14
Getting Started
Page 19
Text should be easy to read. To help ease
•
eyestrain, adjust text attributes such as character
size, spacing, and color. In addition, you will need
to use the controls provided with your monitor to
adjust the visual settings so that contrast and
brightness levels are comfortable for you. High
contrast and low brightness is usually the
preferable combination.
Note:
The ISO 9241 and ANSI/HFS 100-1988 standards
give technical recommendations on how to achieve good
readability.
The monitor should be free from flicker. If the
•
image on your screen is not stable, the monitor
may require repair or adjustment.
When possible, use a program that has a simple
•
user interface, such as easily identifiable icons
and pull-down menus. Also, screen information
should be displayed in a structured and wellorganized way.
Monitor use specifications
When viewing your monitor, your head should
•
not be tilted more than 15 degrees forward.
Optimum readability for monitor use is generally
•
considered to be 21 minutes of arc. This
corresponds to a character size of 3.7 mm
(0.15 inches) at a viewing distance of 60 cm
(24 inches).
You should not have to look up more than
•
5 degrees above horizontal or down more than
30 degrees below horizontal for normal work
tasks, such as typing or reading.
Chapter 1•Preparing to Use Your Computer
15
Page 20
Document Holders
When keying in data from a hard-copy document,
placing it in a document holder rather than on a flat
surface will make it easier to read. The following
recommendations should be observed when using a
document holder:
•
The document holder should be at
approximately the same height and distance
from your eyes as the screen, and as close to the
monitor as possible to prevent neck twisting.
Some users prefer a document holder mounted
to the monitor, while others prefer the document
holder positioned between the screen and
keyboard.
•
If the primary task is to view documents rather
than using the monitor, the document holder
may be placed directly in front of the keyboard
with the monitor slightly to the side.
•
To help reduce stress on your neck and prevent
eye fatigue, try to minimize the movement of
your head and eyes while using a document
holder.
16
Getting Started
Page 21
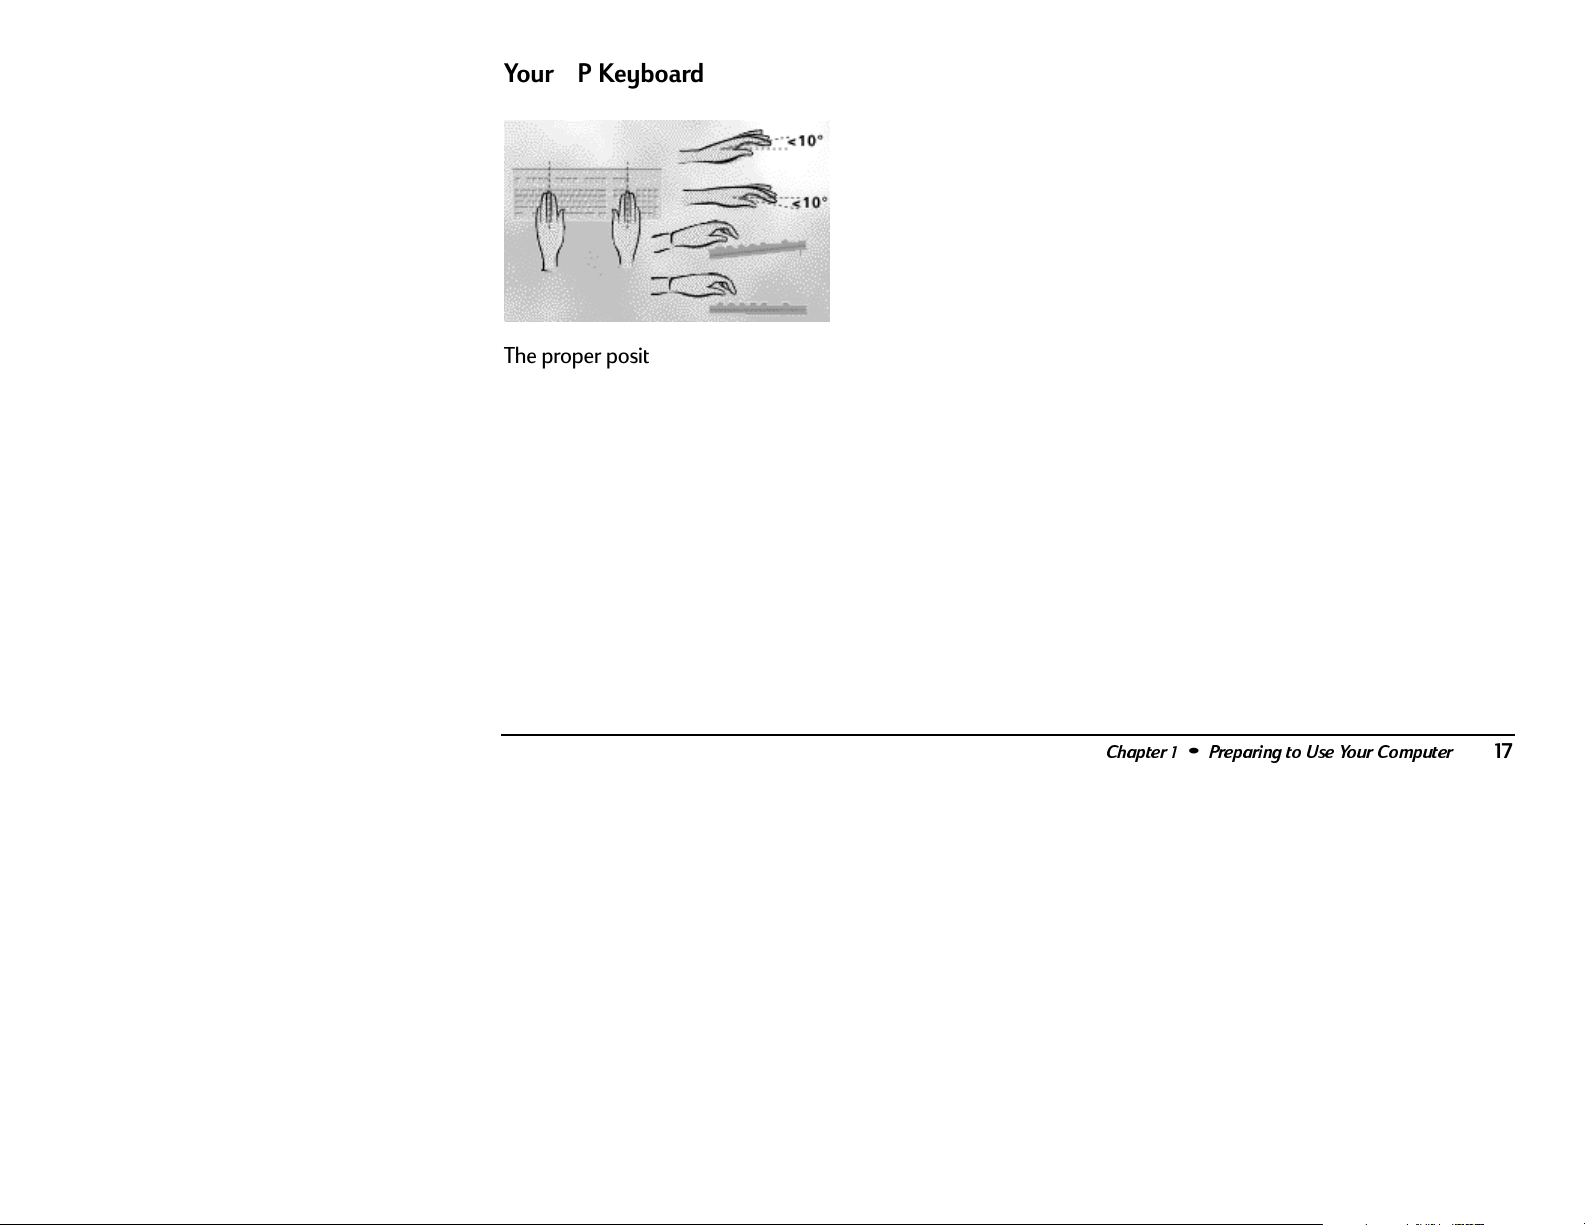
Your HP Keyboard
The proper positioning and use of your HP keyboard
is important when using HP computing equipment.
Be sure to observe the following recommendations to
optimize your comfort and safety:
We recommend you place your keyboard in front
•
of the screen or document holder, whichever is
viewed the most. Your HP keyboard has long
cables, so you can place it in the position that is
most comfortable for you while you are using
your system.
Because HP keyboards vary in depth, youll want
•
to be sure that your work surface or keyboard
tray has sufficient room to accommodate your
model. The keyboard tray should be wide
enough to hold both the keyboard and mouse or
trackball: 66 to 71 cm (26 to 28 inches).
Your HP keyboard may have a kickstand that can
•
be opened or closed to raise or lower the
keyboard angle. If you are in the correct sitting
position with your elbows at about the same level
as the work surface, you may not need to use it.
However, if your elbows are below the work
surface, you may wish to use the kickstand to
raise the back of the keyboard.
Chapter 1•Preparing to Use Your Computer
17
Page 22

•
An adjustable keyboard tray may be useful if you
cannot adjust your chair or work surface to the
proper height for typing. It should adjust in
height from 64 to 76 cm (25 to 30 inches) above
the floor and tilt forward and backward to help
you find the most comfortable position. Note
that research has shown that there may be less
muscle tension in shoulders and forearms with
the keyboard tilted away from you.
•
When using your HP keyboard, remember it takes
very little pressure or force from your fingers to
activate the keys. Improper typing style the
use of too much force can place unnecessary
stress on the tendons and muscles in your hands,
wrists, and forearms.
•
Make sure that your hands are in a neutral
position when you use your keyboard. This
means that your forearms, wrists, and hands
should be in a straight line.
•
The keyboard has a low profile to help prevent
excessive bending of your wrists while typing.
Literature suggests that you should not bend
your wrists sideways or more than 10 degrees up
or down. Keep your wrists straight by moving
your entire hand and forearm over to use the
function keys or numeric keypad.
•
You may use a palm rest to help keep your hands
and wrists in a comfortable and neutral position
when you are not typing. Some HP keyboards
come with an integrated palm rest. If you use a
palm rest, see that it is rounded and padded, and
flush in height with the front edge of the
keyboard. Note that your palms not your
wrists should rest on the palm rest. If you
dont have a palm rest, try not to rest your wrists
on a sharp edge, such as a work surface edge.
18
Getting Started
Page 23
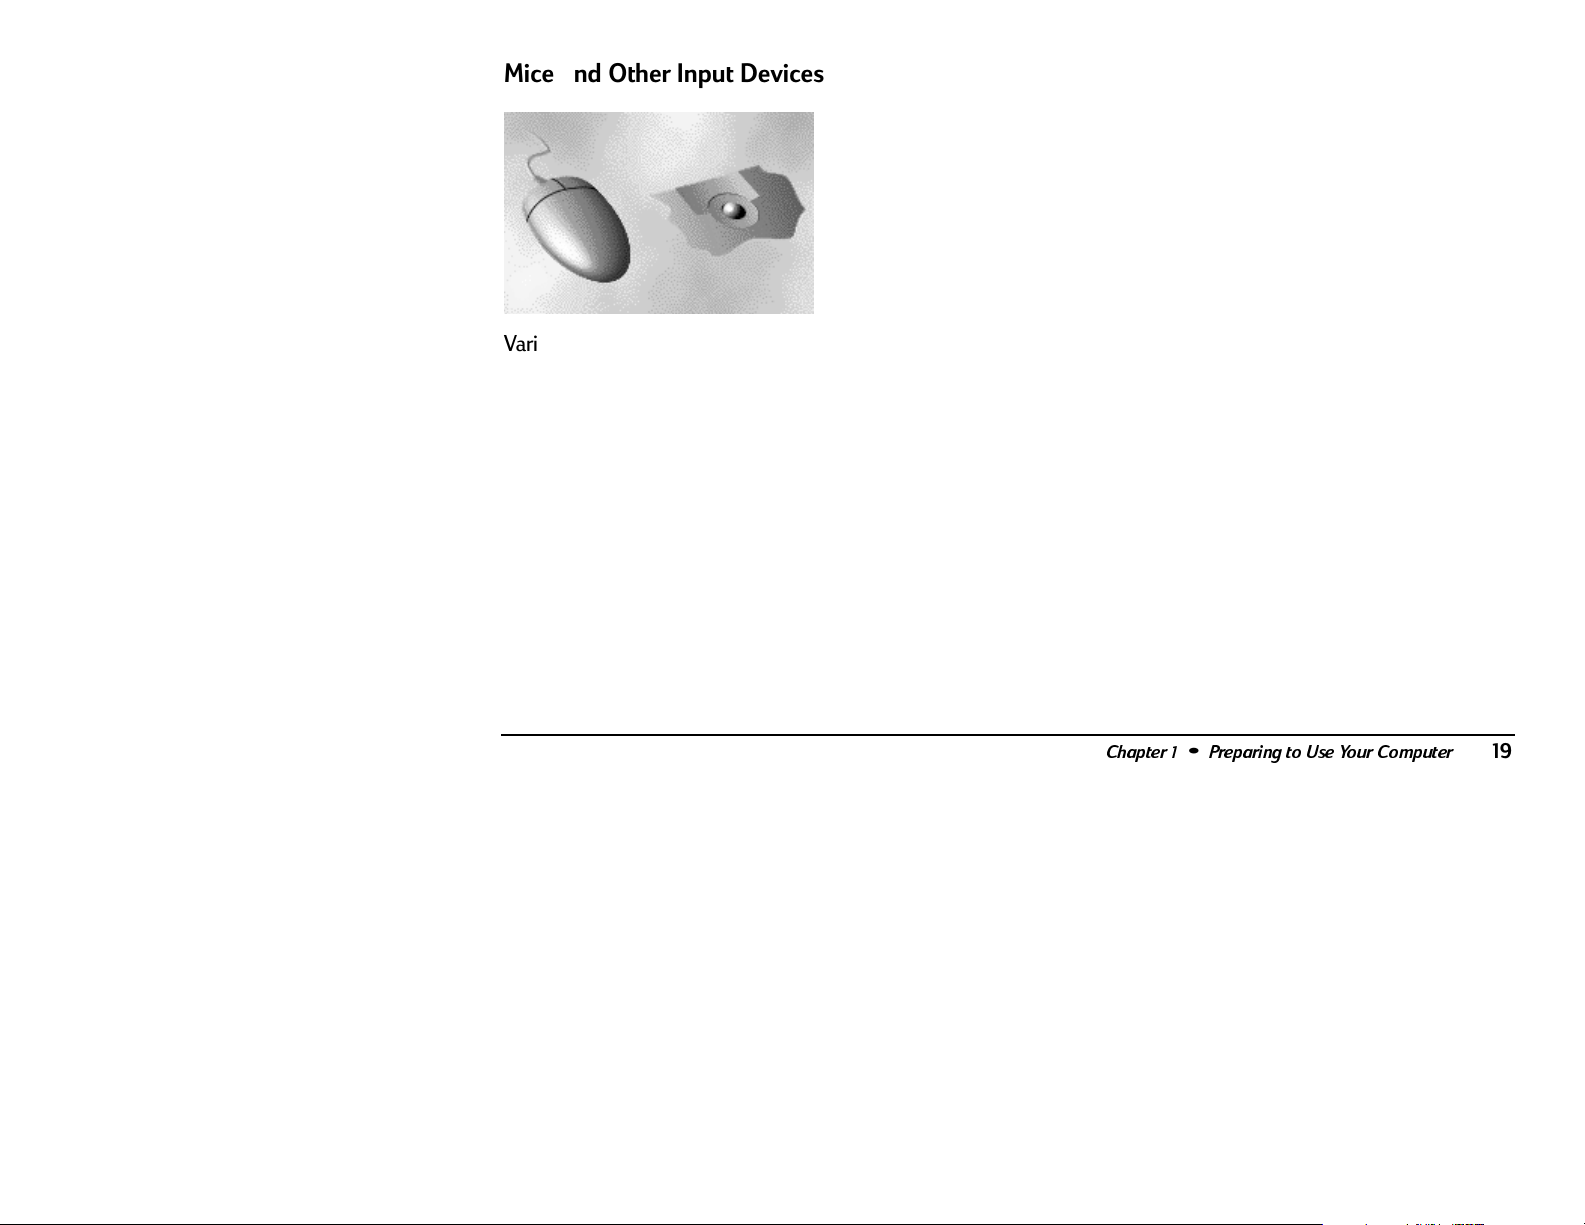
Mice and Other Input Devices
Various aspects of using mice and other input devices
may increase your risk of discomfort or injury.
Observing the following recommendations may
reduce that risk:
As with the keyboard, try to keep your hand,
•
wrist, and forearm in a neutral position while
using your mouse or other input device.
When using a stylus or light pen with a graphics
•
tablet, dont grip the stylus tightly. Keep your
hand and fingers relaxed and try to maintain a
neutral posture in your hand, wrist, and forearm.
If you use your thumb to rotate the ball on a
•
trackball or spaceball, keep it in a relaxed,
natural shape, and maintain a neutral posture in
your hand, wrist, and forearm.
Hold the mouse gently by draping your fingers
•
over it. Keep your hand relaxed and fingers
loose. Do not grip the mouse tightly.
It takes very little pressure or force from your
•
fingers to activate the buttons or scroll wheel on
your mouse, scrolling mouse, trackball, or other
input device. Using too much force can place
unnecessary stress on the tendons and muscles
in your hands, wrists, and forearms.
If you are using a scrolling mouse, be sure to
•
keep your fingers and hand in a relaxed, neutral
position when activating the scroll wheel. Also,
this type of mouse features software that can
minimize the number of mouse movements or
button clicks.
Chapter 1•Preparing to Use Your Computer
19
Page 24
•
When using a mouse, trackball, stylus and
graphics tablet, or other input device, position it
as close to the keyboard as possible, and keep it
at the same level so you do not have to stretch
while using it.
•
Use a good quality mouse pad to enable the
mouse to work most effectively and reduce
unnecessary hand and wrist movements.
Headphones and Speakers
•
Be sure to keep your mouse and trackball clean.
Regular removal of accumulated dust and dirt
helps ensure proper tracking and reduces
unnecessary hand and wrist motions.
Getting Started
20
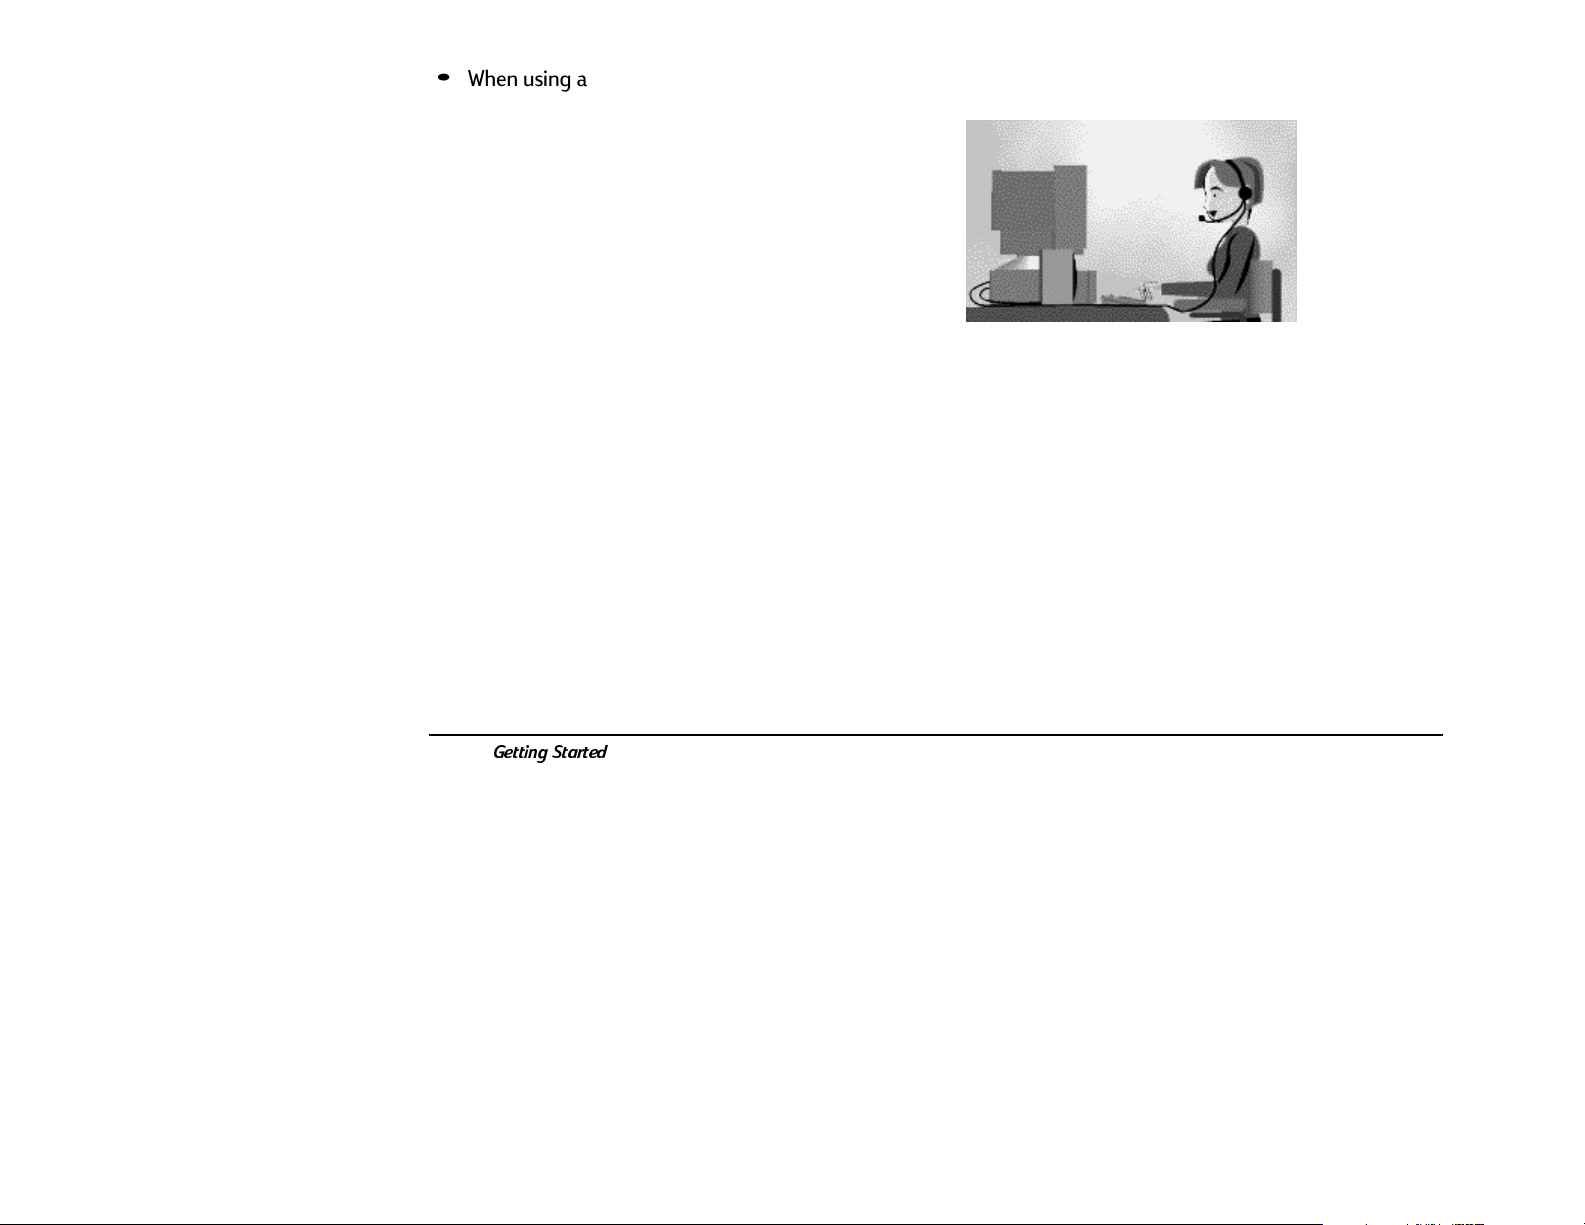
Listening to loud sounds for prolonged periods may
permanently damage your hearing. To avoid
discomfort from unexpected noise, always turn down
the volume before connecting headphones or
speakers to your HP equipment.
When you put on the headphones, slowly increase
the volume until you find a comfortable listening
level, then leave the volume control in that position.
Page 25

Comfort and Safety Checklist
These recommendations are drawn from the latest
available international ergonomic standards and
recommendations, including ISO 9241 and ANSI/HFS
100-1988.
General
Work Surface Height Adjust either your seat
•
height, work surface, or both, to position the work
surface at approximately elbow height.
Work Surface Arrangement Make sure
•
frequently used equipment is within easy reach.
For example, if you are primarily using the
keyboard, place it directly in front of you, not to
the side. If you are primarily using the mouse,
place it in front of your hand or arm. If you are
using both a mouse and keyboard, place them
both at the same work surface height and close
together. If a palm rest is used, the height should
be flush with the front edge of the keyboard.
Other items, such as your telephone or notepad,
also should be considered.
Monitor Place your monitor so that the top of
•
the screen is at, or slightly below, eye level (up to
15 degrees).
Chapter 1•Preparing to Use Your Computer
21
Page 26

•
Head Do not tilt your head forward by more
than 15 degrees, and try not to turn your head
toward the side.
•
Back While sitting at your work surface, make
sure your back is supported by the chairs
backrest in an erect position or angled slightly
backwards.
•
Arms Make sure your arms and elbows are
relaxed and loose, with your upper arm
perpendicular to the floor or slightly forward.
Keep your forearms and hands approximately
parallel to the floor with elbows bent between
70 and 115 degrees. Keep your elbows close to
your sides (less than 20 degrees away from your
body).
•
Legs Your thighs should be horizontal or
angled slightly downward. Your lower legs
should be near a right angle to your thighs. Make
sure there is sufficient room under the work
surface for your legs.
•
Feet If after adjusting your chair you cannot
rest your feet comfortably on the floor, use a
footrest, preferably one that can be adjusted in
height and angle.
Overall
•
Look away from the screen from time-to-time to
help reduce eyestrain. Focus on distant objects
briefly, and blink periodically to lubricate your
eyes. You also should have your eyes checked on
a regular basis and ensure your eyeglass
prescription is suitable for working on a monitor
screen.
22
Getting Started
Page 27

Remember to occasionally shift position and
•
move your body. Keeping your body in one
position for long periods is unnatural and
stressful. When prolonged work is required, take
frequent short breaks. As a rule of thumb, a five
or ten minute break every hour is a good idea.
Short frequent breaks are more beneficial than
longer, less frequent, breaks. Data shows that
people who work for long periods of time without
a break may be more prone to injury.
Changing tasks frequently will help prevent
•
muscle stiffness. For example, alternating
between keyboarding, reading, writing, filing, and
moving around in your work environment helps
you maintain a relaxed posture. Occasionally
stretch the muscles in your hands, arms,
shoulders, neck, and back. You should stretch at
least as often as you take brief task breaks at
least once every hour.
Discomfort may be alleviated by using
•
alternative ergonomic designs and accessories
such as ergonomically personalized chairs, palm
rests, keyboard trays, alternative input devices,
prescription eyeglasses, anti-glare screens, and
more. Seek additional information from the
sources available to you, including your
employer, doctor, local office supply store, and
the information sources provided in this guide.
Chapter 1•Preparing to Use Your Computer
23
Page 28

Information Sources
Bailey, R.W.:
1
Quality Professional User Interfaces for Computer Products,
Applications and Systems,
Bayerisches Staatsministerium fuer Arbeit:
2
Bildschirm aber richtig!,
(Germany) 1992.
Caisse Nationale dAssurances:
3
visualisation,
Chaffin, D. and Andersson, G.:
4
1991.
European Community:
5
the Minimum Safety and Health Requirements for the Work
with Display Screen Equipment,
Belgium, 1990.
Granjean, Eric:
6
Francis, London, England, 1987.
Hamilton, N.:
7
Position and Neck Muscle Tension,
593-610.
Human Performance Engineering: Designing High
3rd edition, 1996.
Arbeiten mit dem
Max Schick GmbH, Muenchen,
Le travail à lécran de
Luzern (Switzerland), 1991.
Occupational Biomechanics,
Council Directive of 29 May 1990 on
Directive /270/EEC, Brussels,
Ergonomics in Computerized Offices,
Source Document Position as it Affects Head
Ergonomics 39 (4):
Taylor &
International Standards Organization:
8
Requirements for Office Work with Visual Display Terminals
(VDTs),
Geneva, Switzerland, 1992.
Putz-Anderson, V.:
9
for Musculoskeletal Diseases of the Upper Limbs,
Sanders, M. and McCormick E.:
10
and Design,
Shiraishi, M. and Ueno, Y.:
11
Forward-tilting Office Chairs,
1994.
Swedish National Board of Occupational Safety and Health:
12
Work with Visual Display Units (VDUs),
1992:14, Stockholm, Sweden, 1992.
U.S. Department of Labor/Occupational Safety and Health
13
Administration:
Government Printing Office, Washington D.C., 1991.
U.S. Department of Labor/Occupational Safety and Health
14
Administration:
U.S. Government Printing Office, Washington, D.C., 1991.
Cumulative Trauma Disorders: A Manual
1987.
Functional Requirements of
Hard Facts About Soft Machines,
Ergonomics: the Study of Work,
Working Safely with Video Display Terminals,
ISO 9241: Ergonomic
1988.
Human Factors in Engineering
ORDINANCE AFS
U.S.
24
Getting Started
Page 29

2
Exploring Your System
Chapter 2 covers the following topics:
Turning the computer on and off
•
Suspending your computer
•
Using the keyboard
•
Using the mouse
•
Using headphones
•
Working with diskettes
•
Using the CD-ROM drive
•
Using the modem
•
Chapter 2•Exploring Your System
25
Page 30

Turning On Your Computer
Turning Off Your Computer
First, press the Power button on your display. Then, to
turn on your computer, press the On button on the
front of the PC.
On button
There is only one way to turn off your computer
correctly. To turn off the computer:
Exit all software programs. (To close programs,
1
click X in the upper right corner of each window.)
Click Start on the taskbar.
2
Click Shut Down (last item on the menu).
3
In the dialog box, make sure Shut down is
4
selected.
Click Yes.
5
Turn off your display.
6
Caution:
is running could corrupt your files.
Pressing the computers On button when software
26
Getting Started
Page 31

Note:
If your system is frozen and wont respond to the
mouse or keyboard, you cant use Shut Down.In this case,
press the On button to turn off the power of your computer.
Wait a few seconds, then turn the computer back on. Turning
off your computer this way does not protect your programs
and files as well as Shut Down does. The next time you turn on
the computer, the hard disk may be scanned for errors.
Suspend also allows faxes to come through to your
computer, and enables your PC to automatically
retrieve your e-mail messages and download
information from the World Wide Web (if you have
programmed your computer to do so).
To suspend the computer:
Suspending Your Computer
As an alternative to shutting down your computer,
you can put your PC in Suspend mode. When you
suspend your computer, it goes into a low-power
state and your display is blank as if its turned
off. The next time you use your computer, any
applications, folders, and documents that were open
before you suspended the computer will be ready
and waiting for you. With Suspend, you can save
electricity without having to wait for your PC to go
through the normal startup routine when you turn on
the computer.
Press the Suspend button on the keyboard. The
1
screen goes dark, and the computer goes into
Suspend mode.
When you want to use your computer again, just
2
start to use the keyboard or mouse, or press the
Suspend button. The screen display will reappear
just as you left it.
Another way to suspend your computer is to choose
Suspend on the Start menu.
Chapter 2•Exploring Your System
27
Page 32

Note:
If you use an application that wakes your computer
when it is suspended (such as when a fax program receives an
incoming fax), the computer will not go back into Suspend
mode automatically, unless your PC is configured to use
the Auto Suspend feature. For more information on Auto
Suspend, see Setting Auto Suspend in the BIOS in the
Getting Help
guide.
Special Keyboard Buttons
Internet Press this button to launch the Internet
browser of your choice. For more information on
connecting to the Internet, see page 48. This button
can be reconfigured to launch any application; see
Reconfiguring Keyboard Buttons on page 29.
Using the Keyboard
You have a special keyboard that enables you to:
•
Connect directly to the Internet (if your
telephone line is connected to the computer).
•
Suspend your computer to save power while you
arent using it.
•
Get support information.
•
Set shortcuts to your favorite programs.
Note:
If your keyboard is not working properly, see
Chapter 2, Troubleshooting, in the
Getting Started
28
Getting Help
guide.
Note:
The Internet button will work only if you have
connected a telephone line to the computer.
Suspend Press this button when your computer
wont be used for a while, but you dont want to turn
it off. Pressing this key will save electricity. The screen
will go dark, and your computer will go into Suspend
mode. When you want to use your system again,
press Suspend again, move the mouse, or press any
key. The screen display will reappear just as you
left it.
Page 33

Information Press this button to see HP support
options. By default, this button launches Personal
Guide but you can configure it to start HP Support
Center or any application you choose. For
information on reconfiguring this key, see the next
section, Reconfiguring Keyboard Buttons.
Reconfiguring Keyboard Buttons
Two buttons on the keyboard can be reconfigured to
start different applications: Information and Internet.
To reconfigure the buttons:
Click Start on the taskbar.
1
Select Settings.
2
Click Control Panel.
3
Double-click the Keyboard icon in
4
Control Panel.
Click the Keyboard Manager tab.
5
In the window that appears, click the button you
6
want to configure.
Select an application from the list, or click
7
Browse to find an application yourself.
Change the label to reflect the new application.
8
(The label will be displayed at the bottom of the
screen when the button is pressed.)
Click OK.
9
Repeat steps 6 through 9 for each button you
10
want to reconfigure.
Click OK when you are finished reconfiguring
11
your keyboard.
Chapter 2•Exploring Your System
29
Page 34

Changing the Screen Display of Keyboard
Messages
When you press any of the three buttons on the top
of your keyboard, the button description (such as
Suspend) appears on your screen.
To change the size, font, and color of these on-screen
messages:
Click Start on the taskbar.
1
Select Settings.
2
Click Control Panel.
3
Double-click the Keyboard icon in
4
Control Panel.
Click the Keyboard Manager tab.
5
Select Change Onscreen Display.
6
Using the Mouse
As an alternative to the keyboard, you can use your
mouse to choose commands from the menus and
select items on the screen. To move the mouse
pointer, just slide the mouse on your desk in the
direction you want to move the pointer; the mouse
pointer will move on the screen in the same direction.
Mouse pads are not required, but they do provide a
clean, flat surface.
Once you have pointed to an item with the mouse,
you can select the item by tapping the left mouse
button once. For some tasks, such as opening a
document or running a program, youll need to
double-click the item. To double-click, point to the
item and tap the left mouse button twice, quickly.
Make your changes.
7
Click Done.
8
Click OK.
9
Getting Started
30
The right mouse button functions differently in each
application. In many programs, the right button
displays a context-sensitive menu.
Page 35

For practice using the mouse:
Run the mouse tutorial that came with your
•
computer. To start the program, click the Start
button on the taskbar, choose Run, type
windows\options\cabs\wintutor.exe, and
click OK.
Play Solitaire or any of the other games included
•
with your computer.
Note:
If your mouse is not working properly, see Chapter 2,
Troubleshooting, of the
Getting Help
guide.
Using Headphones
Your right HP Pavilion speaker is equipped with a
standard mini (3.5mm) headphone jack. This jack
supports most portable headphones. If you would
like to use headphones equipped with the larger
.25-inch phone jack, inexpensive adapters are
available at most consumer electronics stores.
Chapter 2•Exploring Your System
31
Page 36

To use the headphones, plug them into the
headphone jack located at the front of the right
speaker.
Note that when the headphones are plugged in, the
speakers will be muted. (The systems line output,
however, will continue to work.) When you unplug the
headphones, the speakers will go back to normal
operation.
Working with Diskettes
Your computer comes with a 3.5-inch diskette drive.
To insert a diskette into the drive:
Hold the diskette by the label, with the label
1
facing up.
Insert the diskette into the drive, with the metal
2
plate going into the drive first.
Push the diskette into the drive until you hear a
3
click.
To remove the diskette, press the button underneath
the drive. Be sure to remove the diskette before
shutting down your computer; if a diskette is in the
drive the next time you turn on your computer, you
will see an error message and the Windows desktop
will not be able to start. If this happens, just eject the
diskette and press any key to continue.
32
Getting Started
Page 37

Caring for Diskettes
Formatting Diskettes
Youll want to take proper care of your diskettes so
that you dont lose important information. Follow
these tips:
Keep magnetic material away from your
•
diskettes. Magnets can scramble the data on the
diskette.
Do not remove a diskette while the indicator light
•
is on.
Store diskettes at room temperature.
•
Before you can use a diskette, it must be formatted,
or initialized. Most diskettes come preformatted
check the box or diskette label to see if the diskettes
are already formatted. If they are not formatted, you
will need to format them yourself.
To format a diskette:
Insert the diskette in the drive.
1
Double-click the My Computer icon on the
2
desktop.
Click (dont double-click) the 3-1/2 floppy (A:)
3
icon.
Click File on the menu bar and choose Format.
4
Choose OK.
5
Warning:
Formatting erases all data on a diskette.
Chapter 2•Exploring Your System
33
Page 38
Using the CD-ROM Drive
Your CD-ROM drive can run software on CD-ROMs as
well as play music CDs. This section shows you how
to perform these different tasks.
Note:
If you have any problems with your CD-ROM drive,
see Chapter 2, Troubleshooting, in the
Getting Help
guide.
Press the button under the CD-ROM. The disc
5
tray glides back inside the computer.
Caring for CDs
As with diskettes, CDs require special handling so that
you dont lose important information. Follow these
tips:
Inserting a CD
To insert a CD in the CD-ROM drive:
Make sure your computer is turned on.
1
To eject the disc tray, press the button under the
2
CD-ROM drive.
Remove the CD from its case, holding onto the
3
discs edges only.
With the label facing up, gently place the disc in
4
the tray.
Getting Started
34
•
Return CDs to their protective cases when you are
finished using them.
•
Avoid touching the underside of the disc with
your fingers or placing the disc face up on your
desktop. Doing so could scratch the surface.
•
Handle the disc by its outside edges or inner hole
only.
•
Store CDs at room temperature.
Page 39

Playing Music CDs
Playing MPEG Videos
Music CDs automatically play when you insert them
into your CD-ROM drive. To adjust sound, skip tracks,
or stop playing the CD, click the Media Rack button
on the taskbar.
Using CDs that Came with Your
HP Pavilion PC
Some programs (such as encyclopedias) require that
you insert the CD in order to run the software. To play
these CDs:
Place the CD in the CD-ROM drive.
1
Double-click the Preinstalled Software
2
icon on your desktop.
Scroll the Preinstalled Software window until you
3
locate the program you want to start.
Double-click the CD title you wish to play.
4
MPEG (Motion Picture Experts Group) videos can be
on CDs, files downloaded from the Internet, satellite
transmissions, or files on a diskette. Your computer
supports the MPEG-1 standard; these files typically
have a .DAT or .MPG extension.
To play an MPEG-1 file:
In My Computer or Windows Explorer, go to the
1
drive and folder containing the MPEG-1 file.
Double-click the file name you want to play.
2
Chapter 2•Exploring Your System
35
Page 40

Using the Modem
Your HP Pavilion PC comes with a K56flex data/fax
modem. Using the modem and the software included
with your PC, you can:
•
Connect to the Internet (see Connecting to the
Internet on page 48).
•
Send and receive e-mail messages (see Sending
and Receiving E-Mail on page 50).
•
Send and receive faxes (see Sending and
Receiving Faxes on page 55).
Note:
For online documentation on your modem, go to the
Pavilion Library in the HP Support Center.
Even though your modem is capable of downloading
at 56Kbps using K56flex technology, your online or
Internet Service Provider may not operate at this
speed or support this technology. Please check with
your service provider for information on its
capabilities.
Please note that the maximum speed for faxing is
14.4Kbps.
36
Getting Started
Page 41

3
Discovering Your Software
Chapter 3 covers the following topics:
Learning about your Windows desktop
•
Finding your preinstalled software
•
Finding files
•
Adding and deleting software
•
Getting help from the HP Support Center
•
Getting software help
•
Chapter 3•Discovering YourSoftware
37
Page 42

Learning about the Windows Desktop
After you turn on your computer and the operating system loads, the
Windows desktop appears.
38
Getting Started
Page 43

As you can see, the Windows desktop contains a
number of icons; the table below describes some of
the more important ones.
My Computer
Recycle Bin
Internet Explorer
Easy Internet
Access
Use the My Computer icon to view the
contents of the drives and folders on your
computer and to manage your files.
To delete a file or icon, just drag it the
Recycle Bin. Dont forget to empty the bin
periodically.
The Internet Explorer icon launches
Microsofts Web browser. Note that you must
have an Internet Service Provider in order to
use this browser.
The Easy Internet Access icon allows you to
choose from three Web browsers and then
connect to the Internet. See Browsing the
Internet on page 49.
Preinstalled
Software
Personal Guide
Support Center
The Preinstalled Software folder contains
descriptions of all the software that came
with your HP Pavilion PC. You can also
launch applications from this folder.
See Finding YourPreinstalled Software on
page 41.
This icon launches Personal Guide where
you can run tutorials to learn more about
the Windows desktop. See Using Personal
Guide on page 40.
Use this icon to get help with your
HP Pavilion PC software or hardware.
See Getting Help from the HP Support
Center on page 44.
Click the Start button to display the
Windows main menu where you can access
your programs and documents.
Chapter 3•Discovering YourSoftware
39
Page 44

Using Personal Guide
For those who are new to the Windows desktop,
Personal Guide provides an easy way to start using
your HP Pavilion PC. It offers easy access to a variety
of on-screen tutorials and short demos that will help
you get up and running quickly with your new
computer.
Start Personal Guide by double-clicking its
icon on the Windows desktop.
To explore a Personal Guide category, click its button
in the Personal Guide window. Descriptions of the
Personal Guide categories are listed on the following
page.
40
Getting Started
Page 45

Personal Guide Categories
Finding Your Preinstalled
Organizing
Your Files
Changing Your
Desktop
Managing Your
Software
Take Me to the
Internet
In Case of a
Problem
Helps you get acquainted with the Windows
desktop, creating folders, saving files,
moving and removing documents, finding
files, creating shortcuts, and using Windows
Explorer.
Explains how to increase the size of the
desktop, change the colors of your windows
and desktop, choose a screen saver, format
the taskbar, and use Suspend mode.
Explains how to install and remove software,
add software to the Start menu, prevent
software from starting automatically, use the
taskbar, and start a DOS session.
Launches a demo summarizing the benefits
of the Internet. If you sign up for a free
Internet access trial, you can access your
browser directly from here.
Takesyou directly to the HP Support Center
so that you can get help with your
HP Pavilion PC software or hardware.
Software
Your HP Pavilion PC comes with a number of
preinstalled software programs; for your
convenience, these programs have been placed in a
folder on your desktop. The programs vary,
depending on which system you purchased.
To see the key programs on your HP Pavilion PC:
Double-click the Preinstalled Software
1
folder on your Windows desktop.
Click once on an icon to view a description of the
2
software program; this description appears in the
left pane of the Preinstalled Software window.
To run a program, double-click the programs
3
icon in the window.
Chapter 3•Discovering YourSoftware
41
Page 46

Note:
You can also run all of these preinstalled programs
(plus any new ones you install) from the Programs list. To see
this list, click Start on the taskbar and then choose Programs.
Note:
Your window may show different software icons.
Finding Files
To find documents or folders on your computer:
Click Start on the taskbar.
1
Select Find.
2
Click Files or Folders.
3
Type all or part of the name of the document
4
(or folder).
Click Find Now. The magnifying-glass animation
5
means the search is in progress. If there are any
matches, a list of files appears.
Double-click the document (or folder) to open it.
6
42
Getting Started
Page 47

Adding Software
Deleting Software
The best way to install a new program is to use the
Add/Remove Programs utility.
To install new programs by running Add/Remove
Programs:
Insert the CD or diskette in the appropriate drive.
1
Click Start on the taskbar.
2
Select Settings.
3
Click Control Panel.
4
Double-click Add/Remove Programs.
5
Click Install.
6
Follow the on-screen directions.
7
Once a new program is installed, it appears in the
Programs section of the Start menu.
There are a number of ways to remove programs
from your hard disk. Some programs come with their
own uninstall utility, which you use to remove the
program. You can also buy uninstall utilities that
remove any program from your hard disk. Or you
can use the Add/Remove Programs utility, located in
the Control Panel.
To use the Add/Remove Programs utility:
Click Start on the taskbar.
1
Select Settings.
2
Click Control Panel.
3
Double-click Add/Remove Programs.
4
Click the program you want to remove.
5
Click Add/Remove.
6
Click OK.
7
Chapter 3•Discovering YourSoftware
43
Page 48

Getting Help from the HP
Support Center
The HP Support Center groups your support options,
online documentation, tutorials, and system
maintenance tools in one convenient location.
To go to the Support Center, choose
HP Support Center in the Start menu or
double-click the icon on the desktop.
Note:
You can configure your Information button to launch
HP Support Center. See Reconfiguring Keyboard Buttons on
page 29.
Descriptions of HP Support Center options are listed
in the following table.
44
Getting Started
Page 49

HP Support Center Options
Software Help
Hardware Help
HP Pavilion
Library
Tutorials
Common
Questions
System
Maintenance
Each software package shipped with your
computer is listed here, along with its
manual (if there is one), online Help, and
a support phone number.
Information on hardware components
(such as your keyboard) is located here.
Online manuals are found here. Software
manuals (also found under Software
Help) are found here as well.
Learn skills such as creating software
shortcuts and changing the color of your
screen background by taking the short
lessons found here.
Common questions that HP Support
Center personnel are frequently asked
are listed and answered here. Subjects
range from modems to the Internet to
MS-DOS and more. Check here if you
have a question about your computer.
Here you find system tools to clean up
your hard disk and remove viruses.
Getting Software Help
If you are having trouble learning a new software
program, you have a number of ways to get help:
Use the online help. In most programs, you
•
can open a help window by pressing the
F1 function key.
Read the online documentation. To see if a
•
program has documentation online,
double-click the HP Support Center icon
on the desktop and click the HP Pavilion
Library button.
Call the vendors telephone support number or
•
visit its Web site. This information is available in
the HP Support Center, in the Technical Support
category.
Technical Support
Find information about your technical
support options here.
Chapter 3•Discovering YourSoftware
45
Page 50

46
Getting Started
Page 51

4
Chapter 4 covers the following topics:
•
•
•
•
•
•
Communicating with the World
Connecting to the Internet
Signing up for Internet access
Browsing the Internet
Sending and receiving e-mail
Using the HP Message Board
Sending and receiving faxes
Chapter 4•Communicating with the World
47
Page 52

Connecting to the Internet
Signing Up for Internet Access
Your HP Pavilion PC is Internet-ready and comes with
everything you need to use the Internet:
•
Free* Internet access without the use of a credit
card (*Please read the terms and conditions on
page 53)
•
A Personal Message Board where you can create
and post messages to family and friends
•
Personalized e-mail accounts
•
Choice of three browsers
•
A Web site dedicated to HP Pavilion PC owners
If you havent yet signed up for your free* Internet
access:
Double-click the Easy Internet Access
1
icon on your desktop, or press the
Internet button on your keyboard.
Watch the interactive demo to acquaint yourself
2
with the Web and see how to use e-mail.
Click Sign Up to register for your free Internet
3
access trial.
Follow the instructions on your screen. During
4
the sign-up process, you have the option of
adding multiple e-mail accounts.
Note:
Be sure to set up all the accounts you need at this
time because you wont have an opportunity to do so
later.
48
Getting Started
Page 53
Whenever you want to connect to the
Internet in the future, just double-click the
Easy Internet Access icon on your desktop,
or press the Internet button on your keyboard.
Browsing the Internet
Exploring the Internet with your HP Pavilion PC is fun
and easy. When you sign up for the Easy Internet
Access, you have three Internet browsers to choose
from:
Easy Internet Access HPs customized
•
browser that offers an easy and fast way to surf
the Web and send and receive electronic mail.
Kids Internet Browser HPs customized
•
browser designed especially for children. It offers
e-mail services and access to fun Web sites.
Microsoft Internet Explorer a traditional Web
•
browser. For e-mail services, you will need to
configure Microsoft Outlook Express.
Each time you connect to the Internet, you can select
which browser you want to use, or you can create a
customized icon that launches either the Easy
Internet Access or Kids Internet browser.
To connect to the Internet:
Double-click the Easy Internet Access
1
icon on your desktop, or press the
Internet button on your keyboard.
Choose your account.
2
In the Browser Selector dialog box, click the
3
browser you want to use.
Click Start.
4
Chapter 4•Communicating with the World
49
Page 54

Once you are connected to the Internet, be sure to
visit the HP At Home Web site. An HP At Home
button is provided in the Easy Internet Access
browser, or you can enter the following address:
http://www.hp-at-home.com
Sending and Receiving E-Mail
The specific steps for sending and receiving e-mail
depend on which mail program you are using. The
procedures below are for the Easy Internet Access
browser.
At this Web site, you can get:
•
Tips and updates on using your computer
•
Ideas for projects that you can create on your PC
•
Additional assistance when you have a question
or need help
To visit other sites, click the buttons in the customized
browsers or type in the Web addresses. Another way
to browse the Internet is to use the browsers Search
button to hunt for all references to a specific word or
phrase on the Web.
Getting Started
50
To go to the Easy Internet Access browser e-mail
program:
Double-click the Easy Internet Access
1
icon on your desktop, or press the
Internet button on your keyboard.
If you have multiple mail accounts, click the
2
account you want to use.
Choose the Easy Internet Access browser and
3
click Start.
Click the Go to e-mail button.
4
Page 55

To send an e-mail message:
In the Easy Internet Access e-mail window, click
1
Write messages.
Fill in the recipients e-mail address and the
2
subject of the e-mail, and then type your
message.
Click Send messages.
3
To receive e-mail messages:
In the Easy Internet Access e-mail window, click
1
Get messages.
Click a message in the list to read its contents.
2
When you are finished sending and receiving e-mail,
click the Close e-mail button.
Using the HP Message Board
After you sign up for the Easy Internet Access, you
have access to the HP Message Board. This is your
own personal space where you can post messages
and photos for others to view. Its a place where you
can share:
Your latest holiday photos
•
Personalized notes
•
Fun greetings
•
And much more
•
Just give your family and friends your Message
Board Web address and password and they can view
it with their own Internet connection.
Its as easy as Create, Post, and Share.
Chapter 4•Communicating with the World
51
Page 56

Creating a Message
Sharing Your Message Board
To create a message for your Message Board:
Double-click the HP Message Board
1
icon on your desktop.
Click Create & Post to start the Message Creator.
2
Select a message option or choose to design one
3
of your own.
Start personalizing your message.
4
Posting a Message
Once youve completed your message, select Post to
my Message Board to send your message to your
Message Board.
After its been posted, a confirmation will be sent to
you. Posting takes approximately 510 minutes.
Once you receive confirmation that your message
has been posted successfully, send e-mail to your
friends and give them the Web address and password
of your Message Board so they can view your
postings. You can find the Web address and password
in the confirmation e-mail that was sent to you after
you posted your message.
Another way to look up the Web address and
password needed for access to your postings is to
double-click the HP Message Board icon on
the desktop and select Giving people access
to your Message Board.
52
Getting Started
Page 57
Terms and Conditions of the
Free Internet Access
Free Internet access is limited to the number
•
of specified hours, starting from the date of
purchase. Your daily usage may be limited
as well.
Free Internet access only covers the Internet
•
Service Provider (ISP) connect time. You will be
responsible for any additional phone toll charges
from the phone company that are incurred when
you call from your home or office to the nearest
access number.
When selecting a local access number, please
•
remember that calling a number within your area
code does not guarantee the call is free.
Please check with your phone carrier to make
•
sure the number you have selected is considered
a local call in your area. HP and GTE are not
responsible for additional long distance phone
charges.
Your Internet account is nontransferable.
•
Chapter 4•Communicating with the World
53
Page 58

Removing the Channel Bar
To remove the Channel bar from the desktop:
Your Windows desktop may contain the
Internet Explorer Channel bar which you
can use to quickly access pages from
your favorite Web sites. In order to use
the bar, however, you must have an
Internet Service Provider (ISP) and you
need to set up Internet Explorer 4.0 to
connect with your ISP. If you dont plan
on using the Channel bar in the near
future, you may want to remove it from
the desktop.
Right-click an empty area of the desktop.
1
Choose Active Desktop and then Customize my
2
Desktop.
Turn off the Internet Explorer Channel Bar
3
option.
Click OK.
4
Note:
If you later decide you want to use the Channel bar,
just follow the above steps, except turn on the Internet
Explorer Channel Bar option.
54
Getting Started
Page 59

Sending and Receiving Faxes
The QuickLink III software included with your
HP Pavilion PC can turn your PC into a fax machine.
Sending a Fax
There are two ways to compose a fax. You can type a
message on the Quick Fax notepad, or you can fax a
file from any program that can print.
Sending a fax composed on the Quick Fax
notepad
Double-click the Preinstalled Software
1
folder on your desktop, and scroll the
window until you find QuickLink III.
To start the program, double-click QuickLink III.
2
Click Quick Fax on the QuickLink III main
3
window toolbar. The Message Manager appears.
Type the appropriate address and subject
4
information in the fax header.
Type the message body in the QuickFax Note
5
area.
Click Send Fax.
6
Faxing a file using software programs
Software programs that can print can also send faxes.
To send a fax, change the selected printer (in the Print
dialog box) to QuickLink III, and then print as you
normally do.
Chapter 4•Communicating with the World
55
Page 60

Receiving Faxes
QuickLink III also has the ability to receive, view, and
print faxes. Faxes are automatically received when the
QuickLink III program is running in an open or
minimized window.
Note:
To see if you have received any faxes, look at the
status bar at the bottom of the QuickLink III window.
To view and print a fax:
In QuickLink III, click View Fax on the toolbar.
1
Double-click the name of the fax that you want
2
to view.
Click the Print button to print the fax on the
3
selected printer.
56
Getting Started
Page 61

Glossary
A
Add-in Card
and gives added capability, such as video teleconferencing.
Anti-Glare Filter
monitor screen to prevent glare.
Auto Suspend
enabled when the keyboard or mouse isnt used for a set period
of time (such as 30 minutes).
A circuit board that plugs into the motherboard
A mesh or laminar screen placed over the
A power-saving feature that is automatically
B
BIOS
(Basic Input Output System) The part of your computer
that controls communication between all the disk drives,
monitor, keyboard, and other devices.
Boot
Starting or restarting your computer. Booting your
computer when the power is off is called a cold boot.
Restarting your computer while the power is on is called a
warm boot.
Browser
search for information on the Internet.
Byte
memory. A byte contains eight bits.
A program that allows you to view Web pages and
Represents a letter or character in a computer file or
C
CD-ROM
that stores a large amount of information (data or music).
Central Processing Unit
computer that acts as the computers control center. Also refers
to the box that holds the internal components of your
computer.
Click
left mouse button.
Comp-Video In
for receiving composite video from the computer.
Comp-Video Out
computer for sending composite video to the TV.
(Compact Disc Read-Only Memory) A circular disc
(CPU) Themicroprocessor in your
Press a mouse button once. If not specified, assume the
(Composite-Video In) A connector on the TV
(Composite-Video Out) A connector on the
Glossary
57
Page 62

Connector
Control Panel
your computer including changing screen colors, and installing
printers and fonts.
A metal socket for a cable plug.
A collection of utilities that help you maintain
D
DIMM
(Dual Inline Memory Module). A small circuit board to
which RAM memory chips are mounted. Used to increase
system memory.
Digital Camera Port
to which you can connect digital cameras and other serial
devices (select models only).
Diskette
transfer information to and from your computer. It applies to
both the 5.25-inch and 3.5-inch sizes. Also known as floppy
disks.
Diskette Drive
data on diskettes.
Document
graphics or both and then store as a separate file.
A small, portable, magnetically coated disk used to
Information you create in any program text,
A serial port on the front of the computer
A data storage device that stores and retrieves
Drag and Drop
holding down the mouse button while moving the mouse. Drop
by releasing the mouse button to place an item in a specific
location on the screen.
Drive Bay
DVD
(Digital Video Disc or Digital Versatile Disc) A high
capacity storage medium similar in appearance to CD-ROM, but
used for movies, software, and music (select models only).
A two-step process. Drag by pressing and
The space that a disk drive sits in.
E
Electrostatic Discharge
charge which can be damaging to sensitive components, such as
circuit boards and diskettes.
Ergonomics
the interaction between people and the equipment they work
with. Ergonomics also is concerned with the design of the
equipment in order to optimize the efficiency and safety of the
user.
Expansion Slot
an add-in card.
An applied science concerned with understanding
(ESD) A sudden redistribution of static
A connector on the mother board for placing
Double-Click
succession. Unless specified, assume the left mouse button.
58
Pressing a mouse button twice in rapid
Getting Started
Page 63

F
File
A named collection of data. A file can be a program or a
document.
Folder
stored.
In Windows, a named area of a disk where files are
G
Gigabyte
(GB) Approximately one billion bytes of information.
H
Hard Disk
computers storage device. The hard disk is usually fixed in the
computer and not removed.
Hardware
computer, for example: hard drive, add-in cards, and display.
HP Pavilion Library
your system.
A magnetically coated disk that acts as the
The physical components used to operate your
A collection of online books available on
I
Icon
A small graphic that represents a program or a document.
Selecting an icon launches a program or opens a document.
Internet
other through connections over the telephone lines or other
means such as satellite, infrared, or direct cables.
ISP
to the Internet, usually on a subscription basis. By dialing the
ISP with a modem, a subscriber connects to the ISPs servers
which have a permanent connection to the Internet.
A group of computers able to communicate with each
(Internet Service Provider) Abusiness that provides access
J
Joystick
An add-on device used to navigate and play games.
K
Kilobyte
1024 bytes) of information.
(KB) Approximately one thousand bytes (actually
L
LED
(Light Emitting Diode) Asemiconductor light used on
keyboards, diskette drives, and CD/DVD drives to indicate the
device is in use.
Glossary
59
Page 64

M
Megabyte
information.
Memory
Memory (RAM) in your computer.
Menu
allow you to perform tasks.
Menu Bar
corresponding menus. Usually located at the top of the
program window.
MIDI
protocol to control musical instruments, including the
computers synthesizers. An audio format similar to wave files.
(MB) Approximately one million bytes of
Generally refers to the amount of Random Access
A list of commands displayed on your screen, which
A list of menu labels that provide you with access to
(Musical Instrument Digital Interface) A communications
My Computer
folder on a drive. Lets you manage the files on your computer.
Multimedia
forms: graphics, text, sound and animation.
Multimedia Keyboard
controlling sound, playing CDs, and launching applications
(select models only).
Multitasking
time.
Offers a way to view the contents of a single
Refers to software presented in a combination of
A keyboard with special buttons for
The ability to run more than one program at a
O
Online Books
your computer.
Software documentation that can be viewed on
Modem
computers. This device is used commonly for faxing documents
and connecting to the Internet.
Motherboard
Processing Unit, Random Access Memory, and add-in cards.
Mouse
point and click icons and menu options.
MPEG
MS-DOS
60
A device that uses telephone lines to connect to other
The circuit board that holds the Central
A device that allows you to move your cursor and to
A type of computer movie format.
The Microsoft Disk Operating System.
Getting Started
P
Parallel Port
to connect to other devices, like a printer. Also known as the LPT
port.
PC
Personal computer.
Program
perform a certain task (such as word processing or financial
management).
A connector on your computer that allows you
A file or set of files that contain instructions to
Page 65
R
Random Access Memory (RAM)
memory in your computer where data and programs reside
while being executed by the CPU.
Refers to the internal
Start button
the Windows main menu.
Suspend mode
when you arent going to be using your computer for awhile.
A button on the Windows taskbar that displays
A power-saving feature that you can select
Read-Only Memory (ROM)
read but not written to. ROM also describes the chip inside your
computer that holds basic information for your computer.
Recovery CD
system files or software that came with your computer.
Recycle Bin
documents.
CD provided in case you accidentally lose
A temporary storage place for deleted
Any type of memory that can be
S
S-Video In
the computer (select models only).
S-Video Out
to the TV (select models only).
Serial Port
communication between the computer and other devices, such
as a camera. Also known as the COM port.
Software
A connector on the TV for receiving s-video from
A connector on the computer for sending s-video
A connector on the back of the CPU for
Applications or programs that run on your computer.
T
Task
Another term for an open program or folder.
Taskbar
desktop, the taskbar contains the Start button, buttons
representing each open program or folder, and the clock.
Provides an easy way to switch between programs.
Usually located at the bottom of the Windows
U
Universal Serial Bus (USB)
connect to many different types of peripherals, such as scanners
and cameras. Allows connection of multiple devices.
A type of serial interface that can
W
Wallpaper
Wave Files
Windows Explorer
hierarchical structure of your drives and folders and allows you
to access and manage the files on your system.
The background on the desktop in Windows.
(WAVfiles) An audio file format.
A file management program that shows the
Glossary
61
Page 66

62
Getting Started
Page 67

Regulatory and Safety Information
FCC Regulatory and Safety
Information
Regulatory Information Federal Communications
Commission (FCC) (USA only)
Federal Communications Commission Radio Frequency
Interference Statement
Warning:
comply with the limits for a Class B digital device, pursuant to Part
15 of the FCC Rules. These limits are designed to provide
reasonable protection against harmful interference in a residential
installation. This equipment generates, uses, and can radiate radio
frequency energy and, if not installed and used in accordance with
the instructions, may cause harmful interference to radio
communications. However, there is no guarantee that interference
will not occur in a particular installation. If this equipment does
cause harmful interference to radio or television reception, which
can be determined by turning the equipment off and on, the user is
This equipment has been tested and found to
encouraged to correct the interference by one or more of the
following measures:
reorient or relocate the receiving antenna.
•
increase the separation between the equipment and the
•
receiver.
connect the equipment into an outlet that is on a circuit
•
different from the receiver.
consult the dealer or an experienced radio/TV technician for
•
help.
Hewlett-Packards system RFI and Radiated Immunity tests were
conducted with HP-supported peripheral devices and HP-shielded
cables, such as those you receive with your system. Changes or
modifications not expressly approved by Hewlett-Packard could
void the users authority to operate the equipment. Tocomply with
the limits for an FCC Class B computing device, always use
shielded signal cables and the shielded power cord supplied with
this unit.
Regulatory and Safety Information
63
Page 68

Consumer Information and FCC Requirements
Telephone Connection
This equipment complies with Part 68 of the Federal
•
Communications Commission rules. These rules permit this
device to be directly connected to the telephone network.
Standardized jacks are used for these connections. This
equipment should not be used on party lines or coin lines.
If this device is malfunctioning, it may also cause harm to the
•
telephone network; this device should be disconnected until
the source of the problem can be determined and until it has
been repaired. If this is not done, the telephone company
may temporarily disconnect your service.
The telephone company may make changes in its technical
•
operations and procedures. If such changes affect the
compatibility or use of this device, the telephone company is
required to give adequate notice of the changes.
If the telephone company requests information on what
•
equipment is connected to their lines, inform them of:
a
The telephone number this unit is connected to
b
The ringer equivalence number
c
The USOC jack required: RJ-11C
d
The FCC Registration Number
Items (b) and (c) are indicated on the label. The ringer
equivalence number (REN) is used to determine how many
devices can be connected to your telephone line. In most
areas, the sum of the RENs on any one line should not
exceed five (5.0). If too many devices are attached, they may
not ring properly.
In the event of equipment malfunction, all repairs should be
•
performed by Hewlett-Packard or an authorized HP Personal
Computer Dealer Repair center. It is the responsibility of
users requiring service to report the problem to HPs Home
Products Division, or to one of our authorized agents. Service
can be obtained by calling HPs Customer Care Center at the
number listed on your
HP Pavilion PC Support Path
card.
Statement of Fax Branding
The Consumer Protection Act of 1991 makes it unlawful for any
person to use a computer or other electronic device to send any
message via telephone fax machine, unless it clearly contains
a margin at the top or bottom of each transmitted page or on
the first page of the transmission, the date and time it is sent,
identification of the business or other entity, or individual
sending the message, the telephone number of the sending
machine or such business, entity or individual.
64
Getting Started
Page 69

Canada Department of Communication (DOC)
Notice
Telephone Connection
The Canadian Department of Communications label identifies
certified equipment. This certification means that the equipment
meets certain telecommunications network protective,
operational and safety requirements. The department does not
guarantee the equipment will operate to the users satisfaction.
Before installing this equipment, the user should ensure it is
permissible to connect it to the facilities of the local
communications company. The equipment must be installed
using an acceptable method of connection. In some cases, the
companys inside wiring associated with a single line individual
service may be extended by means of a certified connector
assembly (telephone extension cord). The customer should be
aware that compliance with the above conditions may not
prevent degradation of service in some situations.
Repairs to certified equipment should be made by an authorized
Canadian maintenance facility designated by the supplier. Any
repairs or alterations made by the user to this equipment, or
equipment malfunctions may give the telecommunications
company cause to request that the user disconnect the
equipment.
The user should ensure, for their own protection, that the
electrical ground connections of the power utility, telephone
lines and internal metallic water pipe systems, if present, are
connected together. This precaution may be particularly
important in rural areas.
Warning:
themselves, but should contact the appropriate electric inspection
authority or electrician, as appropriate.
Avertissement :
connexions lui-même mais devrait utiliser les services de
lorganisme approprié dinspection des installations électriques ou
dun électricien, selon le cas.
Warning:
device denotes the percentage of the total load to be connected to
a telephone loop; this is used by the device to prevent overloading.
The termination on a loop may consist of any combination of
devices, subject only to the requirement that the sum of the Load
Numbers does not exceed 100.
DOC Statement (Canada only)
This Class B digital apparatus meets all requirements of the
Canadian Interference-Causing Equipment Regulations.
Cet appareil numerique de la classe B respecte toutes les
exigences du Reglement sur le materiel brouilleur du Canada.
Users should not attempt to make such connections
Lutilisateurne devrait pas tenter de faire ces
The Load Number .9 assigned to each terminal
Regulatory and Safety Information
65
Page 70

Energy Star Compliance
Hewlett-Packard Pavilion PCs and monitors marked with the
Energy Star logo comply with the U.S. Environmental Protection
Agencys Energy Star guidelines for energy efficiency. For
information on changing power management features, refer to
Using the BIOS Setup Program in the
Getting Help
guide.
66
Getting Started
Page 71

Declaration of Conformity
According to ISO/IEC Guide 22 and EN 45014
Manufacturers Name:
Manufacturers Address:
declares, that the product
Product Name:
Model Number(s):
Product Options:
conforms to the following Product Specifications:
Safety:
IEC 950:1991 + A1, A2, A3, A4/EN 60950:1992 + A1, A2, A3, A4
EN 41003:1993
EMC:
CISPR 22:1993 / EN 55022:1994 - Class B
EN 50082-1:1992 - Generic Immunity
IEC 801-2:1991/prEN 55024-2:1992 - 4 kV CD, 8 kV AD
IEC 801-3:1984/prEN 55024-3:1991 - 3V/m
IEC 801-4:1988/prEN 55024-4:1992 - 0.5 kV Signal Lines,
FCC Title 47 CFR, Part 15 Class B
AS/NZS 3548:1992/CISPR 22:1993 Class B
Hewlett-Packard Company
10500 Ridgeview Ct.
Cupertino, CA 95015-4010
USA
HP Pavilion Multimedia Computer System
6XXXY (X is any number 0-9, Y is any alphanumeric
character or blank)
All
1)
1 kV Power Lines
2)
/ICES-003, Issue 2
1)
Supplementary Information:
The product herewith complies with the requirements of the following Directives
and carries the CE marking accordingly.
-the EMC Directive 89/336/EEC (including 93/68/EEC)
-the Low Voltage Directive 73/23/EEC (including 93/68/EEC)
1) The Product was tested in a typical configuration with Hewlett-Packard
Personal Computer peripherals.
2) This Device complies with Part 15 of the FCC Rules. Operation is subject to
the following two conditions: (1) this device may not cause harmful
interference, and (2) this device must accept any interference received,
including interference that may cause undesired operation.
Quality Manager
Cupertino, CA May 1998
For Regulatory Compliance Information ONLY, contact:
Australian Contact:
European Contact:
USA Contact:
Product Regulations Manager
Hewlett-Packard Australia Ltd.
31-41 Joseph Street
Blackburn, Victoria 3130, Australia
Your local Hewlett-Packard Sales and Service Office or
Hewlett-Packard GmbH
Department HQ-TRE Standards Europe
Herrenberger StraBe 130
D-71034 Boblingen
(FAX: + 49-7031-14-3143)
Quality Manager,
Hewlett-Packard
HPD
10500 Ridgeview Ct.,
Cupertino, CA 95015-4010
(Phone: 408-343-5000)
Regulatory and Safety Information
67
Page 72

Additional Safety Information
This product has not been evaluated for connection to an IT
power system (an AC distribution system with no direct
connection to earth, according to IEC 950).
AC Power Safety Warning
Warnings:
prevent damage to the power supply, have a qualified person
repair or replace it. All other components are user-serviceable.
Youmust disconnect all power cords, telecommunications links,
networks, and modems before working on the computer.
Do not operate the computer with the cover removed.
The power supply is not user-serviceable. To
Locate the computer near an AC outlet. The AC power cord is your
HP Pavilion PCs main AC disconnecting device and must be easily
accessible at all times. For your safety, the power cord provided
with your system has a grounded plug. Always use the power cord
with a properly grounded wall outlet, to avoid the risk of electrical
shock.
Toreduce the possibility of an electric shock from the telephone
network, plug your computer into the AC outlet before connecting
it to the telephone line. Also, disconnect the telephone line before
unplugging your computer from the AC power outlet.
Warning:
telephone system when installing or removing your computer
cover.
Attention :
telephonique lors de linstallation les couvercles de lappareil hote
sont enleves.
68
Always disconnect the modem cord from the
Debrancher la carte modem du reseau
Getting Started
Electrostatic discharge (ESD) can damage disk drives, add-in cards,
and other components. If an ESD station is not available, wear a
wrist strap attached to a metal part of the computer. Place cards
on a conductive foam pad, if possible, but never
wrapper.
For your safety, always unplug the system from its power source
and from any telecommunications systems (such as phone lines),
networks, or modems before performing any of the procedures
described in this chapter. Failure to do so may result in personal
injury or equipment damage. Hazardous voltage levels are inside
the power supply and modem of this product.
on the card
Page 73
Avertissements :
par lutilisateur. Pour éviter dendommager le bloc dalimentation,
confiez-le à un technicien pour réparation ou remplacement. Tous
les autres composants peuvent être changés ou réparés par
lutilisateur.
Vousdevez débrancher les cordons dalimentation, les liaisons de
télécommunications, les liaisons réseau et les modems avant de
travailler dans lordinateur.
Nutilisez pas lordinateur lorsque le capot est enlevé.
Des décharges électrostatiques peuvent endommager les unités de
disque, cartes dexpansion et autres composants. Si vous ne
disposez pas dune station de protection contre les décharges
électrostatiques, portez un bracelet antistatique relié à une partie
métallique de lordinateur. Placez les cartes sur un tapis en
mousse conducteur, mais ne les posez jamais sur leur emballage.
Pour plus de sécurité, débranchez toujours le système de sa source
dalimentation, de tout système de télécommunications (comme
les lignes téléphoniques), des réseaux et des modems avant
dexécuter lune des procédures décrites dans ce chapitre. Si vous
ne respectez pas ces consignes, vous risquez de vous blesser et de
causer des dommages matériels. Des niveaux de tension
dangereux se trouvent à lintérieur du bloc dalimentation et du
modem de ce produit.
Le bloc dalimentation nest pas réparable
Lithium Battery Caution
Warning:
incorrectly replaced. Replace only with the same, or equivalent,
type recommended by the manufacturer. Dispose of used batteries
according to the manufacturers instructions.
Attention :
incorrect de la batterie. Remplacer uniquement avec une batterie
du meme type ou dun type equivalent recommandé par le
constructeur. Mettre au rebut les batteries usagees conformement
aux instructions du fabricant.
There is danger of an explosion if the battery is
Il y a danger dexplosion silyaremplacement
Regulatory and Safety Information
69
Page 74

Laser Safety Statement
TV Antenna Connectors Protection
Class 1 LED Product.
The CD-ROM and DVD drives contain a laser system and are
classified as a Class 1 Laser Product under a U.S. Department
of Health and Human Services (DHHS) Radiation Performance
standard according to the Radiation Control for Health and
Safety Act of 1968.
Should the unit ever require maintenance, contact an authorized
service location.
Warning:
procedures other than those specified in the HP Pavilion PC Users
Guide may result in hazardous radiation exposure. To prevent
direct exposure to laser beam, do not try to open the enclosure of
the CD-ROM or DVD.
Avertissement :
procédures de performance autres que ceux spécifiés dans le
Guide de lutilisateur de lordinateur HP Pavilion peut entraîner une
exposition à des radiations. Afin déviter une exposition directe au
rayon laser, ne tentez pas douvrir le boîtier du lecteur de CD-ROM
ou DVD.
Use of controls, adjustments, or performance
Lutilisationde commandes, réglages ou
External Television Antenna Grounding
If an outside antenna or cable system is connected to the
product, be sure the antenna or cable system is electrically
grounded so as to provide some protection against voltage
surges and built-up static charges. Article 810 of the National
Electrical Code, ANSI/NFPA 70, provides information with regard
to proper electrical grounding of the mast and supporting
structure, grounding of the lead-in wire to an antenna-discharge
unit, size of grounding conductors, location of antenna-
discharge unit, connection to grounding electrodes, and
requirements for the grounding electrode.
70
Getting Started
Page 75

Antenna Grounding
Reference
1
2
3
4
5
6
7
7
6
5
4
3
1
Antenna Grounding
Grounding Component
Electric Service Equipment
Power Service Grounding Electrode System
(NEC Art 250, Part H)
Ground Clamps
Grounding Conductors (NEC Section 810-21)
Antenna Discharge Unit (NEC Section 810-20)
Ground Clamp
Antenna Lead in Wire
2
Lightning Protection
For added protection of any Hewlett-Packard product during a
lightning storm, or when it is left unattended and unused for
long periods of time, unplug the product from the wall outlet
and disconnect the antenna or cable system. This will prevent
damage to the product due to lightning and power line surges.
Power Lines
An outside antenna system should not be located in the vicinity
of overhead power lines or other electric light or power circuits,
or where it can fall into such power lines or circuits.
Warning:
extreme care should be taken to keepfrom touching such power
lines or circuits as contact with them could be fatal.
Avertissement :
extérieure, vous devez faire attention à ne pas toucher ces lignes et
circuits dalimentation, tout contact pouvant être mortel.
When installing an outside antenna system,
Lorsque vous installez une antenne
Regulatory and Safety Information
71
Page 76

72
Getting Started
Page 77

Index
A
Add/Remove Programs utility, 43
add-in cards, defined, 57
adding software, 43
Auto Suspend feature, 28
defined, 57
B
BIOS, defined, 57
browsers, 28, 39, 49, 50
defined, 57
C
CD-ROM drive, 34
CDs
caring for, 34
defined, 57
inserting in CD-ROM drive, 34
playing music CDs, 35
using program CDs, 35
chair, 7
Channel bar, 54
composite video, defined, 57
computer
setting up, 323
suspending, 27
turning on and off, 2, 26
Control Panel, defined, 58
D
deleting software, 43
desktop
learning about, 38
removing Channel bar from, 54
Digital Camera Port, defined, 58
DIMM, defined, 58
diskettes, working with, 32
document holders, 16
E
Easy Internet Access, 39, 48, 49, 50
e-mail, sending and receiving, 50
F
faxes
sending and receiving, 55
Suspend mode and, 28
finding files, 42
formatting diskettes, 33
H
hardware help, 45
headphones, 20, 31
help. See also Getting Help guide
getting hardware help, 45
getting software help, 45
mouse tutorial, 31
HP At Home Web site, 50
HP Message Board, 51
HP Support Center, 36, 39, 41, 44
Index
73
Page 78

I
Information button, 29
Internet access, 28, 39, 41, 48
Internet button, 28, 48, 49, 50
Internet, defined, 59
ISP, defined, 59
K
keyboard, 17, 28
keyboard buttons, 28
keyboard messages, 30
L
lighting, 10
M
Media Rack, 35
messages
e-mail messages, 5051
HP Message Board, 51
modem, 36
defined, 60
monitor, 13
mouse, 19, 30
mouse tutorial, 2, 31
MPEG videos, playing, 35
music CDs, playing, 35
P
Pavilion Library, 45
defined, 59
Personal Guide, 39, 40
playing music CDs, 35
posture, 11
preinstalled software, 39, 41
problems. See your
programs.
See
Getting Help
software
Q
QuickLink software, 55
R
receiving e-mail, 51
receiving faxes, 56
registering with HP, 2
regulatory information, 6367
removing software, 43
repetitive strain injury (RSI), 34
guide
S
safety information, 21, 6870
screen.
See
monitor
sending e-mail, 51
sending faxes, 55
setting up your computer, 1323
shutting down computer, 26
software
adding new programs, 43
defined, 61
deleting, 43
getting help for, 45
preinstalled software, 39, 41
sound, adjusting, 35
speakers, 20, 31
specifications
for monitor use, 15
for work environment, 10
starting computer, 2, 26
Suspend mode, 27, 28
Suspend mode, defined, 61
S-Video, defined, 61
system maintenance, 45
system tools, 45
74
Getting Started
Page 79

T
turning computer on and off, 2, 26
tutorials, 45
U
Universal Serial Bus, defined, 61
V
videos, playing MPEG, 35
volume, adjusting, 35
W
WAVfiles, defined, 61
Web browsers.
Windows desktop.
workspace, setting up, 6
World Wide Web, 27.
access
See
browsers
See
desktop
See also
Internet
Index
75
Page 80

5967-2947
 Loading...