

Page 1
Tools & Software Calendars Wallpapers
Miscellaneous
IPAQHP Parts,Accessories
only
for IPAQHP Pda and Smartphones
worldwide shipment, great prices
www.repairHPpda.com
PDA Accessories
Quality PDA Accessories Everything you need
for your PDA!
www.sfplanet.com
Budget lcd replacement uk
low cost laptop lcd fitting £
25.00 plus the lcd,
at a low cost
www.laptopsockets.co.uk/laptop_lcd_
Miscellaneous/HP iPAQ hx4700 series Pocket PC Disassembly, Screen Removal &
Repair Guide
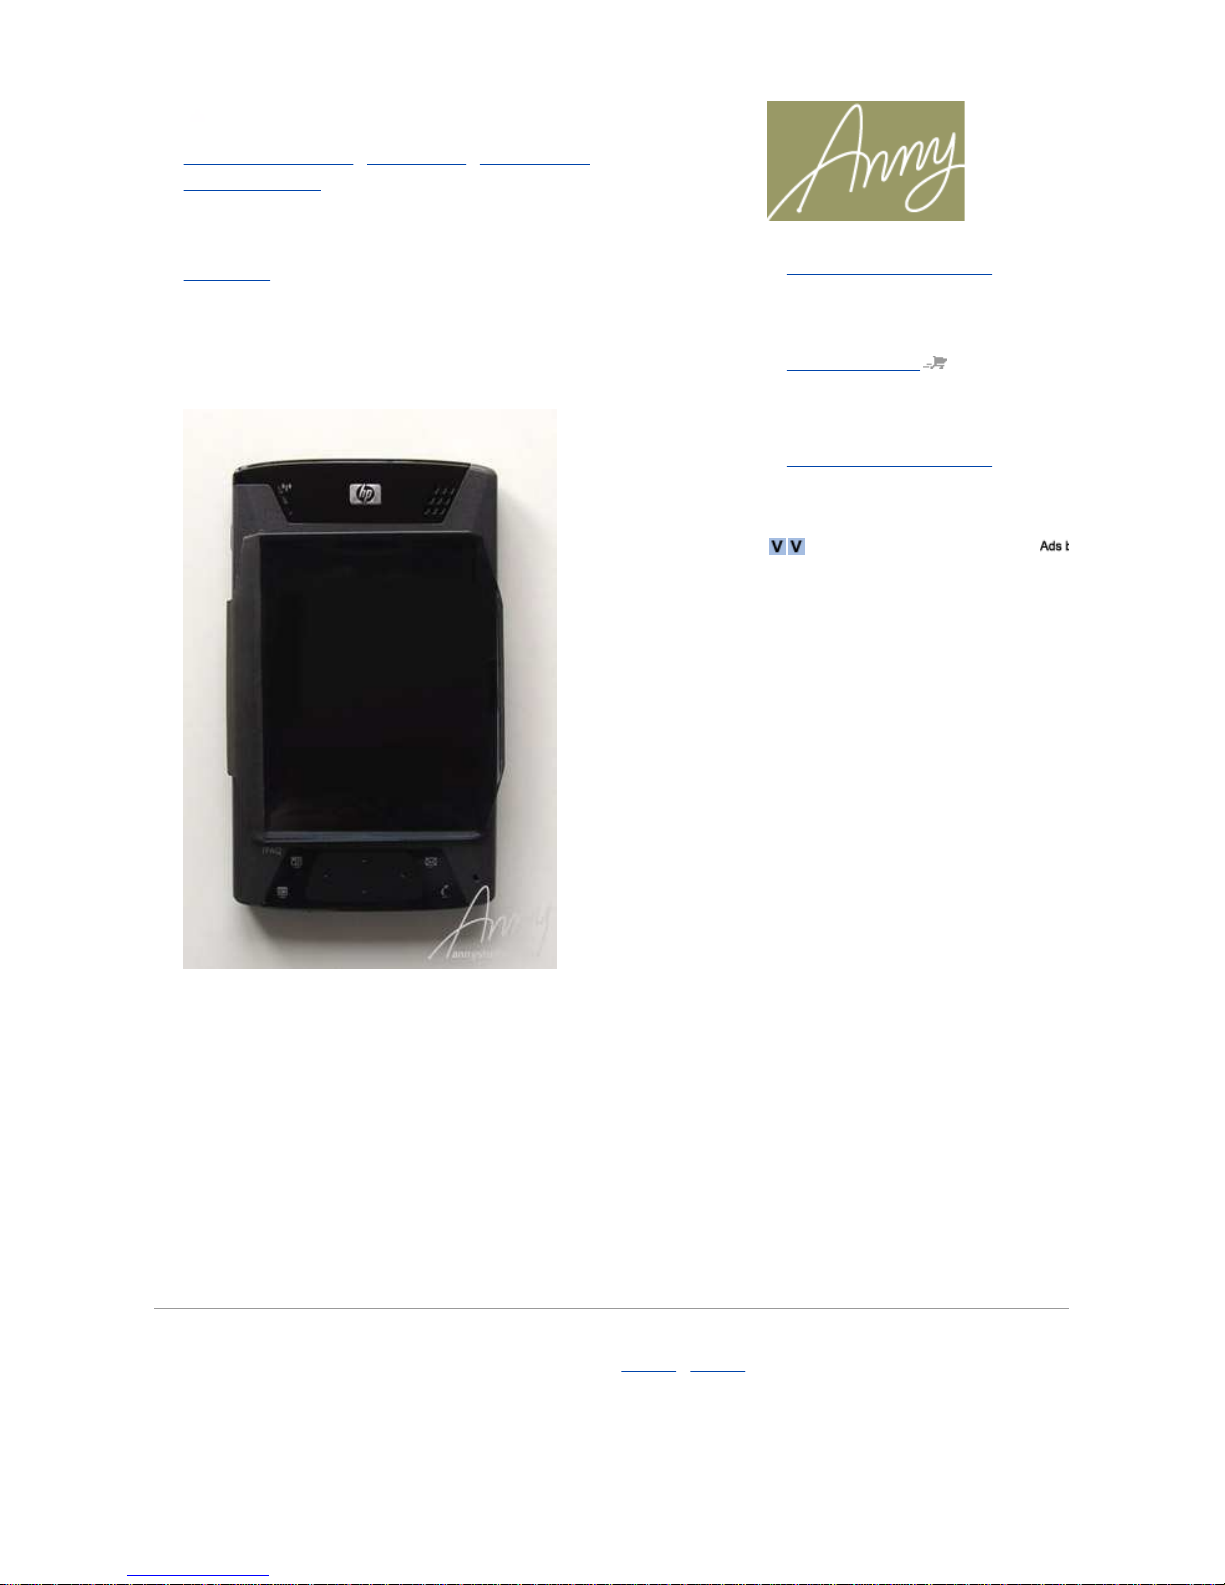
HP iPAQ hx4700 series Pocket PC
Disassembly, Screen Removal & Repair
Guide
I have used my
Hewlett-Packard
Pocket PC for
about a year and a
half without any
problems, until I
was faced with a
very sad surprise
one day. The
screen was dead. I
still have no idea
how that might
happen: my iPAQ
has a screen
protector, and,
moreover, I always
carried it in a small
case.
As I was not sure
whether my iPAQ
was still under
warranty or not
and I had no idea
how long it may
take to repair a
pocket PC in
Adelaide or how
much it may cost, I
decided to repair it
myself. I bought a new iPAQ hx4700 LCD screen from eBay (it
cost 70 AUD, and there were a T6 screwdriver and a case opener
tool in the kit). Unfortunately, I couldn't find any good
instructions for disassembling an HP iPAQ 4700 (or any other HP
PDA 47xx series) on the Internet, so it took a bit more time to
me to discover how to replace the broken LCD screen. I have
made the following instruction in case it would help someone
else. However, please note that I'm not responsible for any
damage caused to yourself or your unit by using the following
instructions.
1
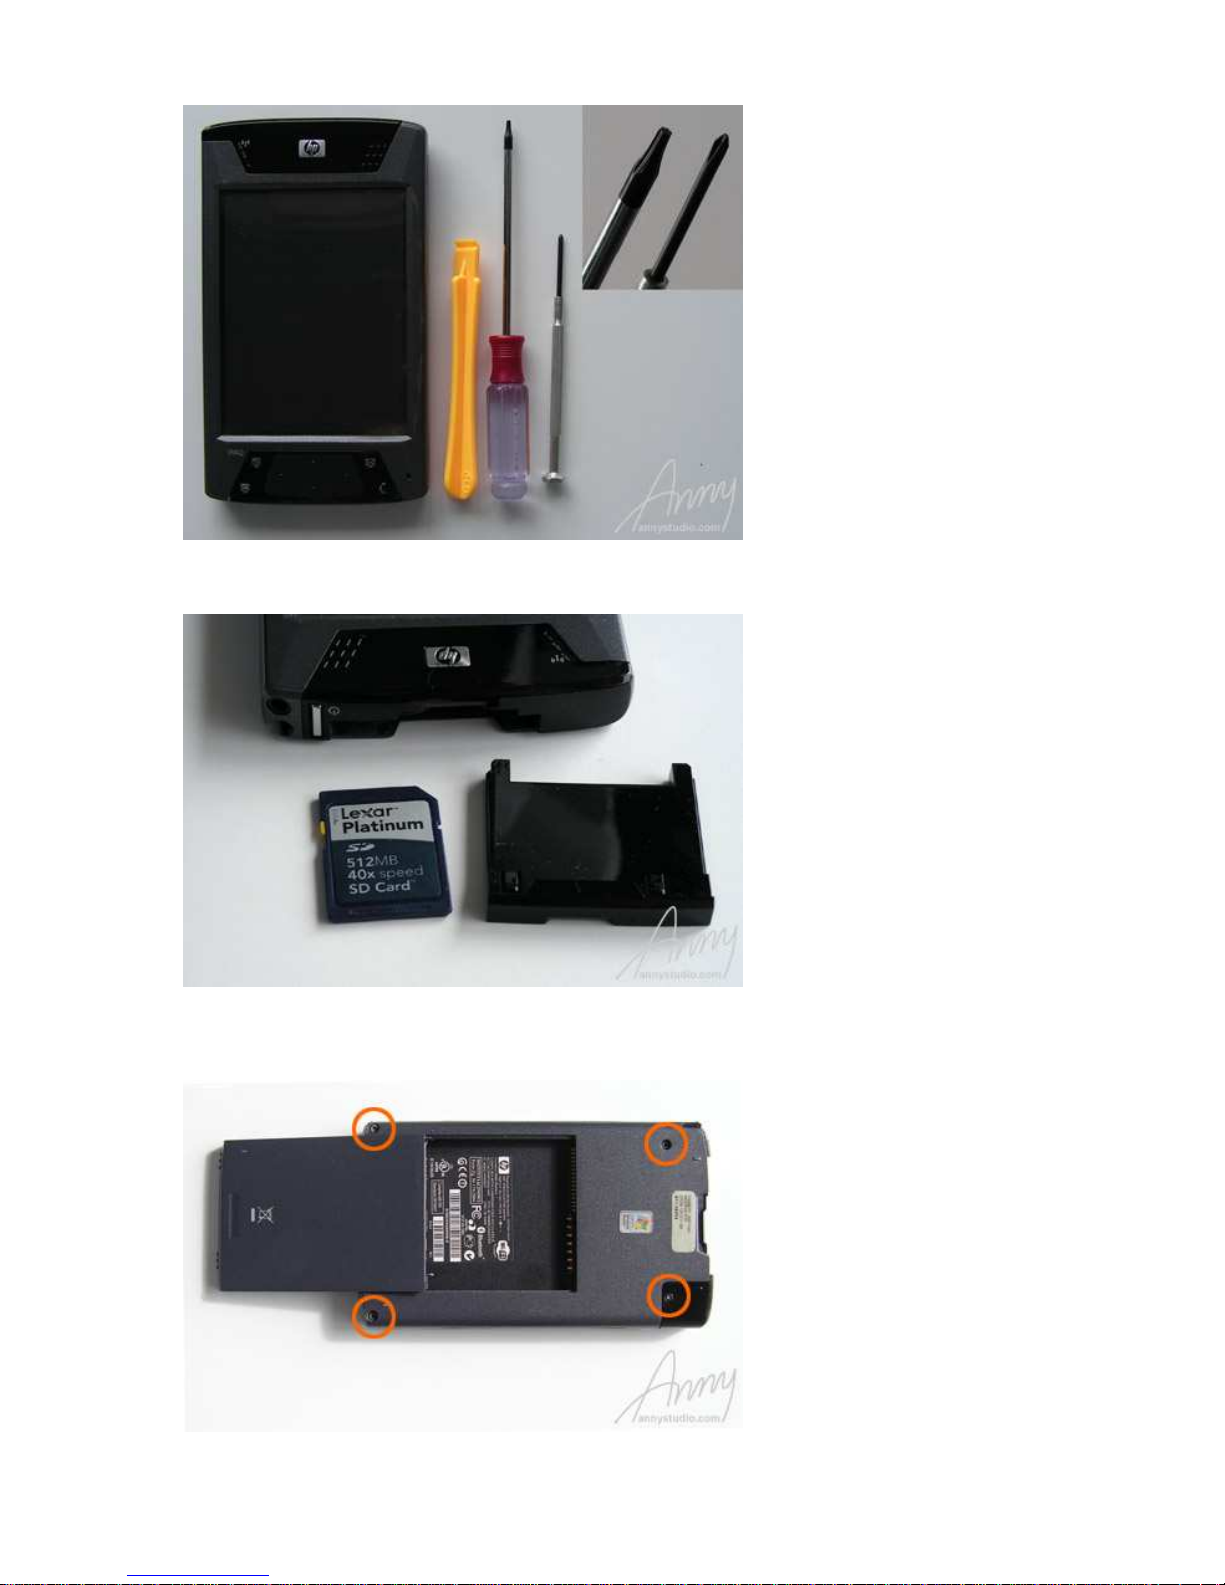
You need a crosshead screwdriver, torx T6 screwdriver, and a
case opener tool (or something like that).
Miscellaneous
Unless otherwise is stated, using any materials from this website is permitted without asking specific permission provided that you
mention the author and place a backlink to www.annystudio.com
© 2003—2008 Anny | Site Map | Contacts
Page
1
of 8HP iPAQ 4700 Disassembly, Screen Removal and Repair Guide
2008
-12-11http://www.annystudio.com/misc/ipaq4700/
Page 2
2
Unplug all devices, remove all SD/MMC cards.
3
Take the battery off, and remove the 4 screws on the back of the
unit using the T6 screwdriver.
4
Page
2
of 8HP iPAQ 4700 Disassembly, Screen Removal and Repair Guide
2008
-12-11http://www.annystudio.com/misc/ipaq4700/
Page 3
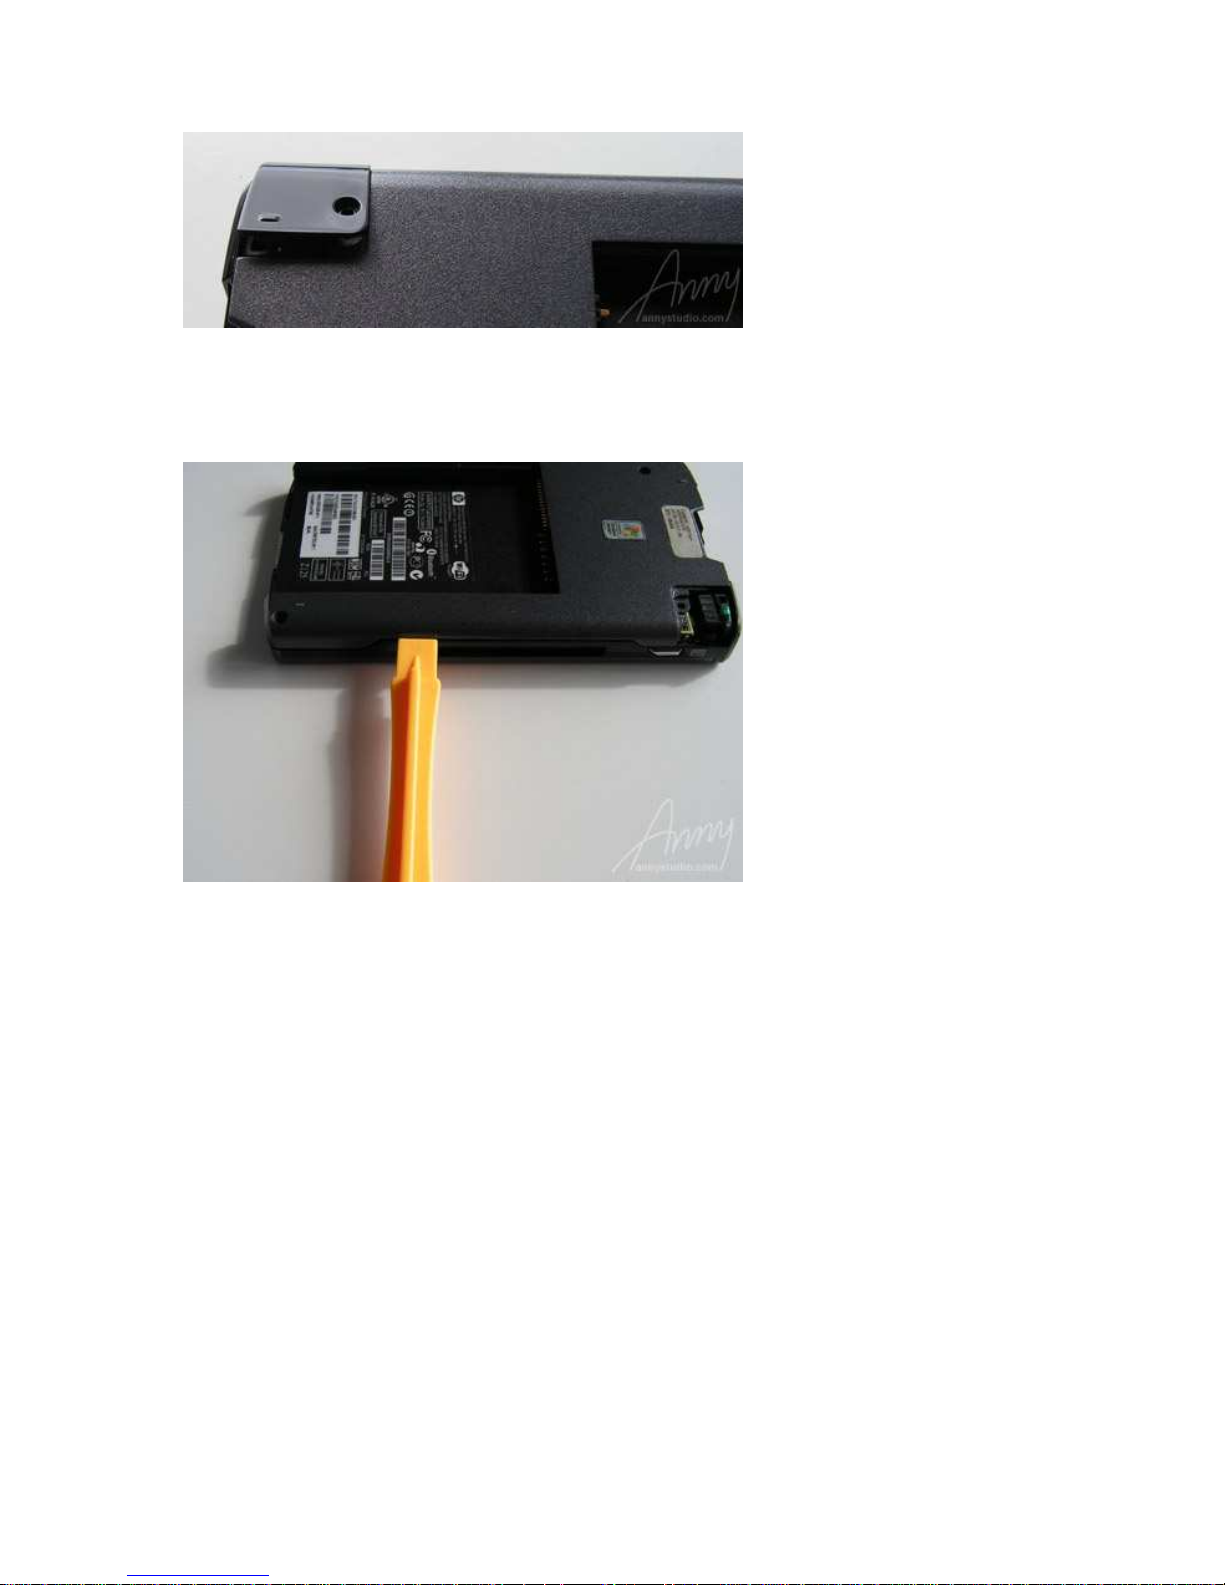
Take the plastic corner off.
5
With all 4 screws removed you can take off the back cover. It is
clipped on, so it might be hard to remove. In this case use the
case opener tool: slide the tool all the way around the case and
releasing the plastic tabs.
6
Detach the two ribbon cables. To do this, release the tabs on
each connector. The smaller ribbon connector has a tab, which
should be picked and pulled upward. The larger connector has a
tab (dark brown in the photo) which shoud be picked on its
ribbon side and opened for up to a 45 degree angle (like a small
door). Once the tab is lifted up, you can now slide the ribbon
cable out. Be very careful, the connectors are extremely
fragile and can be easily damaged! Then remove a small
crosshead screw in the other angle of the unit.
Page
3
of 8HP iPAQ 4700 Disassembly, Screen Removal and Repair Guide
2008
-12-11http://www.annystudio.com/misc/ipaq4700/
Page 4
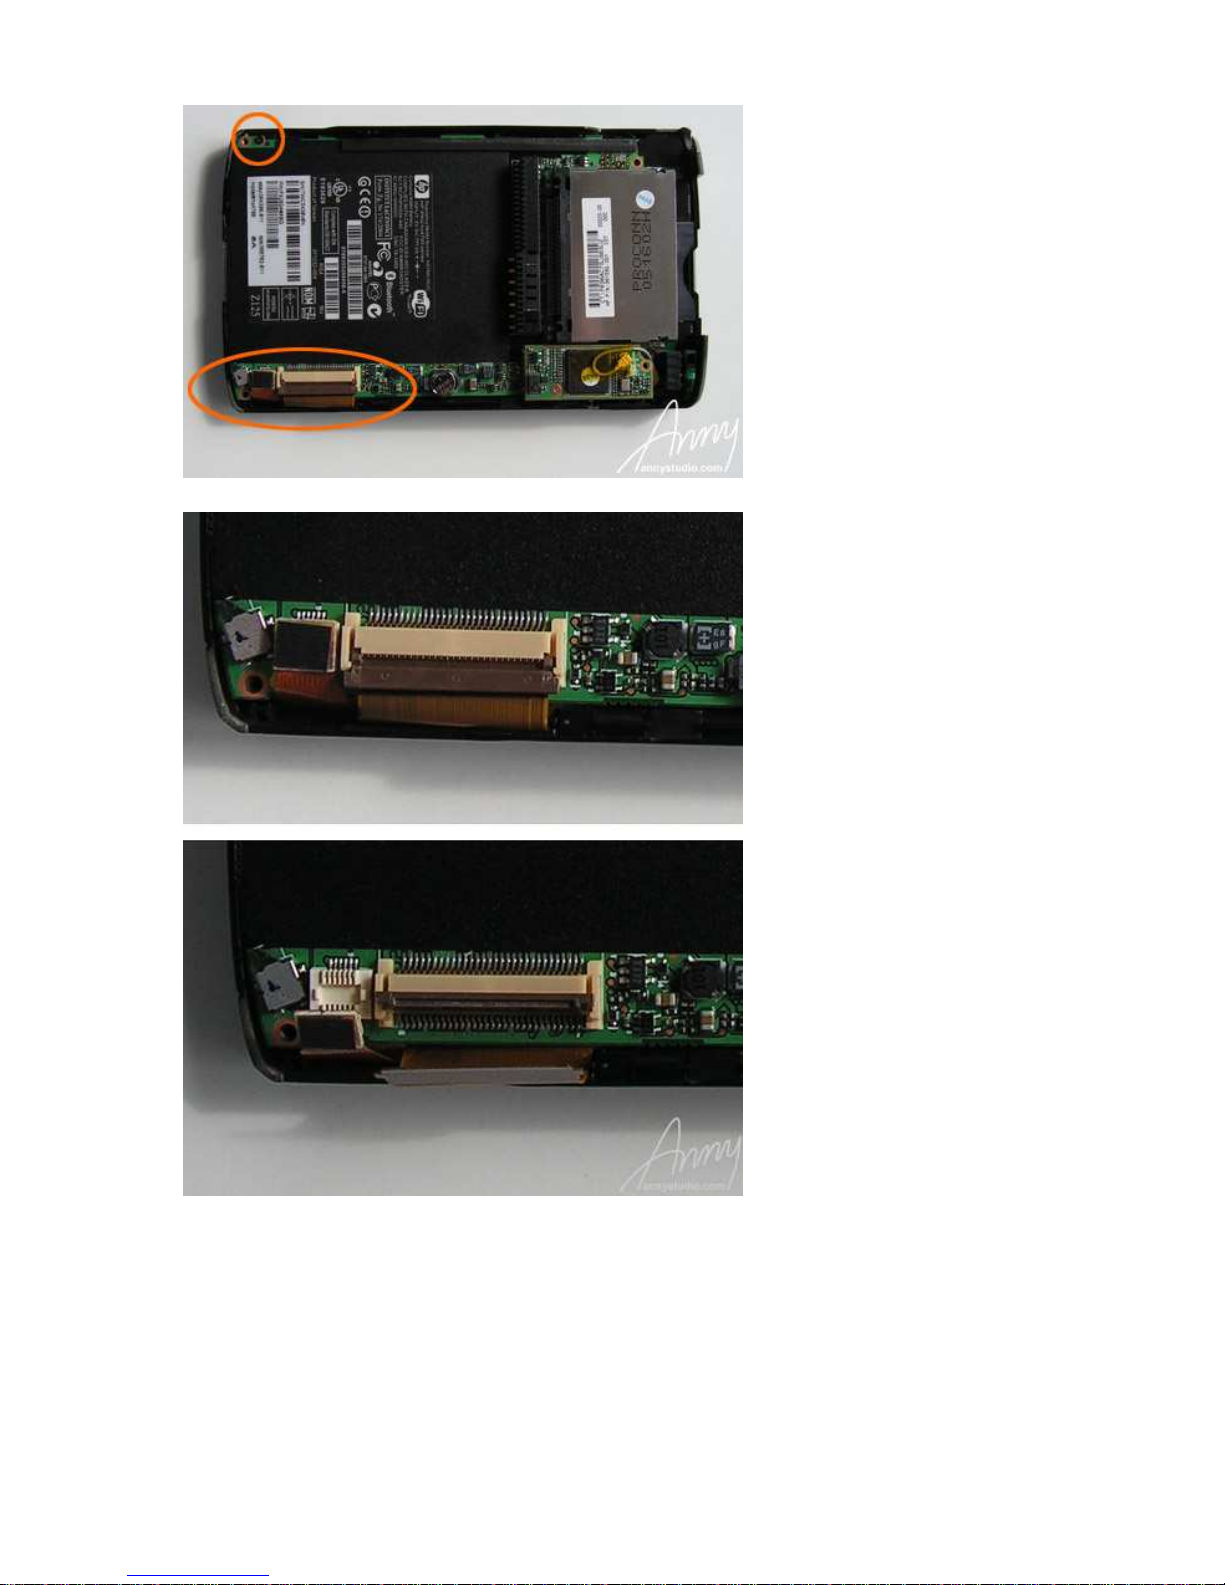
The images below show attached and detached ribbon cables.
7
Remove a cross screw from the transmitting module.
Page
4
of 8HP iPAQ 4700 Disassembly, Screen Removal and Repair Guide
2008
-12-11http://www.annystudio.com/misc/ipaq4700/
Page 5
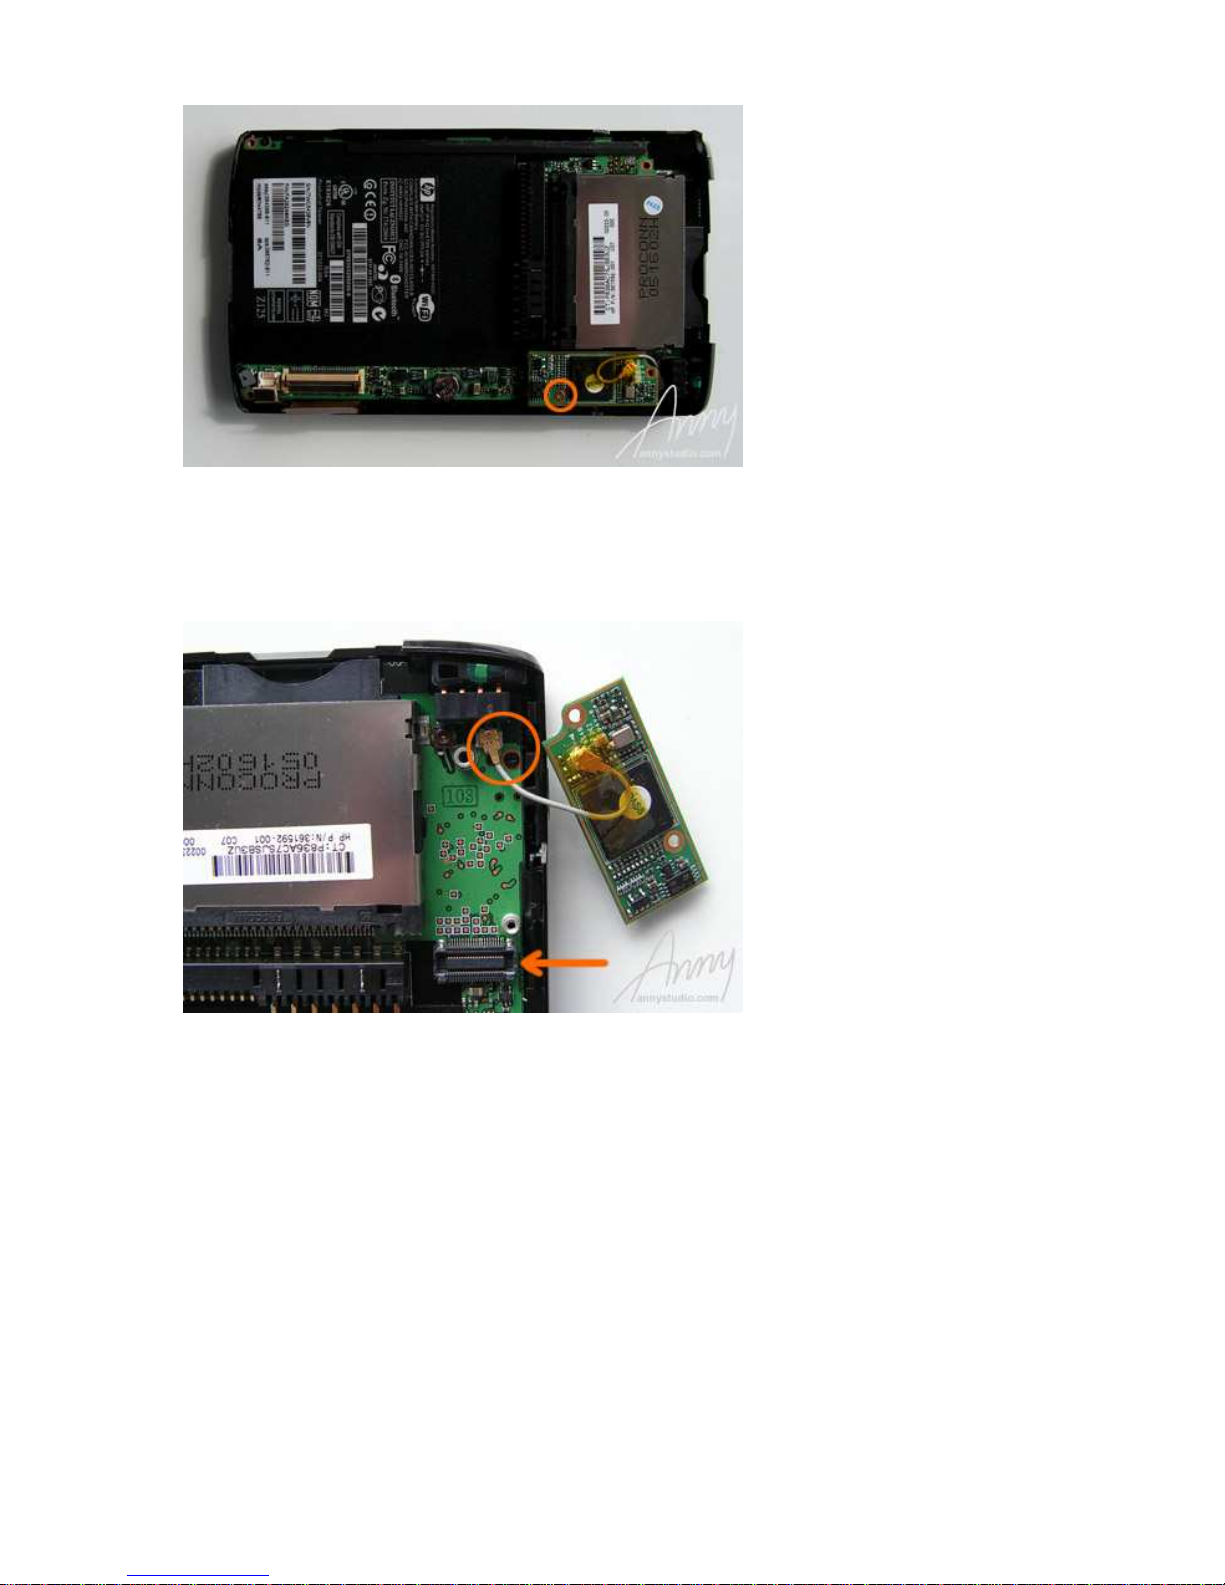
8
Remove the transmitting module. Take the bottom edge of the
module and gently pull upward to disconnect the black connector
(pointed by arrow on the image). Then disconnect the wire
connector and remove the a crosshead screw nearby (outlined by
circle). After that, the motherboard can be easily removed.
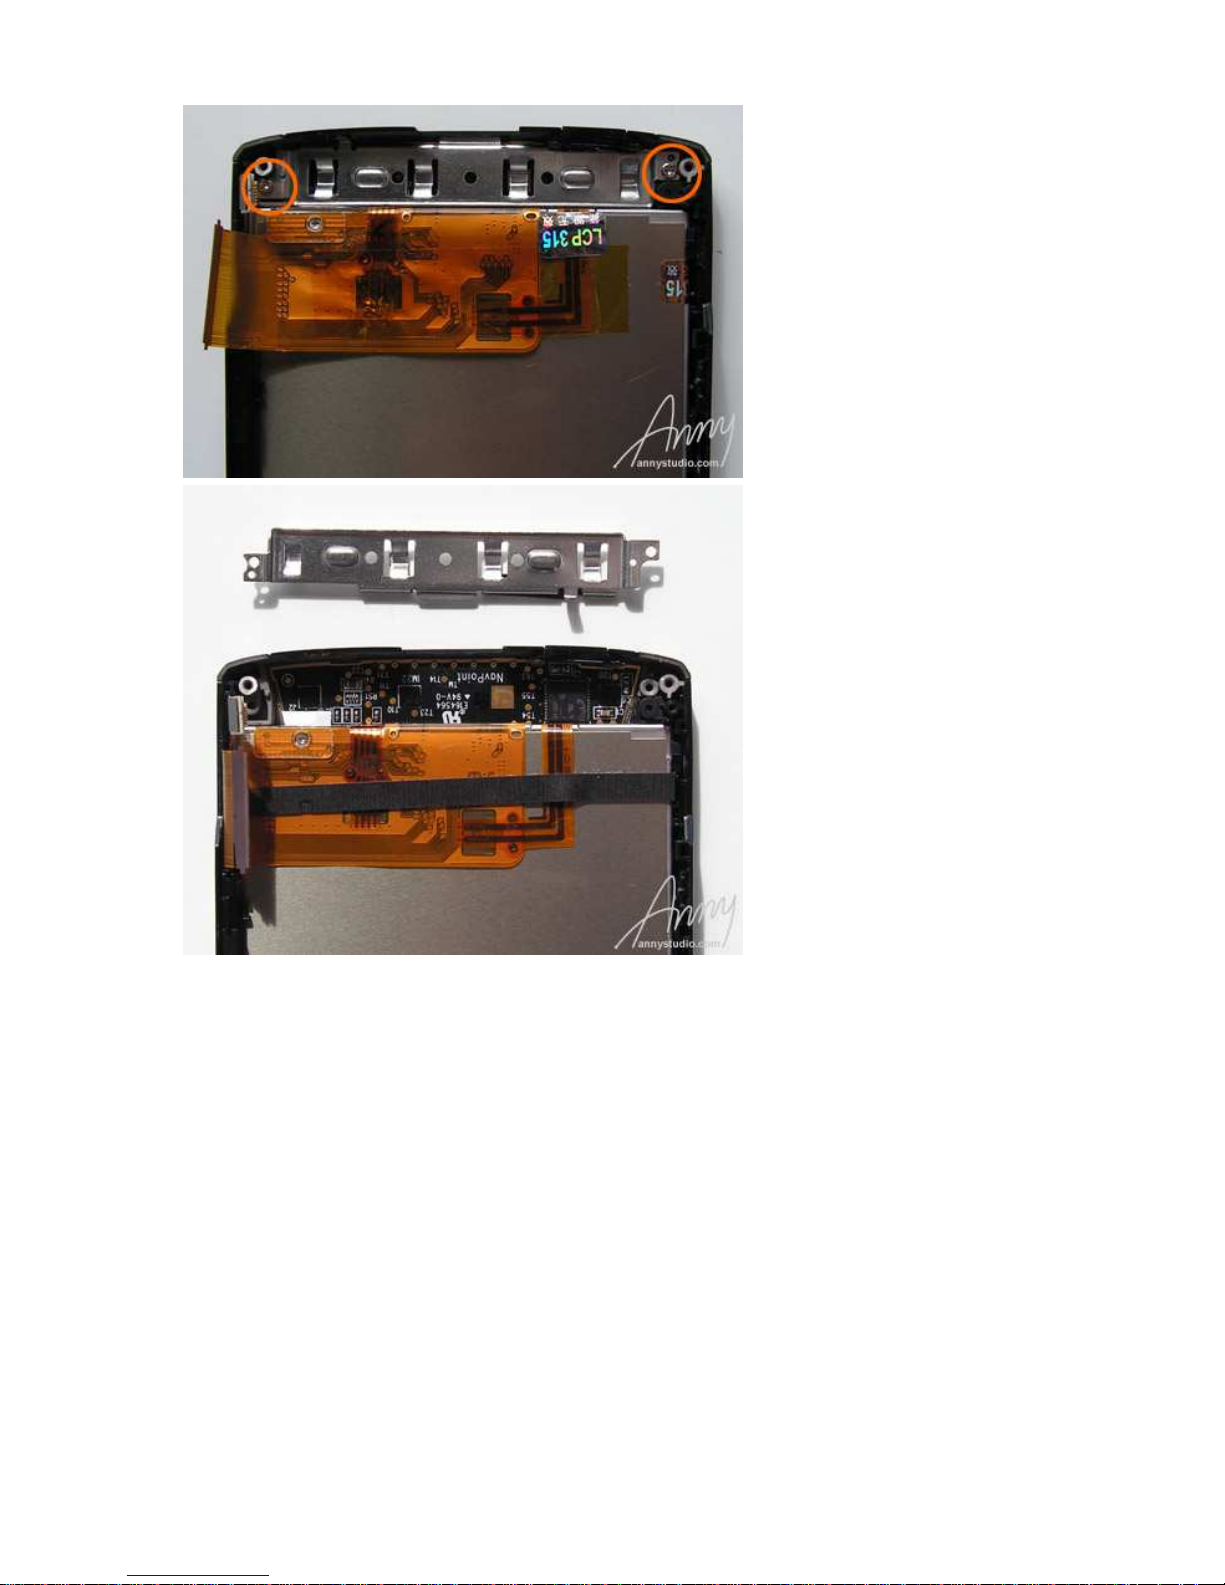
9
After motherboard removed, unscrew 2 crosshead screws as
image below shows.
Page
5
of 8HP iPAQ 4700 Disassembly, Screen Removal and Repair Guide
2008
-12-11http://www.annystudio.com/misc/ipaq4700/
Page 6
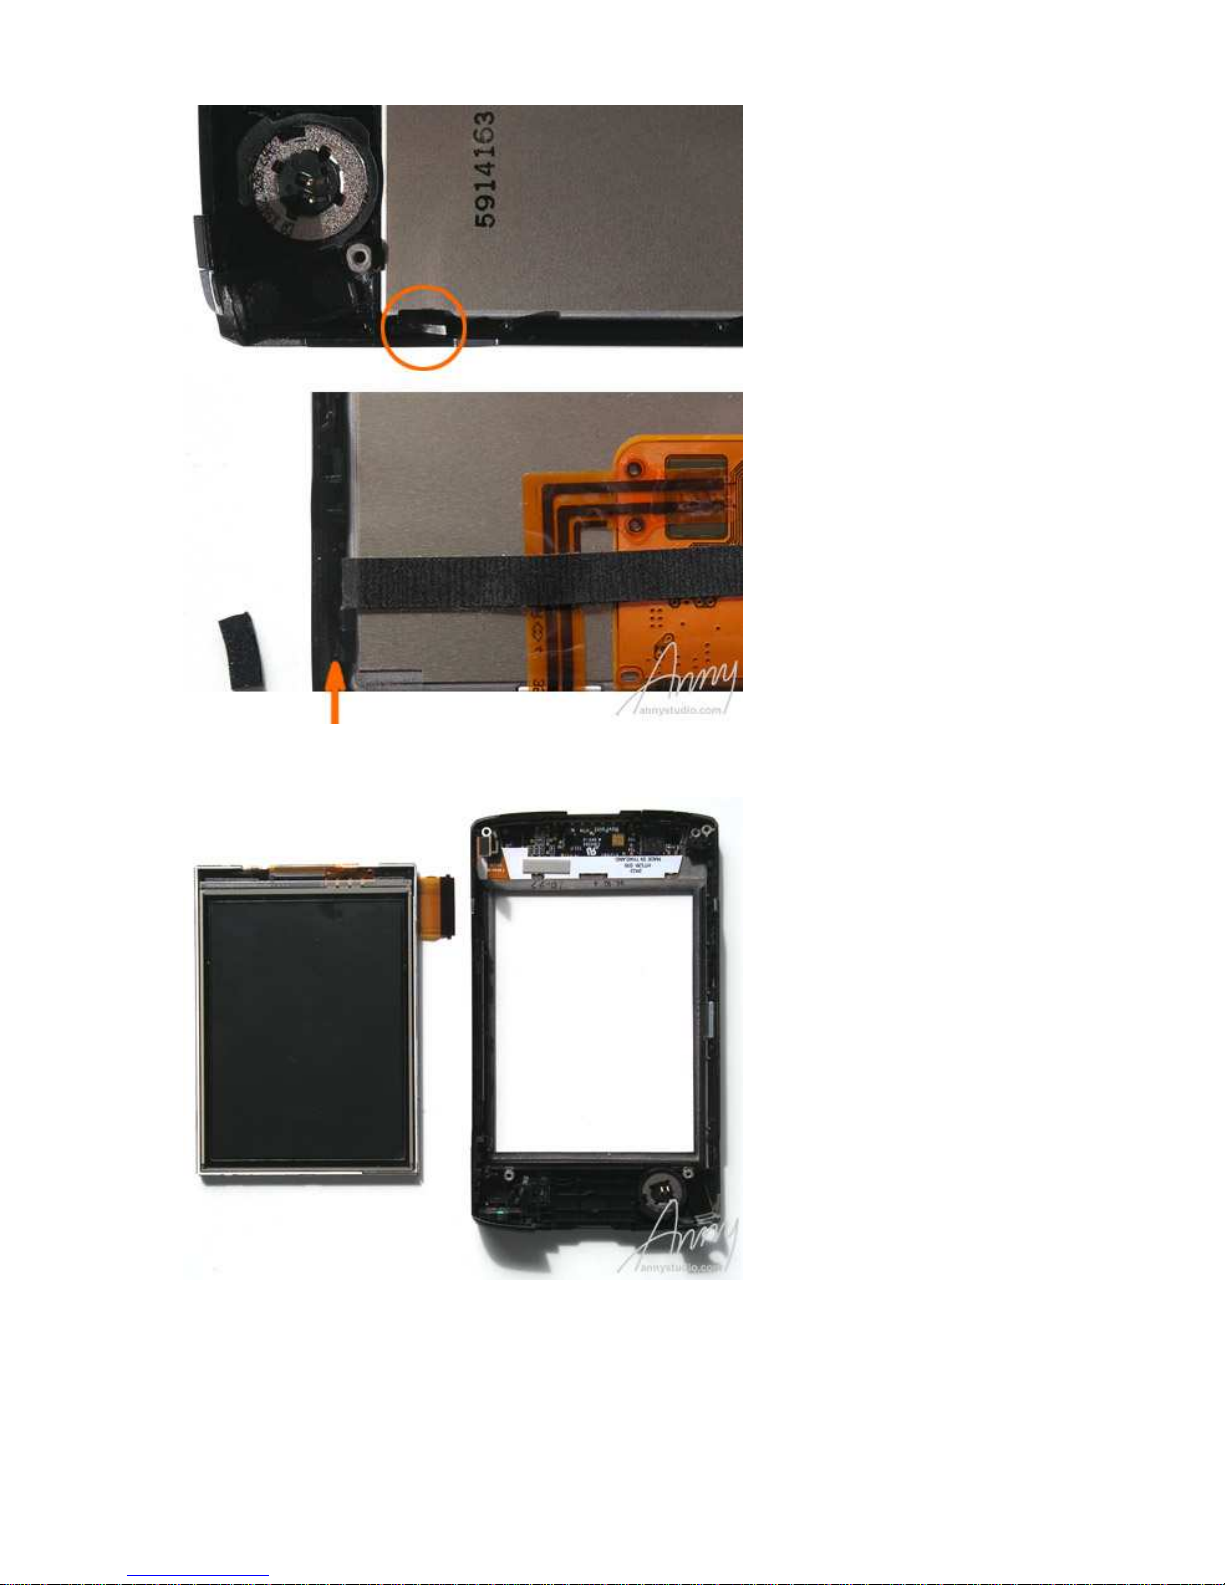
10
To remove the LCD screen, you should carefully release two tabs
on its side that has no ribbon cables. To release these tabs, you
need to remove two small items of rubber between the tabs and
PC case, then release the tabs and the LCD screen should come
out (slide the screen a little aside before bring it out).
Page
6
of 8HP iPAQ 4700 Disassembly, Screen Removal and Repair Guide
2008
-12-11http://www.annystudio.com/misc/ipaq4700/
Page 7
11
Done!
12
If you carefully follow these steps backwards with a new screen,
your iPAQ will be alright:
Page
7
of 8HP iPAQ 4700 Disassembly, Screen Removal and Repair Guide
2008
-12-11http://www.annystudio.com/misc/ipaq4700/
Page 8
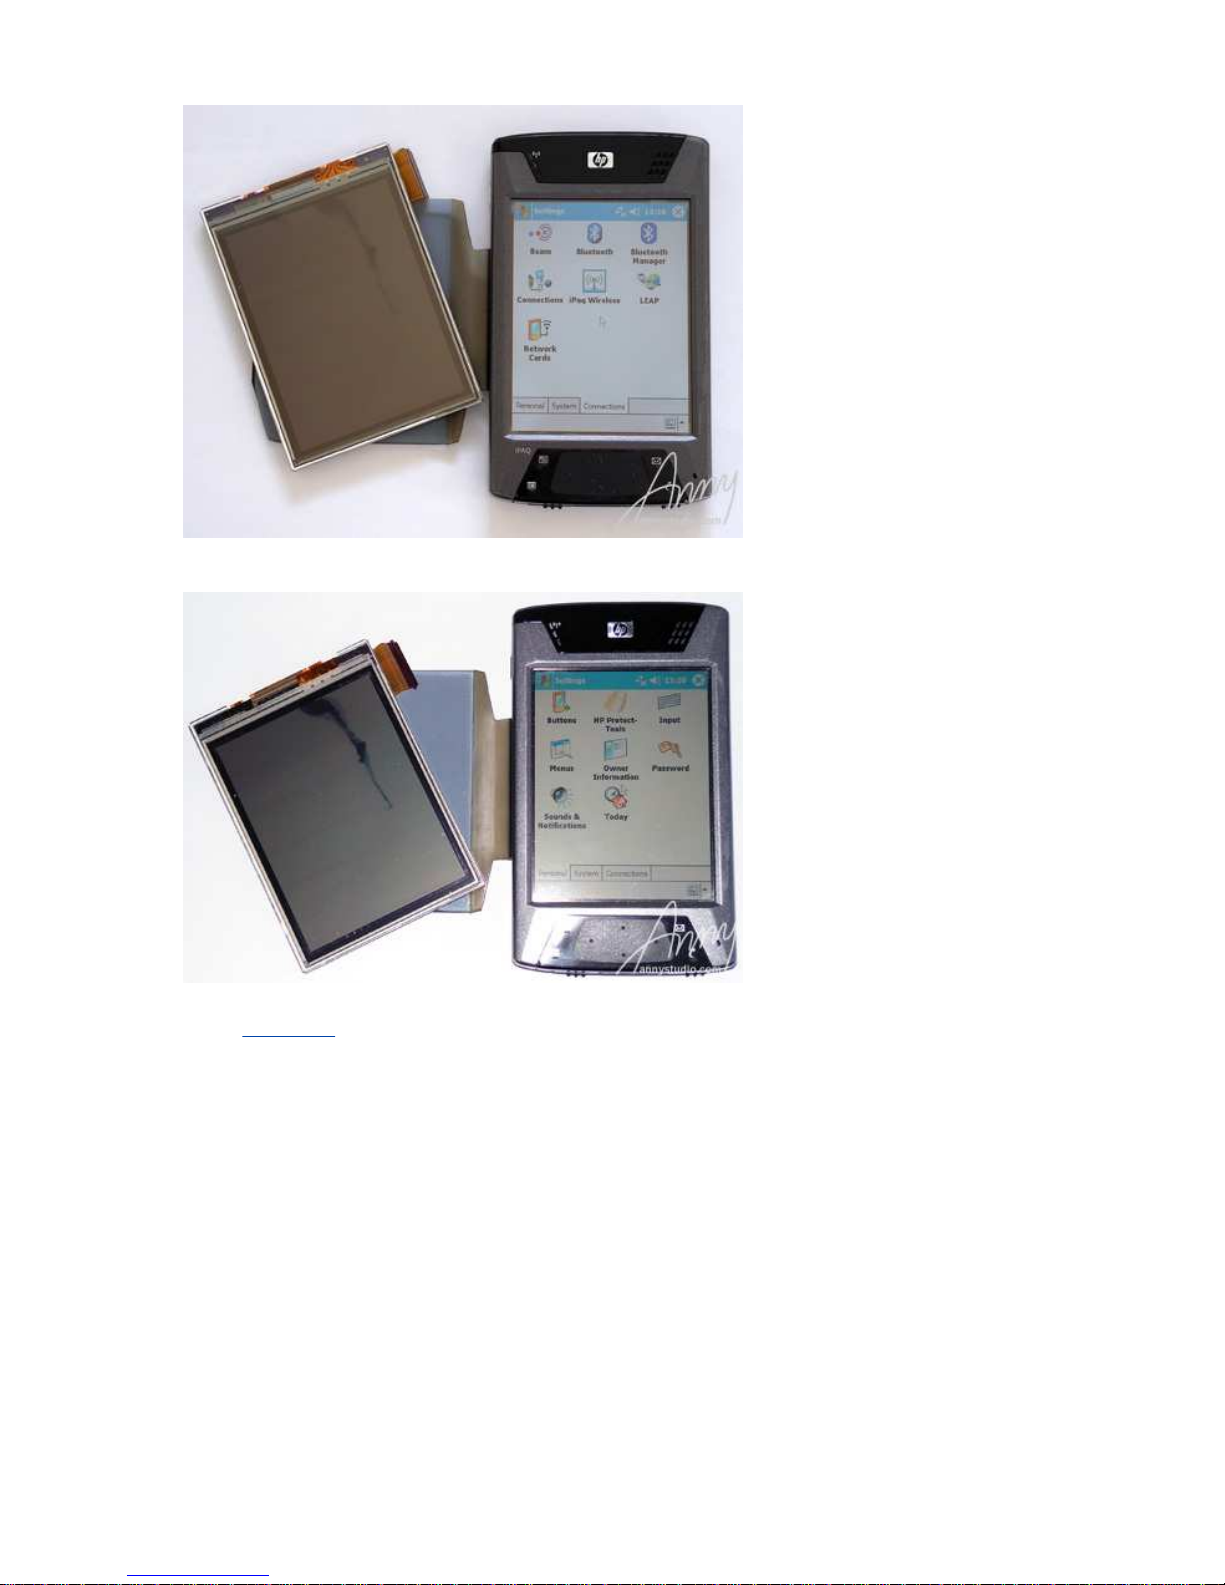
This photo (when I used flash) shows the spot on the old screen
beter:
September 10, 2007
Please contact me if you have any suggestions or questions.
Page
8
of 8HP iPAQ 4700 Disassembly, Screen Removal and Repair Guide
2008
-12-11http://www.annystudio.com/misc/ipaq4700/
 Loading...