

Page 1
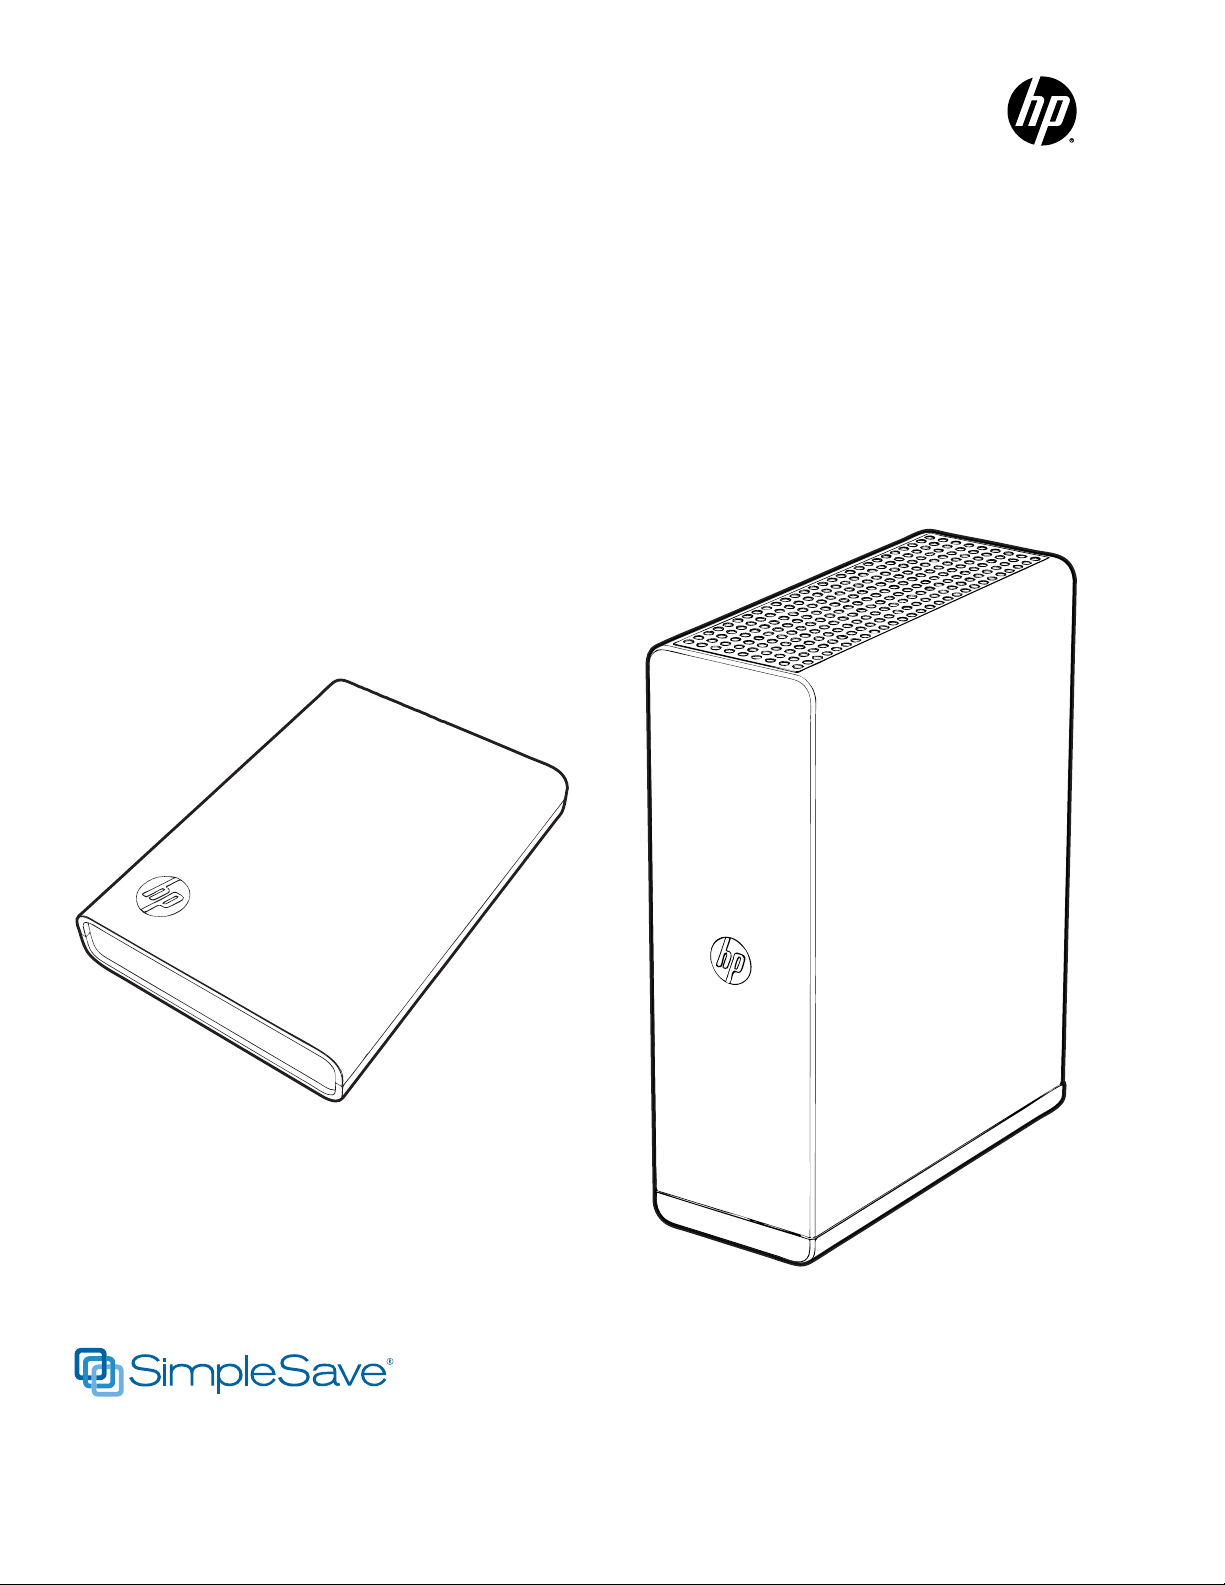
Portable Hard Drive
HP SimpleSave
HP
External Hard Drive
with USB 3.0 and
®
Backup Software
User Manual
HP Portable Hard Drive
HP External Hard Drive
Page 2

Getting Help
For additional help with your drive, its installation, and the software, contact one of
the following:
HP Customer Care Web Support
For the latest updates and information, go to http://hpsupport.wdc.com.
E-mail Support
http://hpsupport.wdc.com/hpsupport/email.asp
Toll-free Telephone Support
North America 866.444.7407
International +800.636.666666
Indonesia 001.803.011.0473
For information about dialing from specific countries, go to
http://hpsupport.wdc.com or http://hp.com/support.
Page 3

Table of Contents
1 Getting Started . . . . . . . . . . . . . . . . . . . . . . . . . . . . . . .1
Compatibility . . . . . . . . . . . . . . . . . . . . . . . . . . . . . . . . . . . . . . . . . . . . . . 1
Handling Precautions . . . . . . . . . . . . . . . . . . . . . . . . . . . . . . . . . . . . . . . 2
Kit Contents - HP Portable Hard Drive . . . . . . . . . . . . . . . . . . . . . . . . . 3
Kit Contents - HP External Hard Drive . . . . . . . . . . . . . . . . . . . . . . . . . 3
2 About Your HP Drive . . . . . . . . . . . . . . . . . . . . . . . . . .4
Features . . . . . . . . . . . . . . . . . . . . . . . . . . . . . . . . . . . . . . . . . . . . . . . . . . 4
HP SimpleSave Backup Software . . . . . . . . . . . . . . . . . . . . . . . . . . . . . 4
Drive Format. . . . . . . . . . . . . . . . . . . . . . . . . . . . . . . . . . . . . . . . . . . . . . . 4
3 Connecting the Device . . . . . . . . . . . . . . . . . . . . . . . . .5
4 HP SimpleSave Backup Software . . . . . . . . . . . . . . .6
How to Back Up Your Files . . . . . . . . . . . . . . . . . . . . . . . . . . . . . . . . . . 7
How To Restore Files . . . . . . . . . . . . . . . . . . . . . . . . . . . . . . . . . . . . . . . 9
My Options. . . . . . . . . . . . . . . . . . . . . . . . . . . . . . . . . . . . . . . . . . . . . . . 13
5 Turning Off/Disconnecting the Device . . . . . . . . . .17
6 Troubleshooting . . . . . . . . . . . . . . . . . . . . . . . . . . . . .18
7 Appendix. . . . . . . . . . . . . . . . . . . . . . . . . . . . . . . . . . . .19
Regulatory Compliance. . . . . . . . . . . . . . . . . . . . . . . . . . . . . . . . . . . . . 19
Warranty Information . . . . . . . . . . . . . . . . . . . . . . . . . . . . . . . . . . . . . . . 20
TABLE OF CONTENTS – i
Page 4

1
HP PORTABLE & EXTERNAL HARD DRIVES
USER MANUAL
Getting Started
Thank you for selecting the HP Portable Hard Drive or HP External Hard Drive. These
are large capacity USB 3.0 external hard drives that connect and disconnect easily
from a USB 3.0 or USB 2.0 connector on the front or back of most computers, and
are designed to quickly and easily store and transfer media files such as digital
photos, music, video, and other important files.
The drives not only take advantage of the latest blazing-fast USB 3.0 technology, but
are also fully compatible with USB 2.0 connections for those who have yet to
upgrade their computers to USB 3.0. When connected to a SuperSpeed USB 3.0
port, consumers can transfer data at speeds up to 5 Gb/s. At that rate, a two-hour
HD video will transfer in as little as three minutes. The same two-hour video would
take approximately 13 minutes to transfer on a USB 2.0 port.
These drives come with HP SimpleSave® backup software that is compatible with
most Microsoft® Windows® operating systems.
Compatibility
An available USB port
One of the following operating systems:
- Windows 7
- Windows Vista
- Windows XP
Note: Compatibility may vary depending on user’s hardware configuration and operating system. HP
portable and external drives and software only support Windows.
Important: For highest performance and reliability, it is recommended that
you install the latest updates and service pack (SP). Go to the Start menu
and select Windows Update.
®
GETTING STARTED – 1
Page 5

HP PORTABLE & EXTERNAL HARD DRIVES
USER MANUAL
Handling Precautions
These drives are precision instruments and must be handled with care during
unpacking and installation. Drives may be damaged by rough handling, shock, or
vibration. Be aware of the following precautions when unpacking and installing your
external storage product:
Do not drop or jolt the device.
Do not move the device during activity.
To allow proper ventilation, do not block air slots located on the underside, top, or
rear of the enclosure if present. Do not stack any objects on top of the device that
may block ventilation.
Do not stack heavy objects on top of the device.
Do not attempt to open the drive’s case. This action voids the warranty.
Do not remove any cables without properly disconnecting the drive through the
operating system.
GETTING STARTED – 2
Page 6
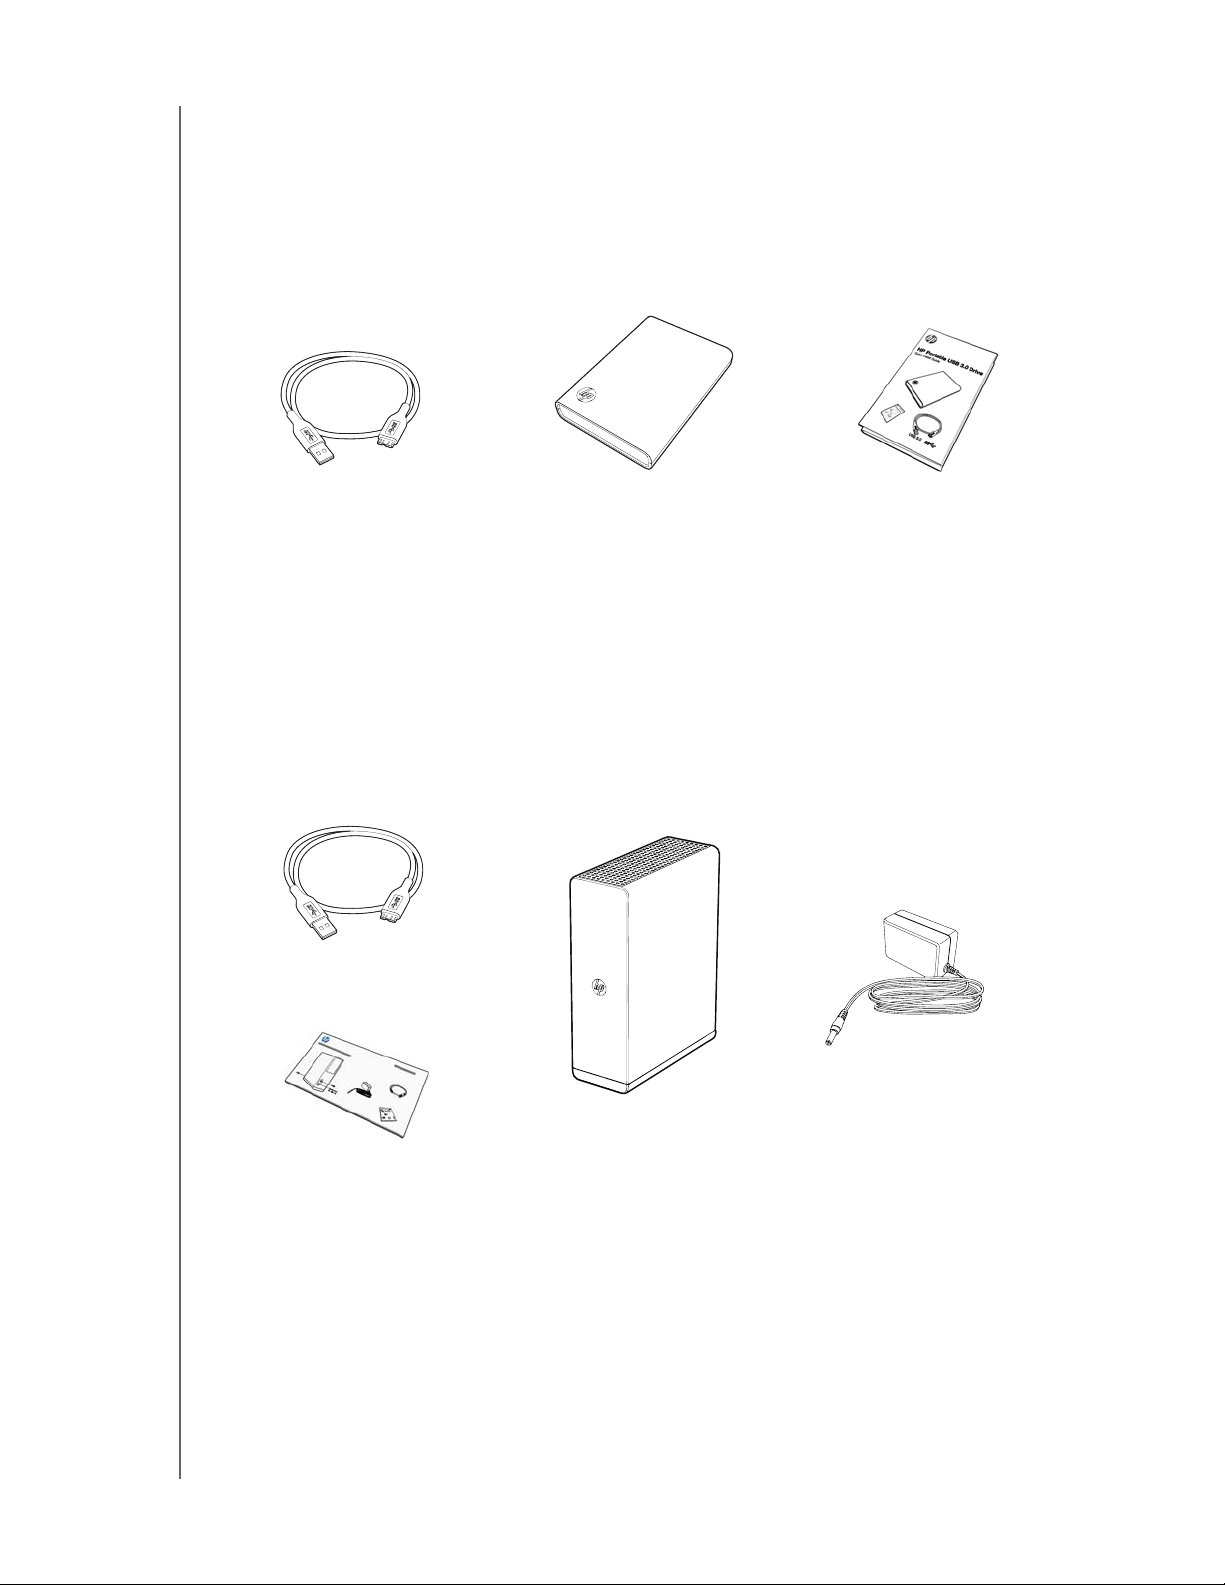
Kit Contents - HP Portable Hard Drive
HP Portable Hard Drive
USB 3.0 cable
HP SimpleSave backup software
Quick Install Guide
HP PORTABLE & EXTERNAL HARD DRIVES
USER MANUAL
USB 3.0 Cable
HP Portable Hard Drive with
HP SimpleSave backup software
Kit Contents - HP External Hard Drive
HP External Hard Drive
USB 3.0 cable
AC adapter
HP SimpleSave backup software
Quick Install Guide
USB 3.0 Cable
Quick Install Guide
AC Adapter
Quick Install Guide
HP External Hard Drive with
HP SimpleSave backup software
GETTING STARTED – 3
Page 7
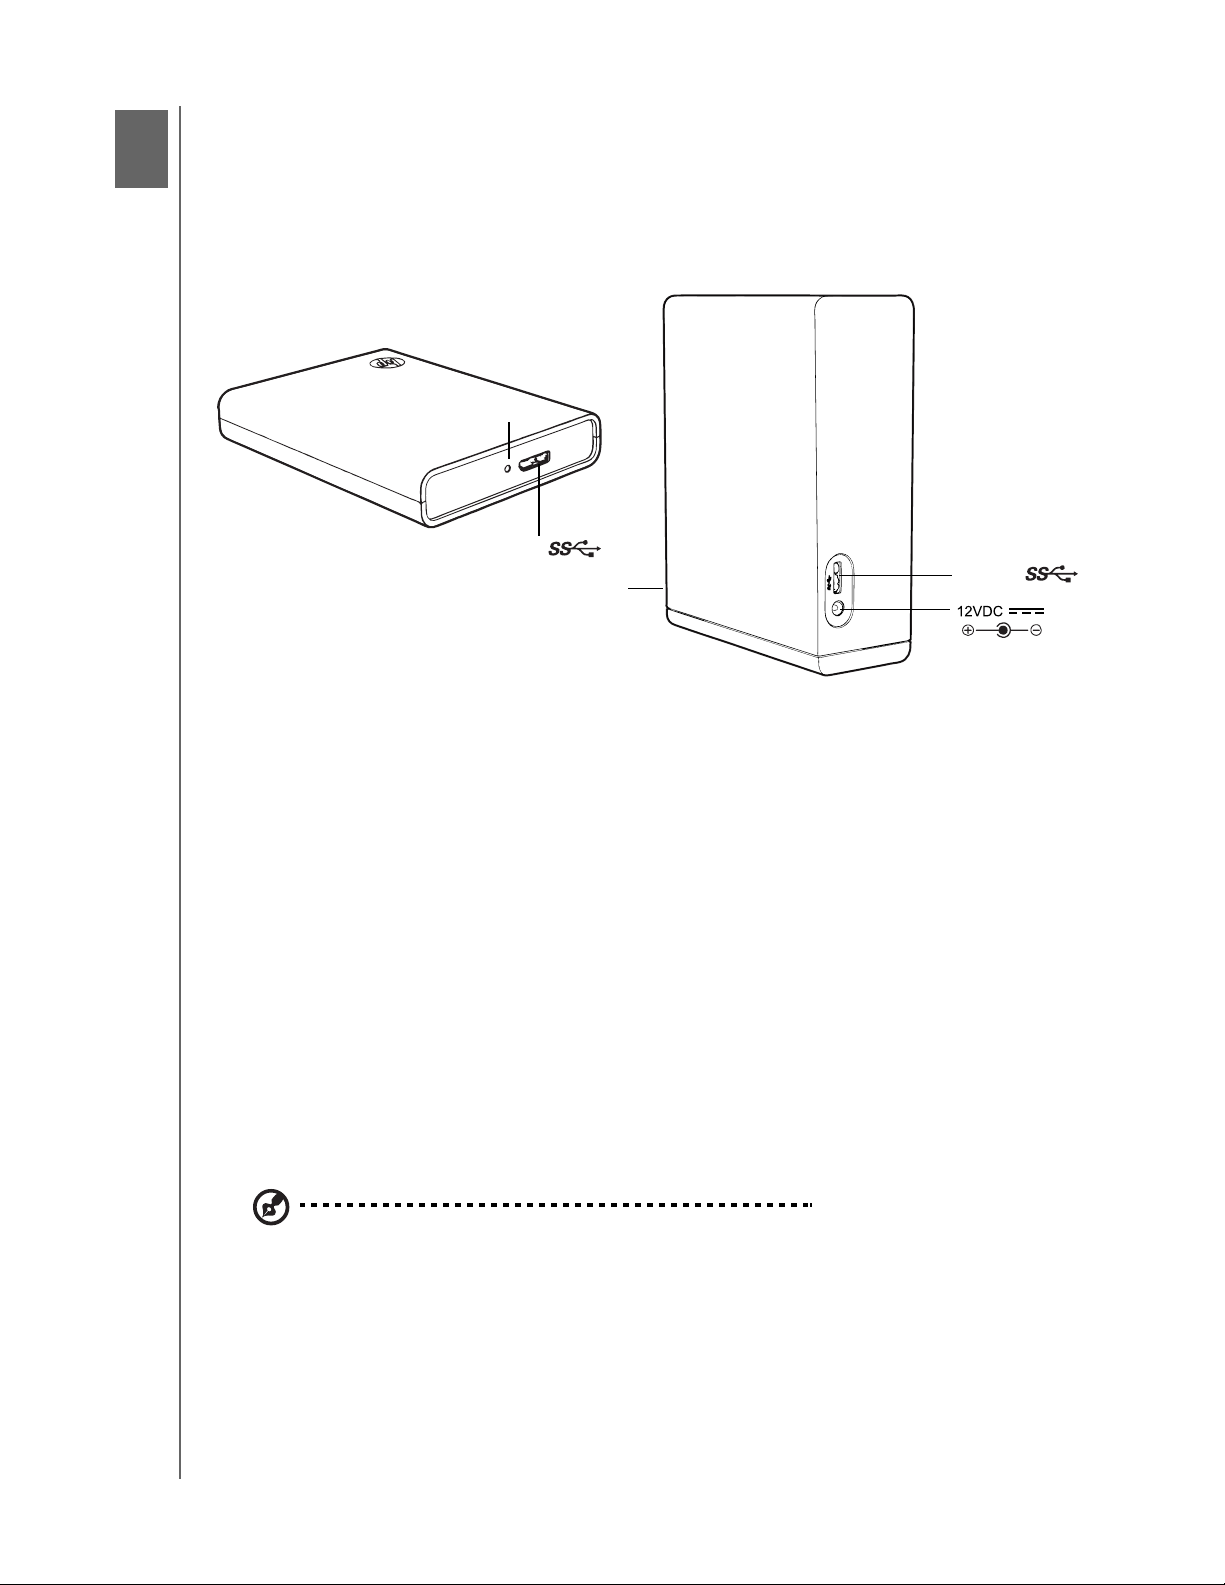
2
About Your HP Drive
Features
LED
USB 3.0
LED
HP PORTABLE & EXTERNAL HARD DRIVES
USER MANUAL
USB 3.0
LED
The power/activity LED is located on the rear of the HP Portable Hard Drive and on
the front of the HP External Hard Drive.
USB 3.0 Interface
SuperSpeed USB (USB 3.0) supports data transfer rates up to 5 Gb/s. USB 3.0 is
backward-compatible with Hi-Speed USB (USB 2.0) and USB 1.1.
HP SimpleSave Backup Software
HP SimpleSave runs directly from your HP drive.
Easily back up all of your digital music, photo, video, recorded TV, gaming, or
other data files.
Easily restore any or all of your backed up files.
After you start it for the first time, HP SimpleSave automatically backs up changes
whenever the computer is idle for 5 minutes.
Can be used to back up multiple computers.
Note: HP SimpleSave backup software backs up only one external drive at a time.
Drive Format
This device is preformatted for the NTFS file system. This file system supports media
files that are larger than 4 GB.
ABOUT YOUR HP DRIVE – 4
Page 8

3
Connecting the Device
HP PORTABLE & EXTERNAL HARD DRIVES
USER MANUAL
HP Portable Hard Drive
1 2
1 USA, Japan, Taiwan, Brazil,
Mexico, Colombia
2 Europe, Korea, Brazil, Chile
3 United Kingdom
4 5
3
4 China
5 Australia, New Zealand,
Argentina
HP External Hard Drive
1
2
or
Global AC adapter configurations
1 2
1 USA, Japan, Taiwan, Brazil,
Mexico, Colombia
2 Europe, Korea, Brazil, Chile
3 United Kingdom
4 5
3
4 China
5 Australia, New Zealand,
Argentina
3
2
1
4
1. Turn on your computer.
2. Connect the USB cable and power cord (HP External Hard Drive only) as shown.
3. You may have to wait up to a full minute for your computer to configure your
HP drive the first time it’s connected to your computer. You may see several
installation messages appear on the screen as your computer sets up your HP
drive for the first time. You will not see these installation messages the next time
you plug in your HP drive.
CONNECTING THE DEVICE – 5
Page 9

4
HP PORTABLE & EXTERNAL HARD DRIVES
USER MANUAL
HP SimpleSave Backup Software
Welcome to HP SimpleSave backup software, a utility you can use with your
HP Portable Hard Drive or HP External Hard Drive that makes it easy to protect the
valuable information on your computer.
HP SimpleSave backup software runs directly from your HP drive and does not need
to be installed on your computer.
To run the HP SimpleSave backup software:
1. Connect the drive to your computer and:
IF Autoplay is . . . THEN . . .
Enabled, Click Open Folder to view files . . . on the Autoplay menu:
Disabled, Use Windows Explorer to open the drive listing:
(HP SimpleSave backup software backs up only one external drive at a time.)
2. Double-click the HPSimpleSave.exe file listing to launch the backup software:
3. Agree to the End User License Agreement (EULA) the first time you use
HP SimpleSave by clicking the Accept button.
HP SimpleSave remains on the HP external hard drive and is not installed on your
internal hard drive. This allows you to take HP SimpleSave with you.
If you leave your HP drive plugged in, the HP SimpleSave icon will appear in the
system tray. HP SimpleSave performs an incremental backup every time your
computer is idle for five minutes.
Each time you start HP SimpleSave it automatically checks for a software update. To
turn off this feature, see “Turning Off Automatic Updates” on page 16.
HP SIMPLESAVE BACKUP SOFTWARE – 6
Page 10

HP PORTABLE & EXTERNAL HARD DRIVES
USER MANUAL
How to Back Up Your Files
After you open HP SimpleSave, it automatically begins backing up the most
common file types on your computer’s primary hard drive.
To change backup options including file types and locations, see “My Options” on
page 13.
Click Start or wait for the automatic timer to finish counting down to start the
backup process. Press any key to stop the countdown.
Backup Notes
It can take several hours (or more) to back up your computer for the first time. You
should consider performing your first backup at a time when your computer is idle.
Although HP SimpleSave incorporates a mechanism to attempt to save files that
are in use, it is highly recommended that you close all other programs to ensure
that all files are backed up at the earliest opportunity.
HP SimpleSave prepares your backup by first scanning your computer. This may
take a few minutes depending on the amount of content on your computer.
You will be presented with a summary of the files found on your computer grouped
into different content categories. The most common file types on your primary drive
are backed up by default. If you need to add custom file extension to be excluded,
see “My Options” on page 13.
The name of the backup is automatically created based on your computer’s name.
The backup name will appear below the summary of the files found on your
computer.
If you want to make any changes to the file types, folders, or locations to be backed
up, click on Change File Types and Locations on the bottom of the screen. For
HP SIMPLESAVE BACKUP SOFTWARE – 7
Page 11

HP PORTABLE & EXTERNAL HARD DRIVES
USER MANUAL
more information about changing file types and locations, see “My Options” on page
13.
Click Start to begin the backup process.
Your backup progress displays during the backup. You can see how many files are
planned for backup and how many have completed. The first time you back up your
computer it can take up to several hours (or more).
Click Pause to temporarily halt the backup process if you need to use your
computer for other tasks. Click Resume to restart the backup process. If you need
to permanently stop the backup process, click Cancel.
The following screen displays when the backup process is complete.
HP SIMPLESAVE BACKUP SOFTWARE – 8
Page 12

HP PORTABLE & EXTERNAL HARD DRIVES
USER MANUAL
Sometimes a file cannot be backed up. If this occurs you will be notified to click the
View Report button. The report outlines which files could not be backed up. If you
need help, go to the HP SimpleSave support website at http://hpsupport.wdc.com.
You can unplug your HP drive after your initial backup, however it is recommended
to leave it plugged in so you always have a backup of your computer files. As long as
your HP drive remains plugged into your computer and the HP SimpleSave Monitor
is running, your computer will be backed up automatically each time your computer
remains idle (not used) for five minutes.
If you unplug your HP drive, just plug it back in and run HP SimpleSave by clicking
the HP SimpleSave application icon. The software automatically backs up any
modified files and all new files since your last backup from your computer to your HP
drive.
Backing up Multiple Computers
If you want to back up another computer, simply unplug your HP drive and plug it
into the other computer. Follow the same steps as detailed in “HP SimpleSave
Backup Software” on page 6.
About the HP SimpleSave Monitor
The HP SimpleSave Monitor appears in your system tray after the initial backup is
performed. The HP SimpleSave Monitor continuously watches your computer for
any new or changed files and automatically backs up those files after your computer
is idle (not used) for five minutes. Your HP drive must be left plugged into your
computer for the HP SimpleSave monitor to work.
Before disconnecting your HP drive, exit HP SimpleSave by right-clicking the HP
SimpleSave Monitor, then click Exit.
To launch the HP SimpleSave main application, right-click on the HP SimpleSave
Monitor, then select Launch HP SimpleSave as shown in the image below. To
view the backup log report, right-click on the HP SimpleSave Monitor, then select
View Report as shown in the image below.
Note: If you exit the HP SimpleSave Monitor, any new or changed files will NOT be backed up.
How To Restore Files
Use HP SimpleSave to restore files you have backed up on your HP drive.
HP SIMPLESAVE BACKUP SOFTWARE – 9
Page 13

HP PORTABLE & EXTERNAL HARD DRIVES
USER MANUAL
Plug the HP drive into the computer onto which you want to restore your files.
Double-click the HP SimpleSave icon in your system tray to start the
HP SimpleSave application.
When the “Welcome to HP SimpleSave” screen appears, click the Restore button
at the bottom of the screen. Restore only appears if there is a backup file on the
drive.
Select the backup file you want to restore files from, then click Open.
Next, select what you want to restore. Restore Everything is selected by default.
Choose this option if you want to restore everything that was backed up.
Click Restore Only These Files to choose specific files or folders you want to
restore. Make your selections by clicking the check boxes next to the folders. You
can select individual files by selecting the files on the right and clicking the checkbox
HP SIMPLESAVE BACKUP SOFTWARE – 10
Page 14

HP PORTABLE & EXTERNAL HARD DRIVES
USER MANUAL
on the top left of the file. Double-click any of the files if you want to preview the file
before restoring. Click OK when finished making your selections.
Note: The files view is set to thumbnail view by default. Click the view icon and make a selection from
the list to change the view to details, icon, list, or small icon.
Next, select where you want to save your restored files.
Clicking Restore to original path restores your files to their original location on
your primary drive. If your original files still exist in the original location,
HP SimpleSave prompts you to decide if you want to Replace, Keep Both, or Skip
for each duplicate file found.
It is recommended you restore your files to one new folder by clicking Restore to
one folder. By default, your files are saved to a new folder found at ‘C:\Restore
Files.’ Click Change Folder to specify a different location. Click OK to continue.
HP SIMPLESAVE BACKUP SOFTWARE – 11
Page 15

HP PORTABLE & EXTERNAL HARD DRIVES
USER MANUAL
Your files will be restored in the same folder structure as when they were originally
backed up.
Note: It may take several minutes to several hours to restore your files depending on the amount of
files you are restoring.
The following screen appears when the restore process is complete.
Sometimes a file cannot be restored. Click View Report if this occurs. The report
outlines which files could not be restored. If you need help, go to the HP SimpleSave
support website at http://hpsupport.wdc.com.
HP SIMPLESAVE BACKUP SOFTWARE – 12
Page 16

HP PORTABLE & EXTERNAL HARD DRIVES
USER MANUAL
My Options
HP SimpleSave has several options for backup plan customization. To access the
options page, click My Options in the HP SimpleSave welcome screen.
File Types & Locations
HP SimpleSave automatically backs up the most common file types on your
computer’s primary hard drive by default. You can use the File Types & Locations
option to modify these settings.
Click Search only these locations under Select Search Location: to specify
specific drives or folders you want HP SimpleSave to back up. If you only wanted to
back up the “My Documents” folder, you can back up only that folder and no other.
Under Select File Types:, all file types to be backed up are selected. You can
deselect a file type to back up by clicking the corresponding blue box. For example,
you may want to back up all of your content except videos, in which case you would
deselect the Video Files box.
Note: These settings will remain saved even if you unplug your HP drive.
HP SIMPLESAVE BACKUP SOFTWARE – 13
Page 17

HP PORTABLE & EXTERNAL HARD DRIVES
Advanced Settings
USER MANUAL
Click Advanced Settings if you want to include or exclude files with certain
extensions from the backup. There are a set of file types that are excluded by default
from being backed up. Those files are excluded by including their extensions in the
"excluded extensions" list.
For example, batch files ("BAT" extension) and log files ("LOG" extension) are
excluded by default. You can include a file type by unchecking the extension for the
file type. For instance, as the example below shows, you can uncheck "*.BAT" and
"*.LOG" to include batch and log files in your backup. You can also go back and
exclude such file types by checking the extension you previously unchecked.
If you have software that uses a file type that you do not want to be backed up, you
can add a custom extension to the excluded extensions list by clicking on the green
"plus sign" ('+') located in the bottom right of the screen. When the "File Extension"
window appears, type the extension of the file type you want to exclude from
backup, then click Save.
Click OK to save your preferences.
HP SIMPLESAVE BACKUP SOFTWARE – 14
Page 18

HP PORTABLE & EXTERNAL HARD DRIVES
USER MANUAL
Once you have added at least one custom extension to the Custom list, you can
uncheck (not exclude) or check (exclude) the extensions in that list.
You can also delete extensions in the Custom list by clicking on the extension, then
clicking on the "minus sign" ('-') in the lower right of the screen. When you click on
the '-' sign, the following window displays:
Click Yes to delete the custom extension or No to leave the extension in the list.
About This Software
In the “About this Software” window you can easily check on the HP SimpleSave
version information, manually check for a software update, and review the End User
License Agreement.
HP SIMPLESAVE BACKUP SOFTWARE – 15
Page 19

HP PORTABLE & EXTERNAL HARD DRIVES
USER MANUAL
Turning Off Automatic Updates
If you do not want HP SimpleSave to check for updates each time the program
starts, click Check for Update, then click In the future do not check for
software updates automatically. Click OK.
Language Preferences
HP SimpleSave matches the language of your operating system by default. To
change the language, select a different language from the list, click OK, then restart
HP SimpleSave for the change to take effect.
HP SIMPLESAVE BACKUP SOFTWARE – 16
Page 20

4445
HP PORTABLE & EXTERNAL HARD DRIVES
USER MANUAL
Turning Off/Disconnecting the Device
Right-click the Safely Remove Hardware icon in your system tray and select Safely
Remove Hardware. You may hear the drive power down before the Power LED
turns off. The drive is now shut down properly, and you may disconnect the drive
safely.
Note: The HP External Hard Drive has a power management feature that allows it to power
automatically off and on with your computer.
Important: To prevent data loss, close all active windows and applications
before shutting down the HP Hard Drive.
TURNING OFF/DISCONNECTING THE DEVICE – 17
Page 21

46
HP PORTABLE & EXTERNAL HARD DRIVES
USER MANUAL
Troubleshooting
Drive does not appear on my computer
Try the following solutions in the order listed:
1. Check to see if the drive is on. The power LED on the front (desktop) or back
(portable) of the drive should be lit.
2. Check that the USB cable is securely and properly connected to the drive and
the USB connector on the computer.
3. While the computer is turned on, unplug the USB cable. Wait 10 seconds, and
then reconnect the USB cable.
4. See if the computer is recognizing the USB port you are using by checking in the
Device Manager window. See the documentation that came with your computer
for more information.
A message appears that states I have a high-speed device connected to a low-speed port (Windows XP)
This is normal. Windows XP displays a message that you have connected your USB
3.0 drive to a USB 2.0 or 1.1 port. You will not have the high-speed capabilities that
you would have using a USB 3.0 port. Hi-Speed USB (USB 2.0) supports data
transfer rates up to 480 Mb/s. Connection to a USB 1.1 port transfers data at USB
1.1 speed (up to 1.5 Mb/s).
Data transfer rate seems slow with my USB 3.0 adapter card
The drive operates as fast as the host adapter card allows. If you are having
performance issues, make sure that the USB 3.0 card and/or controller drivers are
the most current available and are installed properly.
I have reformatted my drive and/or need to reinstall HP SimpleSave backup software
You can reinstall HP SimpleSave backup software after downloading it from
http://hpsupport.wdc.com.
Write Cache Enable does not stay enabled
For protection of your data, Write Cache Enable is turned off. For more information,
go to: http://hpsupport.wdc.com.
Administrator privilege for installing software
Depending on your operating system, you may need to be logged on as the
administrator to install software. See the Windows Help files or the documentation
that came with your computer.
TROUBLESHOOTING – 18
Page 22

7
HP PORTABLE & EXTERNAL HARD DRIVES
USER MANUAL
Appendix
Regulatory Compliance
FCC Class B Information
This device has been tested and found to comply with the limits of a Class B digital device, pursuant to Part 15 of the FCC
Rules. These limits are designed to provide reasonable protection against harmful interference in a residential installation. This
unit generates, uses, and can radiate radio frequency energy and, if not installed and used in accordance with the instructions,
may cause harmful interference to radio or television reception. However, there is no guarantee that interference will not occur
in a particular installation.
determined by turning the equipment off and on, you are encouraged to try to correct the interference by one or more of the
following measures:
• Reorient or relocate the receiving antenna.
• Increase the separation between the equipment and the receiver.
• Connect the equipment into an outlet on a circuit different from that to which the receiver is connected.
• Consult the dealer or an experienced radio/television technician for help.
Any changes or modifications not expressly approved by the manufacturer could void the user’s authority to operate this
equipment.
ICES-003/NMB-003 Statement
Cet appareil numérique de la classe B est conforme à la norme ICES-003 du Canada.
This device complies with Canadian ICES-003 Class B.
If this equipment does cause harmful interference to radio or television reception, which can be
Safety Compliance
Approved for US and Canada. CAN/CSA-C22.2 No. 60950-1, UL 60950-1: Safety of Information Technology Equipment.
Approuvé pour les Etats-Unis et le Canada. CAN/CSA-C22.2 No. 60950-1, UL 60950-1: Sûreté d'équipement de technologie
de l'information.
HP Portable Hard Drive: For use only with a UL Listed PC.
HP External Hard Drive: This product is intended to be supplied by a listed limited power source, double insulated, or direct
plug-in power unit marked “Class 2.”
CE Compliance For Europe
Marking by the CE symbol indicates compliance of this system to the applicable Council Directives of the European Union,
including the EMC Directive (2004/108/EC), the Low Voltage Directive (2006/95/EC), and the EuP Directive 2005/32/EC, where
applicable. A “Declaration of Conformity” in accordance with the applicable directives has been made and is on file at Western
Digital Europe.
KCC Notice (Republic of Korea only)
기종별 사용자 안내문
B급 기기
(가정용 정보통신기기)
Class B Device 1 Please note that this device has been approved for non-business purposes and may be used in any
environment, including residential areas.
이 기기는 가정용으로 전자파적합충족을 한 기기
로서 주거지역에서는 물론 모든 지역에서 사용할
수 있습니다.
APPENDIX – 19
Page 23

HP PORTABLE & EXTERNAL HARD DRIVES
USER MANUAL
Warranty Information
Obtaining Service
Hewlett-Packard (HP) values your business and always attempts to provide you the very best of service. If this HP Branded
Product requires maintenance, either contact the dealer from whom you originally purchased the HP Branded Product or visit
our product support Web site at http://hpsupport.wdc.com for information on how to obtain service or a Return Material
Authorization (RMA). If it is determined that the HP Branded Product may be defective, you will be given an RMA number and
instructions for product return. An unauthorized return (i.e., one for which an RMA number has not been issued) will be
returned to you at your expense. Authorized returns must be shipped in an approved shipping container, prepaid and insured,
to the address provided on your return paperwork. Your original box and packaging materials should be kept for storing or
shipping your HP Branded Product. HP or its authorized service providers shall have no liability for lost data regardless of the
cause, recovery of lost data, or data contained in any product placed in its possession.
Limited Warranty
The manufacturer warrants that the HP Branded Product, in the course of its normal use, will for the term defined below, be
free from defects in material and workmanship and will conform to the manufacturer's specification therefor. The term of your
limited warranty depends on the country in which your HP Branded Product was purchased. The term of your limited warranty
is for 2 years in the North, South and Central America region, 2 years in the Europe, the Middle East and Africa region, and 3
years in the Asia Pacific region, unless otherwise required by law. The term of your limited warranty period shall commence on
the purchase date appearing on your purchase receipt. HP and the manufacturer shall have no liability for any HP Branded
Product returned if the manufacturer determines that the product was stolen from HP or the manufacturer or that the asserted
defect a) is not present, b) cannot reasonably be rectified because of damage occurring before the manufacturer receives the
HP Branded Product, or c) is attributable to misuse, improper installation, alteration (including removing or obliterating labels
and opening or removing external enclosures, unless the product is on the list of limited user-serviceable products and the
specific alteration is within the scope of the applicable instructions, as found at http://hpsupport.wdc.com), accident or
mishandling while in the possession of someone other than the manufacturer. Subject to the limitations specified above, your
sole and exclusive warranty shall be, during the period of warranty specified above and at the manufacturer’s option, the repair
or replacement of the HP Branded Product. The foregoing warranty of the manufacturer shall extend to repaired or replaced
HP Branded Products for the balance of the applicable period of the original warranty or ninety (90) days from the date of
shipment of a repaired or replaced product, whichever is longer.
The foregoing limited warranty is the manufacturer’s sole warranty and is applicable only to products sold as new. The
remedies provided herein are in lieu of a) any and all other remedies and warranties, whether expressed, implied or statutory,
including but not limited to, any implied warranty of merchantability or fitness for a particular purpose, and b) any and all
obligations and liabilities of the manufacturer for damages including, but not limited to accidental, consequential, or special
damages, or any financial loss, lost profits or expenses, or lost data arising out of or in connection with the purchase, use, or
performance of the HP Branded Product, even if HP or the manufacturer has been advised of the possibility of such damages.
In the United States, some states do not allow exclusion or limitations of incidental or consequential damages, so the
limitations above may not apply to you. This warranty gives you specific legal rights, and you may also have other rights which
vary from state to state. Western Digital is the manufacturer of this HP Branded Product on behalf of HP.
For more warranty information, please visit http://hpsupport.wdc.com/hpsupport/rma/policy.asp.
Hewlett-Packard Company
P.O. Box 4010
Cupertino, CA 95015-4010 U.S.A.
The only warranties for HP-branded products and services are set forth in the express warranty statements
accompanying such products and services. Nothing herein should be construed as constituting an additional warranty.
Neither HP nor the manufacturer shall be liable for technical or editorial errors or omissions contained herein.
Neither HP nor the manufacturer assume any responsibility for the use or reliability of its software on equipment that is
not furnished by HP or the manufacturer.
No part of this document may be photocopied, reproduced, or translated to another language without the prior written
consent of the manufacturer.
© 2011 Hewlett-Packard Development Company, L.P.
HP supports lawful use of technology and does not endorse or encourage the use of our products for purposes other
than those permitted by copyright law.
The information in this document is subject to change without notice.
4779-705051-A00 Jan 2011
APPENDIX – 20
 Loading...