

HP ENVY 14-3100 Getting Started Manual

GETTING STARTED

Getting Started

© Copyright 2012 Hewlett-Packard
Development Company, L.P.
Bluetooth is a trademark owned by its
proprietor and used by Hewlett-Packard
Company under license. Intel is a
trademark of Intel Corporation in the U.S.
and other countries. Microsoft and Windows
are U.S. registered trademarks of Microsoft
Corporation. SD Logo is a trademark of its
proprietor.
The information contained herein is subject
to change without notice. The only
warranties for HP products and services are
set forth in the express warranty statements
accompanying such products and services.
Nothing herein should be construed as
constituting an additional warranty. HP shall
not be liable for technical or editorial errors
or omissions contained herein.
First Edition: April 2012
Document Part Number: 687270-001
Product notice
This guide describes features that are
common to most models. Some features
may not be available on your computer.
Software terms
By installing, copying, downloading, or
otherwise using any software product
preinstalled on this computer, you agree to
be bound by the terms of the HP End User
License Agreement (EULA). If you do not
accept these license terms, your sole
remedy is to return the entire unused
product (hardware and software) within 14
days for a refund subject to the refund
policy of your place of purchase.
For any further information or for requesting
a full refund of the computer, please
contact your local point of sale (the seller).

User guides
HP is committed to reducing the
environmental impact of our products. As
part of this effort, we provide user guides
and learning centers on your computer hard
drive in Help and Support. Additional
support and updates to the user guides are
available on the web.


Safety warning notice
WARNING! To reduce the possibility of heat-related injuries or of overheating the computer, do not
place the computer directly on your lap or obstruct the computer air vents. Use the computer only on
a hard, flat surface. Do not allow another hard surface, such as an adjoining optional printer, or a soft
surface, such as pillows or rugs or clothing, to block airflow. Also, do not allow the AC adapter to
contact the skin or a soft surface, such as pillows or rugs or clothing, during operation. The computer
and the AC adapter comply with the user-accessible surface temperature limits defined by the
International Standard for Safety of Information Technology Equipment (IEC 60950).
v

vi Safety warning notice

Table of contents
1 Welcome .......................................................................................................................................................... 1
What's new ........................................................................................................................................... 2
Touch to Share (select models only) ................................................................................... 2
Determining your Android phone OS version ...................................................... 2
Setting up Touch to Share .................................................................................. 2
Using Touch to Share ......................................................................................... 3
Turning the NFC radio antenna on your computer on or off ............................... 3
Accessing settings .............................................................................................. 3
Audio .................................................................................................................................... 4
Volume dial ......................................................................................................... 4
Beats Audio ......................................................................................................... 5
Accessing Beats Audio Control Panel ................................................ 5
Enabling and Disabling Beats Audio .................................................. 6
HP Wireless Audio (select models only) ............................................................. 7
HP Wireless Audio Manager .............................................................. 7
Refreshing your software content with Intel Smart Connect Technology (select
models only) ........................................................................................................................ 8
Radiance backlight keyboard and proximity sensor ............................................................ 8
Power ................................................................................................................................... 9
Factory-sealed battery ........................................................................................ 9
AC adapter .......................................................................................................... 9
HP CoolSense ..................................................................................................................... 9
Intel Wireless Display .......................................................................................................... 9
TPM Embedded Security device ....................................................................................... 10
Finding information ............................................................................................................................. 11
2 Getting to know your computer ................................................................................................................... 13
Top ..................................................................................................................................................... 14
Imagepad ........................................................................................................................... 14
Lights ................................................................................................................................. 15
Button ................................................................................................................................ 16
Keys ................................................................................................................................... 17
vii

Front ................................................................................................................................................... 18
Right side ........................................................................................................................................... 19
Left side .............................................................................................................................................. 20
Display ................................................................................................................................................ 22
Bottom ................................................................................................................................................ 23
3 Networking .................................................................................................................................................... 24
Using an Internet service provider (ISP) ............................................................................................ 25
Connecting to a wireless network ....................................................................................................... 25
Connecting to an existing WLAN ....................................................................................... 26
Setting up a new WLAN network ....................................................................................... 26
Configuring a wireless router ............................................................................ 27
Protecting your WLAN ....................................................................................... 27
4 Keyboard and pointing devices ................................................................................................................... 28
Using the keyboard ............................................................................................................................ 28
Using the action keys ......................................................................................................... 28
Using pointing devices ....................................................................................................................... 30
Setting pointing device preferences ................................................................................... 30
Using the Imagepad ........................................................................................................... 30
Turning the Imagepad off or on ......................................................................... 30
Navigating ......................................................................................................... 31
Selecting ........................................................................................................... 31
Using Imagepad gestures ................................................................................. 32
Scrolling ............................................................................................ 33
Pinching/Zooming ............................................................................. 33
Rotating ............................................................................................ 34
Flicking ............................................................................................. 34
5 Backing up, restoring, and recovering ....................................................................................................... 35
Creating backups ............................................................................................................................... 35
Creating recovery media to recover the original system .................................................... 35
What you need to know ..................................................................................... 36
Creating the recovery media ............................................................ 36
Creating system restore points .......................................................................................... 36
What you need to know ..................................................................................... 37
Creating a system restore point ........................................................................ 37
Backing up system and personal information .................................................................... 37
Tips for a successful backup ............................................................................. 37
What you need to know ..................................................................................... 38
viii

Creating a backup using Windows Backup and Restore .................................. 38
Restore and recovery ......................................................................................................................... 39
Restoring to a previous system restore point .................................................................... 39
Restoring specific files ....................................................................................................... 39
Restoring specific files using Windows Backup and Restore ............................ 39
Recovering the original system using HP Recovery Manager ........................................... 39
What you need to know ..................................................................................... 40
Recovering using HP Recovery partition .......................................................... 40
Recovering using the recovery media ............................................................... 41
Changing the computer boot order ................................................... 41
6 Customer support ......................................................................................................................................... 42
Contacting customer support ............................................................................................................. 42
Labels ................................................................................................................................................. 43
Identifying the labels .......................................................................................................... 43
Locating the labels ............................................................................................................. 44
7 Specifications ................................................................................................................................................ 45
Input power ......................................................................................................................................... 45
Operating environment ....................................................................................................................... 46
Index ................................................................................................................................................................... 47
ix

x

1Welcome
The following sections are included in this chapter:
●
What's new
●
Finding information
Before you set up and register your computer, plug the AC adapter into the computer and connect to
external power. With external power connected, press the power button to begin charging the battery,
and then follow the on-screen instructions.
After you set up and register the computer, it is important to take the following steps:
1. Set up your wired or wireless network. For more information, see
Networking on page 24.
2. Create recovery discs or a recovery flash drive. For instructions, see
Backing up, restoring, and
recovering on page 35.
3. Get to know your computer. See
Getting to know your computer on page 13 and Keyboard
and pointing devices on page 28.
4. Discover the software that is already loaded on the computer, by selecting Start > All
Programs.
1

What's new
Touch to Share (select models only)
With HP Touch to Share, you can wirelessly share websites to and from your Near Field
Communication (NFC)–compatible Android smart phone and your computer.
NOTE: Before starting Touch to Share, be sure that the computer is connected to the Internet.
Determining your Android phone OS version
The Touch to Share setup procedures vary based on the version of your Android phone.
To determine which OS version is installed on your phone, follow these steps:
1. Go to the Settings screen on your phone, and then tap About Phone.
2. Tap Android version to determine which OS is installed on your phone.
Setting up Touch to Share
If you have an Android 2.3 phone, follow these steps:
1. On your phone, go to Settings > Wireless and Networks, and then tap the NFC checkbox to
enable.
2. On your computer, select Start > All Programs > HP > HP Touch to Share, and then follow the
on-screen instructions to download and install the HP Touch to Share for Android app on your
phone.
3. Open the website that you want to share on either your phone or computer.
4. Tap the home button on your phone, and then tap the HP Touch to Share for Android app.
If you have an Android 4.0 phone, follow these steps:
1. On your phone, go to Settings > Wireless and Networks, and then tap the NFC checkbox to
enable.
2. On your computer, select Start > All Programs > HP > HP Touch to Share to open Touch to
Share.
2 Chapter 1 Welcome
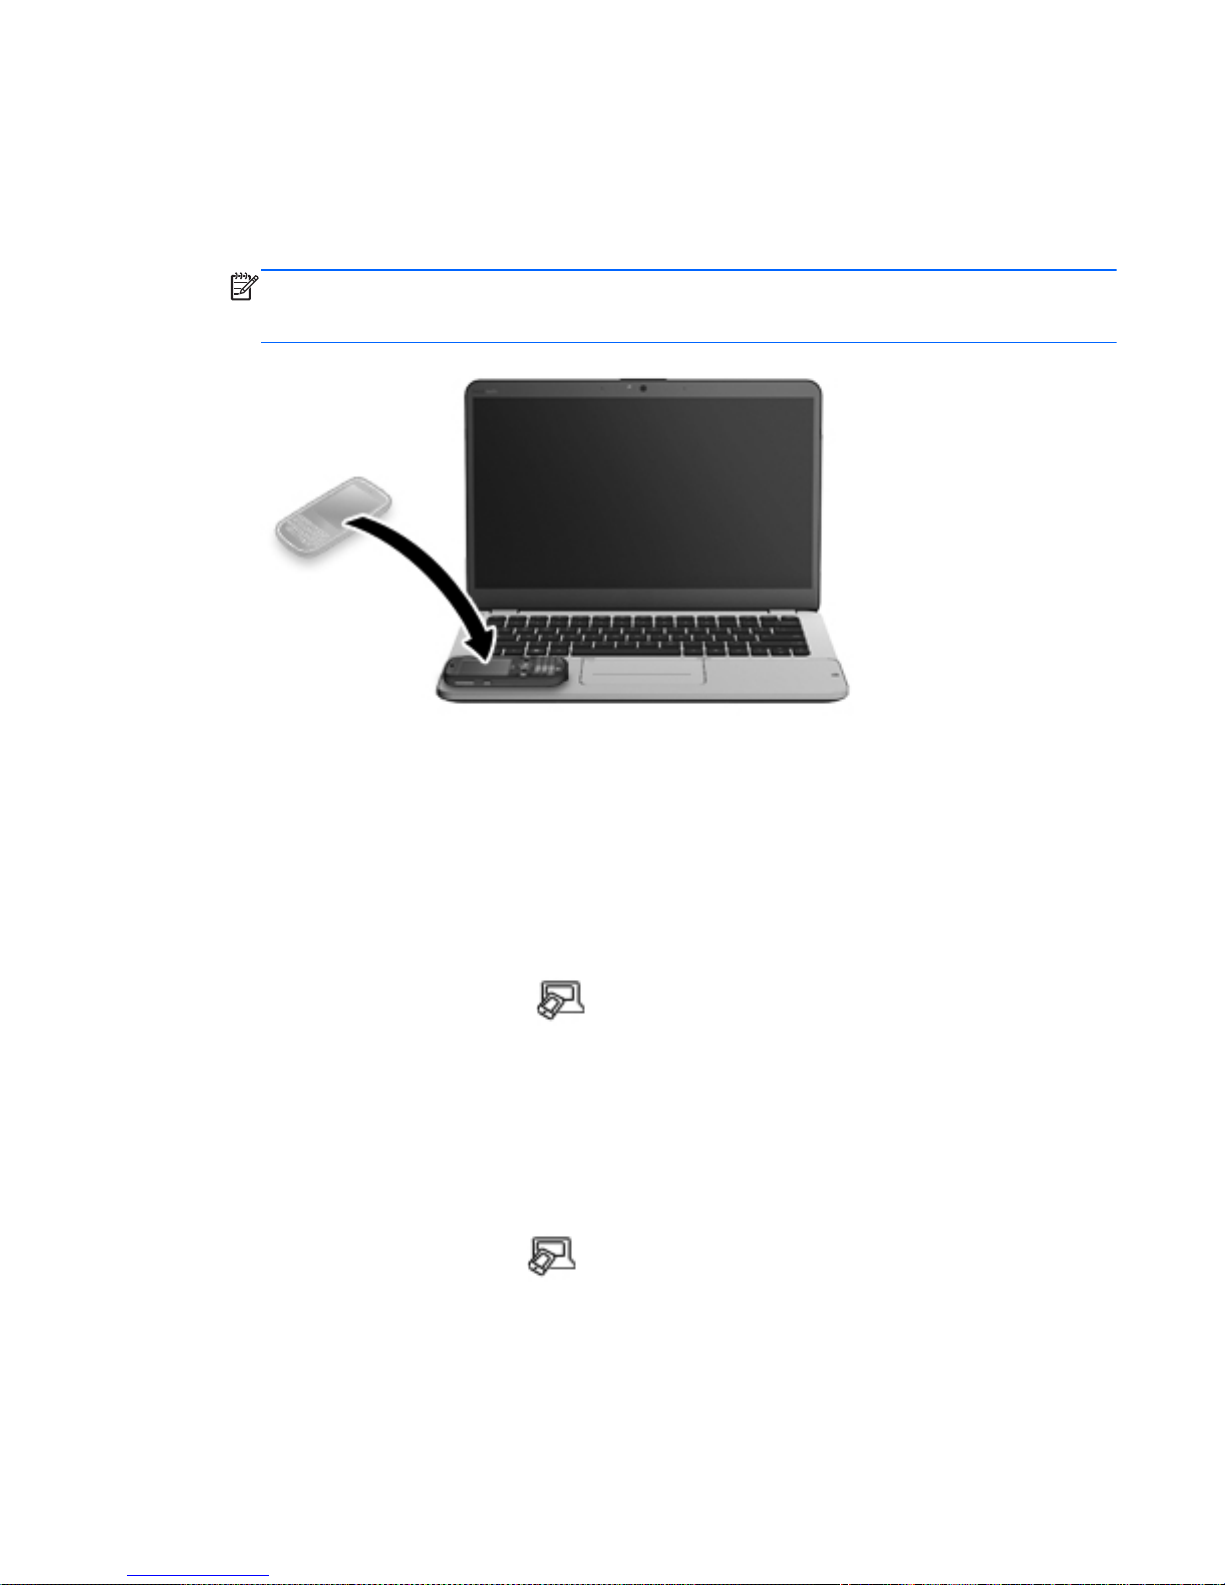
Using Touch to Share
1. Open the website that you want to share on either your phone or your computer.
2. Tap any part of your phone on the left palm rest of your computer. In a few seconds, the website
you are viewing appears on either your computer display or your phone.
NOTE: If a website is open on both devices, a dialog box will appear on each device after you
tap your phone to the computer. Tap Send on the dialog box of the device from which you want
to send the website.
Turning the NFC radio antenna on your computer on or off
To turn the NFC antenna on or off, follow these steps:
1. Select Start > All Programs > HP > HP Touch to Share.
2. Click the Gear icon on the HP Touch to Share screen, and then click On or Off.
– or –
▲
Click the Touch to Share icon
in the notification area, at the far right of the taskbar, and
then click Turn NFC Radio On or Turn NFC Radio Off.
Accessing settings
▲
Select Start > All Programs > HP > HP Touch to Share, and then click the Gear icon on the
Touch to Share screen.
– or –
▲
Click the Touch to Share icon
in the notification area, at the far right of the taskbar. Click
Open HP Touch to Share, and then click the Gear icon on the Touch to Share screen.
What's new 3
Audio
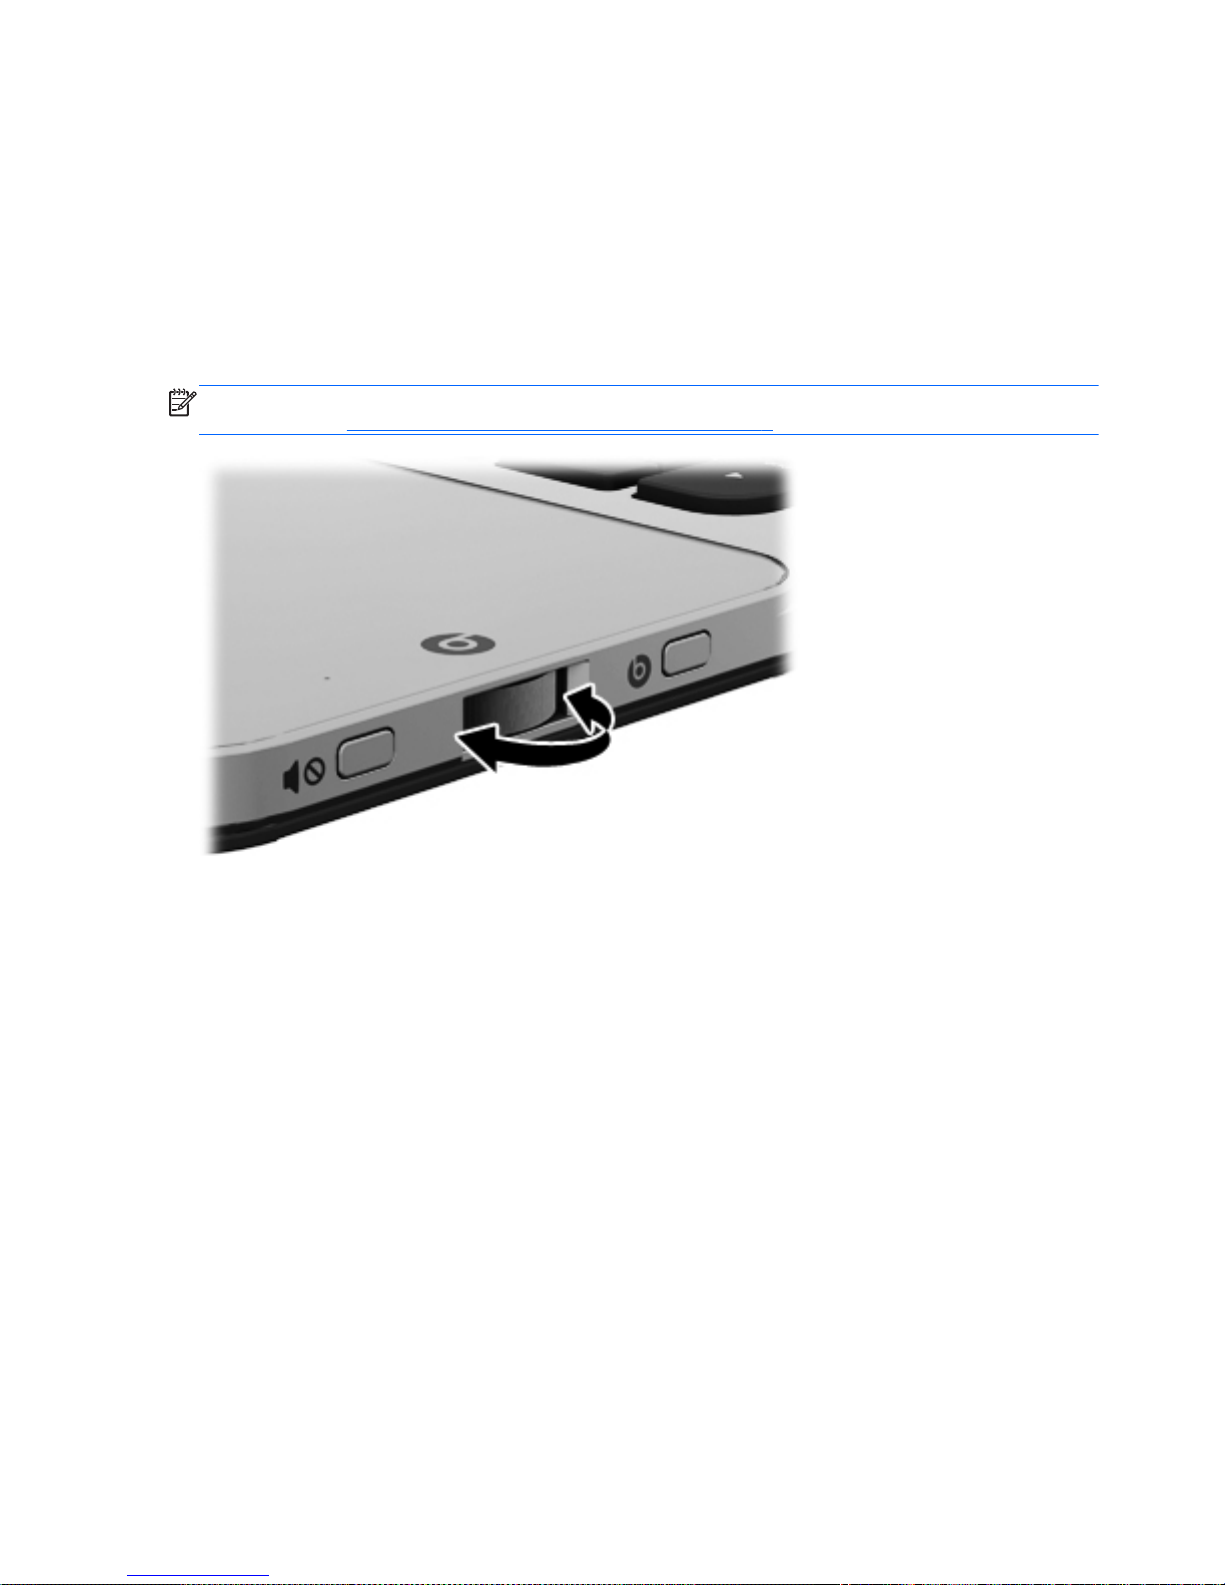
Volume dial
Like the dial on a stereo, the integrated volume dial controls speaker volume on the computer.
▲
To increase speaker volume, rotate the dial clockwise.
– or –
▲ To decrease speaker volume, rotate the dial counter-clockwise.
NOTE: You can manually adjust the volume settings in Beats Audio Control Panel. For more
information, see
Accessing Beats Audio Control Panel on page 5.
4 Chapter 1 Welcome
Beats Audio
Beats Audio is an enhanced audio feature that provides a deep, controlled bass while maintaining a
clear sound.
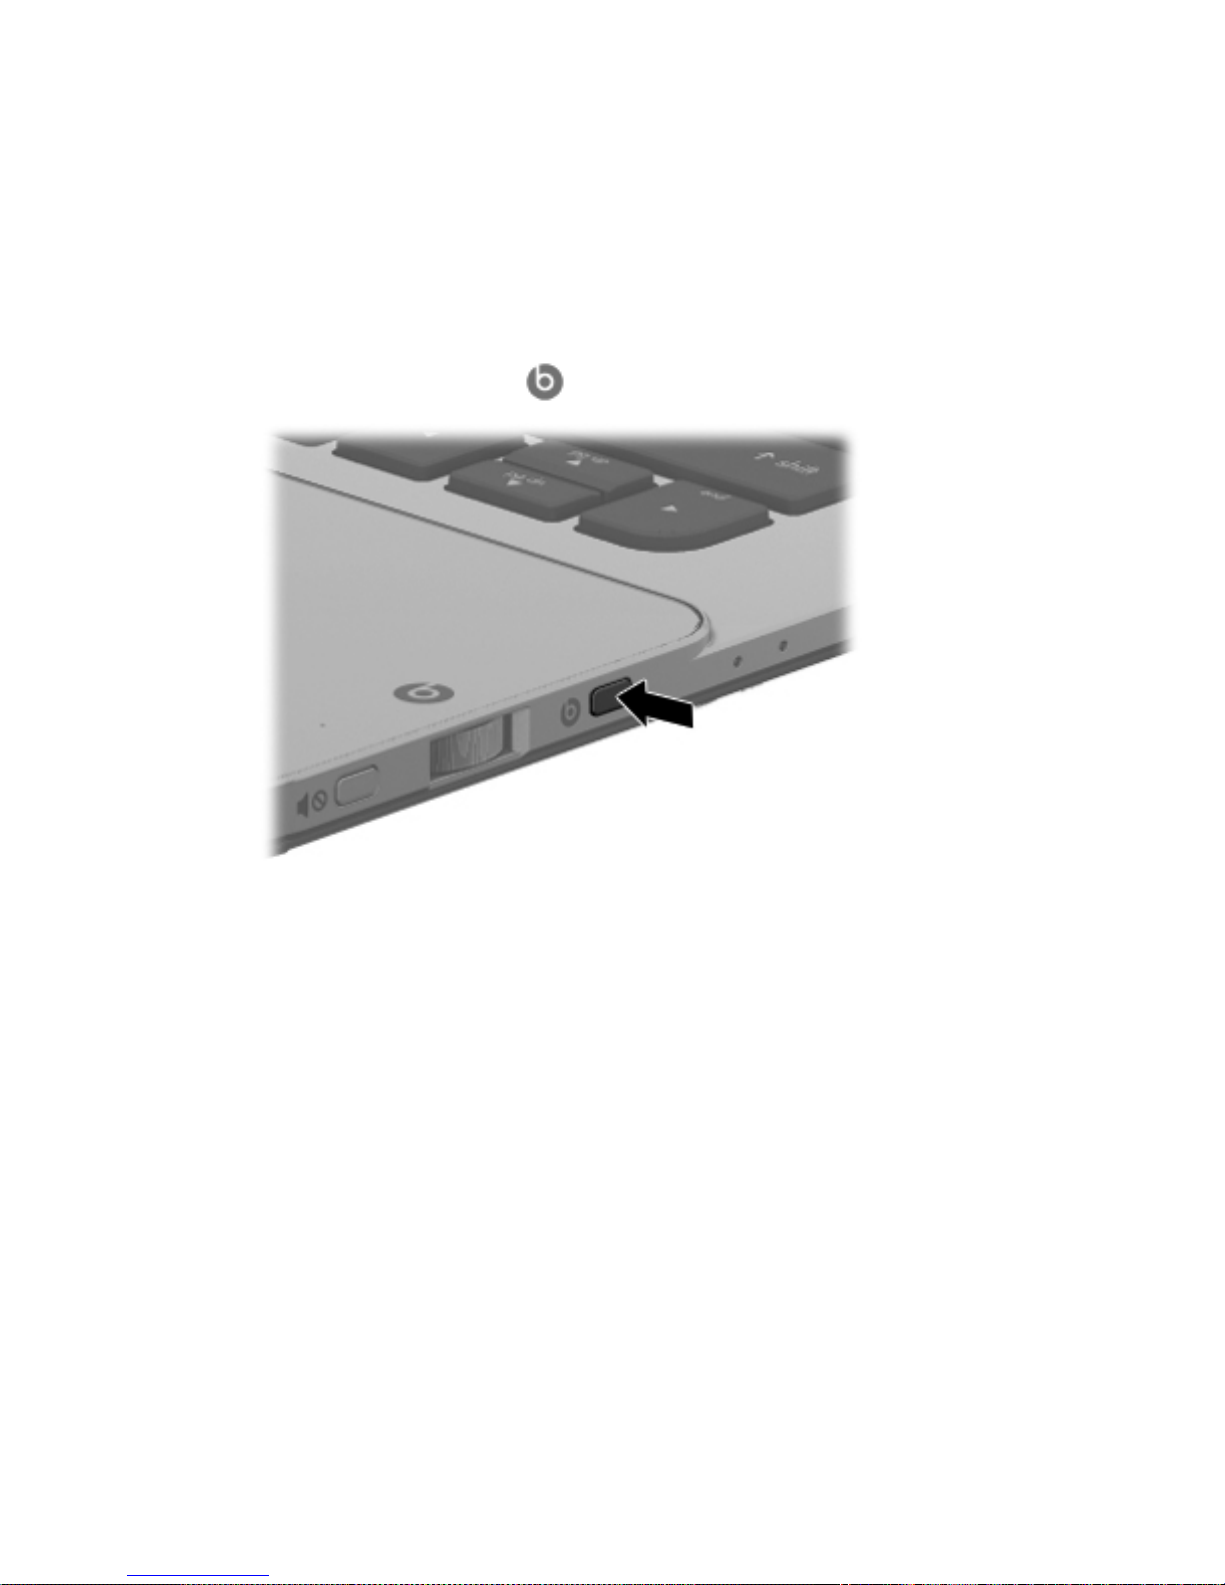
Accessing Beats Audio Control Panel
Beats Audio Control Panel allows you to view and manually control audio and bass settings.
To open Beats Audio Control Panel, do one of the following:
▲
Press the Beats Audio button
on the right side of the computer.
– or –
▲
Select Start > Control Panel > Hardware and Sound > Beats Audio Control Panel.
What's new 5
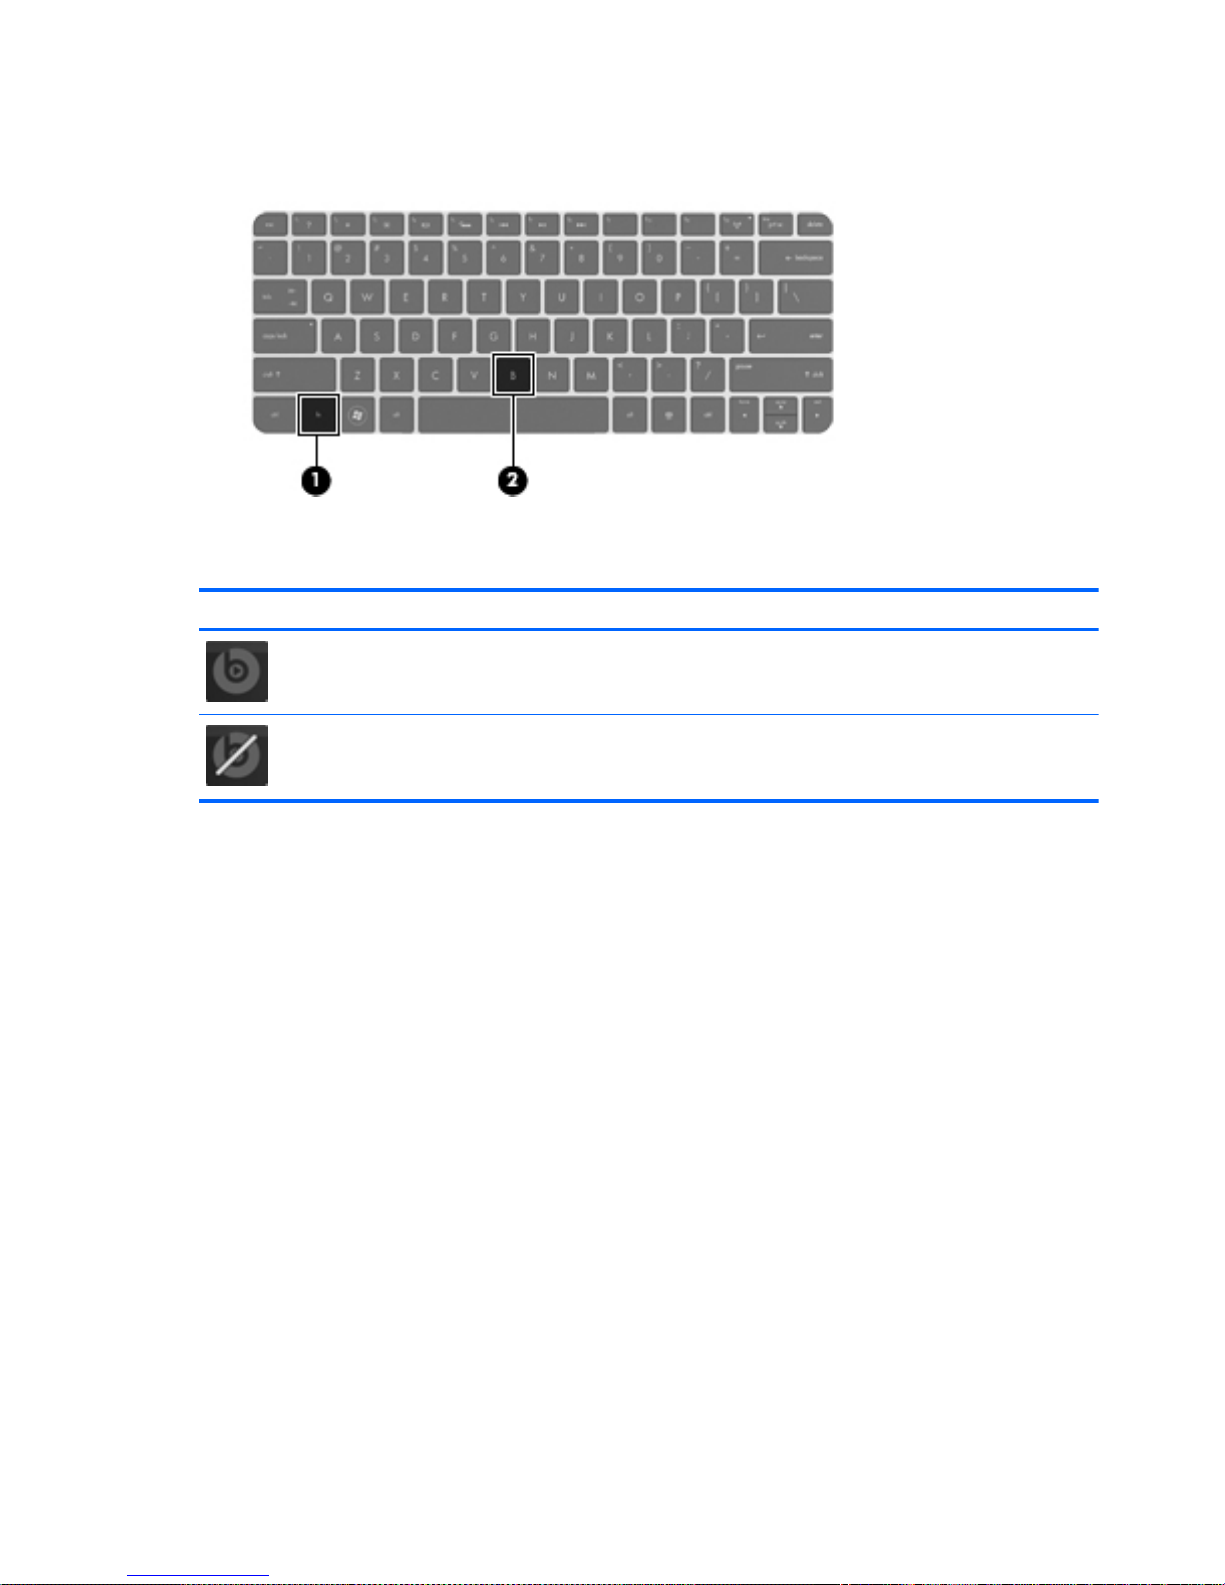
Enabling and Disabling Beats Audio
▲ To enable or disable Beats Audio, press the fn key (1) and the b key (2).
The following table explains the meaning of the Beats Audio icons that appear on the screen when
you press the Beats Audio hot key (fn+b).
Icon Meaning
Beats Audio is enabled.
Beats Audio is disabled.
6 Chapter 1 Welcome
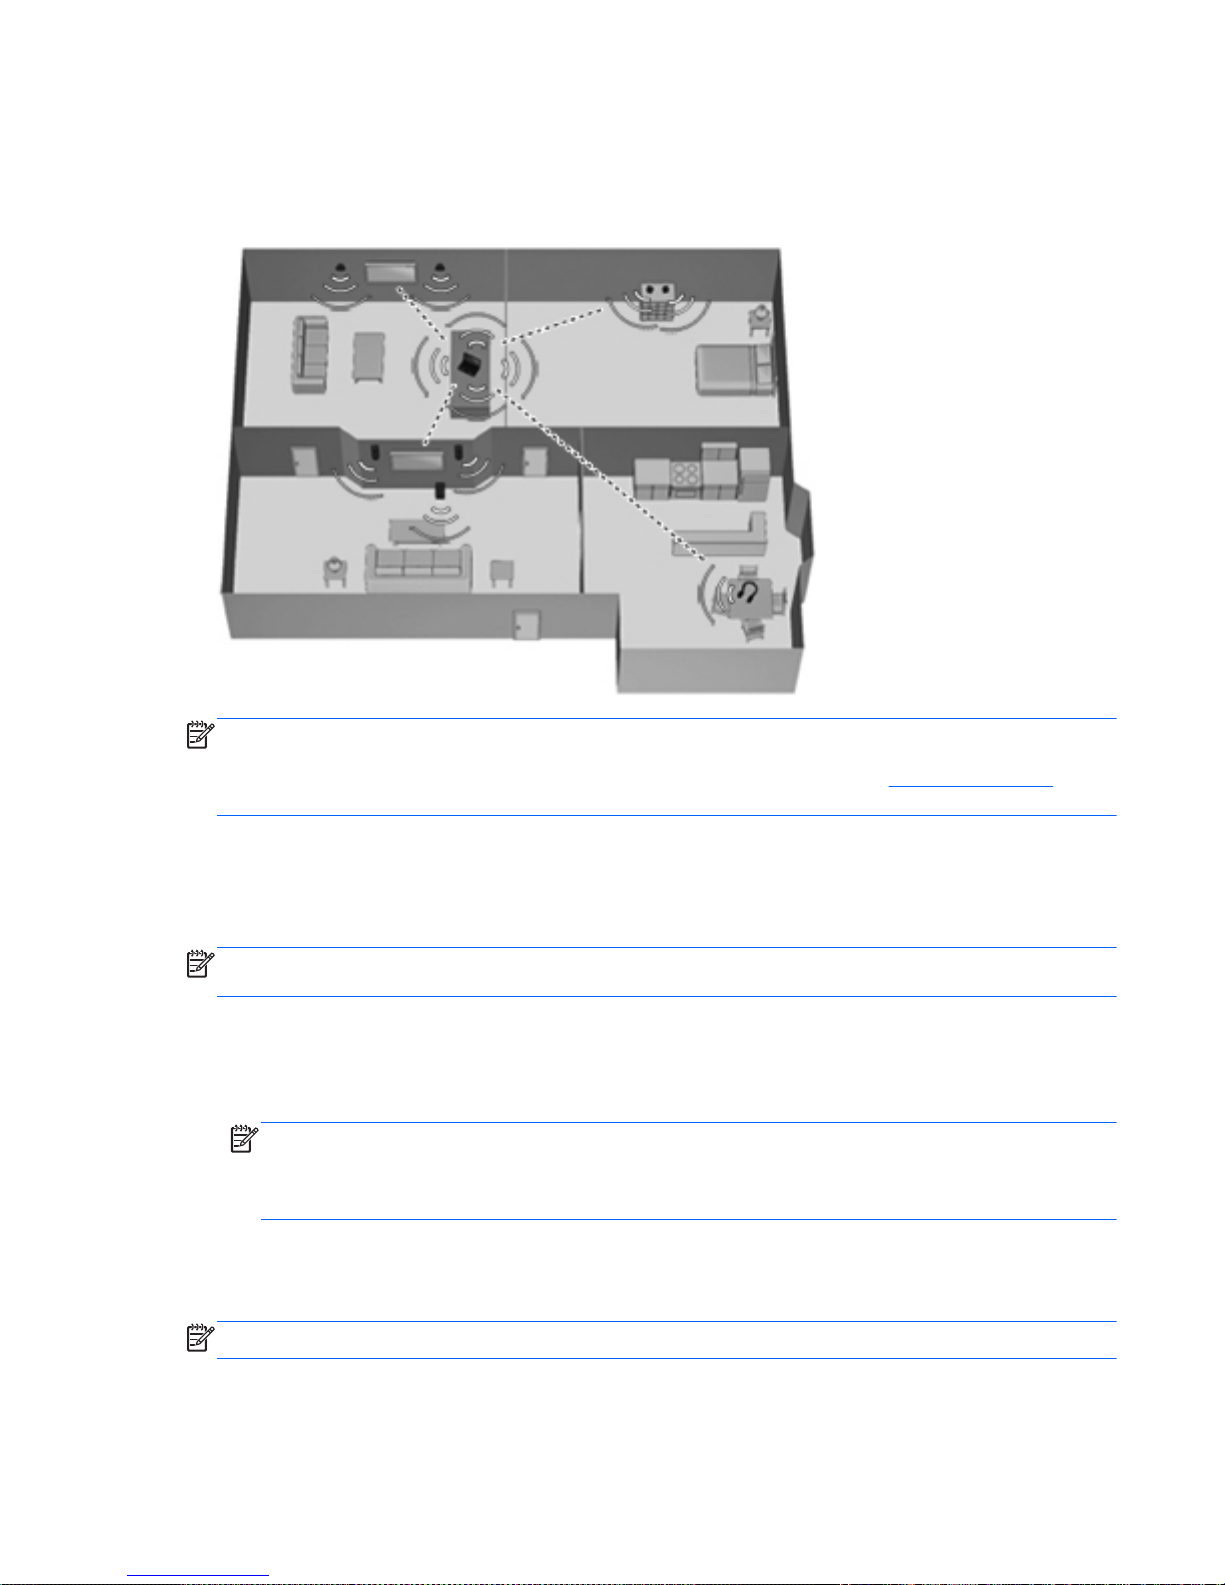
HP Wireless Audio (select models only)
HP Wireless Audio helps you set up a wireless sound system in your home that streams audio from
your computer to a compatible set of wireless-enabled speakers or other audio devices.
NOTE: HP Wireless Audio uses KleerNet technology, and is not compatible with other wireless
technologies. Your wireless audio devices must also be compatible with HP Wireless Audio and
KleerNet technology. To purchase compatible wireless audio devices, go to
http://www.hp.com or a
retailer near you.
HP Wireless Audio Manager
With HP Wireless Audio Manager, you can add, remove, name, and group wireless-enabled devices
in your home audio system.
NOTE: Before you start HP Wireless Audio Manager, be sure that the wireless device is turned on
(the wireless light on the f12 key is white).
To access HP Wireless Audio Manager, do one of the following:
▲
Right-click the HP Wireless Audio icon in the notification area, at the far right of the taskbar,
and then click Launch Manager.
NOTE: If you want to conserve battery life, disable HP Wireless Audio when you are not using
it: Right-click the icon in the notification area and select Disable HP Wireless Audio. To
reenable the software, right-click the icon in the notification area and select Enable HP Wireless
Audio.
– or –
▲
Select Start > Control Panel > Hardware and Sound > HP Wireless Audio.
NOTE: For more information about HP Wireless Audio, see the software Help.
What's new 7
 Loading...