

Page 1

Quick Setup & Getting Started
HP Compaq Business PC
Enhanced for Accessibility
Page 2

© Copyright 2007 Hewlett-Packard Development
Company, L.P. The information contained herein
is subject to change without notice.
Microsoft, Windows, and Windows Vista are
either trademarks or registered trademarks of
Microsoft Corporation in the United States and/or
other countries.
Adobe, Acrobat, and Acrobat Reader are
trademarks or registered trademarks of Adobe
Systems Incorporated.
The only warranties for HP products and services
are set forth in the express warranty statements
accompanying such products and services.
Nothing herein should be construed as
constituting an additional warranty. HP shall not
be liable for technical or editorial errors or
omissions contained herein.
This document contains proprietary information
that is protected by copyright. No part of this
document may be photocopied, reproduced, or
translated to another language without the prior
written consent of Hewlett-Packard Company.
Quick Setup & Getting Started
HP Compaq Business PC
First Edition (January 2007)
Document Part Number: 440790-001
Page 3

About This Book
This guide provides basic informa t io n abou t setting up and maintaining
your computer.
WARNING! Text set off in this manner indicates that failure to follow
directions could re su lt in bod il y har m or l oss of li fe.
CAUTION: Text set off in this manner indicates that failure to follow
directions could result in damage to equipment or loss of
information.
NOTE: Text set off in this manner provides important supplemental
information.
ENWW iii
Page 4

About This Book ENWW iv
Page 5

Table of contents
1 Quick Setup
2 Getting Started
Step 1: Unpack the Computer ........................................................................ 1
Step 2: Confirm the Voltage Setting ............................................................... 2
ep 3
Step 4: Identify Front Panel Components ....................................................... 4
ep 5
Step 6: Turn On the Computer and Install the Microsoft Operatin g
stem ............................................................................................................ 6
Sy
Step 7: Turn Off the Computer ....................................................................... 7
Do
wnloading Microsoft Windows Updates ..................................................... 9
Installing or Upgrading Device Drivers ........................................................... 9
Customizing the Monitor Display .................................................................. 10
HP Backup and Recovery Manager ............................................................. 10
Finding More Information .................................... .......... ................................ 12
Using the Documentation and Diagnostics CD ............................................. 12
Basic Troubleshooting .................................................................................. 13
: Connect
: Connect the Power C
External Devices .................................................................. 3 St
ords .................................................................. 5 St
Helpful Hints ............................................................................... 13
Before You Call for Technical Support ....................................... 15
ENWW v
Page 6

ENWW vi
Page 7
1 Quick Setup
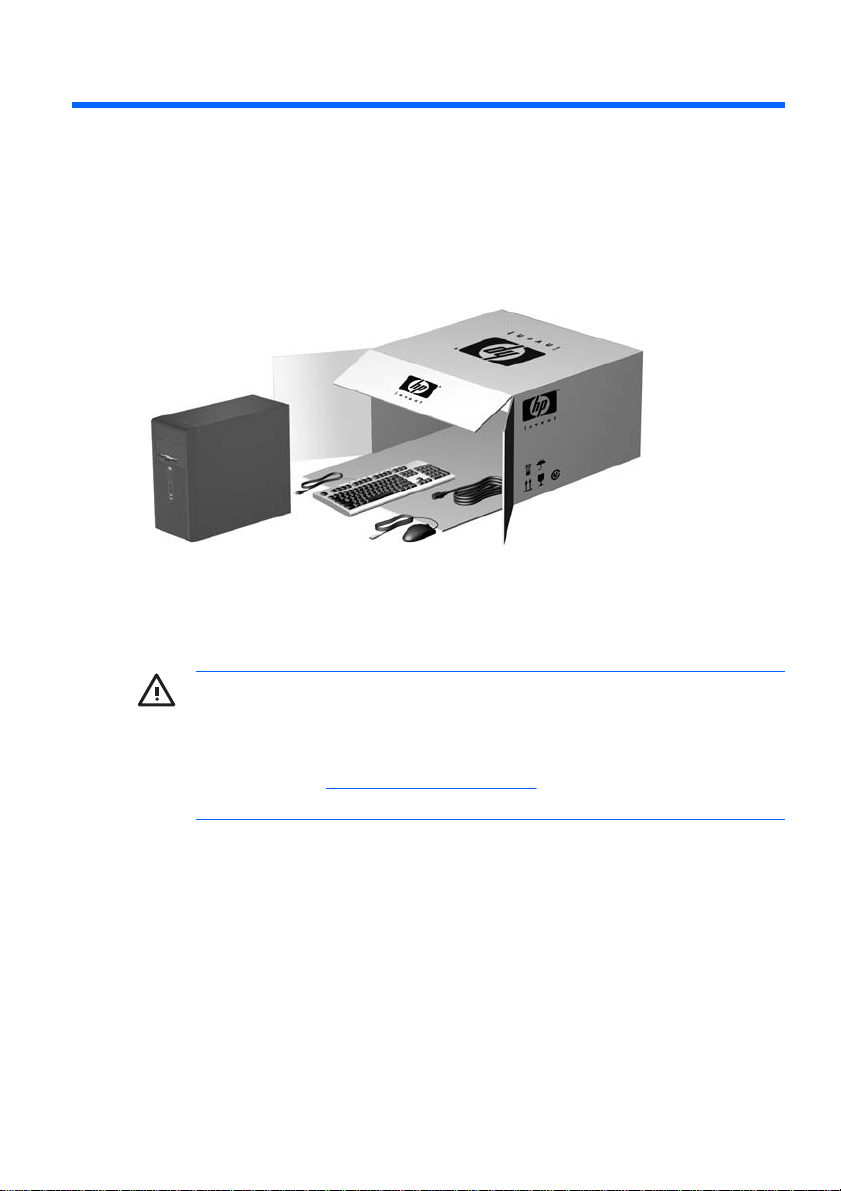
Step 1: Unpack the Computer
WARNING! To reduce the risk of seriou s inj ur y, re ad the Safety &
Comfort Gu id e. It describes proper workstation setup, posture, and
health and work habits for computer users, and provides important
electrical and mechani ca l sa fety i nfo rm ation. This guide is located
on the Web at http://www.hp.com/ergo and on the Documentation
and Diagnostics CD.
ENWW
Step 1: Unpack the Computer
1
Page 8

Step 2: Confirm the Voltage Setting
Ensure that the voltage select switch for the power supply is set to the
correct voltage for your region (115 v olts or 2 30 vo lts ).
CAUTION: You should not need to change the voltage setting;
however, you should verify that the voltage selection is compatible
with your local power specifications. Failure to do so could result in
damage to the computer.
Chapter 1 Quick Setup ENWW 2
Page 9

Step 3: Connect External Devices
Connect the monitor, mouse, keyboard, and network cables.
NOTE: Arrangement and number of connectors may vary by
model.
1 Power Cord Connector 7 Parallel Connector
2 Voltage Select Switch 8 Monitor Connector
3 PS/2 Mouse Connector (green) 9 Microphone Connector (pink)
ENWW
4 PS/2 Keyboard Connec tor
5 Universal Serial Bus (USB) 11 Line-In Aud io Connector (blue)
6
(purple)
Serial Connector 12 RJ-45 Network Connecto r
10 Line-Out Connector for
powered audio devices (green)
NOTE: If a PCI graphics card is installed, the conn ecto rs on th e card a nd the
system board may be used at the same time. Some settings may need to be
changed in Computer Setup to use both connectors. For information about Boot
Order, refer to the Computer Setup (F10) Utility Guide on the Documentation and
Diagnostics CD.
CAUTION: Do not add optional hardware or third-party devices to
the computer until the oper ati ng s yst em i s succ es sfully installed.
Doing so may cause errors and may prevent the operating system
from installing prop erly .
Step 3: Connect External Devices
3
Page 10

Step 4: Identify Front Panel Components
NOTE: The illustration shown below may look different than your
computer model.
1 Optical Drive 7 Headphone Connector
2 Optical Drive Activity Light 8 Microphone Conne ctor
3 5.25" Expansion Bay 9 USB (Universal Serial Bus) Ports
4 3.5" Expansion Bay (optional Media
Card Reader shown)
5 Dual-State Power Button 11 Power On Light
6 Hard Drive Activity Light
1
The 3.5" bay may be populated with a diskette drive or a media card reader, or it ma y be cover ed by
a bezel blank.
1
10 Optical Drive Eject Button
Chapter 1 Quick Setup ENWW 4
Page 11

Step 5: Connect the Power Cords
Connect the power cords and monitor cord as shown. Turn on the monitor,
then turn on the computer.
WARNING! To reduce the risk of electric shock or damage to the
equipment:
ENWW
Do not disable the power cord grounding plug. The grounding plug
is an important safety feature.
Plug the power cord into a grounded (earthed) outlet that is easily
accessible at all times.
Disconnect power from the computer by unplugging the power cord
from either the electrical outlet or the computer.
CAUTION: Be sure there is a 10.2 cm (4-inc h) clear an ce on all
vented sides of the computer and mo nito r to per mi t the re qui re d
airflow.
Step 5: Connect the Power Cords
5
Page 12

Step 6: Turn On the Computer and Install the Microsoft
Operating System
NOTE: If the computer was shipped with Microsoft Windows Vista
loaded, you will be prompted to register the computer with HP Total
Care before installing the operating system. You will see a brief
movie followed by an online registration form. Fill out the form, click
the Begin button, and follow the ins tr uc tion s on the s creen .
If the computer was not shipped with a Microsoft operating system,
some portions of this documentation do not apply. Refer to the
operating system docum enta tion and online Help for opera tin g
instructions.
CAUTION: Do not add optional hardware or third-party devices to
the computer until the operating s yst em i s succ es sfu ll y inst a lle d.
Doing so may cause errors and prevent the operating system from
installing proper ly .
Press the power button to turn on the computer.
The first time you turn on the computer, the operating system is installed
automatically. This process takes about 5 to 10 minutes, depending on
which operating system is being installed. Carefully read and follow the
instructions on the screen to complete the installation.
CAUTION: Once the automatic installation has begun, DO NOT
TURN OFF THE COMPUTER UN TIL THE PROCESS IS
COMPLETE. Turning off the computer during the installation
process may damage the software that runs the computer or prevent
its proper install ati on.
NOTE: If the computer shipped with more than one operating
system language on the hard drive, the installation process could
take up to 60 minutes.
Chapter 1 Quick Setup ENWW 6
Page 13

Step 7: Turn Off the Computer
To properly turn off the compu ter , first shu t down the op er atin g sy stem
software. In Microsoft Windows XP Professional, click Start > Shut
Down. In Microsoft Windows XP Home, click Start > Turn Of f
Computer. In Microsoft Windows Vista, click Start, click the arrow on the
lower right corner of the Start menu, then select Shut Down. The computer
automatically shuts down.
Depending on the operating system, pressing the power button causes the
computer to enter a low-power or “stand by” state instead of automaticall y
turning the power off. This allows you to conserve energy without closing
software applications; later, you can start using the computer immediately
without having to restart the operating system and without losing any data.
To force the computer off manually and bypass the “standby” state, press
and hold the power button for four seco nds .
CAUTION: Manually forcing the computer off will cause the loss of
any unsaved data.
On some models, you can use the Computer Setup utility to reconfigure
the power button to work in on/off mode instead of standby mode. Refer to
the Computer Setup (F10) Utility Guide on the Documentatio n and
Diagnostics CD for more info rmation about using Computer Setup.
ENWW
Step 7: Turn Off the Computer
7
Page 14

Chapter 1 Quick Setup ENWW 8
Page 15

2 Getting Started
Downloading Microsoft Windows Updates
1. To set up your Internet connection, click Start > Internet Explorer and
follow the instructions on the screen.
2. Once an Internet connection has been established, click the Start
button.
3. Select the All Programs menu.
4. Click on the Windows Update link.
In Microsoft Windows XP, you will be dir ect ed to the Microsoft
Windows Update Web site. If you see one or more pop-up windows
that ask you to install a program from http://www.microsoft.com,
click Yes to install the program. Follow the instructions on the Microsoft
Web site to scan for updates and install critical updates and s er vice
packs.
In Microsoft Windows Vist a, the Windows Update screen appears.
Click view available updates and make sure all critical upd ates are
selected. Cl ick the Install button and follow the instructions on the
screen.
It is recommended that you install all of the critical updates and service
packs.
5. After the updates have been installed, Windows will prompt you to
reboot the computer. Be sure to save any files or documents that you
may have open before rebooting. Then select Yes to reboot the
computer.
Installing or Upgrading Device Drivers
When installing optional hardware devices after the operating system
installation is complete, you must also install the drivers for each of the
devices.
If prompted for the i386 directory, replace the path specification with C:
\i386, or use the Browse button in the dialog box to locate the i386 folder.
This action points the opera tin g syste m to the ap pr opr ia te driv er s.
ENWW
Downloading Microsoft Windows Updates
9
Page 16

Obtain the latest support software, including support software for the
operating system from http://www.hp.com/support. Select your country and
language, select Download drivers and softw are, enter the model
number of the computer, and press Enter.
Customizing the Monitor Display
If you wish, you can select or change the monitor model, refresh rates,
screen resolution, color settings, font sizes, and power management
settings. To do so, right-click on the Windows Desktop, then click
Properties in Microsoft Windows XP or Personalize in Microsoft Windows
Vista to change display settings . For mor e information, refer to the onlin e
documentation provided with the graphics controlle r uti li ty or t he
documentation that came with your monitor.
HP Backup and Recovery Manager
NOTE: The features described bel ow are only available on
systems shipped with Mic rosof t Wind ows XP. T he HP Ba ck up an d
Recovery Manager included with Microsoft Windows Vista is a more
limited version. Check for updates by clicking the Software & Driver
Downloads link at http://www.hp.com.
The HP Backup and Recovery Manager is an easy-to-use, versatile
application that is pre-loaded on each system and allows you to:
create Recovery Points to back up the entire system incrementally
●
back up the entire system in a single hard archive
●
back up individual files
●
Backups can be scheduled to occur automatically at designated intervals,
or they can be initiated manually. Recovery can be performed from the
Recovery Partition on the har d dr iv e or the Recov er y Disc S et. The
Recovery Disc Set includes the Restore Plus! CD, the Microsoft Operating
System, and any Supplement al Sof twar e CDs .
NOTE: HP highly recommends that you c rea te a Rec ove ry Dis c
Set immediately before using the c omp uter and sch edu le r egul ar
automatic Recovery Point backups.
10 Chapter 2 Getting Started ENWW
Page 17

To create the Recovery Disc Set:
1. Click Start > HP Backup and Recovery > HP Backup and Recovery
Manager to open the Backup and Recovery Wiza rd , then cl ic k Next.
2. Select Create factory software recovery CDs or DVDs to recover
the system.
3. Follow the instructions in the wizard.
The HP Backup and Recovery M ana ger provides two basic recover y
methods. The first, recovery of files and folders, operates in Windows. The
second, PC Recovery, requires a reboot to the Recovery Partition or from
the Recovery Disc Set. To re boot to the Rec ov er y Pa rti tion, press F11 at
startup when you see the message “Press F11 for Emergency Recovery.”
NOTE: For more information on using HP Backup and Recovery
Manager, refer to the HP Backup and Recovery Manager User
Guide by selecting Start > HP Backup and Recovery > HP Backup
and Recovery Manager Manual.
You can order a Recovery Disc Set from HP by calling the HP
support center. Go to the following Web site, select your region, and
click the Technical support after you buy link under the Call HP
heading to obtain the support center telephone number for your
region.
http://welcome.hp.com/country/us/en/wwcontact_us.html
ENWW
HP Backup and Recovery Manager
11
Page 18

Finding More Information
The following publications are available on the Documentation and
Diagnostics CD:
Quick Setup & Getting Started
●
Hardware Reference Guide
●
Troubleshooting Guide
●
Computer Setup (F10) Uti li ty G ui de
●
Safety & Regulatory Information
●
Support Telephone Numbers
●
Safety & Comfort Guide
●
NOTE: If you do not have an optical drive capable of reading CDs,
you may download the product documentation from the Web at
http://www.hp.com/support. Select your country and language,
select See support and troubleshooting information, enter the
model number of the computer, and pr ess Enter.
Using the Documentation and Diagnostics CD
1. Insert the CD into the optical drive
There may be a slight delay while the software on the CD checks the
Windows Regional Settings.
2. Read and follow the prompts to complete the installation.
The menu and books are displayed in the la ngu age c hos en du ri ng
initial system setup or as spec if ied later in the Windows Regional
Settings. If the Regional Setting s do not ma tch on e of the lang uage s
supported on the CD, the menu and books are displayed in English.
3. Click the title of the book you want to read.
If there is no optical drive activity for two minutes or more, it may be that
Autorun is not enabled on the computer.
12 Chapter 2 Getting Started ENWW
Page 19

To run the Documentation and Diagn ostic s CD if it does not run
automatically:
1. In Microsoft Windows XP, click Start > Run. In Microsoft Windows
Vista, click Start > All Programs > Accessories > Run.
2. Type
X:\autorun.exe_index.html
(where X is the drive letter designator for the optical drive)
3. Click OK.
Basic Troubleshooting
This section concentrates on problems that you might encounter during the
initial setup process. A more comprehensive Troubleshooting Guide is
available on the Documentation and Diagn ost ic s CD and in the self-help
resources at http://www.hp.com/support. Select your country and
language, select See support and troubleshooting information, enter
the model number of the computer, and press Enter.
Helpful Hint s
If you encounter problems with the computer, monitor, or software, see the
following list of general suggestions before taking furt her ac tion :
Check that the computer and monitor are plugged into a working
●
electrical outlet.
ENWW
Check to see that the voltage select switch (some models) is set to the
●
appropriate voltage for your region (115V or 230V).
Check to see that the computer is turned on and the green power light
●
is on.
Check to see that the monitor is turned on and the green monitor light
●
is on.
Turn up the brightness and contrast controls of the monitor if the
●
monitor is dim.
Press and hold any key. If the system beeps, then the keyboard should
●
be operating correctly.
Check all cable connec tio ns fo r loose connections or inc or re ct
●
connections.
Basic Troubleshooting
13
Page 20

Wake the computer by pressing any key on the keyboard or pressing
●
the power button. If the system remains in suspend mode for more
than four seconds, shut down the computer by pressing and holding
the power button for at least four seconds then press the power button
again to restart the computer. If the system will not shut down, unplug
the power cord, wait a few seconds, then plug it in again. The computer
will restart if automatic star t on power los s is set in Com pute r Set up.
If it does not restart, press the power button to start the computer.
Reconfigure your computer afte r ins tal li ng a non –pl ug and p lay
●
expansion board or other op tion .
Be sure that all the needed device drivers have been installed. For
●
example, if you are using a printer, you need a driver for that model
printer.
Remove all bootable media (dis ke tte, CD, or USB dev ic e) from th e
●
system before turning it on.
If you have installed an operating system other than the factory-
●
installed operating system, check to be sure that it is supported on the
system.
If the system has multiple video sources (embedded, PCI, or PCI-
●
Express adapters) installed and a single monitor, the monitor must be
plugged into the monitor connector on the source selected as the
primary VGA adapter. During bo ot, the oth er m oni tor con nec tor s are
disabled and if the monitor is conne cte d into the se ports , the mo nitor
will not function. You can select whic h so urc e wil l be the defa ult V GA
source in Computer Setup.
CAUTION: When the computer is plugged into an AC power
source, there is always voltage applied to the system board. You
must disconnect the power cord from the power source before
opening the computer to prevent system board or component
damage.
14 Chapter 2 Getting Started ENWW
Page 21

Before You Call for Technical Support
If you are having problems with the computer, try the appropriate solutions
below to try to isolate the exact problem before calling for technical support.
Run the diagnostics utility (available on some models only). Refer to
●
the Troubles
CD for more information.
Run the hard drive self-test in Computer Setup. Refer to the Computer
●
Setup (F10) Utility Guide on the Documentation and Diagnostics CD
for more information.
Check the power LED on the front of the computer to see if it is flashing.
●
The flashing lights are error codes that will help you diagnose the
problem. Refer to the Troubl es hooting Guide on the Documentation
and Diagnostics CD for mor e information.
If the screen is blank, plug the monitor into a different video port on the
●
computer if one is available. Or, change out the monitor with a monitor
that you know is functioning properly.
If you are working on a network, plug another computer with a different
●
cable into the network connection. There may be a problem with the
network plug or cable.
If you recently added new hardware, remove the hardware and see if
●
the computer functions properly.
If you recently installed new so ftware, uni ns tal l the software and see
●
if the computer functions properly.
hooting Guide on the Do cu men t ati on and Dia gnos ti cs
ENWW
Boot the computer to the Safe Mode to see if it will boot without all of
●
the drivers loaded. When booting the operating system, use “Last
Known Configuration.”
Refer to the comprehensive online technical support at
●
http://www.hp.com/support.
Refer to Helpful Hints on page 13
●
in this guide for more general
suggestions.
Refer to the c
●
omprehensive Troubles hooting Guide on the
Documentation and Diagnostics CD for more detailed information.
Restore the system to a Recovery Point created in HP Backup and
●
Recovery Manager or run the Restore Plus! CD. For more information
Basic Troubleshooting
15
Page 22

on using HP Backup and Recovery Manager, refer to the HP Backup
and Recovery Manager User Guide by selecting Start > HP Backup
and Recovery > HP Backup and Recovery Manager Manu al.
CAUTION: Running the Restore Plus! CD will erase all data on the
hard drive.
To assist you in resolving problems online, HP Instant Support Professional
Edition provides you with self-solve diagnostics. If you need to contact HP
support, use HP Instant Support Professional Edition's online chat feature.
Access HP Instant Support Professional Edition at: http://www.hp.com/go/
ispe.
Access the Business Su ppo rt Cen t er (BS C) at http://www.hp.com/go/
bizsupport for the latest online suppor t info rm ati on, s oftwa re a nd driv er s,
proactive notification, and worldwide community of peers and HP experts.
If it becomes necessary to call for technical assistance, be prepared to do
the following to ensure that you r se rv ic e ca ll i s han dled properly:
Be in front of your computer when you call.
●
Write down the computer serial number and product ID number, and
●
the monitor serial number before calling.
Spend time troubleshooting the problem with the service technician.
●
Remove any hardware that was recently added to your system.
●
Remove any sof tware that was recently installed.
●
Run the Restore Plus! CD.
●
CAUTION: Running the Restore Plus! CD will erase all data on the
hard drive.
NOTE: For sales information and warranty upgrades (Care Packs),
call an authorized serv ic e pr ov id er or dea ler .
Chapter 2 Getting Started
16
ENWW
 Loading...