

Page 1

HP 1U Rackmount
About this device
Keyboard with USB
Installation Instructions
© Copyright 2006 Hewlett-Packard Development Company, L.P.
The information contained herein is subject to change without notice. The
only warranties for HP products and services are set forth in the express
warranty statements accompanying such products and services. Nothing
herein should be construed as constituting an additional warranty. HP shall
not be liable for technical or editorial errors or omissions contained herein.
January 2006 (First Edition)
Part Number 408569-001
The HP 1U Rackmount Keyboard with USB is a rackmountable 1U keyboard with touchpad.
NOTE: 1U equals 4.5 cm (1.8 in).
The 1U rackmount keyboard is mounted on rails with space
available to add a 1U KVM switch behind the unit. The 1U
rackmount keyboard can be used with all HP 5000 and
10000 Series racks.
Kit contents
The kit contains the following:
• HP 1U Rackmount Keyboard with USB (1)
• M6 screws (4)
• 6-32 screws (5)
• HP 1U Adjustable Toolless Rails (2)
• Cable management arm with brace rail (1)
• Lock plates (2)
• USB cables (2)
• PS/2 cables (2)
• USB cable labels (4)
This kit contains extra hardware for your convenience.
Rack warning
WARNING: To reduce the risk of personal
injury or damage to the equipment, be
sure that:
• The leveling feet are extended to the
floor.
• The full weight of the rack rests on the
leveling feet.
• The stabilizing feet are attached to the
rack if it is a single-rack installation.
• The racks are coupled together in
multiple-rack installations.
• Only one component is extended at a
time. A rack may become unstable if
more than one component is extended
for any reason.
Page 2
Installing the HP 1U Rackmount
Keyboard with USB
NOTE: If the HP 1U Adjustable Toolless Rails do not
snap into place, ensure that they align with the holes
marked on the rack. The holes marked on the rack
must be in the same location for the front and rear of
the rack.
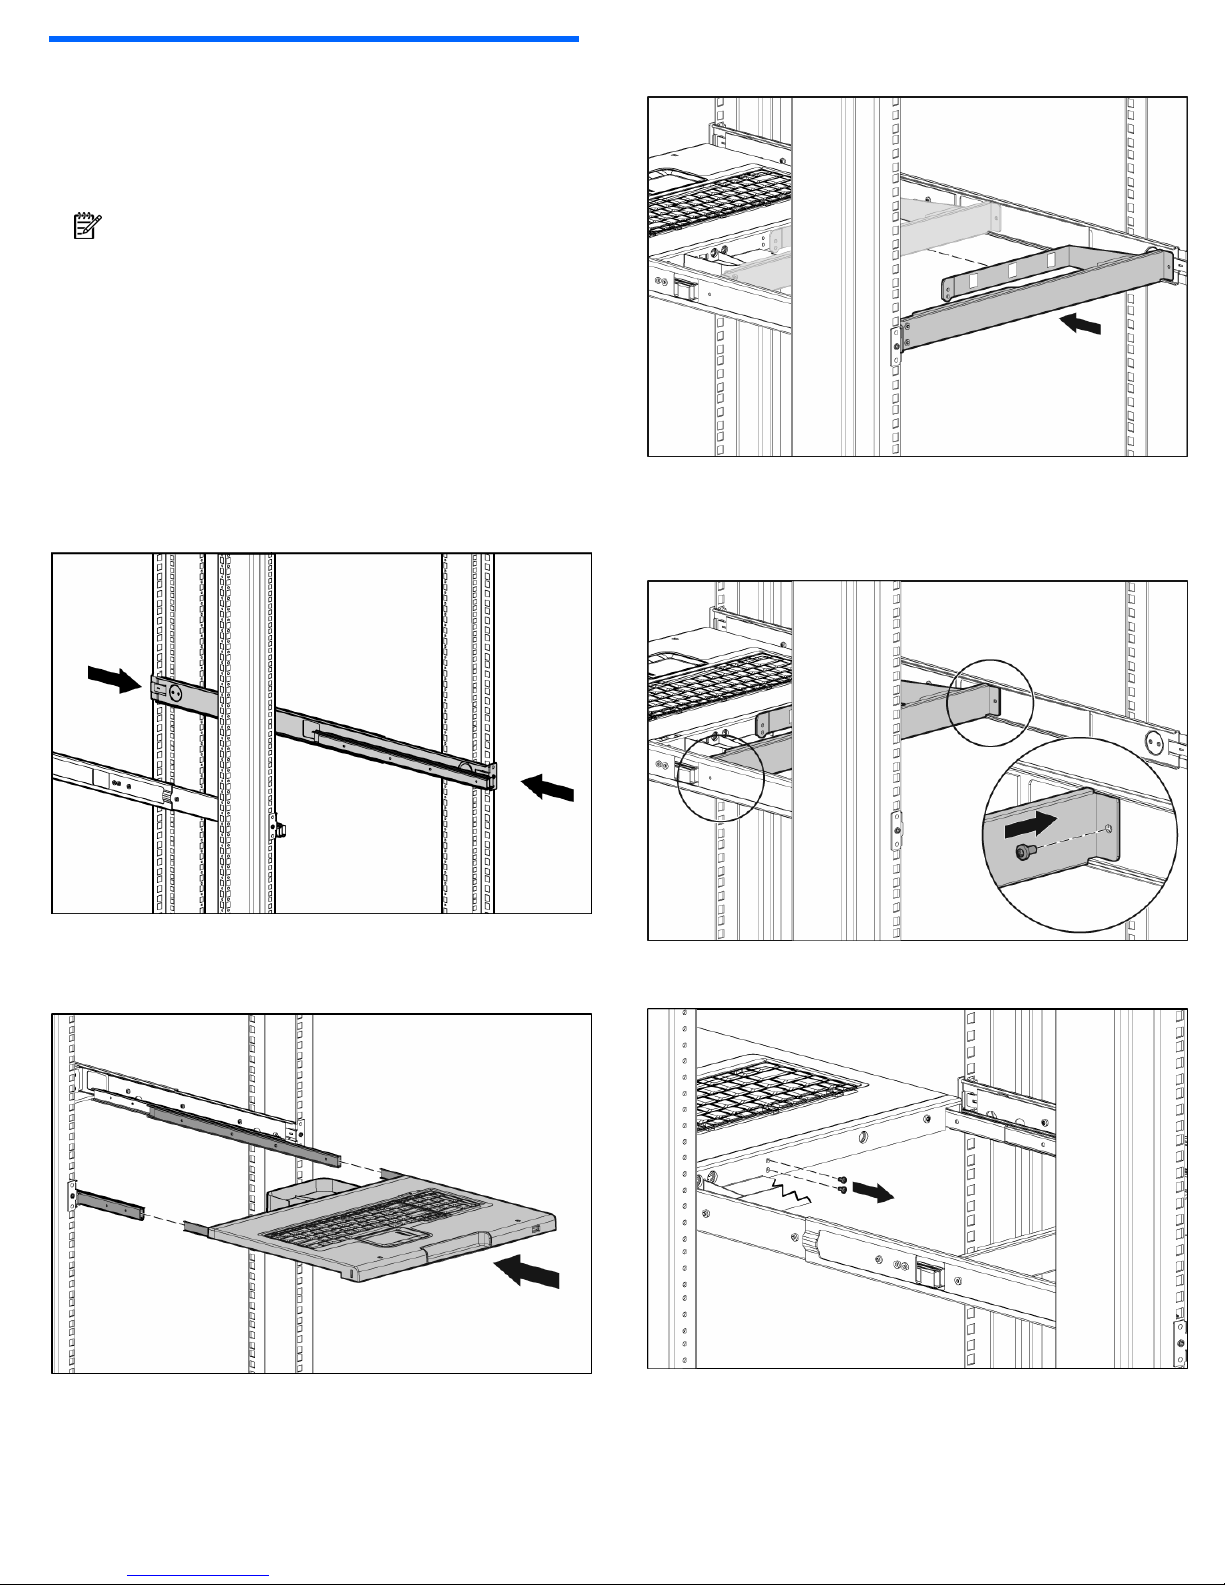
1. Align the HP 1U Adjustable Toolless Rails with the
holes marked on the rack, and snap them into place.
a. Snap one end of the HP 1U Adjustable Toolless
Rails into the Retma rails.
b. Extend the other half of the HP 1U Adjustable
Toolless Rails to meet the appropriate rack depth,
and snap them into place.
4. Slide the brace rail assembly in between the HP 1U
Adjustable Toolless Rails from the rear of the rack.
5. Align the screw holes on the brace rail with the screw
holes on the HP 1U Adjustable Toolless Rails.
6. Secure the brace rail to the HP 1U Adjustable Toolless
Rails with two 6-32 screws.
2. Extend the inner slides until they lock into place.
3. Align the unit with the extended inner slides, inserting
the unit into the rack.
7. Remove the two shipping screws from the rear of the
1U rackmount keyboard and discard the screws.
Page 3
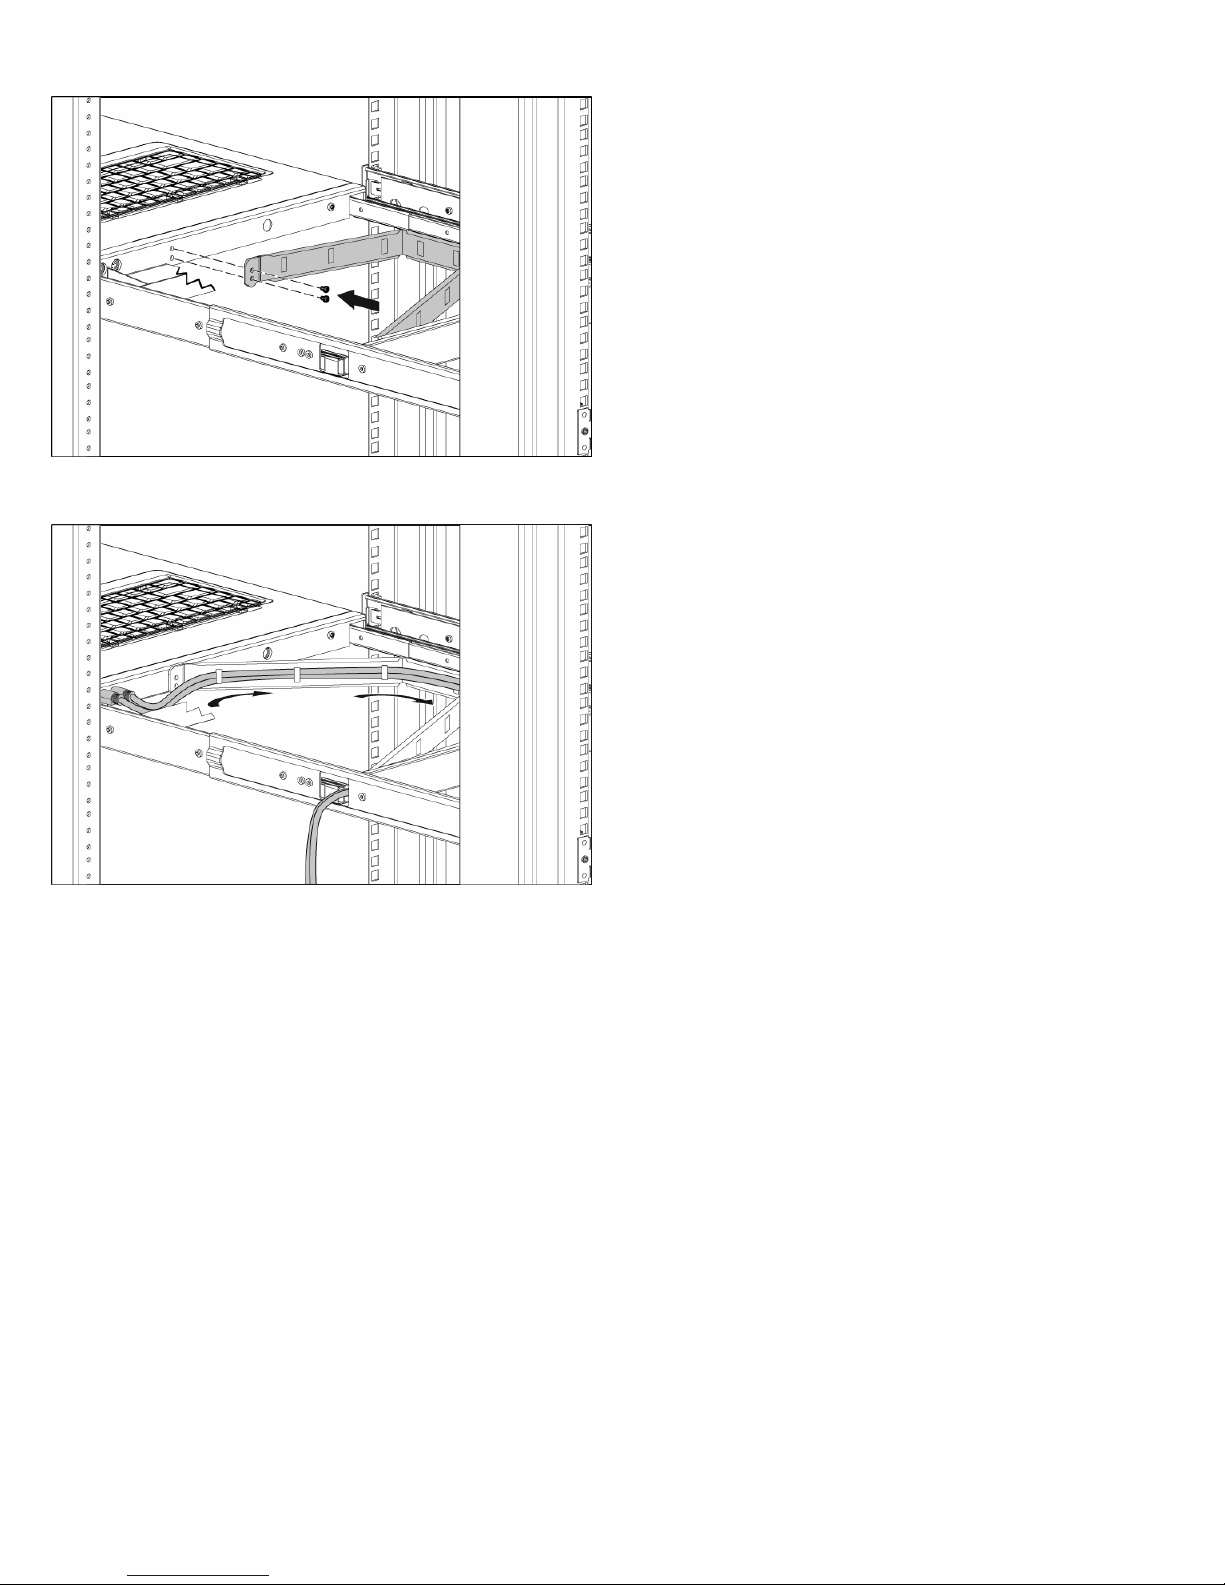
8. Attach the cable management arm to the rear of the
unit with two 6-32 screws.
9. Connect and route the cables through the cable
management arm and opening in the rail.
Installation is complete.
 Loading...