

Page 1

HP 3PAR Online Import for EMC Storage Data Migration Guide 1.2.0
Abstract
This guide provides information on using HP 3PAR Online Import for EMC Storage software to migrate data from an EMC
Storage system to an HP 3PAR StoreServ Storage system.
HP Part Number: QL226-98029
Published: January 2015
Edition: 3
Page 2

© Copyright 2014, 2015 Hewlett-Packard Development Company, L.P.
Confidential computer software. Valid license from HP required for possession, use or copying. Consistent with FAR 12.211 and 12.212, Commercial
Computer Software, Computer Software Documentation, and Technical Data for Commercial Items are licensed to the U.S. Government under
vendor's standard commercial license.
The information contained herein is subject to change without notice. The only warranties for HP products and services are set forth in the express
warranty statements accompanying such products and services. Nothing herein should be construed as constituting an additional warranty. HP shall
not be liable for technical or editorial errors or omissions contained herein.
Acknowledgements
Microsoft®, Windows®, Windows® 7, and Windows Server® are trademarks of the Microsoft Group of companies.
Page 3

Contents
1 Overview of HP 3PAR Online Import for EMC Storage....................................7
Types of Data Migration............................................................................................................7
Understanding Which Data is Migrated......................................................................................7
EMC to HP 3PAR Migration Process............................................................................................8
2 Migration Process Checklists........................................................................9
Online Migration......................................................................................................................9
Prerequisite Component Installation........................................................................................9
Premigration........................................................................................................................9
Migration.........................................................................................................................10
Post-Migration....................................................................................................................10
Minimally Disruptive Migration.................................................................................................11
Prerequisite Component Installation......................................................................................11
Premigration......................................................................................................................11
Migration.........................................................................................................................12
Post-Migration....................................................................................................................12
Offline Migration....................................................................................................................12
Prerequisite Component Installation......................................................................................12
Premigration......................................................................................................................13
Migration.........................................................................................................................13
Post-Migration....................................................................................................................14
3 Installation and Setup for Data Migration.....................................................15
Configuration Rules for HP 3PAR Online Import for EMC Storage Support......................................15
Installing EMC SMI-S Provider..................................................................................................15
Configuring EMC SMI-S Provider..............................................................................................16
Installing the HP 3PAR Online Import Utility for EMC Storage.......................................................17
Migrations Supported by HP 3PAR Online Import Utility for EMC Storage......................................24
Migrations Supported for VNX, CLARiiON CX4, and VMAX...................................................25
Migrations Supported by the HP 3PAR Online Import Utility for VMAX Only..............................28
4 Preparing for Data Migration.....................................................................30
Data Migration Considerations.................................................................................................30
General Considerations......................................................................................................30
System Requirements..........................................................................................................31
Planning for Migration........................................................................................................31
Reconfiguring the Host DSM................................................................................................31
Network and Fabric Zoning Requirements.............................................................................32
Premigration Steps..................................................................................................................33
Zoning the Source EMC Storage to the Destination HP 3PAR StoreServ Storage System...............33
Preparing the Host for MDM...............................................................................................34
Preparing Windows Clusters for Migration........................................................................35
Identifying the Source and Destination Storage Systems..........................................................35
Prerequisites.................................................................................................................35
Required Information.....................................................................................................36
Identifying the Source Storage System..............................................................................36
Identifying the Destination Storage System........................................................................37
Creating the Data Migration Task........................................................................................37
5 Performing Online Data Migration Using Linux.............................................40
Online Data Migration with Removal of EMC PowerPath..............................................................40
Viewing Migration Status....................................................................................................45
Viewing all Migrations...................................................................................................45
Contents 3
Page 4

Viewing Migrations for a Selected Source Storage System..................................................45
Viewing a Selected Migration.........................................................................................45
Viewing Selected Migration Progress by Volume................................................................45
Online Data Migration with Native device-mapper Multipath.......................................................45
Viewing Migration Status....................................................................................................50
Viewing all Migrations...................................................................................................50
Viewing Migrations for a Selected Source Storage System..................................................50
Viewing a Selected Migration.........................................................................................50
Viewing Selected Migration Progress by Volume................................................................50
6 Performing MDM Using a Windows Host.....................................................51
Required Information...............................................................................................................51
Creating the Data Migration Task.............................................................................................51
Updating Host Multipath Software and Unzoning from the Source EMC Storage System..................52
Starting the Data Migration from Source EMC Storage System to Destination HP 3PAR StoreServ
Storage System.......................................................................................................................54
Bringing the Windows Host Back Online...................................................................................54
Viewing Migration Status.........................................................................................................55
Viewing all Migrations........................................................................................................55
Viewing Migrations for a Selected Source Storage System.......................................................55
Viewing a Selected Migration..............................................................................................55
Viewing Selected Migration Progress by Volume....................................................................55
Aborting a Migration..............................................................................................................55
Performing Subsequent Migrations............................................................................................55
7 Performing MDM Using a Linux Host...........................................................56
Required Information...............................................................................................................56
Creating the Data Migration Task.............................................................................................56
Updating Host Multipath Software and Unzoning from Source EMC Storage System........................57
Starting the Data Migration from Source EMC Storage System to Destination HP 3PAR StoreServ
Storage System.......................................................................................................................58
Bringing the Linux Host Back Online..........................................................................................59
Viewing Migration Status.........................................................................................................60
Viewing all Migrations........................................................................................................60
Viewing Migrations for a Selected Source Storage System.......................................................60
Viewing a Selected Migration..............................................................................................60
Viewing Selected Migration Progress by Volume....................................................................60
Aborting a Migration..............................................................................................................60
Performing Subsequent Migrations............................................................................................60
8 Performing MDM Using a Hyper-V Host.......................................................61
Required Information...............................................................................................................61
Creating the Data Migration Task.............................................................................................61
Updating Host Multipath Software and Unzoning from the Source EMC Storage System..................62
Starting the Data Migration from Source EMC Storage System to Destination HP 3PAR StoreServ
Storage System.......................................................................................................................63
Bringing the Hyper-V Host Back Online......................................................................................64
Viewing Migration Status.........................................................................................................64
Viewing all Migrations........................................................................................................64
Viewing Migrations for a Selected Source Storage System.......................................................64
Viewing a Selected Migration..............................................................................................64
Viewing Selected Migration Progress by Volume....................................................................64
Aborting a Migration..............................................................................................................64
Performing Subsequent Migrations............................................................................................65
9 Performing Offline Data Migration..............................................................66
Prerequisite Component Installation...........................................................................................66
4 Contents
Page 5

Preparing Host for Migration....................................................................................................66
Preparing Windows Clusters for Migration............................................................................66
Zoning the Host to the Destination HP 3PAR StoreServ Storage System...........................................66
Shutting Down the Host...........................................................................................................66
Removing the Host from the Storage Group................................................................................66
Identifying the Source and Destination Storage Systems...............................................................66
Prerequisites......................................................................................................................67
Required Information..........................................................................................................67
Identifying the Source Storage System...................................................................................67
Identifying the Destination Storage System.............................................................................67
Creating the Data Migration Task.............................................................................................68
Starting the Data Migration from Source EMC Storage System to Destination HP 3PAR StoreServ
Storage System.......................................................................................................................69
Performing Post-Migration Tasks................................................................................................70
10 Removing a Storage System from EMC SMI-S Provider.................................71
11 HP 3PAR Online Import Utility for EMC Storage: Commands.........................73
adddestination.......................................................................................................................73
addsource.............................................................................................................................74
createmigration......................................................................................................................76
help......................................................................................................................................78
installcertificate......................................................................................................................78
removedestination...................................................................................................................79
removemigration.....................................................................................................................80
removesource.........................................................................................................................80
showconnection.....................................................................................................................80
showdestination......................................................................................................................81
showmigration.......................................................................................................................82
showmigrationdetails..............................................................................................................83
showsource............................................................................................................................84
startmigration.........................................................................................................................84
12 Troubleshooting......................................................................................86
Understanding the HP 3PAR Online Import Utility Data Migration Process......................................86
HP 3PAR Online Import Utility Service.......................................................................................87
HP 3PAR Online Import Utility Server Logs and Output................................................................87
Increase the HP 3PAR Online Import Utility Server Logging Level..............................................87
EMC SMI-S Provider Server Logs and Output..............................................................................88
Increasing the EMC SMI-S Provider Server Logging Level.........................................................88
Troubleshooting Communication Between the HP 3PAR Online Import Utility Server and EMC SMI-S
Provider.................................................................................................................................88
TestSmiProvider Login and Command Examples with Output.........................................................90
HP 3PAR Online Import Utility for EMC Storage Error Messages...................................................93
Troubleshooting Issues.............................................................................................................94
Not able to add a source EMC Storage system......................................................................94
Not able to create migration...............................................................................................95
Initiating a createmigration command to create a host on a destination produces an error
message...........................................................................................................................95
HP Storage Migration group user receives an error message when attempting to login to the
HP 3PAR Online Import Utility.............................................................................................95
Migrated LUNs with No Host in a Storage Group Failed OIU:createmigration............................96
OIU:createmigration Error for LUN Name or Host Name Containing Special Characters.............96
HP 3PAR Online Import Utility does not open on Windows 7 when double-clicking icon or right
mouse-click icon and selecting “Run As Administrator”............................................................96
Contents 5
Page 6

HP 3PAR Online Import Utility startmigration error for Host name greater than 31 characters or
with spaces.......................................................................................................................96
Error Logging into the HP 3PAR Online Import Utility CLI.........................................................96
HP 3PAR Online Import Utility createmigration Results in “ERROR: OIUERRAPP0000 An unexpected
error occurred.” or “OIURSLAPP0000 Contact HP support. You may try restarting the application
service.”...........................................................................................................................96
HP 3PAR Online Import Utility createmigration Results in “ERROR: OIUERRDB1006 Database
constraint violated”............................................................................................................96
HP 3PAR Online Import Utility createmigration Results in “preparationfailed(-NA-)(OIUERRPREP1014:
Error creating host on destination)”.......................................................................................97
HP 3PAR Online Import Utility createmigration ERROR: OIUERRCS1002....................................97
HP 3PAR Online Import Utility addsource ERROR: OIUERRDST0004.........................................97
An “unexpected error” message when destprov/destcpg are not specified for all LUNs...............98
Error message when source array LUN has persistent reservation..............................................98
An adddestination Command May Fail When HP 3PAR Online Import Utility for EMC Storage
Attempts to Connect an HP 3PAR Storage System when using Secure Connections......................98
Error when Importing LUN of Size Smaller than 256 MB.......................................................100
Restarted Migration Showed Incorrect FAILED Status.............................................................101
Migration Includes Unexpected LUNs and Hosts...................................................................101
Masking View Required for Offline Migration of LUN with No Host........................................101
HP 3PAR Online Import Utility for EMC Storage does not distinguish between source arrays when
managing same host........................................................................................................101
13 Support and Other Resources.................................................................102
Contacting HP......................................................................................................................102
HP 3PAR documentation........................................................................................................102
Typographic conventions.......................................................................................................105
HP 3PAR branding information...............................................................................................105
14 Documentation feedback.......................................................................106
Glossary..................................................................................................107
Index.......................................................................................................108
6 Contents
Page 7

1 Overview of HP 3PAR Online Import for EMC Storage
HP 3PAR Online Import for EMC Storage manages the migration of data from a source EMC
Storage system to a destination HP 3PAR StoreServ Storage system. Using HP 3PAR Online Import
for EMC Storage, you can migrate EMC volumes and host configuration information to a destination
HP 3PAR StoreServ Storage system without changing host configurations or interrupting data access.
The terms storage system and array are used interchangeably throughout this guide, and may
refer to either the EMC Storage or HP 3PAR StoreServ Storage systems. The source in the migration
is the EMC Storage system, and the destination is the HP 3PAR StoreServ Storage system.
HP 3PAR Online Import for EMC Storage coordinates the movement of data from the source to the
destination while servicing I/O requests from the hosts. During the data migration, host I/O is
serviced from the destination HP 3PAR StoreServ Storage system. The host/volume presentation
implemented on the EMC Storage is maintained on the destination HP 3PAR StoreServ Storage
system.
Types of Data Migration
The HP 3PAR Online Import Software supports three types of data migration procedures. The
appropriate type of data migration depends on the objects being migrated and the migration type.
• Online—Migration type used when migrating a host or a volume presented to a host. During
online migration, all presentation relationships between hosts and volumes being migrated
are maintained. Host I/O to the data is not disrupted during an online migration.
• Minimally disruptive migration (MDM)—Migration type used when migrating a host or a
volume presented to a host. Host I/O is interrupted only during the time it takes to reconfigure
the host.
• Offline—Migration type used when migrating one or more unpresented volumes. During offline
migration, only the selected volumes are migrated. No hosts are migrated in this situation.
For additional information about online migration, see the support matrix for online import for EMC
Storage on HP SPOCK:
HP SPOCK (http://www.hp.com/storage/spock)
Understanding Which Data is Migrated
Data can be migrated by selecting a host or a volume on the source EMC Storage system. In
addition to the host or volume explicitly selected for an online migration or for MDM, other objects
can be included in the migration using implicit selection. A premigration process identifies the
relationship between hosts and presented volumes and selects all additional objects to completely
migrate the hosts. Consequently, the objects that will be migrated are the combination of the explicit
and the implicit selection and may lead to the migration of a large amount of volumes.
For example, selecting a single host results in migration of the following:
• The host as well as any volumes presented to it
• Any other hosts to which those volumes are presented
• Any volumes presented to those other hosts
IMPORTANT: The implicit selection of objects for migration occurs automatically and cannot be
modified. If the number of objects selected for migration becomes too large, migration might be
canceled before it is started. Once migration begins, it cannot be stopped. See “Aborting a
Migration” (page 55).
The maximum number of volumes that can be migrated with MDM or an online migration is 255.
If you have more offline volumes to migrate, rerun the migration steps for the additional volumes.
Types of Data Migration 7
Page 8

The migration process selects objects to migrate using the following rules:
• Host—When selecting a single host or group of hosts with volume presentations, all the volumes
presented to the host(s) are migrated. In addition, any presentations the source volumes have
to other hosts will include those hosts and all of their presented volumes in the migration.
• Presented volumes—When selecting a volume or group of volumes with host presentations,
the selected volumes and the hosts to which they are presented are migrated. In addition, any
presentations the source hosts have with other volumes will include those volumes in the
migration.
• Unpresented volumes—Only the selected unpresented volumes are migrated. The offline
migration type is the only type available for unpresented volume migration.
NOTE: For more information about supported and unsupported configurations and about the
implicit selection of objects for migration, see “Migrations Supported by HP 3PAR Online Import
Utility for EMC Storage” (page 24).
EMC to HP 3PAR Migration Process
The process to migrate EMC Storage volumes to HP 3PAR StoreServ Storage system consists of
three parts:
• Premigration—Work done to define the source and destination storage system to a migration
definition. This work is not repeated when migrating a second host or additional volumes after
a first migration.
• Migration—Creating and executing the migration. Migration includes the process of unzoning
the destination storage system from the source storage system and removing the source storage
system after the migration is complete. This work is repeated for every migration.
• Post-migration—Removal of the online import setup.
8 Overview of HP 3PAR Online Import for EMC Storage
Page 9

2 Migration Process Checklists
Follow the steps in this chapter to perform online migration, MDM, or offline migration.
Online Migration
Prerequisite Component Installation
Table 1 Prerequisite component installation—Online
SeeStepNumber
1
Premigration
If EMC PowerPath is installed, it must be uninstalled, and device-mapper must be used to configure
multipathing; see the third column in the Table 2 (page 9) for details about each step. If EMC
PowerPath is not installed, see the column on the right for details.
Table 2 Premigration checklist—Online
1
2
configuration.
Install the HP 3PAR Online Import Utility.3
Zone EMC Storage systems and
HP 3PAR StoreServ Storage
systems as peers.
Add source storage system (HP
3PAR Online Import Utility:
addsource command).
HP SPOCK (http://www.hp.com/storage/spock)Check the HP SPOCK website to confirm proper
See also “Configuration Rules for HP 3PAR Online
Import for EMC Storage Support” (page 15)
“Installing EMC SMI-S Provider” (page 15)Install EMC SMI-S Provider.2
“Installing the HP 3PAR Online Import Utility for
EMC Storage” (page 17)
If EMC PowerPath is installed,
see:StepNumber
“Online Data Migration with
Removal of EMC PowerPath”
(page 40), step 1
“Online Data Migration with
Removal of EMC PowerPath”
(page 40), step 2
If EMC PowerPath is not installed,
see:
“Online Data Migration with
Native device-mapper Multipath”
(page 45), step 1
“Online Data Migration with
Native device-mapper Multipath”
(page 45), step 2
3
4
5 1. Uninstall EMC PowerPath:
Add destination storage system
(HP 3PAR Online Import Utility:
adddestination command).
Zone the host to the HP 3PAR
StoreServ Storage system.
Configure device-mapper on the
host.
“Online Data Migration with
Removal of EMC PowerPath”
(page 40), step 3
“Online Data Migration with
Removal of EMC PowerPath”
(page 40), step 4
“Online Data Migration with
Removal of EMC PowerPath”
(page 40), step 5
“Online Data Migration with
Native device-mapper Multipath”
(page 45), step 3
“Online Data Migration with
Native device-mapper Multipath”
(page 45), step 4
“Online Data Migration with
Native device-mapper Multipath”
(page 45), step 5
Online Migration 9
Page 10

Table 2 Premigration checklist—Online (continued)
If EMC PowerPath is installed,
see:StepNumber
NOTE: (A maintenance
window is required.)
2. Configure device-mapper on
the host:
“Online Data Migration with
Removal of EMC PowerPath”
(page 40), step 6
3. Remount application file
systems:
“Online Data Migration with
Removal of EMC PowerPath”
(page 40), step 7
6
7
Create migration (HP 3PAR Online
Import Utility: createmigration
command)
Change the HP 3PAR host
persona/host OS.
Update path configurations.8
“Online Data Migration with
Removal of EMC PowerPath”
(page 40), steps 8–10
“Online Data Migration with
Removal of EMC PowerPath”
(page 40), step 11
“Online Data Migration with
Removal of EMC PowerPath”
(page 40), steps 12–14
If EMC PowerPath is not installed,
see:
“Online Data Migration with
Native device-mapper Multipath”
(page 45), steps 6–8
“Online Data Migration with
Native device-mapper Multipath”
(page 45), step 9
“Online Data Migration with
Native device-mapper Multipath”
(page 45), steps 10–12
Migration
Table 3 Migration checklist—Online
1
2
3
Post-Migration
Table 4 Post-migration checklist—Online
Start the migration (HP 3PAR
Online Import Utility:
startmigration.
Monitor migration with the
HP 3PAR Online Import Utility until
completion.
definition when the migration has
completed.
StepNumber
When all migrations are complete, remove the source storage system (EMC).1
Remove peer zones and reconfigure peer ports to host ports.2
.
If you uninstalled EMC PowerPath
(in “Premigration” (page 9), step
5):StepNumber
“Online Data Migration with
Removal of EMC PowerPath”
(page 40), step 15
“Viewing Migration Status” (page
55)
If you are using native
device-mapper-multipath:
“Online Data Migration with
Native device-mapper Multipath”
(page 45), step 13
“Viewing Migration Status” (page
55)
“removemigration” (page 80)“removemigration” (page 80)Optional: Remove the migration
10 Migration Process Checklists
Page 11

Minimally Disruptive Migration
Prerequisite Component Installation
Table 5 Prerequisite component installation—MDM
SeeStepNumber
1
Premigration
Table 6 Premigration checklist—MDM
1
2
4
5
configuration:
Install the HP 3PAR Online Import Utility.3
Zone EMC Storage systems and HP 3PAR
StoreServ Storage systems as peers.
LUNs.
Add destination storage system (HP 3PAR Online
Import Utility: adddestination command).
createmigration command)
HP SPOCK (http://www.hp.com/storage/spock)Check the HP SPOCK website to confirm proper
See also “Configuration Rules for HP 3PAR Online
Import for EMC Storage Support” (page 15)
“Installing EMC SMI-S Provider” (page 15)Install EMC SMI-S Provider.2
“Installing the HP 3PAR Online Import Utility for
EMC Storage” (page 17)
SeeStepNumber
“Zoning the Source EMC Storage to the
Destination HP 3PAR StoreServ Storage System”
(page 33)
“Preparing the Host for MDM” (page 34)Stop all server applications; offline/unmount
“Identifying the Source Storage System” (page 36)Add source storage system.3
“Identifying the Destination Storage System” (page
37)
“Creating the Data Migration Task” (page 37)Create migration (HP 3PAR Online Import Utility:
6
present.
7
Update host native multipath software, finish
zoning, and shut down the host.
Follow EMC PowerPath documentation instructions.Remove EMC PowerPath from the server, if
• For Windows:
“Updating Host Multipath Software and
Unzoning from the Source EMC Storage
System” (page 52)
• For Linux:
“Updating Host Multipath Software and
Unzoning from Source EMC Storage System”
(page 57)
• For Hyper-V:
“Updating Host Multipath Software and
Unzoning from the Source EMC Storage
System” (page 62)
Minimally Disruptive Migration 11
Page 12

Migration
Table 7 Migration checklist—MDM
SeeStepNumber
1
2
Start the migration (HP 3PAR Online Import Utility:
startmigration command)
Restart the host and rescan migrating disks.
Restart server applications (including cluster).
• For Windows:
“Starting the Data Migration from Source EMC
Storage System to Destination HP 3PAR
StoreServ Storage System” (page 54)
• For Linux:
“Starting the Data Migration from Source EMC
Storage System to Destination HP 3PAR
StoreServ Storage System” (page 58)
• For Hyper-V:
“Starting the Data Migration from Source EMC
Storage System to Destination HP 3PAR
StoreServ Storage System” (page 63)
• For Windows:
“Bringing the Windows Host Back Online”
(page 54)
• For Linux:
“Bringing the Linux Host Back Online” (page
59)
• For Hyper-V:
“Bringing the Hyper-V Host Back Online” (page
64)
3
Import Utility until completion.
4
the migration has completed.
Post-Migration
Table 8 Post-migration checklist—MDM
StepNumber
1
Remove zoning between the EMC Storage system and HP 3PAR StoreServ Storage system after all
migrations from the EMC Storage system are complete.
When all migrations are complete, remove the source storage system (EMC).2
Remove peer zones and reconfigure peer ports to host ports.3
.
Offline Migration
Prerequisite Component Installation
Table 9 Prerequisite component installation—offline
“Viewing Migration Status” (page 55)Monitor migration with the HP 3PAR Online
“removemigration” (page 80)Optional: Remove the migration definition when
SeeStepNumber
1
configuration.
12 Migration Process Checklists
HP SPOCK (http://www.hp.com/storage/spock)Check the HP SPOCK website to confirm proper
Page 13

Table 9 Prerequisite component installation—offline (continued)
SeeStepNumber
See also “Configuration Rules for HP 3PAR Online
Import for EMC Storage Support” (page 15)
“Installing EMC SMI-S Provider” (page 15)Install EMC SMI-S Provider2
Premigration
Table 10 Premigration checklist—offline
1
2
3
4
5
Migration
Install the HP 3PAR Online Import Utility.3
Zone EMC Storage systems and HP 3PAR
StoreServ Storage systems as peers.
LUNs.
Zone the host and the HP 3PAR StoreServ Storage
system; then shut down the host.
Add source and destination storage systems (HP
3PAR Online Import Utility: addsource and
adddestination commands).
createmigration command)
“Installing the HP 3PAR Online Import Utility for
EMC Storage” (page 17)
SeeStepNumber
“Zoning the Source EMC Storage to the
Destination HP 3PAR StoreServ Storage System”
(page 33)
“Preparing Host for Migration” (page 66)Stop all server applications; offline/unmount
“Zoning the Host to the Destination HP 3PAR
StoreServ Storage System” (page 66)
“Identifying the Source and Destination Storage
Systems” (page 66)
“Creating the Data Migration Task” (page 68)Create migration (HP 3PAR Online Import Utility:
Table 11 Migration checklist—offline
1
2
3
Start the migration (HP 3PAR Online Import Utility:
startmigration command)
Import Utility until completion.
the migration has completed.
SeeStepNumber
“Starting the Data Migration from Source EMC
Storage System to Destination HP 3PAR StoreServ
Storage System” (page 69)
“Viewing Migration Status” (page 55)Monitor migration with the HP 3PAR Online
“removemigration” (page 80)Optional: Remove the migration definition when
Offline Migration 13
Page 14

Post-Migration
Table 12 Post-migration checklist—offline
SeeStepNumber
Follow EMC PowerPath documentation instructions.Perform the following tasks for offline migration1
1. Unzone the source EMC Storage system from
the host.
2. Restart the host.
3. Remove the EMC PowerPath multipath
software, if present, and configure native
multipath software.
4. Export the LUNs to the host on the HP 3PAR
StoreServ Storage system.
2
all migrations are complete.
“Performing Post-Migration Tasks” (page 70).Remove the source storage system (EMC) when
14 Migration Process Checklists
Page 15

3 Installation and Setup for Data Migration
This chapter describes requirements for an online import migration.
Configuration Rules for HP 3PAR Online Import for EMC Storage Support
For detailed information about ensuring that the source EMC Storage system and the destination
HP 3PAR StoreServ Storage system are configured properly for data migration, see the HP SPOCK
website:
HP SPOCK (http://www.hp.com/storage/spock)
The HP SPOCK website lists the supported system environment, including:
• The supported source EMC Storage systems and the associated firmware levels.
• The supported destination HP 3PAR StoreServ Storage systems and the associated HP 3PAR
OS levels.
• The supported host operating systems.
• The supported HBAs and the associated BIOS/firmware/driver versions to allow HP 3PAR
StoreServ Storage and EMC Storage coexistence.
• The supported configuration environments for installing HP 3PAR Online Import for EMC
Storage.
Installing EMC SMI-S Provider
The HP 3PAR Online Import Utility manages the EMC Storage systems through the EMC SMI-S
Provider software. The EMC SMI-S Provider is a component of EMC Solutions Enabler and requires
underlying EMC Solutions Enabler code to function correctly. However, installation of the base
EMC Solutions Enabler software does not include the EMC SMI-S Provider component.
Installation of the EMC SMI-S Provider includes only the necessary underlying EMC Solutions
Enabler code, not a full installation of EMC Solutions Enabler.
NOTE: It is technically possible to install the EMC SMI-S Provider on a machine where EMC
Solutions Enabler is already installed, but be aware that the EMC SMI-S Provider installation
uninstalls any existing EMC Solutions Enabler software and reinstalls only the subset of EMC
Solutions Enabler that comes with the EMC SMI-S Provider.
SMI-S Provider and VMAX require a Fibre Channel connection. VNX and CLARiiON CX4 connect
to the SMI-S Provider over an Ethernet Connection.
For VMAX, a VMAX gatekeeper device must be presented to the SMI-S server.
The EMC Solutions Enabler and the EMC SMI-S Provider are provided by EMC as separately
installable products and are available from the EMC Powerlink website. To install the EMC SMI-S
Provider software, follow these steps:
NOTE: The HP 3PAR Online Import Utility supports installation of the EMC SMI-S Provider only
on Windows.
See product release notes for full installation details:
SMI Provider Release Notes (https://developer-content.emc.com/developer/devcenters/storage/
snia/smi-s/downloads/SMI_Provider_RN.pdf)
This link will take you outside the Hewlett-Packard website. HP does not control and is not responsible
for information outside hp.com.
Configuration Rules for HP 3PAR Online Import for EMC Storage Support 15
Page 16

1. Download EMC SMI-S Provider 4.6.1.6 Installer from EMC. An EMC login account is required.
To download the program, go to the following website:
EMC (https://support.emc.com/downloads/5587_SMI-S-Provider)
NOTE: This link will take you outside the Hewlett-Packard website. HP does not control and
is not responsible for information outside hp.com.
2. Launch the se76123 installer. The EMC Solutions Enabler welcome page appears, prompting
you to install Solutions Enabler with SMI-S version V4.6.1.6.
3. Click Next to begin the installation process.
4. The Destination Folder dialog box opens and prompts you to select an install directory for
Solutions Enabler and EMC SMI-S Provider. It is recommended that you choose the default
directory.
5. Click Next to continue. The Provider List dialog box opens.
6. Select Array Provider.
7. Click Next to continue. The Ready to Install Program dialog box opens.
8. Click Install to begin installing files to your selected folder. This may take several minutes.
9. When the Installation Wizard Completed dialog box opens, click Finish to complete the setup.
Configuring EMC SMI-S Provider
Installing EMC SMI-S Provider is a prerequisite to allow remote software to connect to the EMC
Storage system.
You can either work directly on the EMC SMI-S Provider server or start a Remote Desktop Connection
to it.
1. Open a Windows command prompt on the server where the EMC SMI-S Provider software
is installed.
2. Change the directory to the location of the EMC SMI-S Provider installation. The default is:
C:\Program Files\EMC\ECIM\ECOM\bin
3. In the Windows command prompt, type C:\Program Files\EMC\ECIM\ECOM\bin>
testsmiprovider
4. Accept all default settings when prompted.
5. Attach the storage system to the SMI-S Provider.
NOTE: To migrate both a VMAX storage system and an EMC CLARiiON or VNX storage
system, follow both of the following steps.
a. For VMAX storage systems, any VMAX storage arrays connected to the SMI-S Provider
server will be automatically detected, provided that:
• SMI-S and VMAX have a Fibre Channel connection and are zoned.
• The gatekeeper LUN is presented to the SMI-S server.
If the VMAX does not show up, run the disco command to rescan for arrays. Proceed
to step 6, unless you intend to migrate volumes from an EMC CLARiiON or VNX storage
system.
b. To attach an EMC CLARiiON or VNX storage system to SMI-S Provider, use the addsys
command:
(localhost:5988) ? addsys
Add System {y|n} [n]: y
ArrayType (1=Clar, 2=Symm) [1]:
One or more IP address or Hostname or Array ID
16 Installation and Setup for Data Migration
Page 17

Elements for Addresses
IP address or hostname or array id 0 (blank to quit): <IP address of SPA>
IP address or hostname or array id 1 (blank to quit): <IP address of SPB>
IP address or hostname or array id 2 (blank to quit):
Address types corresponding to addresses specified above.
(1=URL, 2=IP/Nodename, 3=array ID)
Address Type (0) [default=2]:
Address Type (1) [default=2]:
User: <Global Administrator>
global administrator user for CX4 array
Password [null]: <password>
++++EMCAddSystem++++
OUTPUT : 0
Output codes are shown in the following table:
Success0
Not Supported1
Unknown2
Timeout3
Failed4
Invalid Parameter5
Job Queued4096
Size Not Supported4097
6. Use the dv command to verify the storage system is discovered.
NOTE:
If your EMC SMI-S Provider has client IP filtering enabled, you need to add the IP address of the
HP 3PAR Online Import Utility server to the trusted IP address list.
To add an HP 3PAR Online Import Utility server to the EMC SMI-S Provider trusted IP address list:
1. Log into SMI-S ECOM administration page using one of the SMI-S user and password
configured:
• https://<SMI-S IP address>:5989/ECOMConfig
• http://<SMI-S IP address>:5988/ECOMConfig
2. Select the Client IP Filtering link on the ECOM Administration page.
3. Add the HP 3PAR Online Import Utility server IP address in the Trusted client’s IP field on the
Client IP Filtering page and click Execute to complete.
Installing the HP 3PAR Online Import Utility for EMC Storage
These steps describe the process for installing the HP 3PAR Online Import Utility. The HP 3PAR
Online Import Utility software can be obtained from the HP Software Depot using the following
link:
Installing the HP 3PAR Online Import Utility for EMC Storage 17
Page 18

HP Software Depot
(https://h20392.www2.hp.com/portal/swdepot/displayProductsList.do?category=3PAR)
NOTE: If you have HP 3PAR Online Import Utility 1.1.0 and are upgrading to HP 3PAR Online
Import Utility 1.2.0, you must uninstall version 1.1.0 before upgrading to version 1.2.0.
See the HP SPOCK website for supported target environments for the HP 3PAR Online Import Utility
server:
HP SPOCK (http://www.hp.com/storage/spock)
The HP 3PAR Online Import Utility software consists of two installable applications: the HP 3PAR
Online Import Utility client and the HP 3PAR Online Import Utility server.
If one component has already been installed on a given system, and you want to add the second
component on the same system, first run the installer to remove the component already installed,
and then rerun the installer to install both components at once.
The default directories and options are shown below:
• Default Installation Directory
◦ C:\Program Files (x86)\Hewlett-Packard\hp3paremcoiu
• Default Log File Name
◦ hp3paremc.log (under C:\Program Files (x86)\Hewlett-Packard\
hp3paremcoiu\OIUTools\tomcat\32-bit\apache-tomcat-7.0.37\logs)
• Default Port Numbers
Service Port: 2396◦
◦ Shutdown Port: 2397
1. Double-click the Installer Package Image icon to begin the installation process.
The HP 3PAR Online Import Utility splash screen and appears with the InstallShield Wizard.
18 Installation and Setup for Data Migration
Page 19

2. When the Welcome screen appears, click Next.
Installing the HP 3PAR Online Import Utility for EMC Storage 19
Page 20
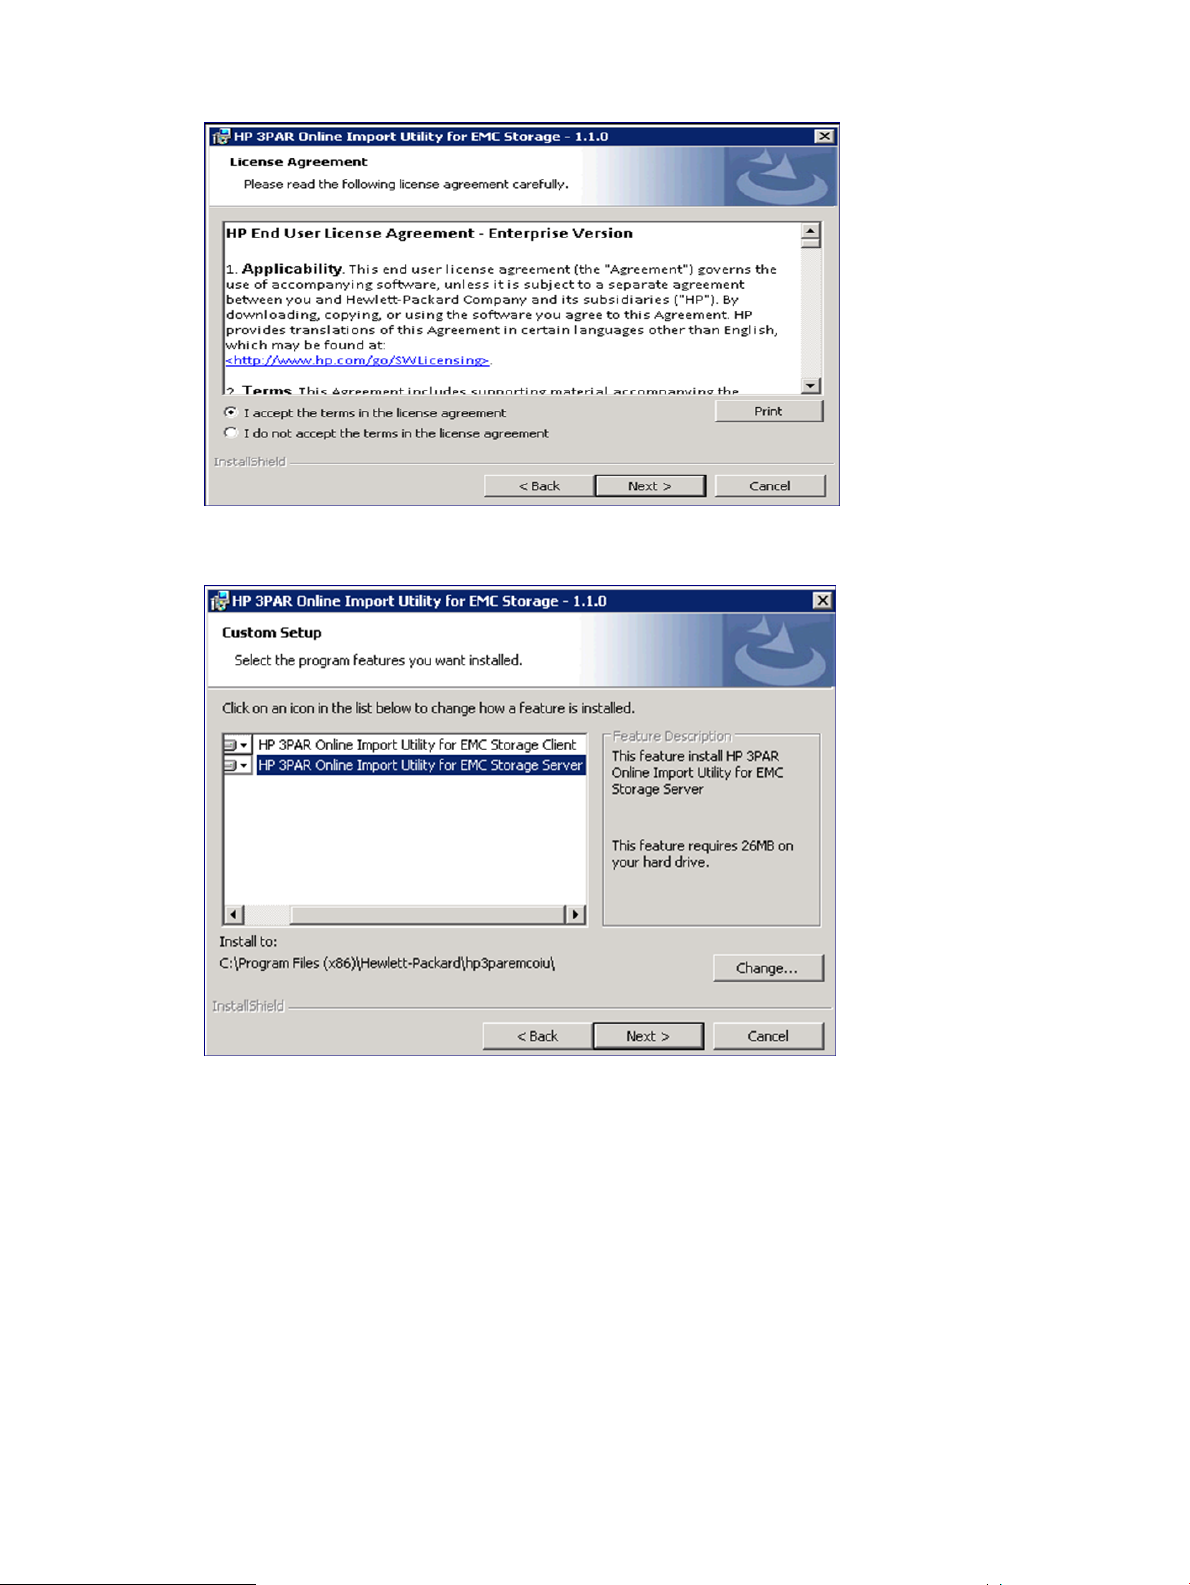
3. Accept the end user license agreement and click Next.
The Custom Setup dialog box appears.
4. To choose the default setup (both the HP 3PAR Online Import Utility server and client installed
on this machine), click Next.
Otherwise, select the component that you want to omit from this installation. Use this option
if you want to install the HP 3PAR Online Import Utility server and client on separate machines,
and then click Next to continue.
5. Click Yes if you have a CA signed certificate, or click No to generate a certificate from the
installer.
20 Installation and Setup for Data Migration
Page 21
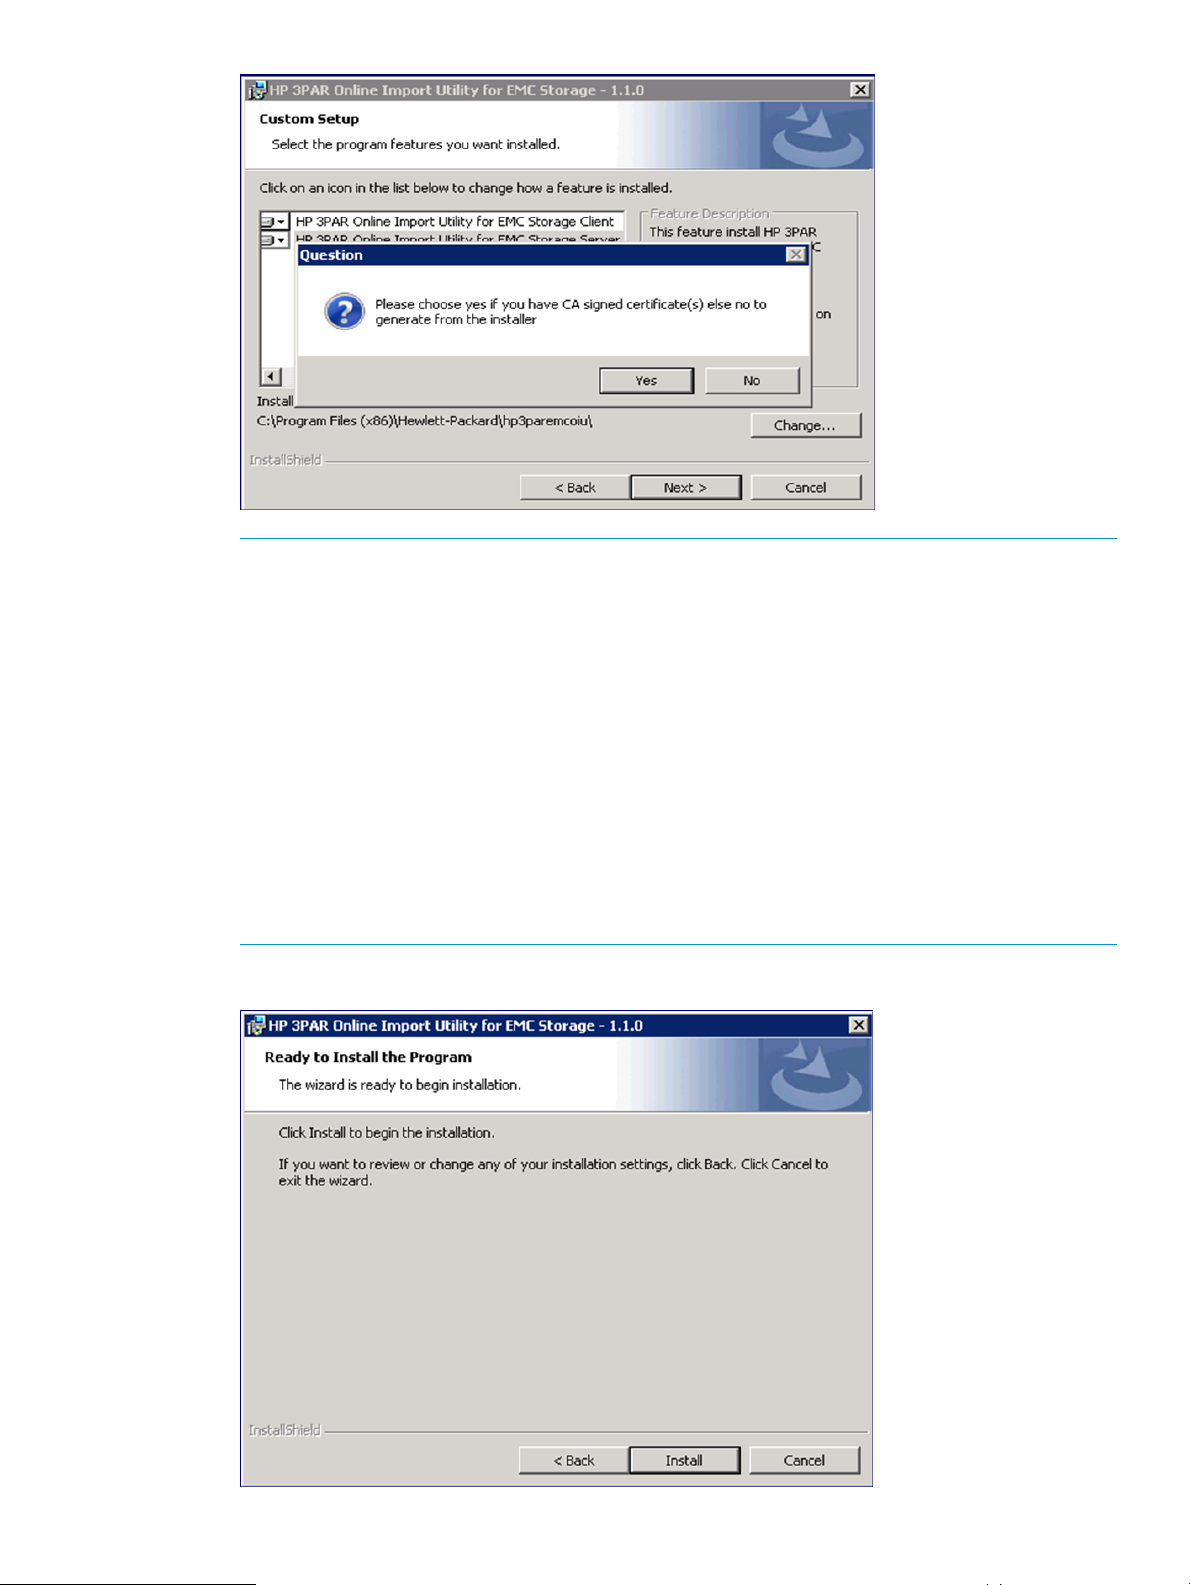
NOTE: After the certificate installation dialog box is passed, the installer checks whether the
default ports are already in use on this machine. If they are, another dialog box will be
displayed, prompting you to specify available ports to use for this installation. This is not a
common occurrence.
NOTE: If there was a conflict with the default port numbers and different port numbers were
supplied to the installation process, the following must be done after installation is complete
to properly use the new ports:
a. Edit OIUCli.bat, located at:
<Install location>\Hewlett-Packard\ hp3paremcoiu\CLI
b. On the following line in the file, change the service port number from the default (2396)
to the supplied port number:
java -jar ..\CLI\oiucli-1.0.0-jar-with-dependencies.jar %* -port
2396
6. Confirm the installation, click Install.
Installing the HP 3PAR Online Import Utility for EMC Storage 21
Page 22
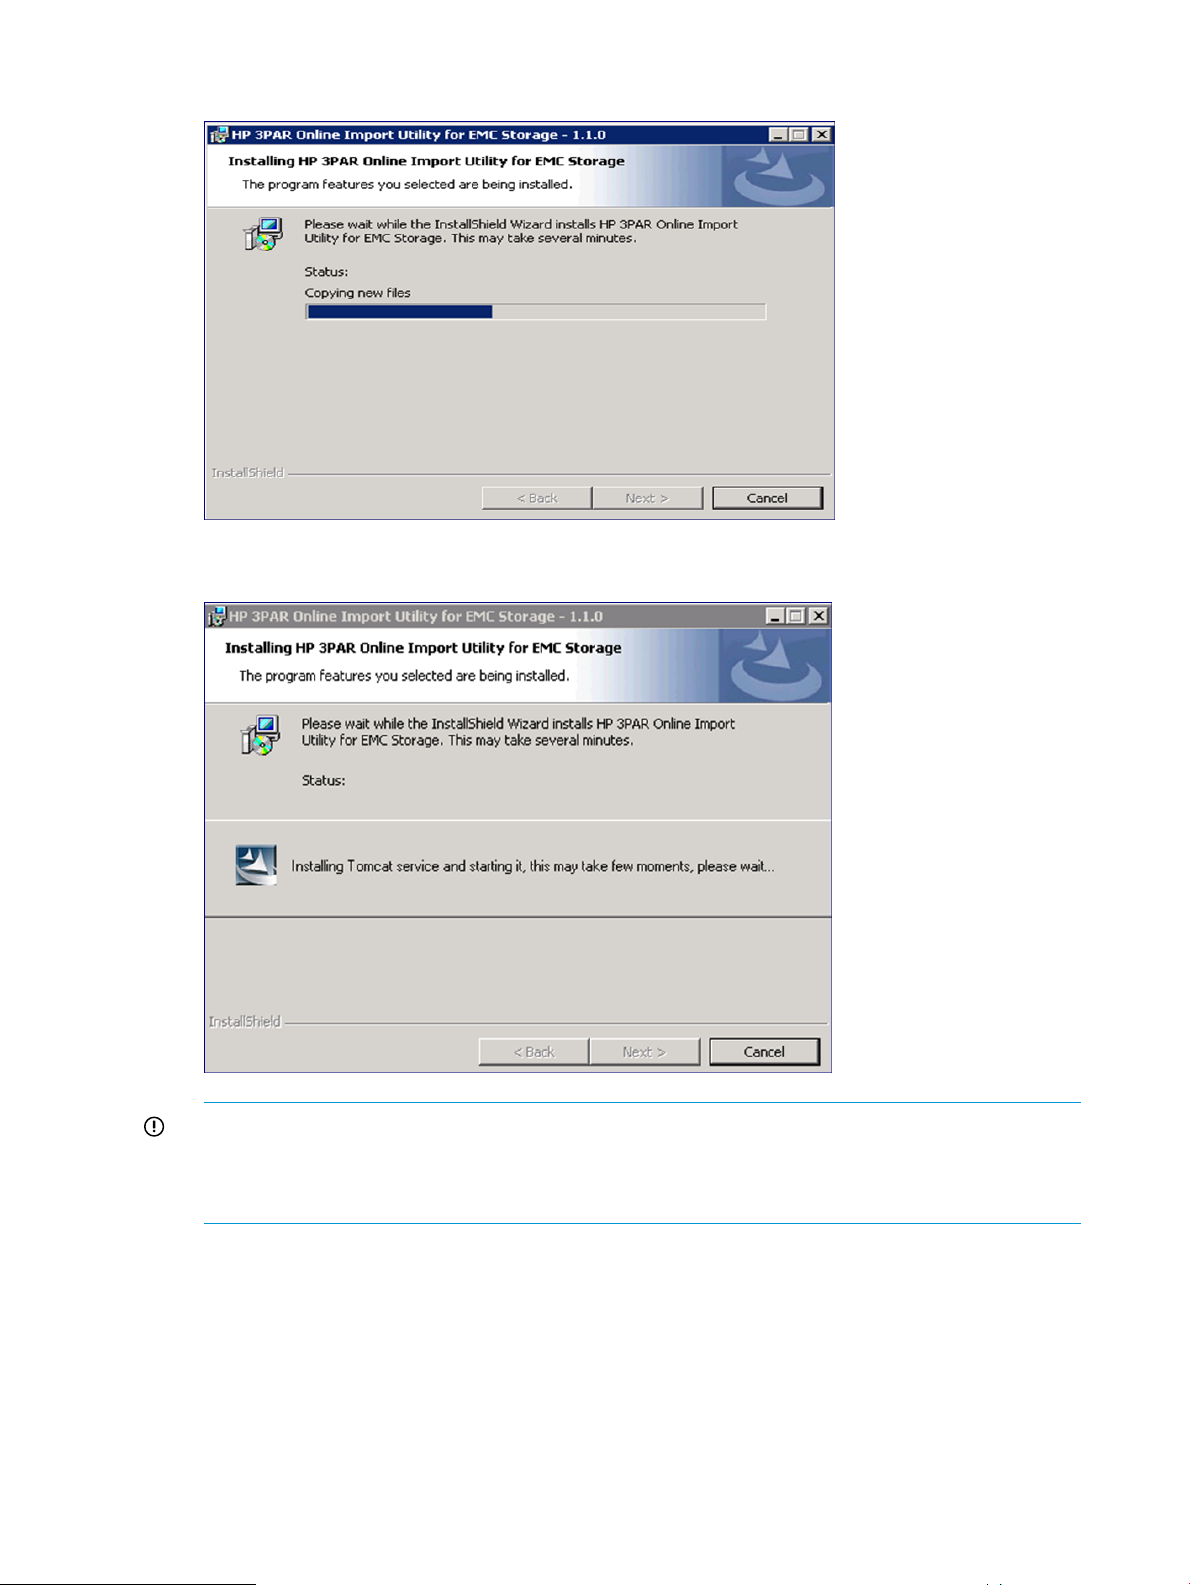
7. Monitor the progress of the installation. When complete, click Next.
8. Tomcat services will begin installation. When complete, click Next.
IMPORTANT: The installer does not support doing a close, cancel, or kill action during the
Tomcat Installation. If the installation of Tomcat is interrupted, the software installation is not
fully cancelled and left in an indeterminate state. Do not click the Cancel button or close the
window by clicking the X in the upper-right corner.
9. When the installation completes, click Finish.
22 Installation and Setup for Data Migration
Page 23
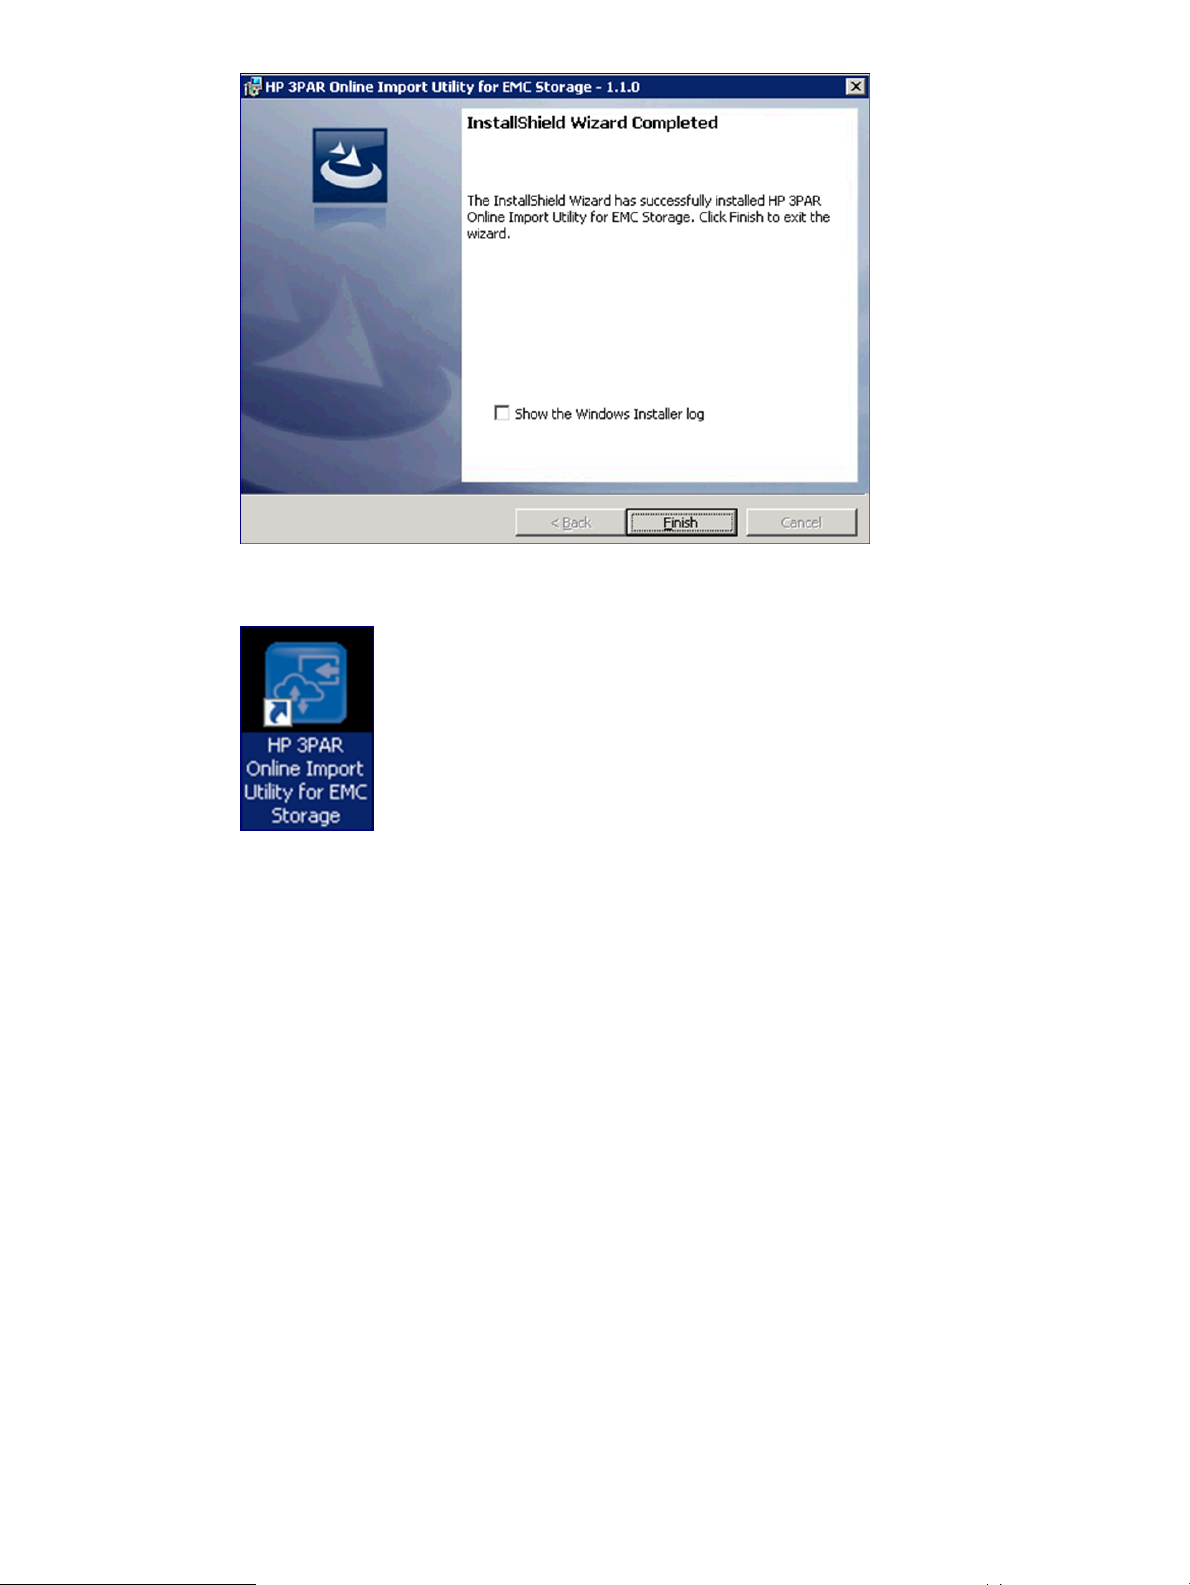
10. The HP 3PAR Online Import Utility shortcut will be installed on your desktop.
11. After successful installation, verify that the HP Storage Migration Admins group has been
created.
12. Add the Administrator account or another account with administrator privileges as a member
of HP Storage Migration Admins group. This is the USERNAME that will be used in starting
the HP 3PAR Online Import Utility.
Installing the HP 3PAR Online Import Utility for EMC Storage 23
Page 24
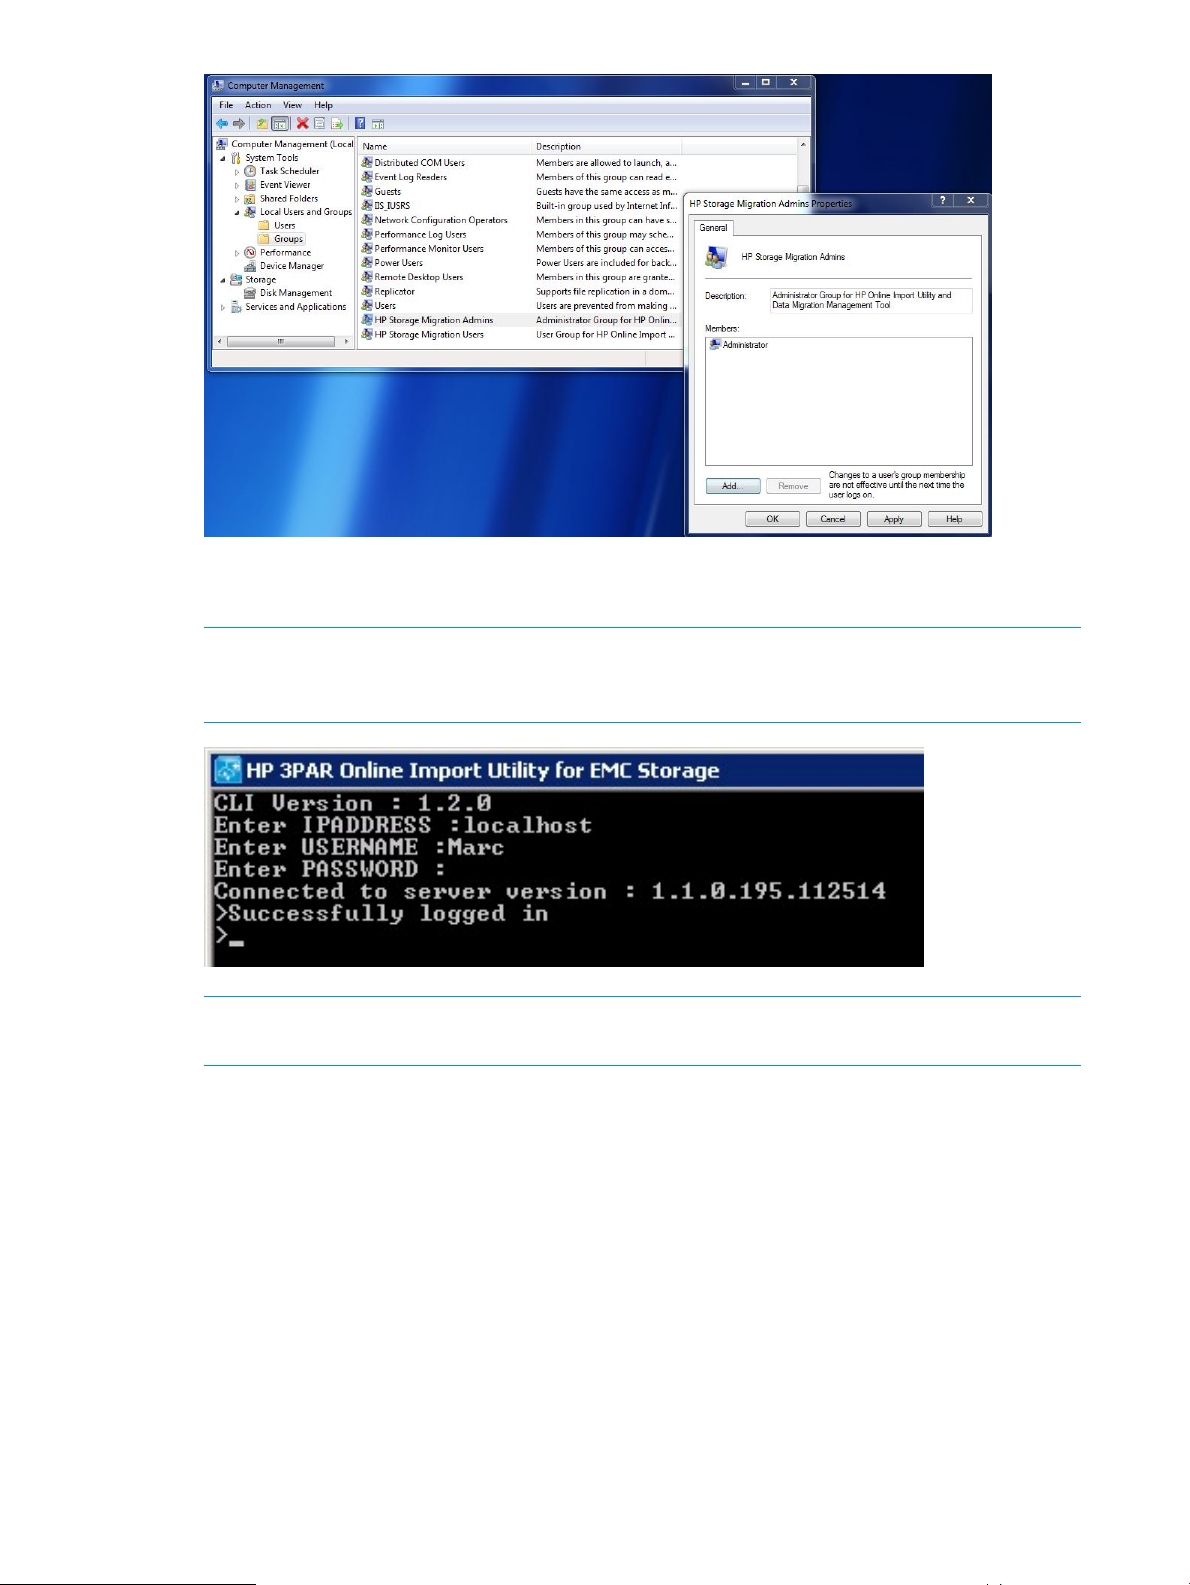
13. To start the utility, double click the HP 3PAR Online Import Utility for EMC Storage desktop
icon, and provide local credentials as stated in the note below.
NOTE: If the client and server have been installed on the same machine, you can use the
keyword LOCALHOST to connect to the local server. Otherwise, use the IP address of the
machine where the server is located.
NOTE: The server version is shown as 1.1.0.195.112514. This is the correct version number
for HP 3PAR Online Import Utility for EMC Storage version 1.2.0.
Migrations Supported by HP 3PAR Online Import Utility for EMC Storage
Verify the types of migrations supported by the HP 3PAR Online Import Utility.
For migration types supported by VNX, CLARiiON CX4, and VMAX, see Table 14 (page 25)
For migration types supported by VMAX only, see Table 15 (page 29)
See Table 13 (page 25) for a legend for the migration-type tables.
24 Installation and Setup for Data Migration
Page 25
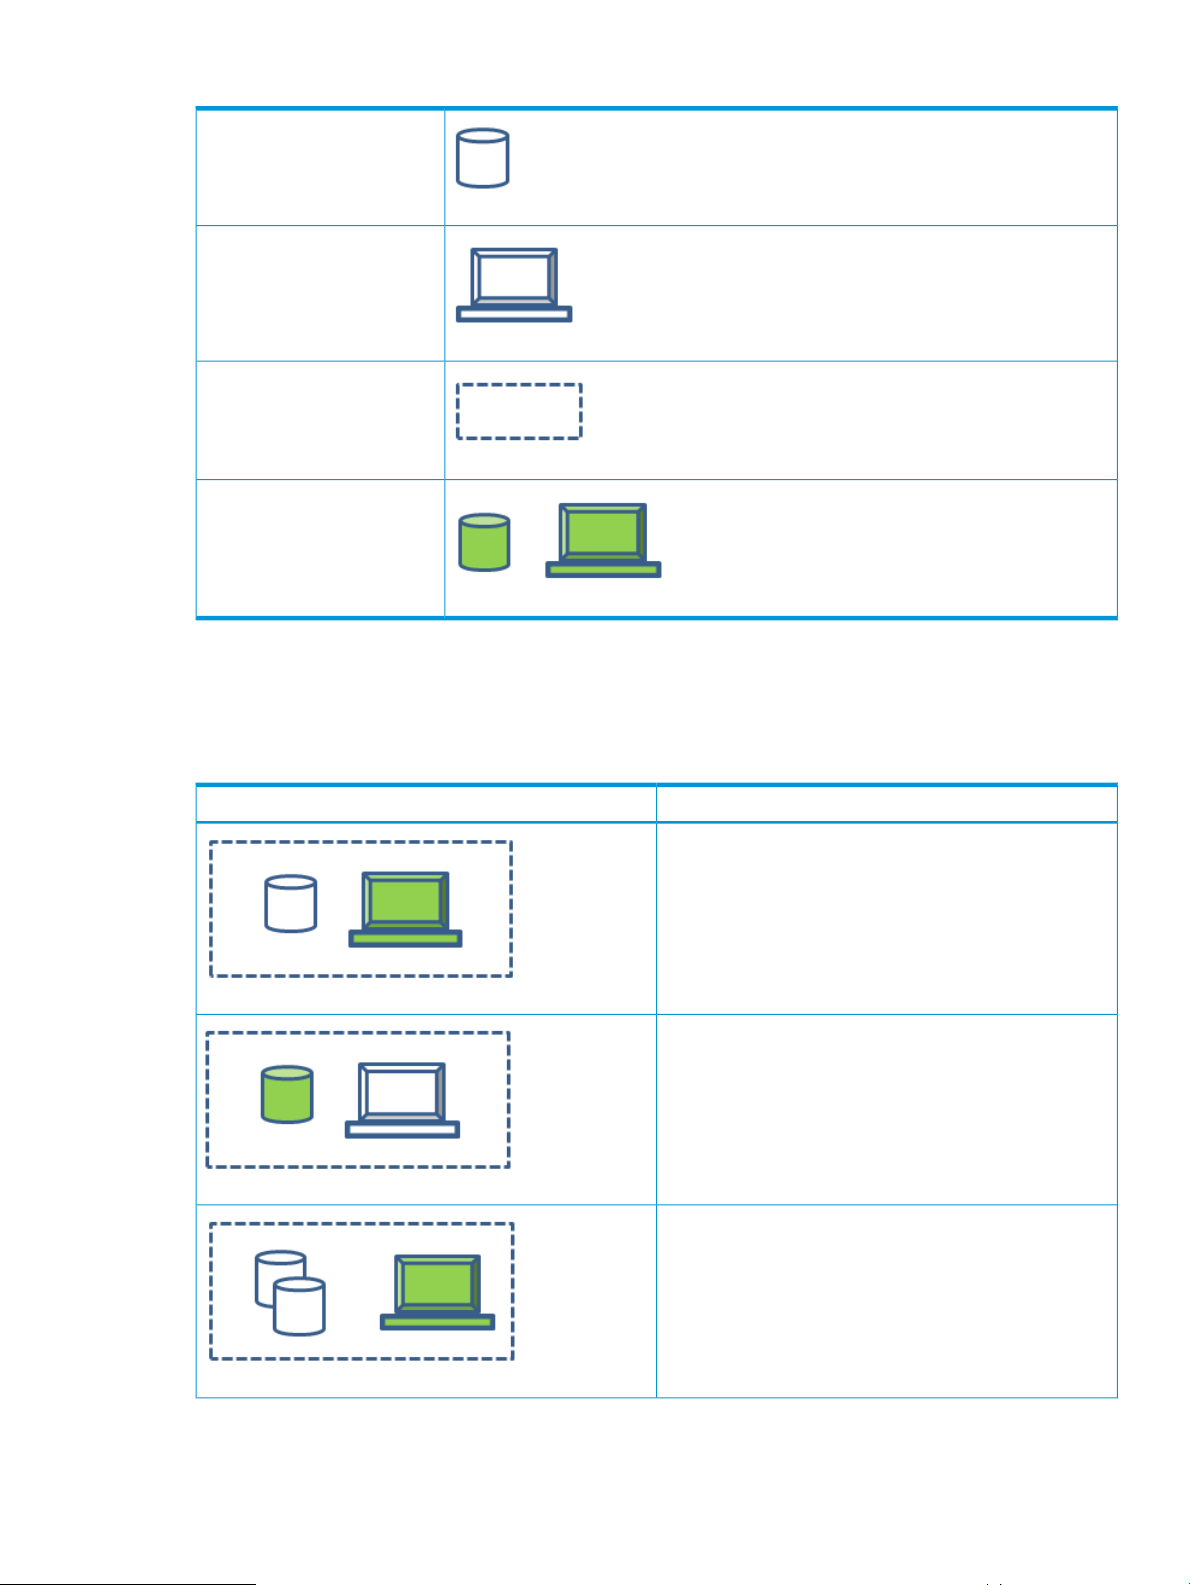
Table 13 Legend for the migration support tables
LUN
Host
Storage Group
Item selected by user input on
CLI
Migrations Supported for VNX, CLARiiON CX4, and VMAX
Migrations supported by the HP 3PAR Online Import Utility for VNX, CLARiiON CX4, and VMAX
are shown in Table 14 (page 25).
Table 14 Migration supported by the HP 3PAR Online Import Utility
DescriptionSupported Configuration
Single LUN, single host
The host is selected on the HP 3PAR Online Import Utility
CLI.
Single LUN, single host
The LUN is selected on the HP 3PAR Online Import Utility
CLI.
Multiple LUNs, single host
The host is selected on the HP 3PAR Online Import Utility
CLI.
Migrations Supported by HP 3PAR Online Import Utility for EMC Storage 25
Page 26
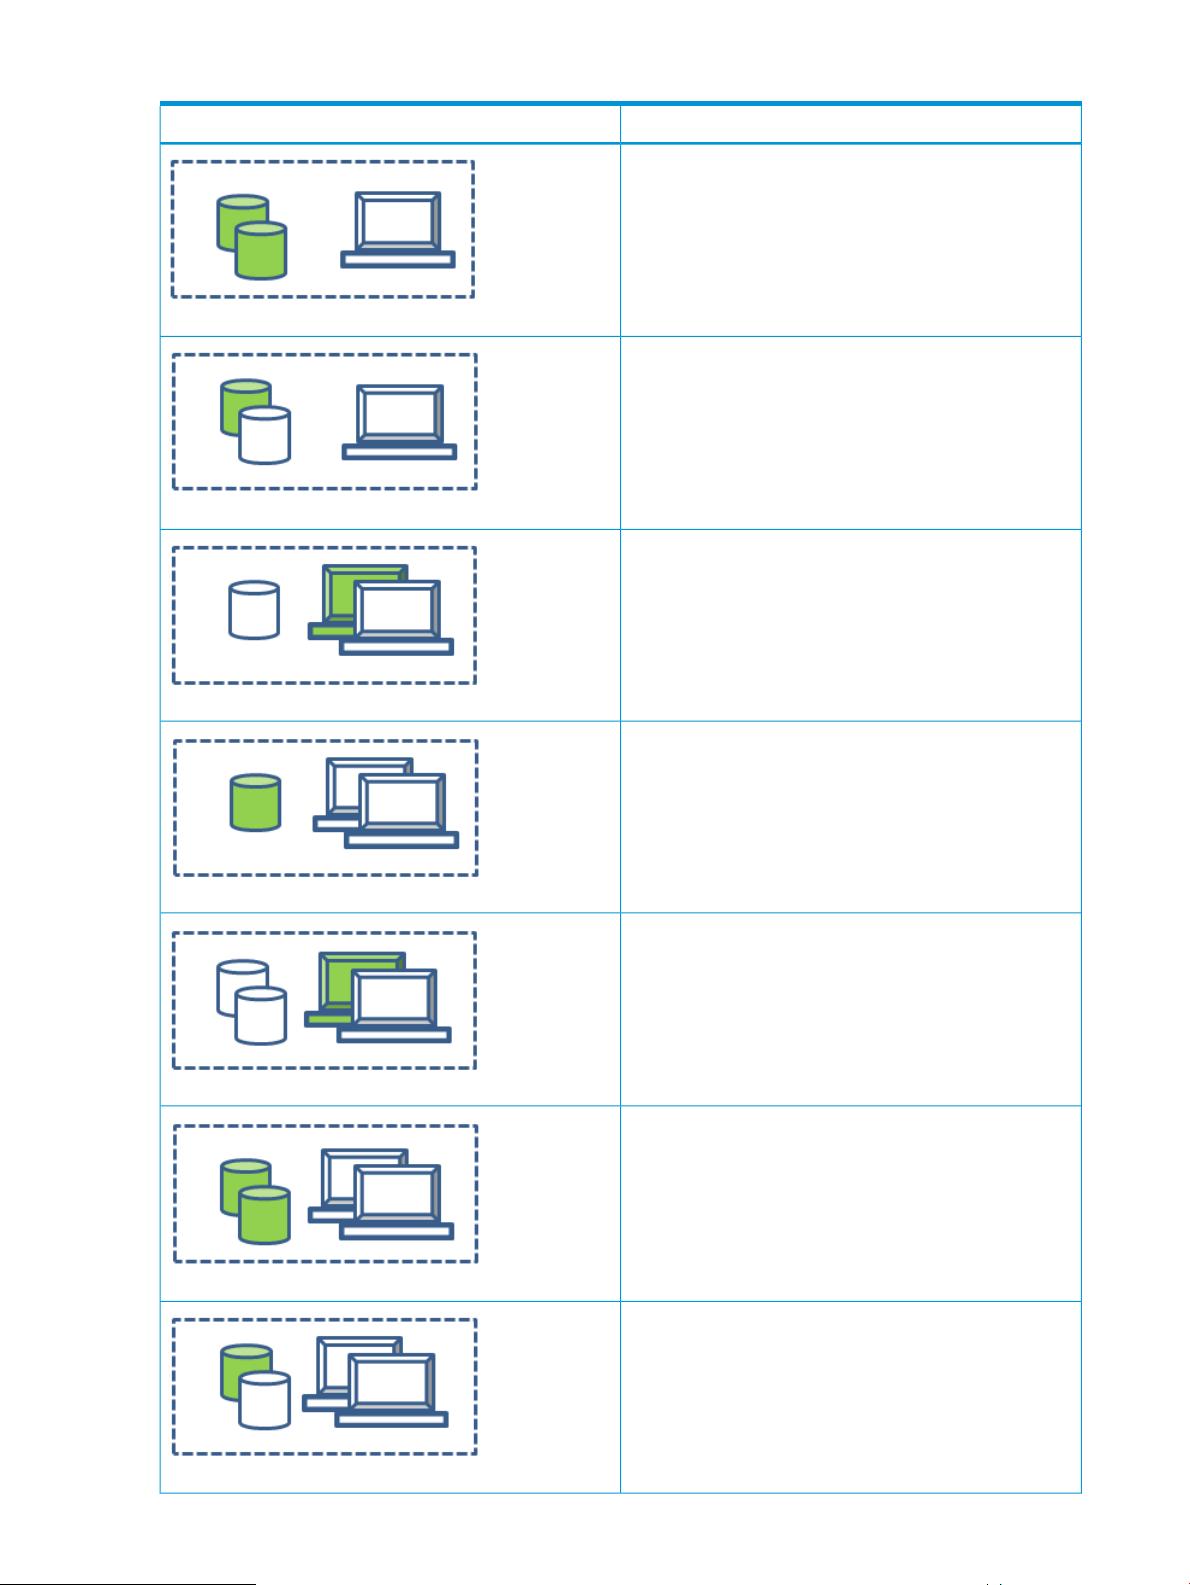
Table 14 Migration supported by the HP 3PAR Online Import Utility (continued)
DescriptionSupported Configuration
Multiple LUNs, single host
All LUNs are selected on the HP 3PAR Online Import Utility
CLI.
Multiple LUNs, single host
Not all LUNs are selected on the HP 3PAR Online Import
Utility CLI. (All LUNs will be migrated.)
Single LUN, multiple hosts
The host is selected on the HP 3PAR Online Import Utility
CLI.
Single LUN, multiple hosts
The LUN is selected on the HP 3PAR Online Import Utility
CLI.
Multiple LUNs, multiple hosts
The host is selected on the HP 3PAR Online Import Utility
CLI.
Multiple LUNs, multiple hosts
All LUNs are selected on the HP 3PAR Online Import Utility
CLI.
26 Installation and Setup for Data Migration
Multiple LUNs, multiple hosts
Not all LUNs are selected on the HP 3PAR Online Import
Utility CLI.
Page 27
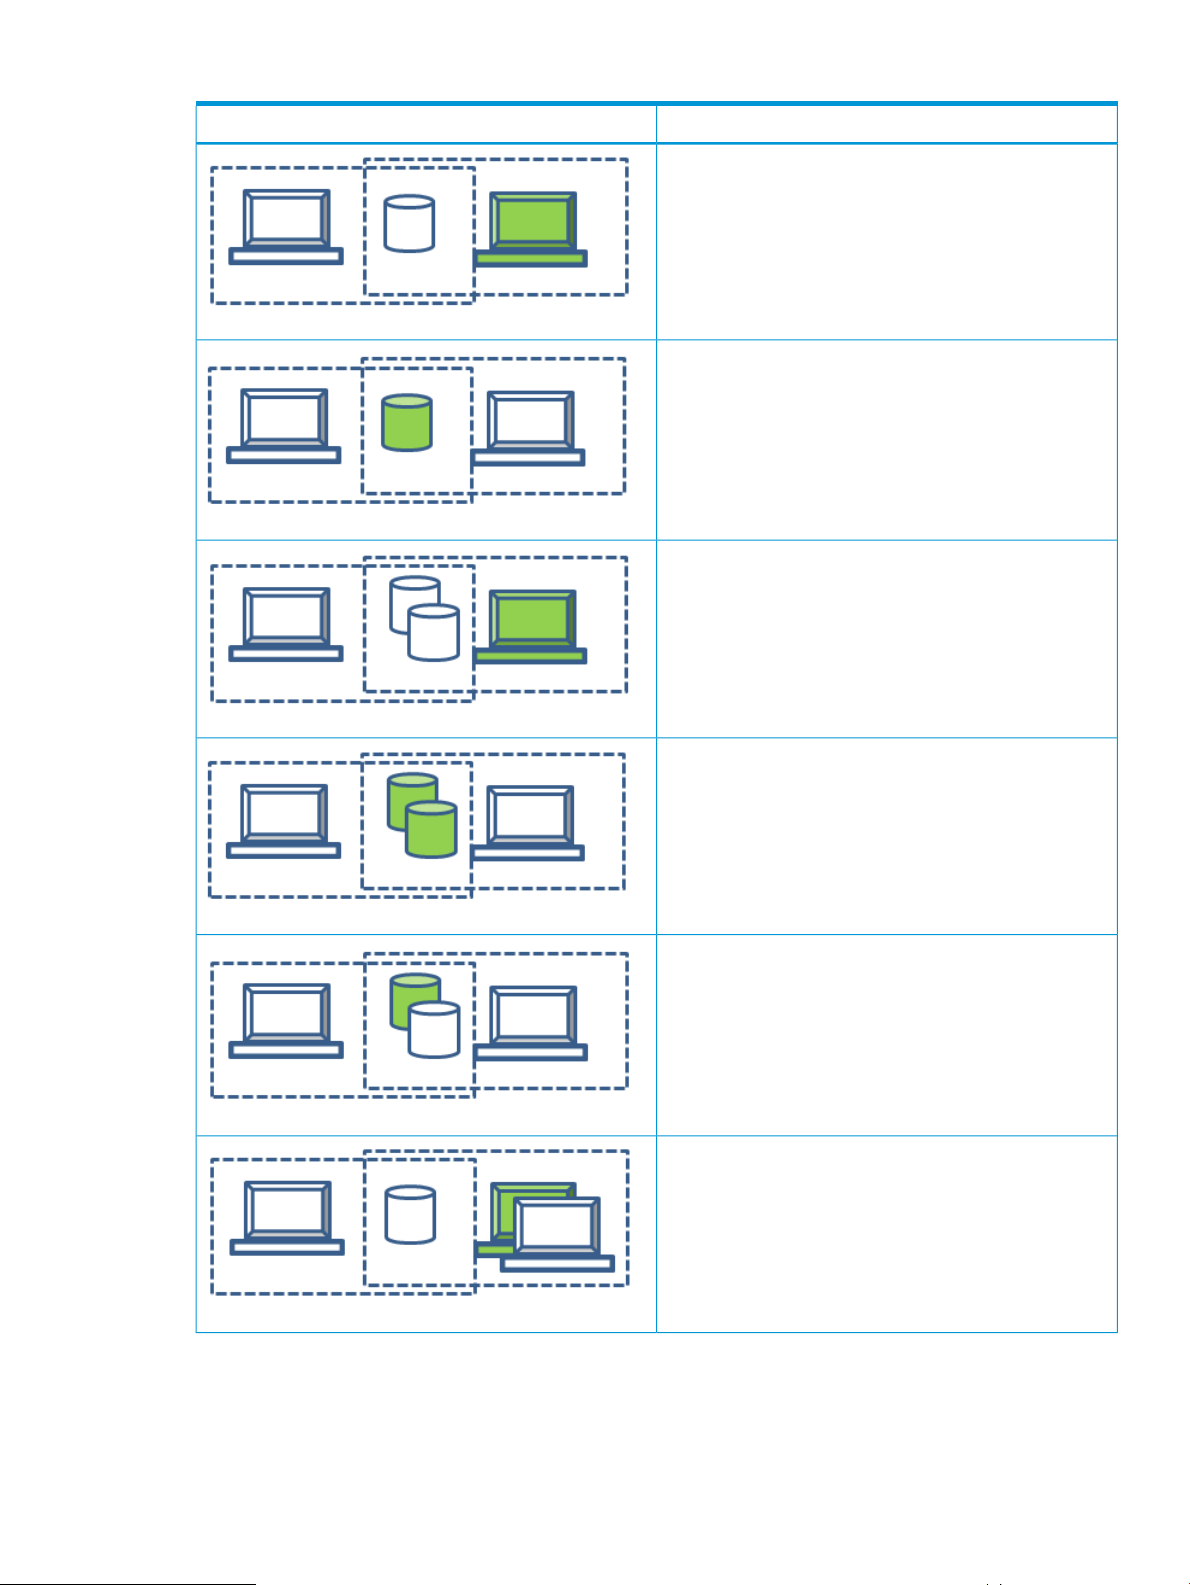
Table 14 Migration supported by the HP 3PAR Online Import Utility (continued)
DescriptionSupported Configuration
Single LUN, multiple hosts
The host is selected on the HP 3PAR Online Import Utility
CLI.
Single LUN, multiple hosts
The LUN is selected on the HP 3PAR Online Import Utility
CLI.
Multiple LUNs, multiple hosts
The host is selected on the HP 3PAR Online Import Utility
CLI.
Multiple LUNs, multiple hosts
All LUNs are selected on the HP 3PAR Online Import Utility
CLI.
Multiple LUNs, multiple hosts
Not all LUNs are selected on the HP 3PAR Online Import
Utility CLI.
Single LUN, multiple hosts
The host is selected on the HP 3PAR Online Import Utility
CLI.
Migrations Supported by HP 3PAR Online Import Utility for EMC Storage 27
Page 28
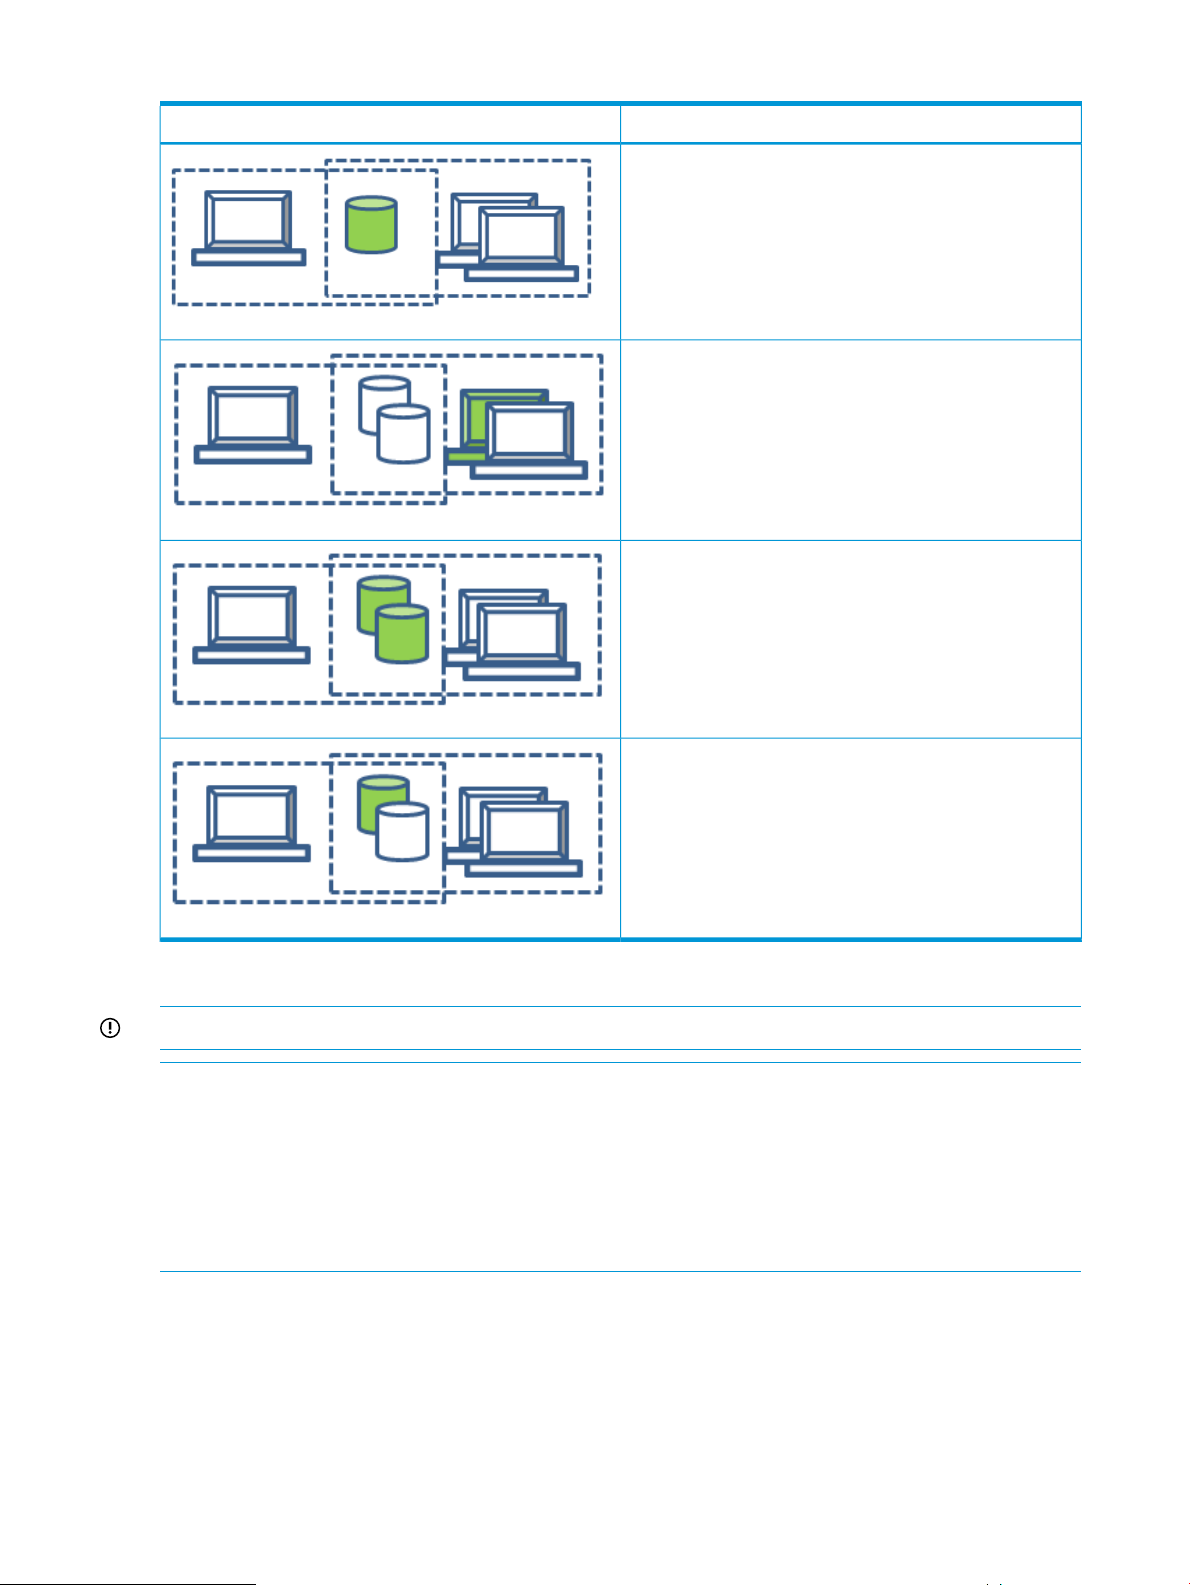
Table 14 Migration supported by the HP 3PAR Online Import Utility (continued)
DescriptionSupported Configuration
Single LUN, multiple hosts
The LUN is selected on the HP 3PAR Online Import Utility
CLI.
Multiple LUNs, multiple hosts
The host is selected on the HP 3PAR Online Import Utility
CLI.
Multiple LUNs, multiple hosts
All LUNs are selected on the HP 3PAR Online Import Utility
CLI.
Multiple LUNs, multiple hosts
Not all LUNs are selected on the HP 3PAR Online Import
Utility CLI.
Migrations Supported by the HP 3PAR Online Import Utility for VMAX Only
IMPORTANT: The migrations shown here are supported only for VMAX.
NOTE: These configurations are not supported for EMC VNX or CLARiiON CX4:
• The createmigration command checks for these configurations and blocks migrations of
unsupported configuration.
• In most cases, unsupported configurations are those in which multiple LUNs that span multiple
storage groups are to be added to the migration (either explicitly or implicitly).
• It is an error when the added storage groups do not contain exactly the same LUNs.
28 Installation and Setup for Data Migration
Page 29
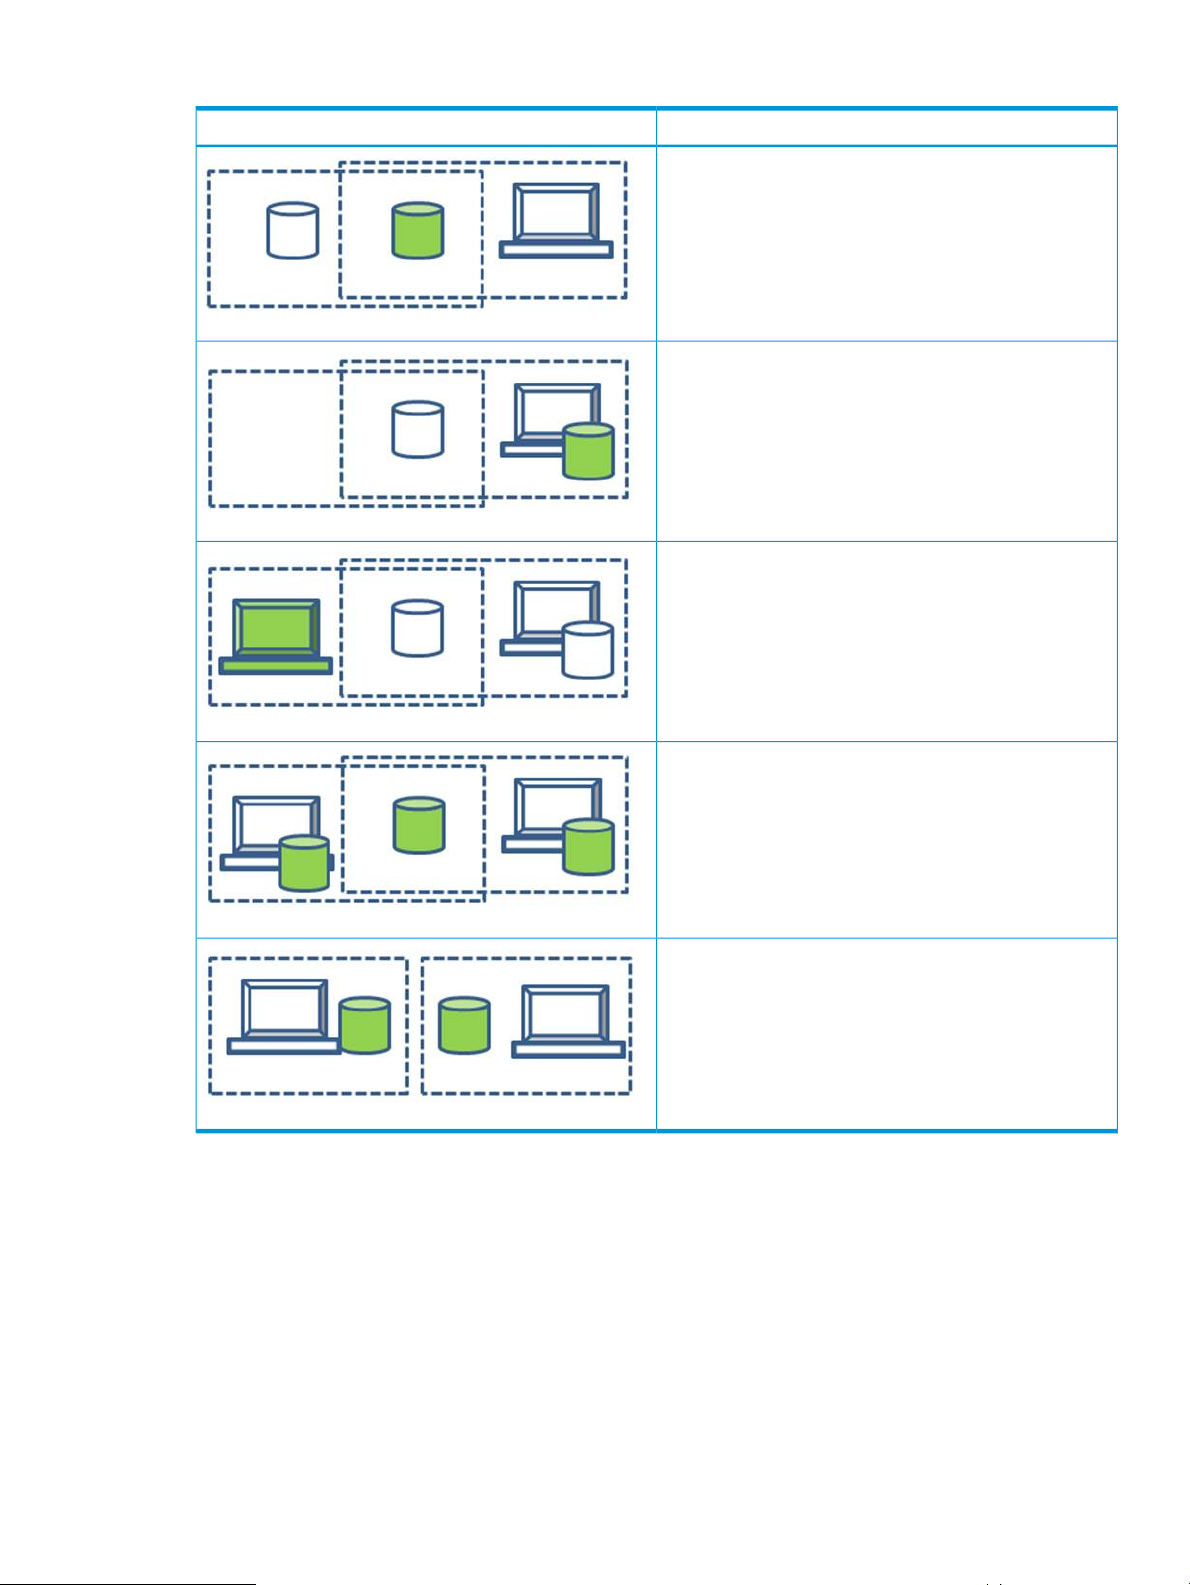
Table 15 Migration supported by the HP 3PAR Online Import Utility for VMAX only
DescriptionUnsupported Configuration
A LUN in multiple storage groups is selected, and the
groups are not identical.
A LUN in a single storage group is selected, but it is
grouped with a shared LUN, and the shared LUN’s storage
groups are not identical.
A host is selected, but it is grouped with a shared LUN,
and the shared LUN’s storage groups are not identical.
LUNs are selected spanning multiple groups, and the
storage groups are not identical.
LUNs are selected spanning multiple storage groups, and
the storage groups are not identical.
Migrations Supported by HP 3PAR Online Import Utility for EMC Storage 29
Page 30

4 Preparing for Data Migration
Use the information in this chapter to ensure all necessary tasks are performed and considerations
are understood before beginning a migration.
Data Migration Considerations
Before migrating data using 3PAR Online Import for EMC Storage, be aware of the following
general considerations, system requirements, and other tasks associated with planning, host
configuration, and network and zoning requirements.
General Considerations
• LUNs and hosts can be implicitly added to the migration, even if they are not specified by the
input.
• Only volumes presented to Fibre Channel hosts can be migrated. Volumes presented to iSCSI
or FCoE hosts cannot be migrated.
• All hosts and LUNs in the source groups are migrated. If there are multiple hosts or LUNs in
the configuration, they all end up in a single CPG.
• When a cluster is being migrated, all the hosts in the cluster must be moved at once.
• HP 3PAR host persona/host OS: EMC Storage arrays do not implement specific OS settings
when registering host initiators on the EMC Storage array. During migration, online import
cannot determine the host OS when migrating the hosts to the HP 3PAR StoreServ Storage.
All hosts that are being created on the HP 3PAR StoreServ Storage during EMC migration
are set by default to host persona 2. Consider changing the HP 3PAR host persona/host OS
to the appropriate setting before enabling access to the HP 3PAR array.
• LUNs identified for migration should not be part of any other current application jobs. For
example, make sure the LUN is not part of a replication job or backup job.
• The LUN limit for offline migrations is 25. The maximum number of volumes that can be
migrated with MDM or an online migration is 255. See “Aborting a Migration” (page 55)
• A createmigration command cannot simultaneously contain a host and a LUN for
migration.
• Only one createmigration is allowed at a time because 3PAR Peer Ports can only be in
one EMC Storage Group at a time.
• When a volume on the source EMC Storage system is migrated, an SCSI-3 reservation is
installed to prevent any unwanted management changes to the volume during the migration.
The SCSI-3 reservation remains on the volume after the migration.
• Only one EMC Storage system at a time can be attached as a source to the destination
HP 3PAR StoreServ Storage system.
• EMC volumes cannot be migrated if they are larger than 16 TB, the maximum volume size on
the HP 3PAR StoreServ Storage system.
• EMC volumes cannot be migrated if they are less than 256 MB, the minimum volume size on
the HP 3PAR StoreServ Storage systems.
• Snapshots become standalone objects on the destination HP 3PAR StoreServ Storage system.
LUNs that have been migrated cannot be part of a replication group.
30 Preparing for Data Migration
Page 31

System Requirements
NOTE: For detailed information about ensuring the source EMC Storage system and the destination
HP 3PAR StoreServ Storage system are configured properly for data migration, see the HP SPOCK
website:
HP SPOCK (http://www.hp.com/storage/spock)
Before migrating data from an EMC Storage system to an HP 3PAR StoreServ Storage system using
HP 3PAR Online Import for EMC Storage, the system environment must meet the following
requirements:
• Source EMC Storage system must be running a supported firmware level. See the HP SPOCK
website for supported firmware versions:
HP SPOCK (http://www.hp.com/storage/spock)
• The destination HP 3PAR StoreServ Storage system must have a valid HP 3PAR Online Import
or HP 3PAR Peer Motion license installed.
• The destination HP 3PAR StoreServ Storage system must be at a supported HP 3PAR OS level.
See HP SPOCK:
HP SPOCK (http://www.hp.com/storage/spock)
Planning for Migration
Advanced planning ensures that you achieve the desired results when migrating data.
• It is a recommended best practice to make a backup of your host/data before starting a
migration.
• To perform an MDM, a maintenance window outage is required with removal of EMC
PowerPath. Please plan accordingly.
• Identify which volumes and hosts will be migrated. If you will not be migrating all the volumes
presented to a host, you must unpresent the volumes that you do not want migrated. Otherwise,
all the volumes will be implicitly included in the migration.
• Determine if you will be using thin or full provisioning on the destination storage system. This
decision impacts the amount of capacity needed on the destination storage system.
NOTE: TDVVs are not supported as a destination for online import.
• Before starting the migration, you should consider creating a snapshot of each volume that
will be migrated.
• Because there is some impact on performance, you may want to schedule migrations during
off-peak hours, if possible.
• To optimize the rate at which data is migrated from the source, hosts with a lighter load/less
data should be migrated first.
• When selecting objects for migration, be aware of any overlap or sharing of volumes between
hosts. In this situation, selecting a host or a volume in any set results in every volume and every
host in all sets being implicitly selected for migration due to the overlap. For additional
information, see “Migrations Supported by HP 3PAR Online Import Utility for EMC Storage”
(page 24).
Reconfiguring the Host DSM
Data migration involves reconfiguring the host DSM used to communicate with the storage system
from an EMC DSM to a native multipathing software DSM (see Table 16 (page 32)).
Data Migration Considerations 31
Page 32

Table 16 Multipathing software by operating system
Multipathing SoftwareOS
Windows native MPIOWindows Server 2012
Windows native MPIOWindows Server 2008 R2
Windows Server 2003
1
For Windows Server 2003, HP uses a specific DSM: HPMpioDSMFor3Par_Kit_Ver_1_0_23_1
HP MPIO
device-mapperLinux
1
After the migration preparation phase is complete, the host might need to be shut down and
reconfigured to use the native multipathing software DSM for MDM.
NOTE: For MDM, when reconfiguring a host to use the native Microsoft MPIO DSM on Windows
2008 R2 or Windows 2012, use 3PARdataVV as the device hardware ID.
When reconfiguring a host to use the native Linux device-mapper DSM, whitelist the HP 3PAR-specific
information in multipath.conf.
For more information about the multipath.conf file, see the HP 3PAR Red Hat Enterprise Linux
and Oracle Linux Implementation Guide. This document is available on the following website:
HP Storage Information Library (http://www.hp.com/go/storage/docs)
For MDM, the data transfer migration phase is then started, and the host is brought back online.
This process ensures that the host is never multipathing between the source EMC Storage system
and the destination HP 3PAR StoreServ Storage system. Even if the native multipathing software
DSM is already configured, it is necessary to restart the host after unzoning the source EMC Storage
system from the host.
IMPORTANT: If you unzone the host and EMC Storage system but do not reconfigure the host
DSM, the host/cluster will experience an outage, because it will not be able to communicate with
the destination HP 3PAR StoreServ Storage system.
Network and Fabric Zoning Requirements
Data migration requires the necessary zoning to create paths between the source and destination
storage systems and any hosts involved in the migration. The data paths used are shown in
Figure 1 (page 33).
• Two unique paths must be zoned between the source and destination storage systems. To
create two paths, the two controller ports on the source EMC Storage system must be connected
to two peer ports on the destination HP 3PAR StoreServ Storage system. See “Zoning the
Source EMC Storage to the Destination HP 3PAR StoreServ Storage System” (page 33).
• The paths between the host and the source EMC Storage system are unzoned before the
migration starts. The timing for this depends on the operating system of the host and the
migration type.
• During data migration, paths must be zoned between the host and destination HP 3PAR
StoreServ Storage system. The time at which these paths are created is determined by the
operating system of the host and the migration type.
32 Preparing for Data Migration
Page 33

Figure 1 Data migration zoning
Premigration Steps
Perform these steps to prepare for migration.
Zoning the Source EMC Storage to the Destination HP 3PAR StoreServ Storage System
The correct zoning must be present between the source EMC Storage system and destination
HP 3PAR StoreServ Storage system at every stage of the migration operation. The following zoning
rules apply:
• There must be two unique paths between the source and destination storage systems. To create
two paths, the two controller host ports on the source EMC Storage system must be zoned to
two peer ports on the destination HP 3PAR StoreServ Storage system. The peer ports on the
destination HP 3PAR StoreServ Storage system must be on adjacent nodes: 0/1, 2/3, 4/5,
or 6/7.
• Zone the source and destination systems together and make sure they are visible to each other
before zoning hosts to the destination system.
• Do not unzone the source and destination systems from each other until the data migration is
complete.
To create the zoning:
1. On the destination HP 3PAR StoreServ Storage system, configure two free ports as peer ports
using adjacent node pairs: 0/1, 2/3, 4/5, or 6/7.
a. Set the port connection type to Point.
b. Set the port connection mode to Peer.
2. Create two zones between the source EMC Storage system and destination HP 3PAR StoreServ
Storage system, ensuring that one EMC host port is in the same zone with one HP 3PAR peer
port.
NOTE: The WWN of a host port changes when it is set to become a peer port. Use the new
WWN of the peer port in zoning.
Each zone should contain only two ports: one from each storage system. Adjacent HP 3PAR
peer nodes should be zoned to separate EMC controllers in a one-to-one mapping. For
example, zone the peer port on node 0 on the HP 3PAR StoreServ Storage system to controller
Premigration Steps 33
Page 34

A on the EMC, and zone the peer port on node 1 on the HP 3PAR StoreServ Storage system
to controller B on the EMC Storage system.
3. Verify that the EMC Storage system can detect both ports on the HP 3PAR StoreServ Storage
system.
Ensure that the peer port WWNs appear in the discovered port list.
• To check peer port connections using VMAX, follow these steps:
Issue the following command:
a.
symaccess -sid <vmax id> list logins
b. Check the Identifier listed for each HP 3PAR peer port and make sure they are
logged in (Yes).
C:\Users\Administrator>symaccess -sid 1212 list logins
Symmetrix ID : 000194901212
Director Identification : FA-7E
Director Port : 0
User-generated Logged On
Identifier Type Node Name Port Name FCID In Fabric
---------------- ----- --------------------------------- ------ ------ ------
20210202ac005f91 Fibre 20210202ac005f91 20210202ac005f91 020400 Yes Yes
Director Identification : FA-8E
Director Port : 0
User-generated Logged On
Identifier Type Node Name Port Name FCID In Fabric
---------------- ----- --------------------------------- ------ ------ -----21210202ac005f91 Fibre 21210202ac005f91 21210202ac005f91 020200 Yes Yes
• To check the HP 3PAR peer port using VNX or CLARiiON CX4, open the Host tab, open
the Initiator tab, and verify that the initiators are logged in.
Alternatively, verify that the EMC is shown as a connected device on both peer ports of the
destination HP 3PAR StoreServ Storage system.
• To check peer port connections from the HP 3PAR StoreServ Storage, issue the
showtarget command with the -rescan option, and then issue the showtarget
command.
In this example, Node_WWN is the WWN of the source array
# showtarget -rescan
#
# showtarget
Port ----Node_WWN---- ----Port_WWN---- ------Description-----1:2:2 xxxxxxxxxxxxxxxx 50000972C012F11C reported_as_scsi_target
0:2:2 xxxxxxxxxxxxxxxx 50000972C012F118 reported_as_scsi_target
Preparing the Host for MDM
NOTE: This section describes preparing the host for MDM. If you are performing a Linux online
migration, see “Performing Online Data Migration Using Linux” (page 40). If you are performing
an offline migration, see “Performing Offline Data Migration” (page 66).
To prepare for a successful migration:
• Stop all applications on the host that may be accessing the LUNs to be migrated. This also
includes any replication and backup applications on the LUNs.
• Set the LUNs to be migrated to an offline/unmounted state.
34 Preparing for Data Migration
Page 35

NOTE: Any applications and services that may automatically start with a reboot should be
disabled until after the migration has started and documentation instructs you to bring your host
back online.
For Hyper-V running on Windows Server 2008 R2, follow these steps to prepare the host for
migration:
1. Stop all applications currently running on the virtual machine.
2. Shut down the virtual machine using Failover Cluster Manager.
Preparing Windows Clusters for Migration
When a Windows cluster is migrated, the cluster must first be disabled so that any SCSI reservations
in use are released. For a Windows Server 2008 R2 active/passive cluster, this can be achieved
by stopping all applications running on the cluster, then stopping the cluster service on all nodes.
When a Windows Server 2012 active/passive cluster is migrated, maintenance mode must be
set on the cluster disks to clear SCSI reservations on the disks. Because the quorum disk cannot be
set in the maintenance mode, it must be set to the offline mode to clear its SCSI reservations. Then,
the cluster service must be stopped on all nodes.
For Hyper-V running on Windows Server 2008 R2, follow these steps to stop the cluster:
1. For the quorum disk, set Offline, CSV disks in Maintenance mode.
2. Using the Failover Cluster Manager, select Shutdown Cluster.
3. Clear the cluster reservation, if present, by following the appropriate Microsoft documentation
about Hyper-V clusters.
For Windows Server 2003 R2, stop the cluster service on each cluster node.
For active/active clusters, offline all disks.
For more information, see Microsoft documentation on how to start/stop the cluster services.
Identifying the Source and Destination Storage Systems
This section provides information on how to identify and add the source and destination storage
systems for migration. Before beginning, prerequisites must be met and information about the
source and destination systems must be gathered.
Prerequisites
• EMC SMI-S Provider is installed and operational.
• The source EMC Storage system must be registered in the EMC SMI-S Provider application.
• The source EMC Storage system has storage group configured with hosts and volumes to be
migrated.
• The HP 3PAR Online Import Utility is installed and operational with network access to both
SMI-S Provider server managing the source EMC Storage system and the destination HP 3PAR
StoreServ Storage system.
• The source EMC Storage system and destination HP 3PAR StoreServ Storage system are zoned
to each another.
Premigration Steps 35
Page 36

Required Information
EMC Storage source system:
• IP address of the EMC SMI-S Provider that is managing the source EMC Storage system from
which the volumes are being migrated.
◦ If the SMI-S server is managing more than one source EMC Storage system, and you
want to identify only one of them, you need to know the WWN of the source storage
system.
• User name and password for EMC SMI-S Provider.
• Port to access EMC SMI-S Provider.
Secure port default 5989.◦
◦ Non-secure port default 5988.
Destination HP 3PAR StoreServ Storage system:
• IP address of the destination HP 3PAR StoreServ Storage system.
• User name and password for the HP 3PAR management application with Super user permission.
Identifying the Source Storage System
To identify the source storage system, follow these steps:
1. From the HP 3PAR Online Import Utility, execute the addsource command.
NOTE: Use your local host user name and password credentials to log into the HP 3PAR
Online Import Utility.
Example 1 addsource command
>addsource -type VNX -mgmtip 10.10.10.10 -user admin -password adminpw —uid
xxxxxxxxxxxxxxxx
>SUCCESS: Added source storage system
2. Execute the showsource command to verify the source storage system information.
Example 2 showsource command
>showsource –type VNX
NAME TYPE UNIQUE_ID FIRMWARE MANAGEMENT_SERVER OPERATIONAL_STATE
CLARiiON+APM00125345014 VNX 50067890BEE0177F 05.32.000.5.201 10.10.10.10 Good
36 Preparing for Data Migration
Page 37

Identifying the Destination Storage System
To identify the destination procedure, follow these steps:
1. From the HP 3PAR Online Import Utility, execute the adddestination command.
Example 3 adddestination command
>adddestination –mgmtip 10.10.10.10 –user 3paradm –password 2Password
>SUCCESS: Added destination storage system
If a certificate validation error occurs on the adddestination command when using the
-secure=true parameter (see Example 4 “Certificate validation error”), first run the
installcertificate command (see Example 5 “Installcertificate command”),
then run the adddestination command again.
Example 4 Certificate validation error
>adddestination -type 3PAR -mgmtip xx.x.xx.xx -user 3paradm -password 3pardata -secure true
-port 5783
>ERROR: OIUERRDST0010 Unable to validate certificate. C:\\InFormMC\security\HP-3PAR-MC-TrustStore
Example 5 Installcertificate command
>installcertificate –mgmtip xx.xx.xx.xx
TParCertifacteVO [issuedTo=HP 3PAR HP_3PAR 7400 1645897, commonName=null, issuedByOrganization=null,
issuedToOrganization=null, serialNo=null, issedBy=HP 3PAR HP_3PAR 7400 1645897,
fingerprint=89:E5:D0:13:6F:D1:07:80:70:76:5C:FE:5B:65:E5:54:C0:18:21:2F, signatureAlgo=SHA1withRSA,
version=v1,validFrom=08/14/2014, validTo=08/11/2024. issuedOn=null, expiresOn=null, validDateRange=true]
Do you accept the certificate? Y/YES Y
>SUCCESS: Installed certificate successfully.
2. Execute the showdestination command to verify the destination storage system information.
Example 6 showdestination command
>showdestination
NAME TYPE UNIQUE_ID FIRMWARE MANAGEMENT_SERVER
OPERATIONAL_STATE PEER_PORTS
3par_7200_DCB_01 3PAR 2FF70002AC005F91 3.2.1 10.10.10.10 Normal
2021-0202-AC00-5F91(0:2:1) 2121-0202-AC00-5F91(1:2:1)
Creating the Data Migration Task
The data migration task performs the following actions in the preparation required for data
migration:
• On a VNX or CLARiiON CX4 source storage system, two HP 3PAR initiators are added to
the storage group that contains the hosts or volumes being migrated. The host name of the
HP 3PAR initiators is unknown. The initiator name appears as the WWN of the peer port on
the HP 3PAR StoreServ Storage.
• On a VMAX source storage system, the following groups are created for the migration:
One storage group is added, containing the devices being migrated. The naming
◦
convention is:
OIU_<migrationID>_SG
◦ One initiator group per HP 3PAR peer port is added. The naming convention is:
<hostname>_<migrationID>
Premigration Steps 37
Page 38

◦ One initiator group “parent” is added and associated to the HP 3PAR peer port initiator
groups. The naming convention is:
OIU_<migrationID>_IG
◦ One port group is added, containing the required ports based on the original masking
views. The naming convention is:
OIU_<migrationID>_PG
After all of these groups have been created and populated, a migration masking view is
added and associated to the migration storage group, initiator group, and port group. The
naming convention is:
OIU_<migrationID>_MV
NOTE: For VMAX, these groups remain on the VMAX system after migration is completed;
they are not cleaned up.
• Hosts are created on the destination storage system.
• Volumes are admitted to the destination storage system but are not exported to the host.
• The createmigration command performs the following checks before creating the migration:
◦ No existing migration task for specified source storage system:
– Only one migration at a time can be provisioned for a given source EMC Storage
system.
◦ The source storage system group configuration is valid.
– The volumes or host specified in the createmigration command are mapped to
a storage group on the associated source EMC Storage system. All LUNs and all
hosts in the mapped storage group will be migrated even if only a subset are entered
in the createmigration command. To determine whether your configuration is
valid, see “Migrations Supported by HP 3PAR Online Import Utility for EMC Storage”
(page 24).
◦ EMC SMI-S Provider version.
◦ Source storage system model number.
NOTE: See the HP SPOCK website for the latest supported versions:
HP SPOCK (http://www.hp.com/storage/spock)
◦ LUN migration eligibility:
Protocol must be Fibre Channel.–
– Replication LUN cannot be migrated.
38 Preparing for Data Migration
Page 39

To create the migration for a given migration type using the createmigration command,
see:
◦ Online migration, if EMC PowerPath is installed: “Online Data Migration with Removal
of EMC PowerPath” (page 40), steps 5–8
Online migration, if EMC PowerPath is not installed: “Online Data Migration with Native
device-mapper Multipath” (page 45), step 6
◦ MDM
Windows: “Creating the Data Migration Task” (page 51)–
– Linux: “Creating the Data Migration Task” (page 56)
– Hyper-V: “Creating the Data Migration Task” (page 61)
◦ Offline migration: “Creating the Data Migration Task” (page 68)
Premigration Steps 39
Page 40

5 Performing Online Data Migration Using Linux
If EMC PowerPath is installed, it must be uninstalled, and device-mapper must be used to configure
multipathing. Follow the online data migration procedure in “Online Data Migration with Removal
of EMC PowerPath” (page 40).
If EMC PowerPath is not installed, follow the online data migration procedure in “Online Data
Migration with Native device-mapper Multipath” (page 45).
Online Data Migration with Removal of EMC PowerPath
To perform online data migration using RHEL 5.x or RHEL 6.x, follow these steps.
NOTE: A maintenance window is required to complete an online data migration with removal
of EMC PowerPath (see step 5).
1. Zone the source array to the destination array.
2. Using the HP 3PAR Online Import Utility addsource command, add the source storage system
Example 7 Using addsource to add a source storage system for online data migration
>addsource -type VMAX -mgmtip 10.10.10.10 -user admin -password adminpw -uid xxxxxxxxxxxxxxxx
>SUCCESS: Added source storage system.
>
>showsource
NAME TYPE UNIQUE_ID FIRMWARE MANA
GEMENT_SERVER OPERATIONAL_STATE
SYMMETRIX+000194901212 VMAX xxxxxxxxxxxxxxxx 5876.229.145
10.10.10.10 Good
3. Using the HP 3PAR Online Import Utility adddestination command, add the destination
HP 3PAR StoreServ Storage system.
Example 8 Using adddestination to add the destination storage system for online data
migration
>adddestination -type 3PAR -mgmtip 10.10.10.10 -user 3paradm -password 3parpassword
>SUCCESS: Added destination storage system.
>
>showdestination
NAME TYPE UNIQUE_ID FIRMWARE MANAGEMENT_SERVER OPER
ATIONAL_STATE PEER_PORTS
3par_7200_DCA_01 3PAR 2FF70002AC005F92 3.2.1 10.10.10.10 Norm
al 2022-0202-AC00-5F92(0:2:2) 2024-0202-AC00-5F92(0:2:4) 2122-0202-AC00-5F92(1:2:2) 2124-02
02-AC00-5F92(1:2:4)
4. Zone the host to the HP 3PAR StoreServ Storage system.
5. Uninstall EMC PowerPath by following these steps:
CAUTION: EMC PowerPath must not be installed during the migration process. Native
device-mapper-multipath must be managing the paths.
Stop all applications before removing EMC PowerPath. For cluster configurations, also stop
the cluster services and the cluster. Applications should be restarted after migration has started.
NOTE: A maintenance window is required. This step requires that all applications be stopped,
but a reboot is not required.
40 Performing Online Data Migration Using Linux
Page 41

a. Close all applications on the host.
b. Unmount the application file systems, bring offline any raw devices (if configured), and
deactivate any volume groups where Logical Volume Manager is in use.
c. For a cluster, stop the cluster services, and then stop the cluster.
d. Uninstall EMC PowerPath from the host, following the EMC PowerPath documentation
instructions.
6. Configure native device-mapper multipath on the host:
a. If multipath is not already installed, install it.
b. Register HP 3PAR LUN types with device-mapper-multipath by whitelisting HP 3PAR-specific
information (in the /etc/multipath.conf file, the vendor is 3PARdata and the
product is VV). See the HP 3PAR StoreServ product documentation on the Linux host
configuration.
NOTE: 3PARdata and VV are case sensitive.
c. Register EMC LUN types with device-mapper-multipath by whitelisting EMC source
array-specific information (if not previously configured).
d. Start device-mapper-multipath.
e. Reload the multipath.conf file.
Example 9 Updating the multipath.conf file
# multipath -v2
# multipath -ll
mpath13 (360060160bf902a00e03cb1bb3c3fe411) dm-4 DGC,VRAID
[size=150G][features=1 queue_if_no_path][hwhandler=1 emc][rw]
\_ round-robin 0 [prio=1][active]
\_ 2:0:0:2 sde 8:64 [active][ready]
\_ round-robin 0 [prio=0][enabled]
\_ 3:0:0:2 sdg 8:96 [active][ready]
mpath12 (360060160bf902a00cae2a2a33c3fe411) dm-3 DGC,VRAID
[size=200G][features=1 queue_if_no_path][hwhandler=1 emc][rw]
\_ round-robin 0 [prio=1][active]
\_ 3:0:0:1 sdf 8:80 [active][ready]
\_ round-robin 0 [prio=0][enabled]
\_ 2:0:0:1 sdd 8:48 [active][ready]
mpath11 (360060160bf902a002ac0388f3c3fe411) dm-2 DGC,VRAID
[size=200G][features=1 queue_if_no_path][hwhandler=1 emc][rw]
\_ round-robin 0 [prio=1][active]
\_ 3:0:0:0 sdb 8:16 [active][ready]
\_ round-robin 0 [prio=0][enabled]
\_ 2:0:0:0 sdc 8:32 [active][ready]
#
7. If EMC PowerPath was uninstalled in step 5, and after multipathing has been configured again
on the host, follow these steps:
a. Modify /etc/fstab for new mount points where applicable. Remount file systems.
b. Where applicable, make the appropriate changes to the Logical Volume Manager
configuration.
Online Data Migration with Removal of EMC PowerPath 41
Page 42

IMPORTANT: In Linux, EMC PowerPath devices are presented as /dev/emcpower*
(for example, /dev/emcpowera). EMC PowerPath removal in Linux also removes this
device type. This changes when the Linux native device-mapper multipath assumes
management of these devices. For example, before EMC PowerPath removal, consider
combining /dev/sdb and /dev/sdc into /dev/emcpowera. After EMC PowerPath
removal, /dev/sdb and /dev/sdc would be represented by /dev/mpathx. This
represents a challenge for customers who use direct device referencing in /etc/fstab
or other custom scripts. HP generally recommends that fstab mounts be performed using
blkid/uuid; however, this is not always employed. In that case, consider mounting
/dev/emcpowera as /var. After EMC PowerPath removal, /var would not automatically
mount to /dev/mpathx.
c. If this is for a cluster configuration, initialize the cluster and start cluster services.
d. Start applications.
8. Using the HP 3PAR Online Import Utility, execute the createmigration command with the
-migtype online option.
Example 10 Using createmigration with -migtype online
>createmigration -sourceuid xxxxxxxxxxxxxxxx -srchost "X7DBU-02-IG" -destcpg "testcpg" -destprov full
-migtype online
>SUCCESS: Migration job submitted successfully. Please check status/details using showmigration command.
Migration id: 1411673030253
This step admits LUNs presented to the EMC Storage system and exports them to the HP 3PAR
host created on the EMC Storage system.
NOTE: Be aware, the createmigration command may take several minutes to complete.
TIP: Make a note of the Migration ID as it will be used in commands to track migration
progress.
9. Execute the showmigration command to verify that the data migration task preparation
has completed successfully. This may take some time. On the successful creation of the task
the STATUS column will indicate preparationcomplete(100%).
>showmigration
MIGRATIONID TYPE SOURCE_NAME
DESTINATION_NAME START_TIME
END_TIME STATUS(PROGRESS)(MESSAGE)
1411673030253 online SYMMETRIX+000194901212
3par_7200_DCA_01 Thu Sep 25 15:
23:50 EDT 2014 -NA- preparationcomplete(100%)(-NA-)
10. Execute the showmigrationdetails command to verify the volumes being migrated. In
the preparation stage, PROGRESS for each volume will be 0% and the TASK_ID will be
unknown.
>showmigrationdetails -migrationid 1411673030253
SOURCE_VOLUME DESTINATION_VOLUME TASK_ID PROGRESS
Volume 00145 Volume_00145 |unknown| 0%
Volume 00146 Volume_00146 |unknown| 0%
>
42 Performing Online Data Migration Using Linux
Page 43

11. HP recommends that you change the HP 3PAR host persona/host OS to the appropriate setting
before enabling access to the HP 3PAR array.
NOTE: EMC Storage arrays do not implement specific OS settings when registering host
initiators on the EMC Storage array. During migration, online import cannot determine the
host OS when migrating the hosts to the HP 3PAR StoreServ Storage. All hosts that are being
created on the HP 3PAR StoreServ Storage during EMC migration are set by default to host
persona 2.
12. Update path configuration on the host. Multipath now recognizes extra paths to the HP 3PAR
StoreServ Storage, but all are still managed as source array devices.
a. Rescan.
b. Reload the multipath.conf file.
Example 11 Updating path configuration on the host
# echo "1" > /sys/class/fc_host/host2/issue_lip
# echo "- - -" > /sys/class/scsi_host/host2/scan
# echo "1" > /sys/class/fc_host/host3/issue_lip
# echo "- - -" > /sys/class/scsi_host/host3/scan
# multipath -ll
mpath13 (360060160bf902a00e03cb1bb3c3fe411) dm-4 DGC,VRAID
[size=150G][features=0][hwhandler=0][rw]
\_ round-robin 0 [prio=0][active]
\_ 2:0:0:2 sde 8:64 [active][ready]
\_ 3:0:0:2 sdg 8:96 [active][ready]
\_ 2:0:1:2 sdj 8:144 [active][ready]
\_ 3:0:1:2 sdm 8:192 [active][ready]
mpath12 (360060160bf902a00cae2a2a33c3fe411) dm-3 DGC,VRAID
[size=200G][features=0][hwhandler=0][rw]
\_ round-robin 0 [prio=0][active]
\_ 3:0:0:1 sdf 8:80 [active][ready]
\_ 2:0:0:1 sdd 8:48 [active][ready]
\_ 2:0:1:1 sdi 8:128 [active][ready]
\_ 3:0:1:1 sdl 8:176 [active][ready]
mpath11 (360060160bf902a002ac0388f3c3fe411) dm-2 DGC,VRAID
[size=200G][features=0][hwhandler=0][rw]
\_ round-robin 0 [prio=0][active]
\_ 3:0:0:0 sdb 8:16 [active][ready]
\_ 2:0:0:0 sdc 8:32 [active][ready]
\_ 2:0:1:0 sdh 8:112 [active][ready]
\_ 3:0:1:0 sdk 8:160 [active][ready]
13. Unzone the host from the source array.
Online Data Migration with Removal of EMC PowerPath 43
Page 44

Example 12 Unzoning an RHEL 5.x host from the source array.
------------------# multipath -ll
sdb: checker msg is "emc_clariion_checker: query command indicates error"
sdc: checker msg is "emc_clariion_checker: query command indicates error"
sdd: checker msg is "emc_clariion_checker: query command indicates error"
sde: checker msg is "emc_clariion_checker: query command indicates error"
sdf: checker msg is "emc_clariion_checker: query command indicates error"
sdg: checker msg is "emc_clariion_checker: query command indicates error"
mpath13 (360060160bf902a00e03cb1bb3c3fe411) dm-4 DGC,VRAID
[size=150G][features=0][hwhandler=0][rw]
\_ round-robin 0 [prio=1][active]
\_ 2:0:0:2 sde 8:64 [failed][faulty]
\_ 3:0:0:2 sdg 8:96 [failed][faulty]
\_ 2:0:1:2 sdj 8:144 [active][ready]
\_ 3:0:1:2 sdm 8:192 [active][ready]
mpath12 (360060160bf902a00cae2a2a33c3fe411) dm-3 DGC,VRAID
[size=200G][features=0][hwhandler=0][rw]
\_ round-robin 0 [prio=1][active]
\_ 3:0:0:1 sdf 8:80 [failed][faulty]
\_ 2:0:0:1 sdd 8:48 [failed][faulty]
\_ 2:0:1:1 sdi 8:128 [active][ready]
\_ 3:0:1:1 sdl 8:176 [active][ready]
mpath11 (360060160bf902a002ac0388f3c3fe411) dm-2 DGC,VRAID
[size=200G][features=0][hwhandler=0][rw]
\_ round-robin 0 [prio=1][active]
\_ 3:0:0:0 sdb 8:16 [failed][faulty]
\_ 2:0:0:0 sdc 8:32 [failed][faulty]
\_ 2:0:1:0 sdh 8:112 [active][ready]
\_ 3:0:1:0 sdk 8:160 [active][ready]
#
Example 13 Unzoning an RHEL 6.x host from the source array
-------------------# multipath -ll
mpathbc (360000970000194901212533030313436) dm-5 3PARdata,VV
size=10G features='1 queue_if_no_path' hwhandler='0' wp=rw
`-+- policy='round-robin 0' prio=1 status=active
|- 0:0:1:2 sdi 8:128 active ready running
`- 1:0:1:2 sdk 8:160 active ready running
mpathc (360000970000194901212533030313435) dm-4 3PARdata,VV
size=10G features='1 queue_if_no_path' hwhandler='0' wp=rw
`-+- policy='round-robin 0' prio=1 status=active
|- 0:0:1:1 sdh 8:112 active ready running
`- 1:0:1:1 sdj 8:144 active ready running
mpathb (360000970000194901212533030303243) dm-3
size=2.8M features='1 queue_if_no_path' hwhandler='0' wp=rw
#
14. For RHEL 5.x, remove faulted source paths. Removing faulted source paths updates multipath
to manage destination paths as HP 3PAR paths.
The following example is for disks sdd and sdc.
44 Performing Online Data Migration Using Linux
Page 45

Example 14 Removing a path to a storage device in RHEL 5.x
# echo offline > /sys/block/sdd/device/state
# echo 1 > /sys/block/sdd/device/delete
# echo offline > /sys/block/sdc/device/state
# echo 1 > /sys/block/sdc/device/delete
# multipath -ll
mpath13 (360060160bf902a00e03cb1bb3c3fe411) dm-4 3PARdata,VV
[size=150G][features=0][hwhandler=0][rw]
\_ round-robin 0 [prio=1][active]
\_ 2:0:1:2 sdj 8:144 [active][ready]
\_ 3:0:1:2 sdm 8:192 [active][ready]
mpath12 (360060160bf902a00cae2a2a33c3fe411) dm-3 3PARdata,VV
[size=200G][features=0][hwhandler=0][rw]
\_ round-robin 0 [prio=1][active]
\_ 2:0:1:1 sdi 8:128 [active][ready]
\_ 3:0:1:1 sdl 8:176 [active][ready]
mpath11 (360060160bf902a002ac0388f3c3fe411) dm-2 3PARdata,VV
[size=200G][features=0][hwhandler=0][rw]
\_ round-robin 0 [prio=1][active]
\_ 2:0:1:0 sdh 8:112 [active][ready]
\_ 3:0:1:0 sdk 8:160 [active][ready]
#
15. Start the migration by using the HP 3PAR Online Import Utility startmigration command.
Example 15 Starting migration by using startmigration
>startmigration -migrationid 1411673030253
>SUCCESS: Data transfer started successfully.
Viewing Migration Status
Viewing all Migrations
To view all migrations, use the showmigration command from the HP 3PAR Online Import Utility.
Viewing Migrations for a Selected Source Storage System
To view all migrations for a selected source EMC Storage system, use the showmigration
command with the source option from the HP 3PAR Online Import Utility. All migrations for the
storage system are displayed.
Viewing a Selected Migration
To view a selected migration, use the showmigration command with the migrationid option
from the HP 3PAR Online Import Utility.
Viewing Selected Migration Progress by Volume
To view details for a selected migration by source storage system volume, use the
showmigrationdetails command with the migrationid option from the HP 3PAR Online
Import Utility.
Online Data Migration with Native device-mapper Multipath
To perform online data migration using RHEL 5.x or RHEL 6.x, follow these steps.
1. Zone the source array to the destination array.
2. Using the HP 3PAR Online Import Utility addsource command, add the source storage system
Online Data Migration with Native device-mapper Multipath 45
Page 46

Example 16 Using addsource to add a source storage system for online data migration
>addsource -type VMAX -mgmtip 10.10.10.10 -user admin -password adminpw -uid xxxxxxxxxxxxxxxx
>SUCCESS: Added source storage system.
>
>showsource
NAME TYPE UNIQUE_ID FIRMWARE MANA
GEMENT_SERVER OPERATIONAL_STATE
SYMMETRIX+000194901212 VMAX xxxxxxxxxxxxxxxx 5876.229.145
10.10.10.10 Good
3. Using the HP 3PAR Online Import Utility adddestination command, add the destination
HP 3PAR StoreServ Storage system.
Example 17 Using adddestination to add the destination storage system for online data
migration
>adddestination -type 3PAR -mgmtip 10.10.10.10 -user 3paradm -password 3parpassword
>SUCCESS: Added destination storage system.
>
>showdestination
NAME TYPE UNIQUE_ID FIRMWARE MANAGEMENT_SERVER OPER
ATIONAL_STATE PEER_PORTS
3par_7200_DCA_01 3PAR 2FF70002AC005F92 3.2.1 10.10.10.10 Norm
al 2022-0202-AC00-5F92(0:2:2) 2024-0202-AC00-5F92(0:2:4) 2122-0202-AC00-5F92(1:2:2) 2124-02
02-AC00-5F92(1:2:4)
4. Zone the host to the HP 3PAR StoreServ Storage system.
5. Configure native device-mapper multipath on the host:
a. If multipath is not already installed, install it.
b. Register HP 3PAR LUN types with native device-mapper-multipath by whitelisting HP
3PAR-specific information (in the /etc/multipath.conf file, the vendor is 3PARdata
and the product is VV). See the HP 3PAR StoreServ product documentation on the Linux
host configuration.
NOTE: 3PARdata and VV are case sensitive.
c. Register EMC LUN types with native device-mapper-multipath by whitelisting EMC source
array -specific information (if not previously configured).
d. Start native device-mapper-multipath.
e. Reload the multipath.conf file.
46 Performing Online Data Migration Using Linux
Page 47

Example 18 Updating the multipath.conf file
# multipath -v2
# multipath -ll
mpath13 (360060160bf902a00e03cb1bb3c3fe411) dm-4 DGC,VRAID
[size=150G][features=1 queue_if_no_path][hwhandler=1 emc][rw]
\_ round-robin 0 [prio=1][active]
\_ 2:0:0:2 sde 8:64 [active][ready]
\_ round-robin 0 [prio=0][enabled]
\_ 3:0:0:2 sdg 8:96 [active][ready]
mpath12 (360060160bf902a00cae2a2a33c3fe411) dm-3 DGC,VRAID
[size=200G][features=1 queue_if_no_path][hwhandler=1 emc][rw]
\_ round-robin 0 [prio=1][active]
\_ 3:0:0:1 sdf 8:80 [active][ready]
\_ round-robin 0 [prio=0][enabled]
\_ 2:0:0:1 sdd 8:48 [active][ready]
mpath11 (360060160bf902a002ac0388f3c3fe411) dm-2 DGC,VRAID
[size=200G][features=1 queue_if_no_path][hwhandler=1 emc][rw]
\_ round-robin 0 [prio=1][active]
\_ 3:0:0:0 sdb 8:16 [active][ready]
\_ round-robin 0 [prio=0][enabled]
\_ 2:0:0:0 sdc 8:32 [active][ready]
#
6. Using the HP 3PAR Online Import Utility, execute the createmigration command with the
-migtype online option.
Example 19 Using createmigration with -migtype online
>createmigration -sourceuid xxxxxxxxxxxxxxxx -srchost "X7DBU-02-IG" -destcpg "testcpg" -destprov full
-migtype online
>SUCCESS: Migration job submitted successfully. Please check status/details using showmigration command.
Migration id: 1411673030253
This step admits LUNs presented to the EMC Storage system and exports them to the HP 3PAR
host created on the EMC Storage system.
NOTE: Be aware, the createmigration command may take several minutes to complete.
TIP: Make a note of the Migration ID as it will be used in commands to track migration
progress.
7. Execute the showmigration command to verify that the data migration task preparation
has completed successfully. This may take some time. On the successful creation of the task
the STATUS column will indicate preparationcomplete(100%).
>showmigration
MIGRATIONID TYPE SOURCE_NAME
DESTINATION_NAME START_TIME
END_TIME STATUS(PROGRESS)(MESSAGE)
1411673030253 online SYMMETRIX+000194901212
3par_7200_DCA_01 Thu Sep 25 15:
23:50 EDT 2014 -NA- preparationcomplete(100%)(-NA-)
8. Execute the showmigrationdetails command to verify the volumes being migrated. In
the preparation stage, PROGRESS for each volume will be 0% and the TASK_ID will be
unknown.
>showmigrationdetails -migrationid 1411673030253
SOURCE_VOLUME DESTINATION_VOLUME TASK_ID PROGRESS
Online Data Migration with Native device-mapper Multipath 47
Page 48

Volume 00145 Volume_00145 |unknown| 0%
Volume 00146 Volume_00146 |unknown| 0%
>
9. HP recommends that you change the HP 3PAR host persona/host OS to the appropriate setting
before enabling access to the HP 3PAR array.
NOTE: EMC Storage arrays do not implement specific OS settings when registering host
initiators on the EMC Storage array. During migration, online import cannot determine the
host OS when migrating the hosts to the HP 3PAR StoreServ Storage. All hosts that are being
created on the HP 3PAR StoreServ Storage during EMC migration are set by default to host
persona 2.
10. Update path configuration on the host. Multipath now recognizes extra paths to the HP 3PAR
StoreServ Storage, but all are still managed as source array devices.
a. Rescan.
b. Reload the multipath.conf file.
Example 20 Updating path configuration on the host
# echo "1" > /sys/class/fc_host/host2/issue_lip
# echo "- - -" > /sys/class/scsi_host/host2/scan
# echo "1" > /sys/class/fc_host/host3/issue_lip
# echo "- - -" > /sys/class/scsi_host/host3/scan
# multipath -ll
mpath13 (360060160bf902a00e03cb1bb3c3fe411) dm-4 DGC,VRAID
[size=150G][features=0][hwhandler=0][rw]
\_ round-robin 0 [prio=0][active]
\_ 2:0:0:2 sde 8:64 [active][ready]
\_ 3:0:0:2 sdg 8:96 [active][ready]
\_ 2:0:1:2 sdj 8:144 [active][ready]
\_ 3:0:1:2 sdm 8:192 [active][ready]
mpath12 (360060160bf902a00cae2a2a33c3fe411) dm-3 DGC,VRAID
[size=200G][features=0][hwhandler=0][rw]
\_ round-robin 0 [prio=0][active]
\_ 3:0:0:1 sdf 8:80 [active][ready]
\_ 2:0:0:1 sdd 8:48 [active][ready]
\_ 2:0:1:1 sdi 8:128 [active][ready]
\_ 3:0:1:1 sdl 8:176 [active][ready]
mpath11 (360060160bf902a002ac0388f3c3fe411) dm-2 DGC,VRAID
[size=200G][features=0][hwhandler=0][rw]
\_ round-robin 0 [prio=0][active]
\_ 3:0:0:0 sdb 8:16 [active][ready]
\_ 2:0:0:0 sdc 8:32 [active][ready]
\_ 2:0:1:0 sdh 8:112 [active][ready]
\_ 3:0:1:0 sdk 8:160 [active][ready]
11. Unzone the host from the source array.
48 Performing Online Data Migration Using Linux
Page 49

Example 21 Unzoning an RHEL 5.x host from the source array.
------------------# multipath -ll
sdb: checker msg is "emc_clariion_checker: query command indicates error"
sdc: checker msg is "emc_clariion_checker: query command indicates error"
sdd: checker msg is "emc_clariion_checker: query command indicates error"
sde: checker msg is "emc_clariion_checker: query command indicates error"
sdf: checker msg is "emc_clariion_checker: query command indicates error"
sdg: checker msg is "emc_clariion_checker: query command indicates error"
mpath13 (360060160bf902a00e03cb1bb3c3fe411) dm-4 DGC,VRAID
[size=150G][features=0][hwhandler=0][rw]
\_ round-robin 0 [prio=1][active]
\_ 2:0:0:2 sde 8:64 [failed][faulty]
\_ 3:0:0:2 sdg 8:96 [failed][faulty]
\_ 2:0:1:2 sdj 8:144 [active][ready]
\_ 3:0:1:2 sdm 8:192 [active][ready]
mpath12 (360060160bf902a00cae2a2a33c3fe411) dm-3 DGC,VRAID
[size=200G][features=0][hwhandler=0][rw]
\_ round-robin 0 [prio=1][active]
\_ 3:0:0:1 sdf 8:80 [failed][faulty]
\_ 2:0:0:1 sdd 8:48 [failed][faulty]
\_ 2:0:1:1 sdi 8:128 [active][ready]
\_ 3:0:1:1 sdl 8:176 [active][ready]
mpath11 (360060160bf902a002ac0388f3c3fe411) dm-2 DGC,VRAID
[size=200G][features=0][hwhandler=0][rw]
\_ round-robin 0 [prio=1][active]
\_ 3:0:0:0 sdb 8:16 [failed][faulty]
\_ 2:0:0:0 sdc 8:32 [failed][faulty]
\_ 2:0:1:0 sdh 8:112 [active][ready]
\_ 3:0:1:0 sdk 8:160 [active][ready]
#
Example 22 Unzoning an RHEL 6.x host from the source array
-------------------# multipath -ll
mpathbc (360000970000194901212533030313436) dm-5 3PARdata,VV
size=10G features='1 queue_if_no_path' hwhandler='0' wp=rw
`-+- policy='round-robin 0' prio=1 status=active
|- 0:0:1:2 sdi 8:128 active ready running
`- 1:0:1:2 sdk 8:160 active ready running
mpathc (360000970000194901212533030313435) dm-4 3PARdata,VV
size=10G features='1 queue_if_no_path' hwhandler='0' wp=rw
`-+- policy='round-robin 0' prio=1 status=active
|- 0:0:1:1 sdh 8:112 active ready running
`- 1:0:1:1 sdj 8:144 active ready running
mpathb (360000970000194901212533030303243) dm-3
size=2.8M features='1 queue_if_no_path' hwhandler='0' wp=rw
#
12. For RHEL 5.x, remove faulted source paths. Removing faulted source paths updates multipath
to manage destination paths as HP 3PAR paths.
The following example is for disks sdd and sdc.
Online Data Migration with Native device-mapper Multipath 49
Page 50

Example 23 Removing a path to a storage device in RHEL 5.x
# echo offline > /sys/block/sdd/device/state
# echo 1 > /sys/block/sdd/device/delete
# echo offline > /sys/block/sdc/device/state
# echo 1 > /sys/block/sdc/device/delete
# multipath -ll
mpath13 (360060160bf902a00e03cb1bb3c3fe411) dm-4 3PARdata,VV
[size=150G][features=0][hwhandler=0][rw]
\_ round-robin 0 [prio=1][active]
\_ 2:0:1:2 sdj 8:144 [active][ready]
\_ 3:0:1:2 sdm 8:192 [active][ready]
mpath12 (360060160bf902a00cae2a2a33c3fe411) dm-3 3PARdata,VV
[size=200G][features=0][hwhandler=0][rw]
\_ round-robin 0 [prio=1][active]
\_ 2:0:1:1 sdi 8:128 [active][ready]
\_ 3:0:1:1 sdl 8:176 [active][ready]
mpath11 (360060160bf902a002ac0388f3c3fe411) dm-2 3PARdata,VV
[size=200G][features=0][hwhandler=0][rw]
\_ round-robin 0 [prio=1][active]
\_ 2:0:1:0 sdh 8:112 [active][ready]
\_ 3:0:1:0 sdk 8:160 [active][ready]
#
13. Start the migration by using the HP 3PAR Online Import Utility startmigration command.
Example 24 Starting migration by using startmigration
>startmigration -migrationid 1411673030253
>SUCCESS: Data transfer started successfully.
Viewing Migration Status
Viewing all Migrations
To view all migrations, use the showmigration command from the HP 3PAR Online Import Utility.
Viewing Migrations for a Selected Source Storage System
To view all migrations for a selected source EMC Storage system, use the showmigration
command with the source option from the HP 3PAR Online Import Utility. All migrations for the
storage system are displayed.
Viewing a Selected Migration
To view a selected migration, use the showmigration command with the migrationid option
from the HP 3PAR Online Import Utility.
Viewing Selected Migration Progress by Volume
To view details for a selected migration by source storage system volume, use the
showmigrationdetails command with the migrationid option from the HP 3PAR Online
Import Utility.
50 Performing Online Data Migration Using Linux
Page 51

6 Performing MDM Using a Windows Host
The MDM process is used when migrating a Windows host with a source EMC Storage system.
The host DSM must be updated to communicate with the destination HP 3PAR StoreServ Storage
system, and the host must be shut down briefly. Host I/O is interrupted only during the time it takes
to reconfigure the host.
Required Information
Source storage system:
• WWN of the source EMC Storage system from which LUNs are being migrated.
• A list of one or more volume name(s) that are being migrated. All volumes must be in same
storage group or different storage groups with identical LUN membership.
OR
Name of host associated with volumes to be migrated. The host and volumes must be in a
supported storage group configuration on the source EMC Storage system. See “Migrations
Supported by HP 3PAR Online Import Utility for EMC Storage” (page 24) for details.
Destination storage system:
• Provisioning type for the volumes being created on the destination storage system (thin or full).
NOTE: TDVVs are not supported as a destination for online import.
• The name of the CPG on the destination storage system where the volumes are being migrated
to.
Creating the Data Migration Task
To create the data migration task for MDM, follow these steps:
Required Information 51
Page 52

1. From the HP 3PAR Online Import Utility, execute the createmigration command.
Example 25 createmigration command
>createmigration -sourceuid 50067890C6E059EE -srchost "HPDL585-01" -destcpg "FC_r5" -destprov thin -migtype
MDM
>SUCCESS: Migration job submitted successfully. Please check status/details using showmigration command.
Migration id: 1395864499741
NOTE: Be aware, the createmigration command may take several minutes to complete.
TIP: Make a note of the Migration ID as it will be used in commands to track migration
progress.
2. Execute the showmigration command to verify that the data migration task preparation
has completed successfully. This may take some time. On the successful creation of the task
the STATUS column will indicate preparationcomplete(100%).
Example 26 showmigration command
>showmigration -migrationid 1395864499741
MIGRATION_ID TYPE SOURCE_NAME DESTINATION_NAME START_TIME END_TIME
STATUS(PROGRESS)(MESSAGE)
1395864499741 MDM CLARiiON+APM00123452867 3par_7200_DCA_01 Wed Mar 26 13:08:19 PDT 2014 -NA-
preparationcomplete(100%)(-NA-)
3. Execute the showmigrationdetails command to verify the volumes being migrated. In
the preparation stage, PROGRESS for each volume will be 0% and the TASK_ID will be
unknown.
Example 27 showmigrationdetails command
>showmigrationdetails -migrationid 1395864499741
SOURCE_VOLUME DESTINATION_VOLUME TASK_ID PROGRESS
OIU_Test_Lun_01 OIU_Test_Lun_01 |unknown| 0%
Updating Host Multipath Software and Unzoning from the Source EMC Storage System
CAUTION:
EMC PowerPath must not be installed during the migration process. For Windows Server 2012,
Windows Server 2012 R2, Windows Server 2008, and Windows Server 2008 R2, Windows
native MPIO must manage the paths. For Windows Server 2003 and Windows Server 2003 R2,
the HP MPIO for Windows Server 2003 must manage the paths.
Stop all applications before removing EMC PowerPath. For cluster configurations, also stop the
cluster services and the cluster. Applications should be restarted after migration has started.
Perform the following steps on the Windows host:
1. Remove EMC PowerPath Multipath software from host following the EMC PowerPath
documentation instructions.
52 Performing MDM Using a Windows Host
Page 53

IMPORTANT: If you are uninstalling EMC PowerPath from a Windows host where the host
is booting from SAN, you will be prompted to restart before removal is completed. This restart
is required and must be completed.
After removal, you will be prompted to restart the host in order for the changes to take effect.
Do not restart at this point.
2. The removal of EMC PowerPath Multipath software may have also disabled the MPIO
installation but not removed it. Manually check to see whether MPIO is still loaded, and if it
is, fully remove it at this time. Now restart the host.
For Windows Server 2003 R2 Cluster or Windows Server 2003 Cluster, if the cluster service
has restarted after the reboot, you must stop it again on each cluster node.
3. Zone the host to the destination HP 3PAR StoreServ Storage system to establish communication.
Using the HP 3PAR Management Console, verify host-to-destination connectivity by confirming
host initiator login on the HP 3PAR StoreServ Storage.
4. Configure MPIO multipath software on the host.
For supported Windows Server OSs except Windows Server 2003 or
Windows Server 2003 R2
• Install MPIO.
• Register HP 3PAR LUN types with MPIO by configuring MPIO to use 3PARdataVV as
the device hardware ID.
NOTE: 3PARdataVV is case sensitive.
For Windows Server 2003 or Windows Server 2003 R2
a. Install HP MPIO DSM for HP 3PAR.
NOTE: You will be prompted to reboot the host in order for the change to take effect.
Do not reboot at this point, since this procedure will require stopping the Windows host
in (step 5).
b. Upgrade HBA drivers if required. For information about supported HBA driver versions,
see HP SPOCK:
HP SPOCK (http://www.hp.com/storage/spock)
c. Install the HP 3PAR NULL driver. The driver is available as a zip file (QL226–10001.zip)
on the HP Software Depot website:
HP Software Depot (https://h20392.www2.hp.com/portal/swdepot/
displayProductInfo.do?productNumber=3PAR_Null_Driver)
NOTE: You will be prompted to reboot the host in order for the change to take effect. Do
not reboot at this point, since this procedure will require stopping the Windows host in (step
5).
5. Shut down the Windows host. Leave the host offline until the migration is started.
6. Unzone the source EMC Storage system from the host.
7. HP recommends that you change the HP 3PAR host persona/host OS to the appropriate setting
before enabling access to the HP 3PAR array.
Updating Host Multipath Software and Unzoning from the Source EMC Storage System 53
Page 54

NOTE: EMC Storage arrays do not implement specific OS settings when registering host
initiators on the EMC Storage array. During migration, online import cannot determine the
host OS when migrating the hosts to the HP 3PAR StoreServ Storage. All hosts that are being
created on the HP 3PAR StoreServ Storage during EMC migration are set by default to host
persona 2.
Starting the Data Migration from Source EMC Storage System to Destination HP 3PAR StoreServ Storage System
1. From the HP 3PAR Online Import Utility, execute the startmigration command.
Example 28 startmigration command
>startmigration -migrationid 1396643904320
>SUCCESS: Data transfer started successfully
2. To view the status of the migration, execute the showmigration command.
Example 29 showmigration command
>showmigration -migrationid 1396643904320
MIGRATION_ID TYPE SOURCE_NAME DESTINATION_NAME START_TIME END_TIME STATUS(PROGRESS)(MESSAGE)
1396643904320 MDM CLARiiON+APM00 3par_7200_DCB_01 Fri Apr 04 16:38:24 EDT 2014 -NA unpresenting(1%)(-NA-)
TIP: The final status on successful completion will indicate “success”.
Bringing the Windows Host Back Online
1. Verify that the import has started and confirm that a TASK_ID is available for each volume
by issuing the showmigrationdetails command.
It is unsafe to bring the hosts back online if the TASK_ID number is not yet available in the
output of showmigrationdetails.
Example 30 Unsafe to bring the host online
>showmigrationdetails -migrationid 1395864499741
SOURCE_VOLUME DESTINATION_VOLUME TASK_ID PROGRESS
Test_Lun_01 Test_Lun_01 |unknown| 0%
Example 31 Safe to bring the host online:
>showmigrationdetails -migrationid 1395864499741
SOURCE_VOLUME DESTINATION_VOLUME TASK_ID PROGRESS
Test_Lun_01 Test_Lun_01 6134 0%
2. After the import has started for all volumes, bring the Windows Server host or Windows cluster
hosts that were shut down back online.
For a Windows Server host that is booting from SAN, during host startup the HBA BIOS must
be reconfigured to select the HP 3PAR boot device. If this is not done, the host will not start
up.
54 Performing MDM Using a Windows Host
Page 55

3. Check the disk status by pointing to diskpart.exe or by opening Disk Manager.
4. All applications and services can now be restarted and the host may resume normal operations
(including first restarting the cluster if applicable).
Viewing Migration Status
Viewing all Migrations
To view all migrations, use the showmigration command from the HP 3PAR Online Import Utility.
Viewing Migrations for a Selected Source Storage System
To view all migrations for a selected source EMC Storage system, use the showmigration
command with the source option from the HP 3PAR Online Import Utility. All migrations for the
storage system are displayed.
Viewing a Selected Migration
To view a selected migration, use the showmigration command with the migrationid option
from the HP 3PAR Online Import Utility.
Viewing Selected Migration Progress by Volume
To view details for a selected migration by source storage system volume, use the
showmigrationdetails command with the migrationid option from the HP 3PAR Online
Import Utility.
Aborting a Migration
A migration can be aborted before it has started by using the removemigration command from
the HP 3PAR Online Import Utility. Once a migration has started, it cannot be aborted. To completely
remove a migration, the removemigration command must be executed a second time. See
“removemigration” (page 80).
Performing Subsequent Migrations
The source EMC Storage system and destination HP 3PAR StoreServ Storage system that have
been defined using the HP 3PAR Online Import Utility addsource/adddestination commands,
can remain defined for subsequent migrations. You only need to run the HP 3PAR Online Import
Utility addsource and adddestination commands if a subsequent migration will be using a
new source or destination storage system.
Viewing Migration Status 55
Page 56

7 Performing MDM Using a Linux Host
The MDM type can be used when migrating a Linux host with a source EMC Storage system. The
host must be shut down briefly during MDM. Host I/O is interrupted only during the time that the
host is shut down.
If you are performing online migration, see “Performing Online Data Migration Using Linux” (page
40).
Required Information
Source storage system:
• WWN of the source EMC Storage system from which LUNs are being migrated.
• A list of one or more volume names that are being migrated. All volumes must be in the same
storage group or different storage groups with identical LUN membership.
OR
Name of the host associated with volumes to be migrated. Host and volumes must be in a
supported storage group configuration on the source EMC Storage system. See “Migrations
Supported by HP 3PAR Online Import Utility for EMC Storage” (page 24) for details.
Destination storage system:
• Provisioning type for the volumes being created on the destination storage system (thin or full).
NOTE: TDVVs are not supported as a destination for online import.
• The name of the CPG on the destination storage system where the volumes are being migrated
to.
Creating the Data Migration Task
To create the data migration task for MDM, follow these steps:
56 Performing MDM Using a Linux Host
Page 57

1. From the HP 3PAR Online Import Utility, execute the createmigration command.
Example 32 createmigration command
>createmigration -sourceuid 50067890C6E059EE -srchost "HPDL585-01" -destcpg "FC_r5" -destprov thin -migtype
MDM
>SUCCESS: Migration job submitted successfully. Please check status/details using showmigration command.
Migration id: 1395864499741
NOTE: Be aware, the createmigration command may take several minutes to complete.
TIP: Make a note of the Migration ID as it will be used in commands to track migration
progress.
2. Execute the showmigration command to verify that the data migration task preparation
has completed successfully. This may take some time. On the successful creation of the task
the STATUS column will indicate preparationcomplete(100%).
Example 33 showmigration command
>showmigration -migrationid 1395864499741
MIGRATION_ID TYPE SOURCE_NAME DESTINATION_NAME START_TIME END_TIME
STATUS(PROGRESS)(MESSAGE)
1395864499741 MDM CLARiiON+APM00123452867 3par_7200_DCA_01 Wed Mar 26 13:08:19 PDT 2014 -NA-
preparationcomplete(100%)(-NA-)
3. Execute the showmigrationdetails command to verify the volumes being migrated. In
the preparation stage, PROGRESS for each volume will be 0% and the TASK_ID will be
unknown.
Example 34 showmigrationdetails command
>showmigrationdetails -migrationid 1395864499741
SOURCE_VOLUME DESTINATION_VOLUME TASK_ID PROGRESS
OIU_Test_Lun_01 OIU_Test_Lun_01 |unknown| 0%
Updating Host Multipath Software and Unzoning from Source EMC Storage System
CAUTION: EMC PowerPath must not be installed during the migration process. Native
device-mapper-multipath must be managing the paths.
Stop all applications before removing EMC PowerPath. For cluster configurations, also stop the
cluster services and the cluster. Applications should be restarted after migration has started.
Perform the following steps on the Linux host:
1. Remove EMC PowerPath Multipath software from the host by following these steps:
a. Close all applications on the host.
b. For a cluster, stop the cluster services, and then stop the cluster.
Updating Host Multipath Software and Unzoning from Source EMC Storage System 57
Page 58

c. Unmount the application file systems, bring offline any raw devices (if configured), and
deactivate any volume groups where Logical Volume Manager is in use.
d. Uninstall EMC PowerPath from the host, following the EMC PowerPath documentation
instructions.
2. Zone the host to the destination HP 3PAR StoreServ Storage system to establish communication.
Using the HP 3PAR Management Console, verify host-to-destination connectivity by confirming
host initiator login on the HP 3PAR StoreServ Storage.
3. Configure device-mapper-multipath (DM) on the host.
a. Install device-mapper-multipath (if not already installed).
b. Register HP 3PAR LUN types with DM by whitelisting HP 3PAR-specific information (the
vendor is 3PARdata and the product is VV) in /etc/multipath.conf. See the
HP 3PAR StoreServ product documentation on the Linux host configuration.
NOTE: 3PARdata and VV are case sensitive.
4. Restart device-mapper-multipath.
5. Modify /etc/fstab for new mount points. Remount file systems.
6. Where applicable, make the appropriate changes to the Logical Volume Manager
configuration.
IMPORTANT: In Linux, EMC PowerPath devices are presented as /dev/emcpower* (i.e.
/dev/emcpowera). EMC PowerPath removal in Linux also removes this device type. This
changes when the Linux native device-mapper multipath assumes management of these devices.
For example, before EMC PowerPath removal, consider /dev/sdb and /dev/sdc being
combined to /dev/emcpowera. After EMC PowerPath removal, /dev/sdb and /dev/sdc
would be represented by /dev/mpathx.
This represents a challenge for customers who use direct device referencing in /etc/fstab
or other custom scripts. HP recommends that fstab mounts are performed using blkid/uuid;
however this is not always employed. For example, if /dev/emcpowera is mounted as /var,
then after the EMC PowerPath removal, /var would not automatically mount to /dev/mpathx.
7. Shut down the Linux host. Leave the host offline until the migration is started.
8. Unzone the source EMC Storage system from the host.
9. HP recommends that you change the HP 3PAR host persona/host OS to the appropriate setting
before enabling access to the HP 3PAR array.
NOTE: EMC Storage arrays do not implement specific OS settings when registering host
initiators on the EMC Storage array. During migration, online import cannot determine the
host OS when migrating the hosts to the HP 3PAR StoreServ Storage. All hosts that are being
created on the HP 3PAR StoreServ Storage during EMC migration are set by default to host
persona 2.
Starting the Data Migration from Source EMC Storage System to Destination HP 3PAR StoreServ Storage System
1. From the HP 3PAR Online Import Utility, execute the startmigration command.
Example 35 startmigration command
>startmigration –migrationid 1122334456
>SUCCESS: Data transfer started successfully
2. To view the status of the migration, execute the showmigration command.
58 Performing MDM Using a Linux Host
Page 59

Example 36 showmigration command
>showmigration -migrationid 1396643904320
MIGRATION_ID TYPE SOURCE_NAME DESTINATION_NAME START_TIME END_TIME STATUS(PROGRESS)(MESSAGE)
1396643904320 MDM CLARiiON+APM00125127014 3par_7200_DCB_01 Fri Apr 04 16:38:24 EDT 2014 -NA-
unpresenting(1%)(-NA-)
TIP: The final status on successful completion will indicate “success”.
Bringing the Linux Host Back Online
To bring the Linux host back online, follow these steps:
1. Verify that the import has started and confirm that a TASK_ID is available for each volume
by issuing the showmigrationdetails command.
Example 37 Unsafe to bring the host online
>showmigrationdetails -migrationid 1395864499741
SOURCE_VOLUME DESTINATION_VOLUME TASK_ID PROGRESS
Test_Lun_01 Test_Lun_01 |unknown| 0%
Example 38 Safe to bring the host online:
>showmigrationdetails -migrationid 1395864499741
SOURCE_VOLUME DESTINATION_VOLUME TASK_ID PROGRESS
Test_Lun_01 Test_Lun_01 6134 0%
2. Once the import has started for all volumes, bring the Linux host online.
3. On the Linux host, scan for newly exported LUNs from the destination HP 3PAR StoreServ
Storage system. Perform this step for all HBAs on the host that are connected to the HP 3PAR
StoreServ Storage system.
Example 39 Scanning Exported LUNs
# ls /sys/class/fc_host
host2
# echo "1" > /sys/class/fc_host/host2/issue_lip#
echo "- - -" > /sys/class/scsi_host/host2/scan
4. On the Linux host, update the multipath for LUNs exported from the destination EMC Storage
system.
Bringing the Linux Host Back Online 59
Page 60

Example 40 Linux Host with Multiple LUNs
# multipath -v2
Apr 10 14:31:11 | mpatha: ignoring map
# multipath -l
mpatho (360060160bf902a0078177a31e4b4e311) dm-2 3PARdata,VV
size=100G features='0' hwhandler='0' wp=rw
`-+- policy='round-robin 0' prio=0 status=active
|- 2:0:0:70 sdb 8:16 active undef running
`- 2:0:1:70 sde 8:64 active undef running
mpathj (360060160bf902a0098bf9953e4b4e311) dm-3 3PARdata,VV
size=1.0M features='0' hwhandler='0' wp=rw
`-+- policy='round-robin 0' prio=0 status=active
|- 2:0:0:72 sdd 8:48 active undef running
`- 2:0:1:72 sdg 8:96 active undef running
mpathf (360060160bf902a0018b35042e4b4e311) dm-4 3PARdata,VV
size=100G features='0' hwhandler='0' wp=rw
`-+- policy='round-robin 0' prio=0 status=active
|- 2:0:0:71 sdc 8:32 active undef running
`- 2:0:1:71 sdf 8:80 active undef running
5. All applications and services can now be restarted and the host may resume normal operations
(including first restarting the cluster if applicable).
Viewing Migration Status
Viewing all Migrations
To view all migrations, use the showmigration command from the HP 3PAR Online Import Utility.
Viewing Migrations for a Selected Source Storage System
To view all migrations for a selected source EMC Storage system, use the showmigration
command with the source option from the HP 3PAR Online Import Utility. All migrations for the
storage system are displayed.
Viewing a Selected Migration
To view a selected migration, use the showmigration command with the migrationid option
from the HP 3PAR Online Import Utility.
Viewing Selected Migration Progress by Volume
To view details for a selected migration by source storage system volume, use the
showmigrationdetails command with the migrationid option from the HP 3PAR Online
Import Utility.
Aborting a Migration
A migration can be aborted before it has started by using the removemigration command from
the HP 3PAR Online Import Utility. Once a migration has started, it cannot be aborted. To completely
remove a migration, the removemigration command must be executed a second time. See
“removemigration” (page 80).
Performing Subsequent Migrations
The source EMC Storage system and destination HP 3PAR StoreServ Storage system that have
been defined using the HP 3PAR Online Import Utility: addsource/adddestination commands,
can remain defined for subsequent migrations. You only need to run the HP 3PAR Online Import
Utility addsource and adddestination commands if a subsequent migration will be using a
new source or destination storage system.
60 Performing MDM Using a Linux Host
Page 61

8 Performing MDM Using a Hyper-V Host
The MDM process is used when migrating a Hyper-V host with a source EMC Storage system. The
host DSM must be updated to communicate with the destination HP 3PAR StoreServ Storage system,
and the host must be shutdown briefly. Host I/O is interrupted only during the time it takes to
reconfigure the host.
Required Information
Source storage system:
• WWN of the source EMC Storage system from which LUNs are being migrated.
• A list of one or more volume name(s) that are being migrated. All volumes must be in same
storage group or different storage groups with identical LUN membership.
OR
Name of host associated with volumes to be migrated. Host and volumes must be in supported
storage group configuration on the source EMC Storage system.
For details, see “Migrations Supported by HP 3PAR Online Import Utility for EMC Storage”
(page 24).
Destination storage system:
• Provisioning type for the volumes being created on the destination storage system (thin or full).
NOTE: TDVVs are not supported as a destination for online import.
• The name of the CPG on the destination storage system where the volumes are being migrated
to.
Creating the Data Migration Task
To create the data migration task for MDM, follow these steps:
Required Information 61
Page 62

1. From the HP 3PAR Online Import Utility, execute the createmigration command.
Example 41 createmigration command
>createmigration -sourceuid 50067890C6E059EE -srchost "HPDL585-01" -destcpg "FC_r5" -destprov thin -migtype
MDM
>SUCCESS: Migration job submitted successfully. Please check status/details using showmigration command.
Migration id: 1395864499741
NOTE: Be aware, the createmigration command may take several minutes to complete.
TIP: Make a note of the Migration ID as it will be used in commands to track migration
progress.
2. Execute the showmigration command to verify that the data migration task preparation
has completed successfully. This may take some time. On the successful creation of the task
the STATUS column will indicate preparationcomplete(100%).
Example 42 showmigration command
>showmigration -migrationid 1395864499741
MIGRATION_ID TYPE SOURCE_NAME DESTINATION_NAME START_TIME END_TIME
STATUS(PROGRESS)(MESSAGE)
1395864499741 MDM CLARiiON+APM00123452867 3par_7200_DCA_01 Wed Mar 26 13:08:19 PDT 2014 -NA-
preparationcomplete(100%)(-NA-)
3. Execute the showmigrationdetails command to verify the volumes being migrated. In
the preparation stage, PROGRESS for each volume will be 0% and the TASK_ID will be
unknown.
Example 43 showmigrationdetails command
>showmigrationdetails -migrationid 1395864499741
SOURCE_VOLUME DESTINATION_VOLUME TASK_ID PROGRESS
OIU_Test_Lun_01 OIU_Test_Lun_01 |unknown| 0%
Updating Host Multipath Software and Unzoning from the Source EMC Storage System
CAUTION:
EMC PowerPath must not be installed during the migration process. Native MPIO must be managing
the paths.
Stop all applications before removing EMC PowerPath. For cluster configurations, also stop the
cluster services and the cluster. Applications should be restarted after migration has started.
Perform the following steps on the Hyper-V host:
1. Remove EMC PowerPath Multipath software from host following the EMC PowerPath
documentation instructions.
62 Performing MDM Using a Hyper-V Host
Page 63

NOTE: After removal, you will be prompted to restart the host in order for the changes to
take effect. Do not restart at this point.
2. The removal of EMC PowerPath Multipath software might have also disabled the MPIO
installation, but not removed it. Manually check to see whether MPIO is still loaded, and if it
is, fully remove it at this time. Now restart the host.
3. Check cluster reservation on the LUNs and, if present, clear it by shutting down the cluster by
performing the following steps:
a. Using the Failover Cluster Manager, stop the cluster.
b. Clear the cluster reservation by following the appropriate Microsoft documentation about
Hyper-V clusters.
4. Zone the host to the destination HP 3PAR StoreServ Storage to establish communication.
Validate host-to-destination connectivity using the HP 3PAR Management Console by confirming
host initiator login on the HP 3PAR StoreServ Storage.
5. Configure the MPIO multipath software on the host.
• Install MPIO
• Register HP 3PAR LUN types with MPIO by configuring MPIO to use 3PARdataVV as
the device hardware ID.
NOTE: 3PARdataVV is case sensitive.
You will be prompted to reboot the host in order for the change to take effect. Do not
restart at this point, as this procedure will already require stopping and restarting the
Windows host immediately in the following step.
6. Shut down the Hyper-V host. Leave the host offline until the migration is started.
7. Unzone the source EMC Storage system from the host.
8. HP recommends that you change HP 3PAR host persona/host OS to the appropriate setting
before enabling access to the HP 3PAR array.
NOTE: EMC Storage arrays do not implement specific OS settings when registering host
initiators on the EMC Storage array. During migration, online import cannot determine the
host OS when migrating the hosts to the HP 3PAR StoreServ Storage. All hosts that are being
created on the HP 3PAR StoreServ Storage during EMC migration are set by default to host
persona 2.
Starting the Data Migration from Source EMC Storage System to Destination HP 3PAR StoreServ Storage System
To start the data migration, follow these steps:
1. From the HP 3PAR Online Import Utility, execute the startmigration command.
Example 44 startmigration command
>startmigration -migrationid 1396643904320
>SUCCESS: Data transfer started successfully
2. To view the status of the migration, execute the showmigration command.
Example 45 showmigration command
>showmigration -migrationid 1396643904320
MIGRATION_ID TYPE SOURCE_NAME DESTINATION_NAME START_TIME END_TIME STATUS(PROGRESS)(MESSAGE)
1396643904320 MDM CLARiiON+APM00 3par_7200_DCB_01 Fri Apr 04 16:38:24 EDT 2014 -NAunpresenting(
1%)(-NA-)
Starting the Data Migration from Source EMC Storage System to Destination HP 3PAR StoreServ Storage System 63
Page 64

TIP: The final status on successful completion will indicate “success”.
Bringing the Hyper-V Host Back Online
To bring the Hyper-V Host back online, follow these steps:
1. Verify that the import has started and confirm that a TASK_ID is available for each volume
by issuing the showmigrationdetails command.
Example 46 Unsafe to bring the host online
>showmigrationdetails -migrationid 1395864499741
SOURCE_VOLUME DESTINATION_VOLUME TASK_ID PROGRESS
Test_Lun_01 Test_Lun_01 |unknown| 0%
Example 47 Safe to bring the host online
>showmigrationdetails -migrationid 1395864499741
SOURCE_VOLUME DESTINATION_VOLUME TASK_ID PROGRESS
Test_Lun_01 Test_Lun_01 6134 0%
2. After the import has started for all volumes, bring the Hyper-V host that was shut down back
online.
3. Bring the quorum and CSV disks back online and start virtual machines from the Failover
Cluster Manager.
4. Restart all applications and services. The host can now resume normal operations.
Viewing Migration Status
Viewing all Migrations
To view all migrations, use the showmigration command from the HP 3PAR Online Import Utility.
Viewing Migrations for a Selected Source Storage System
To view all migrations for a selected source EMC Storage system, use the showmigration
command with the source option from the HP 3PAR Online Import Utility. All migrations for the
storage system are displayed.
Viewing a Selected Migration
To view a selected migration, use the showmigration command with the migrationid option
from the HP 3PAR Online Import Utility.
Viewing Selected Migration Progress by Volume
To view details for a selected migration by source storage system volume, use the
showmigrationdetails command with the migrationid option from the HP 3PAR Online
Import Utility.
Aborting a Migration
A migration can be aborted before it has started by using the removemigration command from
the HP 3PAR Online Import Utility. Once a migration has started, it cannot be aborted. To completely
remove a migration, the removemigration command must be executed a second time. See
“removemigration” (page 80).
64 Performing MDM Using a Hyper-V Host
Page 65

Performing Subsequent Migrations
The source EMC Storage system and destination HP 3PAR StoreServ Storage system that have
been defined using the HP 3PAR Online Import Utility addsource/adddestination commands,
can remain defined for subsequent migrations. You only need to run the HP 3PAR Online Import
Utility addsource and adddestination commands if a subsequent migration will be using a
new source or destination storage system.
Performing Subsequent Migrations 65
Page 66

9 Performing Offline Data Migration
Prerequisite Component Installation
1. Check the HP SPOCK website to confirm proper configuration. See “Configuration Rules for
HP 3PAR Online Import for EMC Storage Support” (page 15).
2. Install EMC SMI-S Provider. See “Installing EMC SMI-S Provider” (page 15).
3. Install HP 3PAR Online Import Utility for EMC Storage. See “Installing the HP 3PAR Online
Import Utility for EMC Storage” (page 17).
4. Ensure that the source EMC Storage system is correctly zoned to the destination HP 3PAR
StoreServ Storage system. See “Zoning the Source EMC Storage to the Destination HP 3PAR
StoreServ Storage System” (page 33).
Preparing Host for Migration
To prepare for a successful migration, stop all applications on the host that may be accessing the
LUNs to be migrated. This also includes any replication and backup applications on the LUNs.
Next, set the LUNs to be migrated to an offline/unmounted state.
NOTE: Any applications and services that may automatically start with a reboot should be
disabled until after the migration has started and the documentation instructs you to bring your
host back online.
Preparing Windows Clusters for Migration
When Windows clusters are migrated, the cluster must first be disabled so that any SCSI reservations
in use are released. For Windows 2008 R2 cluster, this can be achieved by stopping all applications
running on the cluster, then stopping the cluster service on ALL nodes (For more information, see
Microsoft documentation on how to start/stop the cluster services).
When a Windows Server 2012 cluster is migrated, maintenance mode must be set on the cluster
disks to clear SCSI reservations on the disks. Because the quorum disk cannot be set in the
maintenance mode, it must be set to the offline mode to clear its SCSI reservations. Then, the cluster
service must be stopped on all nodes.
Zoning the Host to the Destination HP 3PAR StoreServ Storage System
Zone the host to the destination HP 3PAR StoreServ Storage system to establish communication.
Using the HP 3PAR Management Console, verify host-to-destination connectivity by confirming host
initiator login on the HP 3PAR StoreServ Storage.
Shutting Down the Host
Shut down the host to continue offline migration.
Removing the Host from the Storage Group
Using the EMC Unisphere tool, remove the host(s) from the storage group containing LUNs to be
migrated.
Identifying the Source and Destination Storage Systems
This section provides information about identifying and adding the source storage system for
migration. There are prerequisites and information needed before beginning.
66 Performing Offline Data Migration
Page 67

Prerequisites
• EMC SMI-S Provider is installed and operational.
• The source EMC Storage system must be registered in the EMC SMI-S Provider application.
• HP 3PAR Online Import Utility is installed and operational with network access to both the
EMC SMI-S Provider server managing the source storage system and the destination HP 3PAR
StoreServ Storage system.
• Source EMC Storage system and destination HP 3PAR StoreServ Storage system are zoned
to each other.
Required Information
Source Storage System:
• IP address of the EMC SMI-S Provider server that is managing the source EMC Storage system
from which the volumes are being migrated.
◦ If the SMI-S server is managing more than one source EMC Storage system and you only
want to identify one of them you need to know the WWN of the source storage system.
• User name and password for the EMC SMI-S Provider server.
• Port to access EMC SMI-S Provider.
Secure port default 5989.◦
◦ Non-secure port default 5988.
Destination HP 3PAR StoreServ Storage system:
• IP address of the destination HP 3PAR StoreServ Storage system.
• User name and password for the HP 3PAR management application with Super user permission.
Identifying the Source Storage System
To identify the source storage system, follow these steps:
1. From the HP 3PAR Online Import Utility, execute the addsource command.
NOTE: Use your local host user name and password credentials to log into the HP 3PAR
Online Import Utility.
Example 48 addsource command
>addsource -type VNX -mgmtip 10.10.10.10 -user admin -password adminpw -uid
xxxxxxxxxxxxxxxx
>SUCCESS: Added source storage system
2. Execute the showsource command to verify the source storage system information.
Example 49 showsource command
>showsource –type VNX
NAME TYPE UNIQUE_ID FIRMWARE MANAGEMENT_SERVER OPERATIONAL_STATE
CLARiiON+APM00125345014 VNX 50067890BEE0177F 05.32.000.5.201 10.10.10.10 Good
Identifying the Destination Storage System
To identify the destination procedure, follow these steps:
Identifying the Source and Destination Storage Systems 67
Page 68

1. From the HP 3PAR Online Import Utility, execute the adddestination command.
Example 50 adddestination command
>adddestination –mgmtip 10.10.10.10 –user 3paradm –password 2Password
>SUCCESS: Added destination storage system
2. Execute the showdestination command to verify the destination storage system information.
Example 51 showdestination command
>showdestination
NAME TYPE UNIQUE_ID FIRMWARE MANAGEMENT_SERVER
OPERATIONAL_STATE PEER_PORTS
3par_7200_DCB_01 3PAR 2FF70002AC005F91 3.2.1 10.10.10.10 Normal
2021-0202-AC00-5F91(0:2:1) 2121-0202-AC00-5F91(1:2:1)
Creating the Data Migration Task
To create the data migration task, follow these steps:
1. From the HP 3PAR Online Import Utility, execute the createmigration command.
The command performs the following checks before creating the migration:
• No existing migration task for specified source storage system:
◦ There can only be one migration provisioned at a time per source EMC Storage
system.
• The source storage system group configuration is valid.
◦ The volume(s) specified in the createmigration command are mapped to a
storage group on the associated source EMC Storage system. All LUNs in the mapped
storage group will be migrated even if only a subset are entered in the
createmigration command. Refer to “Migrations Supported by HP 3PAR Online
Import Utility for EMC Storage” (page 24) to determine if your configuration is valid.
• EMC SMI-S Provider version.
• Source storage system model number.
NOTE: See the HP SPOCK website for the latest supported versions:
HP SPOCK (http://www.hp.com/storage/spock)
• LUN migration eligibility:
Protocol must be Fibre Channel.◦
◦ Replication LUN cannot be migrated.
Example 52 createmigration command
>createmigration -sourceuid 50067890C6E059EE -srcvolmap [{"EMC_10"}] -destcpg "FC_r5" -destprov full
-migtype offline
>SUCCESS: Migration job submitted successfully. Please check status/details using showmigration command.
Migration id: 1395864499741
NOTE: Be aware, the createmigration command may take several minutes to complete.
68 Performing Offline Data Migration
Page 69

TIP: Make a note of the Migration ID as it will be used in commands to track migration
progress.
2. Execute the showmigration command to verify the data migration task preparation has
completed successfully. This may take some time. On the successful creation of the task the
STATUS column will indicate preparationcomplete(100%).
Example 53 showmigration command
>showmigration -migrationid 1395864499741
MIGRATION_ID TYPE SOURCE_NAME DESTINATION_NAME START_TIME END_TIME
STATUS(PROGRESS)(MESSAGE)
1395864499741 offline CLARiiON+APM00123452867 3par_7200_DCA_01 Wed Mar 26 13:08:19 PDT
2014 -NA- preparationcomplete(100%)(-NA-)
3. Execute the showmigrationdetails command to verify the volumes being migrated. In
the preparation stage, PROGRESS for each volume will be 0% and the TASK_ID will be
unknown.
Example 54 showmigrationdetails command
>showmigrationdetails -migrationid 1395864499741
SOURCE_VOLUME DESTINATION_VOLUME TASK_ID PROGRESS
OIU_Test_Lun_01 OIU_Test_Lun_01 |unknown| 0%
4. HP recommends that you change the HP 3PAR host persona/host OS to the appropriate setting
before enabling access to the HP 3PAR array.
NOTE: EMC Storage arrays do not implement specific OS settings when registering host
initiators on the EMC Storage array. During migration, online import cannot determine the
host OS when migrating the hosts to the HP 3PAR StoreServ Storage. All hosts that are being
created on the HP 3PAR StoreServ Storage during EMC migration are set by default to host
persona 2.
Starting the Data Migration from Source EMC Storage System to Destination HP 3PAR StoreServ Storage System
To start the migration from the Source EMC Storage system to the destination HP 3PAR Storage
system, follow these steps:
1. From the HP 3PAR Online Import Utility, execute the startmigration command.
Example 55 startmigration command
>startmigration –migrationid 1395864499741
>SUCCESS: Data transfer started successfully
2. To view the status of the migration, execute the showmigration command.
Starting the Data Migration from Source EMC Storage System to Destination HP 3PAR StoreServ Storage System 69
Page 70

Example 56 showmigration command
>showmigration -migrationid 1395864499741
MIGRATION_ID TYPE SOURCE_NAME DESTINATION_NAME START_TIME
END_TIME STATUS(PROGRESS)(MESSAGE)
1396643904320 Offline CLARiiON+APM00125127014 3par_7200_DCB_01 Fri Apr 04 16:38:24 EDT 2014 -NA unpresenting(1%)(-NA-)
TIP: The final status on successful completion will indicate “success”.
Performing Post-Migration Tasks
Perform the following tasks after successful completion of the offline migration:
1. Unzone the source EMC Storage system from the host.
2. Restart the host.
3. Remove the EMC PowerPath Multipath software, if present, and configure native multipath
software.
For additional information, see “Updating Host Multipath Software and Unzoning from the
Source EMC Storage System” (page 52).
4. Export the LUNs to the host on the HP 3PAR StoreServ Storage system. Using the HP 3PAR
Management Console, perform the following steps:
a. Create host entry on the HP 3PAR StoreServ Storage system (if it does not already exist).
b. Set the host OS to the appropriate value (which sets the correct persona).
c. Add host WWN to host entry.
d. Export the migrated LUNs to the newly created host entry.
NOTE: For more information about this process, see the HP 3PAR implementation guides
for your specific host and the HP 3PAR Host Explorer User Guide. These documents are
available at the following website:
HP Storage Information Library (http://www.hp.com/go/storage/docs)
70 Performing Offline Data Migration
Page 71

10 Removing a Storage System from EMC SMI-S Provider
Follow this procedure to remove a system from the list after the migration has completed or if you
have added the wrong system for migration.
CAUTION: You cannot remove a system or abort the migration during the migration process.
You can remove the system only before migration begins or after it has completed.
1. In the SMI-S CLI, execute the ein command.
When prompted for a Class value, enter:
Clar_StorageSystem
Example 57 Removing the Storage System
++++ Testing EnumerationInstanceNames: Clar_StorageSystem ++++
Instance 0:
Clar_StorageSystem.CreationClassName="Clar_StorageSystem",Name=" CLARiiON+APM00000000000”
Instance 1:
Clar_StorageSystem.CreationClassName="Clar_StorageSystem",Name="CLARiiON+APM00000000001"
2. Execute the SMI-S CLI remsys command. Copy the entire path of the array Instance that you
wish to remove. See Example 58 “Verifying that the Storage System Has Been Removed”.
NOTE: The APM value in the object path should match the serial number of the storage
system that you wish to remove.
3. At the SMI-S CLI ObjectPatch[null]: prompt, paste the path of the array Instance.
4. Follow the rest of the prompts and look for a message indicating success.
When you run an SMI-S CLI dv or ein command, you should no longer see the storage system
that you just removed.
71
Page 72

Example 58 Verifying that the Storage System Has Been Removed
(localhost:5988) ? dv
.
.
.
Firmware version information:
(Remote) CLARiiON Array APM00084700545 (Rack Mounted CX4_120) : 04.30.000.5.526
(Remote) CLARiiON Array APM00140710205 (Rack Mounted VNX5300) : 05.32.000.5.201
(Remote) CLARiiON Array APM00140730621 (Rack Mounted VNX5200) : 05.33.000.5.035
(localhost:5988) ? ein
Class: Clar_StorageSystem
++++ Testing EnumerationInstanceNames: Clar_StorageSystem ++++
Instance 0:
Clar_StorageSystem.CreationClassName="Clar_StorageSystem",Name="CLARiiON+APM00084700545"
Instance 1:
Clar_StorageSystem.CreationClassName="Clar_StorageSystem",Name="CLARiiON+APM00140710205"
Instance 2:
Clar_StorageSystem.CreationClassName="Clar_StorageSystem",Name="CLARiiON+APM00140730621"
Enumerate 3 instance names; repeat count 1;return data in 0.010742 seconds
(localhost:5988) ? remsys
Remove System {y|n} [n]: y
System's ObjectPath[null]:
Clar_StorageSystem.CreationClassName="Clar_StorageSystem",Name="CLARiiON+APM00140730621"
About to delete system
Clar_StorageSystem.CreationClassName="Clar_StorageSystem",Name="CLARiiON+APM00140730621"
Are you sure {y|n} [n]: y
++++ EMCRemoveSystem ++++
OUTPUT : 0
Legend:0=Success, 1=Not Supported, 2=Unknown, 3=Timeout, 4=Failed 5=Invalid Parameter
4096=Job Queued, 4097=Size Not Supported
Note: Not all above values apply to all methods - see MOF for the method.
(localhost:5988) ? dv
.
.
.
Firmware version information:
(Remote) CLARiiON Array APM00084700545 (Rack Mounted CX4_120) : 04.30.000.5.526
(Remote) CLARiiON Array APM00140710205 (Rack Mounted VNX5300) : 05.32.000.5.201
72 Removing a Storage System from EMC SMI-S Provider
Page 73

11 HP 3PAR Online Import Utility for EMC Storage:
Commands
This chapter provides reference to HP 3PAR Online Import Utility CLI commands that are used
during online import.
adddestination
Adds a destination system.
DESCRIPTION
The adddestination command adds a destination storage system to the HP 3PAR Online Import
Utility that is intended to be migrated.
PARAMETERS
DescriptionMandatory/OptionalParameter
Mandatorymgmtip
Mandatoryuser
Optionalname
Optionaluid
Optionalport
IP address of the management station
to connect to get details.
User name to be used to connect to
management application.
Plain text password to be used.Mandatorypassword
Storage system family type like 3PAROptionaltype
Name of the storage system or serial
number or 64 bit
hyphenated/non-hyphenated WWN to
identify the storage system. This is
required especially when there are
multiple storage systems managed
under same IP address.
Name of the storage system or serial
number or 64 bit
hyphenated/non-hyphenated WWN to
identify the storage system. This is
required especially when there are
multiple storage systems managed
under same IP address.
Port number on which management
application accepts request to connect
and provide source storage system
details. If not found, default based on
storage system type will be used.
Optionalsecure
True/False. This enables or disables
secure channel communication with
source storage system, wherever
applicable. Default value will be false
or default used by source storage
system communication layer.
EXAMPLES
>adddestination -mgmtip 10.21.19.23 -user 3pardst -password 3parhelp -type 3PAR
>SUCCESS: Added destination storage system.
adddestination 73
Page 74

addsource
DESCRIPTION
The addsource command adds a source storage system to the HP 3PAR Online Import Utility that
is intended to be migrated.
PARAMETERS
DescriptionMandatory/OptionalParameter
Storage system family name:Mandatorytype
VNX
CX
VMAX
After the following “EXAMPLE” table,
see the “NOTE” about the type
parameter in HELP.
Optionalname
Optionaluid
Mandatorymgmtip
Mandatoryuser
Mandatorypassword
Optionalport
Name of the storage system or serial
number or 64 bit
hyphenated/non-hyphenated WWN to
identify the storage system. This is
required especially when there are
multiple storage systems managed
under the same IP address.
Name of the storage system or serial
number or 64 bit
hyphenated/non-hyphenated WWN to
identify the storage system. This is
required especially when there are
multiple storage systems managed by
the same SMI-S server.
IP address of the SMI-S provider that is
managing storage system that is being
added.
User name for SMI-S provider that is
managing storage system that is being
added.
Password for the user of the SMI-S
provider that is managing the storage
system being added.
Port number on which management
application accepts request to connect
and provide source storage system
details.
Mandatory if secure flag is used to set
non-default.
SMI-S port defaults are:
secure port 5989
unsecure port 5988
Optionalsecure
74 HP 3PAR Online Import Utility for EMC Storage: Commands
This enables or disables secure channel
communication with source storage
system.
Page 75

DescriptionMandatory/OptionalParameter
Options are:
• true
• false
EXAMPLE
>addsource -type VNX -mgmtip 10.10.10.10 -user admin -password adminpw -uid
xxxxxxxxxxxxxxxx
>SUCCESS: Added source storage system.
NOTE: Issuing the addsource –help command displays the following results:
>addsource –help
Command
addsource
Syntax
addsource -type <3PAR> [-name|uid <name|uid>] -mgmtip <ip address|FQDN> -user
<user name>
-password <password> [-port <port number>] [-secure <true|false>]
addsource -help
Description
Add a source storage system that is intended to be migrated.
-port : Port number on which management application accepts
request to connect & provide source storage system
details. If not found default based on storage
system type will be used.
-secure : True/False. This enables or disables secure channel
communication with source storage system, wherever
applicable. Default value will be false or default
used by source array communication layer.
-password : Plain text password to be used.
-mgmtip : IP address of the management station to connect
to get details.
-uid : 64 bit hyphenated WWN to identify the storage
system. This is required especially when there
are multiple storage systems managed undere same
IP address
-name : Friendly name of the storage system.
-user : Username to be used to connect to management application.
-type : Storage system family type. Example: 3PAR.
Example
addsource -type 3PAR -name 3PAR1 -mgmtip 10.0.0.3 -user administrator -password
exposedpwd -port 2380 -secure true
>
Note that, for the HP 3PAR Online Import Utility for EMC Storage, the valid values for the type
parameter are VNX, CX, or VMAX.
addsource 75
Page 76

createmigration
DESCRIPTION
The createmigration command performs preparation phase of a migration. Actual data transfer
will not be triggered by this command. This does following for a given set of source volumes while
presenting to 3PAR destination storage system.
NOTE: Can only create one migration at a time per source EMC Storage system.
NOTE: Be aware, the createmigration command may take several minutes to complete.
NOTE: The volume(s) or host specified in the createmigration command are mapped to a
storage group on the associated source EMC Storage system. All LUNs and all hosts in the mapped
storage group will be migrated even if only a subset are entered in the createmigration
command.
PARAMETERS
DescriptionMandatory/OptionalParameter
WWN (World Wide Name).Mandatorysourceuid
srcvolmap or volmapfile
A combination of commands is
mandatory as specified by user—for
example, if srchost is used,
destcpg and destprov should be
used.
If srcvolmap is there, srchost should
not be there.
If srcvolmap has CPG and Prov
information, then destcpg and
destprov need not be there.
If the srcvolmap has mixed Prov
information ("thin" and "full") for some
volumes, then destprov is
mandatory for the rest of the volumes
not specified in srcvolmap.
Map that provides information about
the source volumes for migration. A list
of volume names that identifies the
volumes should be provided.
It can also have mapping of every
source volume to required provisioning
or destination CPG. This is required if
destCPG and destProv are not
provided.
-srcvolmap[{”source unique name”,
desired destination provisioning after
migration (Thin/Full), desired
destination CPG name},{...},...]
Sample content of volmapfile:
“vdisk4”,thin,cpg1
“vdisk2”,full,cpg2
A provisioning and CPG entry here will
override default in destcpg and
destprov.
Possibilities:
“vdisk”,thin
“vdisk”,cpg
“vdisk”
“vdisk”,thin,cpg
For VMAX, use the following format:
Volume <device id>
The <device id> value must be five
characters in length. If the actual device
ID is less than five characters, add “0”
at the front to make five characters. For
example, if the VMAX device ID is
0192:
createmigration -sourceuid
50000972C012F400 -srcvolmap
[{"Volume 00192"}] -destcpg
76 HP 3PAR Online Import Utility for EMC Storage: Commands
Page 77

DescriptionMandatory/OptionalParameter
"testcpg1" -destprov thin
-migtype MDM
srchost
destprov
destcpg
Name of the host for which all source
volumes should be considered for
migration. This should not be there if
srcvolmap or volmapfile is there.
For VMAX, use the name of the initiator
group on the VMAX that contains the
initiator WWN that is being migrated.
If nested initiator groups are being
used, the parent initiator group (which
does not have a direct reference to a
WWN) cannot be used.
Provisioning type of the volumes that
will be created in destination as a result
of migration (Thin/full).
Name of CPG where the migrated
volumes will be made available.
Defaults to offlinemigtype
Optionaldestinationuid
Migration type. For the source EMC
Storage system, the supported migration
type is MDM, except where volumes
being migrated do not have a host in
their storage group on the source EMC
Storage system. This type of migration
must be offline.
UID of the destination storage system.
Since there is a 1:1 mapping, this is an
optional parameter, as the destination
will be autoselected.
EXAMPLES
>createmigration -sourceuid 50067890C6E059EE -srchost "HPDL585-01" -destcpg "FC_r5"
-destprov thin -migtype MDM
>SUCCESS: Migration job submitted successfully. Please check status/details using
showmigration command.
Migration id: 1395864499741
>showmigration -migrationid 1395864499741
MIGRATION_ID TYPE SOURCE_NAME DESTINATION_NAME
START_TIME END_TIME STATUS(PROGRESS)(MESSAGE)
1395864499741 MDM CLARiiON+APM00123452867 3par_7200_DCA_01 Wed Mar 26
13:08:19 PDT 2014 -NA- preparationcomplete(100%)(-NA-)
>showmigrationdetails -migrationid 1395864499741
SOURCE_VOLUME DESTINATION_VOLUME TASK_ID PROGRESS
OIU_Test_Lun_01 OIU_Test_Lun_01 |unknown| 0%
The createmigration command example with mixed provisioning type. To create migration
with EMC 1 to be thin, but others to be fully provisioned, execute the following command:
createmigration -sourceuid 50067890C6E059EE -srcvolmap [{"EMC_1", thin, "FC_r5"}]
-destcpg FC_r5 -destprov full -migtype MDM
createmigration 77
Page 78

help
>SUCCESS: Migration job submitted successfully. Please check status/details using
showmigration command.
Migration id: 1400939745313
DESCRIPTION
Global help command for the HP 3PAR CLI.
PARAMETERS
None.
Abstract
The help command displays available HP 3PAR CLI commands together with short descriptions.
EXAMPLES
>help
CLI provides following commands
showsource – List the source storage systems that are already
added to be treated as source for a migration job. It shows empty table if no
source storage systems found.
showmigration - This command displays the list of available migrations
removemigration - Removes the migration identified by the Migration
ID specified.
startmigration - Start prepared migration OR restart a prepared migration.
removesource - Removes already added source storage system & clears
all related migrations.
addsource - Add a source storage system that is intended to be migrated.
showconnection - This command displays connection between all the configured
source and destination storage systems. –source or –destination can’t be used together.
createmigration - This will perform preparation phase of a migration.
Actual data transfer will not be triggered by this command. This does following
for a given set of source volumes while presenting to 3PAR destination storage system.
installcertificate - Installs certificate from given server IP
removedestination - Removes already added destination storage system & clears
all related migrations.
help - Global Help Command for CLI
showdestination - List the destination storage systems that are already
added to be treated as destination for a migration job. It shows empty table
if no destination storage systems found.
adddestination - Add a destination storage system that is intended
to be migrated.
showmigrationdetails - This command displays the list of volumes associated
with the specified migration and their corresponding status
Help on a specific <command> can also be obtained by typing “<command> -help"
>
installcertificate
Installs certificate from a given server IP.
DESCRIPTION
The installcertificate command Installs certificates from the specified storage system. This
command is executed to add source or destination HP 3PAR StoreServ storage systems in a secure
manner. The command fetches and displays certificate details for the specified array.
78 HP 3PAR Online Import Utility for EMC Storage: Commands
Page 79

PARAMETERS
DescriptionMandatory/OptionalParameter
Mandatorymgmtip
Optionalport
Optionalforce
Optionalsource
IP address of the management station
to connect to in order to get details.
Port number on which management
application accepts a request to
connect and provide source storage
system details. If not found, the default
based on the storage system type will
be used.
Use this option to skip displaying the
certificate details.
Use this option to determine whether
the certificate is installed for the source
array or the destination array. If used,
this option requires an argument to
decide the type of array.
EXAMPLES
>installcertificate –mgmtip 10.10.10.10
TParCertifacteVO [issuedTo=HP 3PAR HP_3PAR 7400 1645897, commonName=null,
issuedByOrganization=null, issuedToOrganization=null, serialNo=null, issedBy=HP 3PAR
HP_3PAR 7400 1645897,
fingerprint=89:E5:D0:13:6F:D1:07:80:70:76:5C:FE:5B:65:E5:54:C0:18:21:2F,
signatureAlgo=SHA1withRSA, version=v1,validFrom=08/14/2014, validTo=08/11/2024.
issuedOn=null, expiresOn=null, validDateRange=true]
Do you accept the certificate? Y/YES Y
>SUCCESS: Installed certificate successfully.
>
removedestination
Removes an added destination storage system.
DESCRIPTION
The removedestination command removes already added destination storage systems and
clears all related migrations.
PARAMETERS
EXAMPLES
removedestination –uid 2FF70002AC003F8E
SUCCESS: Removed destination storage system.
DescriptionMandatory/OptionalParameter
Mandatoryuid
Unique number that represents a source
in the HP 3PAR Peer Motion Utility.
Type of source storage system.Mandatorytype
removedestination 79
Page 80

removemigration
Removes migration.
DESCRIPTION
The removemigration command clears completed or abort prepared migrations.
Active/Incomplete migrations cannot be removed.
PARAMETERS
DescriptionMandatory/OptionalParameter
EXAMPLES
removemigration –migrationid 1122334456
> SUCCESS: The specified migration is successfully removed.
removesource
DESCRIPTION
The removesource command removes already added source storage systems. Sources cannot
be removed if there is an active migration. Migrations must be completed or aborted to be removed.
PARAMETERS
Mandatorymigrationid
Number that represents a migration in
completed/aborted state.
DescriptionMandatory/OptionalParameter
WWN (World Wide Name).Mandatoryuid
Type of storage system:Mandatorytype
VNX
CX4
VMAX
EXAMPLE
>removesource –uid 50060160BEE0177F –type VNX
showconnection
DESCRIPTION
By default, the showconnection command shows a map of all connected source and destination
storage systems. There should be 1:1 mapping between source and destination storage systems
and destination and source systems for peer port FC connection. Given a source storage system,
this shows all the configured destination storage systems it can see and vice versa. However, the
parameters, –source and –destination cannot be used together.
80 HP 3PAR Online Import Utility for EMC Storage: Commands
Page 81

PARAMETERS
DescriptionMandatory/OptionalParameter
EXAMPLE
showconnection -source 50067890BEE0177F
SOURCE_NAME SOURCE_UNIQUE_ID DESTINATION_NAME
DESTINATION_UNIQUE_ID DESTINATION_PEER_PORT
SOURCE_HOST_PORT
CLARiiON+APM00123457014 50067890BEE0177F 3PAR_Array_1
2FF70002DY005F92 2024-0202-DY00-5F92(0:2:4)
5006-7890-3EE0-177F(Port SP_B:0)
CLARiiON+APM00123457014 50060160BEE0177F 3PAR_Array_1
2FF70002DY005F92 2024-0202-DY00-5F92(0:2:4)
5006-7890-3EE0-177F(Port SP_A:0)
showdestination
Description
The showdestination command lists the storage systems that are already added to the HP 3PAR
Online Import Utility to be treated as destination of migration job. It shows an empty table if no
destination storage systems are found.
Optionalsource
Optionaldestination
Source storage system WWN (World
Wide Name).
In accordance with HP 3PAR Online
Import Utility documentation.
PARAMETERS
DescriptionMandatory/optionalParameter
Name of the storage system.Optionalname
Optionaltype
Optionalcsvtable
Optionalfilewrite
Optionalall
Optionalshowcols
Optionalunique_id
Optionalpeer_ports
This is storage system family
name (e.g. 3PAR).
This command can be used to
print delimited output.
Redirects the output of the
command to a file.
Display all details with
headings.
Any argument that follows
showcols depicts field to
display (columns). Accepts a
comma separated list of column
names.
This is serial number or WWN
or hyphenated WWN.
List of host ports hyphenated
64 bit WWN (N:S:P). Peer will
be marked as peer.
showdestination 81
Page 82

Optionallistcols
Displays the list of column
names applicable to that
command.
Firmware version.Optionalfirmware
EXAMPLES
showdestination
NAME TYPE UNIQUE_ID FIRMWARE MANAGEMENT_SERVER OPERATIONAL_STATE PEER_PORTS
DMMT3PAR02 3PAR 2FF70002AC003F9C 3.1.3 15.218.169.236 Normal
2211-0202-AC00-3F9C(2:1:1) 2311-0202-AC00-3F9C(3:1:1)
showmigration
Lists migrations.
DESCRIPTION
The showmigration command lists active migrations in preparation or data transfer phase as
well as the ones that are successful or aborted. By default all migrations are listed. The status of a
migration will show the current state as well as the progress percentage whenever applicable and
failure reason whenever applicable
Optionalmanagement_server
Optionaloperational_state
The IP address/FQDN of the
management server that
manages this storage system.
Operational state of the
storage system (Good, Failed,
Attention).
PARAMETERS
DescriptionMandatory/optionalParameter
Optionaltype
Optionalstatus
Optionalmigrationid
Optionalcsvtable
Optionalfilewrite
Optionalall
Optionalshowcols
Online/MDM/Offline. Display
all migrations that are of the
type specified.
Displays migrations that are in
the specified state.
Unique number that identifies
a migration after
createmigration is
complete. If this is specified,
there is no need to provide
source & destination details.
This command can be used to
print delimited output.
Redirects the output of the
command to a file.
Displays all details with
headings.
Any argument that follows
showcols depicts field to
display (columns). Accepts a
82 HP 3PAR Online Import Utility for EMC Storage: Commands
Page 83

comma separated list of column
names.
EXAMPLES
showmigration
MIGRATION_ID TYPE SOURCE_NAME DESTINATION_NAME START_TIME
END_TIME STATUS(PROGRESS)(MESSAGE)
1397244158146 offline CLARiiON+APM00123457014 DMMT3PAR02 Sat Apr 12 00:52:38
IST 2014 -NA- preparationcomplete(100%)(-NA-)
showmigrationdetails
Optionallistcols
Optionalsourcename
Optionaldestinationname
Display the list of column
names applicable to that
command.
Source storage system name.
Displays migrations created
between this source and
destination storage systems
connected to it.
Destination storage system
name. Displays migrations
created between this
destination and source storage
systems connected to it.
Shows details of a specific migration.
DESCRIPTION
Use the showmigrationdetails command to view details at volume level for a specific
migration. Task ID is the corresponding HP 3PAR task ID, if found. Status at individual volume
levels is on similar lines as the status of migration.
PARAMETERS
DescriptionMandatory/optionalName
Mandatorymigrationid
Optionalcsvtable
Optionalfilewrite
Optionalall
Unique ID that gets generated
after the createmigration
operation. Displays the
migration corresponding to the
ID specified.
This command can be used to
print delimited output.
Redirects the output of the
command to a file.
Displays all details with
headings.
Optionalshowcols
Optionallistcols
Any argument that follows
showcols depicts field to display
(columns). Accepts a comma
separated list of column names.
Displays the list of column
names applicable to that
command.
showmigrationdetails 83
Page 84

Optionaltaskid
Online/MDM/Offline. Displays
all migrations that are of the
type specified.
EXAMPLES
showmigrationdetails -migrationid 1397244158146
SOURCE_VOLUME DESTINATION_VOLUME TASK_ID PROGRESS
test test 6134 Completed
showsource
DESCRIPTION
The showsource command lists the source storage systems that are already added to the CLI
Utility to be treated as source for a migration job.
PARAMETERS
Optionalsourcevolume
Optionaldestinationvolume
Source volume name. Displays
information corresponding to
this volume.
Destination volume name.
Displays information
corresponding to this volume.
DescriptionMandatory/OptionalParameter
Storage system family+serial number.Optionalname
Example:
CLARiiON+APM00125127014
Storage system family name:Optionaltype
VNX
CX4
VMAX
Storage system WWN.Optionalunique_id
Optionalfirmware
Optionalmanagement_server
Firmware version of the source storage
system.
IP address of the SMI-S provider that is
managing storage systems.
Operational state of the storage system.Optionaloperational_state
EXAMPLE
showsource –type VNX
NAME TYPE UNIQUE_ID FIRMWARE
MANAGEMENT_SERVER OPERATIONAL_STATE
CLARiiON+APM00125345014 VNX 50067890BEE0177F
05.32.000.5.201 10.10.10.10 Good
startmigration
Starts the data transfer of a migration.
84 HP 3PAR Online Import Utility for EMC Storage: Commands
Page 85

DESCRIPTION
The startmigration command starts or restarts a prepared migration to go through data transfer
phase of migration. Historic data from source volumes is moved to destination volume over peer
port. Once the data transfer is complete, export to the source host will be executed if the data
migration type is MDM. At the source storage system, the presentation of the source volume to the
source host will be removed. If possible, the source volume will be locked but not deleted.
The host representing the destination storage system that was created during the migration
preparation stage will remain at the source storage system. For another migration, this host will
be reused. When you are finished with all the migration related to the host, you may choose to
delete this host.
PARAMETERS
DescriptionMandatory/OptionalParameter
Mandatorymigrationid
EXAMPLES
startmigration –migrationid 1394789473527
SUCCESS: Data transfer started successfully.
Unique number representing the
migration that is in prepared or
incomplete state.
startmigration 85
Page 86

12 Troubleshooting
This section describes problems you may encounter when using EMC Storage-to-HP 3PAR StoreServ
Storage online import.
NOTE: During the migration process, it is important to remember that the data continues to be
served from the source EMC Storage system until the import of each volume is complete. If host
errors occur, both the destination HP 3PAR StoreServ Storage system and the source EMC Storage
system should be checked for potential problems.
Understanding the HP 3PAR Online Import Utility Data Migration Process
Understanding the migration process and the order of the procedures is helpful when
troubleshooting. The diagnostic tool for EMC Storage is Unisphere; for HP 3PAR, it is the HP 3PAR
Online Import Utility management interface. This section provides an overview of the HP 3PAR
Online Import Utility CLI commands used and what happens when you use them, from setup to
completion of the migration.
• HP 3PAR Online Import Utility: addsource
No change on source or destination storage system◦
◦ Source storage system information added into the HP 3PAR Online Import Utility database
• HP 3PAR Online Import Utility: adddestination
No change on source or destination storage system◦
◦ Destination storage system information added into the HP 3PAR Online Import Utility
database
• HP 3PAR Online Import Utility: createmigration
◦ On the source storage system:
– The HP 3PAR peer ports are added into the storage group which contains the
LUNs/hosts that are being migrated (will display with name=UNKNOWN)
◦ On the destination storage system:
– LUNs are admitted
– Hosts are created
– LUNs are presented to the hosts (online migration)
• HP 3PAR Online Import Utility: startmigration
◦ On the source storage system:
– Hosts are removed from the storage group (except 3PAR peer port hosts)
◦ On the destination storage system:
LUNs are presented to the hosts (MDM)–
◦ Once the migration is completed:
86 Troubleshooting
– Import is started
– The HP 3PAR peer ports are removed from the source storage system group
Page 87

HP 3PAR Online Import Utility Service
The HP 3PAR Online Import Utility service must be stopped before getting the logs or changing
the logging level and restarted afterward. To do this, go to WindowsComputer→Manage screen,
right-click on the Service Name and select stop/start.
HP 3PAR Online Import Utility Server Logs and Output
When an issue occurs, get all the HP 3PAR Online Import Utility server logs and output to assist
with troubleshooting. Use the following action and commands to get the logs and output.
• Go to this file location for the HP 3PAR Online Import Utility logs:
C:\Program Files (x86)\Hewlett-Packard\hp3parpmcli\OIUTools\
◦
tomcat\ 32-bit\apache-tomcat-7.0.37\logs\hp3paremc.log
◦ All versions of the log if it has rolled over
• Get HP 3PAR Online Import Utility output by issuing these commands:
showmigration –migrationid xxx◦
◦ showmigrationdetails –migrationid xxx
◦ showconnections
◦ showsource
◦ showdestination
Increase the HP 3PAR Online Import Utility Server Logging Level
Perform the following to set the HP 3PAR Online Import Utility log to the most verbose level:
1. Edit the following file:
C:\Program Files (x86)\Hewlett-Packard\hp3parpmcli\OIUTools\ tomcat\
32-bit\apache-tomcat-7.0.37\webapps\oiuweb\ WEB-INF\classes\
application.config.properties
2. Online, change log4j.rootCategory=INFO, DebugLogAppender to
log4j.rootCategory=ALL, DebugLogAppender.
3. Restart the HP 3PAR Online Import Utility service so that the logging changes are picked up.
HP 3PAR Online Import Utility Service 87
Page 88

EMC SMI-S Provider Server Logs and Output
When an issue occurs, get all the EMC SMI-S Provider server logs and output to assist with
troubleshooting. Use the following action and commands to get the logs and output.
• Go to this file location to get the EMC SMI-S Provider logs:
◦ Windows: C:\Program Files\EMC\ECIM\ECOM\log\cimomlog
• Get EMC SMI-S Provider output by issuing these commands:
dv command to see EMC SMI-S Provider version information and lists of storage systems
◦
being managed by EMC SMI-S Provider.
Example 59 dv command
(localhost:5988) ? dv
◦ eq command to see storage system information in the format that is being passed to the
EMC plugin for all storage systems being managed by the EMC SMI-S Provider.
NOTE: Select statement parameters are case-sensitive and should be entered as displayed
below.
Example 60 eq command
(localhost:5988) ? eq
Query Language[DMTF:CQL]:
Query []: select Tag,ElementName,Manufacturer,Model from Clar_ArrayChassis
Increasing the EMC SMI-S Provider Server Logging Level
Perform the following steps to set the SMI-S log to the most verbose level:
1. Log into the ECOM administration interface.
2. Select Log Options.
3. Set the Log file to CIMOMLOG.
4. Set the Log Severity to NAVI_TRACE.
5. Set Trace Settings to turn on all 3 traces.
6. Save the Log Setting.
Troubleshooting Communication Between the HP 3PAR Online Import Utility Server and EMC SMI-S Provider
1. In the HP 3PAR Online Import Utility server, issue the showsource command.
2. Execute the desired URL from the HP 3PAR Online Import Utility server
• Secure: https://<SMI-S Server IP address>:<port>/ecomconfig
• Unsecure: http://<SMI-S Server IP address>:<port>/ecomconfig
3. Replace these variables:
• <SMI-S Server IP address> with the Management_Server IP address displayed
• <port> with the port that was used when the addsource command was executed
88 Troubleshooting
in HP 3PAR Online Import Utility showsource output.
The unsecure port default is 5988◦
◦ The secure port default is 5989
Page 89

4. If the SMI-S Provider ECOM login page does not appear, check the following:
• Make sure you have the correct IP address for SMI-S Provider server.
• Make sure you are using the correct port for the EMC SMI-S Provider server. Log into the
EMC SMI-S Provider server and look at the port configuration file which shows which
ports are enabled for use and whether they are expecting a secure or unsecure connection.
◦ Windows: C:\Program Files\EMC\ECIM\ECOM\conf\Port_settings.xml
• Make sure there is network connectivity between the HP 3PAR Online Import Utility server
and the EMC SMI-S Provider
NOTE: Determine whether SMI-S Client filtering is enabled. If enabled, your HP 3PAR
Online Import Utility server must be on the Trusted client IP list.
• Make sure that the SMI-S Provider is running
◦ Windows: Check that the EMC SMI-S Provider (ECOM/EMC) services are started:
5. If the ECOM login page does appear, login using the credentials that you used when you
executed the HP 3PAR Online Import Utility addsource command. If that fails, then you need
to determine which are the correct credentials.
Troubleshooting Communication Between the HP 3PAR Online Import Utility Server and EMC SMI-S Provider 89
Page 90

TestSmiProvider Login and Command Examples with Output
1. Start SMI-S Provider TestSmiProvider tool.
• SMI-S Provider on Windows:
Example 61 Output on Windows
C:\Program Files\EMC\ECIM\ECOM\bin>TestSmiProvider.exe
Connection Type (ssl,no_ssl,native) [no_ssl]:
Host [localhost]:
Port [5988]:
Username [admin]:
Password [#adminpw]: adminpw
Log output to console [y|n (default y)]:
Log output to file [y|n (default y)]:
Logfile path [Testsmiprovider.log]:
Connecting to localhost:5988
Using user account 'admin' with password 'adminpw'
########################################################################
## ##
## EMC SMI Provider Tester ##
## This program is intended for use by EMC Support personnel only. ##
## At any time and without warning this program may be revised ##
## without regard to backwards compatibility or be ##
## removed entirely from the kit. ##
########################################################################
slp - slp urls slpv - slp attributes
cn - Connect dc - Disconnect
disco - EMC Discover rc - RepeatCount
addsys - EMC AddSystem remsys - EMC RemoveSystem
refsys - EMC RefreshSystem
ec - EnumerateClasses ecn - EnumerateClassNames
ei - EnumerateInstances ein - EnumerateInstanceNames
ens - EnumerateNamespaces miner - Mine classes
a - Associators an - AssociatorNames
r - References rn - ReferenceNames
gi - GetInstance gc - GetClass
ci - CreateInstance di - DeleteInstance
mi - ModifyInstance eq - ExecQuery
gp - GetProperty sp - SetProperty
tms - TotalManagedSpace tp - Test pools
ecap - Extent Capacity pd - Profile Discovery
im - InvokeMethod active - ActiveControls
ind - Indications menu tv - Test views
st - Set timeout value lc - Log control
sl - Start listener dv - Display version info
ns - NameSpace vtl - VTL menu
cHP - consolidated host provider menu
q - Quit h - Help
########################################################################
Built with EMC SMI-S Provider: V4.6.1
Namespace: root/emc
repeat count: 1
(localhost:5988) ?
2. Use the dv command in the TestSmiProvider tool to see:
• SMI-S Provider version information
• List of storage systems being managed by SMI-S Provider
90 Troubleshooting
Page 91

Example 62 dv command output
(localhost:5988) ? dv
++++ Display version information ++++
CIM ObjectManager Name: EMC:10.10.10.10
CIMOM Version: EMC CIM Server Version 2.7.3.2.0.7
SMI-S qualified version: 1.5.0
SMI-S Provider version: V4.6.1.6
SMI-S Provider Location: Proxy
SMI-S Provider Server:
Windows_NT WinSrv2008-testB 6.1.7601 Service Pack 1 x86_64 VM Guest OS
(64bit Libraries)
Solutions Enabler version: V7.6-1755 1.23
Firmware version information:
(Remote) CLARiiON Array APM00104501118 (Rack Mounted CX4_120) : 04.30.000.5.526
(Remote) CLARiiON Array APM00125127014 (Rack Mounted VNX5300) : 05.32.000.5.201
Retrieve and Display data - 1 Iteration(s) In 0.390001 Seconds
Please press enter key to continue...
3. Use the eq command in the TestSmiProvider tool to see storage system information in the
format that is being passed to the EMC Plugin for all storage systems being managed by the
SMI-S Provider.
NOTE: Some statement parameters are case-sensitive and should be entered as displayed.
TestSmiProvider Login and Command Examples with Output 91
Page 92

Example 63 eq command output
(localhost:5988) ? eq
Query Language[DMTF:CQL]:
Query []: select Tag,ElementName,Manufacturer,Model from Clar_ArrayChassis
++++ Testing ExecQuery: ++++
Instance 0:
ObjectPath :
//10.64.0.60/root/emc:Clar_ArrayChassis.CreationClassName="Clar_ArrayChassis",Tag="CLARiiON+APM00104501118"
<INSTANCE CLASSNAME="Clar_ArrayChassis" >
<PROPERTY NAME="Tag" TYPE="string">
<VALUE>CLARiiON+APM00104501118</VALUE>
</PROPERTY>
<PROPERTY NAME="ElementName" TYPE="string">
<VALUE>CLARiiON Array APM00104501118</VALUE>
</PROPERTY>
<PROPERTY NAME="Manufacturer" TYPE="string">
<VALUE>EMC Corporation</VALUE>
</PROPERTY>
<PROPERTY NAME="Model" TYPE="string">
<VALUE>Rack Mounted CX4_120</VALUE>
</PROPERTY>
</INSTANCE>
Number of instance qualifiers: 0
Number of instance properties: 4
Property: Tag Number of qualifiers: 0
Property: ElementName Number of qualifiers: 0
Property: Manufacturer Number of qualifiers: 0
Property: Model Number of qualifiers: 0
Instance 1:
ObjectPath :
//10.64.0.60/root/emc:Clar_ArrayChassis.CreationClassName="Clar_ArrayChassis",Tag="CLARiiON+APM00122502867"
<INSTANCE CLASSNAME="Clar_ArrayChassis" >
<PROPERTY NAME="Tag" TYPE="string">
<VALUE>CLARiiON+APM00122502867</VALUE>
</PROPERTY>
<PROPERTY NAME="ElementName" TYPE="string">
<VALUE>CLARiiON Array APM00122502867</VALUE>
</PROPERTY>
<PROPERTY NAME="Manufacturer" TYPE="string">
<VALUE>EMC Corporation</VALUE>
</PROPERTY>
<PROPERTY NAME="Model" TYPE="string">
<VALUE>Rack Mounted VNX5700</VALUE>
</PROPERTY>
</INSTANCE>
Number of instance qualifiers: 0
Number of instance properties: 4
Property: Tag Number of qualifiers: 0
Property: ElementName Number of qualifiers: 0
Property: Manufacturer Number of qualifiers: 0
Property: Model Number of qualifiers: 0
Instance 2:
ObjectPath :
//10.64.0.60/root/emc:Clar_ArrayChassis.CreationClassName="Clar_ArrayChassis",Tag="CLARiiON+APM00125127014"
<INSTANCE CLASSNAME="Clar_ArrayChassis" >
<PROPERTY NAME="Tag" TYPE="string">
<VALUE>CLARiiON+APM00125127014</VALUE>
</PROPERTY>
<PROPERTY NAME="ElementName" TYPE="string">
<VALUE>CLARiiON Array APM00125127014</VALUE>
</PROPERTY>
<PROPERTY NAME="Manufacturer" TYPE="string">
<VALUE>EMC Corporation</VALUE>
</PROPERTY>
<PROPERTY NAME="Model" TYPE="string">
<VALUE>Rack Mounted VNX5300</VALUE>
</PROPERTY>
</INSTANCE>
Number of instance qualifiers: 0
Number of instance properties: 4
Property: Tag Number of qualifiers: 0
Property: ElementName Number of qualifiers: 0
Property: Manufacturer Number of qualifiers: 0
Property: Model Number of qualifiers: 0
ExceQuery 3 instances; repeat count 1;return data in 0.013011 seconds
Retrieve and Display data - 1 Iteration(s) In 0.014121 Seconds
Please press enter key to continue...
92 Troubleshooting
Page 93

HP 3PAR Online Import Utility for EMC Storage Error Messages
OIUERRSRC0020 = "Unsupported EMC storage system version ";
OIURSLSRC0020 = "Check support matrix and upgrade EMC.";
Problem: Source EMC Storage system version check failed.
Solution: Source EMC Storage system must be running at supported version.
OIUERRSRC0111 = "Unable to present the volume to the host in EMC array";
OIURSLSRC0111 = "Contact HP Support if the problem persists.";
Problem: Unable to add HP 3PAR peer port host to source storage system group.
Solution: Check the HP 3PAR Online Import Utility log file for specific description of the problem from SMI-S Provider.
OIUERRSRC0112 = "Unable to unpresent the volume from the host in EMC array"
OIURSLSRC0112 = "Contact HP Support if the problem persists."
Problem: Unable to remove HP 3PAR peer port host from source storage system group.
Solution: Check the HP 3PAR Online Import Utility log file for specific description of the problem from SMI-S Provider.
OIUERRSRC0021 = "There is a active migration on this source. So this source can not
be removed.";
OIURSLSRC0021 = "Migration have to be complete/abort for source to be removed.";
Problem: Tried to execute the HP 3PAR Online Import Utility removemigration command while the specified migration
is still in progress.
Solution: Wait for migration to complete before removing.
OIUERRSRC0022 = "Cannot find specified source Array.";
OIURSLSRC0022 = "An Array has to be added first in order to be removed."
Problem: Tried to execute the HP 3PAR Online Import Utility removesource command with specific UID and that UID
does not exist in the HP 3PAR Online Import Utility database.
Solution: Execute the HP 3PAR Online Import Utility showsource command to determine storage systems that are
currently known.
OIUERRSRC0023 = "You have selected a migration with an unsupported storage group
configuration."
OIURSLSRC0023 = "Verify that your storage group configuration matched one of the
supported configurations."
Problem: The LUN associated with the HP 3PAR Online Import Utility createmigration that was executed is not in
a supported storage group configuration.
Solution: Review supported storage group configurations in “Migrations Supported by HP 3PAR Online Import Utility
for EMC Storage” (page 24) and make appropriate changes before creating the migration.
OIUERRAPP0013 = "Unsupported EMC Provider version for SMI-S"
OIURSLAPP0013 = "Check support matrix and upgrade EMC Provider."
Problem: The SMI-S Provider that was entered is running an unsupported version.
Solution: Storage systems for migration must be managed by SMI-S Provider with supported version.
OIUERRAPP0009 = "Job might have executed successfully but couldn't receive any handle
to track it.";
OIURSLAPP0009 = "Contact HP Support"
Problem: A problem occurred during an SMI-S related job.
Solution: Check the HP 3PAR Online Import Utility log file for a specific description of the problem. HP support may
be required.
OIUERRAPP0010 = "SMI-S EMC Provider WBEM Operations error.";
OIURSLAPP0010 = "Please check SMI-S ECOM connectivity and access, see Log file for
details, and/or Contact HP Support."
HP 3PAR Online Import Utility for EMC Storage Error Messages 93
Page 94

Problem: There could be a problem with communication or access.
Solution: Logs will show the exact cause as an exception trace. Configuration (remote IP access, local access) of the
ECOM might need to be rectified.
OIUERRAPP0011 = "EMC Provider WBEM Connection, Malformed URL.";
OIURSLAPP0011 = "Application internal error, see Log file for details. Contact
HP Support."
Problem: This would indicate a defect in accessing the provider due to incorrect protocol (HTTP, HTTPS allowed), or
no protocol at all.
Solution: Try different combinations of secure settings and port settings in the HP 3PAR Online Import Utility CLI
command. Verify enabled ports on the SMI-S provider.
OIUERRAPP0012 = "EMC Provider WBEM Connection, Client initialization error.";
OIURSLAPP0012 = "Application internal error, see Log file for details. Contact
HP Support."
Problem: This might be caused by a blank user name or password when connecting to SMI-S provider.
Solution: Ensure that the user name and password are specified.
OIUERRAPP0015 = "SMI-S EMC Provider Connection error.";
OIURSLAPP0015 = "Please check SMI-S ECOM connectivity (IP Address, Port number), see
Log file for details, and/or Contact HP Support."
Problem: The wrong IP address or wrong port is specified for SMI-S Provider.
Solution: Use correct SMI-S Provider and IP address.
OIUERRAPP0016 = "SMI-S EMC Provider Authorization error.";
OIURSLAPP0016 = "Please check SMI-S ECOM Access Configuration and/or User Credentials,
see Log file for details, and/or Contact HP Support."
Problem: The SMI-S Provider credentials are wrong, or the HP 3PAR Online Import Utility is not on the trusted client IP
address list.
Solution: Use correct SMI-S Provider credentials. If Trusted IP Address list is enabled, make sure the HP 3PAR Online
Import Utility server is on the trusted IP address list on the ECOM server.
Troubleshooting Issues
Not able to add a source EMC Storage system
Possible causes:
• EMC SMI-S Provider is running an unsupported software version.
• Invalid source array UID specified when executing the addsource command (no error
message displayed).
• Invalid user and/or password provided for EMC SMI-S Provider.
• Invalid IP Address or Port (secure/unsecure) provided for EMC SMI-S Provider.
• EMC SMI-S Provider has client IP address filtering enabled and the HP 3PAR Online Import
Utility server is not on the trusted IP address list.
• EMC SMI-S Provider is not managing the EMC Storage system.
• The HP 3PAR Online Import Utility server and EMC SMI-S Provider do not have network
connectivity.
• EMC SMI-S Provider and EMC Storage system do not have network connectivity.
• The EMC Storage system is running an unsupported firmware version.
Solution: Check each of the above conditions to identify which may be causing the problem, then
resolve it.
94 Troubleshooting
Page 95

Not able to create migration
Possible causes:
• Duplicate volumes exist. This may occur if either a virtual volume with same name or with the
same WWN exists on the destination storage system.
• A host on the destination storage system has a duplicate name.
• The destination storage system does not have enough capacity.
• EMC SMI-S Provider is running an unsupported software version.
• EMC SMI-S Provider user name/password have changed since source storage system was
added.
• EMC SMI-S Provider is not managing the EMC Storage system.
• The HP 3PAR Online Import Utility server and EMC SMI-S Provider do not have network
connectivity.
• EMC SMI-S Provider and EMC Storage system do not have network connectivity.
• The EMC Storage system is running an unsupported firmware version.
• The LUNs or host provided are in an invalid storage group configuration.
• The LUNs are not eligible for migration (a LUN must be Fibre Channel, and cannot be a
replication LUN or reserved).
• The operational state of EMC Storage system does not allow migration.
• There is no connection between source and destination storage systems.
• The wrong migration type is used.
Solution: Check each of the above conditions to identify which may be causing the problem, then
resolve it.
Initiating a createmigration command to create a host on a destination produces an error message
Example 64 createmigration command error
>showmigration -migrationid 1397250721519
MIGRATION_ID TYPE SOURCE_NAME DESTINATION_NAME START_TIME END_TIME STATUS(PROGRESS)(MESSAGE)
1397250721519 MDM CLARiiON V400 Fri Apr 11 16:12:01 CDT 2014
-NA- preparationfailed(-NA-)(OIUERRPREP1014:Error creating host on destination;)
Solution: This problem can occur when the host is already added to the destination. Delete the
host from the destination and then execute the createmigration command.
HP Storage Migration group user receives an error message when attempting to login to the HP 3PAR Online Import Utility
Example 65 OIU login error
CLI Version: 1.2.0
Enter IPADDRESS: 10.64.0.101
Enter USERNAME: tester
Enter PASSWORD:
>ERROR: Invalid credentials, Please try with valid credentials
Enter IPADDRESS:
Solution: When the user in the “User” group was created the check box for User must change
password at next logon was checked by default. After the check box is cleared, login succeeds.
Troubleshooting Issues 95
Page 96

Migrated LUNs with No Host in a Storage Group Failed OIU:createmigration
Solution: If migrated LUNs do not have an associated host, the migration type must be offline.
OIU:createmigration Error for LUN Name or Host Name Containing Special Characters
Solution: The HP 3PAR Online Import Utility does not support special characters in the LUN name
or host name and will cause an error on the createmigration command if special characters
are present in the names. HP recommends changing the unsupported LUN and/or host name to
continue migration.
HP 3PAR Online Import Utility does not open on Windows 7 when double-clicking icon or right mouse-click icon and selecting “Run As Administrator”
Workaround: Run a command prompt window and perform the following steps:
1. Change directory to the location where HP 3PAR Online Import Utility was installed. The
default location is:
C:\Program Files (x86)\Hewlett-Packard\hp3paremcoiu
2. Change directory to the CLI subfolder.
3. Run OIUCLI.bat to start the utility.
HP 3PAR Online Import Utility startmigration error for Host name greater than 31 characters or with spaces
Problem: When migrating a host with a long name or name with spaces, the HP 3PAR Online
Import Utility truncates the host name to 31 characters or replaces spaces with underscores in order
to complete the createmigration command. However, startmigration will fail with Unable
to unpresent a source volume to source host error.
Workaround: Before beginning the migration, rename the host so that there are no spaces in the
name and the name length does not exceed 31 characters.
Error Logging into the HP 3PAR Online Import Utility CLI
Problem: “ERROR: Could not process your request. Illegal character in authority at index...” upon
logging into the HP 3PAR Online Import Utility CLI caused by trailing space on the IP Address.
Solution: Re-open the HP 3PAR Online Import Utility CLI and enter the IP Address without any
spaces at the end.
HP 3PAR Online Import Utility createmigration Results in “ERROR: OIUERRAPP0000 An unexpected error occurred.” or “OIURSLAPP0000 Contact HP support. You may try restarting the application service.”
Problem: Possibly the storage group containing LUNs identified for migration contains a replication
LUN.
Solution: Remove Replication LUN from the storage group.
HP 3PAR Online Import Utility createmigration Results in “ERROR: OIUERRDB1006 Database constraint violated”
Problem: Possible cause is that the host specified does not have any associated LUNs in its storage
group.
Solution: Add the LUNs to be migrated into the storage group.
96 Troubleshooting
Page 97

HP 3PAR Online Import Utility createmigration Results in “preparationfailed(-NA-)(OIUERRPREP1014: Error creating host on destination)”
Problem: Host already exists on destination HP 3PAR StoreServ Storage system with a different
WWN.
Solution: If the same host but different WWN: On initial migration of a host, all WWNs to be
included in storage group (even if not managing any LUNs). This way subsequent migration of
any WWN for this host will find a match. If a different host, change the host name so that it does
not match the existing hostname on destination HP 3PAR StoreServ Storage system.
HP 3PAR Online Import Utility createmigration ERROR: OIUERRCS1002.
Problem: Error occurs when the HP 3PAR Online Import Utility tries to verify a one-to-one zoning
between peer ports and source host ports. If there was no one-to-one mapping then HP 3PAR
Online Import Utility will return the error as shown below.
>createmigration -sourceuid 50060160BEA00351 -srchost R123-S02 -destcpg FC_r5 -destprov
full -migtype MDM
>ERROR: OIUERRCS1002 There is no one-to-one mapping between the peer ports and the
source host ports.
OIURSLCS1002 Ensure that there is a one-to-one mapping between the peer ports and the
source host ports, and that network connectivity between the host, source array and
destination array is proper.
Solution: Verify the source port on the fabric has been zoned with one peer port.
HP 3PAR Online Import Utility addsource ERROR: OIUERRDST0004.
Problem: This error occurs when the HP 3PAR Online Import Utility detects a destination HP 3PAR
storage system with firmware version earlier than the minimum.
The following figure shows a successful and an unsuccessful execution of the addsource operation.
The failure occurs because the HP 3PAR OS version is not supported.
Solution: Upgrade the HP 3PAR storage system to a supported version. See HP SPOCK for the
minimum supported version:
HP SPOCK (http://www.hp.com/storage/spock)
Troubleshooting Issues 97
Page 98

An “unexpected error” message when destprov/destcpg are not specified for all LUNs
Problem: ERROR: OIUERRAPP0000 on createmigration using srcvolmap. This is an example
of the error:
>createmigration -sourceuid 50060160C6E0167A -srcvolmap [{"temp_1", thin, "FC_r6"}]
-migtype MDM
>ERROR: OIUERRAPP0000 An unexpected error occured. OIURSLAPP0000 Contact HP support.
You may try restarting the application service.
Solution: This error can occur when the source array storage group contains multiple volumes but
only one of the volumes is specified in the srcvolmap. In this case, the default destprov and destcpg
parameters must also be included in the createmigration command. Without this, the migration
behavior for the volumes not specified in the srcvolmap is not known. The createmigration
command should look similar to this:
createmigration -sourceuid 50060160C6E0167A -srcvolmap [{"temp_1"}] -migtype MDM
-destcpg "FC_r6" -destprov thin
>SUCCESS: Migration job submitted successfully. Please check status/details using
showmigration command.
Migration id: 1400681640423
Error message when source array LUN has persistent reservation
Problem: OIUERRMS10006:Failed to start Data transfer. Failed to find SCSI PGR keys on
destination... message after startmigration issued.
Solution: This error can occur when one or more of the LUNs in the storage group being migrated
has a persistent reservation. Once this error occurs, no further attempt to migrate any of the LUNs
in the storage group.
An adddestination Command May Fail When HP 3PAR Online Import Utility for EMC Storage Attempts to Connect an HP 3PAR Storage System when using Secure Connections
Problem: An adddestination –type 3PAR command may fail when the Online Import for
EMC Storage Utility is trying to connect using secure connection mode and cannot validate a
certificate.
Example 66 Example error
>adddestination -type 3PAR -mgmtip xx.x.xx.xx -user 3paradm -password 3pardata -secure true
-port 5783
>ERROR: OIUERRDST0010 Unable to validate certificate. C:\\InFormMC\security\HP-3PAR-MC-TrustStore
If, during HP 3PAR OS installation, ‘yes’ is chosen to disable non-encrypted ports (closing ports
5781 and 5782), the installation will leave encrypted port 5783 enabled.
If disabling non-encrypted ports is true, then the -secure and -port flag must be included in
the adddestination –type 3PAR command.
NOTE: -secure and -port are optional parameters. They need to be included only when you
are using the secure connection mode.
If the error message above occurs, the HP-3PAR-MC-TrustStore keystore file must be created in the
<userhome dir>\InformMC\Security directory and copied into the directory as shown in
the error message (C:\InformMC\Security in the example above).
98 Troubleshooting
Page 99

Scope: This may be experienced when an adddestination –type 3PAR command is issued
with the –secure=true and –port flags included.
Solution: If the above error occurs, the HP-3PAR-MC-TrustStore keystore file must be created
or modified in the <userhome dir>\InformMC\Security folder and copied into the folder
as shown in the error message, such as C:\InformMC\Security in the above example. To
copy the keystore file to the correct folder, follow these steps:
NOTE: If you have already added one HP 3PAR StoreServ Storage system, the
HP-3PAR-MC-TrustStore file will be updated for that storage system. The same
HP-3PAR-MC-TrustStore file should be updated for each HP 3PAR StoreServ Storage system
that you want to add as a destination storage system.
1. Close the HP 3PAR Online Import Utility for EMC Storage.
2. Locate the TrustStore file as displayed in the error message. Copy the
HP-3PAR-MC-TrustStore file, if available, to the logged in user’s home directory at:
\InFormMC\security
You can use the echo command, %HOMEDRIVE%%HOMEPATH%, to find the current user’s home
directory.
3. Using the command prompt, browse to the install location:
C:\Program Files (x86)\Hewlett-Packard\hp3paremcoiu\bin
...and run the following command:
TPDCertVerifier.bat
4. Enter the IP address of the HP 3PAR StoreServ and see its certificate details.
If you accept the certificate, the TrustStore file will be updated in the user’s home directory.
5. Replace the existing HP-3PAR-MC-TrustStore file as displayed in the error message with
the newly updated HP-3PAR-MC-TrustStore file in the user’s home directory.
6. Restart the HP 3PAR Online Import Utility for EMC Storage, and execute the adddestination
command again to add the HP 3PAR StoreServ Storage System.
createmigration command may not be successful during AdmitVV phase due to an
improper Failover mode setting on the EMC storage controller
Problem: A createmigration command failure may occur during the admitvv phase due to
an improper EMC Storage controller failover mode setting.
Example 67 Error message—example 1
>createmigration -sourceuid 50060160BEA00351 -srcvolmap [{"EMC_1"}] -destcpg FC_r5 -destprov full -migtype
offline
>SUCCESS: Migration job submitted successfully. Please check status/details using showmigration command.
Migration id: 1406202011980
>showmigration
MIGRATION_ID TYPE SOURCE_NAME DESTINATION_NAME START_TIME
END_TIME STATUS(PROGRESS)(MESSAGE)
1406202011980 MDM CLARiiON+APM00140110205 TAY-7200-04 Thu Jul 24 07:40:11 EDT
2014
-NA- preparationfailed(-NA-)(:OIUERRDST0008:Admit has failed. Volume
60060160FF1137005D6BECAEBA06E411 was not admitted;0 VVs admitted.;)
Typical HP 3PAR Eventlog entries will show admitvv, Test/Device not Unit Ready errors:
Troubleshooting Issues 99
Page 100

Example 68 Error message—example 2
Time : 2014-07-24 07:41:32 EDT
Severity : Minor
Type : CLI command error
Message : {3paradm super all {{0 8}} -1 15.234.144.106 27814} {Command: admitvv EMC_1:XXXXXXXXXXXXXXXXXX Error:
Volume XXXXXXXXXXXXXXXXXXXX was not admitted--0 VVs admitted.} {}
Time : 2014-07-24 07:41:33 EDT
Severity : Informational
Type : Disk event
Message : target WWN XXXXXXXXXXXXXXX on 0:1:2: cmdstat:0x1e (TE_UNITATT -- Unit attention error),
scsistat:0x02 (Check condition), snskey:0x06 (Unit attention), asc/ascq:0x29/0x0 (Power on, reset, or bus device
reset occurred), info:0x0, cmd_spec:0x0, sns_spec:0x0, host:0x4, abort:0, CDB:000000000000 (Test unit ready),
blk:0x0, blkcnt 0x0, fru_cd:0x0, LUN:2, LUN_WWN:XXXXXXXXXXXXXXXXXXXXXXXXXXXXXXX after 0.000s, toterr:44219,
deverr:1
Workaround: In order for the createmigration command to complete successfully, the EMC
Storage controller failover mode must be set to 4 (Active/Active). Failover Mode 4 is ALUA.
This allows the HP 3PAR peer port initiators to access LUNs through the noncontrolling EMC SP
controller.
The EMC Storage controller failover mode may be displayed and edited by using EMC Naviseccli
CLI commands.
To display the current default EMC Storage controller failover mode, execute the following EMC
Naviseccli CLI command:
C:\> naviseccli -address <SP Controller IP address> failovermode
Current failovermode setting is: 1
Any value other than 4 (Active/Active) indicates either a configuration issue or a
hardware/software issue with the EMC Storage controller. The issue must be corrected before
proceeding with data migration.
To change the EMC Storage controller failover mode, follow these steps:
1. Configure the EMC storage controller failover mode to 4 (Active/Active). This may
require resolving any hardware/software or configuration issues which may have led to the
condition.
Example 69 Editing the default EMC Storage controller failover mode
C:\> naviseccli -address <SP Controller IP address> failovermode 4
WARNING: Previous Failovermode setting will be lost!
DO YOU WISH TO CONTINUE (y/n)? y
2. Unzone the HP 3PAR peer ports from the EMC array.
3. Deregister the HP 3PAR Peer Port initiators from the EMC array.
4. Rezone the HP 3PAR peer ports with the EMC array.
IMPORTANT: Each HP 3PAR Peer Port initiator must have its failover mode set to 4 before
you execute the createmigration command.
Error when Importing LUN of Size Smaller than 256 MB
Problem: After a createmigration command is executed with a LUN of size less than 256 MB,
the following message occurs following a showmigration command: "OIUERRDST0008: Admit
has failed ..."
Solution: Increase the size of the source LUN on the EMC Storage array to a minimum of 256 MB,
and then retry the createmigration command.
100 Troubleshooting
 Loading...