

Howard XFLE-C300-MV-TR Series, XFLE-C150-MV-TR Series, XFLE-C100-HV-TR Series, XFLE-C150-HV-TR Series, XFLE-C230-HV-TR Series Installation Instructions Manual
...Page 1
INSTALLATION INSTRUCTIONS
XFLE-TR Series
04/12/2018
Doc#1025-000244-001 RV0
Model number parameter list
1
Where C represents CCT variations.
Model1
Input Voltage
Input Power
(W)
Power
Factor
Input
Current
Weight
(lbs)
Ambient rating
XFLE-C100-MV-TR Series
100 – 277VAC
50/60 Hz
100W
>0.9
1.5A
14
-40° to +40°C
-40° to 104°F
XFLE-C150-MV-TR Series
150W
1.8A
14
XFLE-C230-MV-TR Series
230W
2.5A
18
XFLE-C300-MV-TR Series
300W
3.5A
24
XFLE-C100-HV-TR Series
277 – 480VAC
50/60 Hz
100W
0.55A
14
XFLE-C150-HV-TR Series
150W
0.88A
14
XFLE-C230-HV-TR Series
230W
1.4A
18
XFLE-C300-HV-TR Series
300W
1.8A
24
Warning:
To avoid electric shock:
Be certain electrical power is OFF before and
during installation and maintenance.
Luminaire must be connected to a wiring
system with an equipment-grounding
conductor.
Warning:
To avoid the risk of fire, explosion, or electric shock, this
product should be installed, inspected, and maintained by a
qualified electrician only, in accordance with all applicable
electrical codes.
Warning:
Make sure the supply voltage is the same as the
rated luminaire voltage.
Not suitable for hazardous location use.
Do not operate in ambient temperatures above
those indicated on the luminaire nameplate.
Keep lens tightly closed when in operation.
For supply connections use wire rated for at least 90°C (194°F)
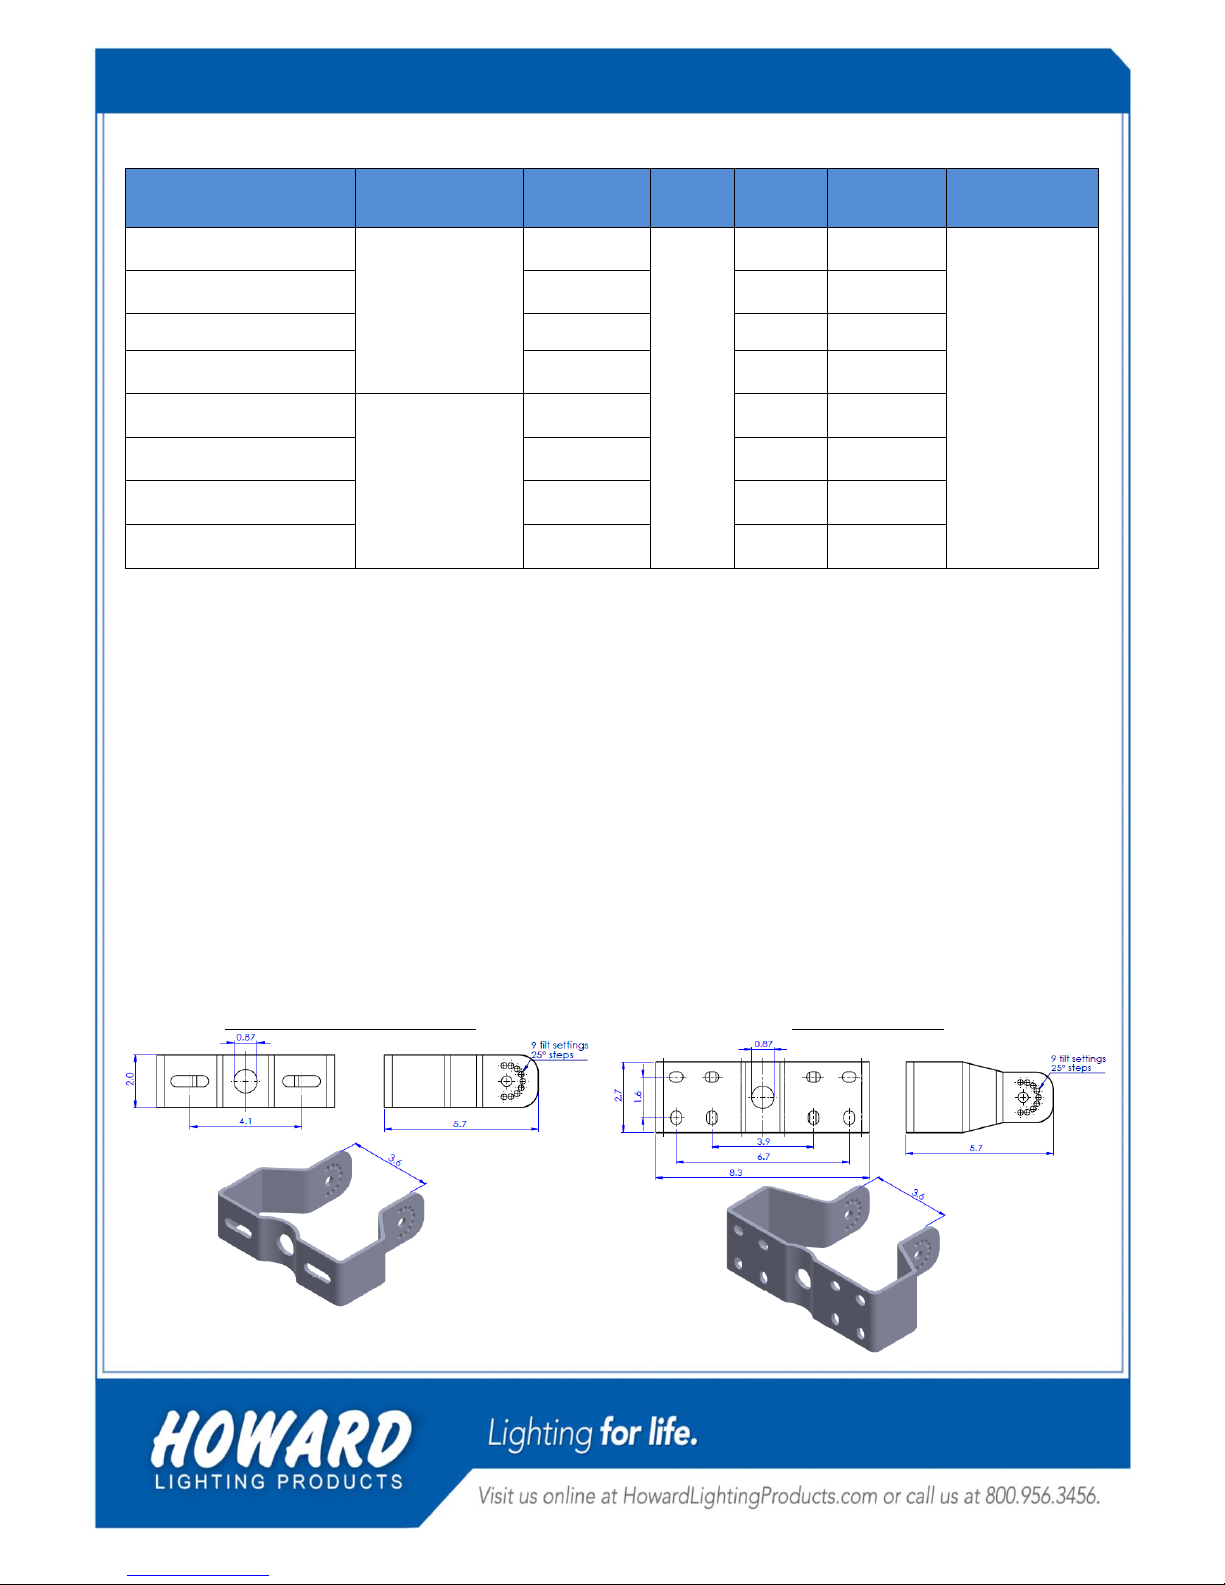
Mounting Details (inches):
For 100, 150, & 230W luminaires
For 300W luminaire
Page 2
INSTALLATION INSTRUCTIONS
XFLE-TR Series
04/12/2018
Doc#1025-000244-001 RV0
Installation Steps
1. Secure trunnion on mounting surface using expansion bolts
(sold by others). Mount hole details are provided on previous
page.
2. Attach luminaire to the trunnion using trunnion bolt and nuts.
Hand tighten trunnion bolt.
3. Ensure power is off, and then make electrical connections.
Connect wires; white wire to “Neutral”, black wire to “Line”,
green wire to “Ground”.
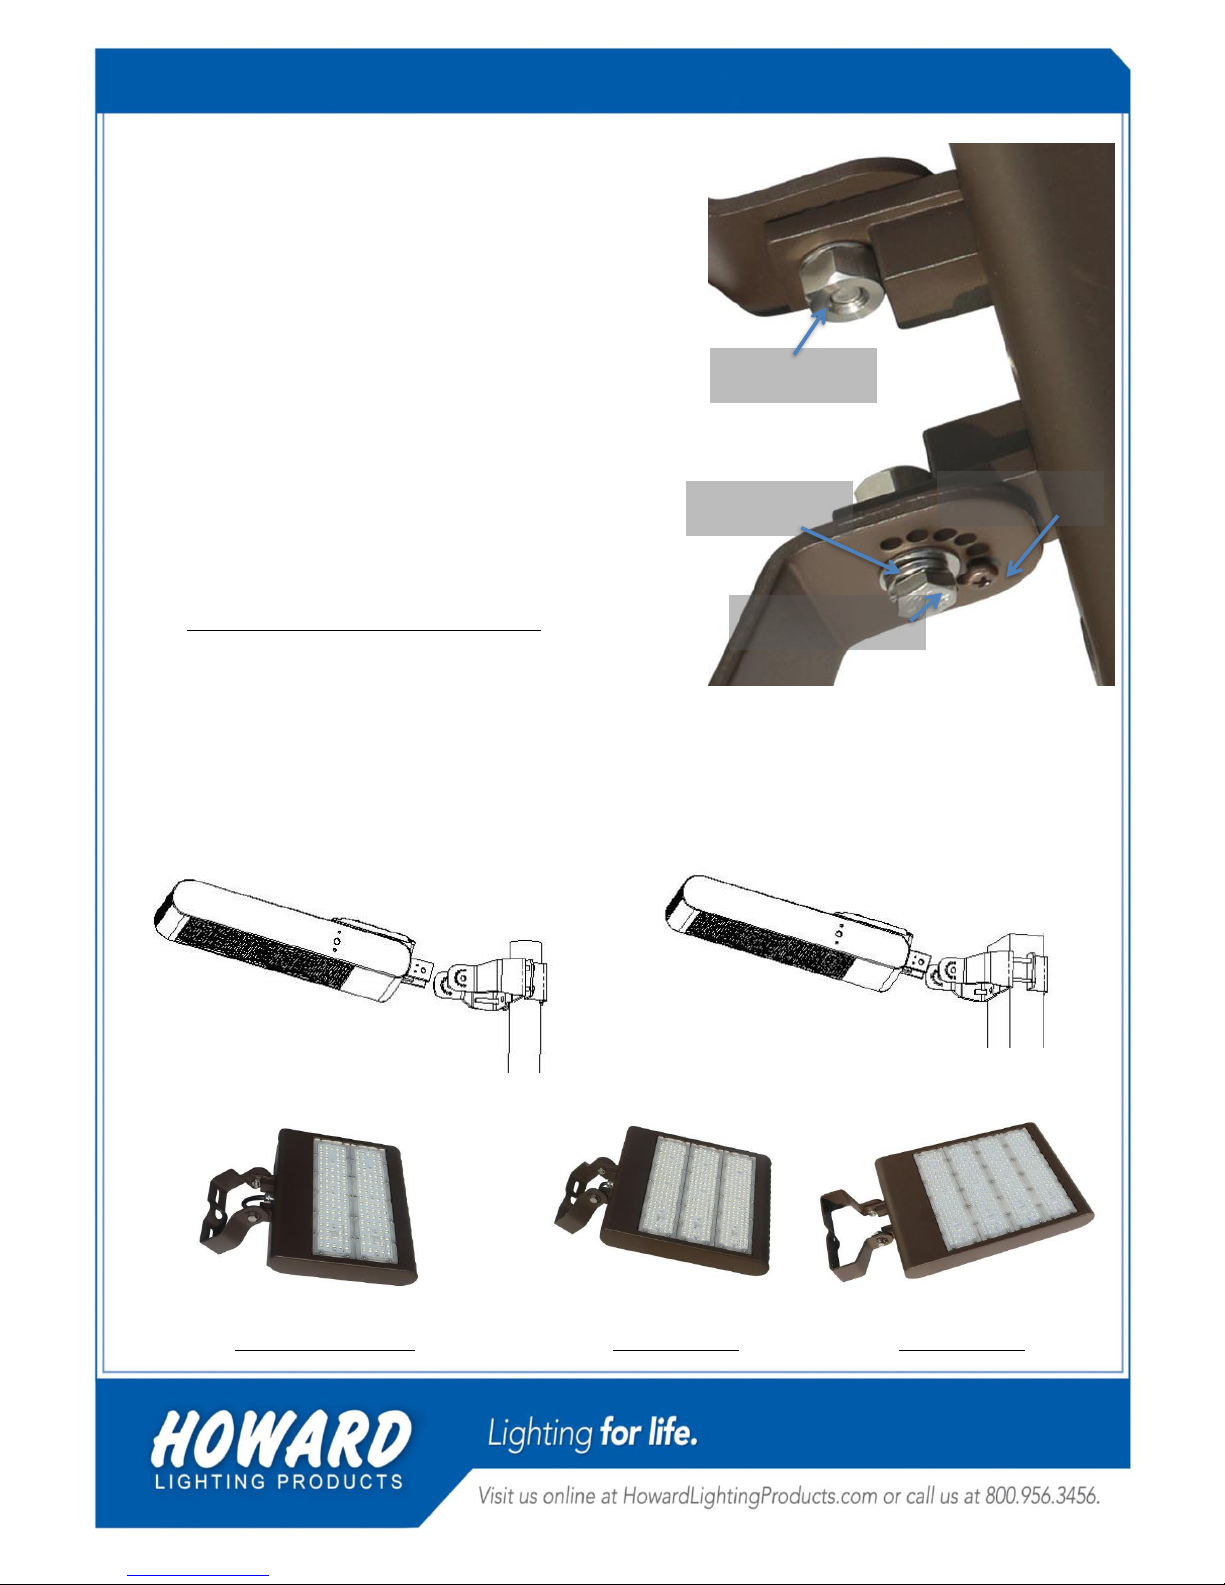
4. Aim fixture –
a. Aim to desired point,
b. Use set screws, both sides, to hold orientation.
(philips-head screwdriver)
5. Tighten trunnion bolts. (requires Metric #14 wrench)
After installation, please
Check that the lighting fixture is firmly fixed.
Check that wires are connected correctly.
At last, turn on the power, and check function.
Mounting on round poles:
Use XLE-TR-RPM (sold separately) For 100W, 150W,
&230W luminaires. (φ2.0” – φ4.3”)
Use XLE-TR-RPML (sold separately) For 300W luminaires.
(φ2.0” – φ4.7”)
Mounting on square poles:
Use XLE-TR-SPM (sold separately) For 100W, 150W,
&230W luminaires. (2.0” – 3.5”)
Use XLE-TR-SPML (sold separately) For 300W luminaires.
(2.0” – 3.9”)
Additional Product Images# 1025-000230-050 RV00
100W, 150W Luminaire
230W Luminaire
300W Luminaire
Set screw
Trunnion bolt
Lock nut
Lock washer
 Loading...