

Page 1
INSTALLATION INSTRUCTIONS URL Series Luminaires 9/30/2014
IMPORTANT:
WARNING:
All work should be performed by a qualified electrician.
To insure personal safety, proper grounding is req'd.
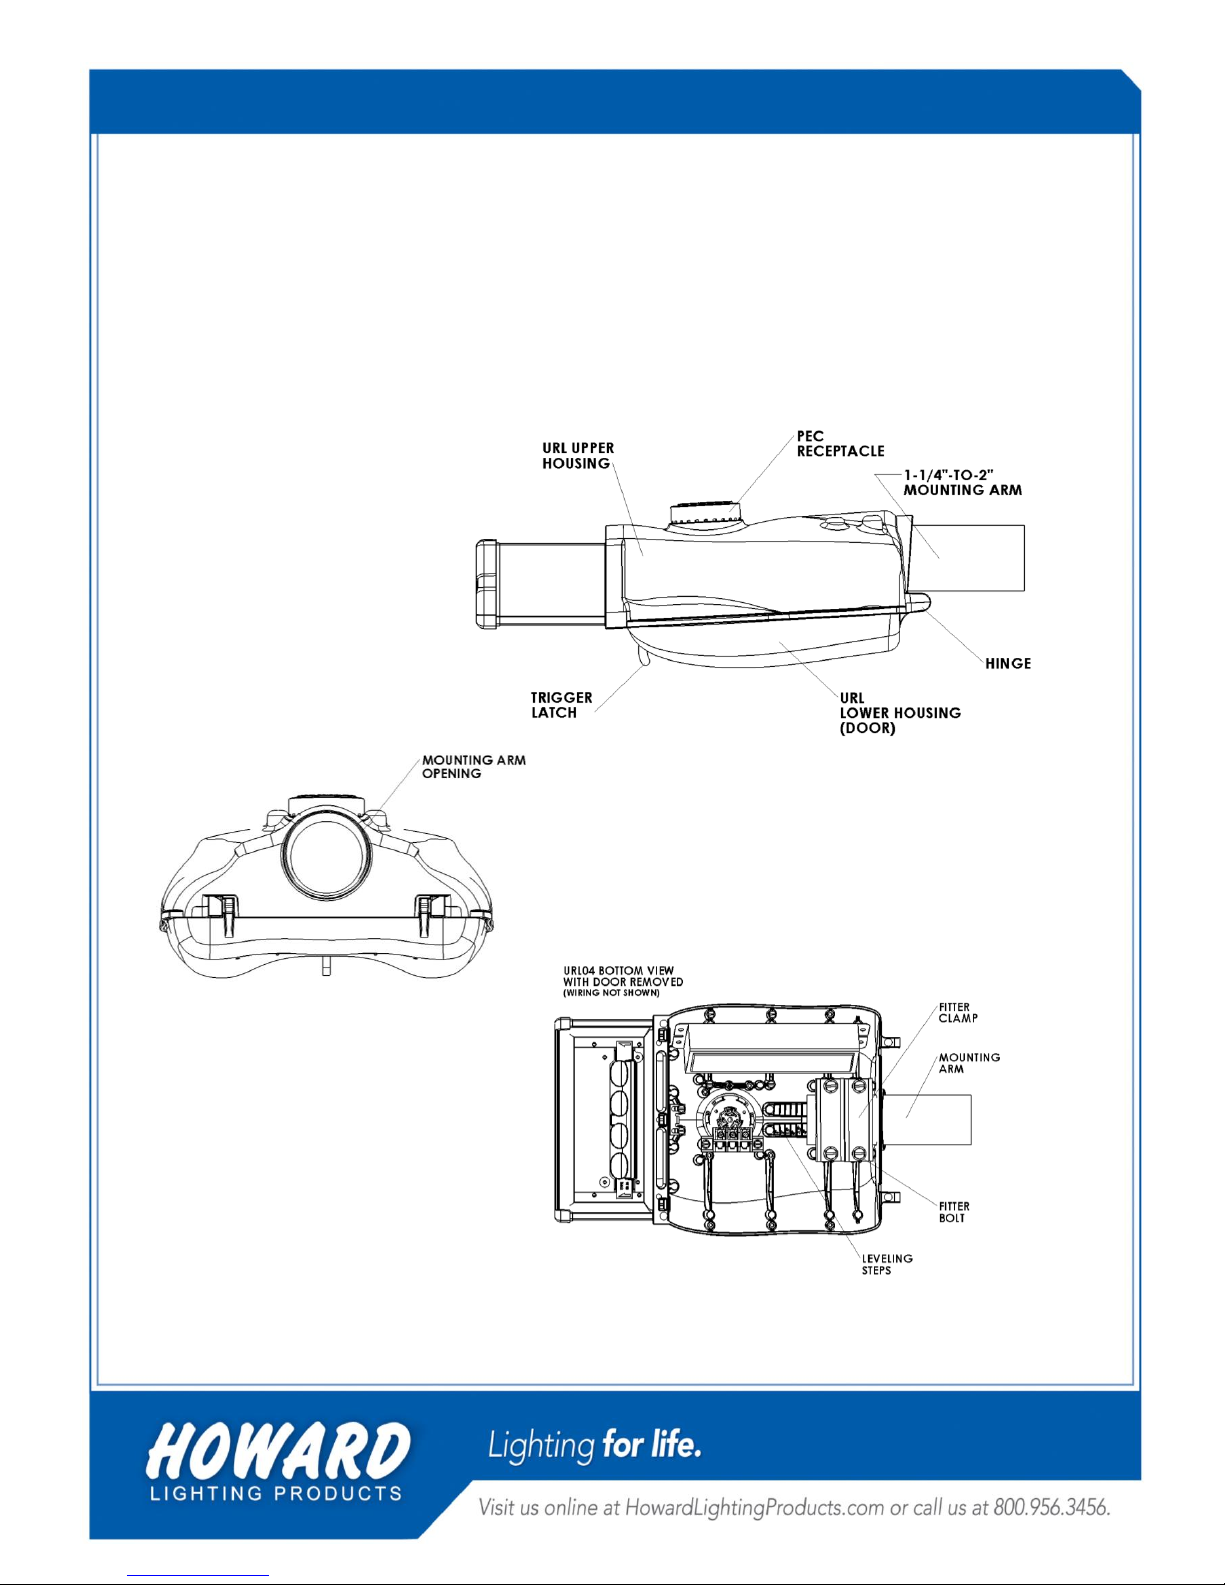
LUMINAIRE INSTALLATION:
Open the luminaire by pulling the trigger
latch toward the nose of the fixture.
Swing the lower housing (door) away
from the upper housing.
The lower housing (door) can be
removed from its hinges for easier
installation of upper housing.
Determine the size of the mounting arm. This luminaire
is designed to optimally accommodate a 2" mounting
arm. If mounting to a 1-1/4" arm, use of included
birdguard is recommended.
Loosen the fitter bolts in the upper housing.
Lift the upper housing into position in front of
the mast arm so that the mast arm enters the
opening at the rear of the housing and extends
into the fixture bewteen the fitter clamp
and the luminaire leveling steps.
Using the cast leveling steps, adjust
the luminaire to the desired mounting angle.
Fully tighten fitter clamp bolts (10-12 ft-lbs).
These instructions do not claim to cover every detail or variation in the equipment or application.
These instructions do not claim to cover every possible contingency during installation or maintenance.
Read all instructions carefully before attempting
installation. If you do not understand these
instructions, please consult your local distributor.
Disconnect power during installation and before
servicing (including relamping).
Risk of Fire.
Product is for outdoor installation and use only.
Thoroughly inspect the fixture for any freight damage;
freight damage should be reported to the delivery
carrier.
To avoid the risk of fire or shock, this fixture must be
wired in accordance with the National Electric Code
and applicable local codes or ordinances.
Compare the catalog/model number description on the
packing slip with the fixture label to assure that you
have received the correct product.
Doc. #1025-000218-000 rev.03
Page 2
INSTALLATION INSTRUCTIONS URL Series Luminaires 9/30/2014
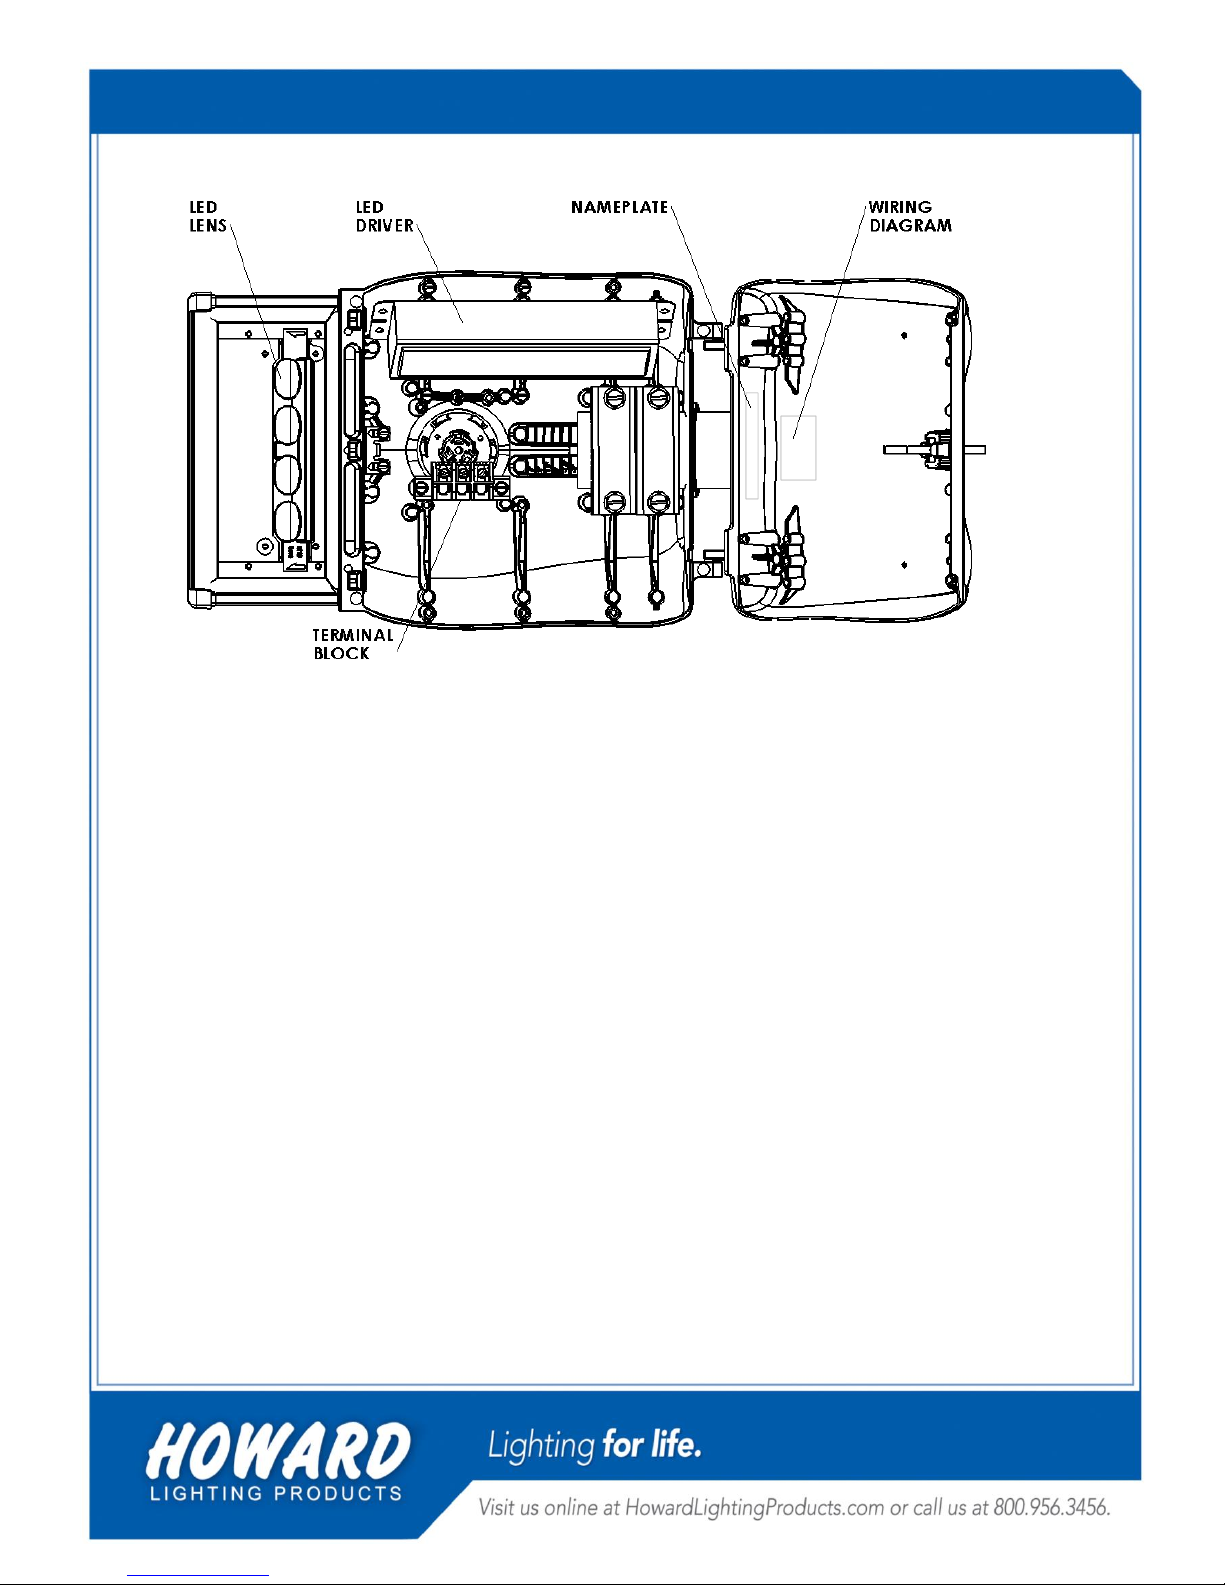
LUMINAIRE WIRING:
Route supply wires (not shown) through mounting arm
for connection to terminal block. Refer to the luminaire
nameplate and wiring diagram labels for connection RE-ATTACHING LOWER HOUSING (DOOR):
and rating information. Insure that power supply voltage
Position lower housing at ~90o angle and
and luminare voltage ratings match. re-attach the lower housing to upper housing by
Use #16 AWG (minimum) leadwires. inserting the lower housing hinge pins onto the
Attach incoming supply power lead wires to terminal upper housing hinges.
block (L1 & N terminals, typically).
Terminal Screws - Tightening Torque: 35.5-44.3 in-lbs. Close the luminaire by swinging the lower housing
up until trigger latch fully engages the latch plate
PHOTOCONTROL INSTALLATION: in the upper housing.
This luminaire is typically pre-wired for photocontrol
operation. Verify photocontrol voltage rating matches
power supply voltage.
If photocontrol operation is not desired, use of a MAINTENANCE:
shorting cap, (such as HI model TL-SC or equivalent), For optimal performance, LED lens may
is required in place of photocontrol. be periodically cleaned using mild detergent
and rinsed with clean water.
Lift & rotate the Receptacle such that the arrow on Clean exterior lens surface only.
the top points North. Release so that the
Do not perform this while luminaire is energized.
Receptacle snaps back into position.
Plug photocontrol into receptacle (located on top
of Upper Housing). Push down and twist photocontrol
clockwise until it locks into position.
NOTE: Photocontrol includes a time delay before
luminaire will energize (to avoid nuisance cycling).
Doc. # 1025-000218-xxx rev.
DOC# 1025-00218-000 rev.03
 Loading...