

Page 1
INSTALLATION INSTRUCTIONS
For models:
SLS008xxxx; SLS020xxxx; SLS030xxxx
WARNING
Please read instructions carefully before attempting to
install fixture, and retain instructions for future reference.
SLS - Solar LED
Streetlight
FIXTURE INSTALLATION
Note: To avoid over-discharge of battery, allow
the luminaire to fully charge before commissioning.
1. Attach the adjustable fitter (T-40 torx security)
to the luminaire, and adjust to appropriate angle for the installation latitude. (A minimum of
15° from horizontal is required for selfcleaning.)
2. Adjust the LED array (phillips) to compensate
for the tilt of the luminaire. LED array should
point directly down.
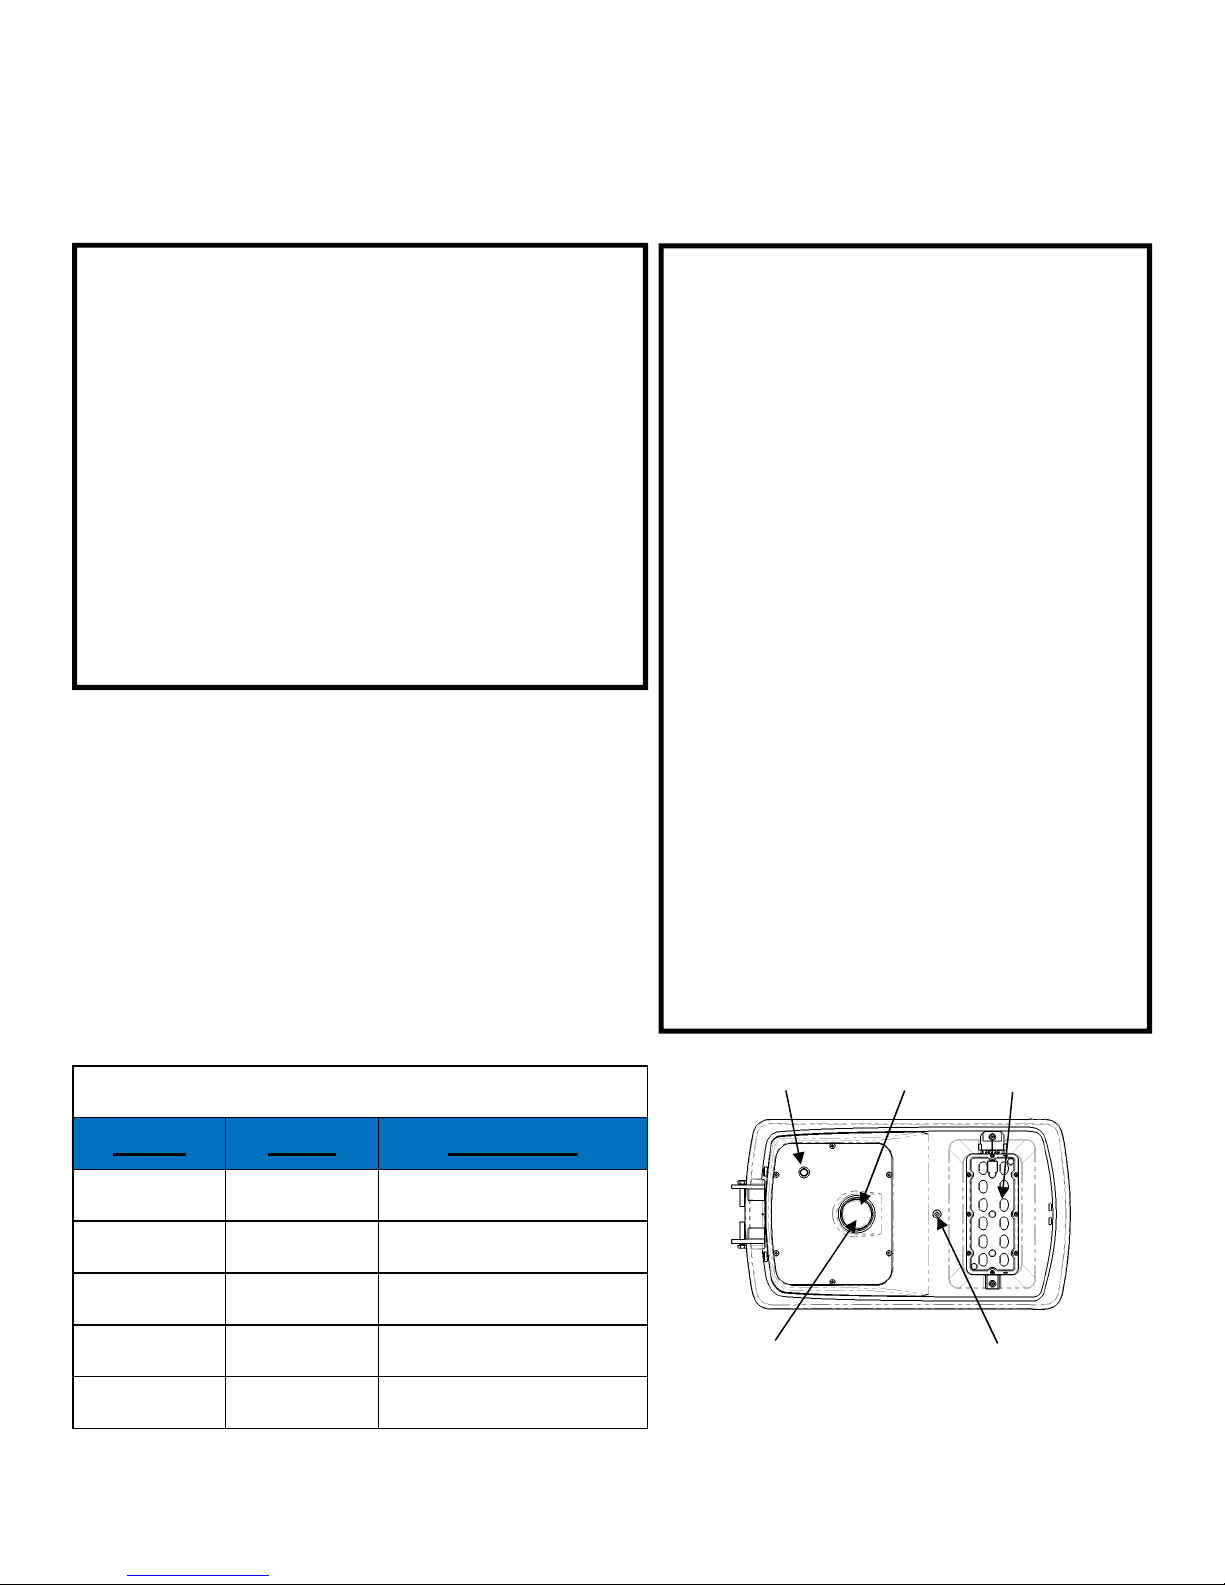
Charge Condition Indicator
Color State Condition
RED Solid Fully Charged
RED Slow Flash Charging
3. Insert the mounting arm into the fitter and level
the LED array. Securely tighten the fitter to the
mounting arm (T40 torx security).
4. Actuate the switch located on the bottom of the
luminaire and confirm that the battery is fully
charged (solid red LED in motion sensor).
5. Cover the solar panel with and opaque material. The luminaire should turn on within a minute.
6. Program the luminaire via the wireless remote.
Power Switch Sensor LED Array
RED Fast Flash Charging Fault
GREEN Solid State of Charge >10%
GREEN Slow Flash State of Charge <10%
2018-04-19
Charge Condition
Indicator
1
Charging Port
(16VDC 5A MAX)
Page 2
INSTALLATION INSTRUCTIONS
For models:
SLS008xxxx; SLS020xxxx; SLS030xxxx
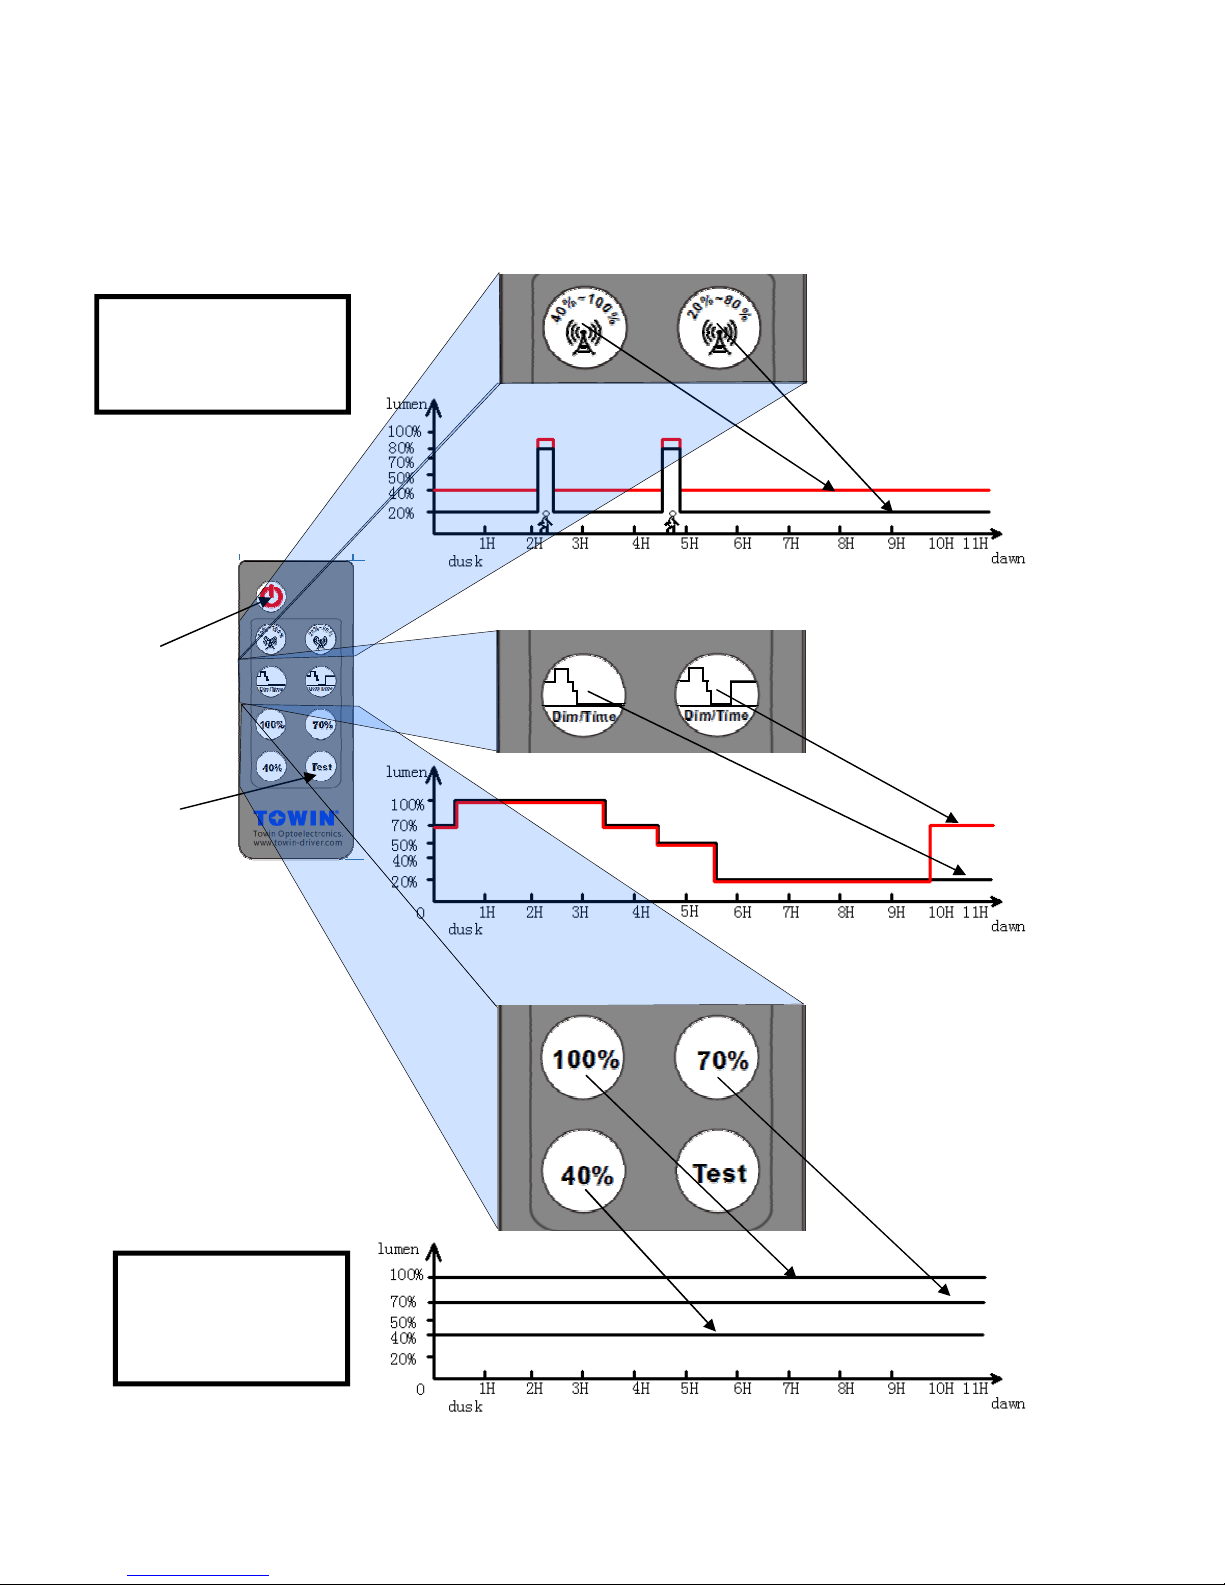
Programming with the wireless remote
NOTE: The Luminaire will
flash twice when mode
selection is received.
Disable
SLS - Solar LED
Streetlight
Motion Sensing Modes:
Time Based Modes:
Unit Test
NOTE: The Luminaire
will reduce to half power
when battery is less
than 40% charged.
Constant Output Modes:
2018-04-19
2
 Loading...