

Page 1

THE HOVERCAM
User’s Manual
FlexView for Solo 8
Version 1.0
7/30/2013
Pathway Innovations and Technologies, Inc. San Diego, CA 92121
Main:(858)870-3499 Fax:(858)357-9945 - Toll Free:866-201-2058
www.thehovercam.com
Copyright © 2010-2014 - All Rights Reserved
Page 2

TABLE OF CONTENTS
1 Introduction .............................................................................................................................4
1.1 Host computer .................................................................................................................4
1.2 PC System requirements: ...............................................................................................4
2 Installation ..............................................................................................................................5
2.1 Connecting the HoverCam Solo 8 camera ....................................................................5
2.2 Installing FlexView ..........................................................................................................5
3 FlexView features with the Solo 8 camera .............................................................................8
3.1 Preview – Customize - Capture .....................................................................................8
3.2 Scanning – It’s quick .......................................................................................................8
3.3 Life-Like vs. Copier-Style Images .................................................................................8
3.4 USB Video ........................................................................................................................8
3.5 Depth of Field ..................................................................................................................9
3.6 Projector or TV Monitor ................................................................................................9
4 Running FlexView ................................................................................................................10
4.1 Select Present, Scan or Archive mode .........................................................................10
4.2 Select Camera ................................................................................................................11
4.3 Search .............................................................................................................................11
4.4 Tools................................................................................................................................11
4.4.1 Change File Path ............................................................................................................................... 11
4.4.2 Naming Convention .......................................................................................................................... 12
4.4.3 Language ........................................................................................................................................... 12
4.4.4 User’s Manual ................................................................................................................................... 12
4.4.5 Update ............................................................................................................................................... 13
4.4.6 About Us ........................................................................................................................................... 13
4.5 Zoom ...............................................................................................................................14
4.5.1 Digital zoom (“Advanced zoom”) ..................................................................................................... 14
4.5.2 Camera lens zoom: ............................................................................................................................ 14
5 Present Mode, for Video Presentations ................................................................................15
5.1 Actions ............................................................................................................................15
5.1.1 Camera Resolution ............................................................................................................................ 15
5.1.2 Display Size ....................................................................................................................................... 15
5.1.3 Video Codec ...................................................................................................................................... 16
5.2 Advanced Controls ........................................................................................................16
5.2.1 Focus ................................................................................................................................................. 16
5.2.2 Exposure ............................................................................................................................................ 16
5.2.3 White Balance ................................................................................................................................... 17
Page 3

5.2.4 Select Focus ....................................................................................................................................... 17
5.2.5 Switch to YUV Mode/Switch to MJPEG mode ................................................................................ 17
5.3 Library ...........................................................................................................................17
5.4 Additional Controls .......................................................................................................18
5.4.1 Rotate ................................................................................................................................................ 18
5.4.2 Digital Zoom ..................................................................................................................................... 18
5.4.3 Actual Size (1:1) ................................................................................................................................ 19
5.4.4 Fit to Screen ...................................................................................................................................... 19
5.4.5 Mirror ................................................................................................................................ ................ 19
5.4.6 Full Screen ......................................................................................................................................... 19
5.5 Freeze Frame/Continue ................................................................................................19
5.6 Using the Secondary Camera .......................................................................................19
5.6.1 Swap Cameras and Rotate ................................................................................................................. 19
5.6.2 Secondary Camera Settings ............................................................................................................... 20
5.7 Start Capture .................................................................................................................20
5.8 Annotate .........................................................................................................................20
5.9 Slingshot .........................................................................................................................23
5.10 Catapult ......................................................................................................................24
6 Scan Mode, for quick scans, snapshots and sequence captures .........................................25
6.1 Actions ............................................................................................................................25
6.1.1 Camera Resolution ............................................................................................................................ 25
6.1.2 Display Size ....................................................................................................................................... 25
6.1.3 File Format ........................................................................................................................................ 25
6.1.4 Image Quality ................................................................................................................................... 25
6.1.5 Straighten .......................................................................................................................................... 25
6.1.6 Crop ................................................................................................................................................... 26
6.1.7 Quick Multi Capture feature .............................................................................................................. 26
6.2 Effects .............................................................................................................................26
6.2.1 Button Controls ................................................................................................................................. 26
6.2.2 Slider controls: Brightness, Saturation, Contrast ............................................................................... 27
6.2.3 Remember Settings ................................................................ ............................................................ 27
6.3 Library ...........................................................................................................................27
6.4 Additional Controls .......................................................................................................27
6.4.1 Scan It (Snap) .................................................................................................................................... 27
6.4.2 Auto Capture ..................................................................................................................................... 27
6.5 Annotate .........................................................................................................................29
6.6 Secondary Camera (Face shot with Scan)...................................................................29
6.7 Slingshot .........................................................................................................................29
6.8 Catapult ..........................................................................................................................29
7 Archive Mode: Managing and sharing your files ...............................................................30
7.1 Archive Library .............................................................................................................30
7.1.1 File Types ................................................................................................................................ .......... 31
Page 4

7.1.2 Folders and files ................................................................................................................................ 31
7.2 Archive Controls ...........................................................................................................32
7.2.1 Stack ................................ ................................................................................................ .................. 32
7.2.2 Unstack .............................................................................................................................................. 33
7.2.3 Delete ................................................................................................................................................ 33
7.2.4 Export ................................................................................................................................................ 33
7.2.5 Create PDF ........................................................................................................................................ 33
7.2.6 Email ................................................................................................................................................. 34
7.2.7 Print ................................................................................................................................................... 34
7.2.8 OCR (Optical Character Recognition) .............................................................................................. 34
7.2.9 Signature ............................................................................................................................................ 35
7.2.10 Share .................................................................................................................................................. 36
8 Legal and Notice Information ..............................................................................................38
8.1 Warranty ........................................................................................................................38
8.2 Trademarks....................................................................................................................38
8.3 User License Agreement (EULA) ................................................................................38
8.3.1 Acceptance ........................................................................................................................................ 38
8.3.2 License Grant 27 ............................................................................................................................... 39
8.4 Restrictions ....................................................................................................................39
8.4.1 Restrictions on Transfer .................................................................................................................... 39
8.4.2 Restrictions on Use ............................................................................................................................ 39
8.4.3 Restrictions on Alteration .................................................................................................................. 39
8.4.4 Restrictions on Copying .................................................................................................................... 40
8.5 Disclaimer of Warranties and Limitation of Liability ...............................................40
8.6 Limitation of Remedies and Damages .........................................................................41
8.7 Governing Law, Jurisdiction and Costs ......................................................................41
8.8 Severability ....................................................................................................................41
Page 5

1 Introduction
This User’s Manual is written specifically for The HoverCam FlexView
software running on a PC-compatible computer connected to a HoverCam
Solo 8 camera.
We encourage you to read through this manual to understand how to use
your Solo 8 camera with our FlexView software and all its features. However,
if an unexpected incident arises, please call us or submit a support ticket at
http://www.thehovercam.com/support/ for a prompt and friendly reply.
When contacting The HoverCam Support, please make sure to tell us:
your operating system
the HoverCam Model number
the problem you are experiencing, and
as much contextual information as possible.
Alternatively, you may email us at support@thehovercam.com, or call our
toll-free Tech Support Department at (866) 201-2056, ext. 201 or ext. 207.
1.1 Host computer
HoverCam FlexView runs on PC-compatible computers only. Mac users will
use the HoverCam Flex10 software. FlexView is a new and improved version
of HoverCam’s Flex program upgraded to work with the new Solo 8 camera.
1.2 PC System requirements:
Processor: Minimum: Intel Pentium III 1GHz or faster processor
Recommended: Pentium 4 2GHZ or faster
OS: Windows 2000/XP/2003, Windows Vista, Windows 7
RAM: Minimum: 512 MB RAM; Recommended: 1GB RAM.
Note: If you are going to use the software on a computer that barely meets
the minimum requirements, you may experience a slow video refresh rate.
Page 6
2 Installation
2.1 Connecting the HoverCam Solo 8 camera
When you first use the Solo 8 camera, notice that there are two USB ports
on the back of the camera. One of them is marked “Install”, and the other is
a regular USB port. Use the Install port to connect the camera to a USB port
on your computer with the USB cable provided. The Solo 8 camera works
over both USB 2.0 and USB 3.0.
IMPORTANT: After the FlexView application is installed (see below), remove
the USB cable from the Install port on the back of the camera, and plug it
into the regular USB port located next to the Install port.
2.2 Installing FlexView
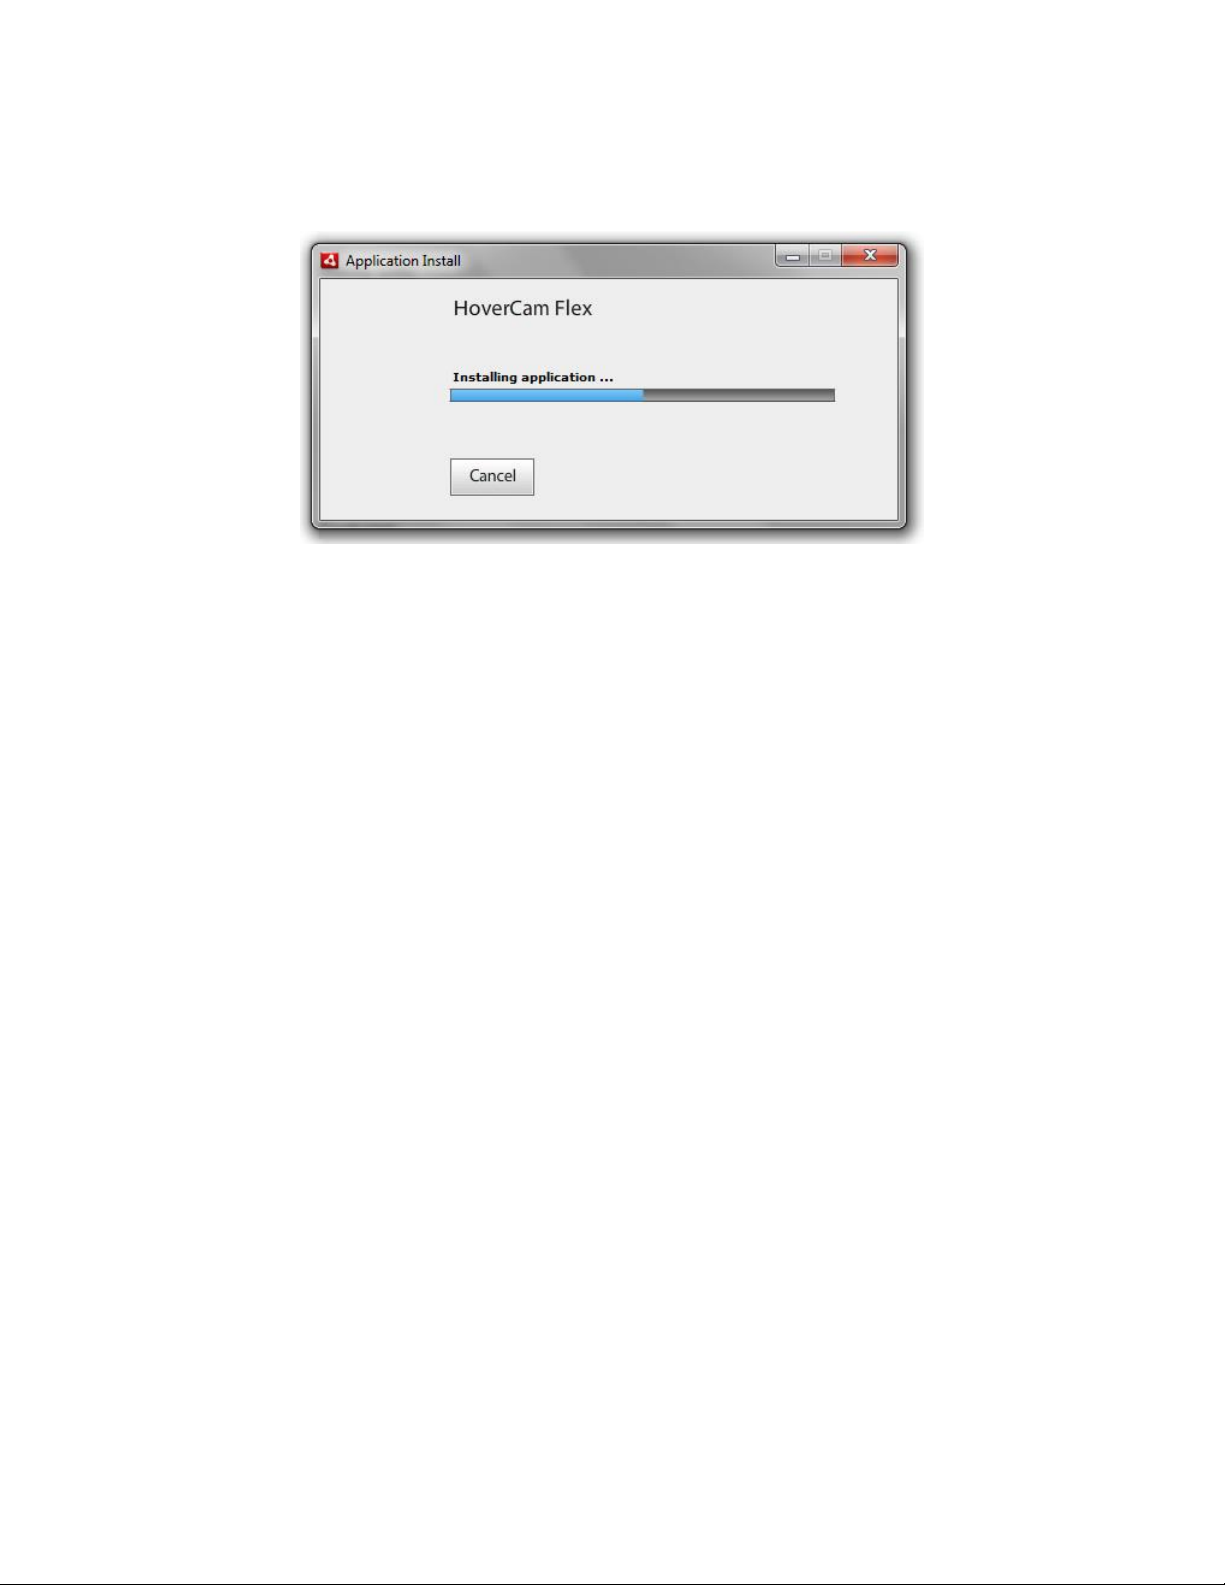
The HoverCam FlexView software will install automatically once the Solo 8 is
connected via the “Install” port. This process may take a few minutes.
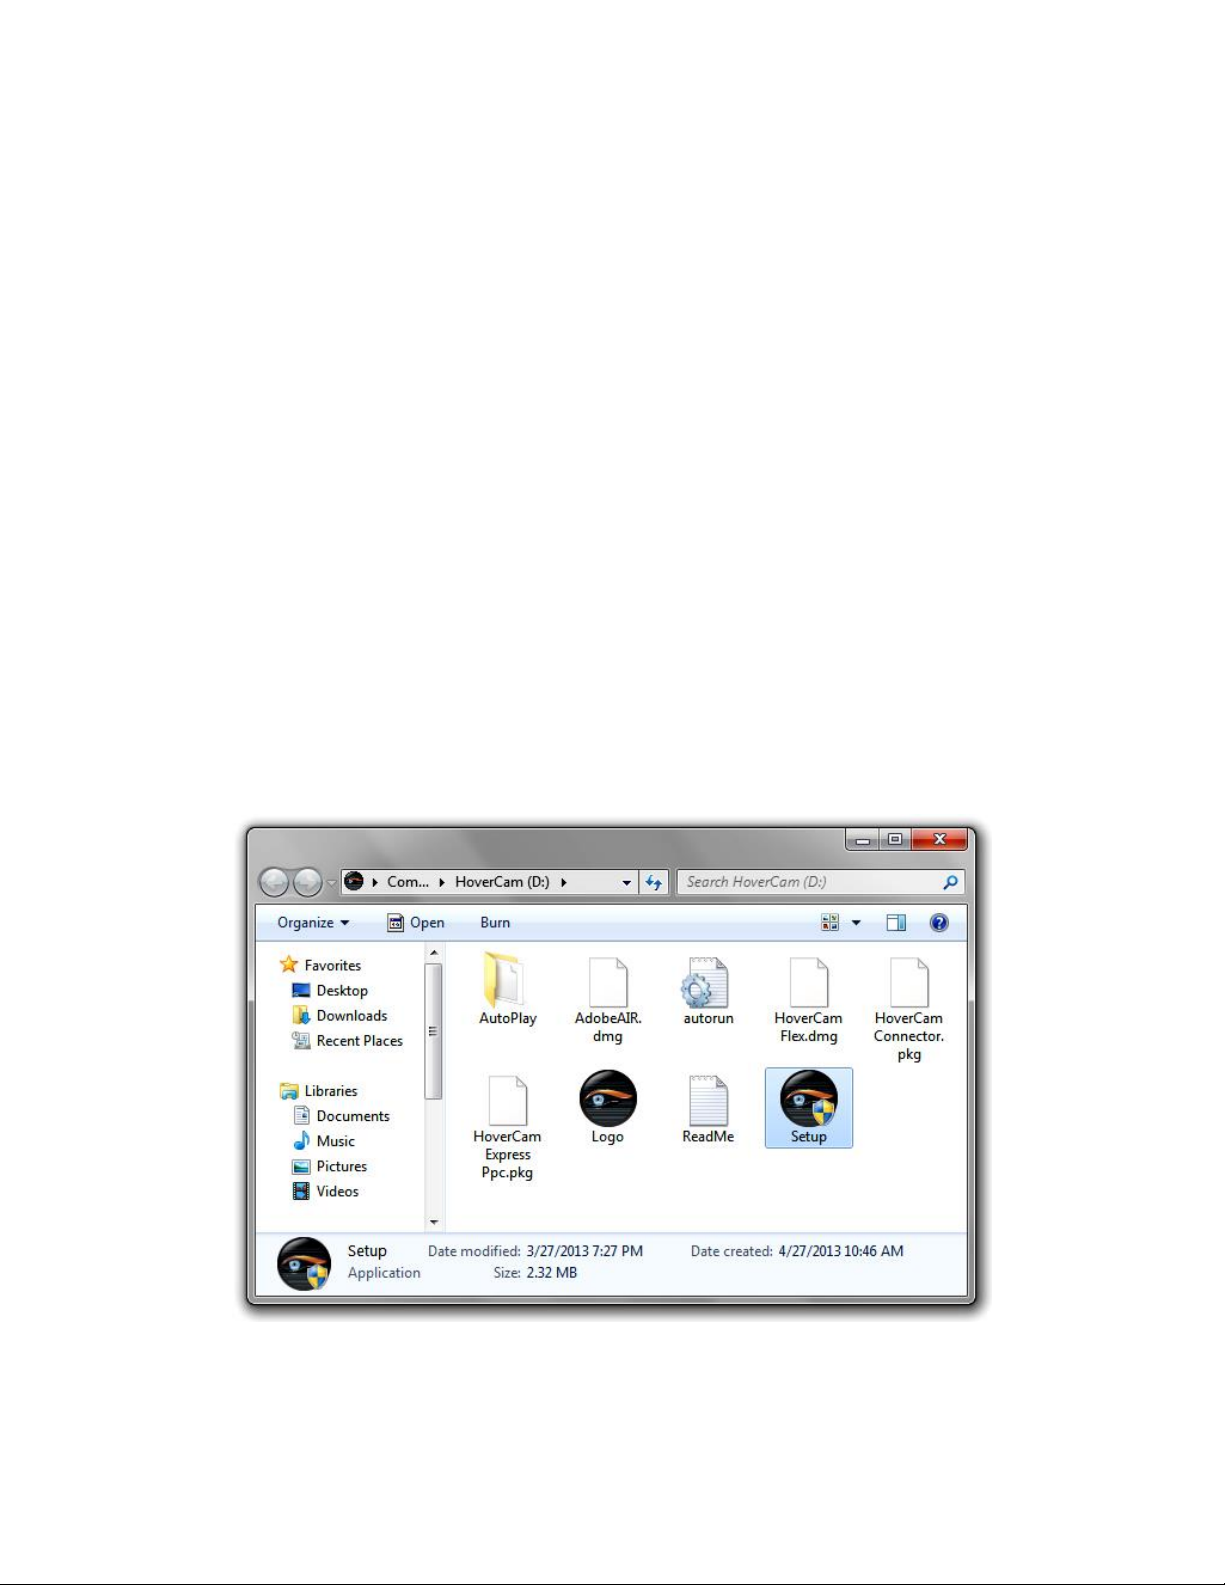
Some computers may need to have the software manually installed,
depending on the computer’s settings. The Solo 8 will look like a USB thumb
drive to your computer. If this is the case, double click the Setup file to bring
up the installation screen.
Click on the “Install FlexView” button to continue the installation.
Page 7
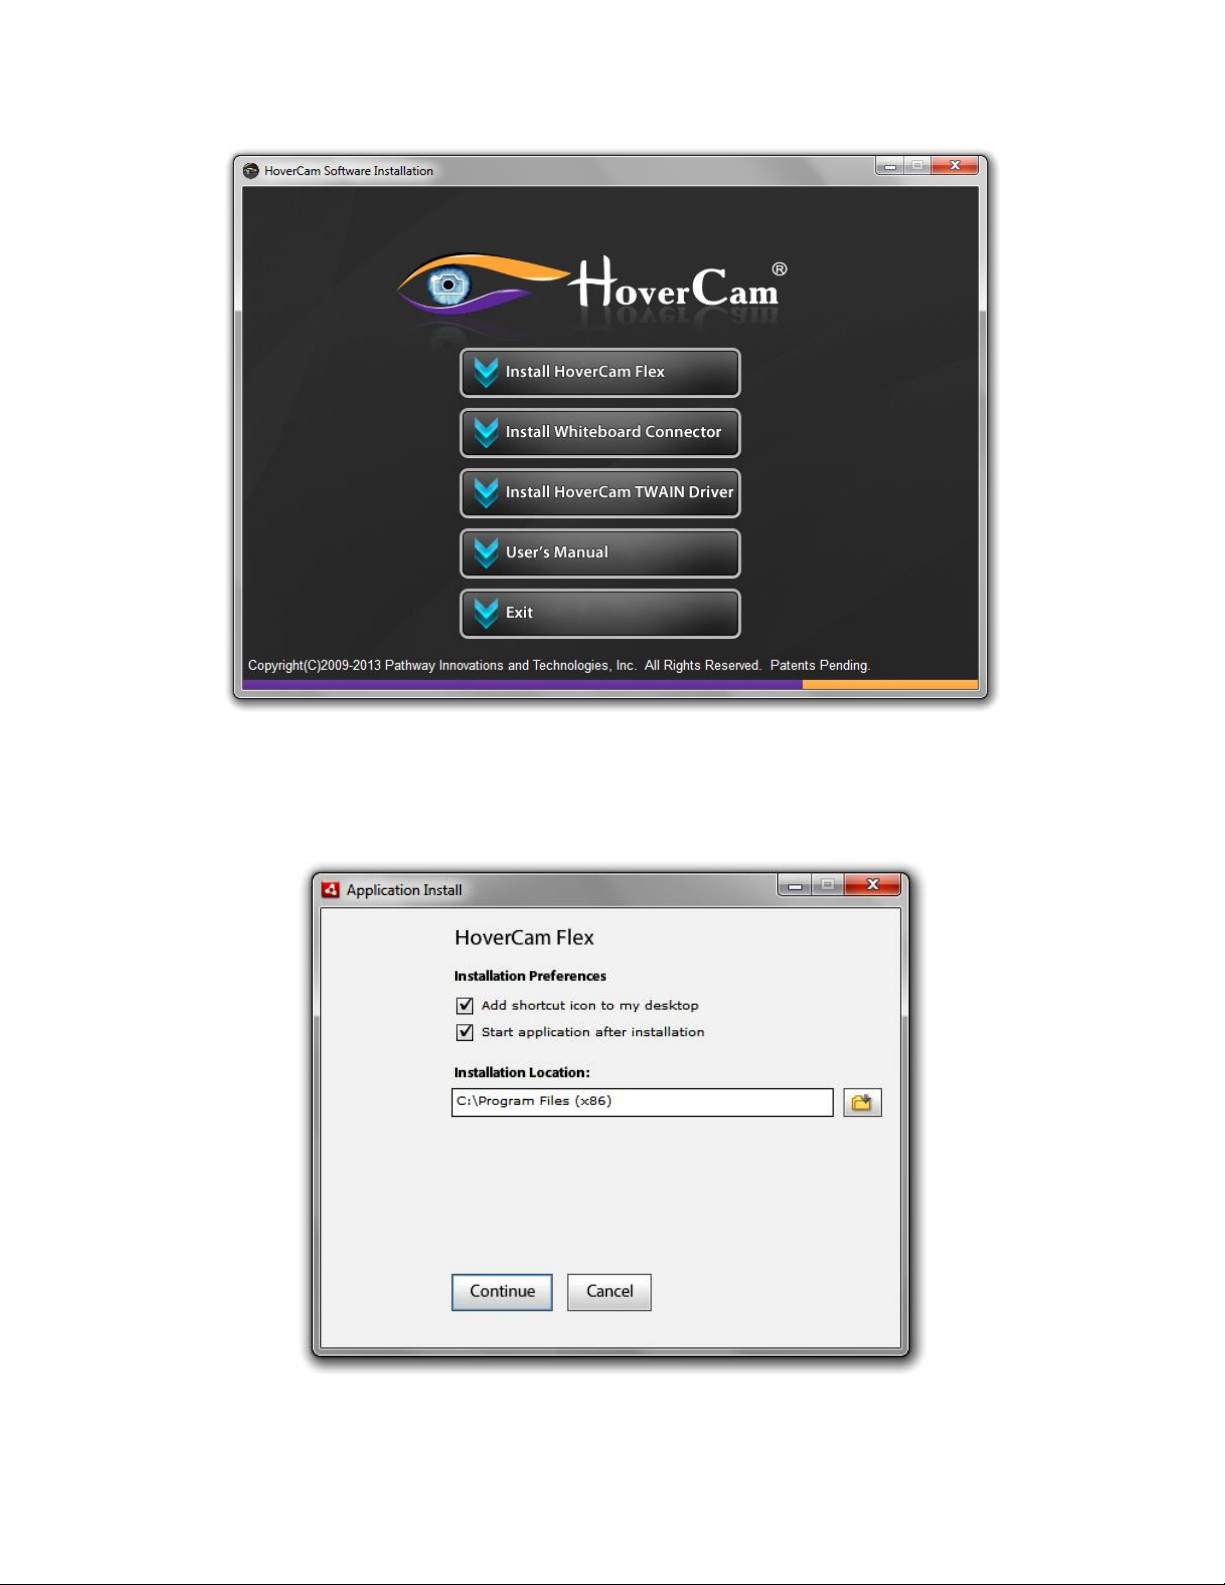
You have the option to change the default installation location of FlexView on
your system as shown below. During installation, if your computer does not
have Adobe Air ®, it will be installed automatically.
Page 8
You can create a FlexView shortcut and choose to start the application once
installation completes.
After the installation is complete, you will not be using the “Install” USB port
on the back of the camera. Unplug the USB cable from that port and connect
it to the regular USB port, also on the back of the camera.
Congratulations!
You are now ready to begin using FlexView with your Solo 8!
Page 9

3 FlexView features with the Solo 8 camera
The Solo 8, as with the entire line of HoverCam document cameras, is “more
than a scanner, and more than a camera”. It is excellent for quick multiple
scans, with time sequenced snap scans and motion sensing options.
This means there are some new concepts when using the Solo 8.
3.1 Preview – Customize - Capture
With the Solo 8 and FlexView, you see a live preview of the document or
subject under the camera. You can change or adjust the document
orientation in real time. You may place documents with various sizes freely.
It is no longer necessary to wait for slow-showing static preview scans from
a linear scanner. With the FlexView software you can actually customize the
live preview before you record a video or scan a document. You can adjust
the colors, you can add text and annotations and even fix the placement and
layout of the document or presentation.
3.2 Scanning – It’s quick
The Solo 8 captures the entire page of a document in a single snapshot that
completes in less than a second. This is much faster than using a traditional
scanner with its mechanical sweeping action of the scanning. Multiple-page
scanning is also made easier with FlexView.
3.3 Life-Like vs. Copier-Style Images
With the Solo 8, your scanned image is a more accurate reproduction of the
real document or three-dimensional object. Expect a life-like image that is
significantly better than the carbon-copy style of traditional scanned images.
3.4 USB Video
The live video via USB can be used as a video presentation with a projector
or an HDMI monitor. This is an excellent solution for classroom instructors
and visual presenters. The FlexView software allows you to present live
video, record a video session and save it to present again at a later time, or
record just a selected portion of the displayed image if you need to focus in
on one area. The built-in microphone on the Solo 8 records voice along with
the video for a complete presentation.
8 | P a g e
Page 10

3.5 Depth of Field
The Solo 8 lens offers a large depth of field which makes it possible to take
clear pictures even for scenes with multiple objects of varying heights or
with a thick open book.
3.6 Projector or TV Monitor
Solo 8 works with all projectors. If the projector can accept HDMI input
displaying minimum of 720P HD video, HoverCam has supplied a free HDMI
cable for you. If the projector accepts only VGA or component or composite
video input, HoverCam has also supplied the correct cables in the package.
9 | P a g e
Page 11
4 Running FlexView
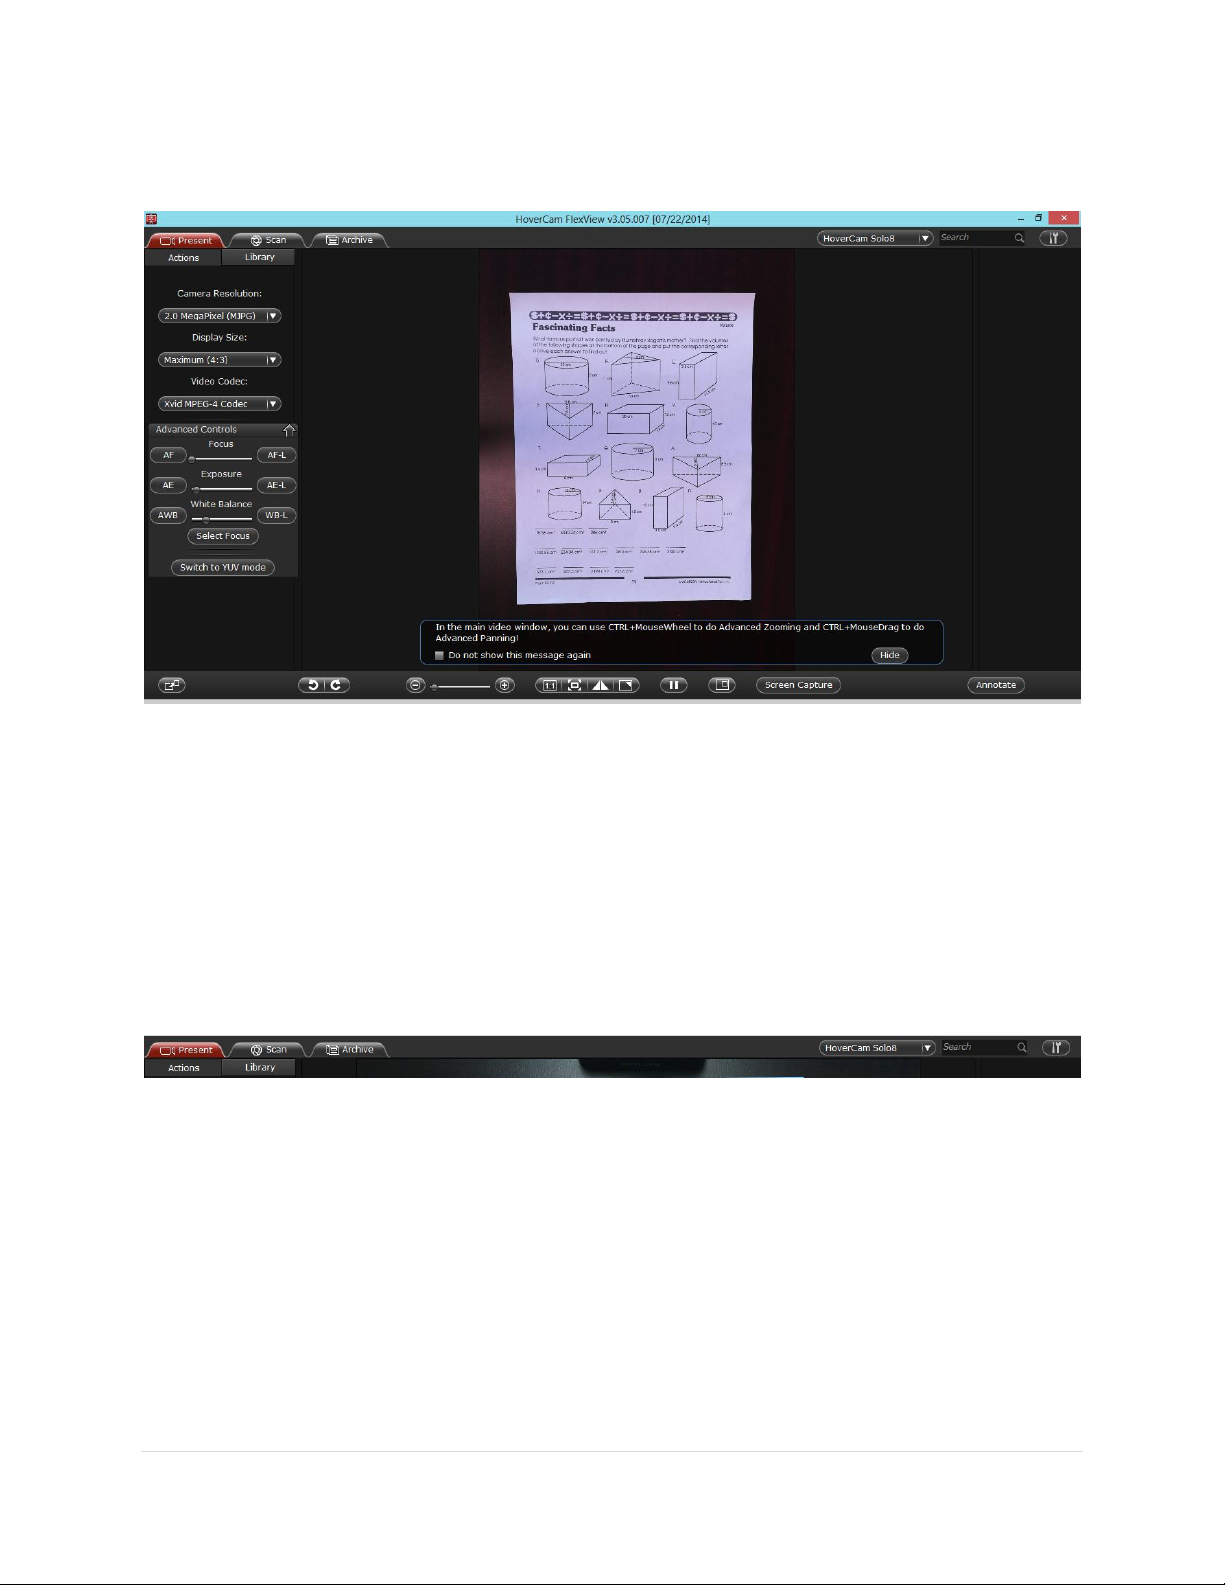
The FlexView main window is shown here. The Present, Scan and Archive
modes are launched here by clicking on their respective tabs in the upper
left. The Present mode is selected by default. There are many features and
adjustments you can make here on the main window.
Below is a list of the FlexView features displayed along the top bar of the
main window, reading from left to right. These features are available at all
times while you are running FlexView. They are explained in the following
sections.
Tabs to select Present, Scan or Archive mode
Drop-down menu to select camera
Text box to Search for an image or video file you have previously
saved
Drop-down Tools menu
4.1 Select Present, Scan or Archive mode
HoverCam FlexView supports three main operational modes, shown as tabs.
Click the tab of your choice to change modes. Each mode is explained in
detail in its own section of this manual:
10 | P a g e
Page 12
Present Mode, for giving a video presentation over a projector or HDMI
monitor to a classroom or audience
Scan Mode, for scanning documents (taking still pictures of them and
saving the file in various formats, including PDF)
Archive Mode, for storing and retrieving your saved scans (images)
and videos.
4.2 Select Camera
Before you can make your presentation or
scan your document or image with FlexView,
make sure you have the Solo 8 camera
selected from the pull-down menu near the
top left of the main window.
4.3 Search
When you use FlexView to scan documents
and make video presentations, you will save
your work in files on the computer. FlexView provides file storage and
archiving capabilities that are explained in the Archive section of this
manual. The Search feature allows you to find any video, document, image
or file in the HoverCam Library. Type the name of the file to search for into
the Search box, then press Enter on the keyboard or click the magnifying
glass icon. Your results will be displayed in the Archive mode window.
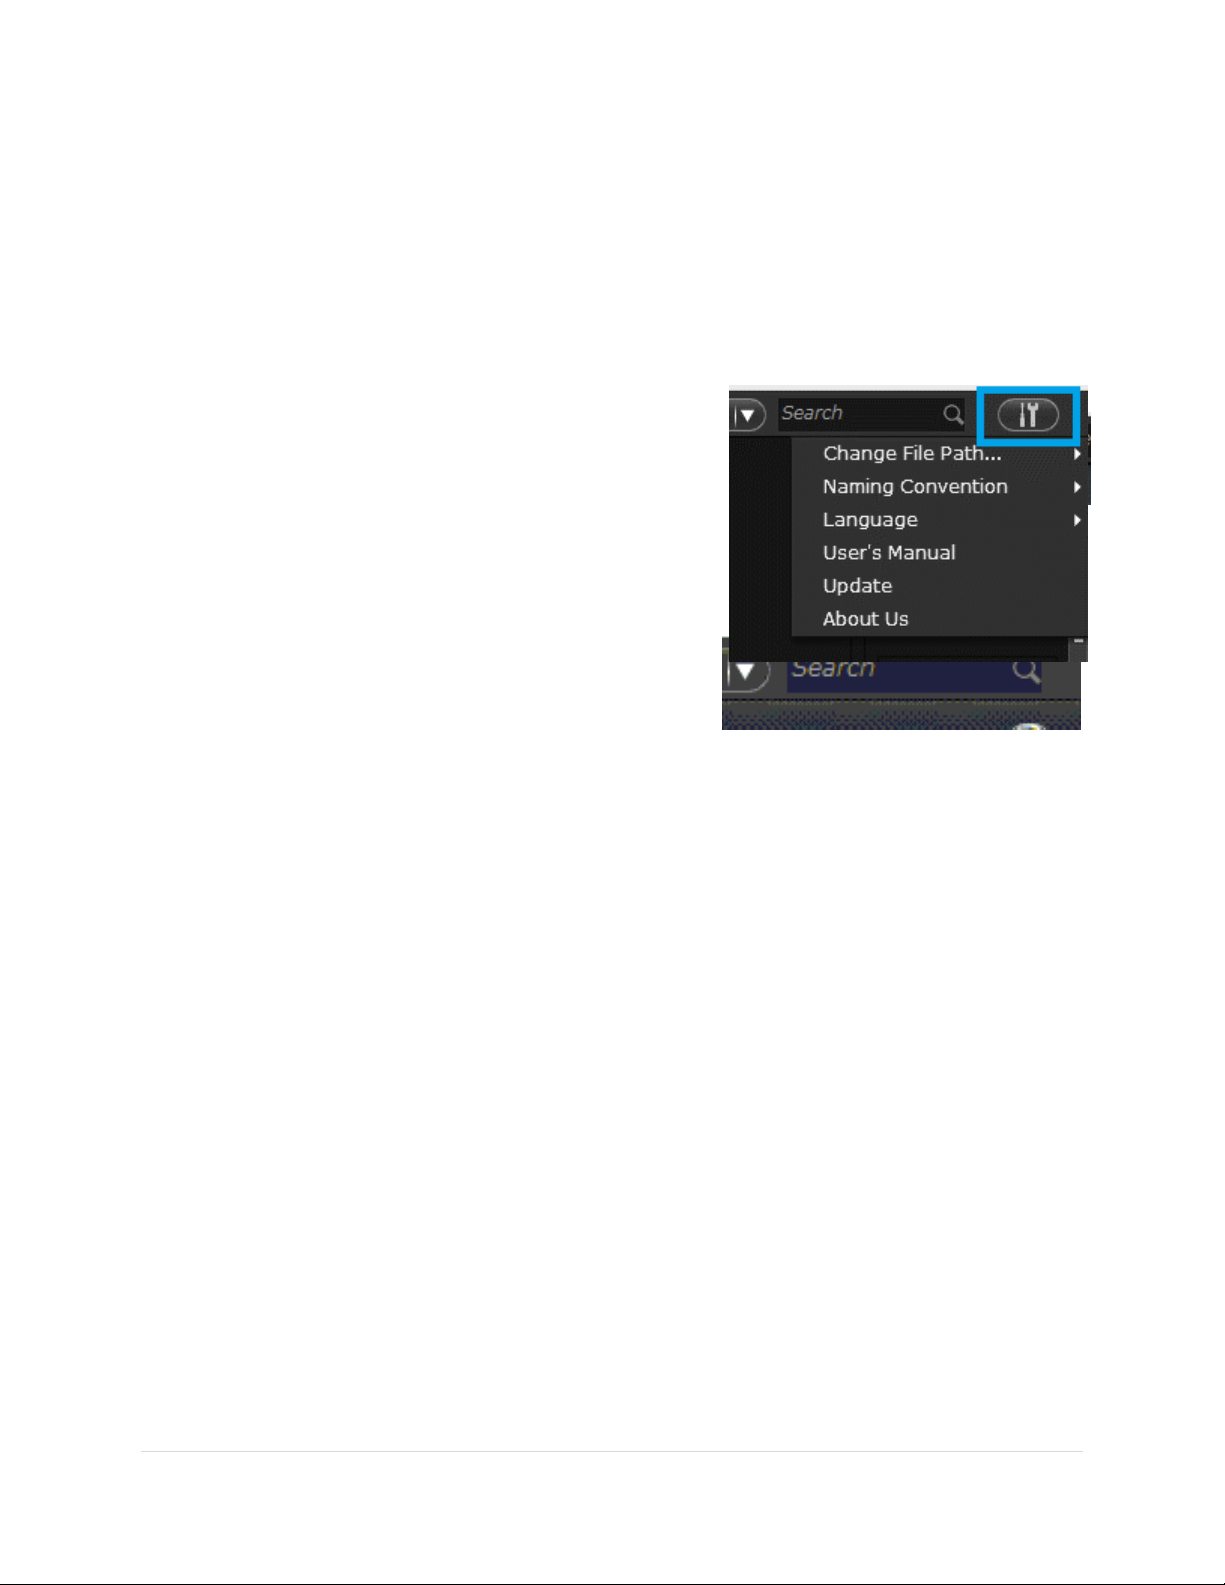
4.4 Tools
Access the Tools drop-down menu on the upper right corner of the main
window. This menu allows you to change the following general FlexView
settings:
4.4.1 Change File Path
You can change the default path for the “HoverCam Flex Library” folder,
where all the captured images are kept by default. The “HoverCam Flex
Library” is a regular folder in the user’s home directory, normally under “My
Documents”. To change this to a new location, click on “Change file path…”,
then click “Other” on the pull-out menu. A Windows Explorer window opens
up so you can browse to the file path of your choice and select it. Make sure
to select a path where you don’t have permission problems; for example,
11 | P a g e
Page 13

with Windows 7, saving application files/data under “c:\Program Files” is
prohibited.
Your old files will remain in the old location. Changing to a new path begins
a new default folder. You may create new subdirectories under the new
folder; it will not have any default subdirectories.
4.4.2 Naming Convention
Scanned images are saved with a file naming convention, by default as
“IMG_” followed 4 digits starting at 0001. Video files are saved with the
name “VIDEO_” followed by 4 digits. You can change the naming
conventions for both image and video files by selecting the menu “Tools
Naming Convention Image Name (or Video Name)Customize.” Enter
your preferred name prefix in the box, then Click OK to accept or click
Cancel to exit with no change.
You may also change the names in batch later on by selecting a group of
files in the HoverCam Library; this is best viewed in the Archive mode.
Select the files by clicking the check box under each one; then right-click
select “rename”. Enter the new prefix and it will be applied to all the
selected files.
Individual file names may be changed at any time using the FlexView
Library. The video and image files are shown along the right side of the
screen in the Present and Scan modes. Highlight the file name with your
mouse and then type in the new name. In the FlexView Archive mode, you
can also change the name of a file by this method or by selecting the file and
then right-clicking and selecting “Rename” from the pop-up menu.
4.4.3 Language
Default Language is English, you can change language to
Dutch
German
Japanese
Swedish
4.4.4 User’s Manual
This is a link to the latest version of FlexView User’s Manual on The
HoverCam website.
12 | P a g e
Page 14

4.4.5 Update
The Update option checks for any updates to the FlexView software. If
updates are found, this feature then updates FlexView to the latest release.
4.4.6 About Us
13 | P a g e
Page 15

4.5 Zoom
The Zoom feature works in both Present and Scan modes, so it is covered
here. There are two ways to zoom in and out of the current image in
FlexView, digital zoom and zooming with the camera lens.
4.5.1 Digital zoom (“Advanced zoom”)
Use the CTRL key plus the mouse wheel to zoom in and out of your image
digitally. This method uses the pixels that are displayed and algorithmically
expands them to effectively zoom in closer. Pan around the image with the
CTRL key held down and drag the image with the mouse. This is the same
feature as the zoom slider bar on the bottom of the screen.
4.5.2 Camera lens zoom:
Use the mouse wheel without the CTRL key to zoom in and out using the
camera lens itself. Pan with the mouse by grabbing a location on the
displayed image and then dragging.
14 | P a g e
Page 16

5 Present Mode, for Video Presentations
The Present mode tab has two sub-tabs shown directly under it labelled
“Actions” and “Library.”
5.1 Actions
The Actions tab shows the various camera
and image parameters and controls to use to
optimize your presentation.
5.1.1 Camera Resolution
This allows you to adjust the video resolution
of the camera image; it is better to keep the
resolution lower for higher refresh rate.
Generally projectors used in classrooms or in
corporate conference rooms have a
maximum resolution of less than 1080P HD
(1920x1080 pixels). More often, projectors
only work at VGA resolution (1024x768
pixels).
Tip: There is a simple rule of thumb
whenever working with video: A USB
connection has limited bandwidth. The higher
the Camera Resolution or Display Size, the
lower the refresh rate. Unless you want to
see a very sharp high-resolution image
without the need to present under the
camera, try lowering the camera resolution
settings and you will get higher refresh rate
and smoother motion in the video.
5.1.2 Display Size
This pull-down menu selects the Display size of the image from the camera,
along with the video aspect ratio:
15 | P a g e
Page 17

Medium (4:3)
High (4:3)
High (16:9)
Maximum (4:3)
Maximum (16:9)
5.1.3 Video Codec
A Video Codec is software that helps code and de-code
digital video. Your system may have multiple Video
Codecs. FlexView uses the Xvid MPEG-4 Codec as a
default. If you want the video encoded with a different
codec you can select it from the drop down list.
5.2 Advanced Controls
The Advanced Controls panel shows features only available on the HoverCam
Solo 8 camera. This includes adjustments to focus, exposure and white
balance as described below.
Use the arrow shown on the top right of this panel to collapse or expand the
contents of this panel. Move the panel around the screen as needed by
dragging the top bar with your mouse.
5.2.1 Focus
The slider bar allows manual focus.
The AF button on the left of the slider bar is for Auto Focus. Click this and
the camera will take a couple of seconds to adjust itself to the optimum
focus settings for the current subject.
The AF-L button on the right of the slider bar is for locking the Auto Focus
(“Auto Focus Lock”). When you click AF-L, the camera first adjusts itself for
the optimum focus setting for the current subject, then locks those settings
so it will not attempt to change the focus even if something in the field of
view changes or moves.
5.2.2 Exposure
The slider bar allows manual exposure adjustment.
The AE button on the left of the slider bar is for Auto Exposure. Click this
and the camera will adjust itself to the optimum exposure setting for the
current subject.
16 | P a g e
Page 18

The AE-L button on the right of the slider bar is to lock the Auto Exposure.
When selected, the camera first adjusts itself to the optimum exposure and
then locks the settings so that it will not attempt to change the exposure
even if the subject or lighting changes.
5.2.3 White Balance
The slider bar allows manual white balance adjustment.
The AWB button on the left of the slider bar is for Auto White Balance. Click
this and the camera will adjust itself to the optimum white balance settings
for the current subject.
The WB-L on the right of the slider bar is to lock the White Balance. When
selected, the camera firsts adjusts itself for the optimum white balance
levels for the current subject, and then locks the settings so it will not
attempt to change the white balance even if the subject changes.
5.2.4 Select Focus
The Select Focus button allows you to select an area of the current image to
focus on. When clicked, the mouse cursor will turn into a cross-hair. Move
the cross-hair to the area of the image you would like to focus on and then
click that location. A green rectangle will appear there and the camera refocuses itself on that portion of the image.
5.2.5 Switch to YUV Mode/Switch to MJPEG mode
This button is located near the bottom of the Advanced Controls panel. It
allows you to command the camera to switch the output mode between YUV
and MJPEG formats. If the camera is set to display in YUV format, the button
will read “Switch to MJPEG mode”, and if it’s set to display in MJPEG mode,
the button will read “Switch to YUV mode.”
The FlexView software will actually shut down momentarily and re-start itself
with the new setting.
5.3 Library
The Library tab under the Present tab shows the My HoverCam Flex Library
folder and sub-folders where FlexView is setup to save all recorded videos
and scanned images. By default it is under the User’s Documents folder.
You may change it to any other folder by using the “Change File Path…”
option under the Tools drop down menu.
17 | P a g e
Page 19

Using the Archive mode, you can create any folder structure within your
Library to organize your documents, videos and scanned images.
5.4 Additional Controls
5.4.1 Rotate
The Rotate icons allow you to rotate the recording area of your screen
clockwise or
counter clockwise
in 90 degree
increments.
5.4.2 Digital Zoom
The Digital zoom slider bar brings the image in closer or farther away
as explained in the Zoom section of this manual under Running
Flexview.
18 | P a g e
Page 20

5.4.3 Actual Size (1:1)
Actual Size allows you to check the size of the
image or video at 100%
5.4.4 Fit to Screen
Fit-to-Screen adjusts the screen size to fit inside the application
window.
5.4.5 Mirror
Mirror inverts the screen horizontally. Click once
to invert; click again to restore.
5.4.6 Full Screen
Full Screen shows the image over the entire PC screen. To bring the
FlexView controls back into view, press the icon again or press the ESC
key.
5.5 Freeze Frame/Continue
This button lets you freeze the image being
displayed for your audience so you can keep it displayed while you make
adjustments to the subject being presented. Once the displayed image is
frozen, the button becomes “Continue”. When you are ready to resume your
presentation, click the Continue button, and
live video display will resume.
5.6 Using the Secondary Camera
As an option, you can enable the Secondary Camera (if one is available by
clicking the Secondary Camera button near the lower right. If you are doing
a screen capture, the secondary camera will show up in that recording if it’s
enabled at the time.
5.6.1 Swap Cameras and Rotate
The Secondary Camera window
allows you to Swap Cameras with the Solo 8. Hover over the secondary
19 | P a g e
Page 21

camera window and notice there are now buttons across the bottom of that
window. The Swap Cameras button is the icon on the bottom left. Click to
make the secondary camera image show up as the main image. Click again
to move the secondary camera back to the small window.
You can rotate the secondary camera screen clockwise or counter clockwise
using the Rotate buttons.
5.6.2 Secondary Camera Settings
You can change the secondary camera source and window size by clicking
the Settings icon on the bottom right of the secondary camera window
5.7 Start Capture
This feature allows you to make quick videos of instructional sequences or a
set of tasks being performed. The video resolution will be of lower quality;
high quality video capture is now done with HoverCam’s FlexCap program.
Click the Start Capture button, and a green rectangle will appear around
your image. Adjust the green lines to select the recording area of your
screen. Once done, simply click the Start button from the bottom right
corner of the selected area to begin recording. FlexView will record the
screen area outlined by the green border until you click the Stop Capture
button or Shift-F9. Click the Cancel button if you don’t want to begin
recording.
5.8 Annotate
The Annotate feature
gives you a full set of annotation tools during a Present session or recording.
20 | P a g e
Page 22

To improve your presentation, you can add text, circles, rectangles,
pointers, highlight items and more. You can add and delete the annotations
in real time as necessary. In this way, FlexView gives you a virtual
whiteboard and allows you to greatly enhance your lectures and online
presentations.
Click the Annotate button on the lower right of the main window to display
the annotation tool bar. Click the button again to remove the toolbar. The
following is a list of tools available along with the function performed. The
Annotation features work the same way in Scan mode.
21 | P a g e
Page 23

End Annotation Tool Selection (cancels Selector)
Annotation Pointer Selector
Free Hand Drawing tool
Line Drawing Tool
Arrow Line Drawing Tool
Mask Tool (for covering answers, for example)
Rectangle Drawing Tool (draw a box)
Oval Drawing Tool (draw a circle/ellipse)
Color Fill Tool (fills in ellipses and rectangles)
Text Tool (type words onto your image)
Eraser Tool (erases small portions of lines, etc.)
Delete Annotation (deletes the selected annotation)
Clear All Annotations (deletes all annotations)
Color Selector (for lines, shapes, fills and text)
Line Thickness Selector
Transparency Setting (for lines, shapes and fills)
Font Setting (for Text tool)
22 | P a g e
Page 24

5.9 Slingshot
The Slingshot feature allows you to take a screen shot of the current image
displayed in the main FlexView window and paste it into another software
application, such as a rich text editor or an image editor program. This
feature works in both Present and Scan modes.
With the image you want to transfer displayed on the main FlexView
window, click on the Slingshot button on the bottom left corner of the
FlexView main window. FlexView immediately minimizes and a small
FlexView icon appears.
Go to the application program where you want to bring the image; the small
FlexView icon will be visible on top of your other program. Hover over the
FlexView icon with the mouse and notice the snapshot image appears just
beneath it (this is a temporary image). Grab the image and the icon (they
will move together) with the mouse and drag it onto your application. It may
take a second or two for the image to appear in your application. Notice the
FlexView icon is still visible. You will use this in a moment to return to
FlexView.
At this point, you may want to save your application with the new image;
you can make adjustments to the image later.
Exit the Slingshot feature and return to FlexView by any
of three methods:
Hover over the FlexView icon with the mouse and
click on the red Return icon in the lower left corner
of the temporary image
Hover over the floating FlexView icon and right
click, then click the “Return to FlexView” button
that appears. You will immediately return to FlexView
23 | P a g e
Page 25

Click on the main FlexView program icon on your desktop directly
5.10 Catapult
Catapult is a unique function in FlexView that allows you to drag and drop a
saved scanned image or video file directly into another program such as
Microsoft Word ® or an interactive white board.
To use catapult in Present or Scan mode, make sure your receiving
application program is open. Then, in FlexView, left click on a scanned image
or video thumbnail. Start to drag the image, and notice the edges of the
FlexView program window change color to green on the top and left edges,
and light blue on the bottom and right edges. Drag the image to a green
edge to drop the image to the receiving application and immediately return
to FlexView. Drag the image to a blue edge and drop the image into your
other application and stay in that application so you can work there before
returning to FlexView.
24 | P a g e
Page 26

6 Scan Mode, for quick scans, snapshots and sequence captures
With “Scan” mode, the objective is to capture a clear picture with the
highest resolution possible, and then save the image to a file with the proper
format. The default Camera Resolution setting here is the maximum for the
HoverCam Solo 8.
Scan mode is also able to capture a straightened image with little or no
warping or any other distortion. You will find the controls here developed by
our engineers to make straightening simple.
Scan mode, like Present mode, provides you a live preview of the image or
document being scanned. This allows you to adjust the image or document
before you actually scan it.
6.1 Actions
6.1.1 Camera Resolution
This works the same way as in Present mode. It is explained under the
Actions section of the Present mode earlier in this manual.
6.1.2 Display Size
In Scan mode you can select the highest Display Size for your needs. This is
unlike in Present mode where refresh rate and external video sources should
be kept in mind while selecting Display Size.
6.1.3 File Format
This pull-down lets you select the desired file format for your scan. Several
image formats are supported, as well as PDF.
6.1.4 Image Quality
This pull-down menu allows you to adjust the
quality of the image or document being
scanned. For files uploaded to the internet, the
image quality is normally set to “low” to keep
file size low.
6.1.5 Straighten
You can straighten the image displayed using the slider. The slider rotates
the screen -15 to +15 degrees with 0.5 degree increments. “Reset” cancels
all previous straightening adjustments.
25 | P a g e
Page 27

6.1.6 Crop
The Crop tool allows you to select an area on the screen to scan. This is
extremely helpful if you only want to scan a certain part of the image, such
as a paragraph or image or a barcode. Once your image is adjusted, click
the “crop” button, then click and drag the crop pointer to surround the area
you want to scan. Then click the Camera button to capture the image inside
the red rectangle. When finished, click “Cancel Crop” to remove the crop
guide.
6.1.7 Quick Multi Capture feature
Once a document is straightened and properly aligned, you can use the
same settings to scan additional documents. Simply stack the next sheet on
top of the adjusted document to scan with the same straightening settings
without any additional calibration.
6.2 Effects
FlexView provides several effects to apply to
a document before scanning. These are
accomplished with the following screen
controls:
6.2.1 Button Controls
The following buttons work as toggles to
change the current image: click once to
produce the effect, click again to remove it.
The “None” button clears all the effects and
returns to the native image.
B & W (changes a color image to black
and white)
Grey Scale (changes a color or black
and white image to grey scale)
Sharpen
Emboss
Fuzzy
None (Standard)
26 | P a g e
Page 28

6.2.2 Slider controls: Brightness, Saturation, Contrast
These three slider controls allow you to adjust the Brightness, Saturation
and Contrast settings separately.
6.2.3 Remember Settings
Check this box to save the current settings so you do not have to make the
same adjustments every time you scan a document.
6.3 Library
The Library tab works the same way in Scan mode as it does with Present
mode. It is explained under the Present section earlier in this manual.
6.4 Additional Controls
Scan mode has most of the same feature controls along
the bottom of the main window as the Present mode,
including: Rotate, Digital Zoom, Actual Size (1:1), Fit to
Screen, Mirror, Full Screen, Freeze Frame/Continue and
Secondary Camera. The Scan It (take picture) and Auto
Capture controls are unique to the Scan mode.
6.4.1 Scan It (Snap)
Once you are ready, simply click the “Take Picture”
button to instantly scan the item.
6.4.2 Auto Capture
One of the strongest features of the FlexView software is the ability to
quickly scan multiple items or pages. You can either select a time interval or
a motion trigger, and FlexView will start taking successive scans.
To enable Auto Capture, click the button located near the bottom right of the
FlexView screen. This will open up the “Auto Capture” configuration window
where you will select either a time interval or motion trigger.
6.4.2.1 Time Interval
27 | P a g e
Page 29

Use “Time Interval” to capture images at regular time intervals
automatically. Set the number of total pages or images being scanned as
appropriate for your situation; then set the duration in seconds after which
you want the Solo 8 to auto capture in “Take a picture Every:” option.
For more duration options click on “more..”.
“More” allows you to set an interval up to the exact hour, minute and second
to auto capture and scan. This is very useful for recording the progress of a
lengthy process.
6.4.2.2 Motion Trigger
Use “Motion Trigger” to automatically scan as soon as the object being
scanned is replaced or a page is turned. To enable motion sensing simply set
a countdown, in seconds, to allow you to adjust the next sheet or document
before the Solo 8 takes a snapshot.
28 | P a g e
Page 30

6.5 Annotate
The Annotate feature works the same in Scan mode as it does under Present
mode. It is explained under the Present section, above.
6.6 Secondary Camera (Face shot with Scan)
With FlexView you have the option to capture a small secondary image (such
as a face shot of the presenter) along with the main image or document
being scanned. This is explained in the section of this manual called “Using
the Secondary Camera” under the Present mode.
Click on the Secondary Camera button. Once you are ready, click the
Camera icon, or “Take Picture” button and instantly take a snapshot.
6.7 Slingshot
This works the same way as in Present mode. It is explained under the
Slingshot section of the Present mode earlier in this manual.
6.8 Catapult
This works the same way as in Present mode. It is explained under the
Catapult section of the Present mode earlier in this manual.
29 | P a g e
Page 31

7 Archive Mode: Managing and sharing your
files
The Archive mode is for storing and effectively
organizing all of your scanned or recorded files; it
also allows you export, copy and share files on the
internet. FlexView also has a powerful optical
character recognition (OCR) tool that generates text
from scanned images.
The left side of the Archive screen shows the
folders in your HoverCam Flex Library. The
feature controls are located across the top of
the window:
7.1 Archive Library
The file directory structure on the left side of the screen allows you to
navigate through the Library. Just above the file directory is a list of
supported file types in the following order:
Image
Video
Stacks
Signature
OCR
30 | P a g e
Page 32

7.1.1 File Types
Click on any of the file types to display all the files of that type in your
FlexView Archive Library. They will be displayed in the center window. For
example, to see all your video files, click on Video. The Stacks, Signature
and OCR file types are explained in a following section.
7.1.2 Folders and files
Click on any folder or on the “My FlexView Library” root folder to view all
files in that folder. The filenames may be displayed as icons or as a list by
clicking on the List or Thumbnail (small picture) buttons located at the upper
right corner of the window.
Move files by left clicking on the file name and dragging with the mouse.
Right click on a filename and a menu appears allowing you to Move, Copy,
Delete, Rename, apply a signature, create a PDF or Show in Windows
Explorer. The Signature and PDF options are explained in following sections.
31 | P a g e
Page 33

7.2 Archive Controls
The Archive Controls are located across the top of the Archive window.
These allow you to perform different actions on selected files. These features
only work on the files displayed in the center pane, not on the file folders
displayed in the left pane. Each of these controls is described below, starting
from left to right.
7.2.1 Stack
The Stack feature lets you organize files by allowing you to group similar
files together into one file called a “stack”. This is very convenient for
emailing a group of images or to create a virtual booklet of your scanned
documents.
To stack items, simply select all files that you would like to include in a
group, as shown in the image below, and click the Stack button.
The result is a single file with “type” Stack or PDF Stack as shown in the
image below. You can also select a stacked file and add other individual files
to that stack.
32 | P a g e
Page 34

7.2.2 Unstack
Use the Unstack button to ungroup a stacked group of files. Simply select
the stacked file and press “Unstack” from the top menu.
7.2.3 Delete
The Delete button allows you to delete selected files. Deleted items are
moved to the FlexView “Recycle Bin”. Click on a file to select it; notice the
small box underneath it now has a checkmark to indicate it is selected. Next,
click the Delete icon. You will be asked to confirm the deletion. You can
select multiple files for deletion by clicking them one at a time and then
clicking Delete.
7.2.4 Export
The Export feature allows you to copy one or more selected files from the
FlexView Library and save them together as either one PDF or one TIFF
elsewhere on your computer. Select one or more files, then click the Export
button. You will be prompted for the location and file type to save. If you
select more than one file, the files will be combined into one PDF or TIFF file
and saved.
7.2.5 Create PDF
This handy feature saves your selected image(s) as PDF files. Note that PDF
files are not considered “images” and will not be displayed if you select
“Images” as the file type to display. PDF files will be displayed under the
folder they are stored in.
33 | P a g e
Page 35

7.2.6 Email
This feature uses the current Windows ® default email program to send the
selected file(s). This default must be set up first for this feature to work.
7.2.7 Print
Print your files by selecting one or more of them and then clicking the Print
button. The Windows ® Print dialog box will appear.
7.2.8 OCR (Optical Character Recognition)
FlexView has a built in OCR tool that allows you to convert an image file
(.jpg and .png files only) to a text document. This feature works best if the
image was saved with high resolution. To apply OCR, select the image from
the list and click the “OCR” button.
A message will appear, “Performing OCR, Please Wait”. When complete, the
image is displayed alongside of a machine-encoded text file that was
created. The machine-encoded text is now attached to this image file.
As with all leading OCR software, the accuracy depends upon the quality of
image being converted.
7.2.8.1 Text to Voice
To help you proof-read the output, FlexView has a “text to speech” (TTS)
feature that reads the resulting text for you. Click the speaker button located
under the OCR page as shown in the image below. When finished viewing
the document, click the red “return” arrow located at the top right of the
screen.
34 | P a g e
Page 36

7.2.9 Signature
The Signature feature allows you to add a speciallysaved signature image file onto an image document
(.jpg and.png files only). First, select a document that
you would like to sign. Double-click on the name of the
selected file. Click on the Signature icon. The image
will appear in a new window, along with an array of
adjustment and editing tools on the left and signature
and annotation tools on the right. At this point you can
make changes to the image if needed, before adding your signature.
If you have a saved default signature, it will appear as the mouse cursor in
the new window. If you would like to make adjustments to the image now
before adding your signature, just move the mouse cursor over to the
toolbar on the right and click on the signature pen icon. At this point you can
make changes to the image if needed, before adding your signature.
When you are ready to put your signature on the image, click on the
Signature tool pen icon if needed to change the mouse cursor to your
signature, drag it onto the document and click to place it where you want it.
You will then be prompted to enter your password to verify your signature. If
the password is verified, the signature image will be merged onto the image
35 | P a g e
Page 37

file where you placed it. This operation cannot be undone, but you can
cancel by clicking the “X” in the upper right corner if you need to start over.
If you don’t have a saved signature, a dialog box will appear for you to enter
your name and a password. You can then select a method of entering your
signature: freehand (use mouse as pen), image (use pen and paper under
the camera), or signature file (browse for a saved signature file already
created in FlexView). Follow the screen prompts. Remember your password
(record it somewhere where you can find it later). When finished, click the
OK button at the bottom center of the window (you may need to drag the
window upward to see the button).
If you want to use a different or new signature than the default, move your
mouse over to the “Select Signature” gear icon
just under the pen icon. A new window will show
the saved signatures to select from. Select New
to create an entirely new signature, or pick one
of the signatures from the list.
7.2.10 Share
The Share feature lets you easily upload your
scanned images to many popular cloud services,
including:
Share on Facebook
Backup on Evernote
Share on Dropbox
Share on Picasa
Share on YouTube
36 | P a g e
Page 38

Select the file(s) you would like to share and select the appropriate platform
from the Facebook drop down. Follow the prompts to login to the service if
necessary.
37 | P a g e
Page 39

8 Legal and Notice Information
8.1 Warranty
The information contained herein is subject to change without notice. The
only warranties for P.I.T. products are set forth in the express warranty
statements accompanying these products. Nothing herein should be
construed as constituting an additional warranty. P.I.T. Is not liable for any
technical or editorial errors or omissions contained herein.
8.2 Trademarks
HoverCam is a registered trademark of Pathway Innovation & Technology,
Inc.
Intel is a registered trademark of Intel Corporation.
Evernote is a registered trademark of Evernote Corporation.
Dropbox is a registered trademark of Dropbox, Inc.
Macintosh, iMovie, Photo Booth and iChat are registered trademarks of
Apple, Inc.
Windows Vista, Windows XP and Windows Live Messenger are registered
trademarks of Microsoft, Inc.
Skype is a registered trademark of Skype Limited.
AOL is a registered trademark of America Online, Inc.
Google Talk is a trademark of Google Inc.
8.3 User License Agreement (EULA)
This copy of FlexView ("the Software Product") and accompanying
documentation is licensed and not sold. This Software Product is protected
by copyright laws and treaties, as well as laws and treaties related to other
forms of intellectual property. Pathway Innovations & Technologies, Inc. or
its subsidiaries, affiliates, and suppliers (collectively "P.I.T.") own intellectual
property rights in the Software Product. The Licensee's ("you" or "your")
license to download, use, copy, or change the Software Product is subject to
these rights and to all the terms and conditions of this End User License
Agreement ("Agreement").
8.3.1 Acceptance
YOU ACCEPT AND AGREE TO BE BOUND BY THE TERMS OF THIS
AGREEMENT BY SELECTING THE "ACCEPT" OPTION AND DOWNLOADING
THE SOFTWARE PRODUCT OR BY INSTALLING, USING, OR COPYING THE
SOFTWARE PRODUCT. YOU MUST AGREE TO ALL OF THE TERMS OF THIS
38 | P a g e
Page 40

AGREEMENT BEFORE YOU WILL BE ALLOWED TO DOWNLOAD THE
SOFTWARE PRODUCT. IF YOU DO NOT AGREE TO ALL OF THE TERMS OF
THIS AGREEMENT, YOU MUST SELECT "DECLINE" AND YOU MUST NOT
INSTALL, USE, OR COPY THE SOFTWARE PRODUCT.
8.3.2 License Grant 27
This Agreement entitles you to install and use one copy of the software
Product. In addition, you may make one archival copy of the Software
Product. The archival copy must be on a storage medium other than a hard
drive, and may only be used for the reinstallation of the Software Product.
This Agreement does not permit the installation or use of multiple copies of
the Software Product, or the installation of the software Product on more
than one computer at any given time, on a system that allows shared used
of applications, on a multi-user network, or on any configuration or system
of computers that allows multiple users. Multiple copy use or installation is
only allowed if you obtain an appropriate licensing agreement for each
user and each copy of the Software Product.
8.4 Restrictions
8.4.1 Restrictions on Transfer
Without first obtaining the express written consent of P.I.T., you may not
assign your rights and obligations under this Agreement, or redistribute,
encumber, sell, rent, lease, sublicense, or otherwise transfer your rights to
the Software Product.
8.4.2 Restrictions on Use
You may not use, copy, or install the Software Product on any system with
more than one computer, or permit the use, copying, or installation of the
Software Product by more than one user or on more than one computer. If
you hold multiple, validly licensed copies, you may not use, copy, or install
the Software Product on any system with more than the number of
computers permitted by license, or permit the use, copying, or installation
by more users, or on more computers than the number permitted by license.
You may not decompile, "reverse-engineer", disassemble, or otherwise
attempt to derive the source code for the Software Product.
8.4.3 Restrictions on Alteration
You may not modify the Software Product or create any derivative work of
the Software Product or its accompanying documentation. Derivative works
39 | P a g e
Page 41

include but are not limited to translations. You may not alter any files or
libraries in any portion of the Software Product.
8.4.4 Restrictions on Copying
You may not copy any part of the Software Product except to the extent that
licensed use inherently demands the creation of a temporary copy stored in
computer memory and not permanently affixed on storage medium. You
may make one archival copy which must be stored on a medium other than
a computer hard drive.
8.5 Disclaimer of Warranties and Limitation of Liability
UNLESS OTHERWISE EXPLICITLY AGREED TO IN WRITING BY P.I.T., P.I.T.
MAKES NO OTHER WARRANTIES, EXPRESS OR IMPLIED, IN FACT OR IN
LAW,INCLUDING, BUT NOT LIMITED TO, ANY IMPLIED WARRANTIES OF
MERCHANTABILITY OR FITNESS FOR A PARTICULAR PURPOSE OTHER THAN
AS SET FORTH IN THIS AGREEMENT OR IN THE LIMITED WARRANTY
DOCUMENTS PROVIDED WITH THE SOFTWARE PRODUCT.
P.I.T. makes no warranty that the Software Product will meet your
requirements or operate under your specific conditions of use. P.I.T. makes
no warranty that operation of the Software Product will be secure, error free,
or free from interruption. YOU MUST DETERMINE WHETHER THE SOFTWARE
PRODUCT SUFFICIENTLY MEETS YOUR REQUIREMENTS FOR SECURITY AND
UNINTERRUPTABILITY. YOU BEAR SOLE RESPONSIBILITY AND ALL
LIABILITY FOR ANY LOSS INCURRED DUE TO FAILURE OF THE SOFTWARE
PRODUCT TO MEET YOUR REQUIREMENTS. P.I.T. WILL NOT, UNDER ANY
CIRCUMSTANCES, BE RESPONSIBLE OR LIABLE FOR THE LOSS OF DATA ON
ANY COMPUTER OR INFORMATION STORAGE DEVICE.
UNDER NO CIRCUMSTANCES SHALL P.I.T., ITS DIRECTORS, OFFICERS,
EMPLOYEES OR AGENTS BE LIABLE TO YOU OR ANY OTHER PARTY FOR
INDIRECT, CONSEQUENTIAL, SPECIAL, INCIDENTAL, PUNITIVE, OR
EXEMPLARY DAMAGES OF ANY KIND (INCLUDING LOST REVENUES OR
PROFITS OR LOSS OF BUSINESS) RESULTING FROM THIS AGREEMENT, OR
FROM THE FURNISHING, PERFORMANCE, INSTALLATION, OR USE OF THE
SOFTWARE PRODUCT, WHETHER DUE TO A BREACH OF CONTRACT, BREACH
OF WARRANTY, OR THE NEGLIGENCE OF P.I.T. OR ANY OTHER PARTY, EVEN
IF P.I.T. IS ADVISED BEFOREHAND OF THE POSSIBILITY OF SUCH
DAMAGES. TO THE EXTENT THAT THE APPLICABLE JURISDICTION LIMITS
40 | P a g e
Page 42

P.I.T.'S ABILITY TO DISCLAIM ANY IMPLIED WARRANTIES, THIS
DISCLAIMER SHALL BE EFFECTIVE TO THE MAXIMUM EXTENT PERMITTED.
8.6 Limitation of Remedies and Damages
Your remedy for a breach of this Agreement or of any warranty included in
this Agreement is the correction or replacement of the Software Product.
Selection of whether to correct or replace shall be solely at the discretion of
P.I.T.. P.I.T. reserves the right to substitute a functionally equivalent copy of
the Software Product as a replacement. If P.I.T. is unable to provide a
replacement or substitute Software Product or corrections to the Software
Product, your sole alternate remedy shall be a refund of the purchase price
for the Software Product exclusive of any costs for shipping and handling.
Any claim must be made within the applicable warranty period. All
warranties cover only defects arising under normal use and do not include
malfunctions or failure resulting from misuse, abuse, neglect, alteration,
problems with electrical power, acts of nature, unusual temperatures or
humidity, improper installation, or damage determined by P.I.T. to have
been caused by you. All limited warranties on the Software Product are
granted only to you and are non-transferable. You agree to indemnify and
hold P.I.T. harmless from all claims, judgments, liabilities, expenses, or
costs arising from your breach of this Agreement and/or acts or omissions.
8.7 Governing Law, Jurisdiction and Costs
This Agreement is governed by the laws of California, without regard to
California's conflict or choice of law provisions.
8.8 Severability
If any provision of this Agreement shall be held to be invalid or
unenforceable, the remainder of this Agreement shall remain in full force and
effect. To the extent any express or implied restrictions are not permitted by
applicable laws, these express or implied restrictions shall remain in force
and effect to the maximum extent permitted by such applicable laws.
41 | P a g e
 Loading...