

Page 1

HoverCam Flex 11
User’s Manual
Pathway Innovations and Technologies, Inc. San Diego, CA
Tel: (858)870-3499 Fax: (858)357-9945 Toll Free: 866-201-2058
www.thehovercam.com support@thehovercam.com
Page 2

Introduction
The HoverCam Flex 11 application runs on IBM-PC compatible computers and allows you to record highquality videos and snapshots with your HoverCam device. Additionally, it offers a range of features and
functions to facilitate your instructional delivery and save you time.
Downloading and Installing
To obtain Flex 11, visit our website (www.thehovercam.com). Alternatively, Flex can be downloaded
from your HoverCam Camera directly using the instillation port. Locate “Hovercam Flex 11” and select
“Download for PC” to begin downloading the file. Once the file is downloaded, open the program and
follow the on-screen instillation instructions.
Note: To operate the program, you will need to have a HoverCam document camera connected to your
PC. If you launch Flex 11 without a document camera connected, you will see the following message:
“cannot find available HoverCam camera device. Please make sure a HoverCam camera is plugged in.”
Once the program launches and the main screen is displayed, click the “Settings” icon on the bottom
right to specify the HoverCam camera and the video resolution you wish to use
Note: Be sure to check that you have the latest version of Flex 11 loaded onto your computer. You can
find the update button under “Settings” – “misc.” on the control dock.
Page 3

Main Screen Elements (what you’ll see when you launch the software)
• Live video display in center (taking up most of the screen area)
• A pull-out tab on the left edge for showing the recent snapshots saved. Click on the pull-out tab
to display recent snapshots and/or access the archive manager; click the tab again to hide the
snapshots.
• The annotation tool wheel
• A Tool Bar is displayed across the bottom of the screen. The following icons are included (from
left to right) and are described in the following sections of this manual:
• Previous Snapshot
• Side-by-side
• Multi-Split
• Slingshot
• Snapshot
• Recording
• Multi-Scan
• Pause
• View Options
• Zoom
• Focus
• Adjustments
• Cropping
• Settings
Page 4
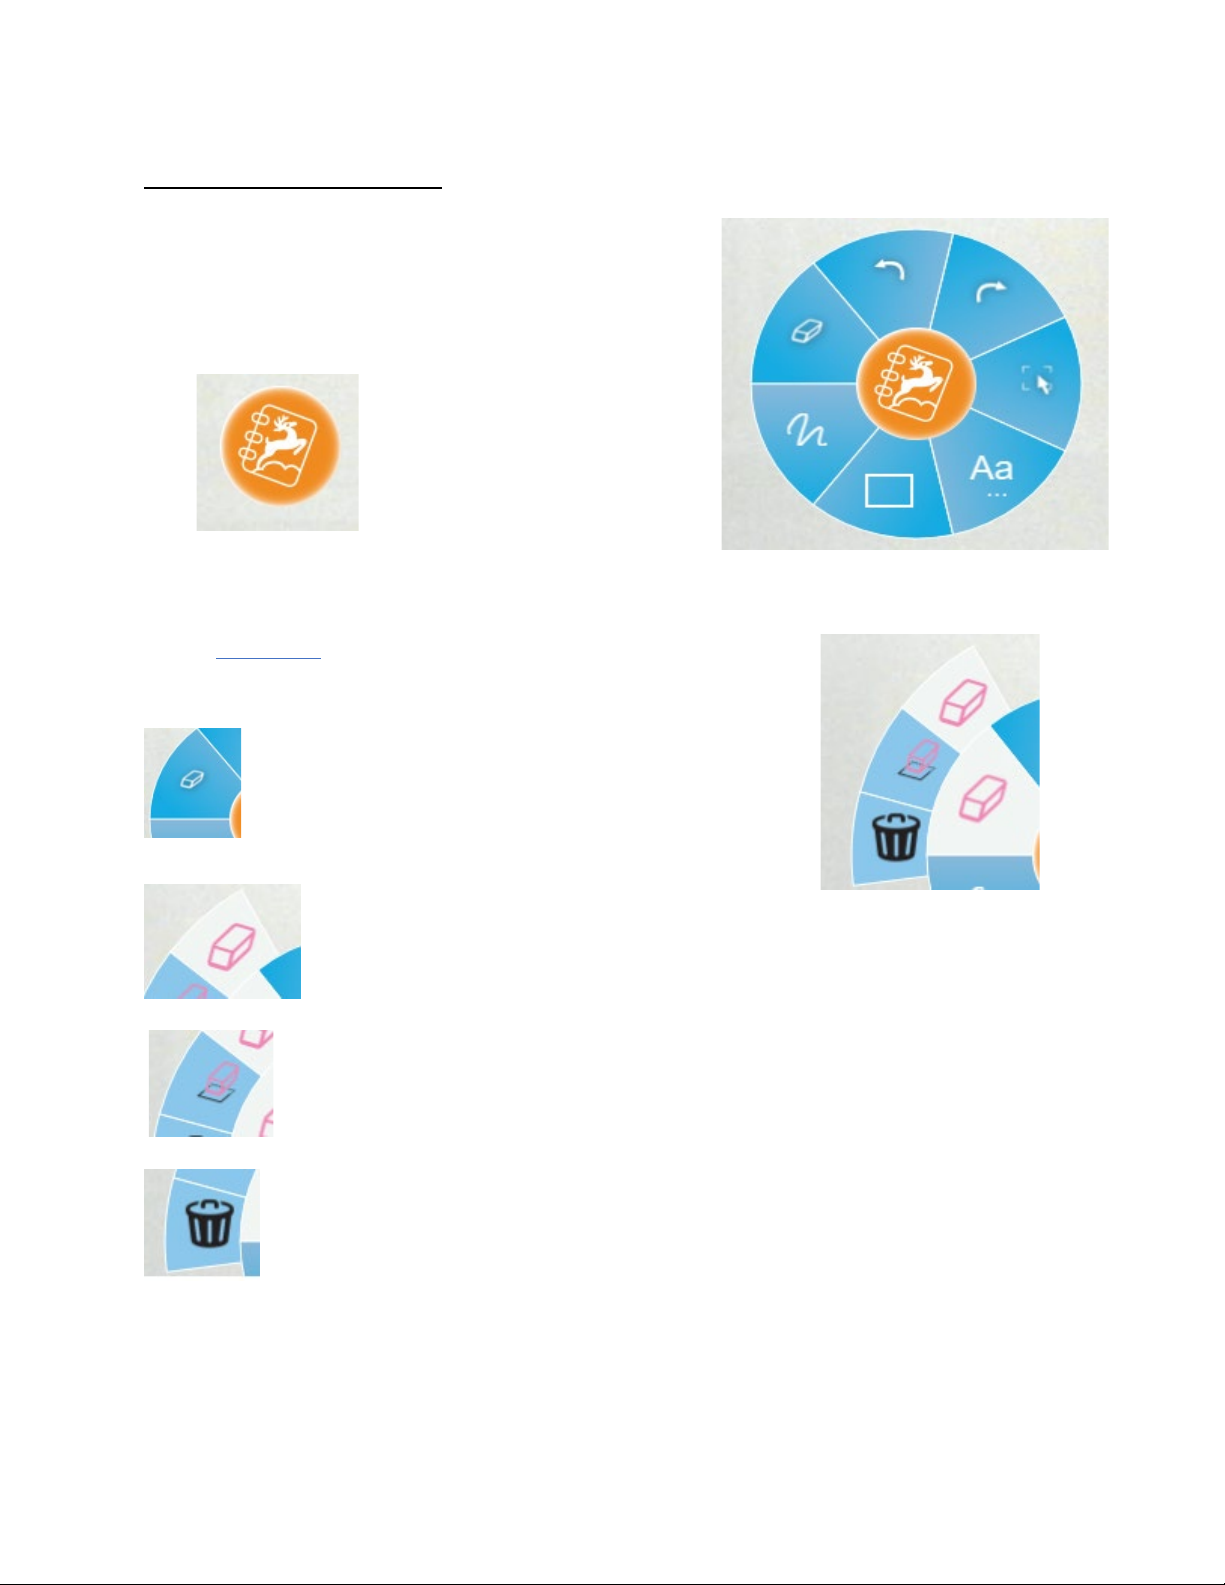
Annotation Wheel
The annotation wheel will automatically open on the right
side of the screen when Flex 11 launches. The wheel can be
expanded or collapsed by clicking on the orange KnoteSter
icon in the center. You can also drag and drop the wheel to
different locations on the screen.
The annotation wheel has the following seven functions/tools:
1. Eraser tools
Clicking on the eraser icon will open a pop-out window with the
three eraser tools:
-The pixel eraser allows you to erase specific parts of your
annotations:
-The object eraser allows you to erase an entire annotation at once:
-The full screen eraser allows you to erase all annotations that are currently on screen:
Page 5
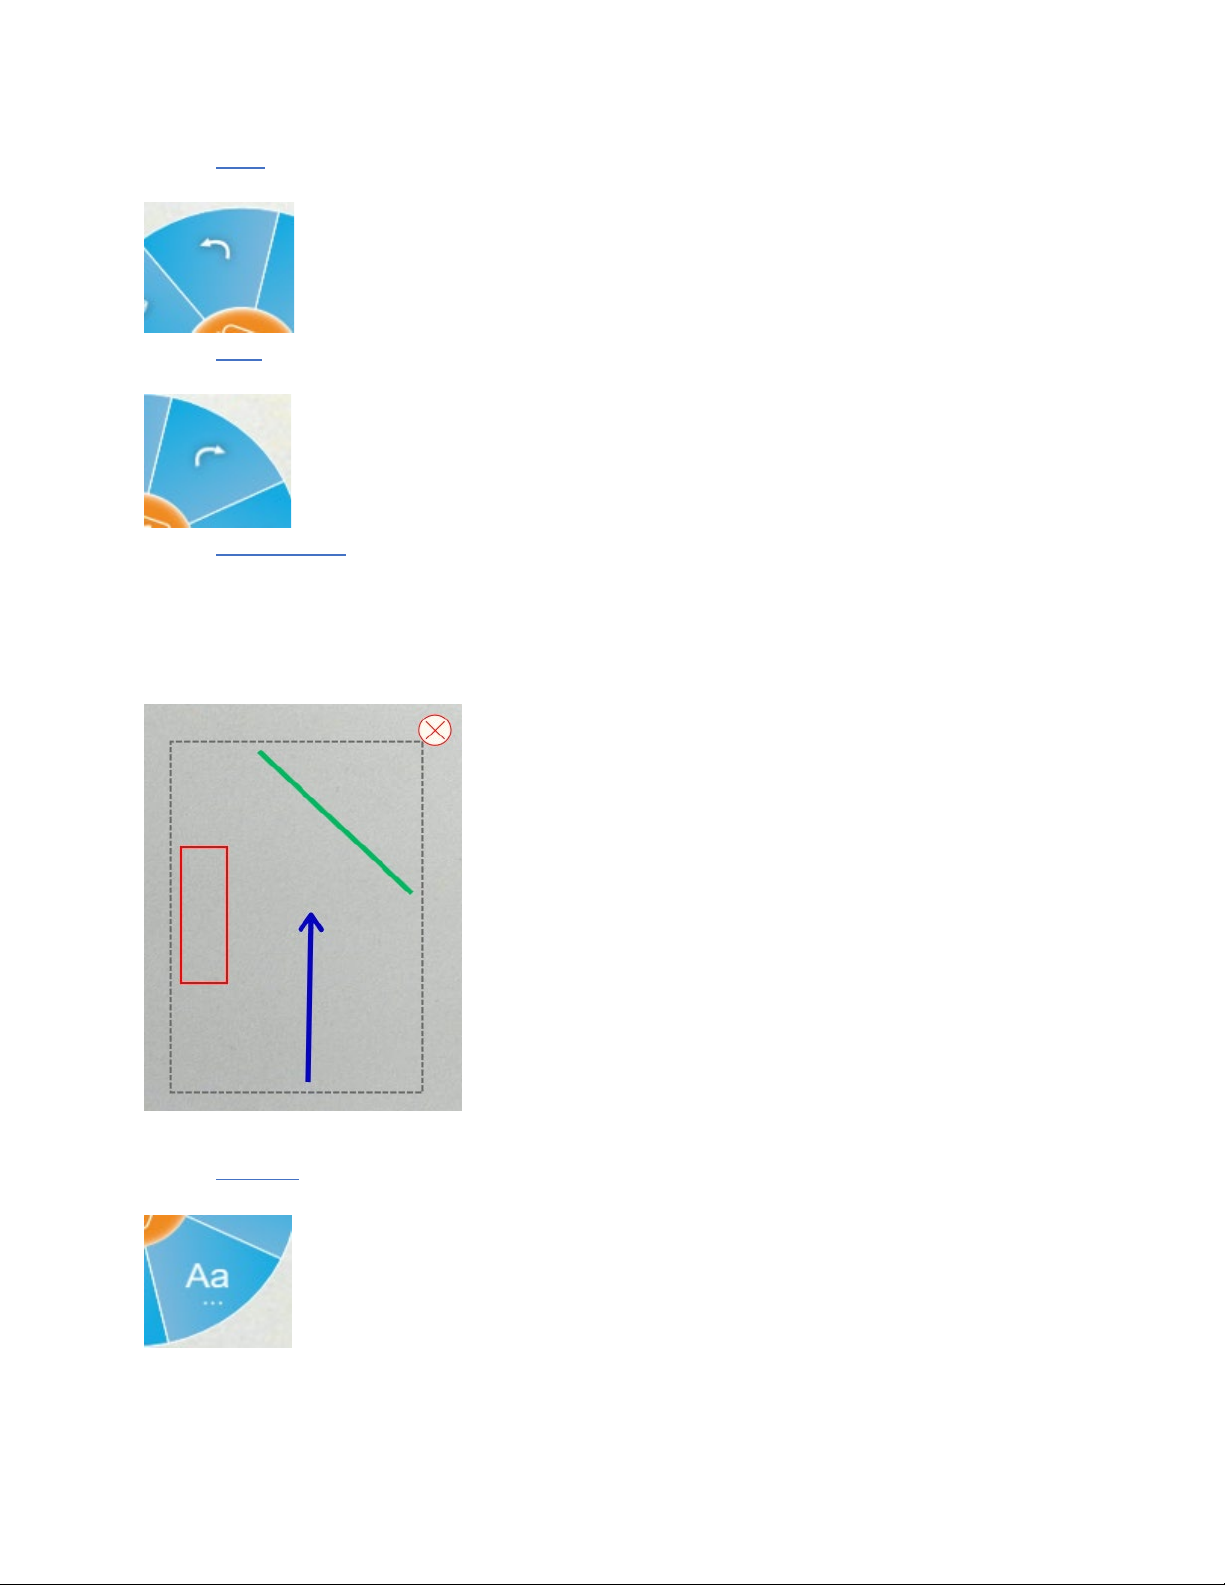
2. Undo
This button will undo the previous action:
3. Redo
This button will restore the previously “undo” action:
4. Canvass Select
Once selected, you can use your mouse or touch controls to trace a dotted line around specific
annotations you wish to adjust. Once the annotations are selected, a dotted outlined box will appear
around the selected annotations as well as a red “close” button on the top right corner. You can now
drag the selected annotations and move them to a different location on the screen. You can also delete
the annotations by selecting the red “close” button.
5. Text Tool
Creates an editable text box. You can use your keyboard to type in text:
Page 6
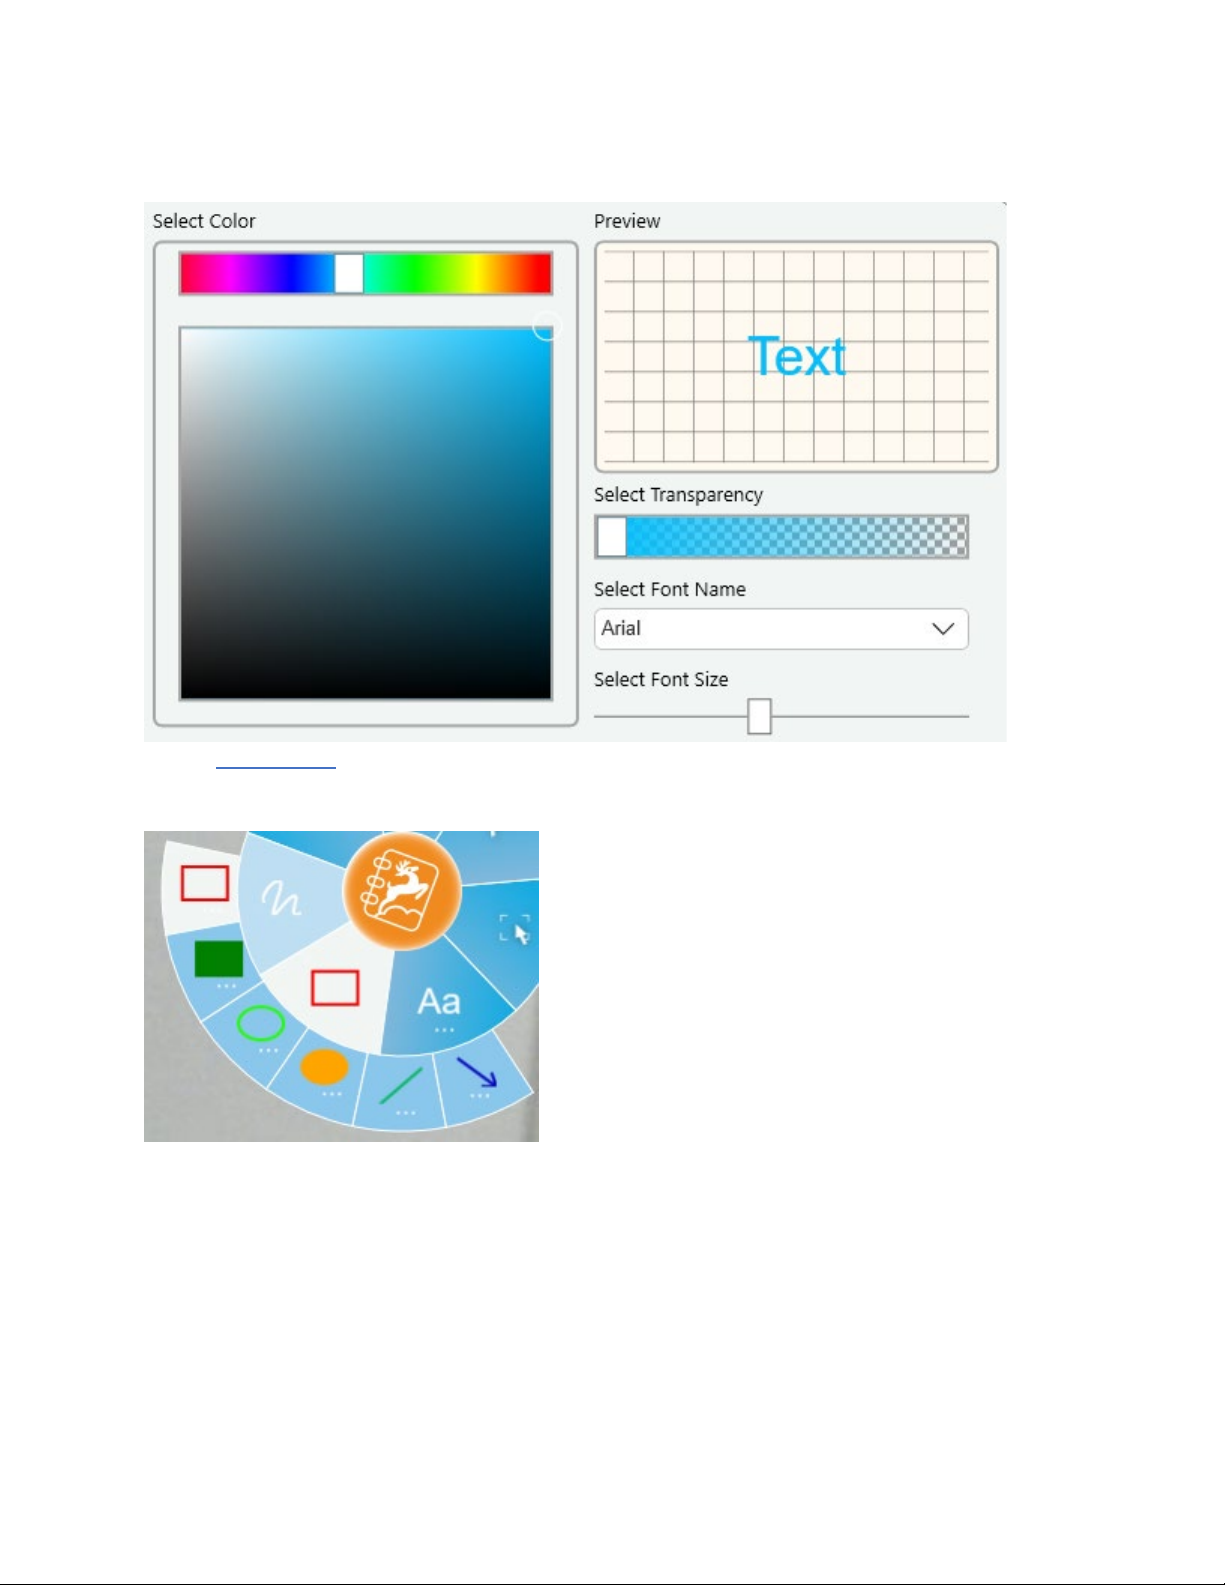
You can access customization options by clicking and holding on the text tool icon. From here you can
change the color, transparency, size, and font style of your text:
6. Insert Shapes
This button allows you to insert shapes onto the plane. When selected, the shapes pop-out window will
be displayed:
Page 7
From here you can select your desired object. Holding a long click on any of the objects will open
customization options for that object. This allows you to change the color, transparency and thickness of
the selected shape:
The main annotation wheel will display the most recently selected shape.
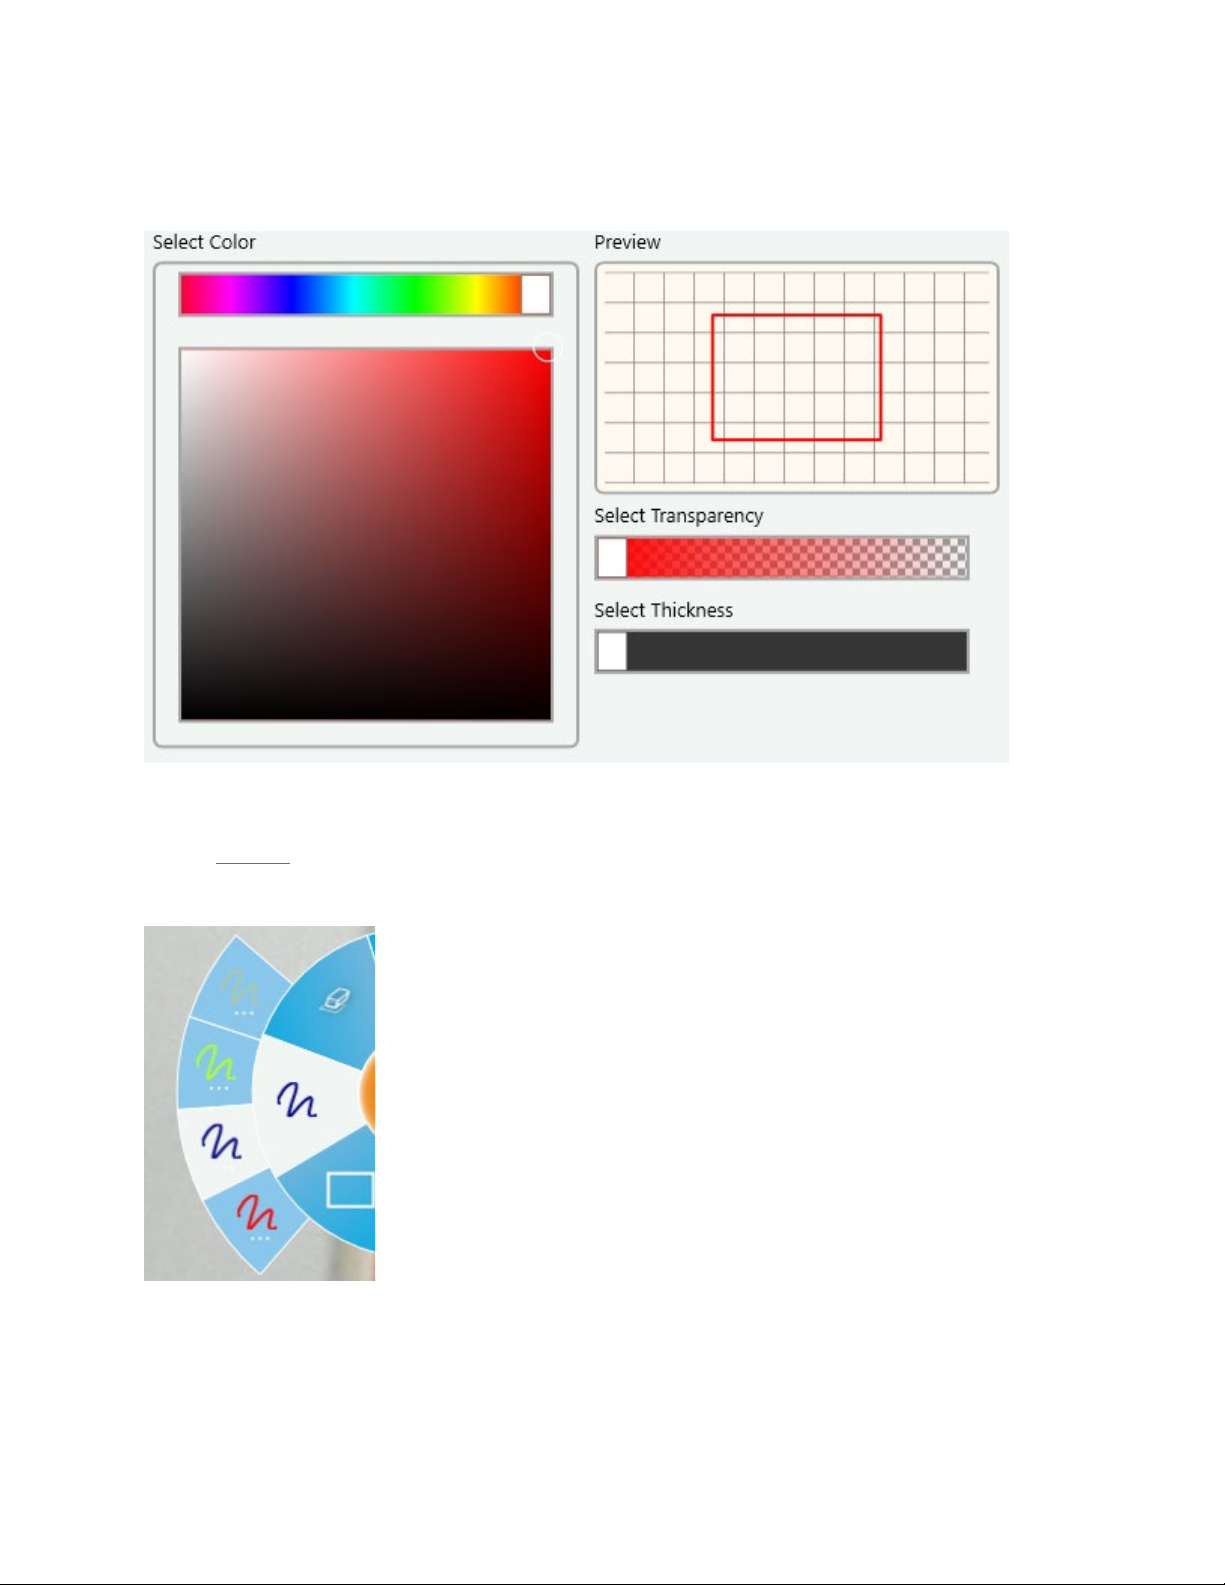
7. Pen tool
The pen tool allows you to mark free-hand annotations. When selected, a pop-out window will display
your four most recent pen settings:
Page 8

Holding a long click on any of the pen icons will open customization options for that pen allowing you to
change the color, transparency, and thickness of the selected pen:
Live Video Display
The main screen shows the live video image from your document camera. If the image is not displaying,
click the “Settings” icon at the bottom of the main screen and make sure that the correct camera is
selected. Then click the “Save” button. Position the camera’s base/neck as necessary. Once your image
is adjusted, you may take snapshots or high-quality video captures of the live video feed. If you start Flex
Page 9
11 without a HoverCam camera connected you will see the following message: “cannot find available
HoverCam camera device. Please make sure a HoverCam camera is plugged in.” If the camera comes
unplugged during normal use, please reconnect your camera and wait a few moments for Flex to
reconnect with the camera.
Control Dock
The control dock (located at the bottom of the initial home screen) contains tools for using and adjusting
your camera. We’ll identify and explain each item on the control dock from left to right.
The control dock can be collapsed and expanded again by clicking on the pull-out tab located at the
bottom of the control dock under the “multi-scan” icon
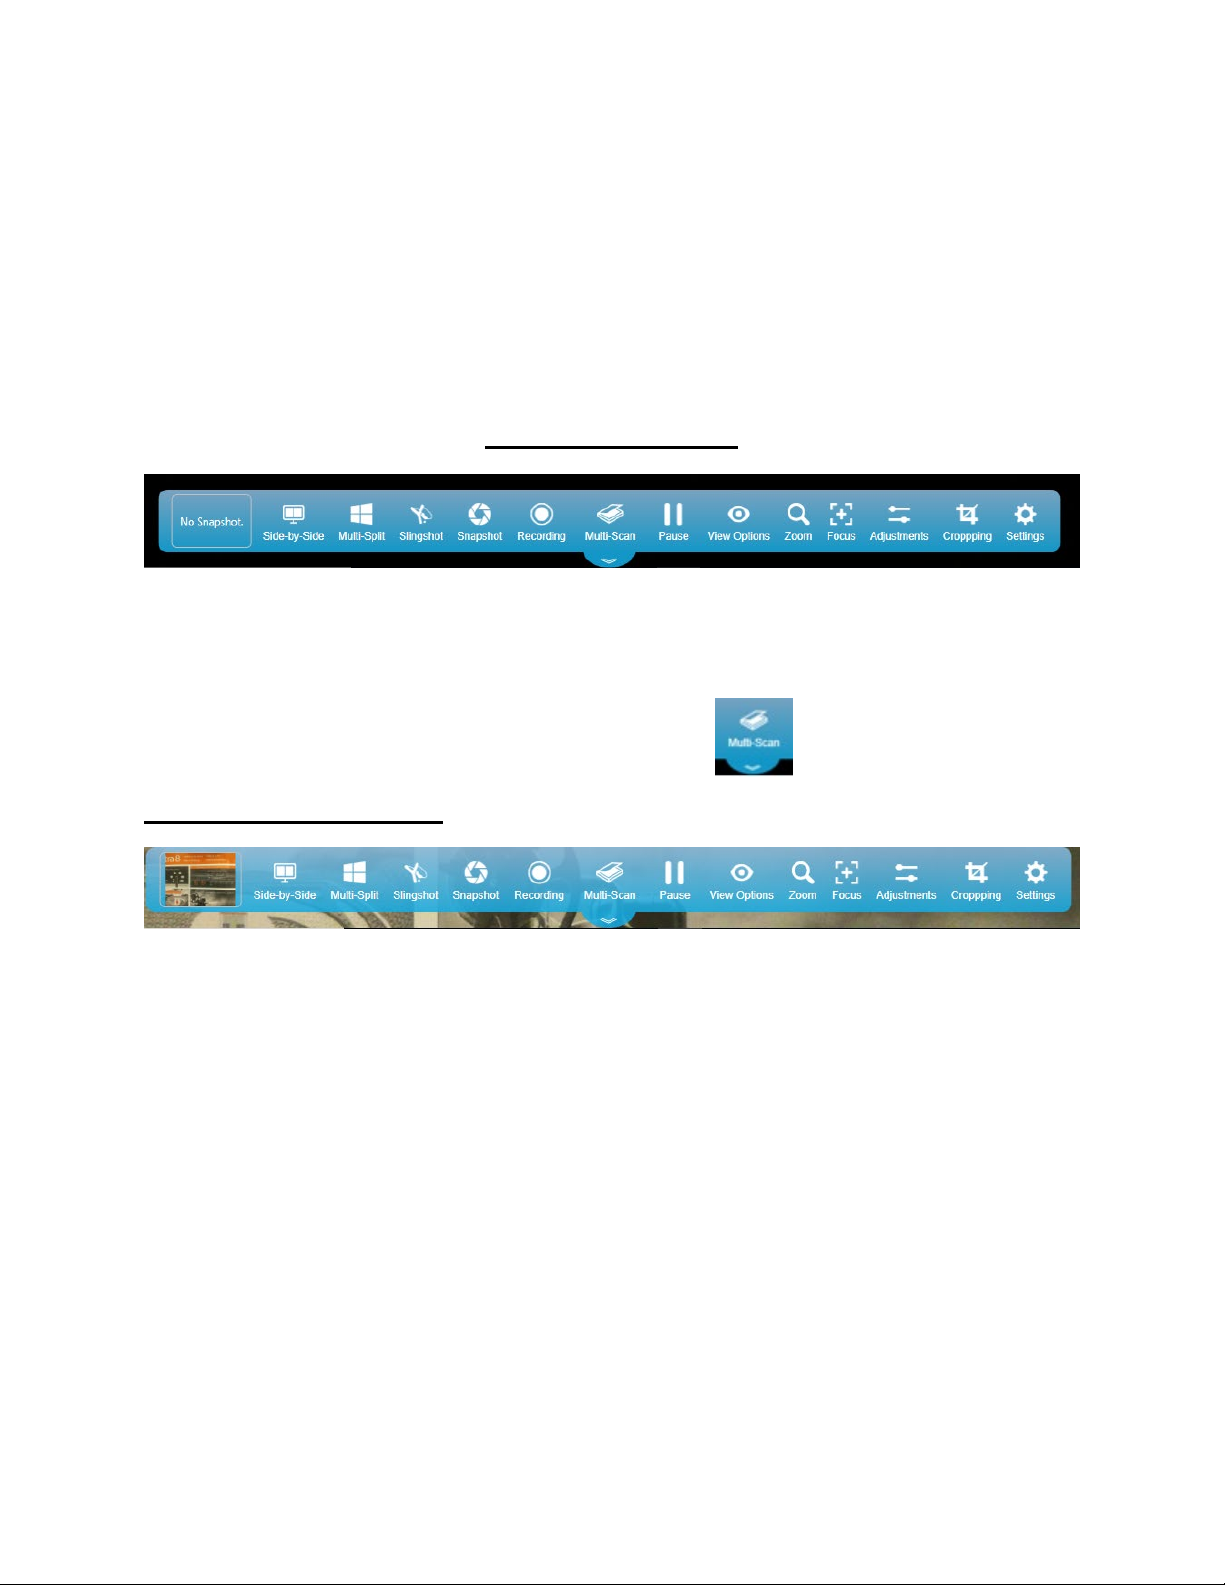
Previous Snapshot
Once you take a snapshot of an image a preview will be generated and displayed in the “previous
snapshot” box on your control deck.
If you click on the image, “side-by-side” mode (this mode is explained in the following section) will
launch and you will see the image you just took on the left side of the screen along with the live video
display on the right side. A preview box will open on the top left side of the screen which will display
your previous 5 snapshots and you can use the scroll bar to scroll through other previous snapshots.
Clicking on any of these will display the selected image on the left side of your “side-by-side” window.
Page 10
Side-by-side
This mode will allow you to display a previous snapshot image next to your current live video feed,
allowing you to compare documents side-by-side with your current live feed.
To enter side-by-side mode, simply click on the “side-by-side” button on your control dock. The window
on the left side of the screen will display the image from your “previous snapshot” box. If there is
currently no image in your “previous snapshot” box, the left side will display a black window.
Page 11

Clicking on any of the images in the previous snapshot bar will display the selected image on the left of
the side-by-side screen. You can zoom in or out and rotate the image by using pinch and zoom touch
controls.
You can also enter side-by-side mode by selecting the pull-out tab on the left of the screen and then
selecting any of the previously stored snapshots.
You can adjust the prioritization (increase or decrease how much of the screen each side takes up) by
clicking on the “center slider” and sliding it to the left or right as desired.
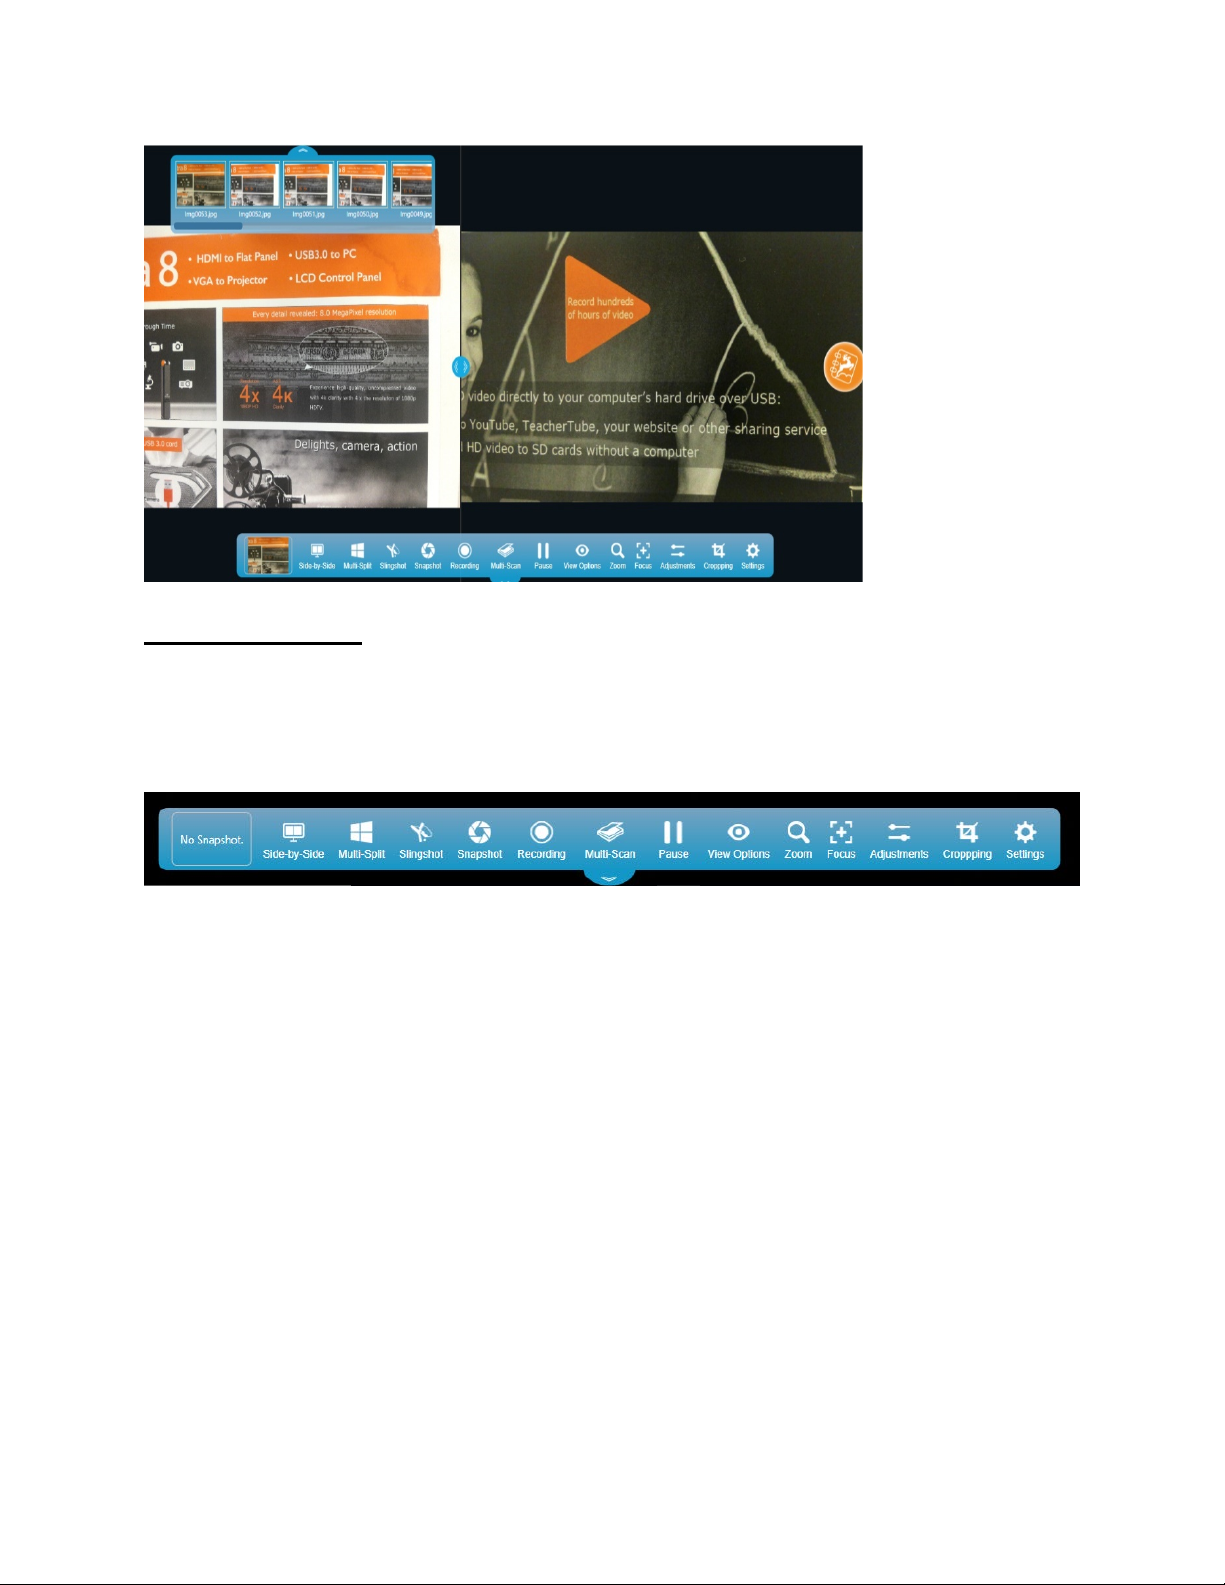
Multi-split
The multi-split button functions similarly to the side-by-side function but allows you to split the screen
into as many as 16 separate images (including the live feed.) The live feed will always display in the top
left window. When you select multi-split, an option box will pop up. You can adjust the number of
columns and rows that will display by selecting the corresponding up or down arrows:
Page 12
Once you have selected the desired number of rows and columns, select “start” and multi-split mode
will launch. Just as with the “side-by-side” mode you can zoom in or out and rotate the images by using
pinch and zoom touch controls.
To select which saved snapshots appear in any given window, simply open the “pull out tab” on the left
side of the screen, locate the desired image, and “drag and drop” it into the desired display window.
To exit multi-split mode, select “multi-split” on the control dock and then select “stop”
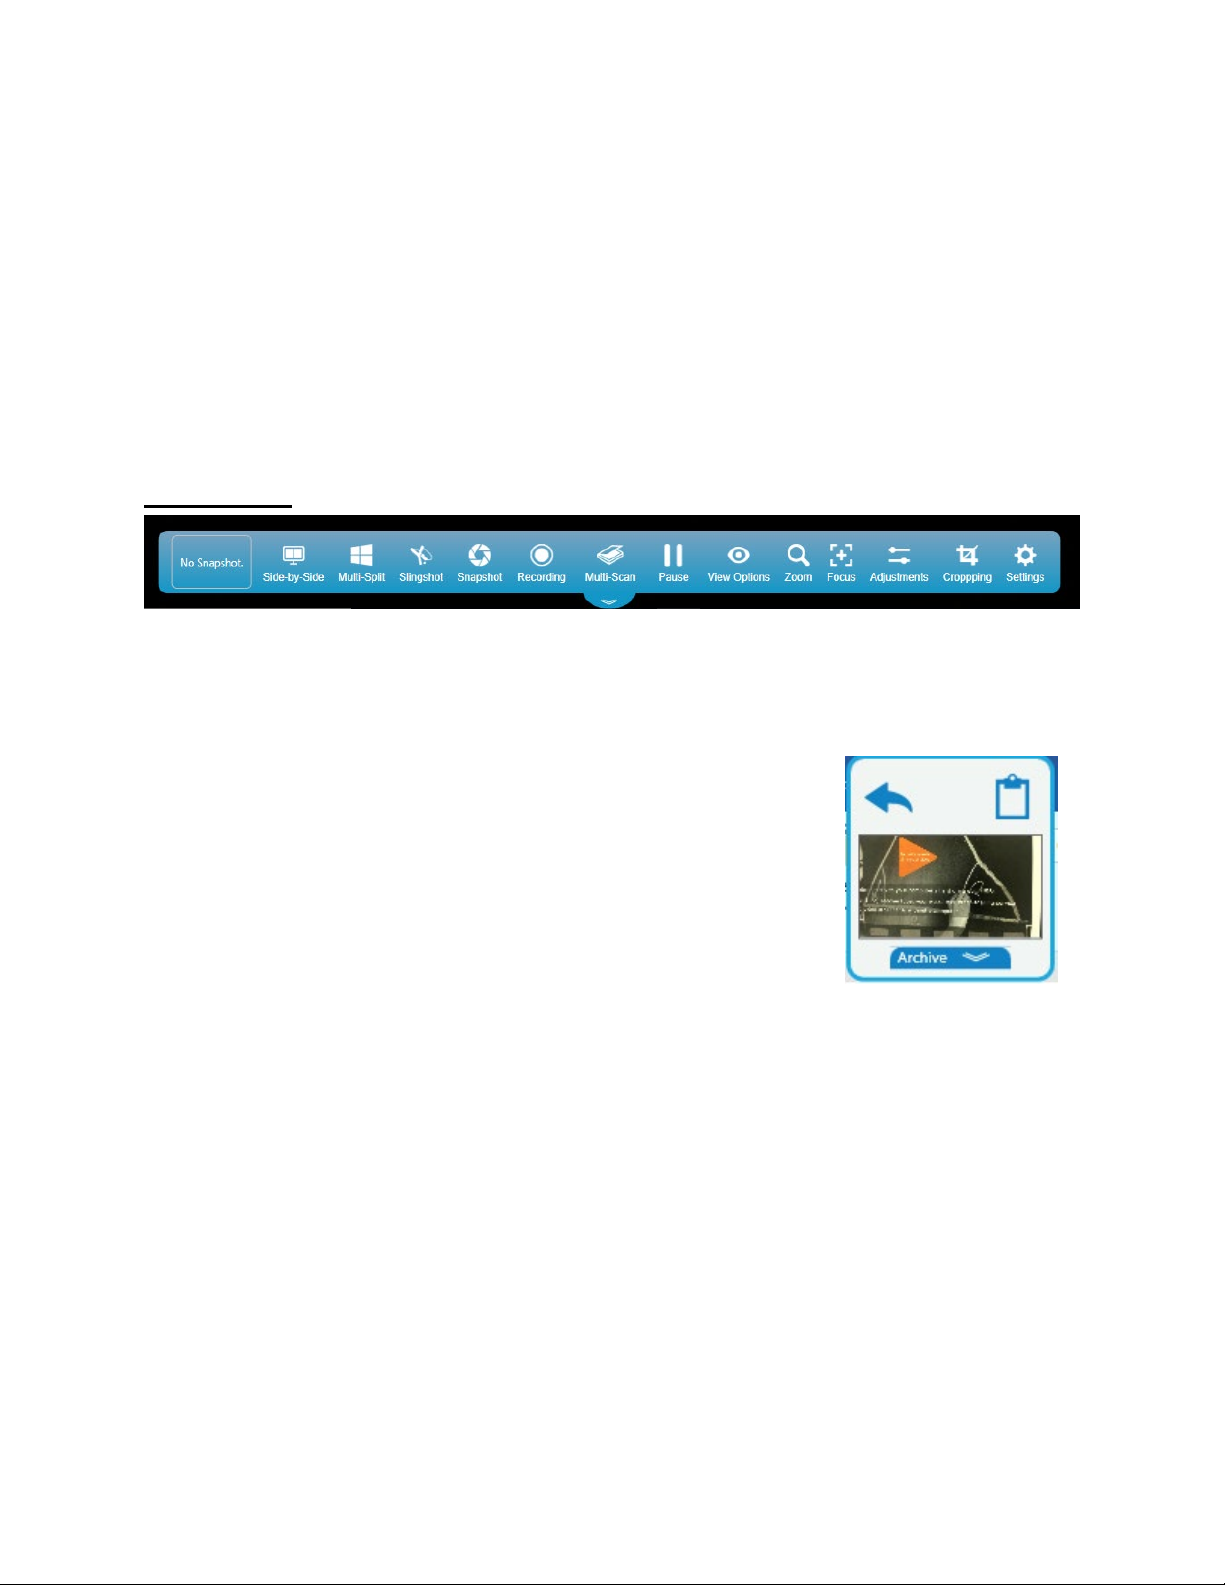
Slingshot
The Slingshot feature allows you to insert the currently displayed image (and/or another stored image
from your recent archive) into another software application, such as a rich text editor/word processor,
interactive whiteboard software or an image editor program. Multiple images may be pasted into your
other program with one click of the Slingshot icon.
Once you select the Slingshot button, Flex 11 will immediately minimize and
a small window showing your current image will appear near the upper left
portion of your screen:
Notice there are three buttons on this thumbnail image:
• Return to Camera is on the upper left. Click this button to return to Flex 11 at any time, whether
you have pasted the image or not.
• Clipboard is on the upper right. Click this button to save the currently displayed image to your
active clip board. After the image is pined to your clipboard, you can paste it into other
applications. (Right click and select paste or press ctrl + V on your keyboard.)
• Archive is on the bottom. Click this to select a previously saved snapshot from the Archive list to
insert into another application.
You can also drag and drop the currently displayed live video image into other applications. Open the
desired program; the Slingshot window will remain near the upper left on your screen. Click on the
display window and drag it onto the desired application. It may take a second or two for the image to
appear there. Notice the Slingshot window is still displayed in the upper left corner of the screen. You
Page 13
will use this in a moment to return to Flex 11. To paste a previously saved image, click the “Archive”
button on the Slingshot window. Then select the saved image by clicking it and dragging it onto your
application. You may select and paste multiple images. After inserting your image(s), you may want to
save your application; you can adjust the image(s) later.
Exit the Slingshot feature and return to Flex 11 by clicking on the blue “Return to Camera” arrow in
the upper left corner of the Slingshot window.
Snapshot
Once the live video image is adjusted to your liking, save a picture of it by clicking on the Snapshot icon.
Your most recent snapshot will be shown in the “previous snapshot” box. It will also appear in the pullout panel on the left. Your snapshots are stored by default in the following subdirectory:
C:\Users\Hovercam Backup\Documents\KnoteSter Suite
You can change the location of where your images are stored in the Settings menu
In the pull-out panel on the left side of the screen, the snapshots are displayed with their unique names
by default as with any digital camera. You may rename these images using the Archive screen described
later in this manual.
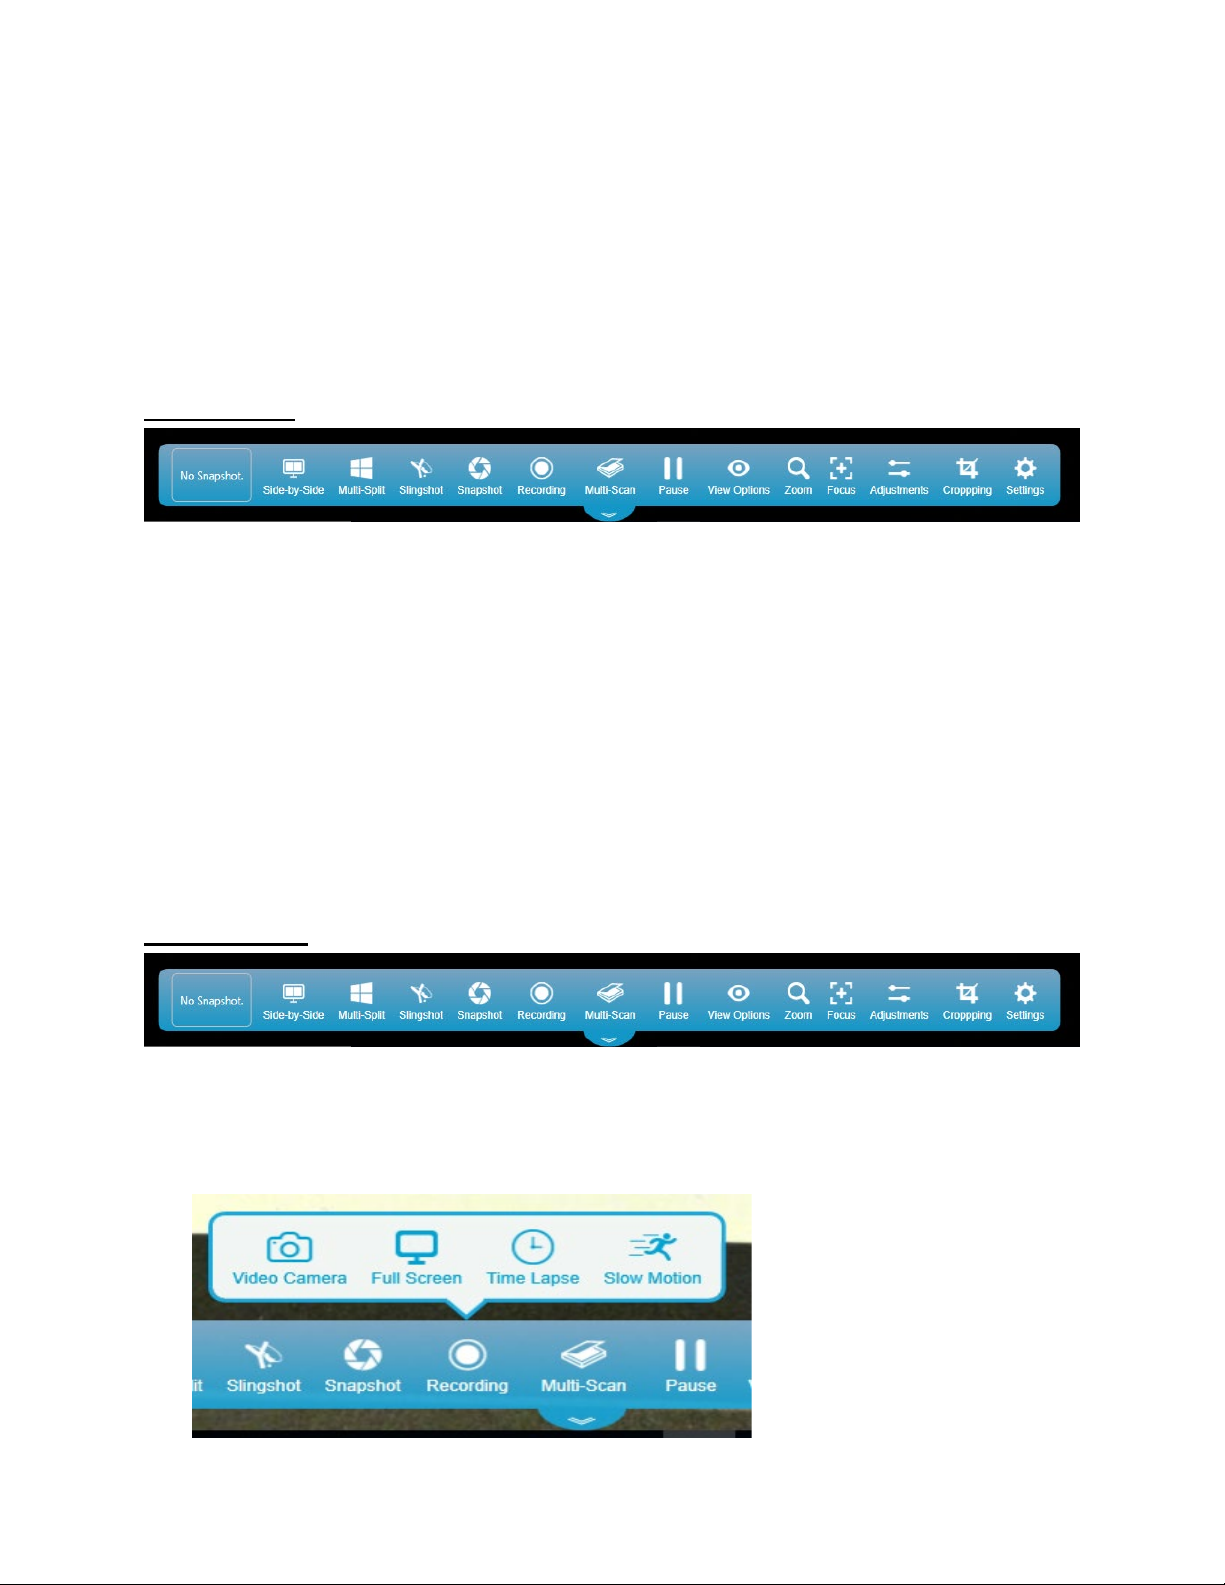
Recording
To capture a video sequence, click the Recording icon in the center bottom of the screen. This brings up
a set of four buttons in a pop-up dialog box just above the Recording icon:
Page 14

Video Camera
To begin recording a standard video, select the icon labeled “Video Camera” and Flex will begin
recording whatever is in the camera’s field of view. You will see a red timestamp indicator above the
“Recording” icon on your control dock.
Note: When using the “Video Camera” function, Flex will record any audio the camera’s microphone
captures as well as the camera’s video feed and any annotations you make. This mode will not capture
the full screen or other programs you launch during your lesson (use “Full Screen” mode for this).
To stop or pause recording, select the “Recording” icon once more and a control box will pop-up:
Full Screen
To screen capture your lesson you must use the “Full Screen” option.
After selecting “Recording” on the control dock, select “Full Screen”
Page 15

Upon selecting “Full Screen” you will see a countdown indicator in the center of the screen. After 3
seconds Flex will begin screen capturing and you will see a red timestamp indicator above the
“Recording” icon on your control dock. Additionally, a tool bar window will open in the lower right
corner of your screen:
This tool bar window can be “drag and dropped” to a different part of the screen. This tool bar allows
you to pause or stop recording without having to pull up the full Flex window.
The blue circled arrow icon will minimize this tool bar:
Time Lapse
To record a time lapse video, select “Recording” on the control dock, then select “Time Lapse”
Upon selecting “time lapse”
an options window will open allowing you
to adjust the settings of your time lapse
video.
Recording Duration: allows you to set how
long Flex will record for. Select the desired
number of hours, minutes, and seconds.
Speed Relative to Real Time: This slider
will determine how fast the video plays
back relative to real time. Example: if you
select 2x, the time lapse video will pay
back at twice the speed of real time.
Page 16

Playback rate (fps): This slider allows you to adjust how many frames per second your video will play in.
Selecting a higher fps will produce a smoother video.
Video Length: This shows you how long your final video will be based on the current “speed relative to
real time” settings.
Start and Close: Select “start” when you’re ready to begin recording. Selecting close will close the time
lapse window.
To stop or pause recording, select the “Recording” icon once more and a control box will pop-up:
Slow Motion
To record a slow-motion video, select “Recording” from the control dock and then select the “Slow
Motion” icon
Your slow-motion video will automatically start recording as indicated by the red recording timestamp
above the “Recording” icon
To stop or pause recording, select the “Recording” icon once more and a control box will pop-up:
Page 17

Multi-Scan (automatic multiple snapshots)
The multi-scan tool allows you to rapidly scan many documents using your HoverCam camera.
When you select the multi-scan tool, an options window will pop-up:
From here you can decide if you’d like to operate the scanner via timer countdown or motion trigger.
Use the indicator button at the top of the window to toggle between the modes. From this window you
can toggle between operating in landscape or non-landscape and select to save scans as a pdf.
Timer mode
This setting allows you to set an interval (in seconds) and the camera will automatically take a scan at
your desired interval.
You can use the “Set Max Images” to adjust the maximum number of scans taken.
Page 18

Motion mode
When you select motion mode the following setting options window will appear:
From here you can adjust the “countdown delay” which will determine how many seconds the camera
waits to take a scan each time motion is detected.
Adjusting the “reactive delay” will determine how long the camera waits to reset between scans.
Pause
Pressing the pause button on the control dock will pause (freeze) the current image being displayed in
your live video feed. This feature allows you to make changes under the camera that will not be
displayed until you un-pause the display.
While the image is “paused” you will see a red circle above the “Pause” icon:
While paused, the annotation feature still works, but you won’t be able to see the annotations until you
click the Pause icon again to “un-pause” the display. Snapshot also works and will take a snapshot of
what is currently under the camera, not the paused image.
To end the pause and resume displaying the live video feed, simply select the “Pause” button once
more.
Page 19
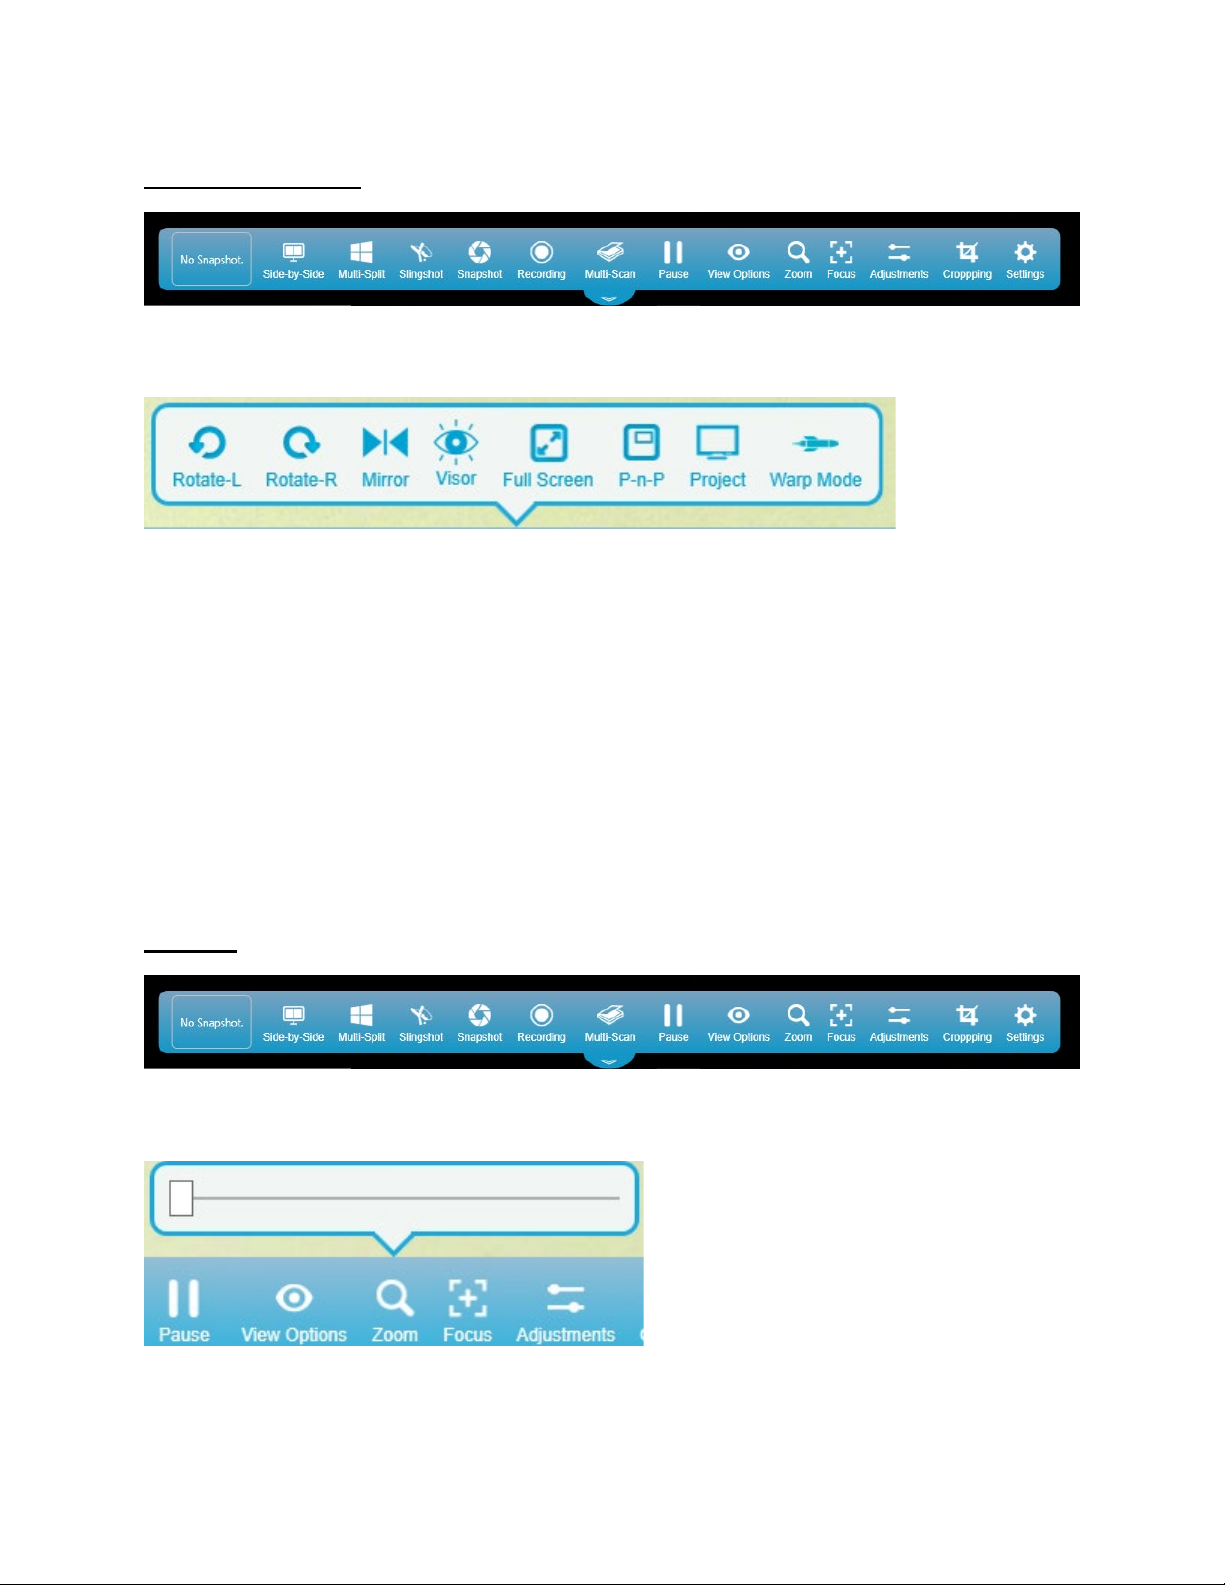
View Options
When you select the “view options” button a window of options will appear above the “view options”
icon:
Rotate Left: click to rotate the image counter-clockwise.
• Rotate Right: click to rotate the image clockwise.
• Mirror: click to “flip” the image horizontally. Click again to bring it back to the original
orientation.
• Visor: places a large green box over your live video feed. This “visor” box can be “drag and
dropped” to conceal or reveal specific parts of the screen.
• Full Screen: click to enlarge the image to fill the screen. Click again to bring the Flex 11 control
dock back along the bottom of the screen.
• P-n-P (picture in picture): allows a 2nd camera to be turned on and displayed on screen.
• Project: allows you to project to a connected screen.
• Warp mode: allows you to record video at 120 fps (frames per second).
Zoom
Selecting the “Zoom” button brings up the zoom slider, allowing you to adjust your camera’s optical
zoom:
Page 20

Focus
Selecting the “Focus” button will open the following
window above the icon:
• Selective Focus: allows you to click on specific
areas of the live video display for the lens to focus
on.
• AF (auto focus): when selected, the camera lens
will automatically determine the optimal focal
point. As the display field changes, the camera
will continue to automatically readjust the focus. To prevent the camera from continuing to
readjust, select AF-L (auto focus lock).
• AF-L (auto focus lock): when selected, the camera lens will auto focus then “lock” and remain
on the same focal point regardless of any changes to the camera’s field of view.
Page 21

Adjustments
(placeholder image. Highlight the adjustments button)
Upon selecting the “Adjustments” button on the control dock, a pop-up window will appear above the
Adjustments icon with sliders allowing you to adjust six different image parameters:
The focus, exposure, and white balance can be set to ‘auto’ or ‘locked’ using the ‘A’ and ‘L’ buttons
located on the right side of the sliders.
After adjusting the parameters to the desired settings select the green “SAVE” button to save the
settings.
Selecting the green “Reset” button will reset the settings back to your previously saved levels.
Selecting the orange “Default” button will return the settings back the factory default levels.
Page 22

Cropping
Selecting the “Cropping” button on the control dock will open an adjustable cropping window and the
following tool bar with seven options:
• Capture: takes
a snapshot of the
current cropped
window.
• Clipboard: saves the cropped image to your active clipboard so that you can
paste the image into other programs. (similar to the “Slingshot” clipboard
described on)
• OCR (optical character recognition): The OCR feature converts a snapshot of a page
of text into a text file which can be edited and copied into another program. When
selected, a snapshot of the cropped plane will be taken and automatically converted
into text in the right-side column under “OCR Results.” You can edit the text directly using a
mouse and keyboard. Clicking the green “Copy to Clipboard” button will copy the scanned text
Page 23

to your active clipboard, allowing you to paste it directly into other applications such as a word
processor or PowerPoint.
OCR Usage Tips:
• OCR works best when scanning a non-reflective paper surface.
• Adjust your cropped plane to crop out as much of the surrounding surface as possible.
• If you’re experiencing inaccurate scans of your texts, try using the “Gridlines” and “Straighten”
features (described below) to align and level the text as much as possible before taking the OCR
scan.
• Insure the cropped plan is in focus by using the “auto-focus” button described below.
• Auto-Focus: When selected, the camera will automatically adjust its focal settings
to bring the current field of view into focus.
• Straighten: When selected, a gridline overlay will be placed over the cropping
plane and an alignment slider will open inside the tool bar. This slider will allow
you to adjust the tilt of the cropping plane.
• Gridlines: Places a transparent grid overlay on the cropping
plane allowing you to visually check the alignment of your document.
• Close: closes the cropping pop-up tool bar.
Page 24

Settings
When selected, the setting pop-up window will appear above the “Settings” icon:
• Camera:
Under this tab you can select the desired camera, microphone, resolution, and flicker removal.
- Camera: Select from the available cameras if multiple cameras are connected to your
computer or Pilot.
- Microphone: Select from the available microphones if multiple microphones are
connected to your computer or Pilot.
- Resolution: Select you desired resolution. 720P is the default resolution setting.
- Flicker Removal: Disable or select the desired flicker removal frequency. Thin lines and
sharp edges in images sometimes flicker when shown on interlaced displays, such as
many TV screens. Flicker removal can reduce or eliminate this flicker. For users in the
USA, set the frequency to 50hz. Users outside the USA, please verify your nation’s
standardized frequency and select accordingly.
Page 25

• Scan:
Under this tab you can identify the current save folder, change your file naming, and select the
desired output format for your scanned images.
After making changes, click on the green
“Save” button to save your new settings. You
can reset back to factory default by clicking on
the green “Reset” button. Clicking on the
orange “Cancel” button will close the
“Settings” window.
- Save Folder: Shows the save folder where your scans are located.
- File Naming: Allows you to edit your file naming.
- Output Format: Change the format your scans will be saved as. JPG is the default.
Page 26
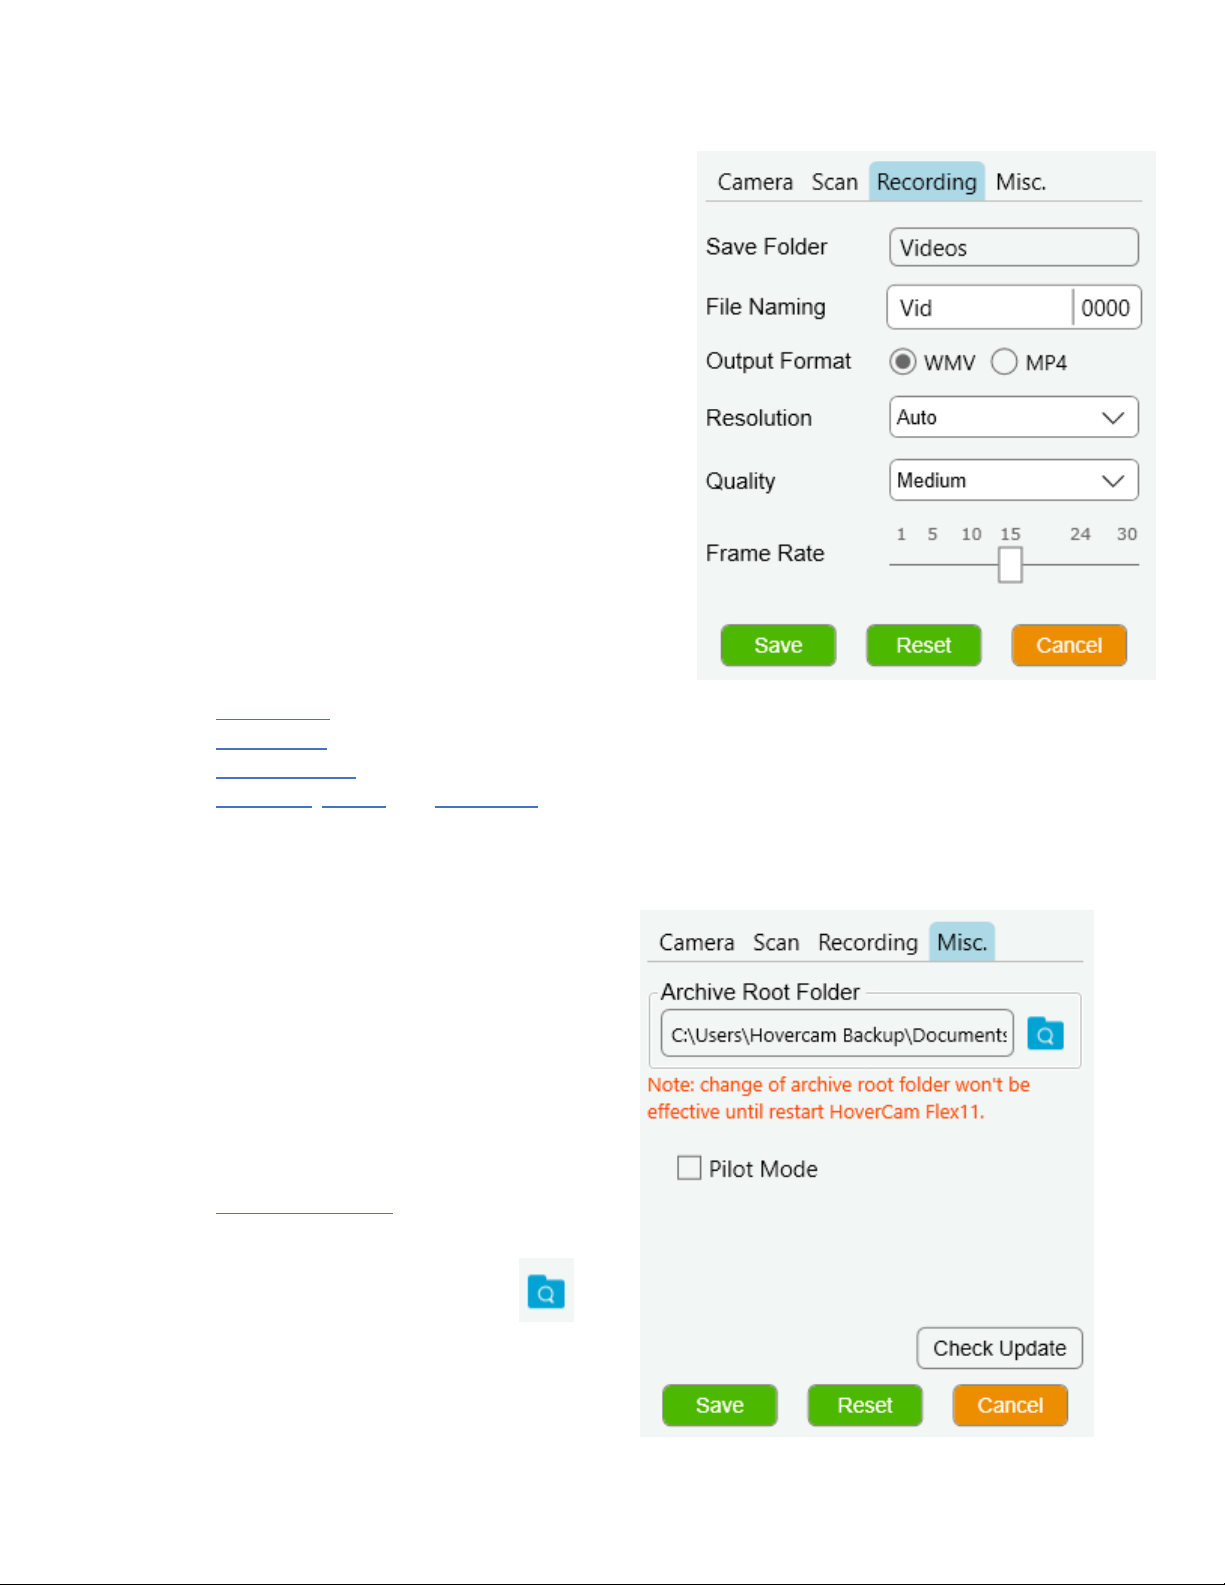
• Recording:
Under this tab you can identify the current save
folder, change your file naming, select the output
format, and adjust the resolution, quality, and
frame rate of video recordings.
After making changes, click on the green “Save”
button to save your new settings. You can reset
back to factory default by clicking on the green
“Reset” button. Clicking on the orange “Cancel”
button will close the “Settings” window.
- Save Folder: Shows the save folder where your recordings are located.
- File Naming: Allows you to edit your file naming.
- Output Format: Change the format your recordings will be saved as. WMV is the default.
- Resolution, Quality, and Frame Rate: adjust the picture and frame rate settings of your video
recordings.
• Misc.:
Under this tab you can identify and change
the location of the archive root folder, select
Pilot mode if using a HoverCam Pilot, and
check for Flex 11 software updates.
After making changes, click on the green
“Save” button to save your new settings. You
can reset back to factory default by clicking
on the green “Reset” button. Clicking on the
orange “Cancel” button will close the
“Settings” window.
- Archive Root Folder: From here you can
adjust where Flex stores the archived images
and videos on your computer.
By selecting the blue folder
icon, you can browse possible
locations and select a new location. Click on
the desired location then click on “select
folder” to make your selection.
Page 27
- Pilot Mode: If you are using Flex 11 on a Pilot, checking this box will insure the Solo 8 camera
will start in the correct orientation each time Flex 11 launches.
- Check Updates: When selected, Flex 11 will check for any available updates. If an update is
available, an instillation window will pop-up. Follow the onscreen instructions to install the
update.
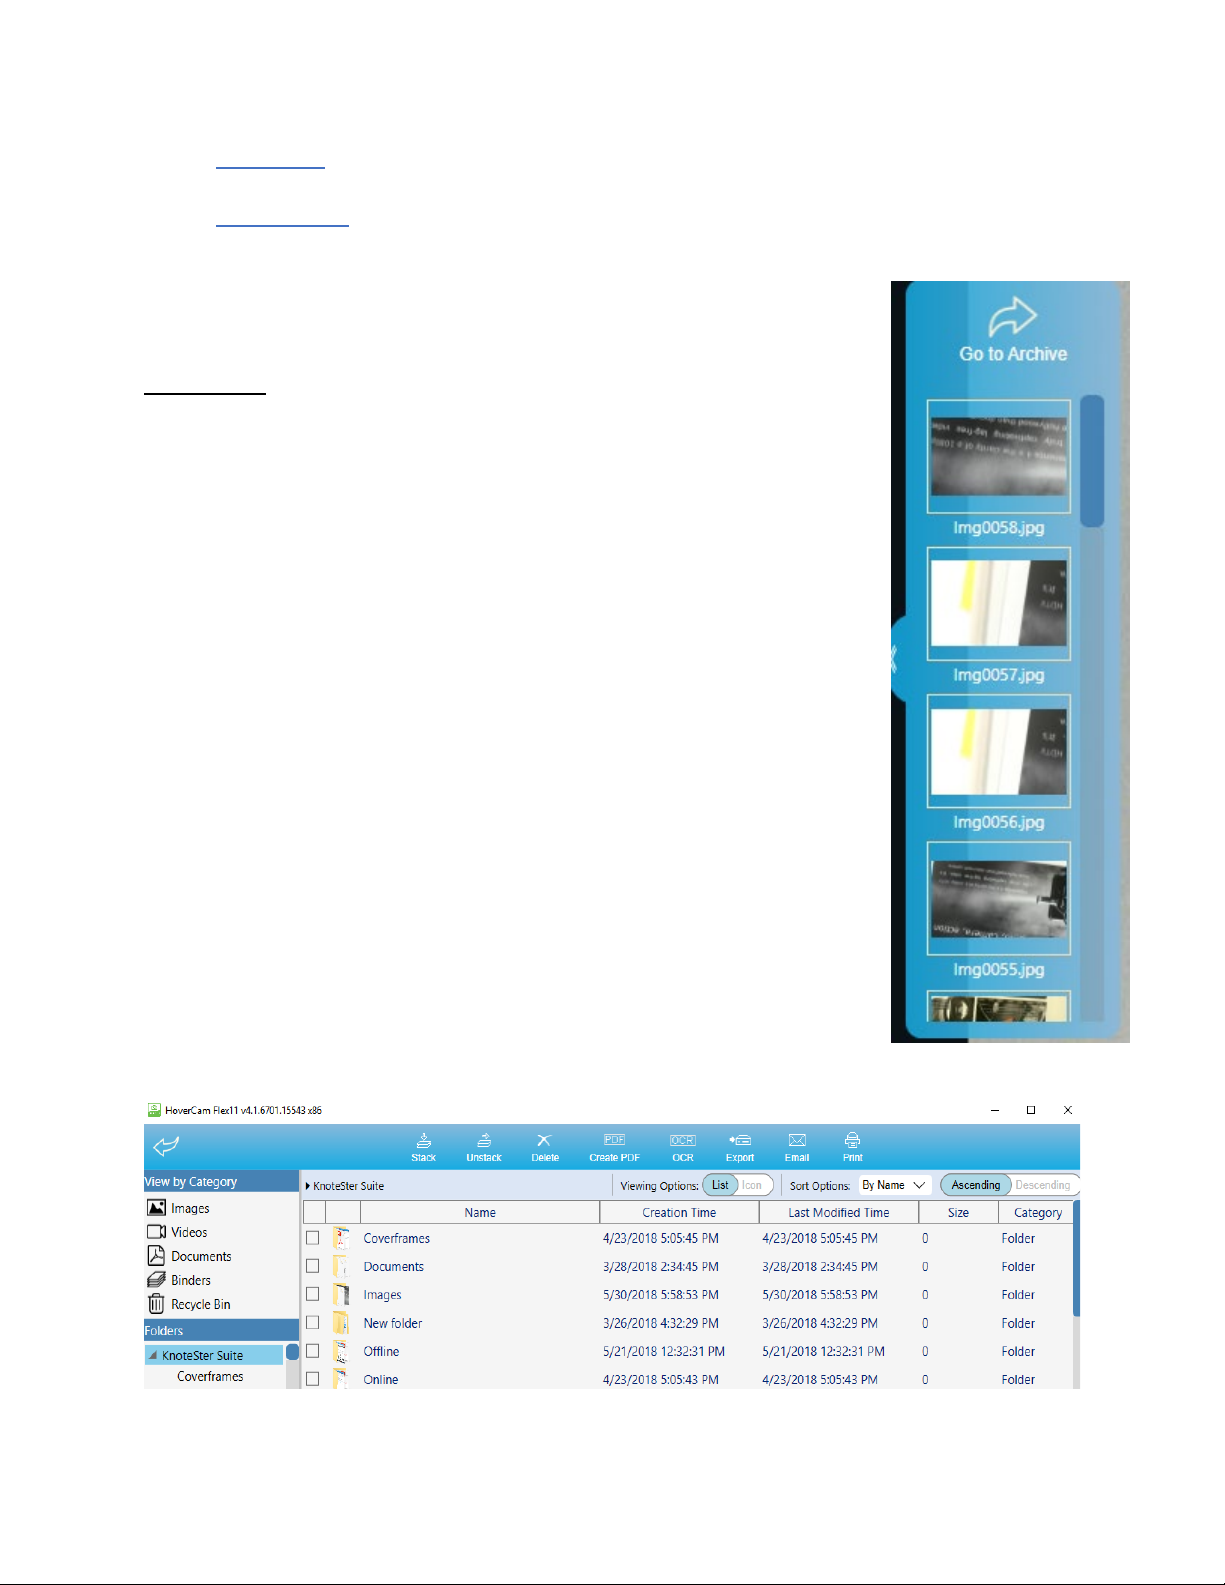
Archive
The Archive feature allows you to view your saved image and video files, as well
as PDF files you have created. The files may be organized, printed, deleted,
renamed and moved to different directories.
Click the pull-out tab on the left side of the main screen and the recent snapshots
will be displayed in a panel, along with an arrow icon at the top of the panel
labeled “Go to Archive”. As you move your mouse over each image on this panel,
a red “X” will appear in the upper right corner of the image. You can delete the
image easily by clicking the red “X”.
If you double-click on one of these images, side-by-side mode will launch, and
the image will appear on the left window.
Click the “Go to Archive icon” and the Archive screen will appear as shown
below:
Page 28
Return to the Main Screen by clicking the blue arrow icon located at top left corner of the Archive
screen.
Under the blue arrow icon, along the left side of the screen, is a list of the file types that are stored in
the Archive. Under that is a directory listing of your “Folders” showing the Image and Video
subdirectories.
The middle of the screen shows the Image and Video subdirectories as folder icons. Double-click the
folder to show its contents:
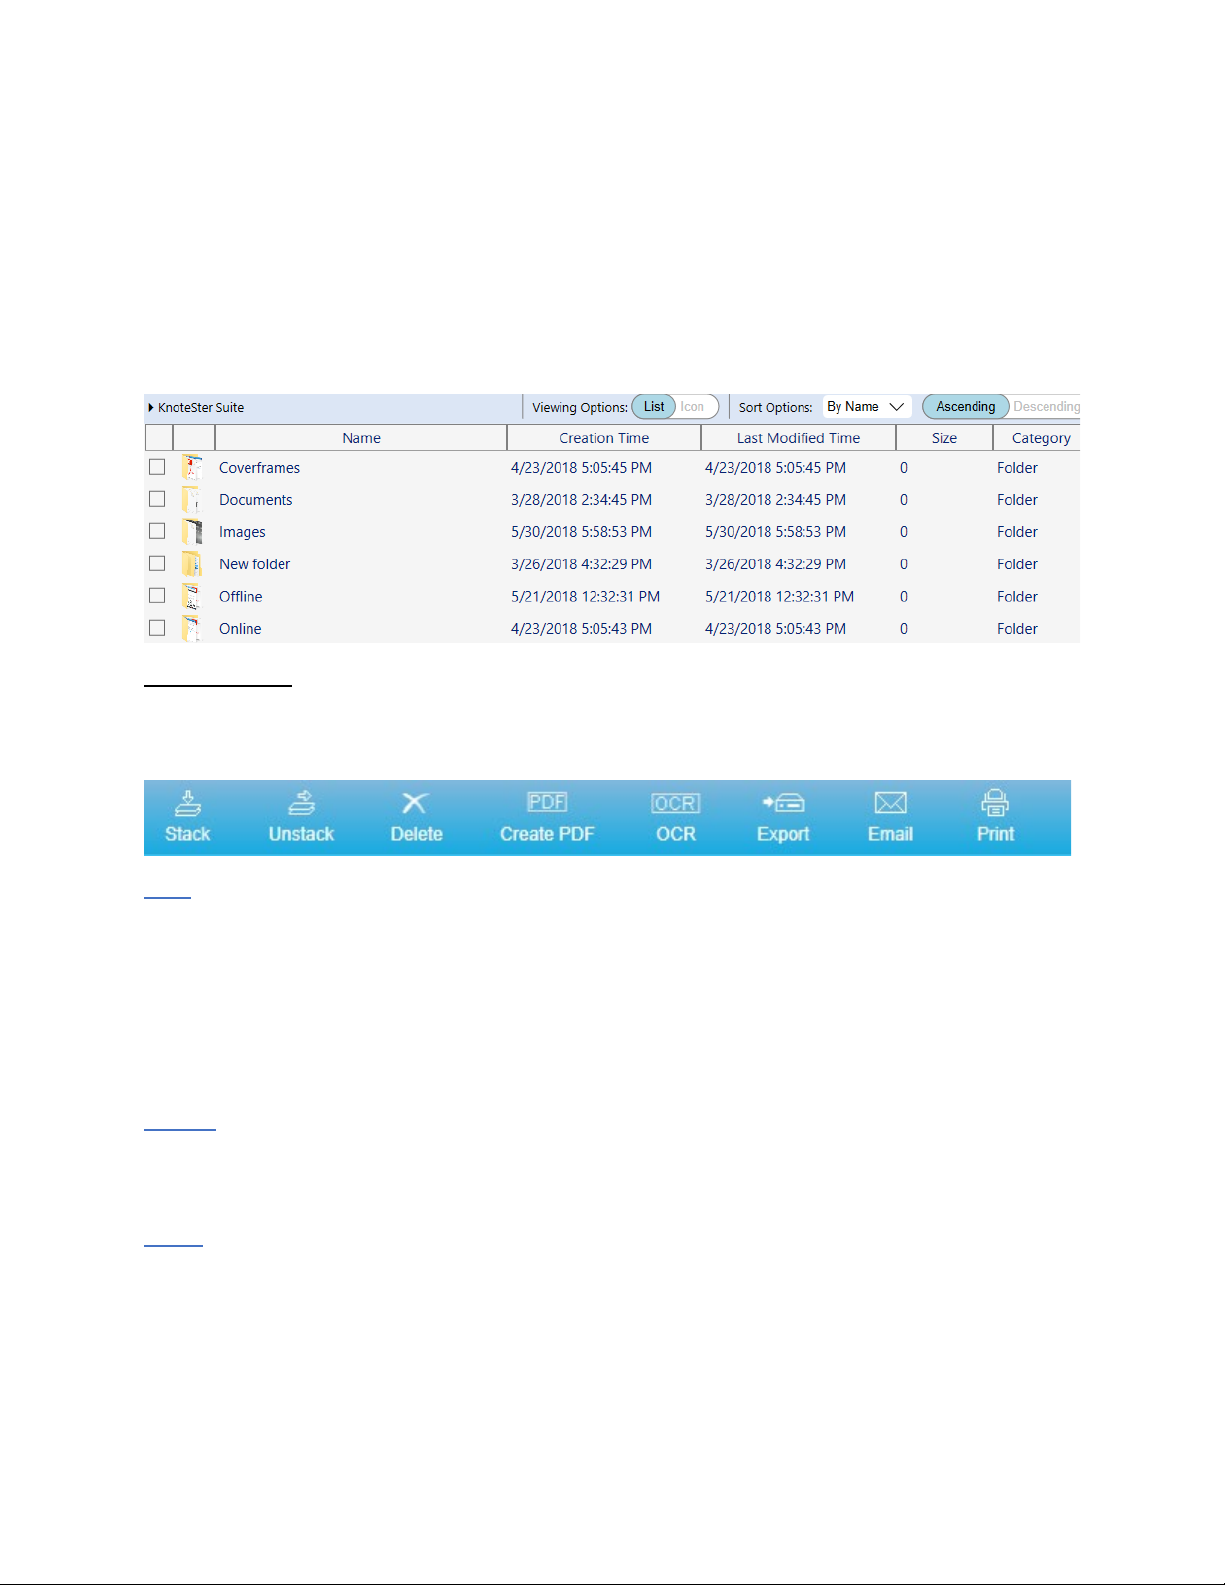
Archive Controls
Along the top of the screen is the Archive Controls panel. The icons here are buttons that allow you to
work with, organize and print your image files. These features are described below:
Stack
The Stack feature lets you organize files by allowing you to group similar files together into one file
called a “stack”. This is very convenient for emailing a group of images or for creating a virtual booklet of
your scanned documents. To stack items, simply select all files that you would like to include in a group
by highlighting them or clicking on the box to the left of each file, then clicking the Stack icon. The files
will be bundled into one file. The filename of the new file will be the filename of the first file in the
stack. There will be no file extension.
Unstack
Use the Unstack button to ungroup a stacked group of files. Simply select the stacked file and click the
Unstack button.
Delete
The Delete button allows you to delete selected files. Deleted items are moved to the “Recycle
Bin”. Click on a file to select it, then click the Delete button. You will be asked to confirm the deletion.
Page 29

Create PDF
This handy feature saves your selected image(s) as a PDF file. Select one or more image files, then click
the “Create PDF” button. Your new .pdf file will be saved in the “Images” subdirectory. It will also be
shown when you click on the PDF file type on the left side of the screen.
OCR (Optical Character Reader)
The OCR feature is for converting an image of a page of text to an actual text file. It could take a minute
or two depending on the print quality of the original image.
Export
The Export feature allows you to copy one selected file from your library and save it
as a JPG, PNG, BMP or TIFF file elsewhere on your computer. Select a file, then click the “Export” button.
A dialog box will prompt you for the location, new filename and file type to save. This dialog also
displays a thumbnail of the image that will be exported. Click OK to proceed or Cancel to abandon the
export.
If you specify more than one file, only the first file listed is included in the exported file.
Email
The email feature allows you to email your archived files directly to an email address. Select a file, then
click the “Email” button. Your default email application will launch a new composition window with the
file already attached.
Print
Print files by selecting them and then clicking the Print button.
Annotations:
If you double click on a file within the archive manager, the image will open within the archive editor,
and you can add annotations using the annotation tool bar. To exit the editor, select the black close
circle at the top right corner:
Page 30

Legal and Notice Information
Warranty
The information contained herein is subject to change without notice. The only warranties for P.I.T.
products are set forth in the express warranty statements accompanying these products. Nothing herein
should be construed as constituting an additional warranty. P.I.T. Is not liable for any technical or
editorial errors or omissions contained herein.
Trademarks
HoverCam is a registered trademark of Pathway Innovations & Technologies, Inc. Intel is a registered
trademark of Intel Corporation. IBM ® is a registered trademark of IBM Corporation. Windows Vista,
Windows XP and Windows Live Messenger are registered trademarks of Microsoft, Inc.
User License Agreement (EULA)
This copy of Flex 11 ("the Software Product") and accompanying documentation is licensed and not sold.
This Software Product is protected by copyright laws and treaties, as well as laws and treaties related to
other forms of intellectual property. Pathway Innovations & Technologies, Inc. or its subsidiaries,
affiliates, and suppliers (collectively "P.I.T.") own intellectual property rights in the Software Product.
The Licensee's ("you" or "your") license to download, use, copy, or change the Software Product is
subject to these rights and to all the terms and conditions of this End User License Agreement
("Agreement").
Acceptance
IN USING THIS PRODUCT, YOU ACCEPT AND AGREE TO BE BOUND BY THE TERMS OF THIS AGREEMENT
BY SELECTING THE "ACCEPT" OPTION AND DOWNLOADING THE SOFTWARE PRODUCT OR BY
INSTALLING, USING, OR COPYING THE SOFTWARE PRODUCT. YOU MUST AGREE TO ALL OF THE TERMS
OF THIS AGREEMENT BEFORE YOU WILL BE ALLOWED TO DOWNLOAD THE SOFTWARE PRODUCT. IF YOU
DO NOT AGREE TO ALL OF THE TERMS OF THIS AGREEMENT, YOU MUST SELECT "DECLINE" AND YOU
MUST NOT INSTALL, USE, OR COPY THE SOFTWARE PRODUCT.
License Grant 27
This Agreement entitles you to install and use one copy of the software Product. In addition, you may
make one archival copy of the Software Product. The archival copy must be on a storage medium other
than a hard drive and may only be used for the reinstallation of the Software Product. This Agreement
does not permit the installation or use of multiple copies of the Software Product, or the installation of
the software Product on more than one computer at any given time, on a system that allows shared
used of applications, on a multi-user network, or on any configuration or system of computers that
allows multiple users. Multiple copy use or installation is only allowed if you obtain an appropriate
licensing agreement for each user and each copy of the Software Product.
Page 31

Restrictions
Restrictions on Transfer - Without first obtaining the express written consent of P.I.T., you may not
assign your rights and obligations under this Agreement, or redistribute, encumber, sell, rent, lease,
sublicense, or otherwise transfer your rights to the Software Product.
Restrictions on Use - You may not use, copy, or install the Software Product on any system with more
than one computer, or permit the use, copying, or installation of the Software Product by more than one
user or on more than one computer. If you hold multiple, validly licensed copies, you may not use, copy,
or install the Software Product on any system with more than the number of computers permitted by
license, or permit the use, copying, or installation by more users, or on more computers than the
number permitted by license. You may not decompile, "reverse-engineer", disassemble, or otherwise
attempt to derive the source code for the Software Product.
Restrictions on Alteration - You may not modify the Software Product or create any derivative work of
the Software Product or its accompanying documentation. Derivative works include but are not limited
to translations. You may not alter any files or libraries in any portion of the Software Product.
Restrictions on Copying - You may not copy any part of the Software Product except to the extent that
licensed use inherently demands the creation of a temporary copy stored in computer memory and not
permanently affixed on storage medium. You may make one archival copy which must be stored on a
medium other than a computer hard drive.
Disclaimer of Warranties and Limitation of Liability
UNLESS OTHERWISE EXPLICITLY AGREED TO IN WRITING BY P.I.T., P.I.T. MAKES NO OTHER WARRANTIES,
EXPRESS OR IMPLIED, IN FACT OR IN LAW, INCLUDING, BUT NOT LIMITED TO, ANY IMPLIED
WARRANTIES OF MERCHANTABILITY OR FITNESS FOR A PARTICULAR PURPOSE OTHER THAN AS SET
FORTH IN THIS AGREEMENT OR IN THE LIMITED WARRANTY DOCUMENTS PROVIDED WITH THE
SOFTWARE PRODUCT. P.I.T. makes no warranty that the Software Product will meet your requirements
or operate under your specific conditions of use. P.I.T. makes no warranty that operation of the
Software Product will be secure, error free, or free from interruption. YOU MUST DETERMINE WHETHER
THE SOFTWARE PRODUCT SUFFICIENTLY MEETS YOUR REQUIREMENTS FOR SECURITY AND
UNINTERRUPTABILITY. YOU BEAR SOLE RESPONSIBILITY AND ALL LIABILITY FOR ANY LOSS INCURRED
DUE TO FAILURE OF THE SOFTWARE PRODUCT TO MEET YOUR REQUIREMENTS. P.I.T. WILL NOT, UNDER
ANY CIRCUMSTANCES, BE RESPONSIBLE OR LIABLE FOR THE LOSS OF DATA ON ANY COMPUTER OR
INFORMATION STORAGE DEVICE. UNDER NO CIRCUMSTANCES SHALL P.I.T., ITS DIRECTORS, OFFICERS,
EMPLOYEES OR AGENTS BE LIABLE TO YOU OR ANY OTHER PARTY FOR INDIRECT, CONSEQUENTIAL,
SPECIAL, INCIDENTAL, PUNITIVE, OR EXEMPLARY DAMAGES OF ANY KIND (INCLUDING LOST REVENUES
OR PROFITS OR LOSS OF BUSINESS) RESULTING FROM THIS AGREEMENT, OR FROM THE FURNISHING,
PERFORMANCE, INSTALLATION, OR USE OF THE SOFTWARE PRODUCT, WHETHER DUE TO A BREACH OF
CONTRACT, BREACH OF WARRANTY, OR THE NEGLIGENCE OF P.I.T. OR ANY OTHER PARTY, EVEN IF P.I.T.
IS ADVISED BEFOREHAND OF THE POSSIBILITY OF SUCH DAMAGES. TO THE EXTENT THAT THE
Page 32

APPLICABLE JURISDICTION LIMITS P.I.T.'S ABILITY TO DISCLAIM ANY IMPLIED WARRANTIES, THIS
DISCLAIMER SHALL BE EFFECTIVE TO THE MAXIMUM EXTENT PERMITTED.
Limitation of Remedies and Damages
Your remedy for a breach of this Agreement or of any warranty included in this Agreement is the
correction or replacement of the Software Product. Selection of whether to correct or replace shall be
solely at the discretion of P.I.T. P.I.T. reserves the right to substitute a functionally equivalent copy of
the Software Product as a replacement. If P.I.T. is unable to provide a replacement or substitute
Software Product or corrections to the Software Product, your sole alternate remedy shall be a refund of
the purchase price for the Software Product exclusive of any costs for shipping and handling. Any claim
must be made within the applicable warranty period. All warranties cover only defects arising under
normal use and do not include malfunctions or failure resulting from misuse, abuse, neglect, alteration,
problems with electrical power, acts of nature, unusual temperatures or humidity, improper installation,
or damage determined by P.I.T. to have been caused by you. All limited warranties on the Software
Product are granted only to you and are non-transferable. You agree to indemnify and hold P.I.T.
harmless from all claims, judgments, liabilities, expenses, or costs arising from your breach of this
Agreement and/or acts or omissions.
Governing Law, Jurisdiction and Costs
This Agreement is governed by the laws of California, without regard to California's conflict or choice of
law provisions.
Severability
If any provision of this Agreement shall be held to be invalid or unenforceable, the remainder of this
Agreement shall remain in full force and effect. To the extent any express or implied restrictions are not
permitted by applicable laws, these express or implied restrictions shall remain in force and effect to the
maximum extent permitted by such applicable laws.
 Loading...