

Houzer ISL3322BS31 Installation Manual
Topmount Sinks
General Recommendations:
Please
Read installation and maintenance instruction thoroughly.
Be sure to use proper tools and always were personal safety devices for your protection
Warranty
HOUZER stainless steel sinks are produced to highest manufacturing standards using premium grade
type-304 stainless steel and are covered by a limited lifetime warranty.
Carefully follow the step-by-step installation instructions.
That way you’ll ensure compleat satisfation and protect your warranty.
Long-Life care
HOUZER Stainless Steel Sinks are easy to keep new looking, longer, with minimal care. For the best
results, always rinse with a mild soap and wipe dry after each use. Rub lightly with soft cloth indirection
of grain line on a regular basis. To avoid damage to sink surface and discolorlation, never use a steel wool
or scouring pad.
Tools and Materials needed:
Tape Measure Framing Square Eye Protection
Hacksaw/Jigsaw Ear Protection Silicone Adhesive Sealant
Rags Shims Wood Braces
Pencil (NOT ink) Denatured Alcohol
Be sure to use proper tools and always wear personal safety devices for your protection.
1
Installation Instructions
Please carefully read complete instructions before beginning installation.
Note: These instructions are for installation with solid surface, composite material countertops.
Houzer recommends professional countertop installers and is not responsible for damages to the
countertop or sink during installation.
1. Remove your new Enex sink from the carton. Use caution as sink edges may cause minor cuts.
Wear safety gloves for your protection.
2. Remove your old sink and check cutout opening of the counter top to be sure it is sized properly.
See cutout dimensions below and verify your new sink will fit to the opening by setting new sink
to the counter top temporarily. Cutout dimensions of all Enex sinks are as below.
Sink TypeSink Type
Single Bowl
Double Bowl
Mobil Home
Bar Sink
Overall SizeOverall Size
25” X 22”
33” X 22”
33” X 19”
15” X 15”
Cutout dimensionCutout dimension
24-3/8” X 21-3/8”
32-3/8” X 21-3/8”
32-3/8” X 18-3/8”
14-3/8” X 14-3/8”
3. If you are installing a sink to a new counter top please follow directions as shown.
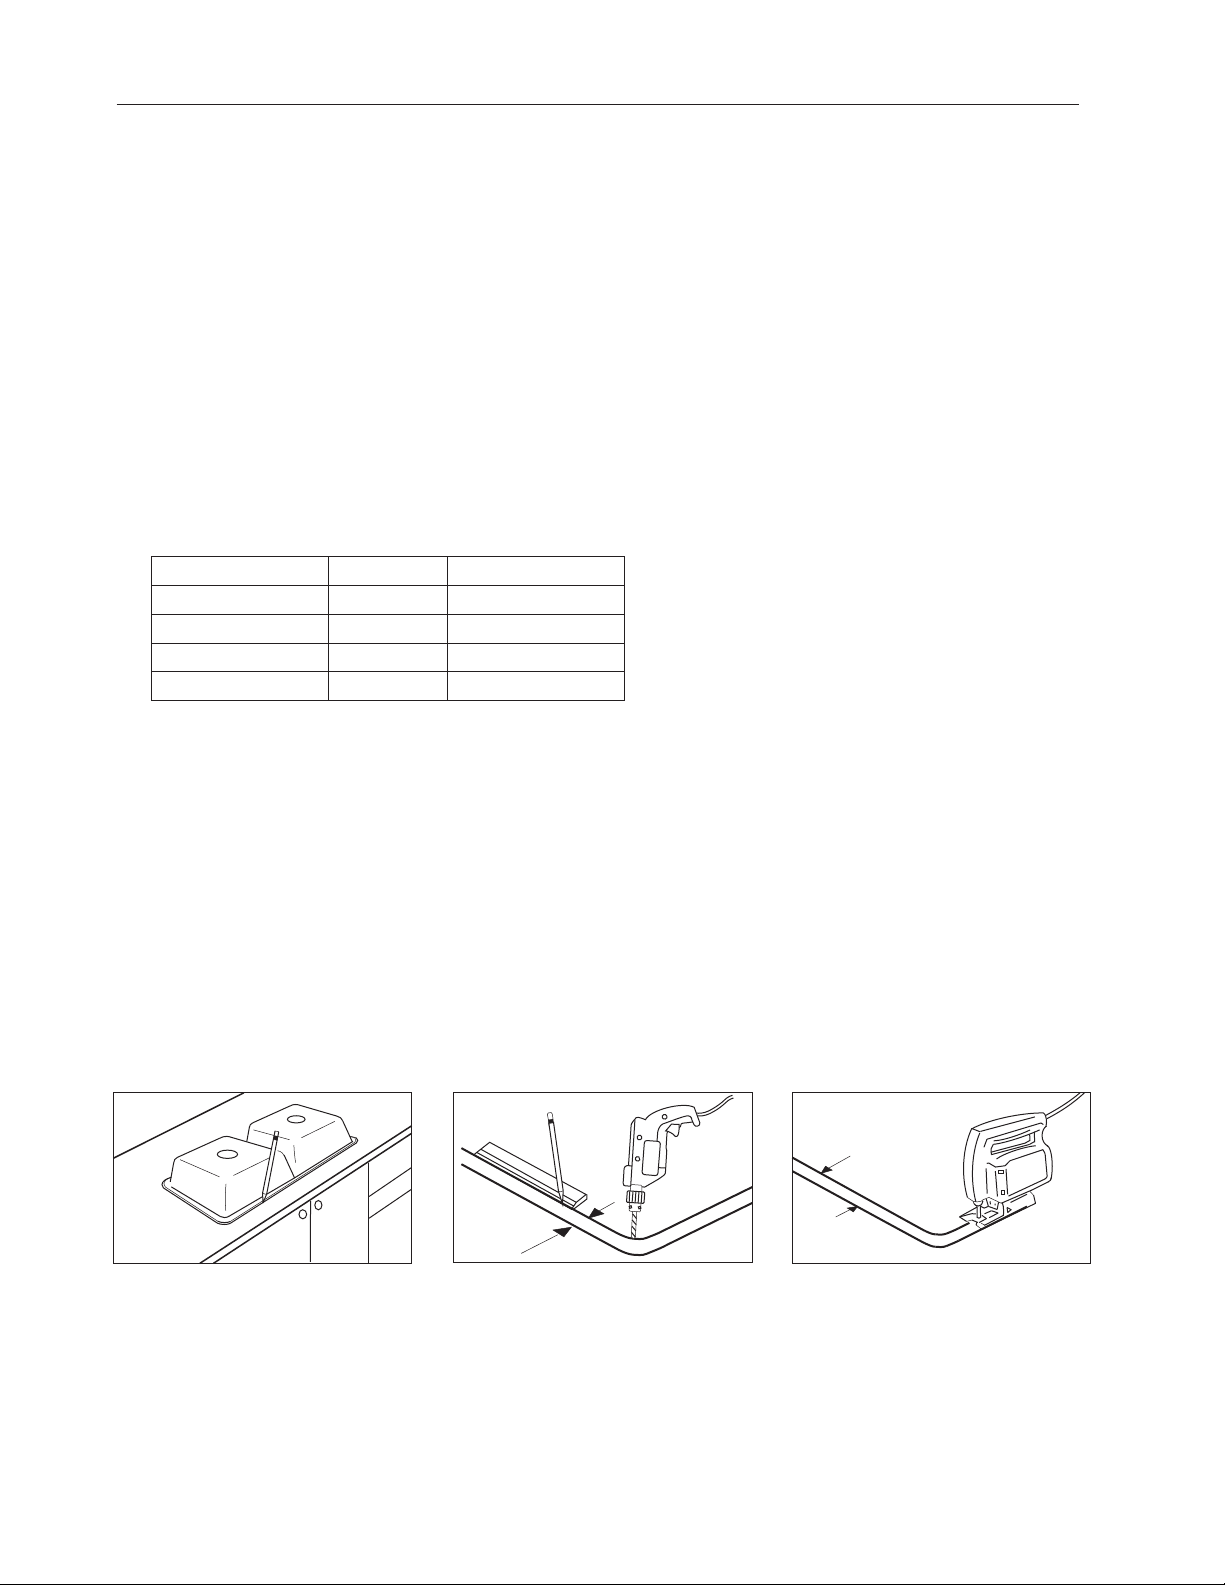
4. Place sink upside down on the counter top in desired position and trace completely outside sink rim using
soft lead pencil. (Figure 1)
Remove sink from counter top and draw cutout line 5/16” inside the original rim outside line with
5.
1-1/2” radius at corners. Drill hole at the inside corner of the cutout line. (Figure 2)
6.
Using a sabre saw, start cutting from the drilled hole along the cutout line. Support cutout until
the cut is completed. (Figure 3)
Cutout Line
5/16”
Figure 1
Apply caulking compound around the perimeter of the cutout opening
7.
Figure 2
Outside Line
Figure 3
8. Attach faucet and sink strainer as necessary. Follow installation instructions supplied with faucet.
2
 Loading...