

HouseWarmer HWFMC-72UH-1, HWFMS-48UO-1, HWFMS-48-1, HWMS-60UO-1, HWMS-60W-1 Installation Instructions Manual
...
INSTALLATION INSTRUCTIONS
12”
12” 12”
MANTEL
SURROUNDS AND
MANTEL SHELF
COMBO UNIT
HWFMC-72UH-1
SURROUNDS
HWFMS-48(UO,W)-1
MANTELSHELVES
HWMS-60(UO,W)-1
HWMS-72(UO,W)-1
INSTRUCTIONS MUST BE LEFT WITH OWNER FOR FUTURE REFERENCE AFTER INSTALLATION.
Recommended for use with most replaces from 32 to
42 inches wide and up to 38 inches tall. Reference your
replace manufacturer’s instructions for clearance to
combustible requirements.
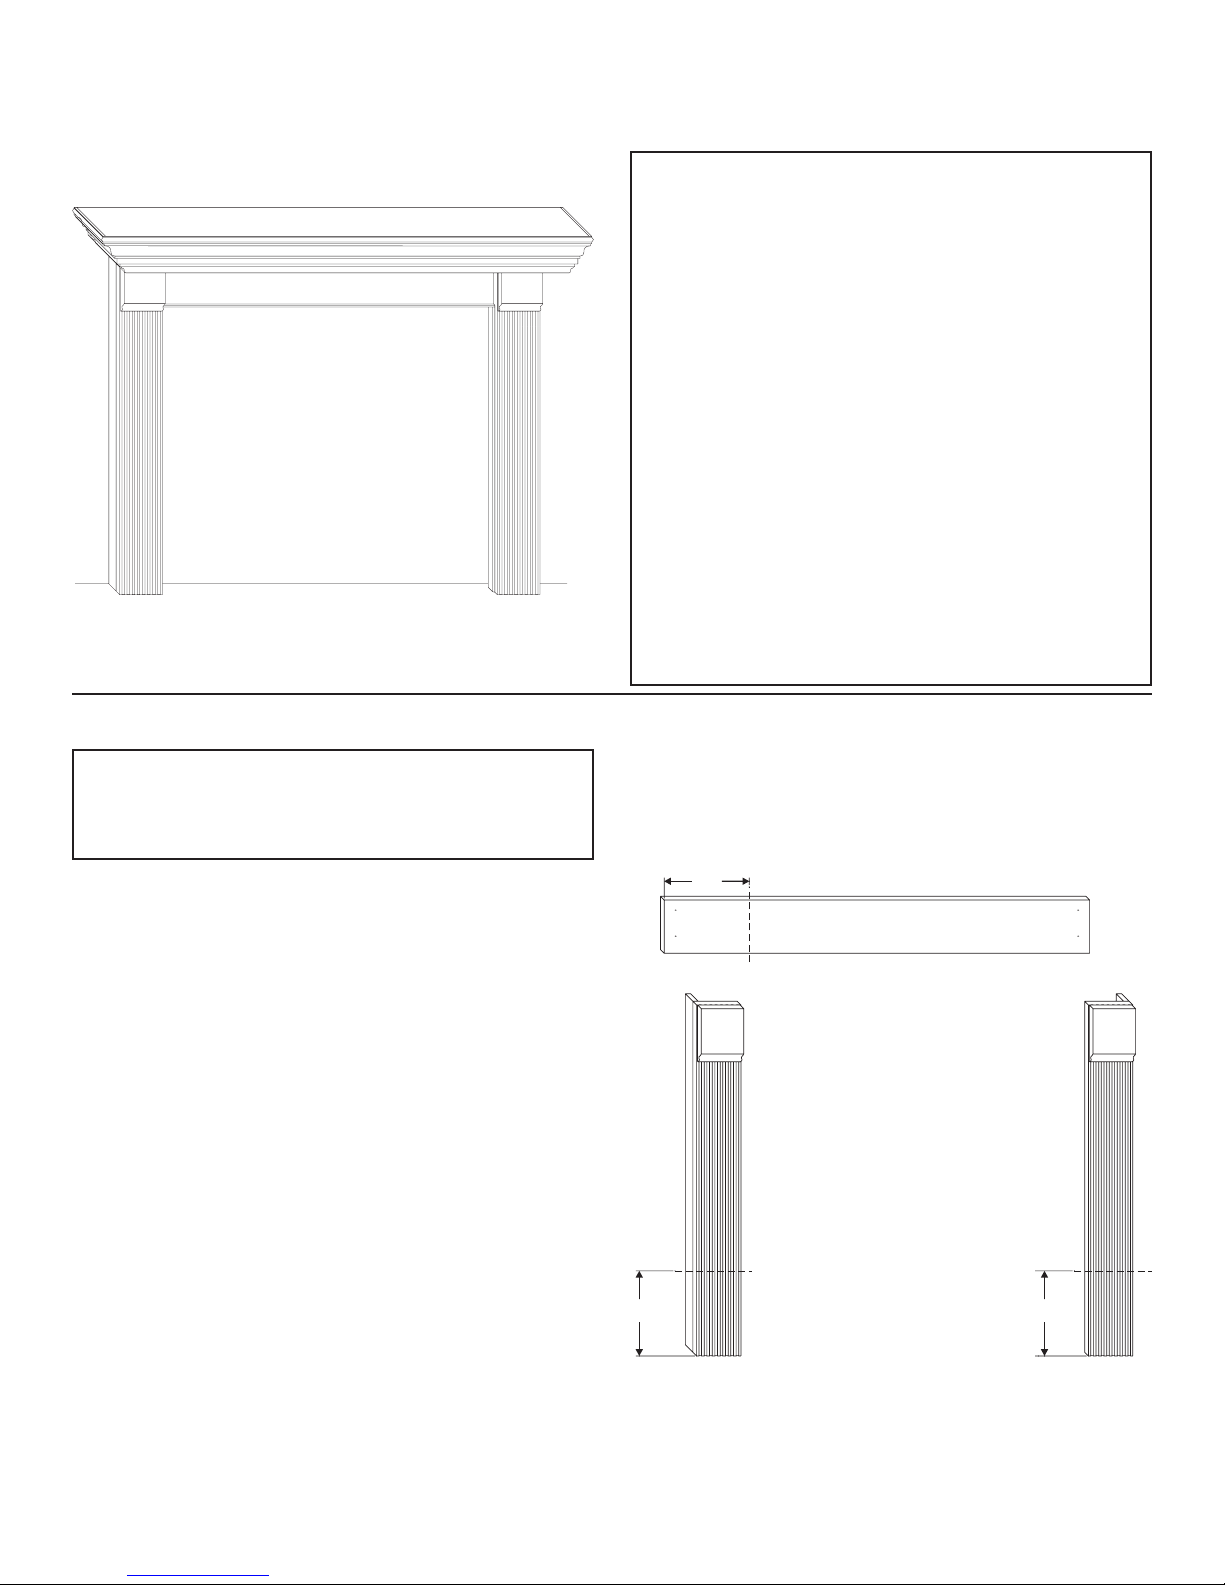
Mantel Modication Instructions
1. When modifying the surround (HWFMS48(UO,W)) to match
the HWMS60(UO,W) mantelshelves, the cuts shown in
Figure 1 give the best appearance. No modication is
necessary for the HWFMC72.
Figure 1
Note: Top and side trim will need to be cut to t these modi-
cations.
Page 1
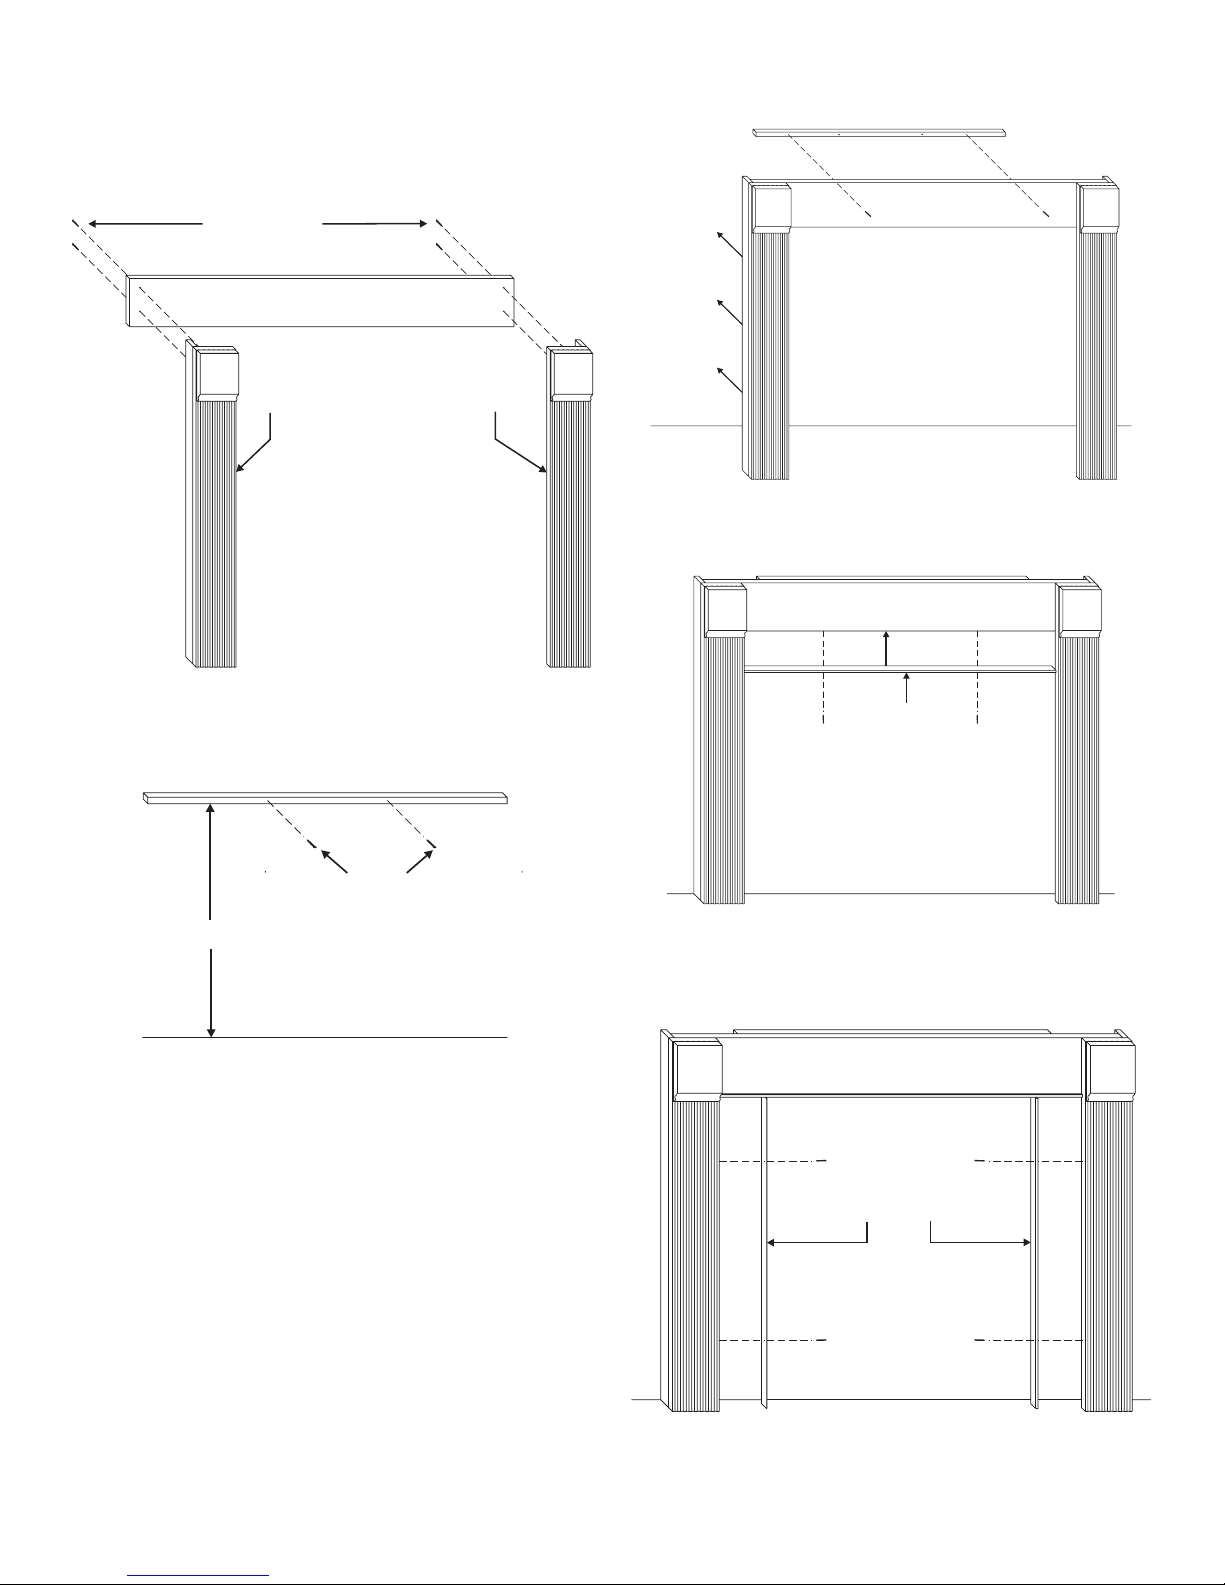
Mantel Installation Instructions
BREAST BOARD
LEFT SIDE
ASSEMBLY
RIGHT SIDE
ASSEMBLY
1-1/4” SCREWS
FLOOR
WALL CLEAT
49-1/2”
1-1/4” SCREWS
BREAST BOARD
TOP INSIDE
EDGE TRIM
INSIDE EDGE TRIM
1. Align and attach the breast board to the right and left side
assemblies. See Figure 2. Breast board ends should be at
against the inside edges of the side assemblies and ush at the
top of the side assemblies. Use of a square is recommended to
ensure a 90° installation.
3. Attach the surround assembly to the wall cleat using two
nishing nails through the breast board. See Figure 4.
Figure 4
4. Attach the top inside edge trim to the bottom of the breast
board using two nishing nails. See Figure 5.
Figure 2
2. Attach the 42” wall cleat 49-1/2” above the oor. Ensure that
the wall cleat is level. See Figure 3.
Figure 3
Figure 5
5. Attach the side inside edge trim to the left and right side
assemblies using two nishing nails on each side. See
Figure 6.
Figure 6
M10537-0-0710Page 2 Empire Comfort Systems Inc. • 918 Freeburg Avenue • Belleville, IL 62220
 Loading...