

Page 1
®
®
PORTABLE MAGNETIC DRILLS
OPERATORS MANUAL
HMD100
FOR USE WITH “17,000-SERIES” ROTABROACH CUTTERS
Page 2
HOUGEN® ROTABROACH
®
Portable Magnetic Drill
Model HMD100
Welcome to Hougen
Congratulations on your purchase of the Hougen® Rotabroach
Portable Magnetic Drill. Your model is designed to produce
superior holes quickly and efficiently. Through constant innovation
and development, Hougen is committed to provide you with holeproducing tools and products to help you be more productive.
Before attempting to operate your new Portable Magnetic Drill,
please read all instructions first. These include the Operator's
Manual and Warning Label on the unit itself. With proper use,
care, and maintenance, your model will provide you with years of
effective hole drilling performance. Once again, thank you for
selecting our product and welcome to Hougen.
®
INDEX
Contents Checklist
Important Safety Instructions
Review of Controls
“17,000-Series” Cutter Installation
Operating Instructions
Control Panel Diagram
Hookup Diagram
Drill Parts Diagram
Parts List
○○○○○○○○○○○○○○○○○○○○○○○○○○○○○○○○○○○○○○○○○○○○○○○○○○○○○
Other Hougen Products
Motor Diagram and Parts List
Limited Warranty
Factory Authorized Warranty Repair Centers. . . . .
○○○○○○○○○○○○○○○○○○○○○○○○○○○○○○○○○○○○○○○○○○○○○○○○
○○○○○○○○○○○○○○○○○○○○○○○○○○○○○○○○○○○○○○○○○○
○○○○○○○○○○○○○○○○○○○○○○○○○○○○○○○○○○○○○○○○○○○○○○○
○○○○○○○○○○○○○○○○○○○○○○○○○○○○○○○○○○○○○○○
○○○○○○○○○○○○○○○○○○○○○○○○○○○○○○○○○○○○○○○○○○○○○○
○○○○○○○○○○○○○○○○○○○○○○○○○○○○○○○○○○○○○○○○○○○○○
○○○○○○○○○○○○○○○○○○○○○○○○○○○○○○○○○○○○○○○○○○○○○○○○○
○○○○○○○○○○○○○○○○○○○○○○○○○○○○○○○○○○○○○○○○○○○○○○○
○○○○○○○○○○○○○○○○○○○○○○○○○○○○○○○○○○○○○○○○○○○○○
○○○○○○○○○○○○○○○○○○○○○○○○○○○○○○○○○○○○○○○○○○
○○○○○○○○○○○○○○○○○○○○○○○○○○○○○○○○○○○○○○○○○○○○○○○○○
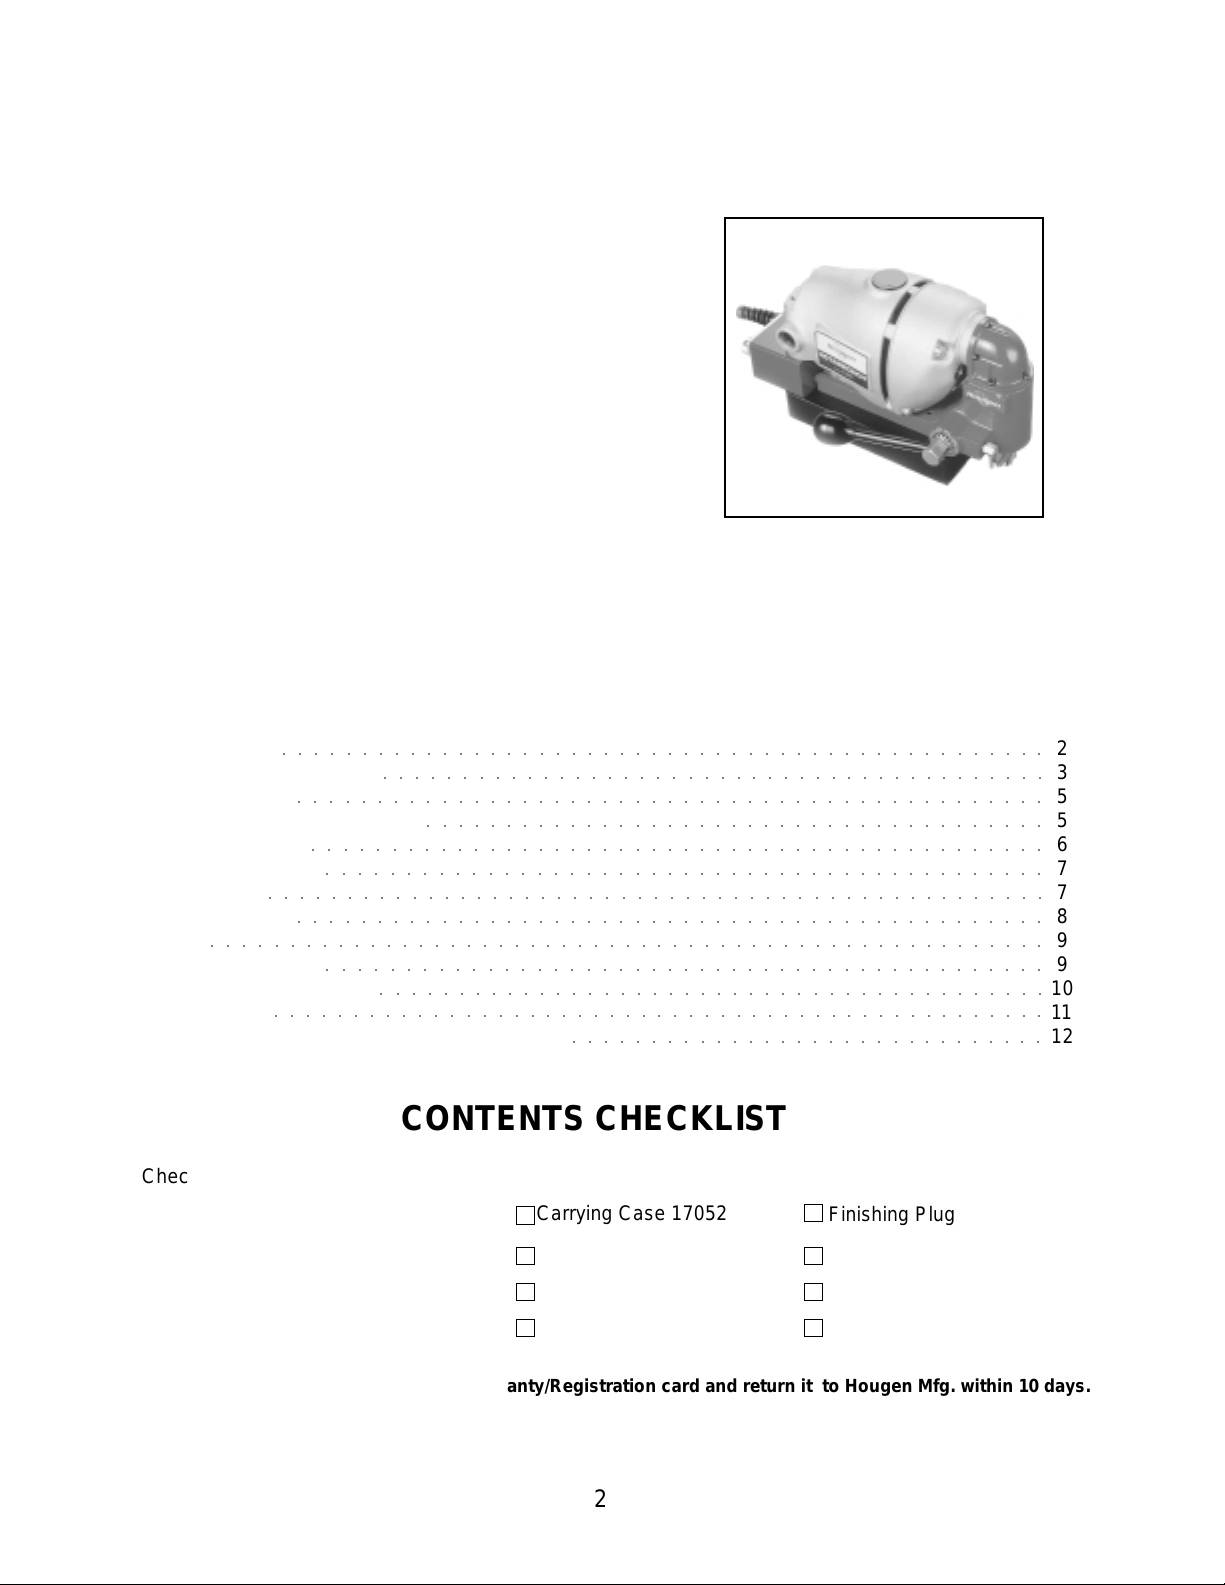
CONTENTS CHECKLIST
Check the contents of the carrying
case to be sure the following items
are included with your new Magnetic
Drill.
Carrying Case 17052
Safety Strap 17059
○○○○○○○○○○○○○○○○○○○○○○○○○○○○○○
Finishing Plug
Stick Lubricant 11746
2
3
5
5
6
7
7
8
9
9
10
11
12
Cutting Fluid Pint 11741
Feed Handle/knob 17071 (2)
Operator’s Manual 17061 Warranty/Registration card*
* Please take the time NOW to fill out your Warranty/Registration card and return it to Hougen Mfg. within 10 days.
2
Page 3
Important Safety Instructions
1. Read All Instructions
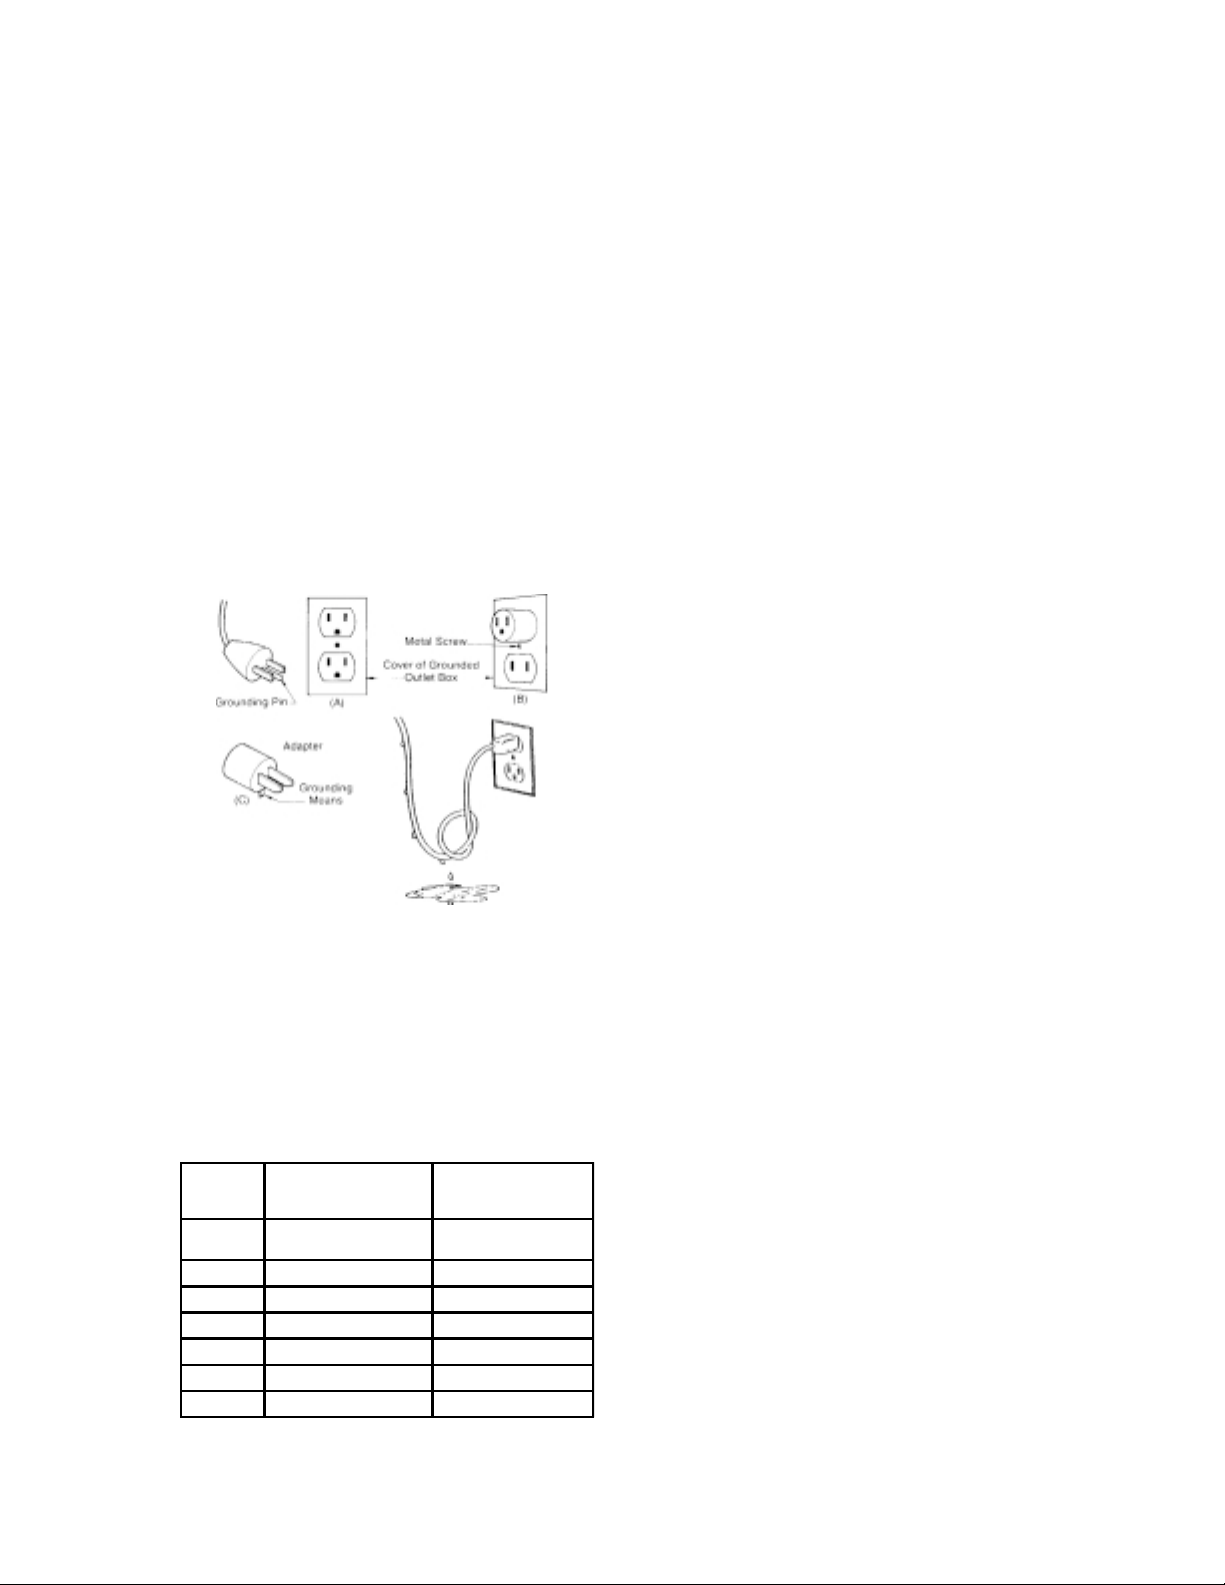
2. Grounding Instructions
This tool should be grounded while in use to protect the
operator from electric shock. The tool is equipped with
a 3-conductor cord and a 3-prong grounding type plug
to fit the proper grounding type receptacle. The green
(or green and yellow) conductor in the cord is the
grounding wire. Never connect the green (or green and
yellow) wire to a live terminal. Your unit is for use on
115V, and has a plug that looks like that shown in sketch
(A). An adapter, see sketches (B) and (C), is available
for connecting sketch (A) type plugs to 2-prong recep
tacles. The green-colored rigid ear, lug, or the like,
extending from the adapter must be connected to a
permanent ground, such as a properly grounded outlet
box.
Note: Use of a grounding adapter is prohibited in
Canada by Part I of the Canadian Electrical Code.
4. Extension Cords
Use only 3-wire extension cords that have 3-prong
grounding type plugs and 3-pole receptacles that
accept the tool's plug. Replace or repair damaged
cords. Make sure the conductor size is large enough
to prevent excessive voltage drop which will cause
loss of power and possible motor damage.
5. Do Not Force Tool
It will do the job better and faster at the rate for which
it was intended.
6. Keep Work Area Clean
Cluttered areas and benches invite injuries.
Keep dirt and chips from under magnet and
Rotabroach Cutter area. Do not attach magnet to
surfaces where paint is thick or peeling.
7. Consider Work Area Environment
Do not expose tool to rain.
Do not use tool in damp or wet locations.
Keep work area well lit.
Do not use tool in presence of flammable liquids or
gases. Disconnect from power source when changing
cutters or maintaining drill.
8. Guard Against Electric Shock
Prevent body contact with grounded surfaces. For
example: pipes, radiators, ranges, refrigerator
enclosures.
3. Safe Electrical Connection
Your HMD100 is rated for use on 120VAC at 50-60Hz.
Do not attempt to use drill on power sources rated other
than this. Wet electrical connections are shock hazards.
To prevent the cutting fluid from traveling along the cord
and contacting the plug or power outlet, tie a drip loop
as shown above. Also elevate extension cords or gang
box connections.
Length
of Cord,
Feet
Up to 25 16 18
26-50 14 18
51 -100 10 16
101-2 00 8 14
201-3 00 6 12
301-5 00 4 10
Recommended Wire
Gauge
115V M o t or
10-12 Amps
Recommended
Wire Gauge
230V Motor
5-6 Am ps
9. Keep Children Away
Do not let visitors contact tool. All visitors should be
kept away from work area while in use.
10. Store Idle Tools
When not in use, tools should be stored in a dry, and
high or locked-up place — out of reach of children.
11. Use Right Tool
Do not force small tool or attachment to do the job
of a heavy duty tool.
Do not use tool for purpose not intended — for
example — do not use a circular saw for cutting tree
limbs or logs.
12. Secure Work
Use clamps or a vise to hold work. It is safer than
using your hand and it frees both hands to operate
tool.
13. Always Wear Safety Glasses or Goggles
14. Dress Properly
Do not wear loose clothing or jewelry. They might
entangle with spinning chips or get caught in moving
parts. Rubber gloves and non-skid footwear are
recommended when working outdoors. Wear sturdy
leather gloves when working indoors.
Wear protective hair covering to contain long hair.
3
Page 4

Important Safety Instructions
(Continued)
15. Do Not Abuse Cord
Never carry drill unit by its cord or yank it to disconnect from receptacle.
Keep cord away from heat, oil, and sharp edges.
16. Do Not Overreach
Keep proper footing and balance at all time.
17. Maintain Tools With Care
Keep tools sharp and clean for better and safer
performance.
Do not use dull or broken Rotabroach Cutters.
Follow instructions for lubricating and changing
accessories.
Inspect tool cords periodically and, if damaged,
have repaired by authorized service facility.
Inspect extension cords periodically and, if
damaged, have repaired by authorized service
facility.
Keep handles dry, clean, and free from oil and
grease.
18. Disconnect Tools
Disconnect when not in use, before servicing, and
when changing Rotabroach Cutters or accessories.
19. Remove Adjusting Keys and Wrenches
Form a habit of checking to see that keys and
wrenches are removed from tool before turning it
on.
20. Check Damaged Parts
Before further use of the drill, a part that is
damaged should be carefully checked to determine
that it willoperate properly and perform its intended
function.
Check for alignment of moving parts, binding of
moving parts, breakage of parts, mounting, and any
other conditions that may affect its operation. A
part that is damaged should be properly repaired or
replaced by an authorized service center unless
otherwise indicated elsewhere in this operator
manual. Do not operate tool if switch does not turn
it on and off.
21.Stay Alert
Watch what you are doing.
Use common sense.
Do not operate tool when you are tired.
Have defective switches replaced by authorized
service center.
22. Outdoor Use Extension Cords
When tool is used outdoors, use only extension
cords intended for use outdoors and so marked.
23. Additional Safety Precautions
Arbor and cutter should never be used as a handhold. Keep hands and clothing away from all moving
parts. Do not use Rotabroach Cutters where ejected slug
might cause injury (slug ejected at end of cut).
Also, adhere to all operating instructions. Do not drill
through any surface that may contain live electrical
wiring. Drilling into a live wire could cause exposed metal
parts of the drill to be made live. Remove chips wrapped
around Rotabroach Cutter and arbor after each hole.
With motor off and power disconnected, grasp chips with
leather gloved hand or pliers and pull while rotating
counterclockwise. Should the cutter become jammed in
the work, stop the unit immediately to prevent personal
injury. Disconnect the drill from the power supply and
loosen jammed cutter by turning the arbor counterclock
wise. Never attempt to free the jammed cutter by starting
the motor. Service at authorized repair center only.
24. Non-Conforming Cutting Tools
Your Magnetic Drill is designed to use Hougen
Rotabroach Cutters. The use of drilling tools having
different shank styles is not recommended as they may
not tighten securely in the drill arbor with risk of accident or injury.
25. Operating Near Welding Equipment
When operating your Magnetic Drill near an arc welder,
it is important that they are connected to the same Earth
Ground. If they are not, severe damage to the unit,
particularly the power cord, could occur. This could
also result in personal injury to the operator.
26. Notice
This unit is an Industrial Portable tool and is not designed
for production. If this product is used as a production unit,
internal gear failure could occur and cause serious
damage.
27. Circuit Breaker
Changing of the circuit breaker to a higher amp rated
breaker, or by-passing the circuit breaker is not
recommended and is cause for cancelation of the
product warranty.
28. Circuit Breaker Operation
The circuit breaker is a thermal circuit breaker. When it
reaches the higher temperature rating it will trip and cause
the unit to shut down. This is a protection device and can
be reset after 5 to 10 seconds of cool down period. To
reset the circuit breaker, press the breaker button back in.
If it does not reset, let the unit cool a little longer until you
can push the button in and it stays in position.
4
Page 5

Review of Controls
Magnet On/Off
Feed Handle
Motor On/Off
Circuit Breaker
Feed Lock/Release
(pull & turn)
“17,000-Series” Cutter Installation
1. Disconnect machine from power source.
2. Insert pilot into cutter.
3. Align flat on shank with pin in spindle.
4. Insert cutter into spindle.
5. Give cutter 1/4 turn in opposite direction of flutes.
5
Page 6

Operating Instructions
Place drill on material and locate for drilling hole.
Press magnet switch to “ON”
CAUTION: Do not over-feed cutter. Excessive feed
pressure may cause the magnet to break free from
material.
Thread safety strap through opening between
motor and drill housing. Ensure that strap does not
interfere with operation of feed handles.
Insert tab of strap into buckle. Cinch strap tight to
material and drill housing. Check for slack and
adjust as needed.
17,000 FEATURES AND DESCRIPTION:
Second layer penetration may be difficult. Slight
additional feed pressure may be required (avoid
over-feed as note above).
If unable to penetrate second layer, withdraw cutter
from material ejecting slug and clean away any
remaining chips. Feed cutter in hole and continue
cut.
Release motor switch when cut is finished.
Fully retract cutter from material, ejecting the slug.
Engage feed lock/release.
Remove safety strap.
Turn magnet switch to “OFF” position.
CAUTION: Retain firm hold on drill to prevent
dropping.
Cutter I.D. may collect chips, restricting depth of cut.
Cutter should be frequently inspected and any chips
or debris removed.
CAUTION:
• Keep strap clear of cutting area, chips, and
rough edges on material.
• Inspect strap periodically for fraying and
damage. Do not use a damaged safety strap.
Apply liberal amount of cutting fluid or stick lubricant to cutter. Additional lubrication may be needed
to complete cut.
Disengage feed lock/release.
Press and hold motor switch. (Note: Switch must
be held in “ON” position while cutting)
Feed Rotabroach Cutter slowly into workpiece.
Only after cutting path is established to a depth of
about 1/16" can additional force be applied to
feed handles.
OPTIONAL FEED METHODS:
• 5/8” Box Wrench
• Ratchet with 5/8” Socket (shown below)
• NO PLIERS OR OPEN END WRENCH (will damage
threaded feed handle mounting holes)
Ease up on feed pressure as cutter starts breaking
through.
6
Page 7

Control Panel /Hookup Diagram
7
Page 8

HMD100 Drill Parts Diagram
8
Page 9

HMD100 Parts List
Part No. Description Qty.
01226 SWITCH GUARD 1
01833 ROCKER SWITCH 1
01989 1/4-28 X 3/4 SHCS 2
17002 SCR-SHC #6-32 X 1/2 SHCS 3
17003 LH SPIRAL MITER GEAR 1
17006 SPLINE SHAFT 1
17009 SCR-SHC #8-32 X 1/2 SHCS 3
17010 BALL BEARING 1
1 7 011 RETA INING RING 1
17013 HOUSING 1
17015 1/4-28 X 1/2 FHSCS 1
1 7 017 NYLON THRUS T WA SHE R 2
1 7 018 STEEL THRUS T WA SHER 2
1 7 019 RETA INING RING 2
17022 FEED GE AR 1
17023 SNAP RING 1
17027 MOTOR ASSEMBLY 1
17029 MAGNET ASSEMBLY 1
17030 3/32 X 3/32 X 5/8 KEY 1
17031 FACEPLATE 1
17032 SCREW 1
17034 POWER CORD ASSEMBLY 1
17035 SWITCH-MOMENTARY 1
17037 C ONTROL PANEL ASSE MBLY 1
17039 SPRING PLUNGER 1
17042 E LECTRICAL BOX 1
17045 FINISHING PLUG 1
17048 RECTIFIER ASSEMBLY 1
1 7 049 JUMPER- M O T O R SWITC H 1
17050 JUMPER-MAGNET SWITCH 1
17060 CIRCUIT BREAKER 1
17065 DOWEL PIN 1
17068 RH SPIRAL MITER GEAR ASSEMBLY 1
17069 QUILL ASSEMBLY 1
17070 ARBOR ASSEMBLY 1
17071 FEED HANDLE ASSEMBLY 2
17072 GEA R BOX CAP ASSEMBLY 1
40108 1/4-20 X 1-1/4 SHCS 4
40374 NUT 1
41042 8-32 X 3/8 BHCS 4
50035 1/4 LOCK WASHER 2
90077 1 0-32 X 1/2 BHCS 4
Hougen Holemaking Products
“17,000-Series” Rotabroach
Cutters for HMD100”
The “17,000-Series” Rotabroach
Annular cutters are made specifically
for the HMD100. They are equipped
with a tool-less quick release shank,
and can drill up to 3/4" deep in single or
stacked plate. They are made of
premium high speed steel and available
in diameters from 5/8" to 1-1/16".
*** NEW ***
“17,000” Series Cutter Kit Hougen part number 17001”
Kit includes all 10 cutters listed plus 2
pilots all in a handy case. Contact your
local distributor for pricing
Part No. Diameter
17116 1/2"
17118 9/ 16"
17120 5/8"
17122 11/16"
17124 3/4"
17126 13/16"
17128 7/8"
17130 15/16"
17132 1"
17134 1-1/16"
9
Page 10

Motor Diagram and Parts List
Item
Part No. Description Qty.
No.
1 BD -144266-00 Field Ca se 1 19 10995 B rush Assy. (pai r) 1
2 BD-445786-31 Armature 1 20 BD-376 Set Screw 2
3 BD-400322-71 Field 1 21 BD-40 0718 Nylon Ba ll 2
4 BD-12158 Screw & Washer 2 22 BD-46210 Brush Holder Plug 2
6 BD-133410 Fan 1 23 BD-61 208-03 Brush Holder 2
8 B D-51404-03 Gear Case Cover 1 24 BD-46212 Brush Lead Terminal 2
9 BD-143691-00 Gasket 1 25 BD-330003-04 Ball Bearing 1
10 BD-135937 Needle Bearing 1 26 BD-132332 Bearing Sleeve 1
11 BD-700964 Ball Bearing 2 28 BD-21235 Brush Cover 1
12 BD-212 46 Needle B eari ng 4 30 BD-5 1407 Fiber Washer 4
13 04370 Gear Case 1 31 BD-51405 1st. Inter Gear Assy. 1
14 BD-400147 Spindle Gear 1 32 BD-49082 1st.133410 Inter Gear 1
15 BD - 7027 Key 1 33 BD -51401 1st. Inter P ini o n 1
16 BD-133316-01 Spindle 1 34 BD-51406 2nd. Inter Gear Assy. 1
17 B D-990 2 2-02 Retain ing Ring 1 35 BD-21822 2nd. Inte r Gear 1
18 10992 Washer 1 36 BD-51402 2nd. Inter Pinion 1
Item
Part No. Description Qty.
No.
10
Page 11

Hougen Holemaking Products
Rotabroach Portable Magnetic Drills
Rotabroach®.. the Work Anywhere Portable Magnetic Drills. No matter what you do -fabricate, install, maintain, repair,
retrofit, or manufacture, Hougen Rotabroach Portable Magnetic Drills put superior holemaking capabilities in your
hands. On-site, at-the-work drilling that’s easier, faster, and safer, wherever electrical power is available.
A series of twelve models lets you custom match power and features to your specific application needs. You can choose
from economical light duty models for drilling holes up to 1-3/8" diameter and 2" depth of cut, while others have the
might to produce 3-1/16" holes thru 3" thick material. Some with power feed, some with multi-speed spindles. But all
have incomparable performance for fast drilling, maneuverability, and lightness, resulting in minimal operator fatigue,
fast setups, and improved productivity.
With Rotabroach Portable Magnetic Drills, you save time by no longer moving large, heavy structures to machines or
using hand-held drills that can be inaccurate and tiring.
Model Descriptio n
Max. Capacity
Dia. D epth
HMD100 Complete Drill w/Case 450 RPM Motor 115V 1-1/16" 3/4" "17,000"
Cutter
Series
*
10904 Complete Drill w/Case 450 RPM Motor 115V 1-3/8" 2"
HMD500 Complete Two-speed Drill w/Case 115V 2-3/8" 3"
10909 Complete Drill 350 RPM Motor 230V
10909S Complete Drill 350 RPM Motor 230V
"12,000"
10914 Complete Drill 350 RPM Motor 115V
2-1/16" 3"
10914S Complete Drill 350 RPM Motor 115V
10925 Power Feed 350 RPM Motor 115V
10926 Power Feed Drill 350 RP M Motor 230V
1 0915 Complet e Multi-speed Dr i ll 115 V
3-1/16" 3"
10916 Complete Multi-speed Drill 230V
* “17,000-Series” Rotabroach Cutters for use with HMD100 only.
"42,000" &
"43,000"
Commercial / Industrial Limited Warranty
Hougen Manufacturing, Incorporated warrants its Portable Magnetic Drills for one (1) year and its Electro-hydraulic
Hole Punchers and other products for ninety (90) days from date of purchase against defects due to faulty material
or workmanship and will repair or replace (at its option) without charge any items returned. This warranty is void if
the item has been damaged by accident or unreasonable use, neglect, improper service, or other causes not arising
out of defects in material or workmanship. No other expressed warranty is given or authorized. Hougen Manufacturing, Inc. disclaims any implied warranty of MERCHANTABILITY or FITNESS for any period beyond the expressed
warranty and shall not be liable for incidental or consequential damages. Some states do not allow exclusions of
incidental or consequential damages or limitation on how long an implied warranty lasts and, if the law of such a
state governs your purchase, the above exclusion and limitation may not apply to you. This warranty gives you
specific legal rights and you may also have other rights which vary from state to state.
To obtain warranty service, return the item(s), transportation prepaid, to your nearest Factory Authorized Repair
Center or to Hougen Manufacturing, Inc., 3001 Hougen Drive, Swartz Creek, Michigan 48473.
Hougen Drills (Rotabroach Cutters) are warranted against manufacturing defects only. Subject to Hougen Manufacturing inspection.
THIS WARRANTY IS IN LIEU OF ANY OTHER WARRANTY, EXPRESSED OR IMPLIED, INCLUDING ANY
11
Page 12

Factory Authorized W arranty Repair Centers
United States - East
A&A Industrial Supplies Inc.
251 Meacham Ave.
Elmont, NY 11003
(516) 437-0114
Awisco Repair Center
55-16 43rd Ave.
Maspeth, NY 11378
(718) 786-7788
Boyer Machinery Co.
2280 Wyandotte Road
Willow Grove, PA 19090
(215) 657-2242
Colony Hardware Supply Co.
15 Stiles Street
New Haven, CT 06512
(203) 466-5252
Hanes Supply Repair Center
10 Cairn Street
Rochester, NY 14609
(716) 826-2636
N.H. Bragg & Sons
90 Perry Road
Bangor, ME 04401
(207) 947-8611
Pennsylvania Tool Sales
and Service, Inc.
625 Bev Road
Youngstown, OH 44512
(330) 758-0845
Weld Tooling Corp.
3001 W. Carson Street
Pittsburgh, PA 15204
(412) 331-1776
West
ATS Repair Center
2400 West Directors Row
Salt Lake City, UT 84125
(801) 972-3182
Caltool Industrial Supply
470 Hester Street
San Leandro, CA 94577
(510) 729-0600
Kenbil Service Co.
2900 Adams St., B-15
Riverside, CA 92504
(909) 689-6633
Quimby Welding Repair
1603 Northwest 14th Ave.
Portland, OR 97209
(503) 221-1100
A.C.C. Machinery Co., Inc.
747 Grand Ave.
Phoenix, AZ 85007
(602) 258-7330
Southeast
Gardner Southeast Repair
807 Meroney Street
Chattanooga, TN 37405
(423) 756-4722
Mid-South Welding Supply
505 51st. Avenue
Meridian, MS 39307
(601) 483-9331
South
Allied Sales & Service Co.
1508 River Oaks Rd., West
Jefferson, LA 70123
(504) 734-9566
Wilbanks Repair Center
5532 S. 94th East Ave.
Tulsa, OK 74145
(918) 627-8445
Midwest
Ceekay Repair Center
5835 Manchester Ave.
St. Louis, MO 63110
(314) 644-3500
Miller Industrial Supply Co.
1695 N. 21st
Decatur, IL 62525
(217) 428-7787
Hougen Manufacturing, Inc.
3001 Hougen Drive
Swartz Creek, MI 48473
(810) 635-7111
Westbrook Engineering
23501 Mound Road
Warren, MI 48091
(810) 759-3100
Southwest
Arcmaster Repair Center
301 Woodrow Ave
Fort Worth, TX 76105
(817) 531-8101
Rex Supply Repair Center
3715 Harrisburg
Houston, TX 77003
(713) 222-2251
Canada
OK Power Tool
14740 115 Avenue
Edmonton, Alberta
Canada T5M 3B9
(403) 454-5111
Outiltech Orleans, Inc.
5695 Rue Rideau
Quebec, Quebec
Canada G2E 5V9
(418) 877-7776
Edward H. Pope, Ltd.
10 Imperial Court
Brampton, Ontario
Canada L6T 4X4
(905) 458-4800
Power Tool Clinic
19835-56 Ave
Langley, B.C.
Canada V3A 3V1
(604) 530-3550
O.T.I. Repair Center Inc
195 Rue Henry Bessemer
Bois Des Filion
Quebec Canada J6Z 4S9
(450) 965-2224
®
Hougen Manufacturing, Inc.
P.O. Box 2005 • Flint, MI 48501-2005
3001 Hougen Drive • Swartz Creek, MI 48473
Phone (810) 635-7111 • FAX (810) 635-8277
Email: hougenco@tir.com
Online: www.hougen.com
Form 17061 7/2001 1M
.
 Loading...