

Hotwheels PIYGWB95-20A5T, PIYGWB95-20A5R Instruction Manual
FOR PRODUCT SOLD IN USA • POUR LES PRODUITS VENDUS AUX ÉTATS-UNIS
This device complies with Part 15 of the FCC Rules.
Operation is subject to the following two conditions:
(1) This device may not cause harmful interference, and (2) this device must accept any interference received, including interference that
may cause undesired operation.
• This equipment has been tested and found to comply with the limits for a Class B digital device, pursuant to part 15 of the FCC rules.
These limits are designed to provide reasonable protection against harmful interference in a residential installation. This equipment
generates, uses and can radiate radio frequency energy and, if not installed and used in accordance with the instructions, may cause
harmful interference to radio communications. However, there is no guarantee that interference will not occur in a particular installation.
If this equipment does cause harmful interference to radio or television reception, which can be determined by turning the equipment off
and on, the user is encouraged to try to correct the interference by one or more of the following measures:
• Reorient or relocate the receiving antenna.
• Increase the separation between the equipment and receiver.
• Connect the equipment into an outlet on a circuit different from that to which the receiver is connected.
• Consult the dealer or an experienced radio/TV technician for help.
NOTE: Changes or modifications not expressly approved by the manufacturer responsible for compliance could void the user’s authority
to operate the equipment.
Cet appareil est conforme à l'article 15 de la réglementation de la FCC.
L'utilisation de ce dispositif est autorisée seulement aux deux conditions suivantes :
(1) il ne doit pas produire de brouillage nuisible, et (2) l'utilisateur du dispositif doit être prêt à accepter tout brouillage radioélectrique
reçu, même si ce brouillage est susceptible de compromettre le fonctionnement du dispositif.
• Cet appareil a été testé et jugé conforme aux limites de la classe B pour un appareil numérique en vertu de l'article 15 de la
réglementation de la FCC. Ces limites ont été instaurées pour fournir une protection raisonnable contre toute interférence nuisible dans
une installation résidentielle. Cet appareil génère, utilise et peut émettre de l'énergie radiofréquence. S'il n'est pas installé et utilisé
conformément aux instructions, il peut provoquer des interférences sur les communications radio. Cependant, il n'est pas garanti que
des interférences ne se produiront pas dans certaines installations. Si cet appareil cause des interférences à la réception radio ou
télévisée (ce qui peut être vérifié en éteignant l'appareil puis en le remettant sous tension), l'utilisateur peut tenter de les résoudre en
suivant une ou plusieurs des mesures ci-après :
• Réorienter ou déplacer l'antenne réceptrice.
• Augmenter l'espace entre l'appareil et le récepteur.
• Brancher l'appareil sur une prise de courant différente de celle sur laquelle le récepteur est branché.
• Pour obtenir de l'aide, contacter le vendeur ou un technicien radio/télévision expérimenté.
REMARQUE : Tout changement ou modification de cet appareil n'ayant pas été expressément approuvé par les parties responsables de
sa conformité peut entraîner l'annulation du droit d'exploitation de l'équipement par l'utilisateur.
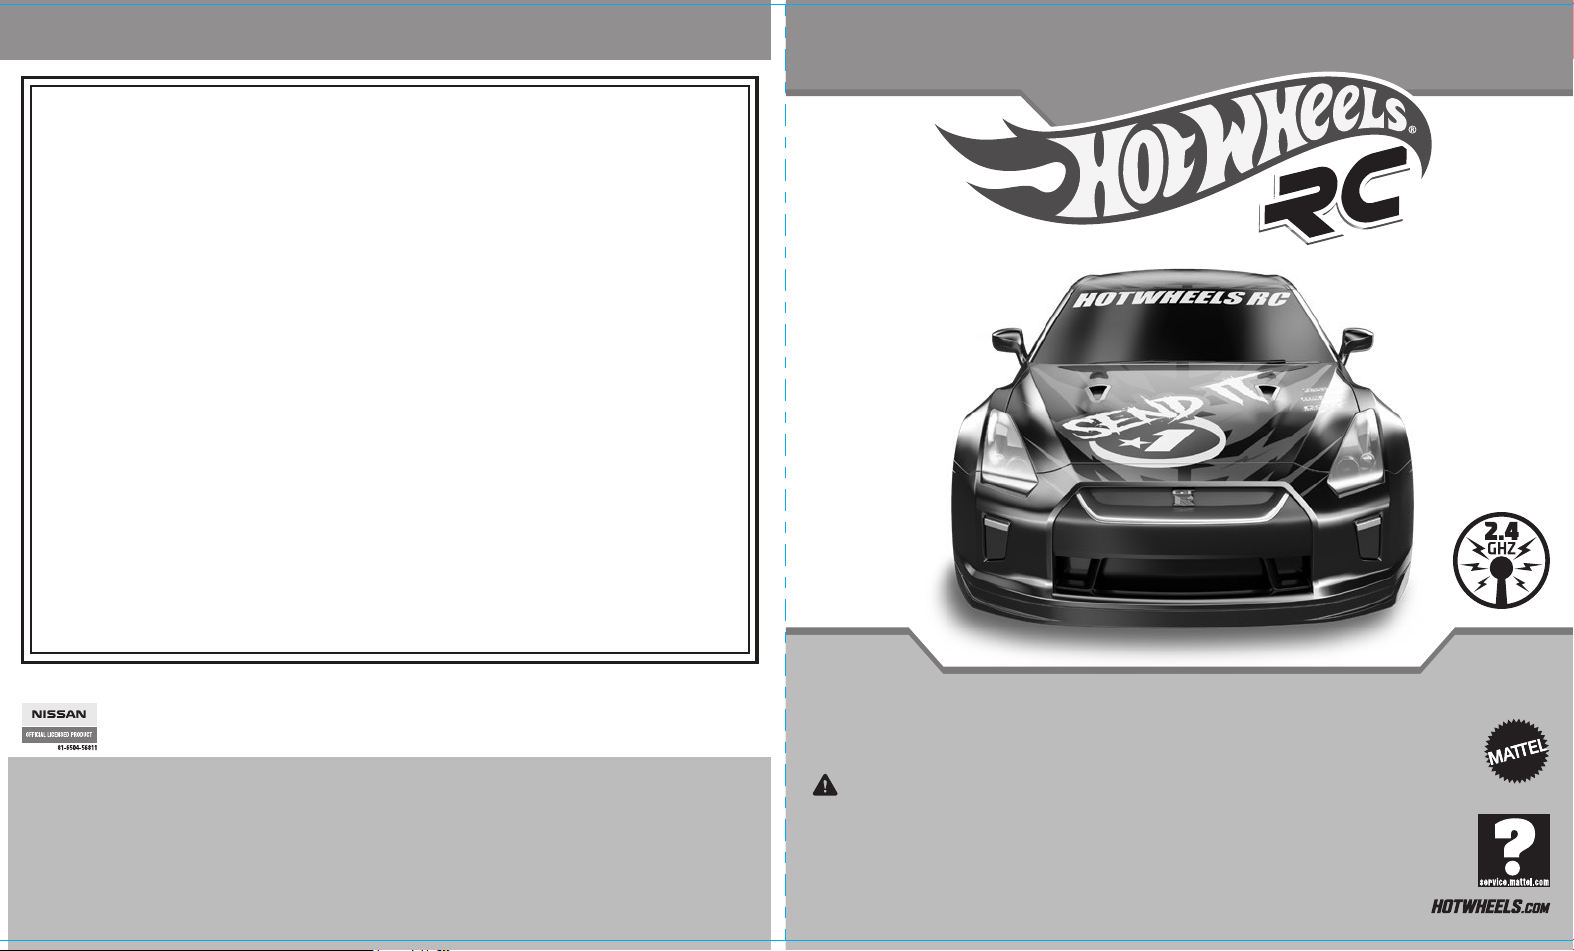
INSTRUCTIONS • INSTRUCCIONES • RÈGLES DE JEU • INSTRUÇÕES
TM
FCC ID: PIYGWB95-20A5T, PIYGWB95-20A5R
Nissan Motor Co., Ltd. trademarks, designs, copyrights and/or other intellectual property rights are used under license.
Les marques, designs, droits d'auteur et/ou autres droits de propriété intellectuelle de Nissan Motor Co., Ltd. sont utilisés sous licence.
©2020 Mattel. ® and ™ designate U.S. trademarks of Mattel, except as noted. ® et ™ désignent des marques de Mattel aux États-Unis, sauf indication contraire. Mattel, Inc., 636 Girard Avenue, East
Aurora, NY 14052, U.S.A. Consumer Services 1-800-524-8697. Mattel Canada Inc., Mississauga, Ontario L5R 3W2. You may call us free at / Composez sans frais le 1-800-524-8697. Mattel Australia
Pty. Ltd., 658 Church St., Richmond, Victoria, 3121. Consumer Advisory Service - 1300 135 312. Mattel East Asia Ltd., Room 503-09, North Tower, World Finance Centre, Harbour City, Tsimshatsui,
HK, China. Tel.: (852) 3185-6500. Diimport & Diedarkan Oleh: Mattel Continental Asia Sdn Bhd. Level 19, Tower 3, Avenue 7, No. 8 Jalan Kerinchi, Bangsar South, 59200 Kuala Lumpur, Malaysia.
Mattel South Africa (PTY) LTD, Office 102 I3, 30 Melrose Boulevard, Johannesburg 2196. Importado y distribuido por Mattel de México, S.A. de C.V., Miguel de Cervantes Saavedra No. 193, Pisos 10
y 11, Col. Granada, Alcaldía Miguel Hidalgo, C.P. 11520, México, Ciudad de México. R.F.C. MME-920701-NB3. Tels.: 59-05-51-00 Ext. 5206 ó 01-800-463-59-89. Mattel Chile, S.A., Avenida Américo
Vespucio 501-B, Quilicura, Santiago. Tel.: 1230-020-6213. Servicio al consumidor Venezuela: Tel.: 0-800-100-9123. Mattel Argentina, S.A., Av. Libertador 1000, Piso 11 – Oficinas 109 y 111, Vicente
López – Prov. Buenos Aires. Tel.: 0800-666-3373. Mattel Colombia, S.A., Calle 123#7-07 P.5, Bogotá. Tel.: 01800-710-2069. Mattel Perú, S.A., Av. Juan de Arona # 151, Centro Empresarial Juan de
Arona, Torre C, Piso 7, Oficina 704, San Isidro, Lima 27, Perú. RUC: 20425853865. Reg. Importador: 02350-12-JUE-DIGESA. Tel.: 0800-54744. E-mail Latinoamérica: Servicio.Clientes@Mattel.com.
Distribuído por : Mattel do Brasil Ltda.- CNPJ : 54.558.002/0001-20 - Rua Verbo Divino, 1488 - 2º. Andar - 04719-904 - Chácara Santo Antônio - São Paulo - SP - Brasil. Serviço de Atendimento ao
Consumidor: fone 0800-550780. E-mail: sac.matteldobrazil@mattel.com.
12111098
Keep these instructions for future reference as they contain important information. IMPORTANT: Please read all instructions before operating
your vehicle. • Leer y guardar estas instrucciones para futura referencia, ya que contienen información importante acerca de este producto.
IMPORTANTE: leer todas las instrucciones antes de usar el vehículo. • Conserver ce mode d'emploi pour s'y référer en cas de besoin car il
contient des informations importantes. IMPORTANT : Lire attentivement toutes les instructions avant d'utiliser le véhicule. • Guarde estas
instruções para futuras referências, pois contêm informações importantes. IMPORTANTE: Leia as intruções antes de operar o veículo.
CAUTION: • PRECAUCIÓN: • MISE EN GARDE : • ATENÇÃO:
Surfaces may become hot and cause burns if electronics get wet. To prevent entanglement, keep all hair away from moving parts. • Las
superficies se pueden calentar y causar quemaduras si las piezas electrónicas se mojan. Para evitar lesiones, mantener el cabello alejado de
las partes movibles. • Les surfaces peuvent devenir chaudes et causer des brûlures si les composants électroniques sont mouillés. Pour
prévenir tout risque d'enchevêtrement, tenir les cheveux éloignés des éléments mobiles. • As superfícies podem esquentar e gerar fogo se
os aparelhos eletrônicos ficarem molhados. Para evitar emaranhamento, mantenha os cabelos longe das peças.
Adult supervision is recommended when the vehicle is being operated. • Se recomienda la supervisión de un adulto mientras el vehículo está en uso.
La surveillance d'un adulte est recommandée lors de l'utilisation de ce véhicule. • Recomenda-se a supervisão de um adulto durante a operação do veículo.
5+
®
GWB72-4B70-4LB
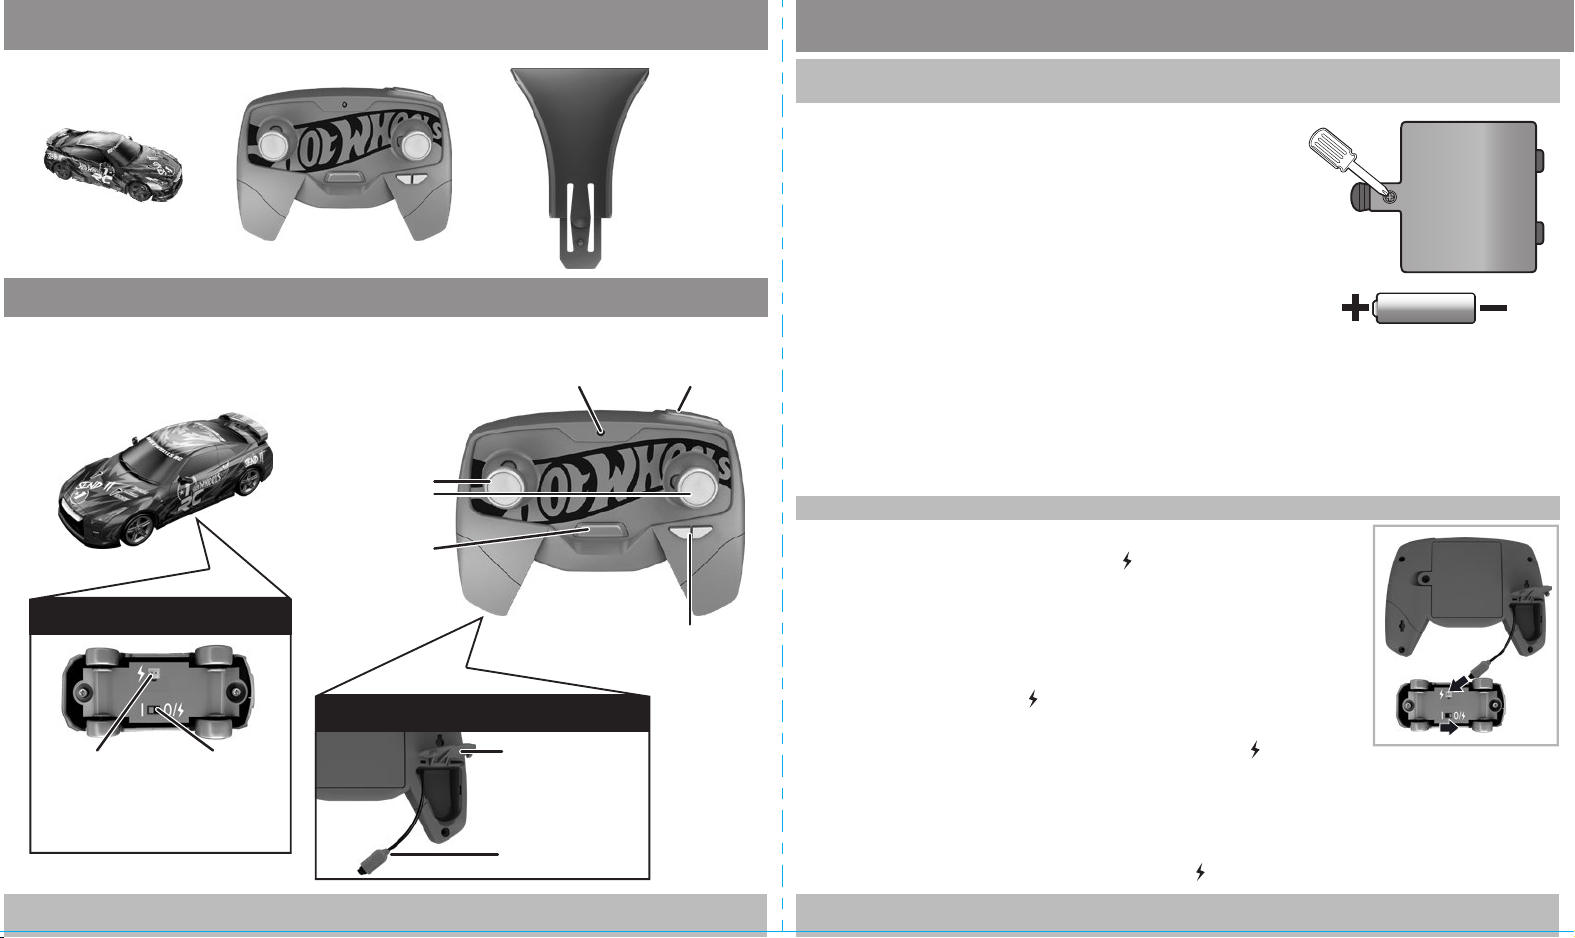
1: CONTENTS • CONTENIDO • CONTENU • CONTEÚDO 4: HOW TO DRIVE • CÓMO CONDUCIR • COMMENT CONDUIRE • COMO DIRIGIR3: SET UP • PREPARACIÓN • PRÉPARATION • PREPARAÇÃO
A. REMOTE CONTROLLER BATTERY INSTALLATION • COLOCACIÓN DE LAS PILAS DEL CONTROL REMOTO
INSTALLATION DES PILES DANS LA TÉLÉCOMMANDE • INSTALAÇÃO DAS PILHAS DO CONTROLE
1. Unscrew the battery cover with a Phillips head screwdriver (not included).
2. Install 4 AA (LR6) alkaline batteries (not included) with polarity (+/-) as shown inside the
battery compartment. For longer life, use alkaline batteries.
3. Replace battery cover and tighten screw.
4. Replace batteries in the remote controller if the LED on the remote controller does not go
on during a recharge or if the vehicle does not respond well after a recharge.
1. Desatornille la tapa del compartimento para pilas con un destornillador Phillips (no incluido).
2. Instale 4 pilas alcalinas AA (LR6) (no incluidas) con polaridad (+/-) como se muestra en el interior
del compartimento para pilas. Para una mayor vida útil, utilice pilas alcalinas.
3. Vuelva a colocar la tapa del compartimento para pilas y apriete el tornillo.
4. Remplaza las pilas del control remoto si la luz LED del control no se enciende durante la
2: FEATURES • CARACTERÍSTICAS • FONCTIONS • FUNÇÕES
LED INDICATOR
INDICADOR LED
VOYANT DEL
INDICADOR DE LED
BOUTONS ALIGNMENT (ALIGNEMENT)
CORD COVER
CUBIERTA PARA CABLE
CACHE-FIL
TAMPA DO CABO
CHARGE CORD
CABLE DE CARGA
CÂBLE DE RECHARGE
CABO DE CARREGAMENTO
BOTONES DE ALINEACIÓN
BOTÕES DE ALINHAMENTO
BOTTOM VIEW • VISTA DE ABAJO
VUE DE DESSOUS • VISÃO DA BASE
FPO
CHARGE PORT
PUERTO DE CARGA
PORT DE RECHARGE
PORTA DE
CARREGAMENTO
ON/OFF SWITCH
INTERRUPTOR DE
ENCENDIDO/APAGADO
INTERRUPTEUR
MARCHE/ARRÊT
BOTÃO LIGA/DESLIGA
DRIVING
CONTROLS
CONTROLES DE
CONDUCCIÓN
COMMANDES DE
CONDUITE
CONTROLES DE
DIREÇÃO
PAIRING/CHARGE BUTTON
BOTÓN DE CARGA
/EMPAREJAMIENTO
BOUTON DE JUMELAGE
/CHARGEMENT
BOTÃO DE
EMPARELHAMENTO
/CARREGAMENTO
BACK VIEW • VISTA DE ATRÁS
VUE ARRIÈRE • VISÃO DE TRÁS
BOOST BUTTON
BOTÓN DE ACELERACIÓN
BOUTON TURBO
BOTÃO DO ACELERADOR
ALIGNMENT BUTTONS
recarga o si el vehículo no responde bien después de una recarga.
1. Dévissez le couvercle de la batterie avec un tournevis cruciforme (non inclus).
2. Placez quatre piles alcalinesAA (LR6) (non incluses) avec la polarité (+/-) comme indiqué à
l’intérieur du compartiment des piles. Pour prolonger la durée de vie, utilisez des piles alcalines.
3. Replacez le couvercle du compartiment des piles et serrez la vis.
4. Remplacer les piles de la télécommande si le voyant à DEL de la télécommande ne s’allume pas pendant la recharge ou si le véhicule ne
répond pas après une recharge.
1. Desparafuse a tampa da bateria com uma chave Phillips (não incluída).
2. Insira 4 pilhas alcalinas AA (LR6) (não incluídas) com polaridade (+/-) conforme indicado no interior do compartimento de baterias. Para uma
vida útil maior, use pilhas alcalinas.
3. Reposicione a tampa da bateria e aperte o parafuso.
4. Substitua as pilhas do controle remoto se o LED do controle remoto não acender durante uma recarga ou se o veículo não responder bem
após uma recarga.
AA (LR6)
B. CHARGING THE VEHICLE • CARGAR EL VEHÍCULO • CHARGE DU VÉHICULE • COMO CARREGAR O VEÍCULO
The vehicle is powered by a permanently installed Lithium-ion (Li-ion) battery, and it must be fully
charged with the remote controller before first use.
1. Switch off the vehicle by sliding the power switch to OFF (O/ ).
2. Open the cord cover and plug the remote controller charge cord into the vehicle's charge port.
3. Press the charge button to begin charging the vehicle. A red LED will slowly flash on the remote controller
as the vehicle is charging.
4. The red LED will stop flashing but remain on for a while when the vehicle is fully charged. Unplug the charge
cord when charging is complete. A full charge will usually take approximately 20 minutes. Charging time
may vary.
5. Recharge the vehicle if the remote controller LED rapidly flashes then goes off during play or if the vehicle
begins to respond slowly.
NOTE: Power switch must be in the OFF (O/ ) position when charging the vehicle.
El vehículo recibe energía mediante una pila de ion de litio incorporada y se debe cargar completamente con el
control remoto antes de su primer uso.
1. Para apagar el vehículo, desliza el botón para encender a la posición de APAGADO (O/ ).
2. Abre la cubierta para cables y enchufa el cable de carga del control remoto en el puerto de carga del vehículo.
3. Presiona el botón de carga para comenzar a cargar el vehículo. Una luz LED roja comenzará a parpadear lentamente en el control remoto cuando el
vehículo se esté cargando.
4. La luz LED roja dejará de parpadear y permanecerá encendida un momento cuando el vehículo esté cargado completamente. Desconecta el cable
de carga cuando se complete la carga. Una carga completa usualmente demora aproximadamente 20 minutos. El tiempo de la carga puede variar.
5. Recarga el vehículo si la luz LED del control remoto parpadea rápido y, luego, se apaga durante el juego o si el vehículo comienza a
responder lentamente.
ADVERTENCIA: El botón para encender debe estar en posición APAGADO (O/ ) cuando se cargue el vehículo.
x4
32 54 76
 Loading...