

Hotspot ACWH18 Installation Manual

Air Conditioner Water Heater
Model ACWH18
Installation Guide
IMPORTANT! READ THIS FIRST!
Commissioning of this unit must be done by a licensed HVAC
technician. Commissioning includes making the electrical and
refrigerant line connections, evacuating and charging the unit, and
starting up the unit for the first time.
Depending on local regulations in your area, it’s possible for a qualified
end user to perform other parts of the installation. A qualified user
would be a user with expert handyman and plumbing skills, who has
performed similar work previously, and who has the required tools and
equipment.
It is up to the user to determine if a permit is needed and to determine
what self-installation work is allowed under local regulations.
Installation of this system must be done in accordance with proper
plumbing, electrical and HVAC standards such as those established
under NEC, ASHREA, AHRI and IAPMO, and must comply with state
and local codes.
The manufacturer accepts no responsibility for failure to follow the
applicable standards and codes. Failure to have a licensed HVAC
technician perform the commissioning may void your warranty.
HotSpot Energy LLC
1228 Progressive Dr. Suite 201
Chesapeake VA 23320
info@hotspotenergy.com
1-757-410-8640

The following is an outline of some of the main tasks involved in preinstalling the ACWH. We assume you have the tools and equipment, skills
and experience, etc., to perform these tasks. If you do not or if you are
not sure if you do, then refer these tasks to a professional.
Read this document entirely before proceeding.
1.Thoroughly read and understand the ACWH Owners Manual. When
doing so, pay extra attention to allowable distances and elevations
between the indoor unit and the outdoor unit, and the allowable
distance between the outdoor unit and the hot water tank. Also note
the instructions in the owners manual for the indoor unit and
condensate drain tube.
2. Determine a proper location for the outdoor unit and set a pad in
place. Pre-fabricated pads for air conditioners are available from Lowes
or Home Depot or similar retailers. Alternatively you can select an
exterior wall mount option, or pour your own concrete pad.
3. Unpack the indoor and outdoor units and carefully read and
understand all of the enclosed documentation. Place the outdoor unit
on the pad. Set the indoor unit inside away from weather.
4. Measure your distances so that you know how much and what type of
electrical lines you will need, verify capacity on your circuit breaker
panel, etc. See the owners manual for AWG and electrical
requirements. Measure the water line path between the outdoor unit
and tank so you know how much PEX and insulation to purchase and
what adapters and fittings are needed.

5. Plan the job and obtain the needed materials. For electrical you may need
Romex or you may be required to used wire in conduit or other option depending
on your situation and local code. You may need conduit, PVC or other pipe for the
outdoor connections.
For water lines we suggest ¾ PEX. If your run is over 100 ft. one-way it is possible
to exceed this maximum distance by using 1” PEX after performing a pump head
calculation and consulting the pump curve.
If you are at this point and are not sure how to proceed, you are probably not a
good candidate to perform these tasks.
6. Mount the indoor unit on the wall for placement purposes. Make sure it is
level.
7. Unpack the line-set and place one end of it near the connection to the indoor
unit and place the other end near the outdoor unit. Connect the line-set to the
indoor unit. Do not other end. If the line-set is not long enough and you did not
order a 25 ft. extension, your HVAC technician can make one easily if he knows in
advance that he will need to do so. Same applies to the control cable that
connects the indoor unit to the outdoor unit. Make a watertight professional 3”
exterior wall penetration. Fit the line-set and control cable through the hole and
carefully bend it towards the outdoor unit. Do this work neatly and carefully,
considering the requirements of the drain tube. Use tape to wrap the line-set and
control cable. Use the included grommet to seal the hole. Secure the line-set to a
wall or other structure so it cannot move in the wind, first making sure you have
enough extra line at each end for your connections. Know what kind of structural
and finish materials you are working with and obtain the correct hardware to
properly attach the line-set to the structure. Measure twice! Make sure your lineset and cables are long enough.
8. Before starting installation of the water connections, inspect the water heater
for leaks, corrosion or other problems. If the water heater needs to be changed
out, now is the right time. If the existing water heater is acceptable, proceed
with the following installation.
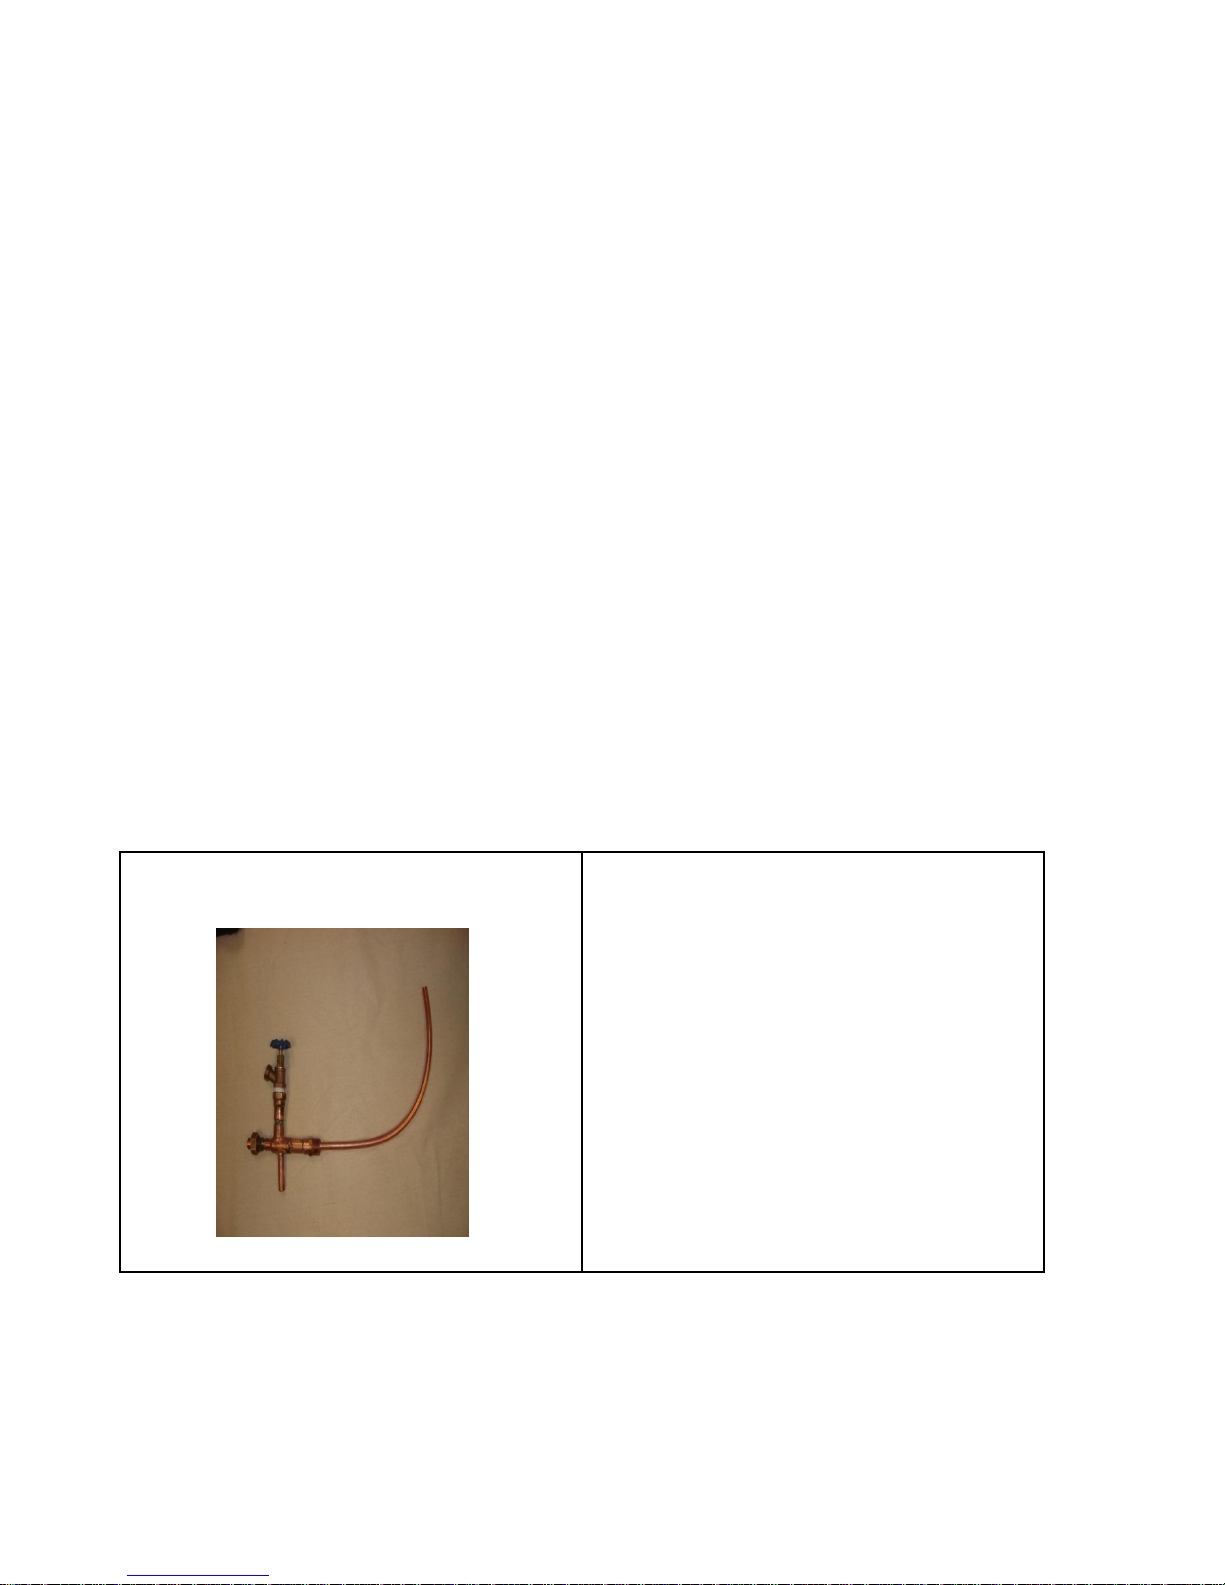
Fig. 1 Tank Tap
Shown on the next page are options for
connecting the water lines from the ACWH
to the water tank. One option shown shows
the use of the Tank Tap Adapter (shown in fig
1). This adapter is designed to use the boiler
drain port as both the supply and return to the
ACWH while retaining its drain
functionality. Detailed Tank Tap instructions
follow at the end of this document. If you did
not order a Tank Tap with your unit, use the
plumbing method.
9. Shut off power to the water heater, if electric, at the fuse or circuit breaker
panel. If it’s a gas-fired water heater, close off the gas valve found ahead of
the water heater burner and controls. If gas, be sure you know how to turn
the gas on and off (including resetting the igniter safety switch) before doing
this.
Shut off the cold water supply to the water heater.
10. Empty the water heater by attaching a hose to the drain valve and
opening the pressure relief valve. If the draining water appears dirty or
cloudy, you may have to refill the water heater and drain it again, until the
draining water appears clear and free of sediment.
NOTE: Some water heaters are already plumbed with stubs extending from
the cold water line and the hot water delivery line. Use the cold
water stub, do not use the hot water stub.
 Loading...