How it Works
Log In / Sign Up
Buy Points
How it Works
FAQ
Contact Us
Questions and Suggestions
Users
HOTPOINT/ARISTON
Loading...
R
RDPG 96607 JD EU
RDSG 86207 S EU
4
RDSG 86207 S IT
RDSG 86407 KK FR
RDSG 86407 S EU
3
RDSG 86407 W FR
2
RDSSG7 IT
RFC 20 S
RFI 20 W
RLAAV22K.1
RLAAV22P.1
RM 702 W
RMB 1185.1
RMB 1185.1 F
RMB 1185.1 F.R6
RMB 1185.1S F
RMB 1185.1S F.R6
RMB 1185.1X F
RMB 1185.1X F.R6
RMB 11852 F
RMB 1185.L F
RMB 1185.L F.R6
RMBA 1167
2
RMBA 1167 CR
RMBA 1167 S
RMBA 1167 X
RMBA 1185.1...
RMBA 1185.1 F
RMBA 1185.1 F.R6
RMBA 1185 LV
RMBA 1200.L V
RMBA 2185.L
RMBA 2200.L
RMBDA 1185.1 F
RMBDA 3185.1
RMBH 1200.1 S F H
RMBH 1200F
RMTA 1167.L
RMTA 1167.L X
RMTA1167.L X.019
RMTA 1185.019
RMUP 100 SH
RMUP100X H
2
RMUP167X NF C H
RMUP 167XNFH
RO642 TOIRFH
RPD 1045 JX TK
RPD 1046 DD IT
2
RPD 1046 DX IT
2
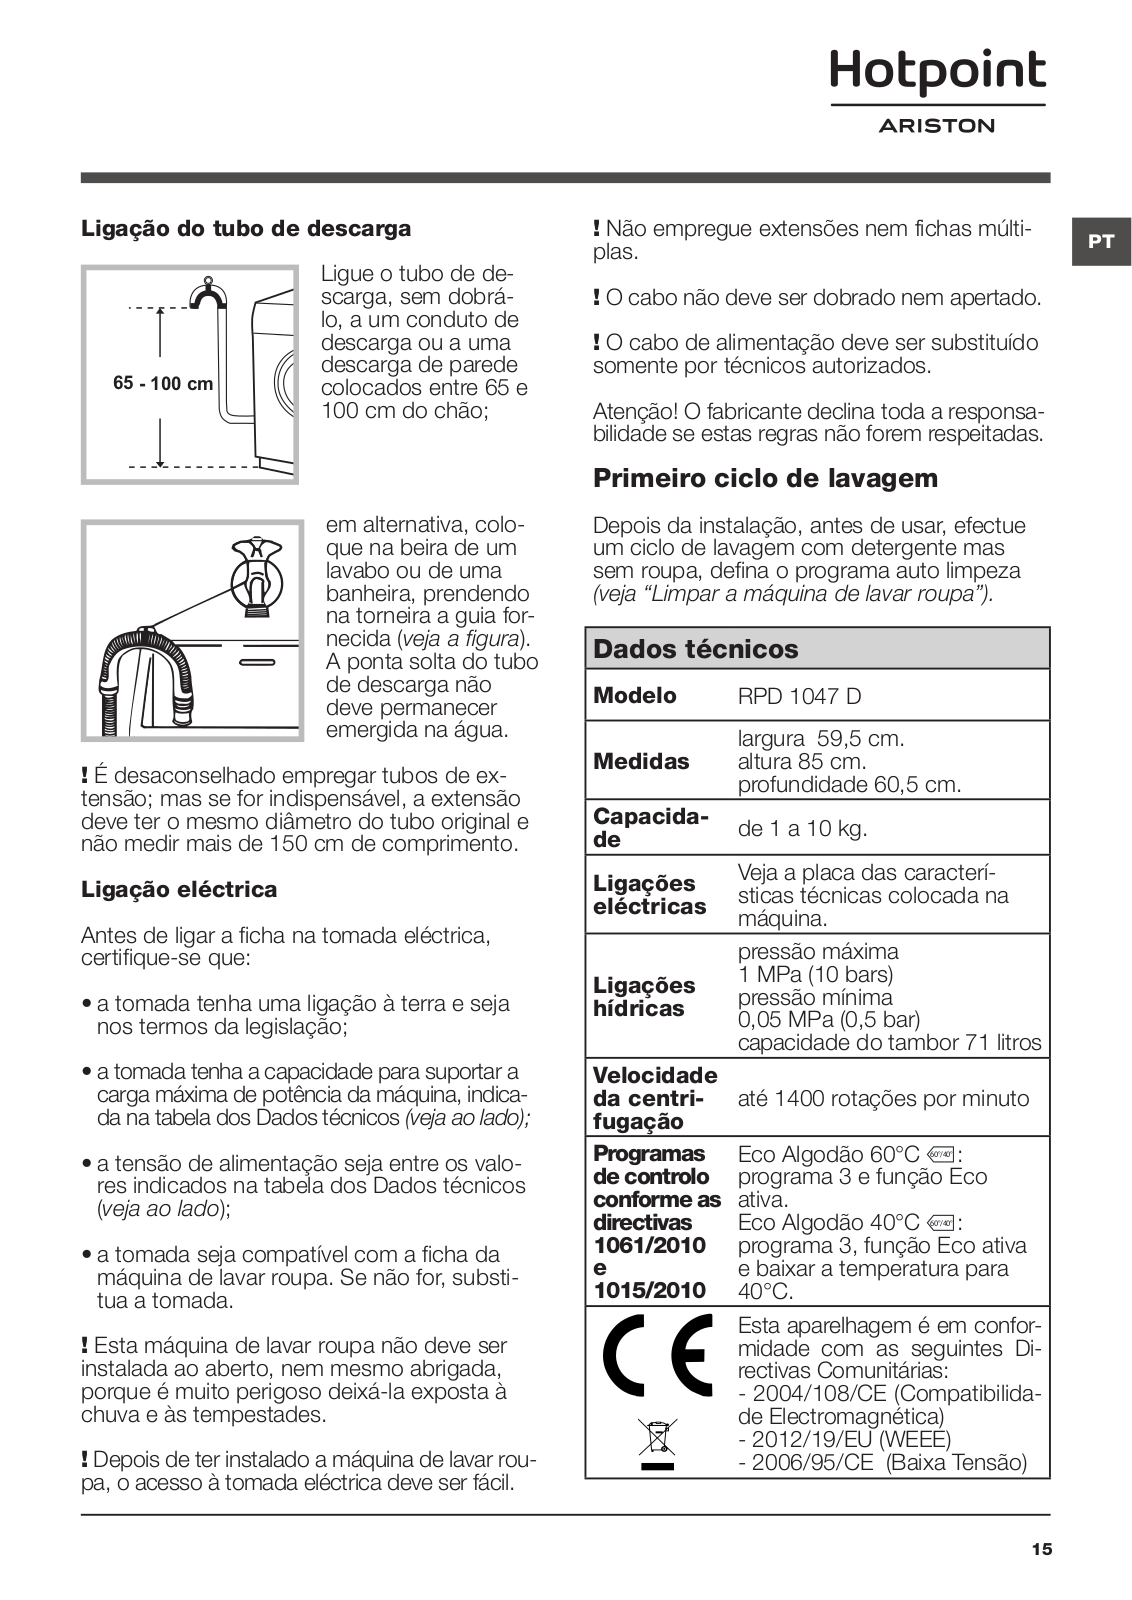
RPD 1047 D
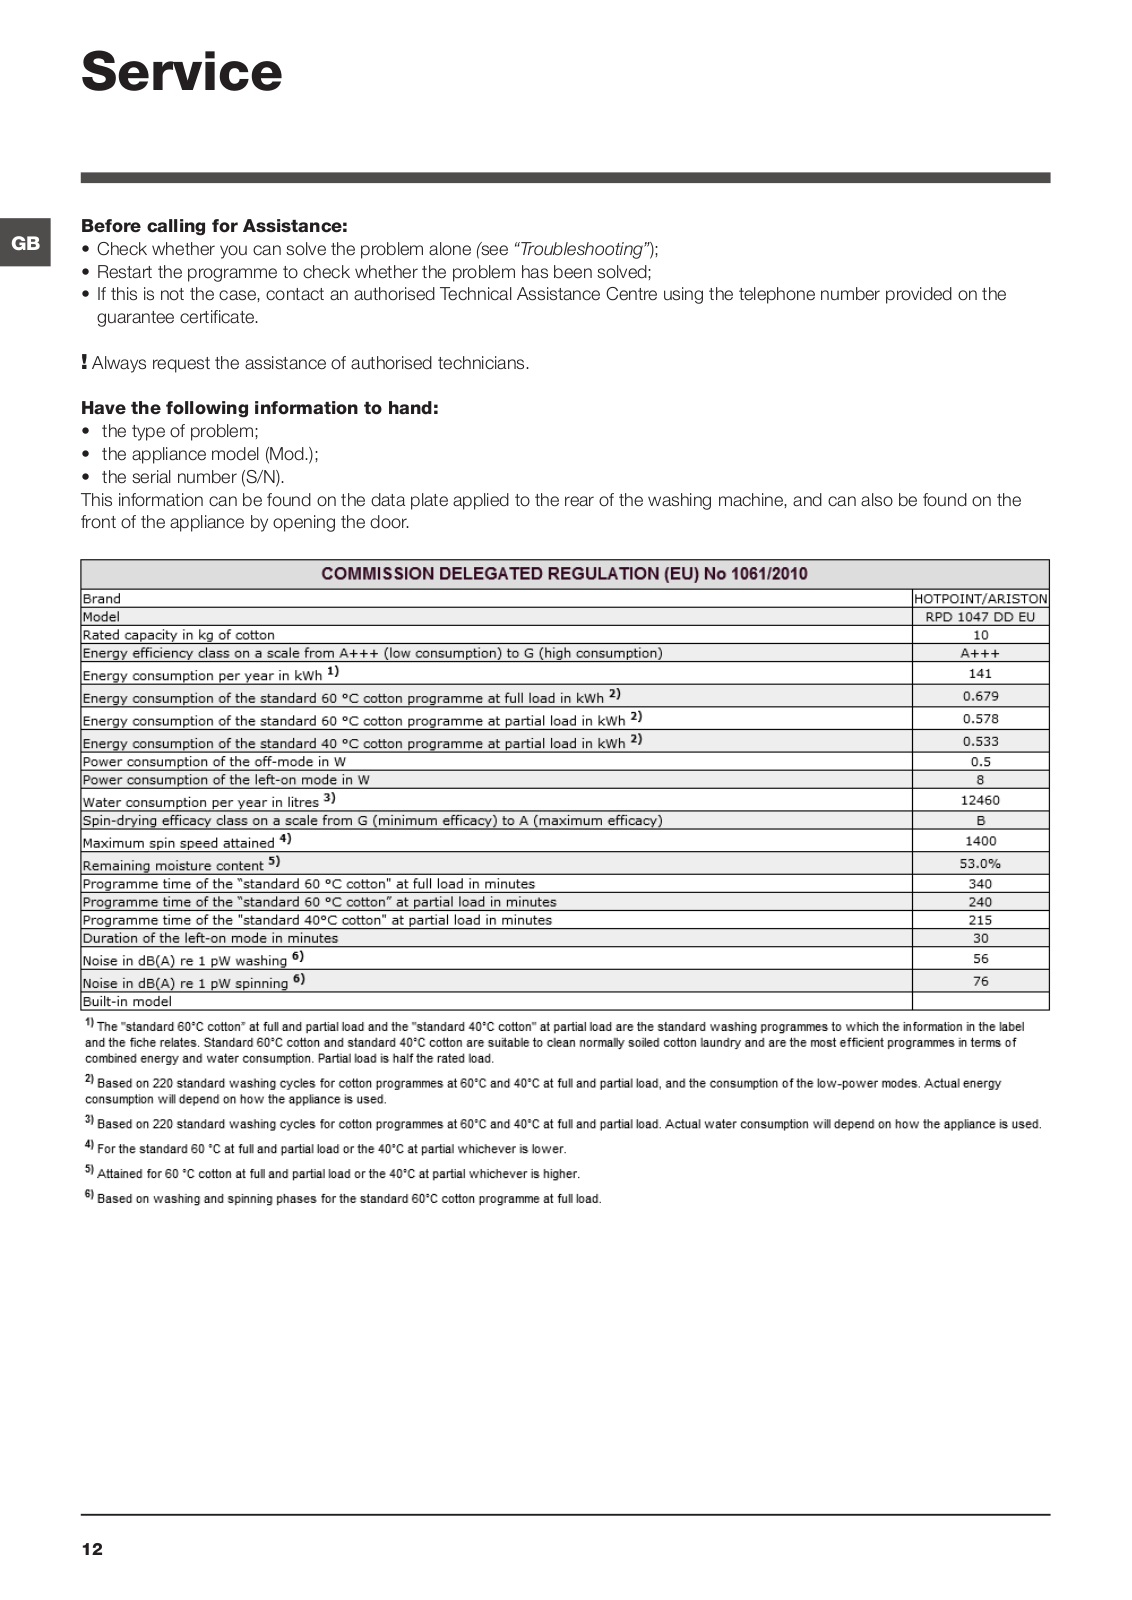
RPD 1047 DD EU
7
RPD 1047 DD FR
RPD 1066 DS TK
RPD 1146 DX TK
RPD 1165 D
RPD 1165 DX EU
4
RPD 8247 JD PL
2
RPD 8247 JKD PL
RPD 8247 JSD PL
RPD 826 DX EU
3
RPD 846 D
RPD 846 DS CZ
RPD 925 JX TK
RPD 926 DD EU
4
RPD 926 DD IT
RPD 927 DX EU
3
RPD 947 DX TK
RPD 965 D
RPD 965 DD EU
4
RPF 743 EU
RPF 843 EU
RPG 1045 JS FR
2
RPG 724 JX PL
RPG 744 JS FR
RPG 806 DK PL
RPG 806 DS PL
RPG 825 DX IT
RPG 825 JS FR
RPG 825 JS IT
RPG 825 JX IT
RPG 826 D
RPG 826 DD IT
2
RPG 826 DD IT/1
2
RPG 826 DS PL
RPG 845 J
RPG 845 JS FR
RPG 846 D
RPG 846 DD EU
5
RPG 846 DS TK
RPG 925 JS FR
2
RPG 926 DX EU
2
RPG 926 DX IT
RPG 926 DX TK
RPG 945 JKK FR
RPG 945 JS FR
2
RPG 946 JS IT
RPG 946 JX IT
RPG 964 J EU
RSD 7239 DX
3
RSD 8229 ST K
3
Loading...
Loading...
Nothing found
RPD 1047 DD EU
User Manual
72 pgs
5.14 Mb
0
User Manual
72 pgs
5.18 Mb
0
User Manual
24 pgs
2.03 Mb
0
User Manual [da]
48 pgs
3.09 Mb
0
User Manual [hu]
60 pgs
4.19 Mb
0
User Manual [ro]
13 pgs
12.17 Mb
0
User Manual [ru]
12 pgs
1.29 Mb
0
Table of contents
Loading...
HOTPOINT/ARISTON RPD 1047 DD EU User Manual
...
HOTPOINT/ARISTON User Manual
Download
Specifications and Main Features
Frequently Asked Questions
User Manual
Download
Loading...
+
50
hidden pages
Unhide
You need points to download manuals.
1 point = 1 manual.
You can buy points or you can get point for every manual you upload.
Buy points
Upload your manuals