How it Works
Log In / Sign Up
Buy Points
How it Works
FAQ
Contact Us
Questions and Suggestions
Users
HOTPOINT/ARISTON
Loading...
F
FMF 703B IT
FMF 7081BS TK
FMF 7081 BS TK.M
FMF 723 EU
2
FMF 723 EU.M
FMF 801 TK
FMF 801 TK.M
FMF 802 B IT
FMF 802BS TK.M
FMF 803B IT
FMF 803 TK
FMF 803 TK.M
FMF 823B FR.C
FMF 823BX TK
FMF 823BX TK.M
FMF 823 EU.M
FMF 903 TK
FMF 923
FMF 923BS TK
FMF 923K EU
FMF 923K EU.C
3
FMF 923K TK
FMF 923 TK
FMF 923 TK.C
FMG 1023B EU
FMG 1024M TK
FMG 1043B FR
FMG 602 TK
FMG 602 TK.M
FMG 622B EU
FMG 622 B EU.M
FMG 702S C TK
FMG 703 C TK
FMG 703 C TK.M
FMG 722BS C TK
FMG 722 BS TK.M
FMG 722 HC SS
FMG 722W PL
FMG 723B IT
FMG 723BS TK
FMG 723BS TK.M
FMG 723MB EU
2
FMG 723MB EU.M
3
FMG 723M PL
FMG 723M TK.M
FMG 743
FMG 743 SK
2
FMG 743 SK.C
FMG 823B EU
FMG 823B EU.M
3
FMG 823M TK
FMG 823 M TK.M
2
FMG 863 SK
FMG 923B IT
FMG 923M TK
FMG 924M TK
FMG 943B FR.C
FML 502 TK.M
FML 602 EU.M
FML 703 EU
FML 703 TK
FML 802 IT
FML 803 EU
FMO 122.1 X
2
FMSDN 623
FMSDN 623B CZ
2
FMSF 502 TK
FMSF 6082 TK
FMSF 702B EU
2
FMSF 702B EU.L
3
FMSG 602 TK
FMSG 623B EU
FMSGN 623
FMSGN 623B CZ
FMSL 5082 TK
FMSL 603 EU
FMUG 502 B IT
FMUG 502 W PL
FO 87.1/E
FO 87.1/E IX
FO 87 C.2/E
FO 87 C.2/E IX
FO 87 C.2/E TD IX
FO 88 C.1 IX
FO 97 C.1/E
FO 97 C.1/E IX
FO 97 C/E IX AG
FP 1005 AX0
FP 1009 AB0
FP 1009 AX0
FQ 1010.1
FQ 101.1
2
FQ 1012 C.1
2
FQ 101 C.1
FQ 101 P.1
FQ 1030.1
FQ 103.1
2
FQ 1032C.1
FQ 1037 C.1
3
FQ 103 C.1
Loading...
Loading...
Nothing found
FMG 823B EU.M
User Manual
60 pgs
4.58 Mb
0
User Manual
36 pgs
2.87 Mb
0
User Manual [it]
48 pgs
3.58 Mb
0
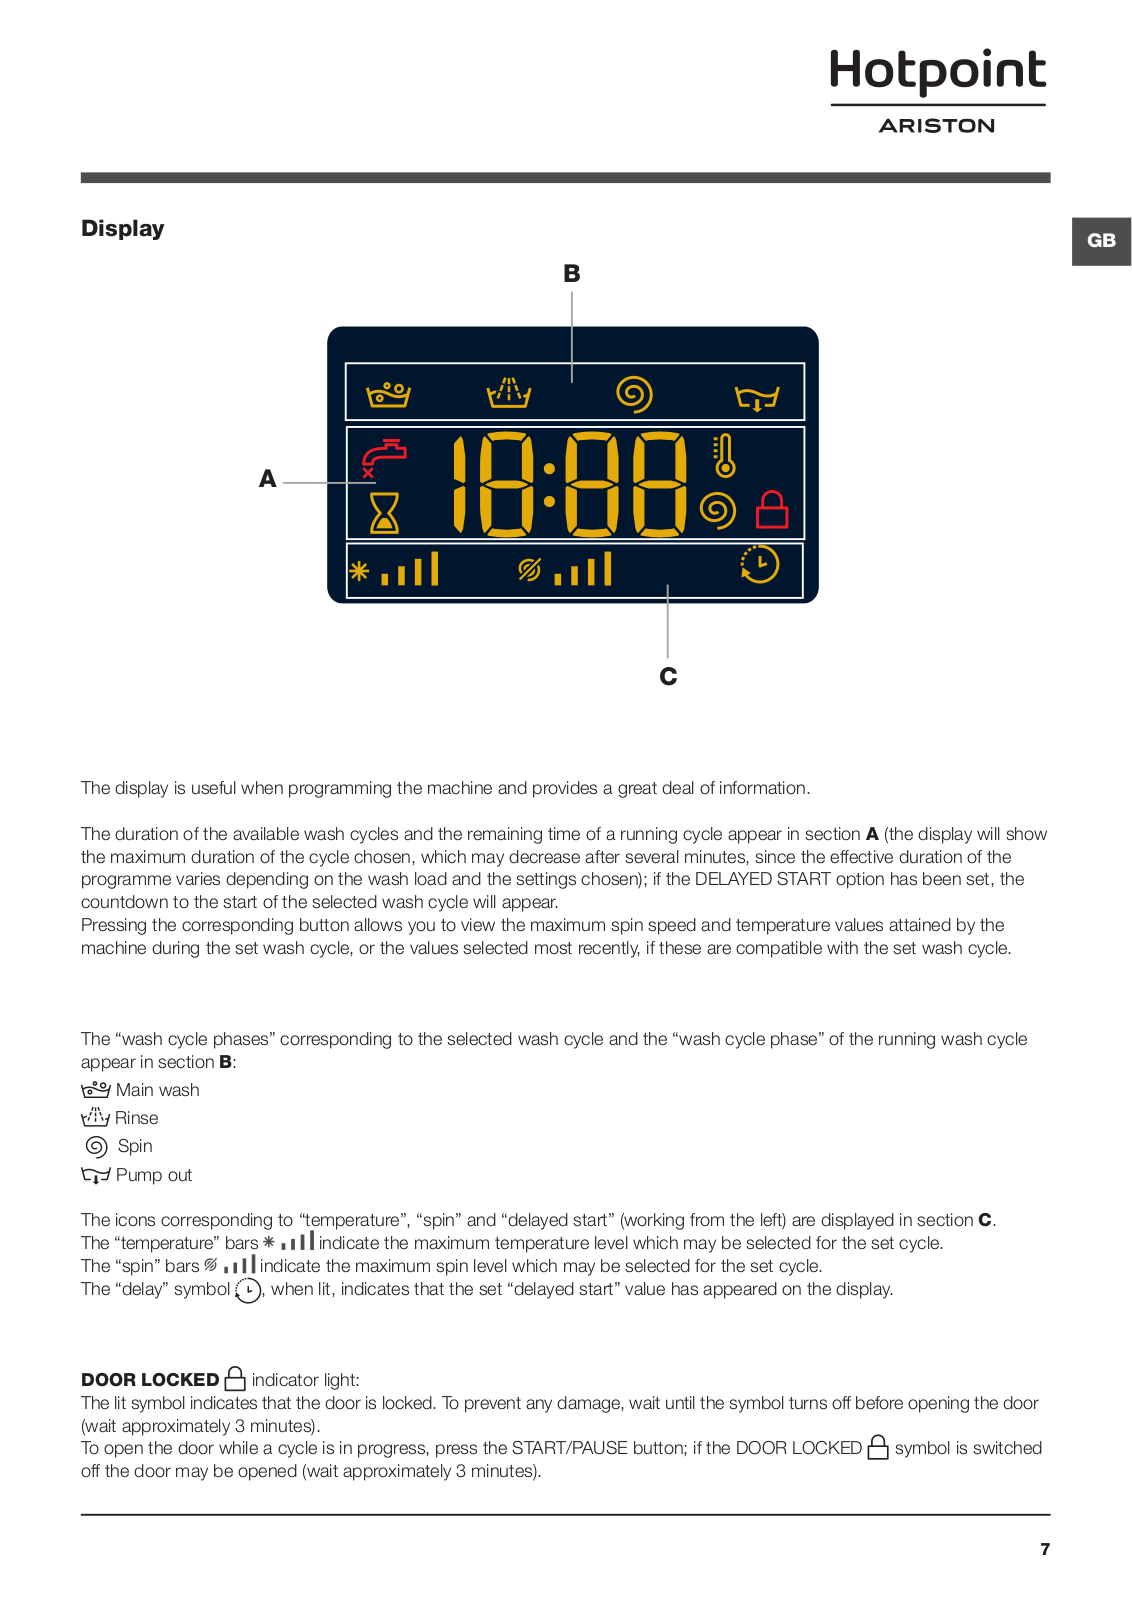
Table of contents
Loading...
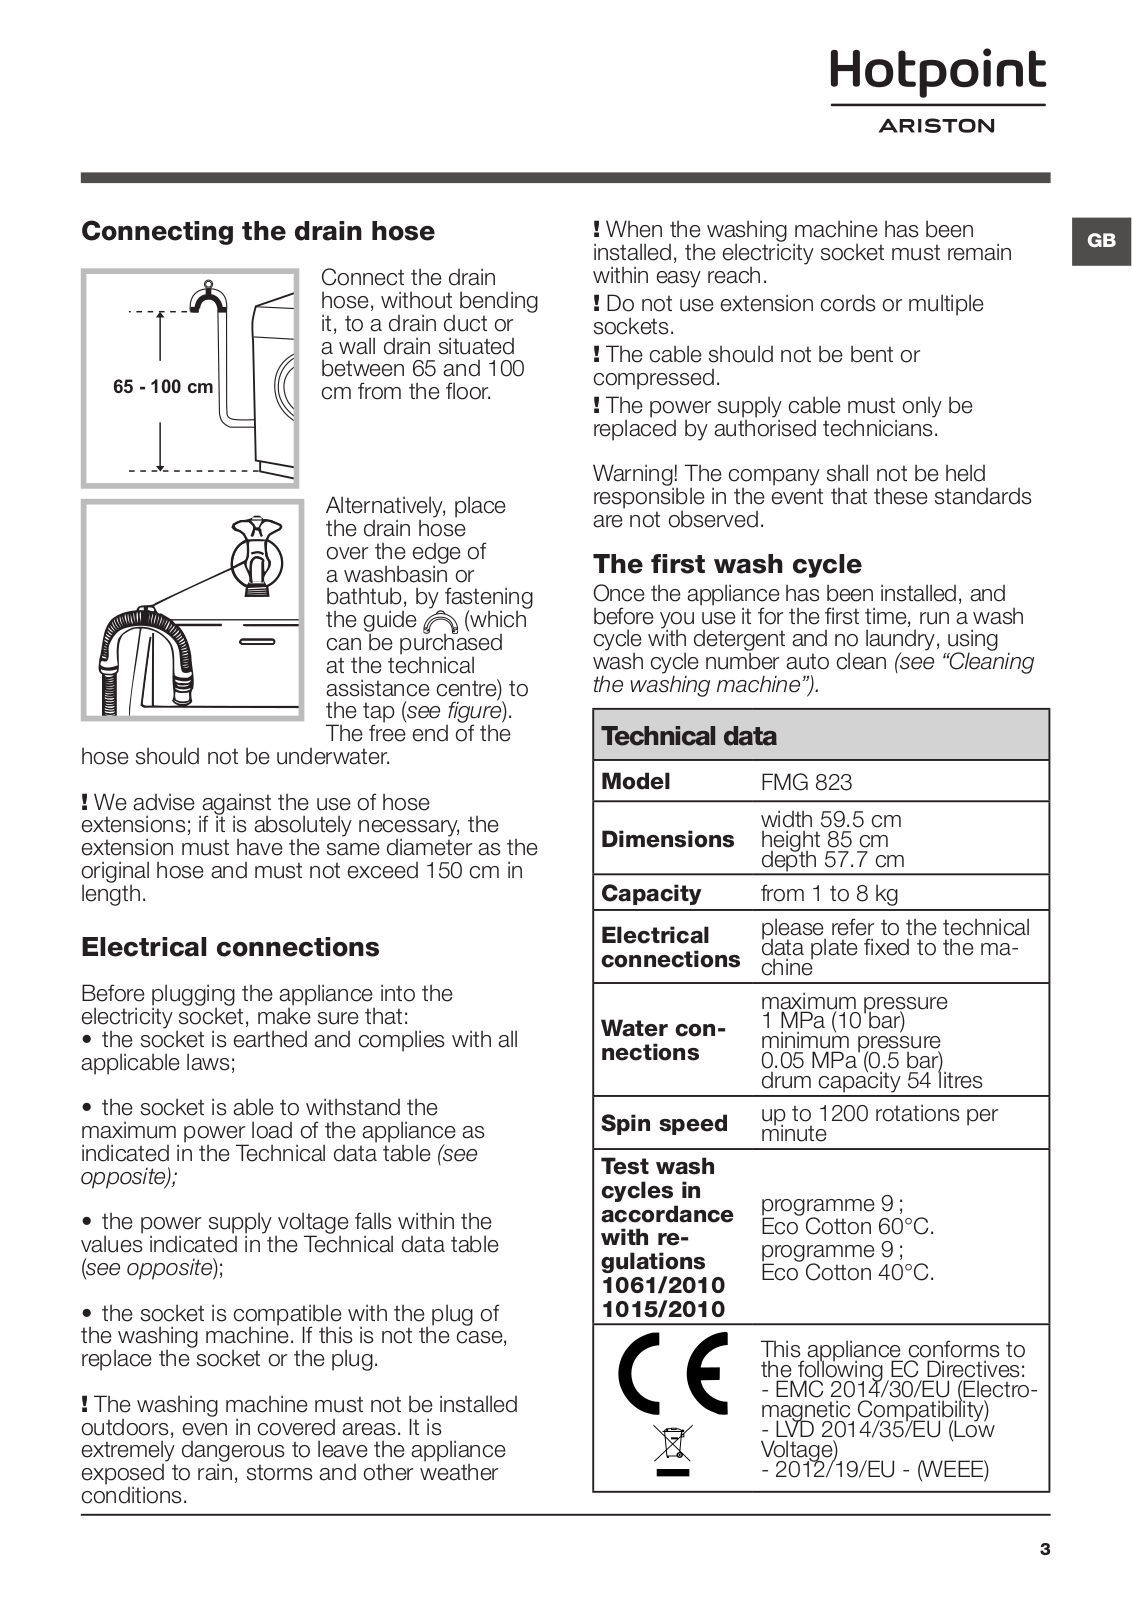
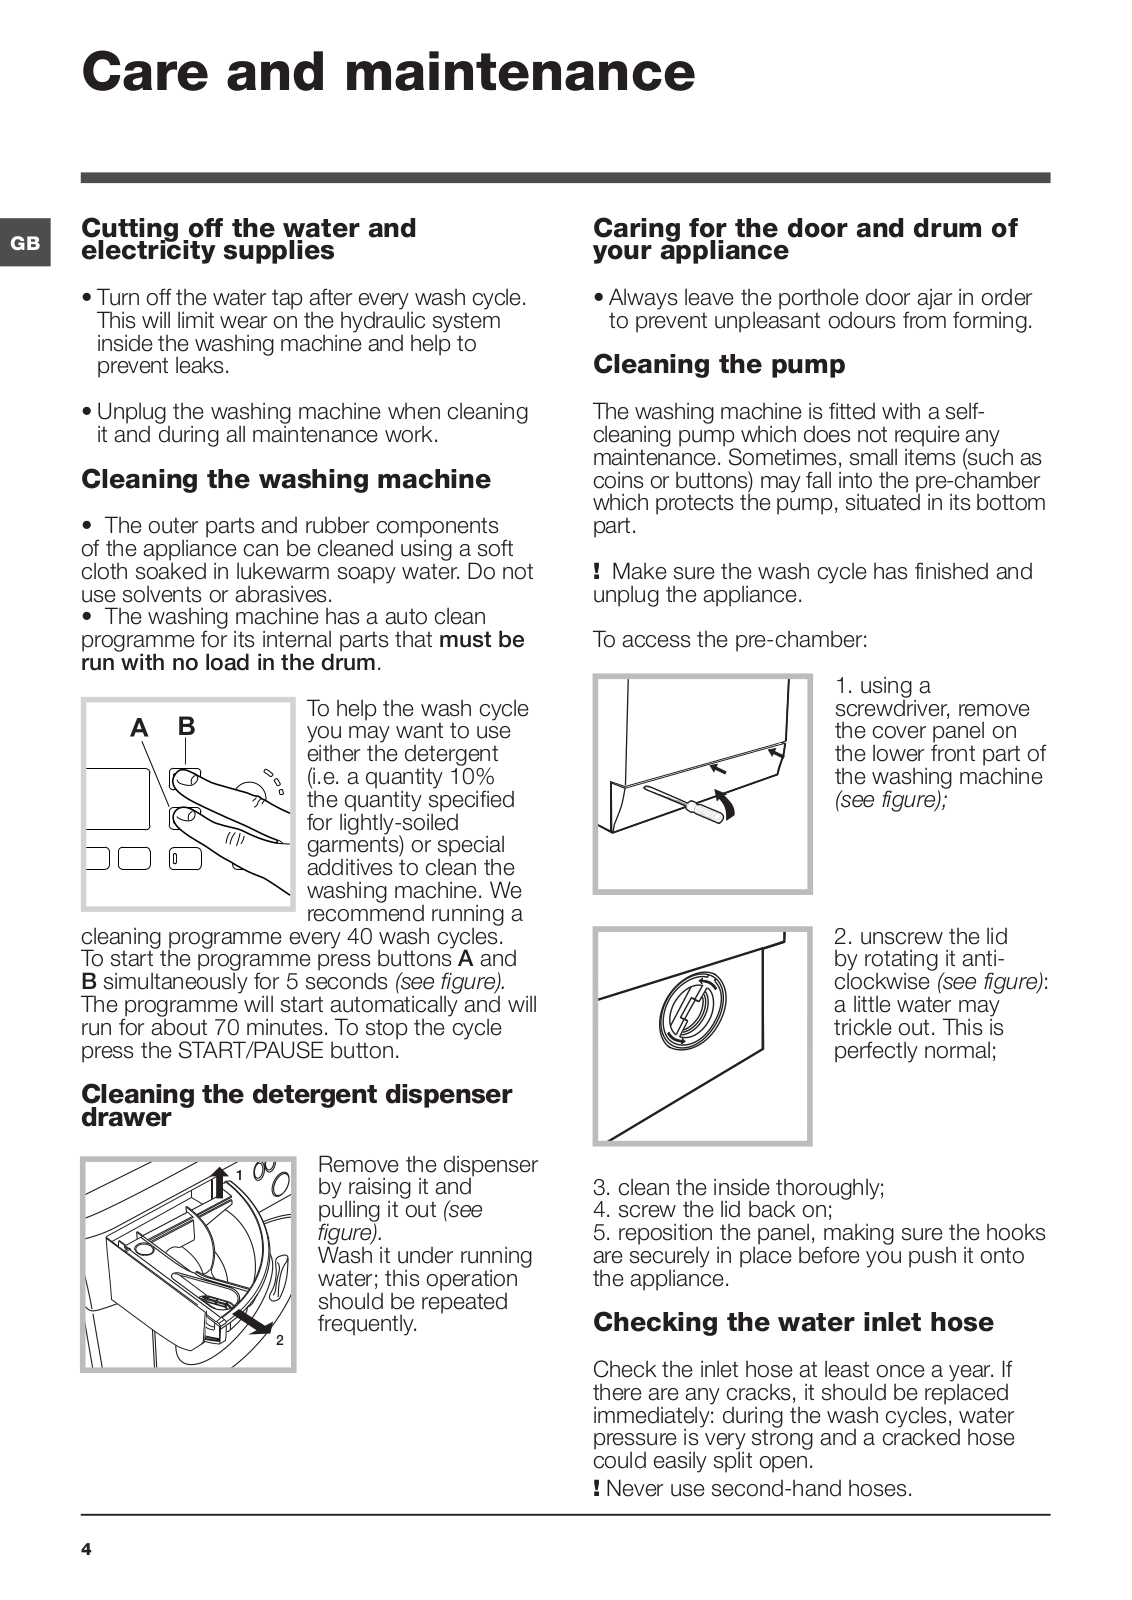
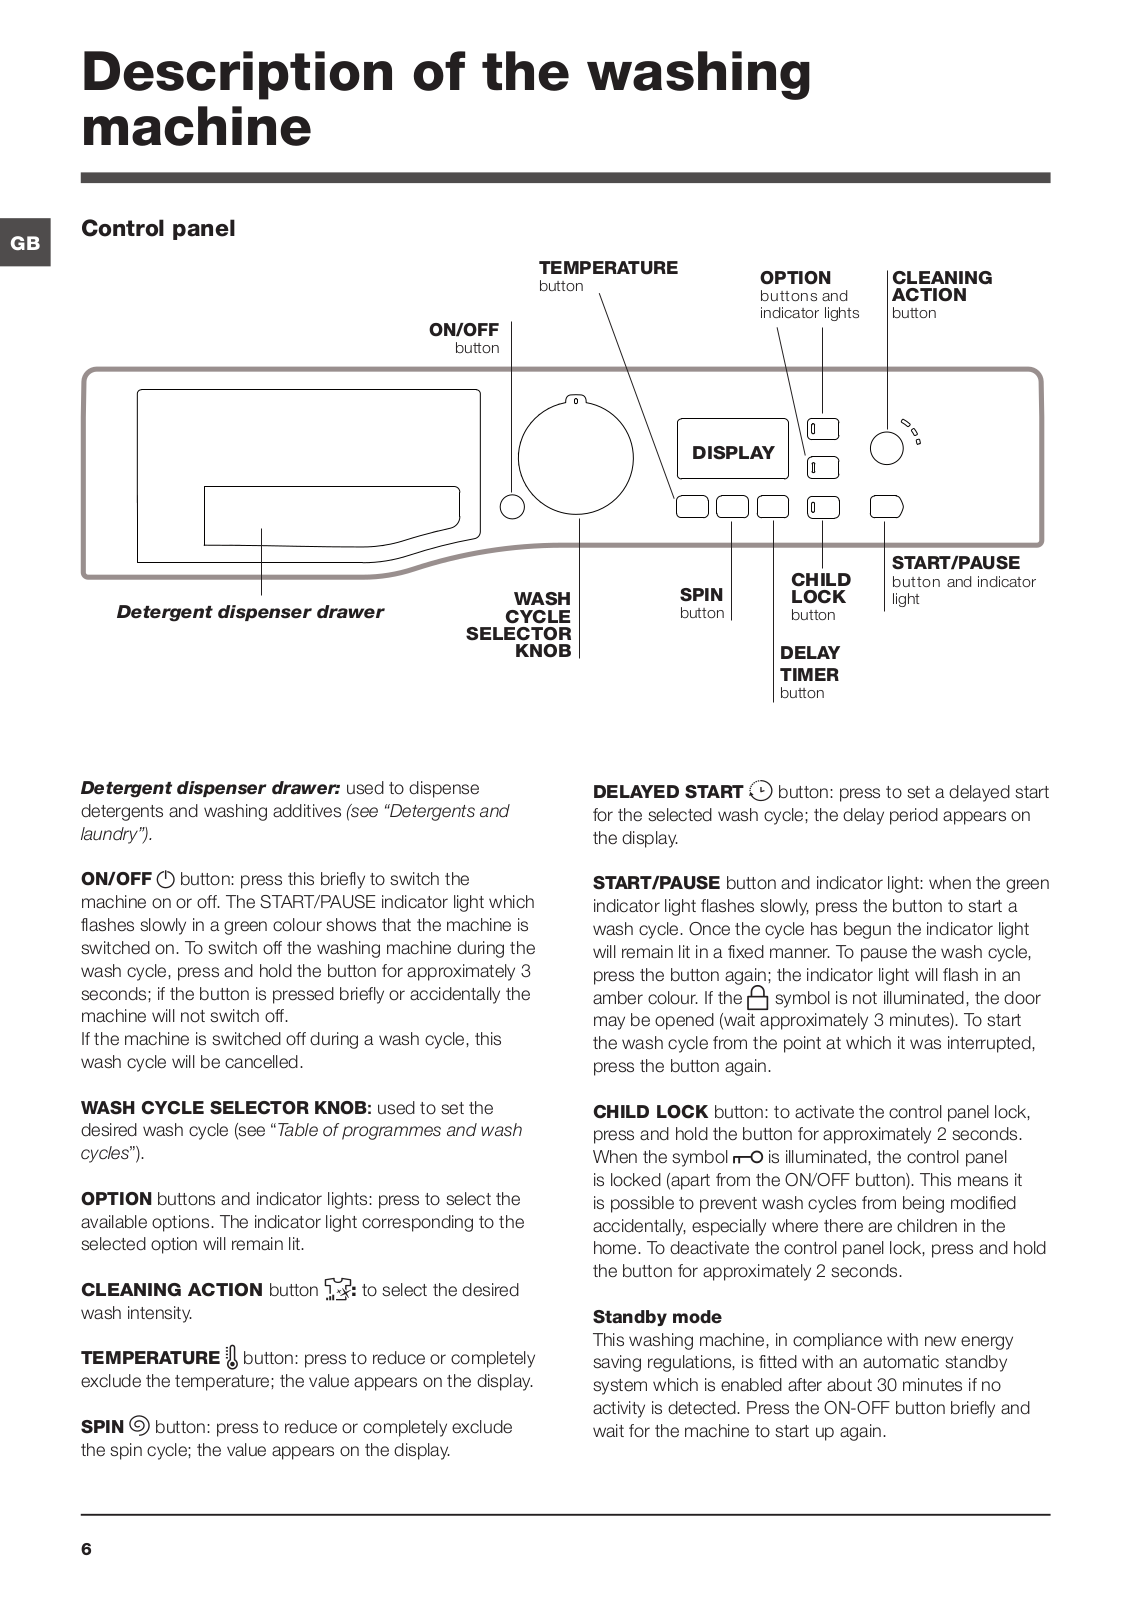
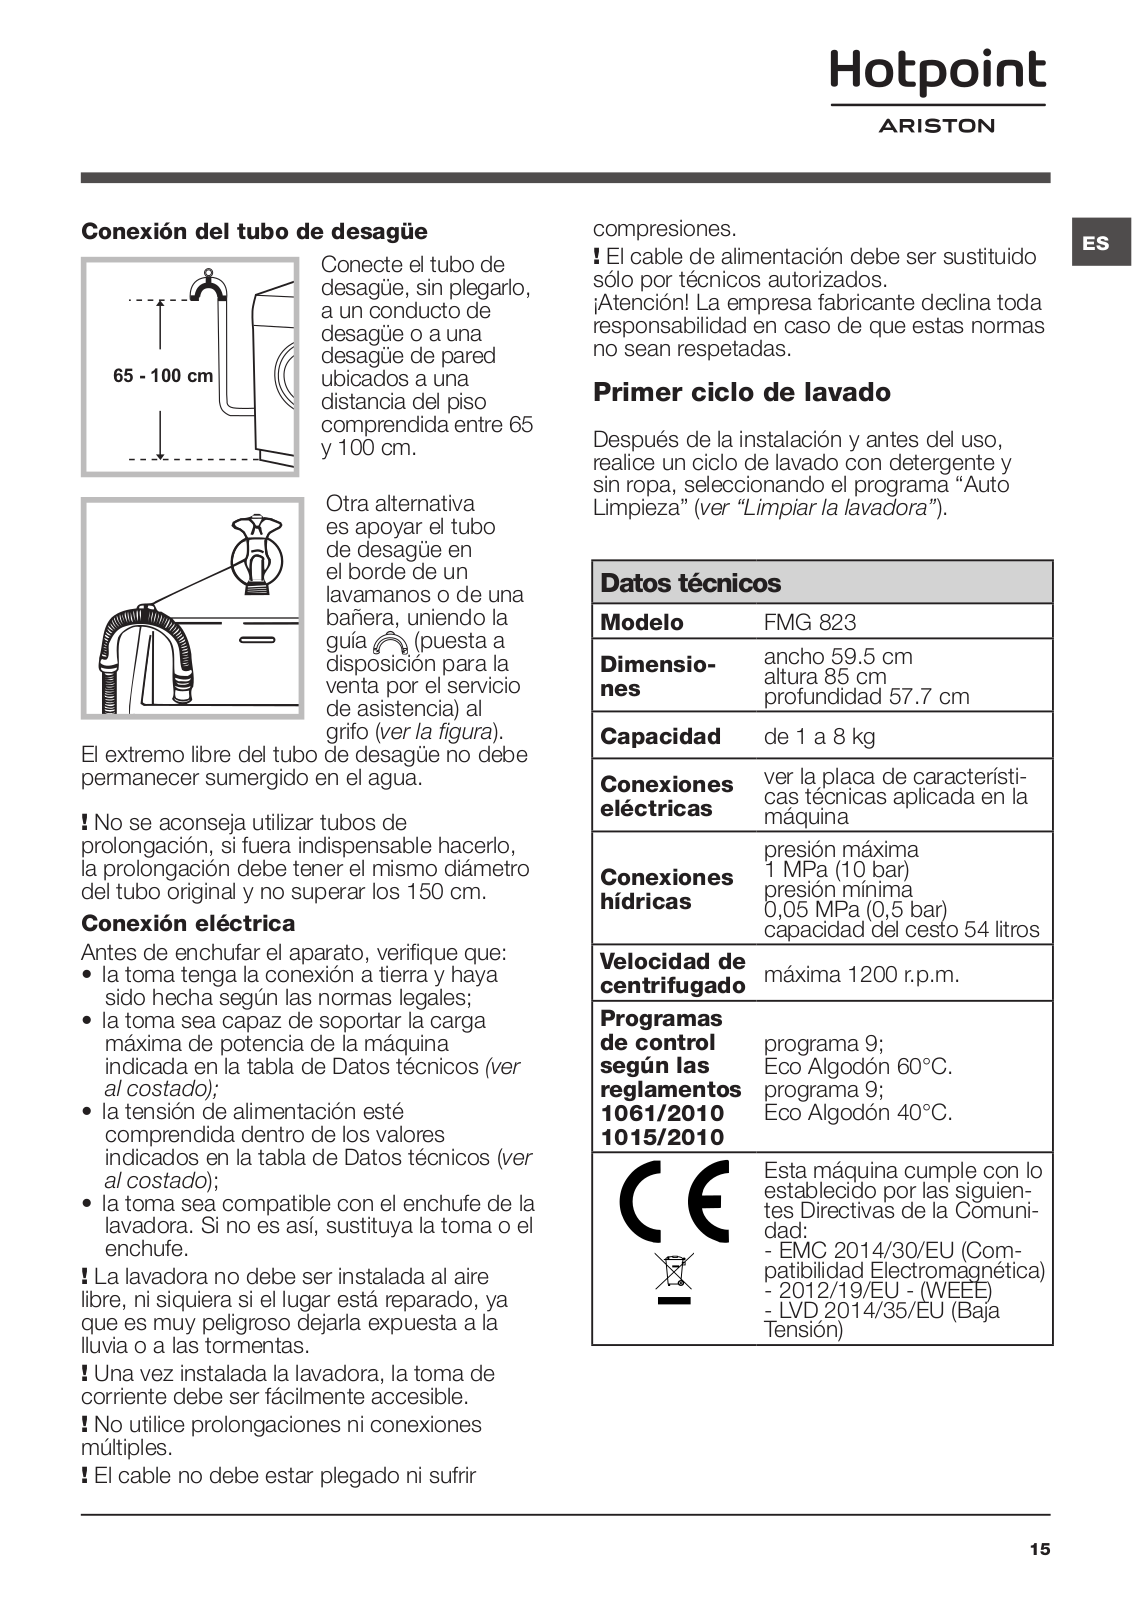
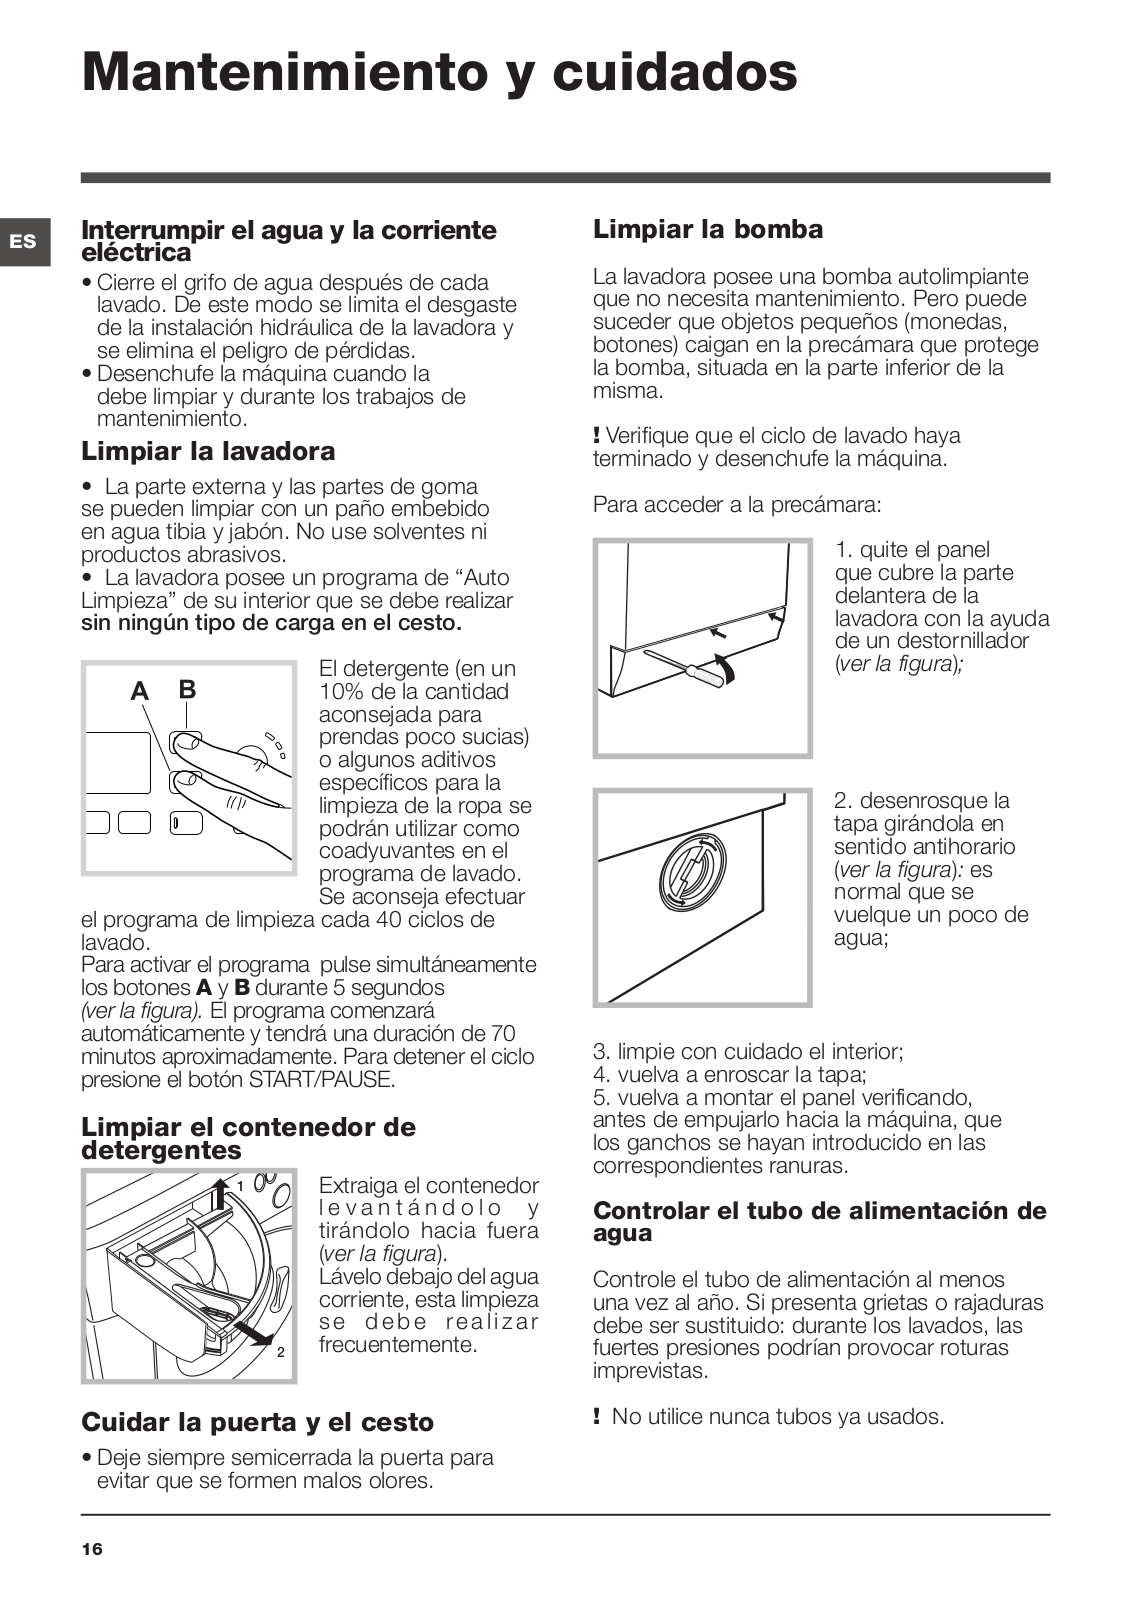
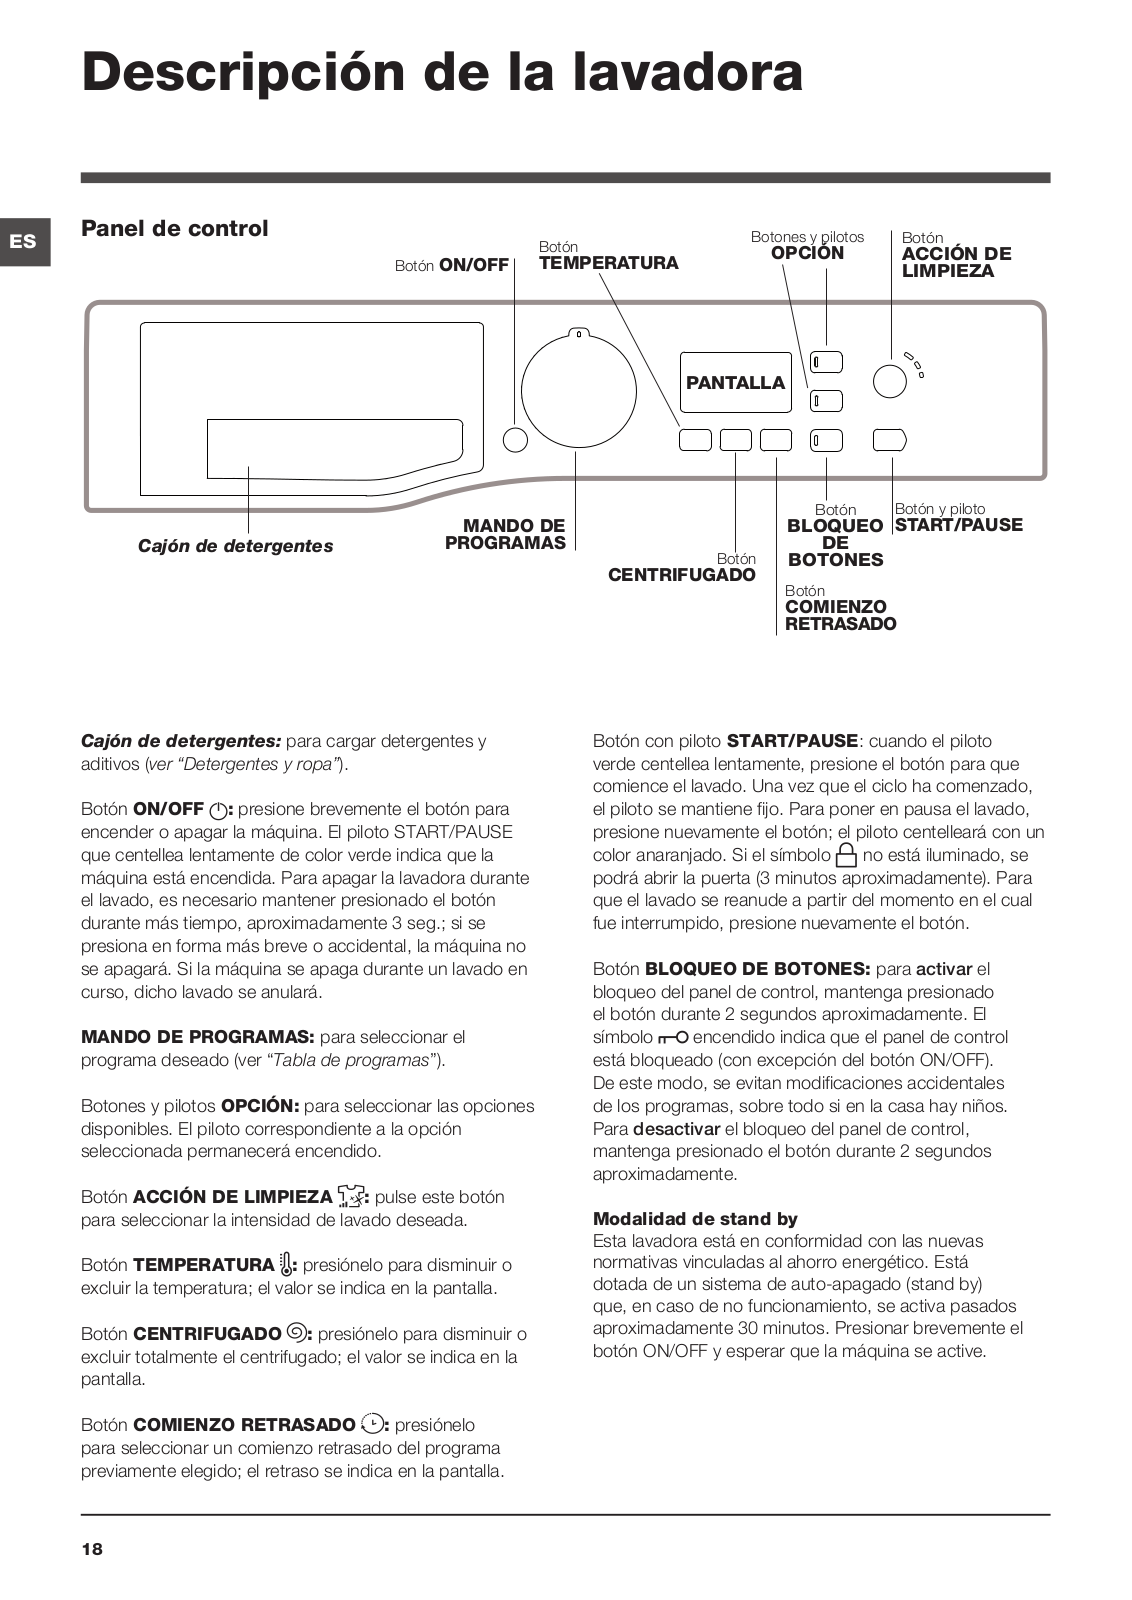
HOTPOINT/ARISTON FMG 823B EU.M User Manual
...
HOTPOINT/ARISTON User Manual
Download
Specifications and Main Features
Frequently Asked Questions
User Manual
Download
Loading...
+
42
hidden pages
Unhide
You need points to download manuals.
1 point = 1 manual.
You can buy points or you can get point for every manual you upload.
Buy points
Upload your manuals