

Hotpoint WW3440S, WW3610S Use And Care Manual
How
Contents
Agitator
20
Use
and
Care
of
Appliance Registration
2
models
Auto
Soak
8
Bleach Dispenser
7
WW3440S
Care and Cleaning
20
Consumer Services
23
WW
361
OS
Controls Setting
6
Cycle Descriptions
5
Cycle Times
7
Detergents
and Additives
12–15
Energy-Saving Tips
8
Fabric and
Cvcle Settings
9
Fabric Softener Dispenser
7
Hard Water
12
Important Phone Numbers 23
Loading the Washer
6, 11
Model and Serial Numbers
2
Operating Instructions
6-10
Problem Solver
16-20
Safetv Instructions
3,4
Soak Cycle
8, 10
Sorting Clothes
6, 10
Stains
14
Stain Removal Guide
15
Storage and Vacation Tips 20
User Maintenance Instructions 20
Warranty
Back Cover
GE Answer
Center@
800.626.2000
~LP
US
~LP
YOU...
Read this book carefully. Save time and money.
Write down the model
It is intended to help you
Before you request service . . .
and serial numbers.
operate and maintain your check the Problem Solver
You’ll find them on a label on
new washer properly.
section. It lists causes of minor
the lower left side near the front.
Keep it handy for answers to
operating problems that you can
correct yourself.
These numbers are also on the
your questions.
Consumer Product Ownership
If you don’t understand something
Registration Card that came with
or need more help, write (include
If you received a
damaged washer...
your washer. Before sending in
vour ~hone
number):
this card, please write these
. .
—
--
numbers here:
Consumer
Aft-airs
Immediately contact the dealer (or
Hotpoint
builder) that sold you the washer.
Appliance Park
Model Number
Louisville. KY 40225
Serial Number
Use these numbers in any
correspondence or service
calls concerning your washer.
WA~WG: For your
safety
the information in this
man~
must be
fo~owed to
minimk
the risk
of~re
or explosion or to
preve~t
property
damtige,
personal
injury or
loss of life.
—Do
not
store or me
gasoMe or
other
●
~ediately CM
your gas supplier
fmm
a
flammable vapors and
Uquids
in the
neighbor’s
phone. FOBOW
the gas
supp~er’s
vicini~
of this or any other appliance.
instructions.
—~T
TO DO
IF
YOU S~LL GAS
.
Eyou
cannot reach your gas
suppHerS
●
Do not try to
tight
any appliance.
CM the fm
department
●
Do not touch any
electrid
switch;
—htiBation
and service must be performed
do not use
any
phone in your
b@&g.
by a qualified
instaBer,
service
agency
or
the gas supplier.
●
C1ear
the room,
btiding
or area of
W
occupants.
All washing instruction terms in this book conform to the Care
Labeling Rule established by the Federal Trade Commission, January 1984.
If You Need Service
To obtain service, see the Consumer Services page
in the back of this book.
We’re proud of our service and want you to be
pleased. If for some reason you are not happy with the
service you receive, here are three steps to follow for
further help.
FIRST, contact the people who serviced your
appliance. Explain why you are not pleased. In most
cases, this will solve the problem.
NEXT, if you are still not pleased, write all the
details—including your phone number—to:
Manager, Consumer Relations
Hotpoint
Appliance Park
Louisville, KY 40225
~ALLY,
if your problem is still not resolved, write:
Major Appliance Consumer Action Panel
20 North
Wacker
Drive
Chicago, IL 60606
A
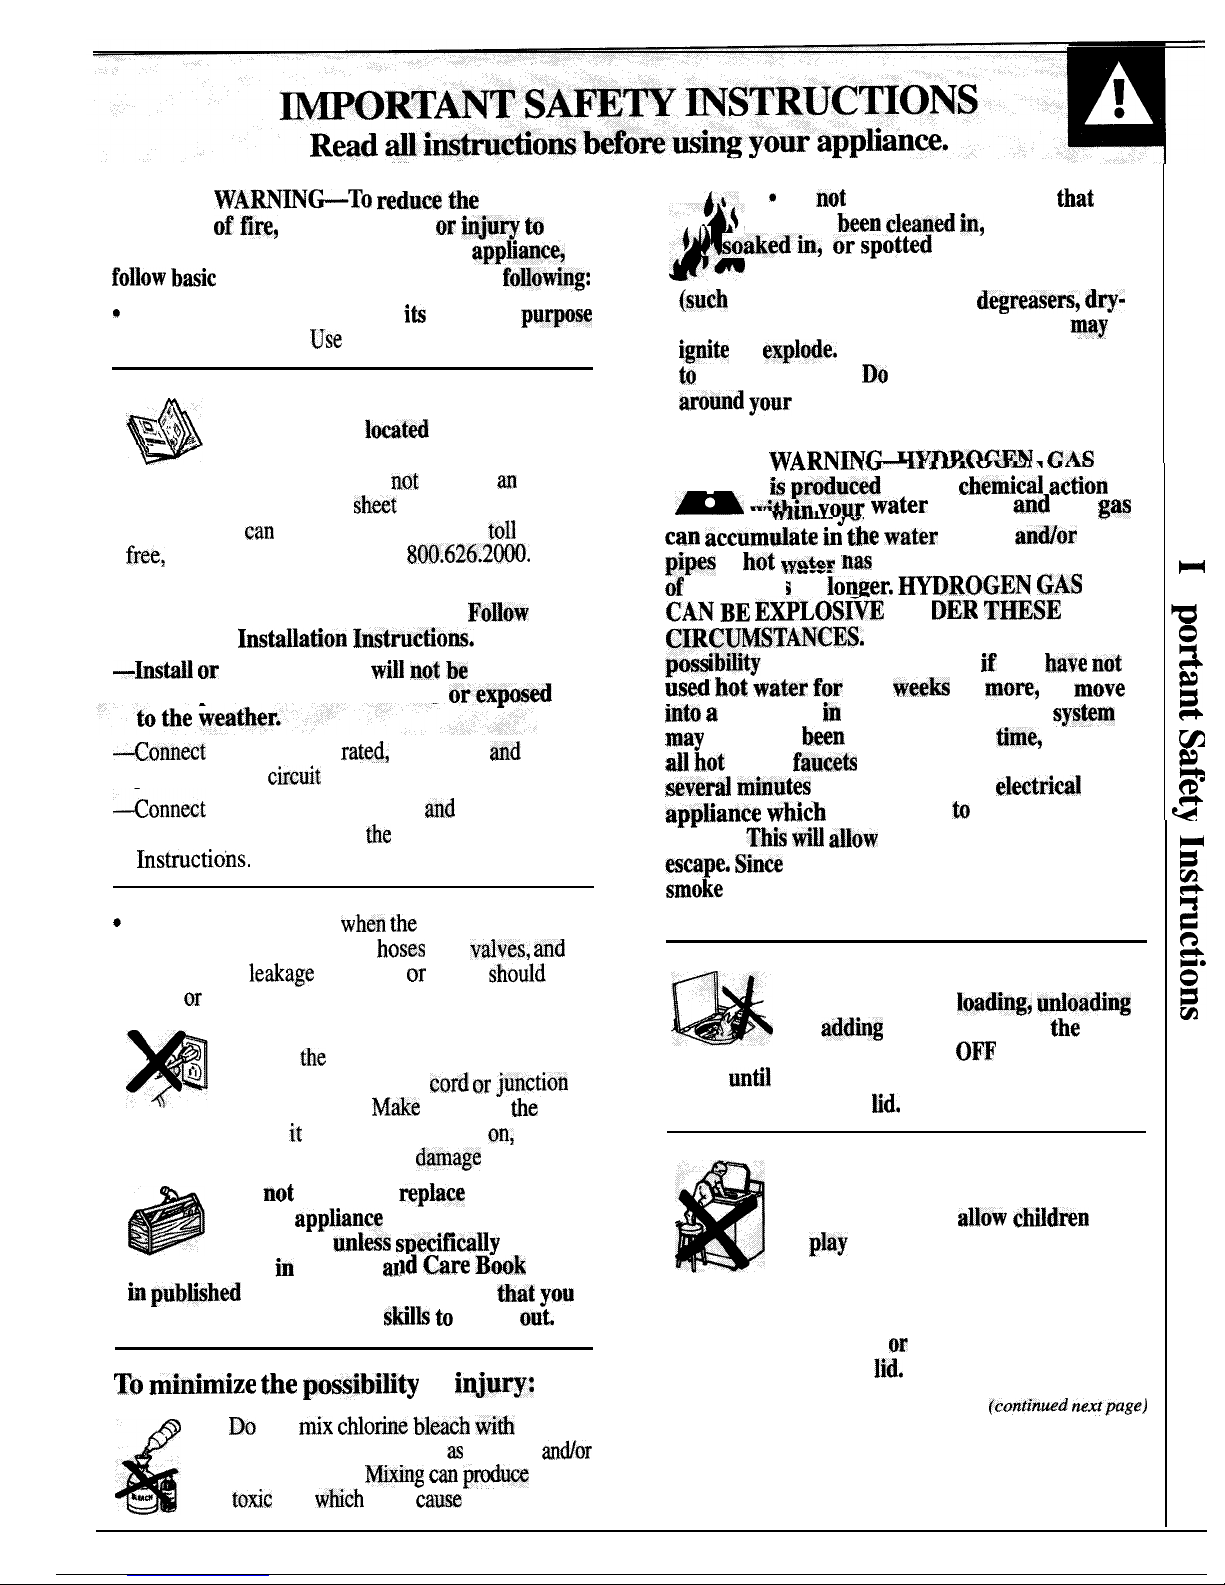
WARN~&To
reduc~ the
risk
d’,
h
*
Do
not
wash or dry articles
that
of firey
electric shock, or
injury to
have
been clean~d in,
washed in,
persons when using your
appfiance,
f /
saakedin, orspotted
with
follow basic
precautions, including the
fo~owing:
combustible or explosive substances
o
Use this appliance
only for
its
intended
purpow
(such
as wax, paint, gasoline,
degreasers, dry-
as
described in this
Use
and Care Book.
cleaning solvents, kerosene, etc.) which
may
ignite
or
expiode.
Do not add three substances
to
the wash water. Do not use these substances
. This washer must be properly
around your
washer an&or dryer during
~, ,4;
‘Q< ‘ Q
- “.
installed and
Iocated
in accordance
operation.
-*. .*
with the Installation Instructions
before it is used.
If you did
not
receive
an
A
WARNNC ‘vnnfifinN fiAQ
:a nwdl,el
Installation Instructions
sheet
with your
washer, you
can
obtain one by calling,
toll
Wlmlm JU1
free,
the GE Answer Center?
8W.626.2~.
can accumdate in tl
pi~a
if
hot w~t~p ha
—Properly ground to conform with all
of
two weeks
governing codes and ordinances.
FOHOW
CAN BE EDLOS~
UN]
details in
InstaBation hstructions.
CIR~U~
—Instil or
store where it
wi~ not bti
exposed
pos~l
to temperatures below freezing
orexb
Usf
. .
(~xk
&
m&NwuuA
~
-.=-
“ ~.”...ed
by the
chemi~ action
m
..~+k:. XYqar water
heater
and
the
gas
he w~ter
heater
antior
water
,. w.-.
..M
not been used for a period
~
\
or
louer. ~ROGEN GAS
DER T~SE
3
v
MSTANCES.
So to prevent the
g
ImXty
of damage or injury, if you
have not
w hot water for
two
weeks
or
mum,
or
move
g
mto a
residence k which the hot water
system
*
may
not have
been
used for some
time,
turn on
~
#l
hot
water
fauc~ts
and allow them to run for
g
]everd minutes
before using any
electricrd
m
hich
is
connected to the hot water
G
<onnect
to a properly
rated,
protected
and
sized
J
power supply
circuit
to avoid electrical overload.
1
i
=onnect
to adequate plumbing
and
drain
“
. ----
facilities as described in
the
Installation
apptiance wl___
----
system.
~is wiH allow
any hydrogen gas to
.
kstructions.
escape, Since
the gas is flammable, do not
smoke
or use an open flame or appliance
*
Turn off water faucets
when the
washer is not in
during this process.
use to relieve pressure on
hoses
and
vdvcs, and
to minimize
le~age
if a hose or valve
should
break or rupture.
●
Never reach into washer while it is
moving. Before
Io&ding, urdoading
*
When disconnecting this appliance
or
adding
clothes, push in
the
Cycle
pull by
the
plug rather than the cord to
Selector knob to
0~
position, then
avoid damage to the
cord or junctio~
of
wait
until
the machine has completely stopped
cord and plug.
Make
sure that
the
cord
before opening the
tid.
is located so that it will not be stepped
on,
tripped
over or otherwise subjected to
damage
or stress.
q
* Close
supervision is necessary if
●
Do
not
repair or
repkce
any part
, this appliance is used by or near
of the
apptiance
or attempt any
children. Do not
a~ow chtidren
servicing
unless spec~lcally
to
play
inside, on, or with this
recommended
in
this Use
am
appliance or any discarded
i~ pubtished
user-repair instructions
that you
appliance. Dispose of discarded appliances and
understand and have the
skilb to
carry
out.
shipping or packing materials properly. Before
discarding a washer,
or
removing from service,
To midmize the po=ibility
of
i@my:
remove the washer
lid.
(contin~d netipage)
d
●
Do
not
mix cMorine bleach
witi
ammonia or acids such as vinegar
an~or
rust remover.
-g
can produw
a
w@
tofic
gas
which
may
cause
death.
3
Id Care Book
or
#
WORTANT
SMTY
~STRUC~ONS
{continued)
m
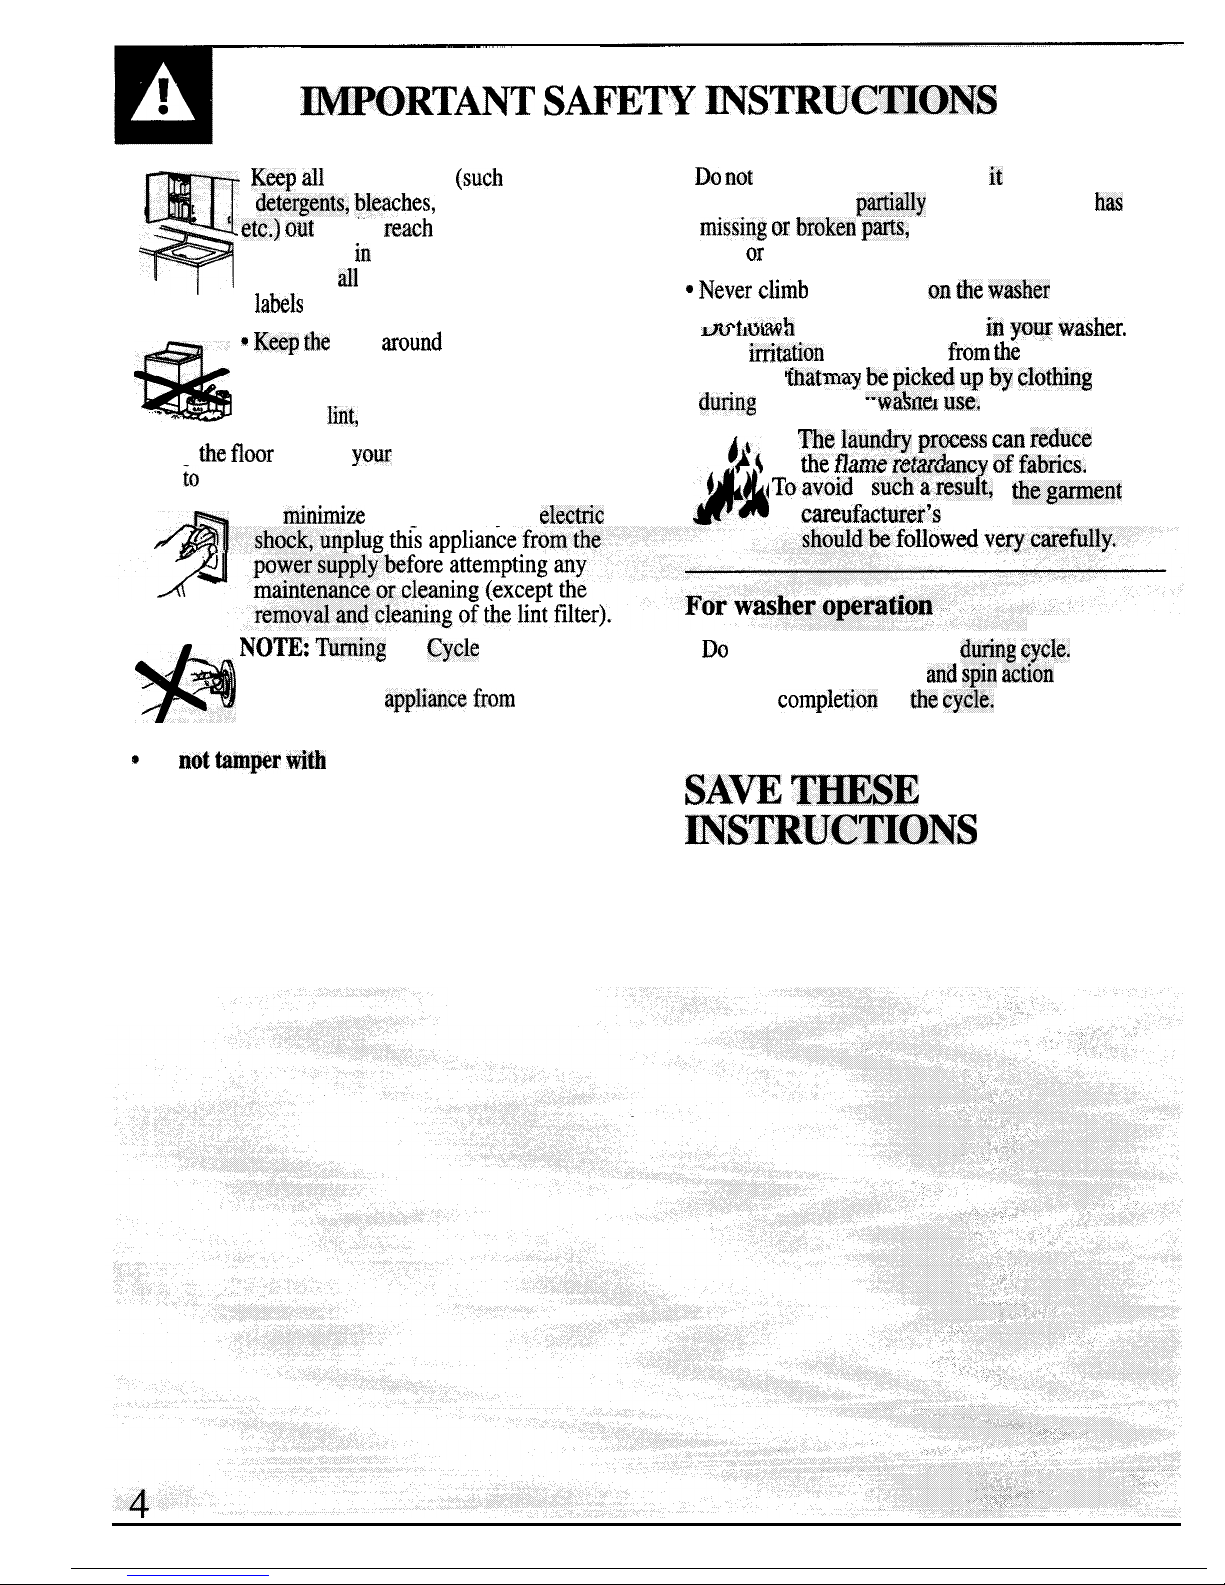
●
Keep ail
laundry aids
(such
as
●
Do not
operate this appliance if it is damaged,
de%rgents, ~leaches,
fabric softeners,
malfunctioning,
partidy
disassembled, or
has
‘
etc.) out
of the
reach
of children,
*
missing or broken parts,
including a damaged
preferably in a locked cabinet.
cord
or
plug.
Observe dl warnings on container
labels
to avoid personal injury.
* Never ctimb
on or stand on
the washer
top.
-
‘-
‘-* =*’ash
fiberglass articles ~
yuur washer.
~tion
could result
from the
remaining
‘L-+ ‘-=7 be picked up by clothing
--.-AL-A U$es
wess can reduce
dry
~o
reduce the possibility of slipping.
h
~i~ ~l=ii~ i=~~=ancy of fabrics.
~ ‘/ Toavoid suchamsult, %ogarment
A
●
To
rninimim
the possibility of
el~ctric
care
instructions
* Keep the
area
around
and underneath
- Mu
ilut
W4
your appliances free from the
Skin
irrita
4
accumulation of combustible materials,
particles
filaL
l~lay
during
subsequent
WUIIEI
I
such as
Itit,
paper, rags, chemicals, etc.
●
Keep
the floor
around
your
appliances
clean and
●
Thfi
laun@
prc
41, +k.s.-a..A..A
*
NO~: wing
the
Cycle
Selector
* Do not leave washer lid up
during cycle.
“
knob to an Opposition does NOT
This will stop the wash
and spin ~ction
and
disconnect the
applimce from
the
prevent
completio~
of
the cycle.
power supply.
e
Do
not
-~r witi
controls.
SAW mSE
WSTRUCTIONS
T~S
TO HELP YOU SELECT
SETT~GS
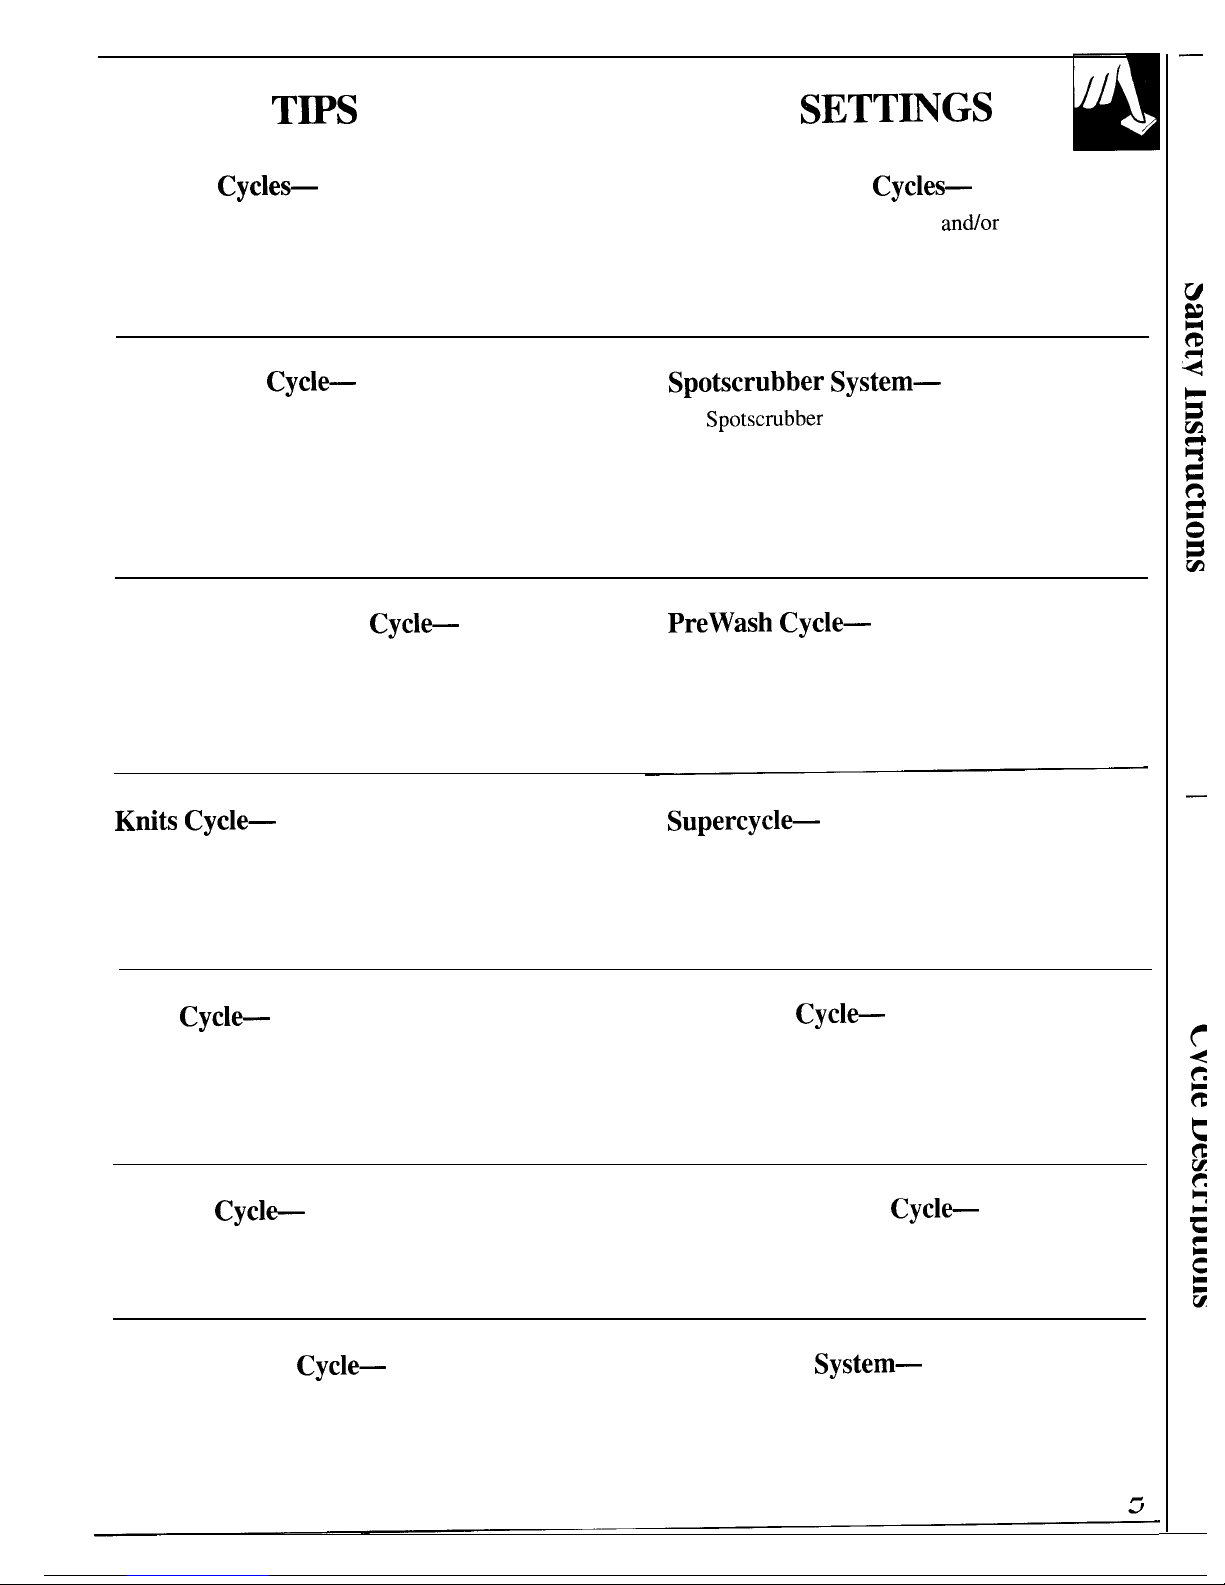
Cycle names and features may vary (on models so equipped)
Regular
Cycle+
Permanent Press
Cycles—
For most cottons, linens, work and play clothes.
For loads of synthetics, blends
andor
delicate fabrics.
Longer wash times plus deep rinse, spray rinse
A cold water cool down helps prevent set-in wrinkles
and spin provide thorough washing and detergent
in permanent press shirts, blouses, dresses and similar
removal.
apparel with normal soil.
Rapid Wash
Cycle—
Spotscrubber System—
Saves time and energy when washing small loads
The
Spotscrubber
cycle uses a special wash cycle and
of lightly soiled clothes.
a highly concentrated detergent solution in a small
amount of water in the Mini-Basket tub.
Rinse water carries away soils and detergent suds and
automatic extra rinse assures complete removal of
detergent.
Optional Extra Rinse
Cycle—
PreWash Cycle—
The option of an extra rinse in the Regular Cycle
For use when clothes are excessively soiled.
helps assure complete detergent removal when extra
Provides an agitated soak, and a soak without
detergent was used or where unusual skin sensitivity
agitation, followed by agitation and spin. Washer
to detergent is a concern.
must be reset for desired wash cycle.
Knih
Cycle—
Supercycle—
A shorter cycle specially-designed for today’s knits.
For modern fabrics with heavy or oily soil. Agitation
An early and long spray rinse cools down fabrics
for a long time loosens stubborn soils.
before the washer reaches maximum spin speed to
help prevent wrinkle setting.
Soak
Cycle—
Auto Soak
Cycle
Clothes activate in a soaking agent for a short time,
This will add additional wash time on cycles to allow
then the water spins out. Washer turns off at end of
the detergent to break down excessive soils. After the
Soak Cycle—must be reset for desired wash cycle.
Auto Soak is complete, it will automatically move
through the selected cycle.
Delicate
Cycle
Washable Woolens
Cycl*
For lingerie and fabrics requiring special care, this
This cycle helps to reduce the need to wash these
cycle has a gentle wash and a slow spin.
fabrics by hand.
Washable Silks
Cycle—
Mini-Basket
System—
For fine washable silks. Check manufacturers’ care
Uses the Mini-Basket feature. Provides a complete
labels for special instructions.
wash, rinse and spin cycle.
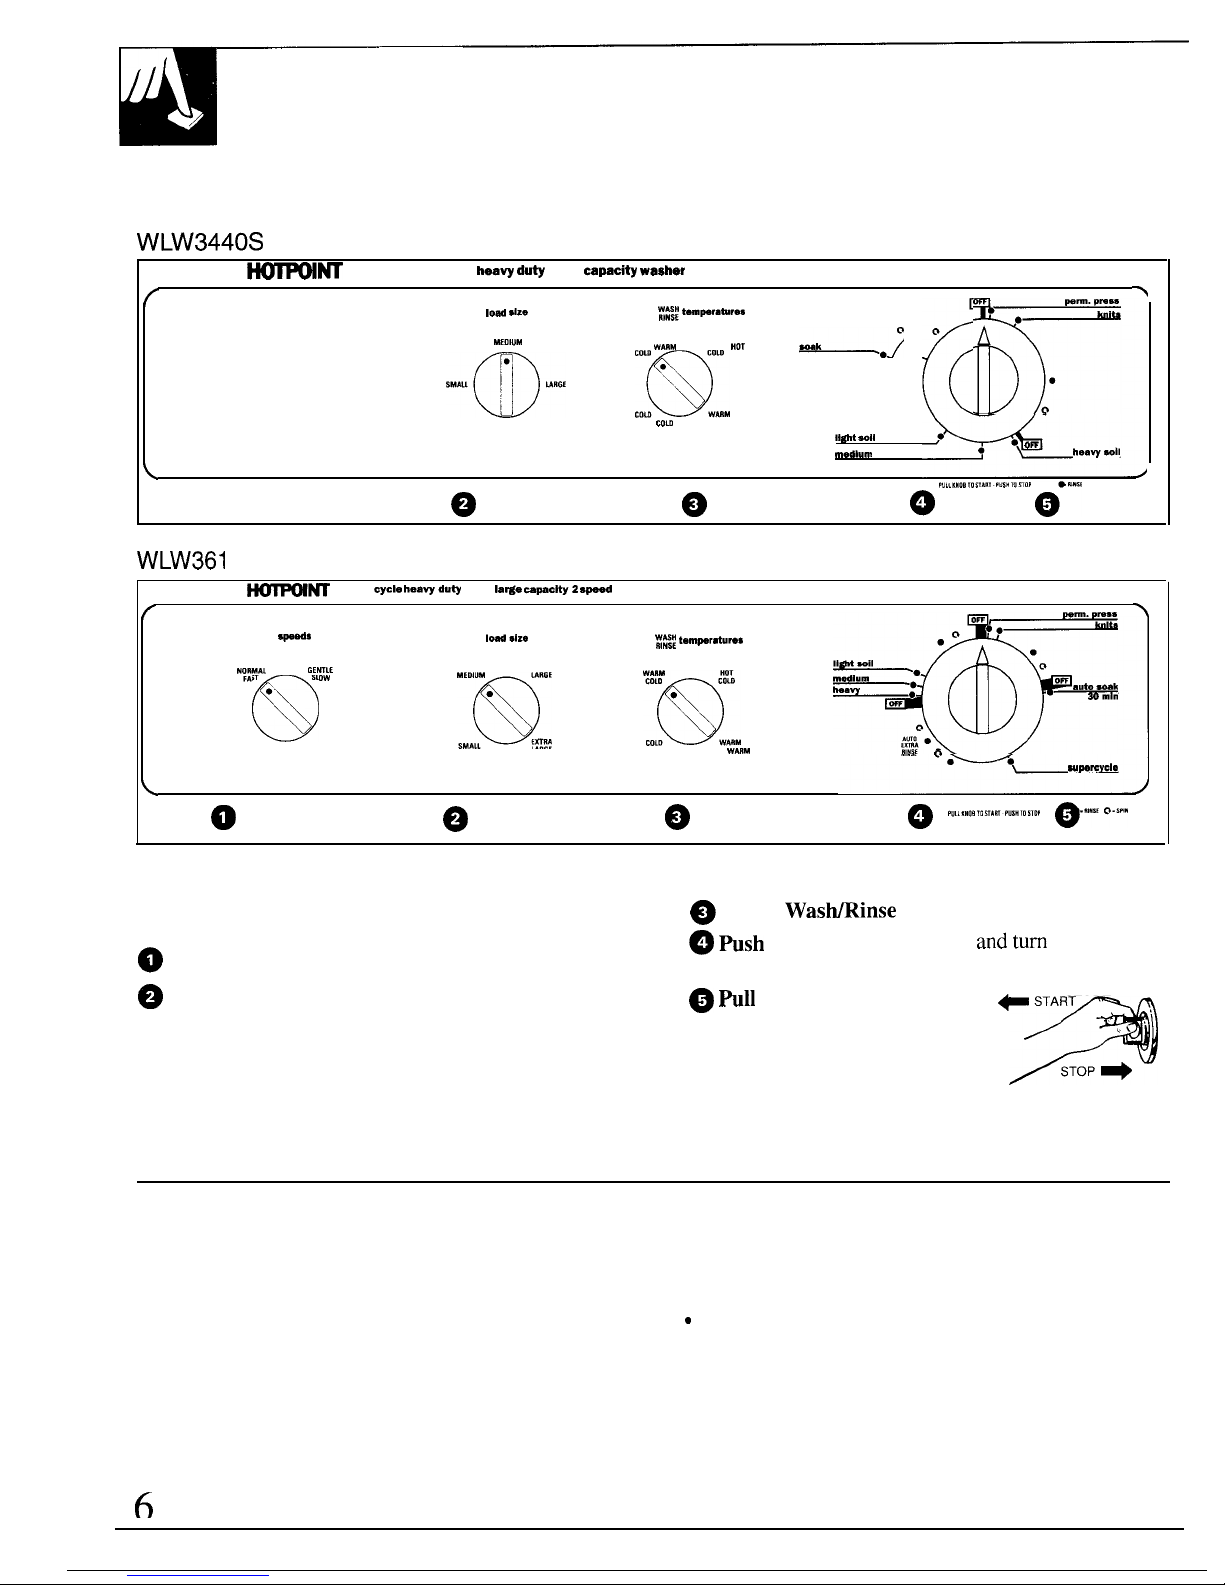
HOW TO OPERATE YOUR CLOTHES WASHER
Features and appearances may vary slightly
WARNING—To reduce the risk of fire, electric shock, or injury to persons when using your
appliance, read the IMPORTANT SAFETY INSTRUCTIONS before operating this appliance.
WLW3440S
~M
6 cycle
heev
du~ large capmiw
weeher
(
7
loti
*Z.
flf~~
tmwr.tir.s
MEO,”M
~:&M
“or
@,
‘“’”m”’”
,..s:.
‘0”
“•-
Wu
WARM
lint *II
●
● OR
medium
●
heawmil
\
9
9
@ ‘“’’’””BrOaRa”s””””O””O’ Q-”N’ o”’””
WLW361
OS
~w
7
cycle bawduW
extra
Iatie mwciW2 S-
warner
f
m
P
\
WASN
SPIN
‘d’
1-s1,0
~~s~
temwrd.ns
N:~~:L :~~JE
Q
●
\
“a,
:s:
‘:@:M
“’’”i:.*oO”*-
URGE
COLD
WUM
0
●
●
Wmmvcle
<
e
9
Q
a
““’’”00’09’”’”s”10s’0’
e-’’”””s””””
Setting the Controls —
Controls and features will vary from model to model
Use the Suggested Fabric and Cycle Settings guide
~
Select
Was~inse
Temperature.
to help you make the proper selections.
@
Select Wash Spin Speed.
@ fish
Cycle Selector knob in andturn clockwise to
your selected wash setting.
@
Select Water Level.
~ fill
Cycle Selector knob
+
START ,
SMALL: Washer is less than 1/3 full of clothes.
out to start the washer. If
9
L\ ‘
MEDIUM: Between 1/3 and 1/2 full.
you wish to change setting
after washer has started, push
STOP
@
LARGE: Between 1/2 and 2/3 full.
Cycle Selector knob into stop
EXTRA LARGE: Over 2/3 full.
the washer and reset to the new
position. Setting can be changed at any time.
Sorting and Loading
● Sort clothes carefully by fabric type, weight, color
●
See Bleach and Fabric Softener Dispenser sections
and amount of soil, according to instructions in How
for instructions in their uses (on models so equipped).
to Sort Clothes section.
“
For information on how to use bleaches and fabric
● Add measured amount of detergent. See Detergents
softeners, see Other Laundry Products section.
section for information on detergents and other
laundry additives.
● Close the lid. Washer will fill but not agitate or spin
with the lid open.
● Load clothes into wash basket, being careful not
to overload. See How to Load Your Washer section.
6
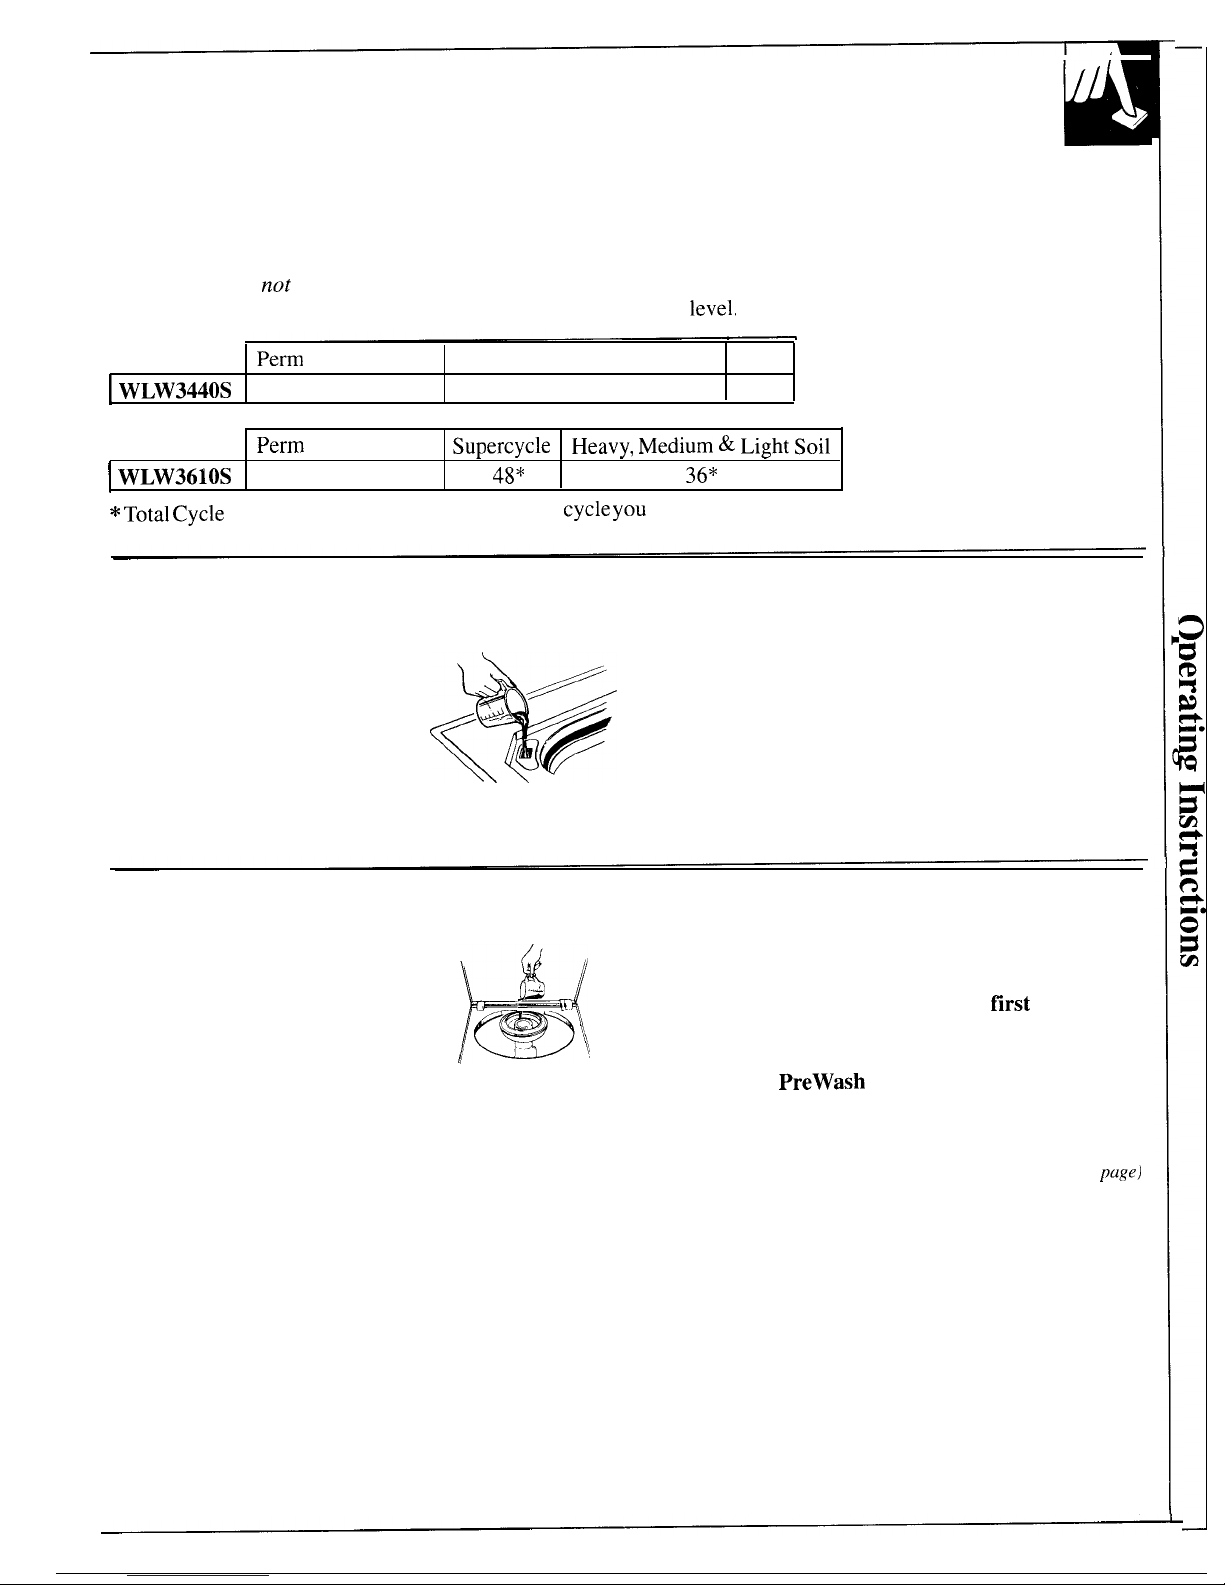
Cycle Times —
Total Cycle Times (Approximate Minutes)
NOTES:
● Total time includes pauses between each phase of the cycle.
● Total time does
not
include water fill times. Fill times vary
depending on household water pressure and your selected water
level.
Perm
Press & Knits
Heavy, Medium & Light Soil
soak
I
WLW3440S
25
37
12
Perm
Press & Knits
Supercycle
Heavy, Medium
& Light soil
I
WLW3610S
29
48*
36*
* Total Cycle
Minutes do not include the auto soak
cycle
YOU have chosen.
HOW to Use the Bleach Dispenser (on models so equipped)
Use this dispenser with liquid bleach only.
● Measure bleach carefully. See manufacturer’s
If you prefer to use powdered bleach,
/
instructions.
pour it into the wash basket
● Pour measured amount of liquid bleach directly into
along with your detergent.
d.
Do not pour powdered bleach
%%
bleach dispenser.
into the bleach dispenser.
●
Do not overfill or allow dispenser to overflow. Avoid
splashing. Undiluted bleach can cause fabric damage.
● Never pour undiluted liquid bleach directly
onto clothes or into the wash basket.
How to Use the Fabric Softener Dispenser
(on models
so
equipped)
● Position the Fabric Softener
● The fabric softener will automatically be dispensed
Dispenser on the agitator.
%(
at the proper time.
..4
● Pour manufacturer’s recommended
● Do not stop the washer during the
fllrst
spin.
amount of fabric softener into a
,0
.-
This will cause the dispenser to empty too soon.
one cup (240 ml) measuring cup.
)
-
~
\
● Do not use the Fabric Softener Dispenser with
● Add enough water to fill the cup 1/2 full.
the Soak or
PreWash Cycle.
● Pour the diluted softener into the dispenser.
●
If the dispenser gets clogged, soak it in a solution of
one cup (240 ml) water and one cup (240 ml) alcohol.
(continued next page)
7
OPERAT~G mSTRUCTIONS
(continued)
HOW
to
Use
the Soak
Cycles
(on models so equipped)
●
Soak: Turn the cycle selector to soak. Start the
● NOTE: For an extended soak, allow the washer
washer. Add
pre-measured
detergent or soak product;
to fill and agitate for a few minutes to dissolve the
add clothes.
soaking agent. Then push in the Cycle Selector knob
to stop the washer (keep lid closed) and allow to
soak for as long as desired. After desired soak
period, pull out the Cycle Selector knob to complete
the cycle.
HOW to Use the Auto Soak Cycle (on models so equipped)
In the Auto Soak cycle the washer fills, agitates and
● Supercycle with Auto Soak: Set the Cycle Selector
soaks for the time you selected. It automatically
knob for Auto soak. Start the washer. The washer
advances into the next cycle.
will agitate, soak and automatically advance into
the
Supercycle.
ENERGY-SAV~G
TPS
If your clothes and household items don’t look clean
and fresh after washing, you will probably rewash
them.. and that means you’ll waste energy. Remember
to sort your clothes carefully, and load them properly,
select correct cycles, use enough detergent and
choose a
water temperature warm enough to release and get rid
of soil.
● Try to wash less often. Save articles of the same type
of fabric until you have a full load.
8
● If you must wash smaller loads, adjust the amount of
water. Small loads should have lower water levels.
● Always rinse in cold water. The temperature of the
rinse does not affect cleaning.
“
Wash in off-peak utility hours. Your local utility can
tell you which are the off-peak hours.
● Use your washer’s Normal Spin. This will remove
more water during spin, which will shorten drying
cycle to save more energy.
 Loading...