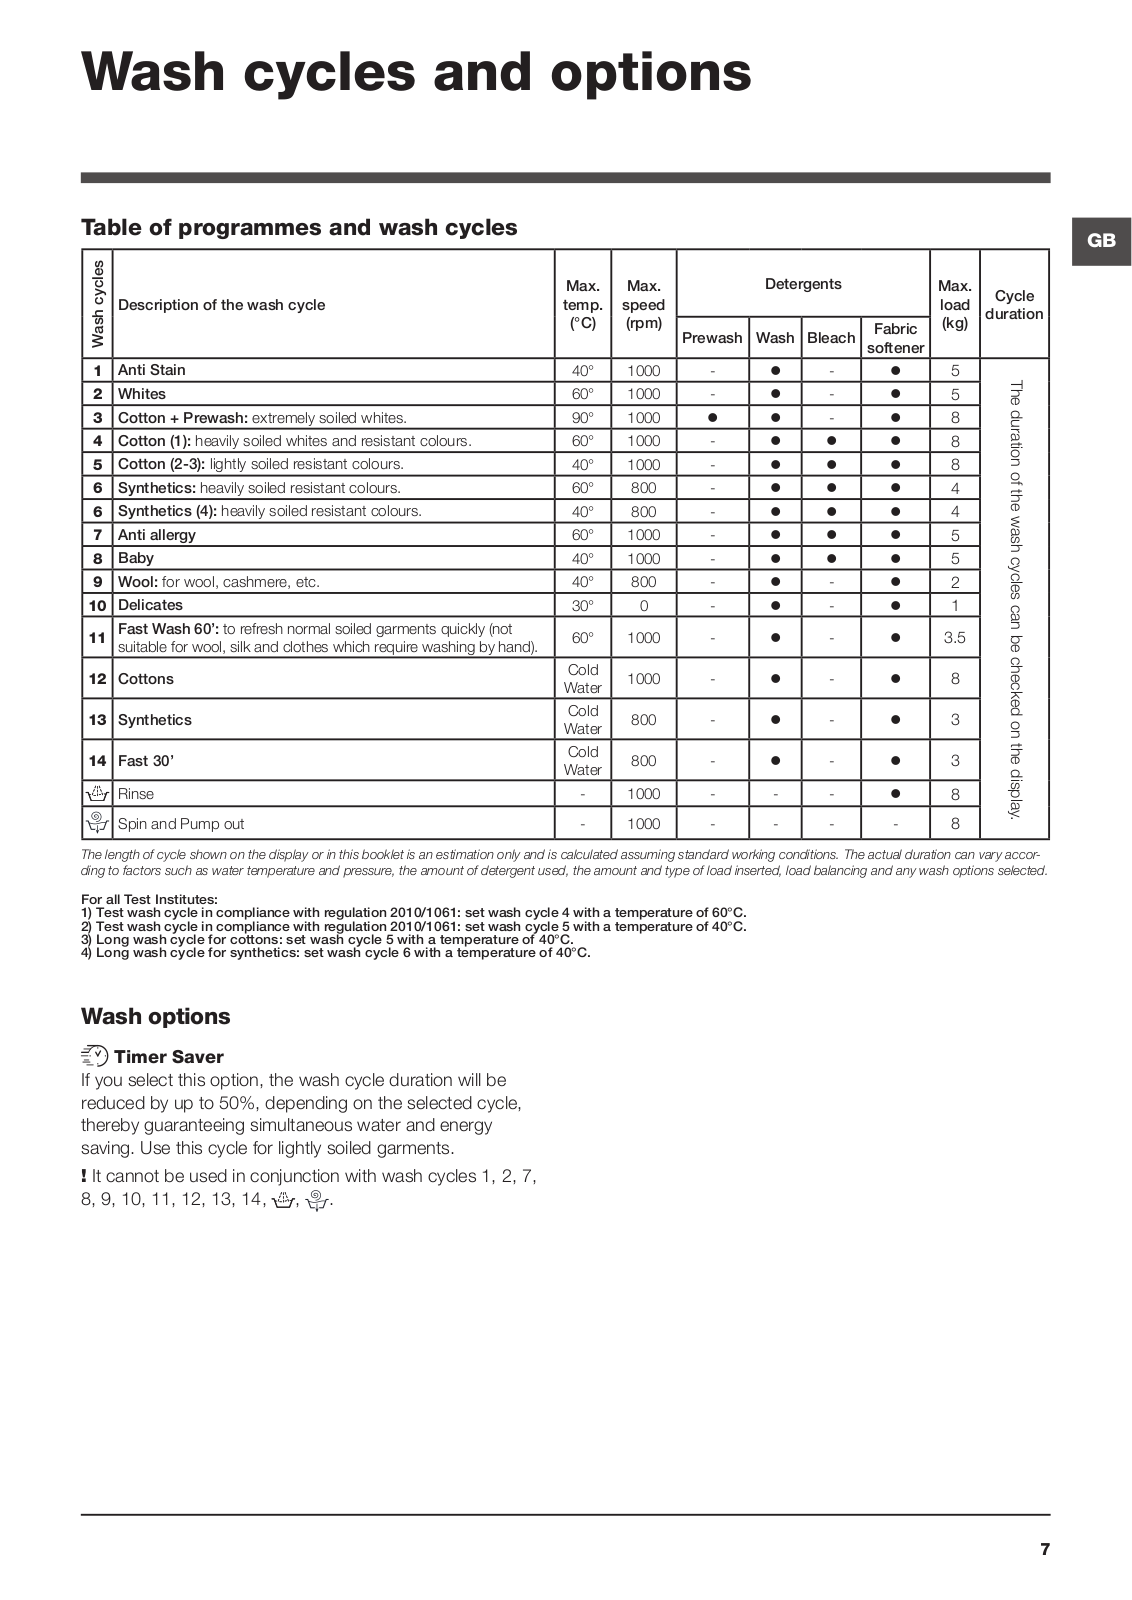
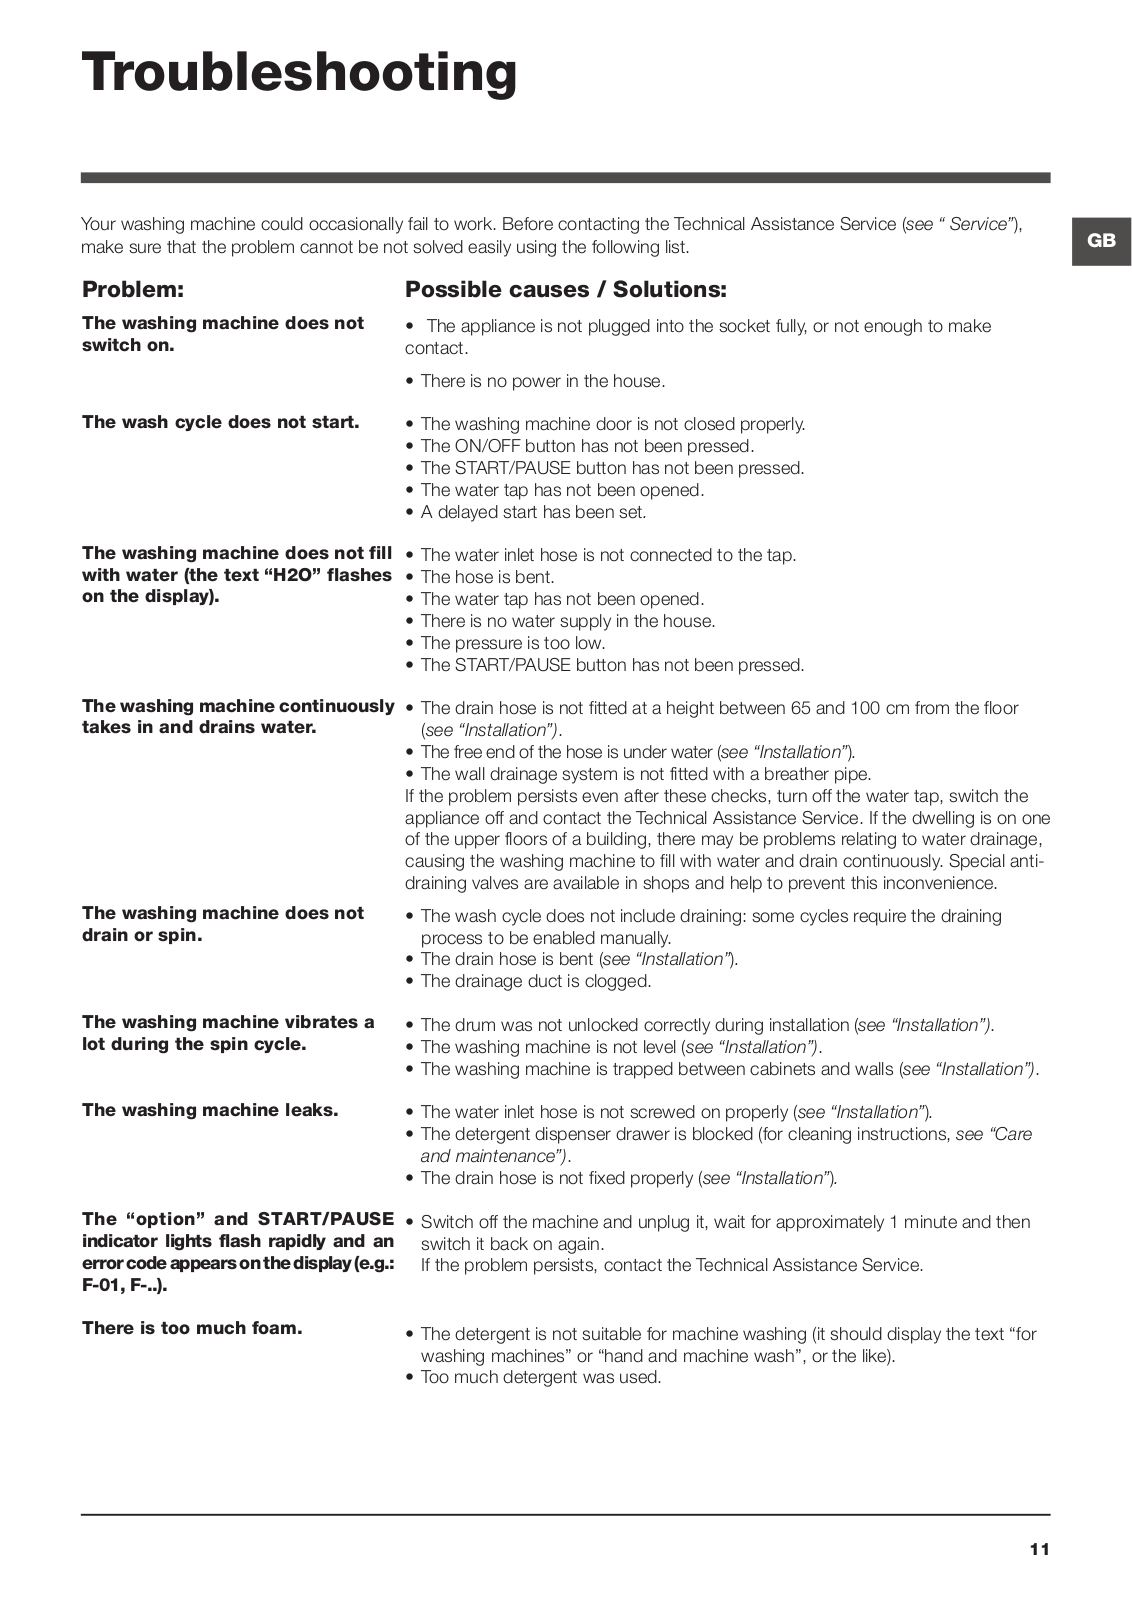
How it Works
Log In / Sign Up
Buy Points
How it Works
FAQ
Contact Us
Questions and Suggestions
Users
Hotpoint
Loading...
W
WMEF 762
wmef-923
WMEF 943
WMEF 943P UK
WMEF 963
WMEUF 722P UK
WMEUF 743G UK
WMEUF 743P UK
WMEUF 944P UK
WMF
WMF 520 A
WMF 520 G
WMF 520 K
WMF 520 P
WMF540A
WMF540G
WMF540K
WMF540P
WMF 560 A
WMF 560 G
WMF 560 K
WMF 560 P
WMF 601
WMF 601 EU
WMF 700
WMF 701
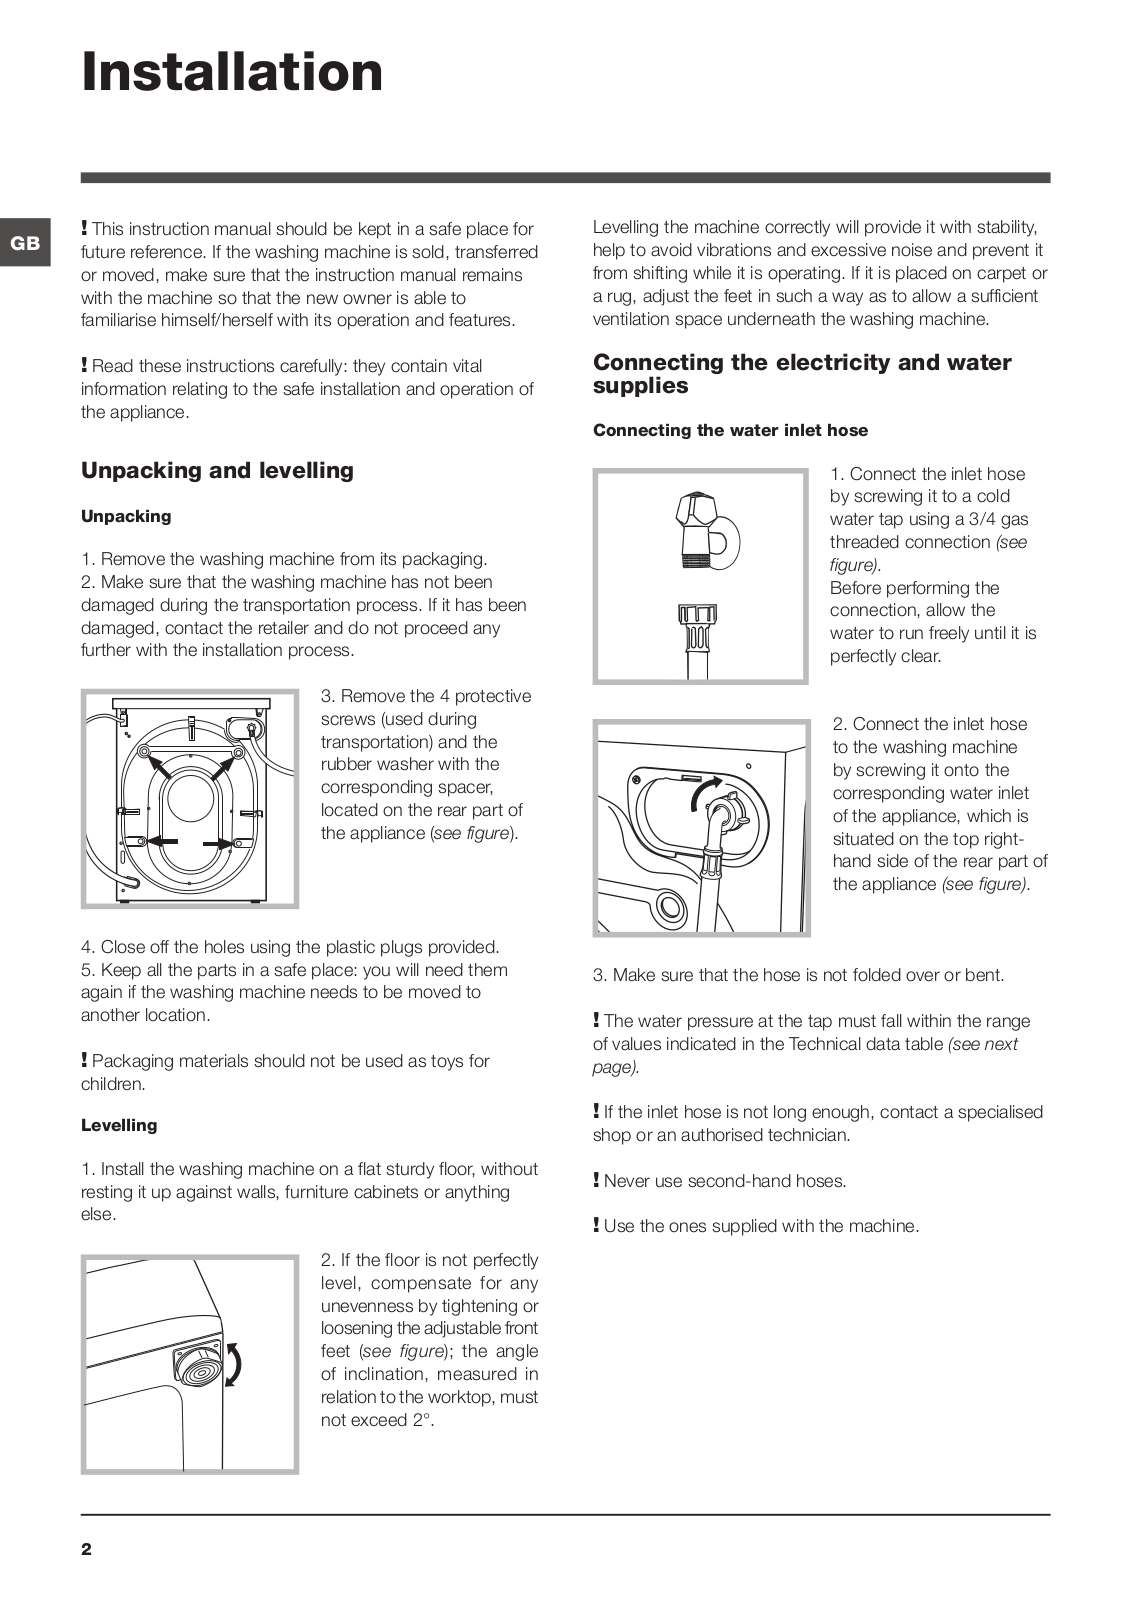
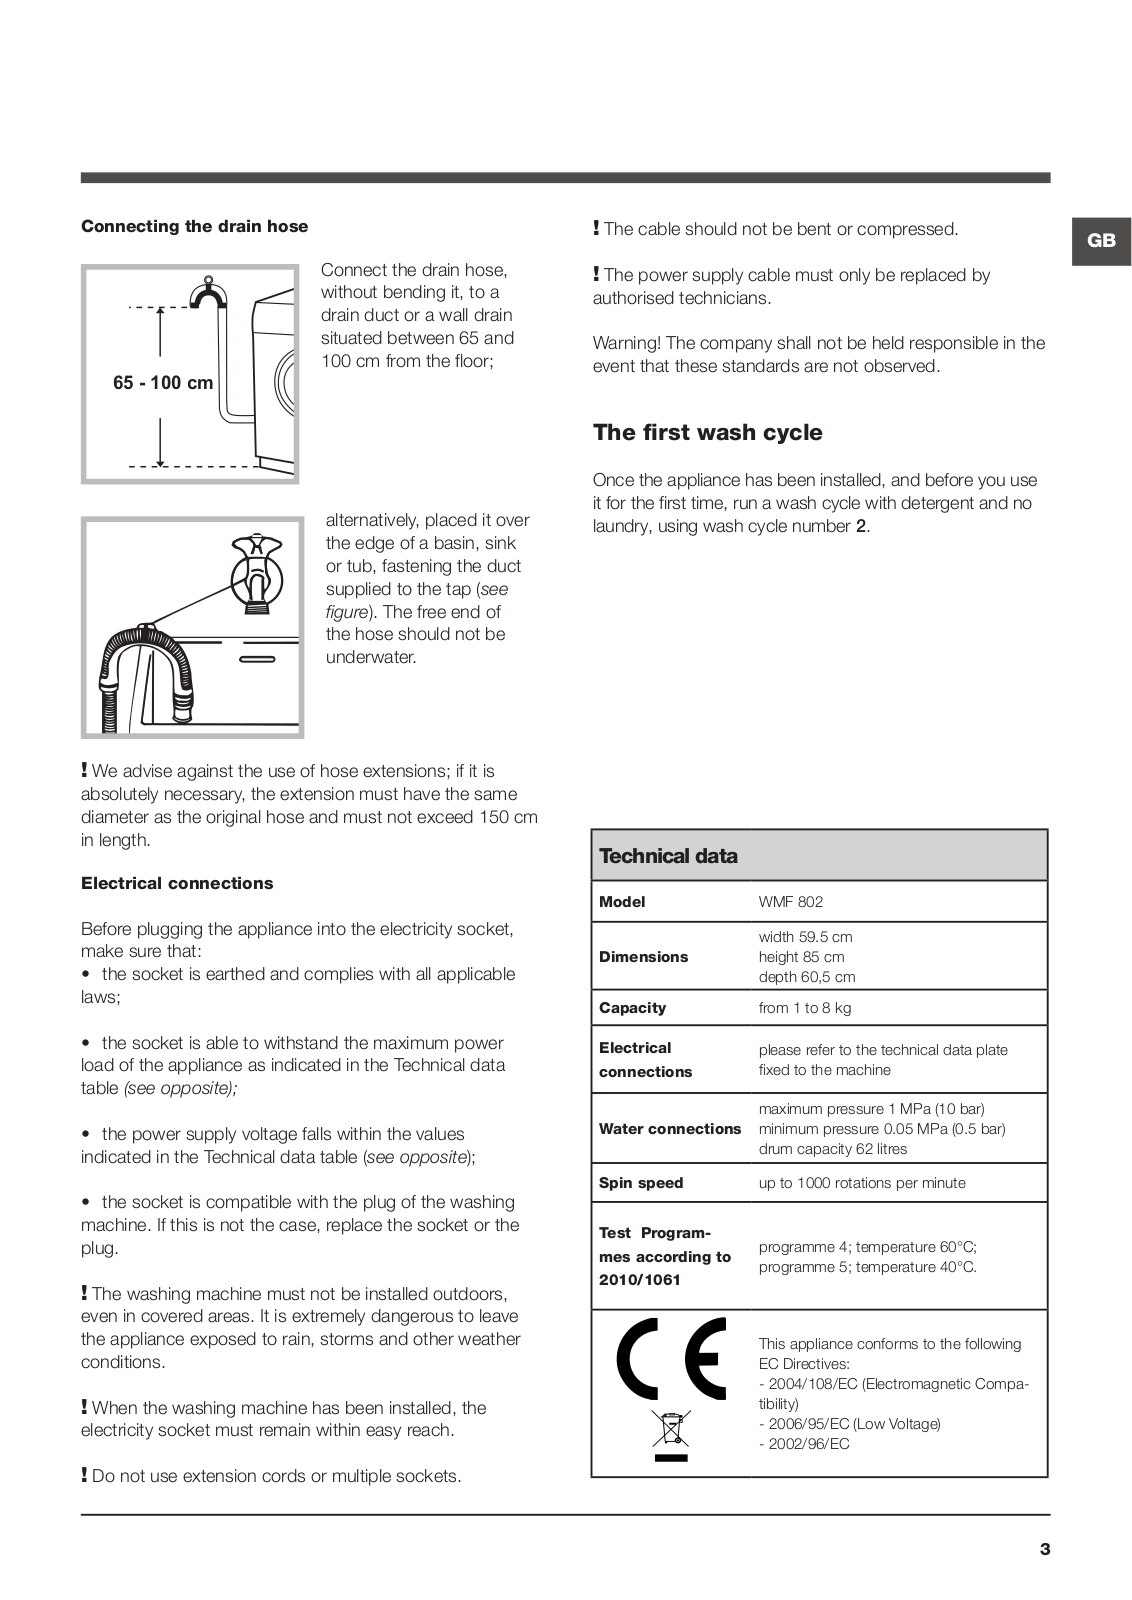
2
WMF 701 EU.M
WMF 702
WMF 7025 EU
WMF 7025 EU.M
WMF 702B IT
WMF 7081BS EU
WMF 720 A
WMF 720 G
WMF720GUK.R
2
WMF720GUK.RA
WMF 720 K
WMF 720 P
WMF720PUK.R
WMF720PUK.RA
WMF 722
WMF 722BSC EU
WMF 722BSC EU.M
WMF 722 FR
WMF 722 FR.M
WMF 729B AUS
WMF 740 A
WMF 740 G
WMF740 -G-A-K
WMF 740 K
WMF 740 P
WMF 740 P-G-A-K-X
WMF 740X
WMF 760 A
WMF 760 A (UK).R
WMF 760 G
WMF 760 K
WMF 760 P
WMF 760 P-G-A-K
WMF 802
WMF 822B EU
WMF 822B EU.C
WMF 823 FR
WMF 823 K
WMF 823K FR
WMF 903
WMF 923 EU
WMF 923 EU.C
2
WMF 940 A
WMF 940 G
WMF 940 K
WMF 940 P
WMF 945 A
WMF 945 G
WMF 945 K
WMF 945 P
wmfc 741
WMFG
WMFG 1053
WMFG 611
WMFG 631
WMFG 641
WMFG 651
WMFG 741
WMFG 741G UK
WMFG 741P UK
WMFG 741P UK.M
WMFG 821
WMFG 821P UK
WMFG8337
WMFG 8337G UK
Wmfg 8537
WMFG 942
WMFL 833
WMFUG 1063
WMFUG 1063P UK
WMFUG 742
WMFUG 742G UK
WMFUG 742P UK
WMFUG 742 P UK.M
Loading...
Loading...
Nothing found
WMF 802
User Manual
36 pgs
1.81 Mb
0
Table of contents
Loading...
Hotpoint WMF 802 User Manual
...
Hotpoint User Manual
Download
Specifications and Main Features
Frequently Asked Questions
User Manual
Download
Loading...
+
25
hidden pages
Unhide
You need points to download manuals.
1 point = 1 manual.
You can buy points or you can get point for every manual you upload.
Buy points
Upload your manuals
 Loading...