How it Works
Log In / Sign Up
Buy Points
How it Works
FAQ
Contact Us
Questions and Suggestions
Users
Hotpoint
Loading...
W
WMD943BSFR
2
WMD 947 P
WMD 960 A
WMD960P
WMD 962
WMD 962 A
WMD 962 G
WMD 962 K
WMD962P
2
WMD 962 P-G-A-K
WMD 967 A
WMD 967 G
WMD 967 K
WMD 967 P
WMD 9692 A
WMD 9692 G
WMD 9692 K
WMD 9692 P
WMDN 7225 B CZ
WMEF 641
WMEF 702
WMEF 722
WMEF 7225
WMEF 722 BC UK
WMEF 742
WMEF 742G UK
WMEF 742P UK
WMEF 762
wmef-923
WMEF 943
WMEF 943P UK
WMEF 963
WMEUF 722P UK
WMEUF 743G UK
WMEUF 743P UK
WMEUF 944P UK
WMF
WMF 520 A
WMF 520 G
WMF 520 K
WMF 520 P
WMF540A
WMF540G
WMF540K
WMF540P
WMF 560 A
WMF 560 G
WMF 560 K
WMF 560 P
WMF 601
WMF 601 EU
WMF 700
WMF 701
2
WMF 701 EU.M
WMF 702
WMF 7025 EU
WMF 7025 EU.M
WMF 702B IT
WMF 7081BS EU
WMF 720 A
WMF 720 G
WMF720GUK.R
2
WMF720GUK.RA
WMF 720 K
WMF 720 P
WMF 722
WMF 722BSC EU
WMF 722BSC EU.M
WMF 722 FR
WMF 722 FR.M
WMF 729B AUS
WMF 740 A
WMF 740 G
WMF 740 K
WMF 740 P
WMF 740 P-G-A-K-X
WMF 740X
WMF 760 A
WMF 760 A (UK).R
WMF 760 G
WMF 760 K
WMF 760 P
WMF 760 P-G-A-K
WMF 802
WMF 822B EU
WMF 822B EU.C
WMF 823 FR
WMF 823 K
WMF 823K FR
WMF 903
WMF 923 EU
WMF 923 EU.C
2
WMF 940 A
WMF 940 G
WMF 940 K
WMF 940 P
WMF 945 A
WMF 945 G
WMF 945 K
WMF 945 P
Loading...
Loading...
Nothing found
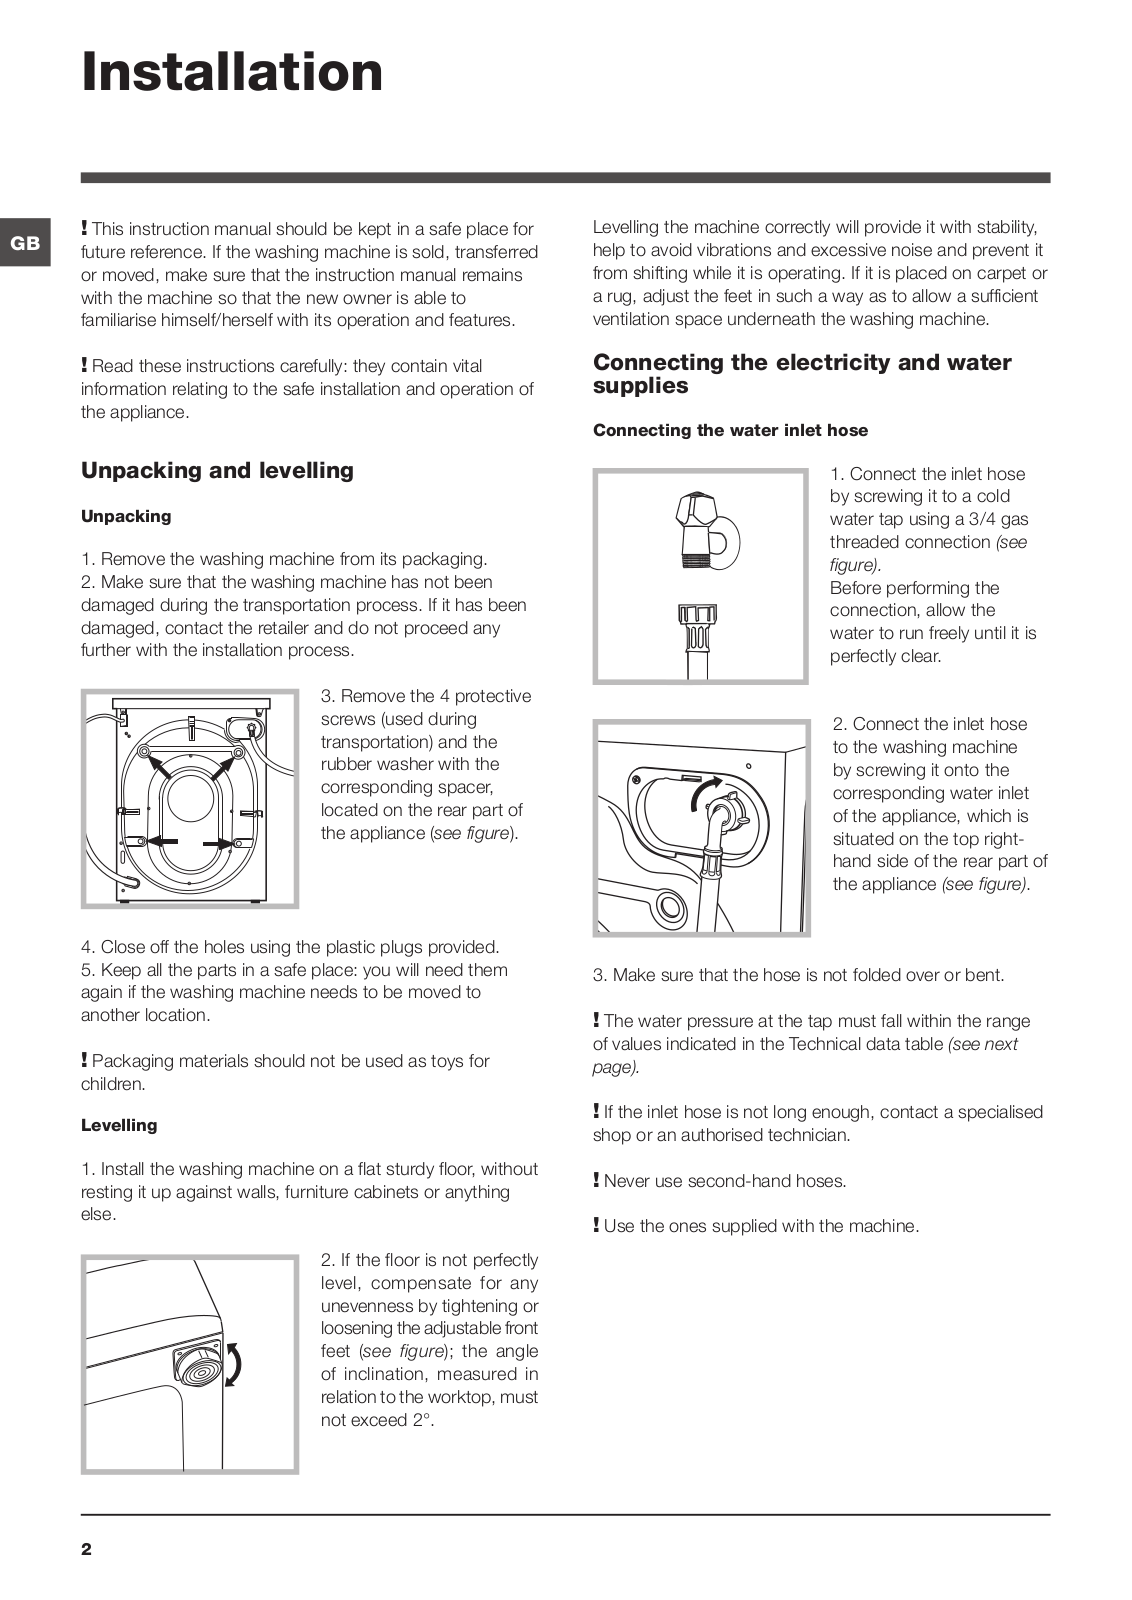
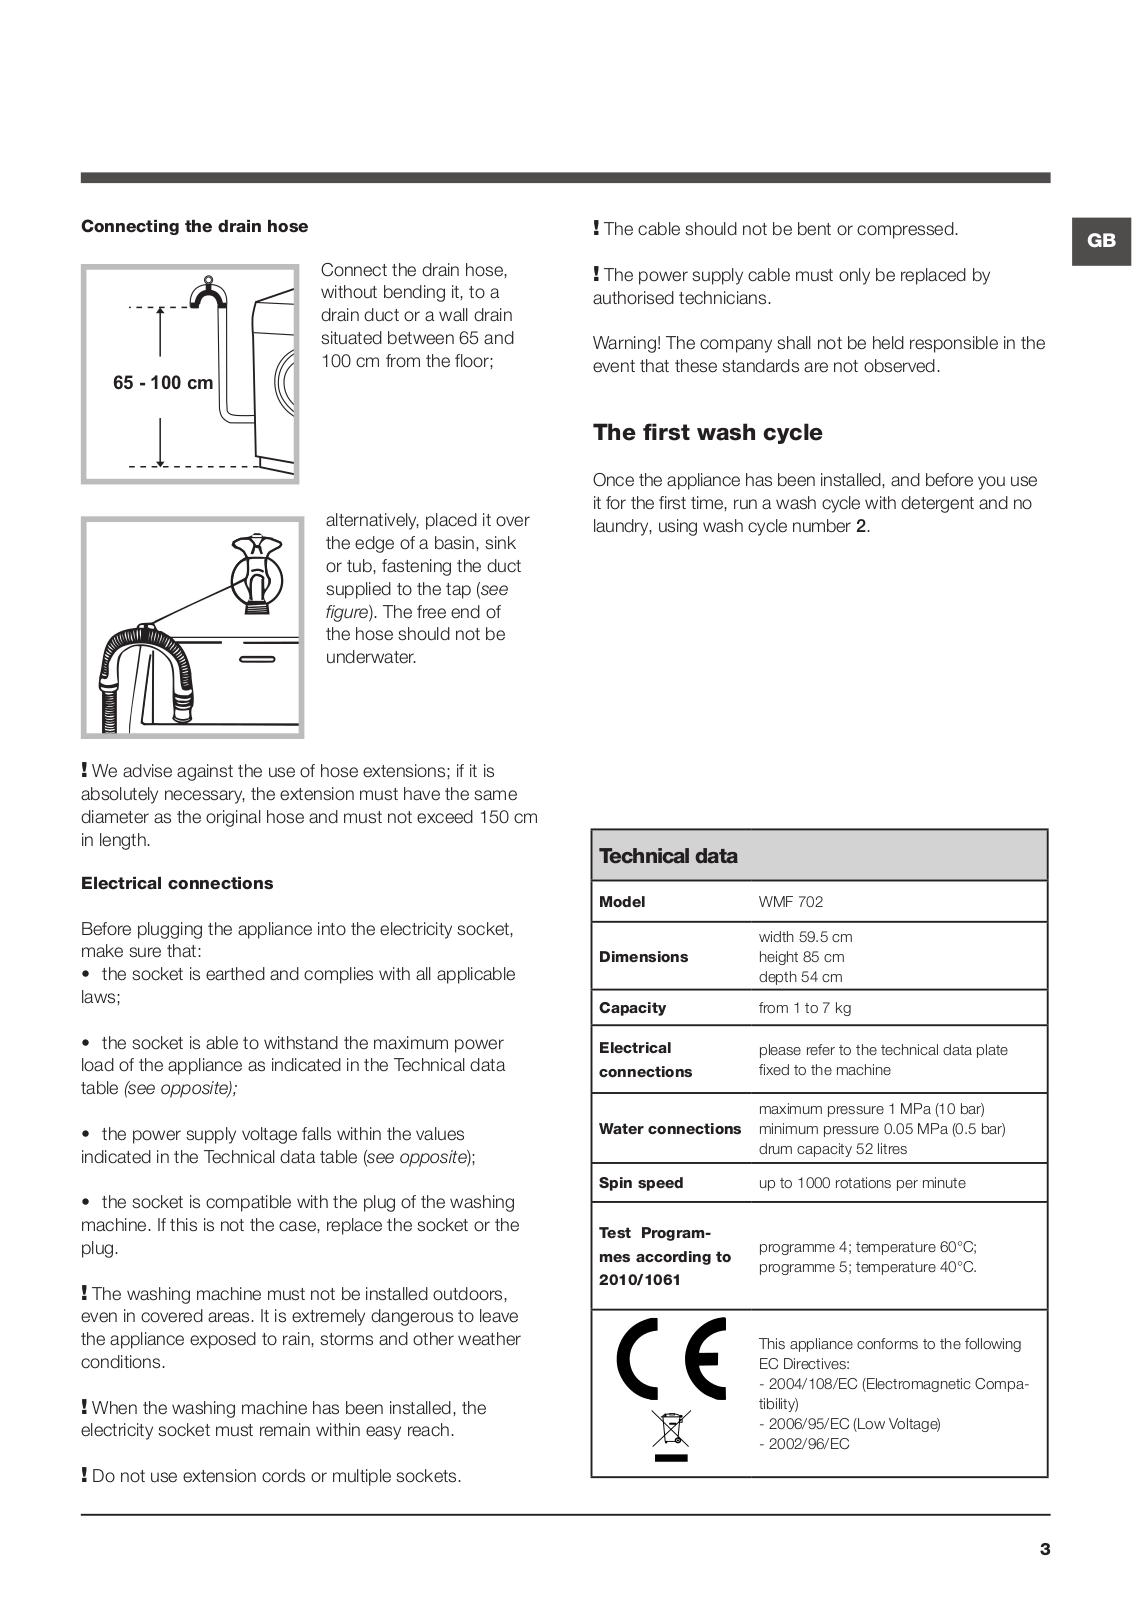
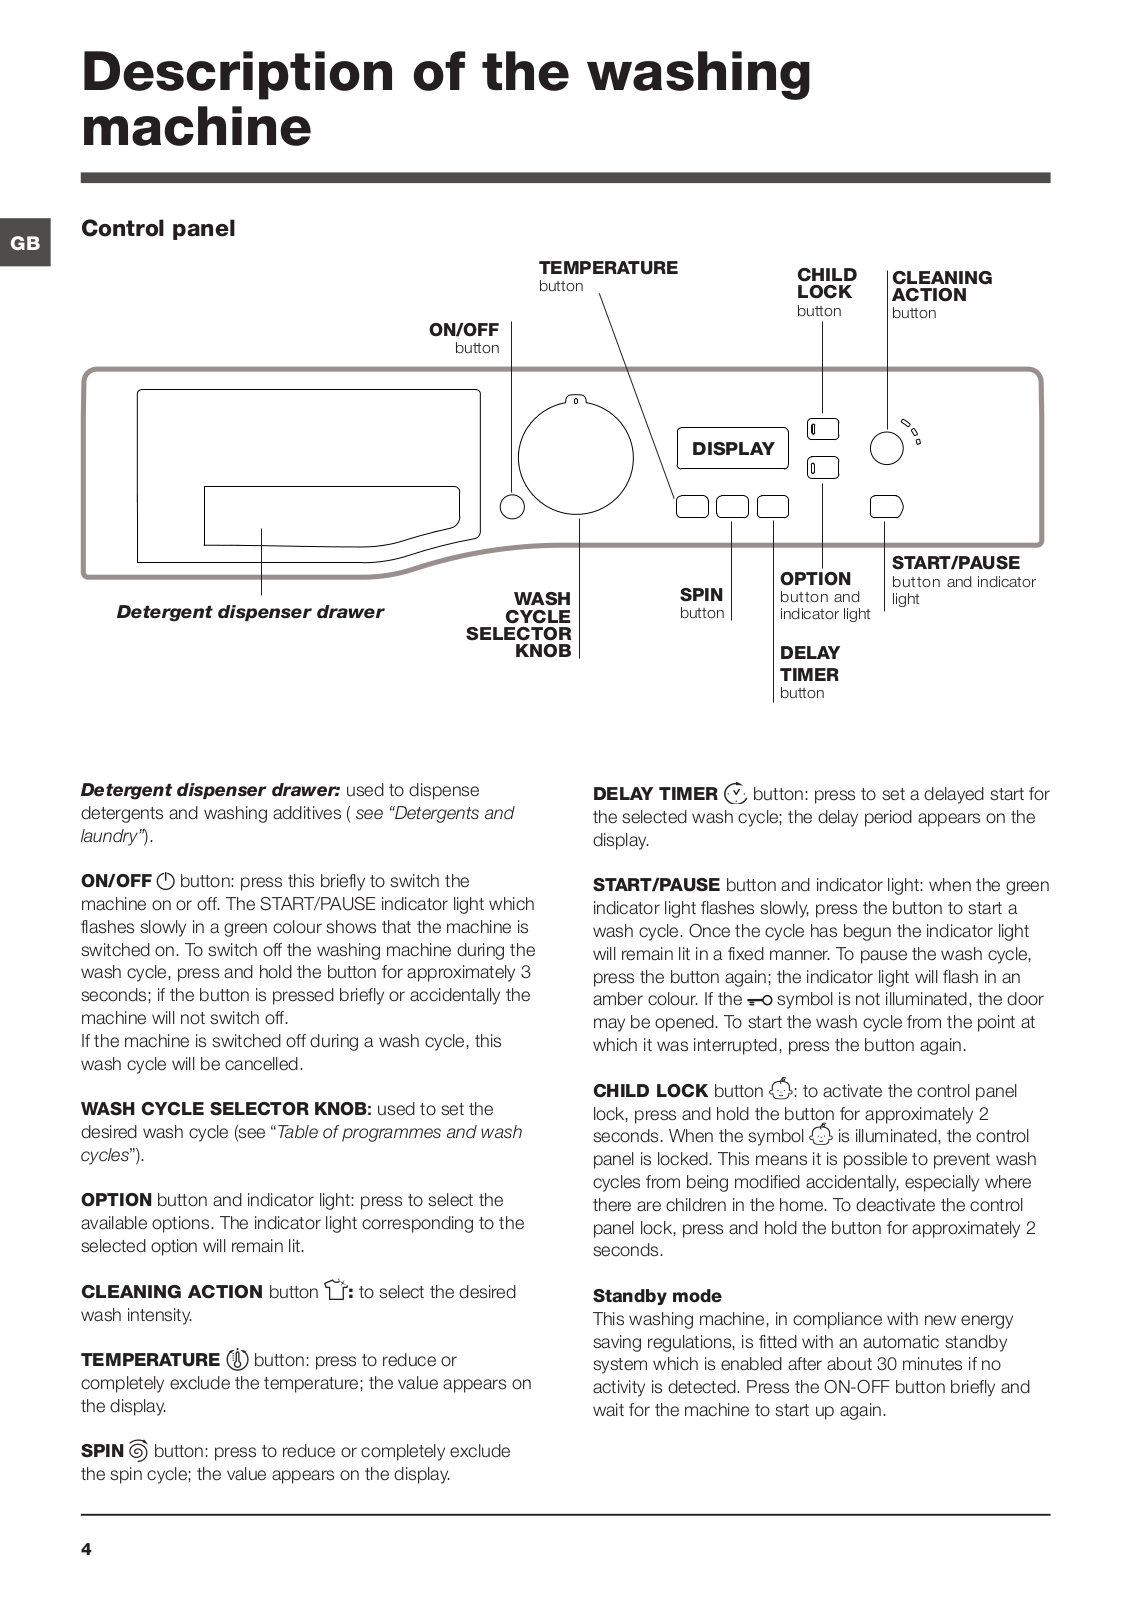
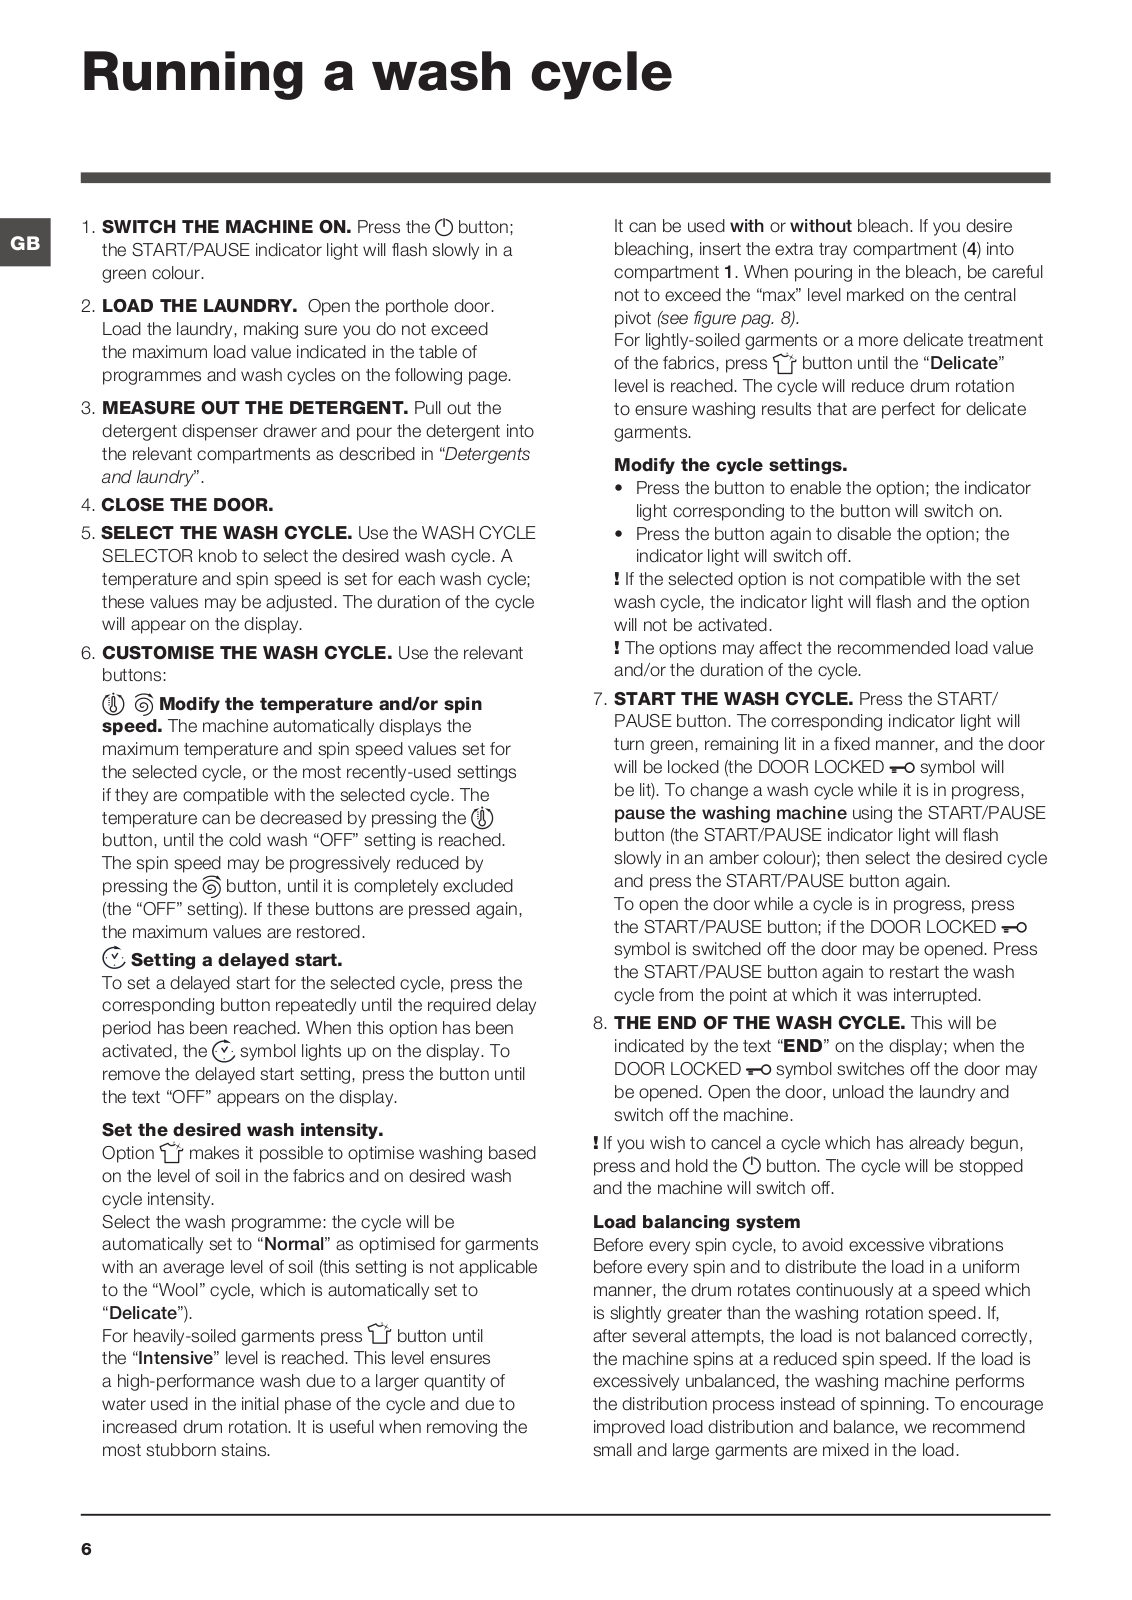
WMF 702
User Manual
24 pgs
1.18 Mb
0
Table of contents
Loading...
Hotpoint WMF 702 User Manual
...
Hotpoint User Manual
Download
Specifications and Main Features
Frequently Asked Questions
User Manual
Download
Loading...
+
16
hidden pages
Unhide
You need points to download manuals.
1 point = 1 manual.
You can buy points or you can get point for every manual you upload.
Buy points
Upload your manuals
 Loading...