

Hotpoint WLW3760 Use And Care Manual
Yourbwbhw
Contents
Appliance Registration
2
use
and Care
Bleach Dispenser
8
Care and Cleaning
25
of
Model
Consumer Services
27
Controls Setting Guide
10, 11
WW3760
Cycle Settings
6,7
Detergents, Other Additives 14–18
Energy-Saving Tips
9
Fabric Softener Dispenser
8
Hard Water
17
Important Phone Numbers 27
Limestone Deposits
15
Loading the Washer
5, 13
Model and Serial Numbers
2
Operating the Washer 5-8
Pretreating
11, 12, 18
Problem Solver
21-25
Safety Instructions
3,4
Sorting Clothes 5, 12
Stains
19
Stain Removal Guide
20
Storage
and Vacation
Tips
25
User Maintenance Instructions 25
Warranty
Back Cover
GE Answer
Center@
800.626.2000
HELP US HELP YOU...
Read this book carefully.
It is intended to help you
operate and maintain your
new washer properly.
Keep it handy for answers to
your questions.
If you don’t understand something
or need more help, write (include
your phone number)
Consumer Affairs
Hotpoint
Appliance Park
Louisville, KY 40225
Save time and money.
Before you request service . . .
check the Problem Solver
section. It lists causes of minor
operating problems that you can
correct yourself.
If you received a
damaged washer...
Immediately contact the dealer (or
builder) that sold you the washer.
Write down the model
and serial numbers.
You’ll find them on a label on
the lower left side near the front.
These numbers are also on the
Consumer Product Ownership
Registration Card that came with
your washer. Before sending in
this card, please write these
numbers here:
Model Number
Serial Number
Use these numbers in any
correspondence or service
calls concerning your washer.
WAM~G:
For your safety
the
information in this
mand
must be
fo~owed
to
mi-e
the risk of fire or explosion or to prevent property damage, personal
injury or
loss of life.
—Do
not
store or use gasoline or other
Q tiediately cti
your gas supplier from a
flammable vapors and
Uquids
in the
neighbor’s
phone. FOBOW
the
gas supptier’s
vicinity of this or any other appliance.
instructions.
—~T TO
DO IF YOU
S~LL
GAS
●
M you
cannot reach
your
gas
suppher, dl
c
Do not try to
tight
any appliance.
the
fire department.
. Do not
touch
any electrid switch;
—InstaMation
and service must be performed
do not use any phone in your building.
by a
qtified insta~er,
service
agen~ or
the gas supplier.
●
Clear the room,
bufiding
or area of
M
occupants.
All washing instruction terms in this book conform to the Care
Labeling Rule established by the Federal Trade Commission, January 1984.
If You Need Service
To obtain service, see the
Consumer Services page
in the back of this book.
We’re proud of our service and
want you to be pleased. If for some
reason you are not happy with the
service you receive, here are 3
steps to follow for further help.
First, contact the people who
FINALLY, if your problem
serviced your appliance. Explain
is still not resolved, write:
why you are not pleased. In most
Major Appliance Consumer
cases, this will solve the problem.
Action Panel
NEXT, if you are
still
not pleased,
20 North
Wacker
Drive
write all the details—including
Chicago, IL 60606
your phone number—to:
Manager, Consumer Relations
Hotpoint
Appliance Park
Louisville, KY 40225
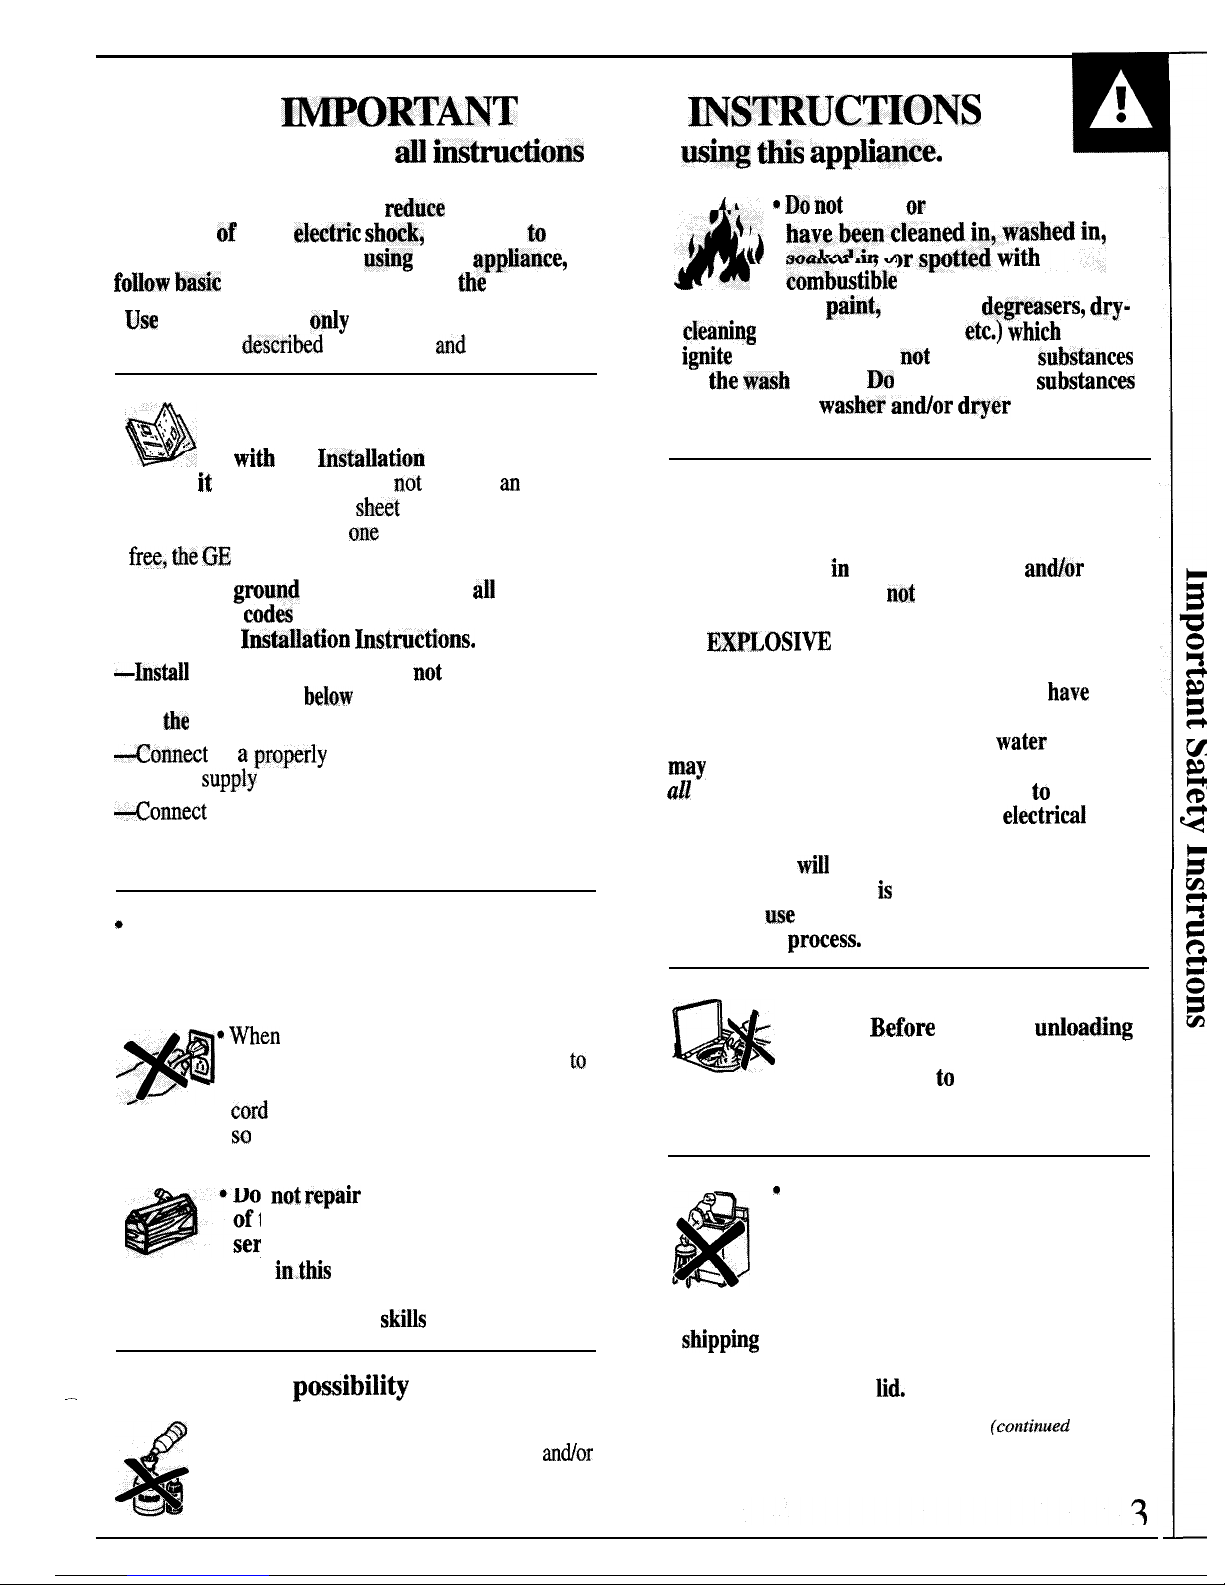
WORTMT
SAFETY
~STRUCTIONS
Read W
imtmctiom
before
whg tis apphce.
A
WARNINGTO
reduce
the risk
~ “~~ ~;;;e~;;~;;~~t~:,;;hedia,
A
* Do not
wash or dry articles that
of
fire,
electric
shock,
or injury
to
persons when
using
your
apptiance,
.
.
follow basic
precautions, including
th~
following:
combusti~le
or explosive substances
●
Use
this appliance
o~y
for its intended
(such as wax,
paint,
gasoline,
degreasers, dry-
purpose
as
d~scribed
in this Use
and
Care Book.
cleaning
solvents, kerosene,
etc.) which
may
ignite
or explode. Do
not
add
these
s~bstances
to
the wash
water. Do not use these
substancw
*
This
washer must be properly
‘Q;:b ,,
installed and located in accordance
‘.. w
with
the
InstaMation
Instructions
before it is used.
If you did
not
receive
an
Installation Instructions
sheet
with your
washer, you can obtain
ono
by calling, toll
free, the GE
Answer Center? 800.626.2000.
—Properly
ground
to conform with
all
governing
codes
and ordinances. Follow
details in
InstaHation hstructions.
—Instil
or store where it will
not
be exposed
to temperatures
beiow
freezing or exposed
to
the
weather.
<omect
to a proprly rated, protected and sized
—
power
supply
circuit to avoid electrical overload.
<onnect
to adequate plumbing and drain
facilities as described in the Installation
Instructions.
*
Turn off water faucets when the washer is not in
use to relieve pressure on hoses and valves, and to
minimize leakage if a hose or valve should break
or rupture.
* men
disconnecting this appliance
pull by the plug rather than the cord
to
avoid damage to the cord or junction of
cord
and plug. Make sure that the cord
is located so that it will not be stepped on, tripped “
over or otherwise subjected to damage or stress.
*.
*
Do
not r~pair
or replace any part
of the appliance or attempt any
servicing unless specifically
recommended
in.this
Use and Care Book or in
published user-repair instructions that you
understand and have the
skiUs
to carry out.
.-
To
minimize the
powibility
of injury:
6
●
Do not mix chlorine bleach with
ammonia or acids such as vinegar
andor
rust remover. Mixing can produce a
e
toxic gas which may cause death.
around your
washer antior d~er
during
operation.
A
WARNING-HYDROGEN GAS
is produced by the chemical action
within your water heater and the gas
can accumulate in the water heater
antior
water
pipes if hot water has
not
been used for a period
of 2 weeks or longer. HYDROGEN GAS CAN
BE
EXPLOSZW
UNDER THESE
CIRCUMSTANCES. So to prevent the
possibility of damage or injury, if you
have
not
used hot water for two weeks or more, or move
into a residence in which the hot
water
system
may
not have been used for some time, turn on
all
hot water faucets and allow them to run for
several minutes before using any
electrid
appliance which is connected to the hot water
system. This
wi~
allow any hydrogen gas to
escape. Since the gas
is
flammable, do not
smoke or
use
an open flame or appliance
during this
prwess.
●
Never reach into washer while it is
Q*
~~
moving.
Before
loading,
mdoading
,>
or adding clothes, push in the Cycle
Selector knob
to
OFF position, then
wait until the machine has completely stopped
before opening the lid.
*
Close supervision is necessary if
&
this appliance is used by or near
P%
(
children. Do not allow children
to play inside, on, or with this
~-
appliance or any discarded
appliance. Dispose of discarded appliances and
shipptig
or packing materials properly. Before
discarding a washer, or removing from service,
remove the washer
lid.
(continued next page)

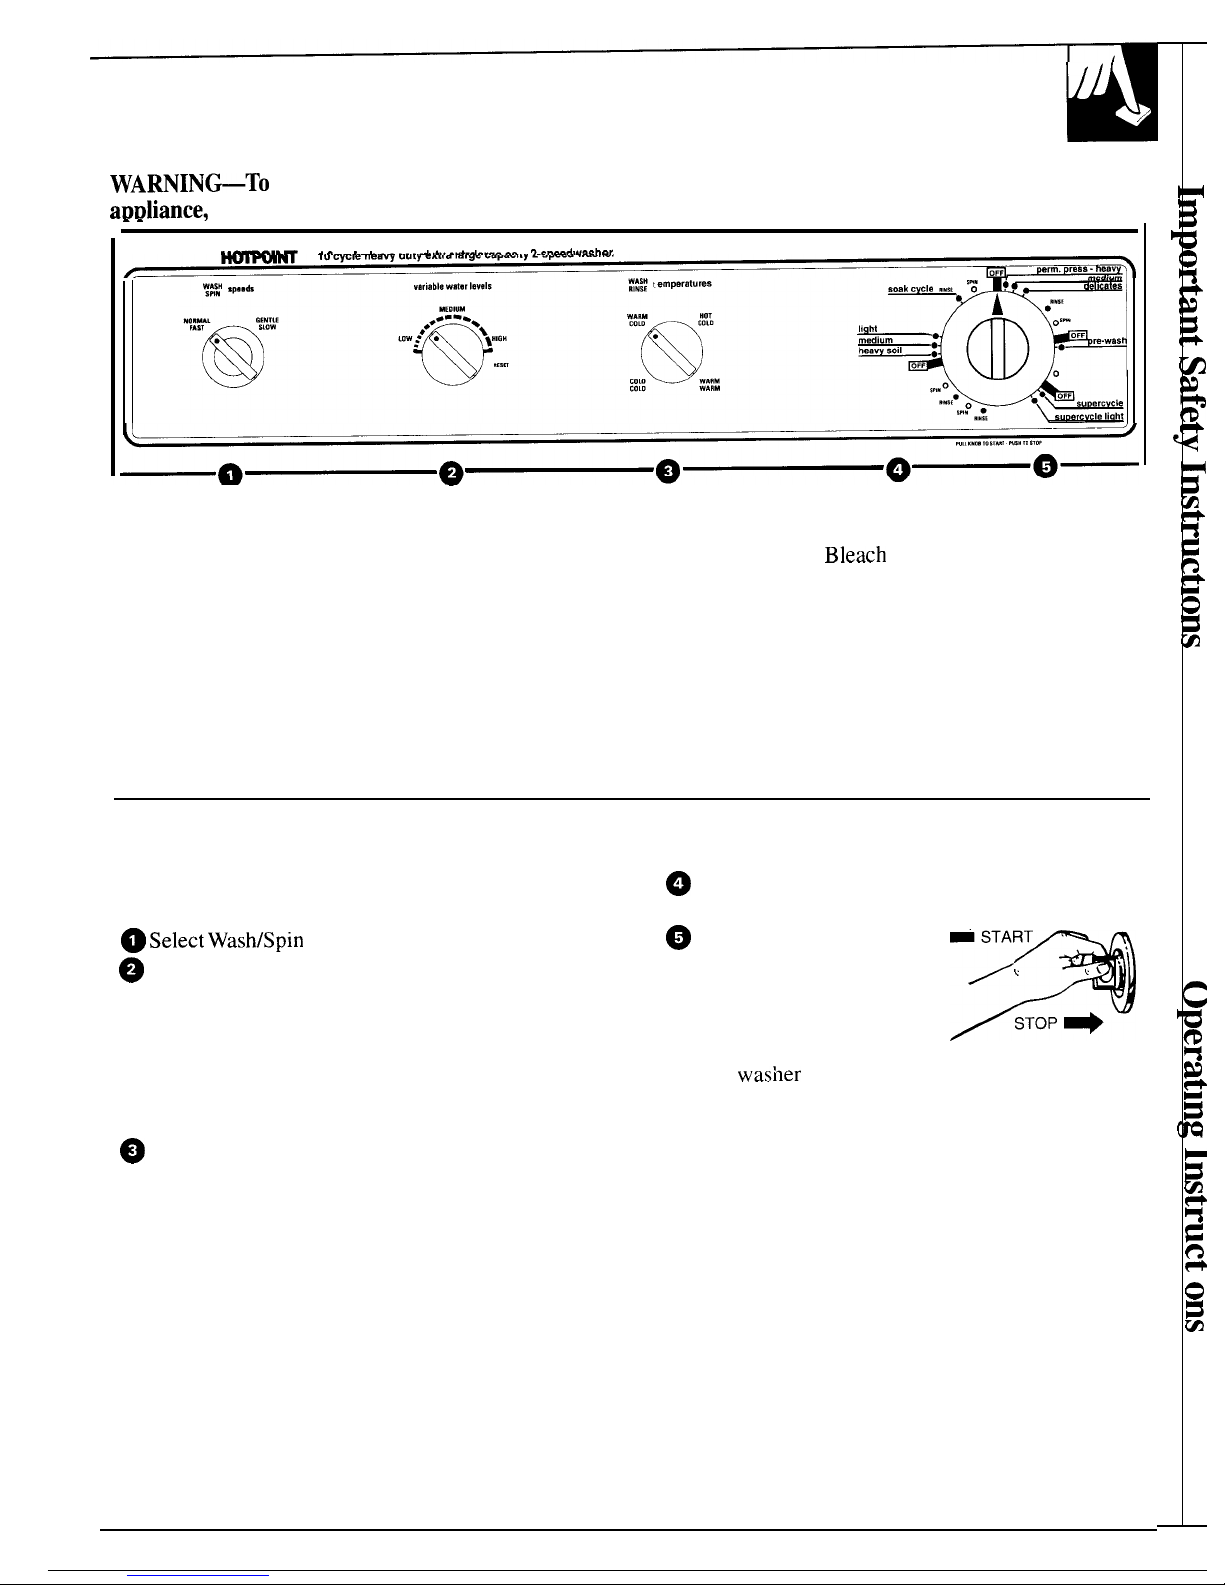
HOW TO OPERATE YOUR CLOTHES WASHER
M
WARNIN&TO
reduce the risk of fire, electric shock, or injury to persons when using your
appliance,
read the IMPORTANT SAFETY INSTRUCTIONS before operating this appliance.
--
..—.. -. . . . . . . . . . . .
.
d
--------- ,-.---.
-”-,-,
.–=--A .“... -.
—
Sorting and Loading
● Sort clothes carefully by fabric type, weight, color
and amount of soil, according to instructions in How
to Sort Clothes section.
● Add measured amount of detergent. See Detergents,
Other Additives section for information on detergents
and other laundry additives.
● Load clothes into wash basket, being careful not
to overload. See How to Load Your Washer section
for more information.
● See How to Use
Bleach
Dispenser section
for information on the Bleach Dispenser.
● See How to Use Fabric Softener Dispenser
section for more information on the Fabric
Softener Dispenser.
● For information on bleaches and fabric softeners,
see Other Laundry Products section.
● Close the lid. Washer will fill but not agitate or spin
with the lid open.
Setting the Controls
Use the Controls Setting Guide to help you make the
@
proper selections.
~ Select WashlSpin
Speed.
Q
~
Select Water Level.
LOW: Washer is less than 1/2 full of clothes.
MEDIUM: Between 1/2 and 2/3 full.
HIGH: Over 2/3 full.
If you wish to increase water level after you’ve made
a selection, turn knob to RESET and select new level.
~
Select Wash/Rinse Temperature.
Push Cycle Selector knob in and turn clockwise to
your selected wash setting.
Pull Cycle Selector knob
@
START
out to start the washer.
If you wish to change
9
/ ‘ ‘ ‘
setting after washer
has started, push Cycle
STOP
@
Selector knob into stop
the
wasiler
and reset to the
new position. Setting can be changed at any time.
5
TWS TO HELP YOU SELECT
SETT~GS
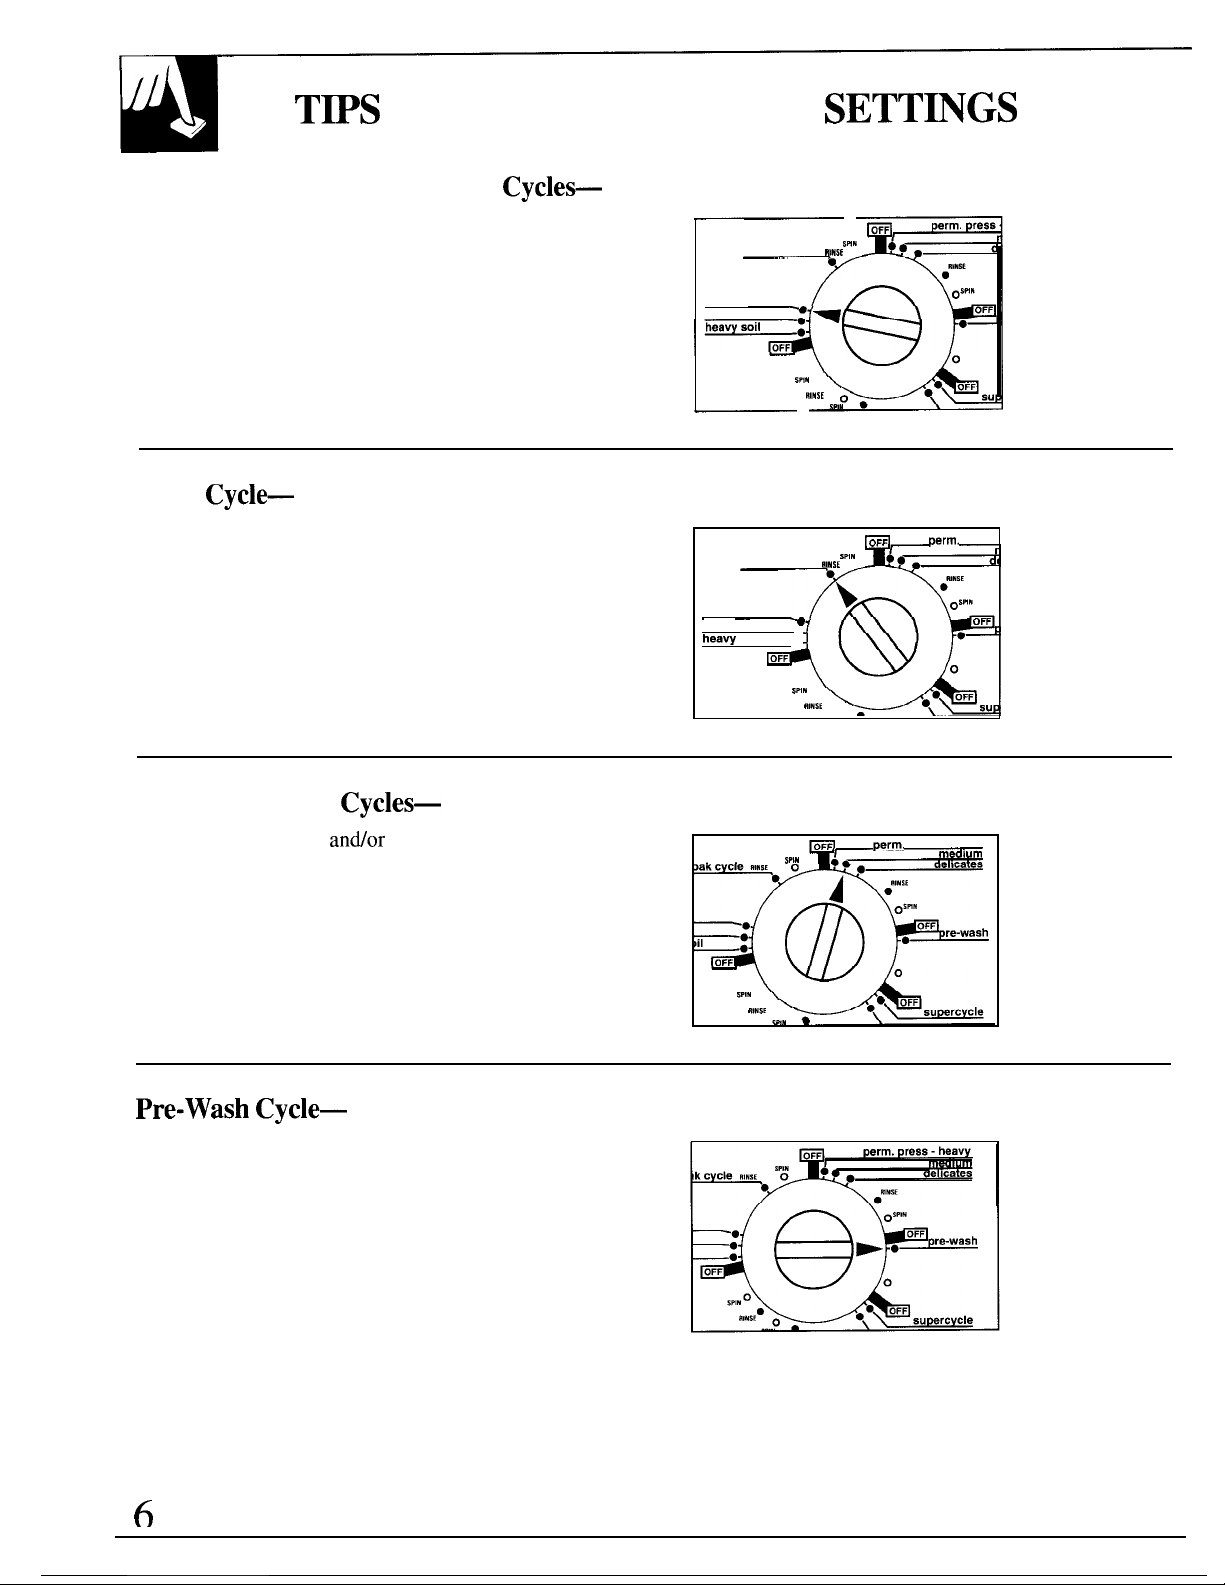
Heavy Soil, Medium and Light
Cycles—
For most cottons, linens, and work and play clothes.
Longer wash times plus an extra deep rinse, spray
rinse and spin provide thorough washing and
detergent removal.
s..
soak cycle
RINSE
o
light
medium
s.,
o
●
,,,s,
Soak
Cycle—
Clothes activate in a soaking agent for a short time,
then the water spins out. Washer turns off at end of
Soak Cycle—must be reset for desired wash cycle.
perm. press.
w,.
soak cycle
HINSE
o
light
medium
heaw
soil
●
●
w.
o
●
,,.s,
o
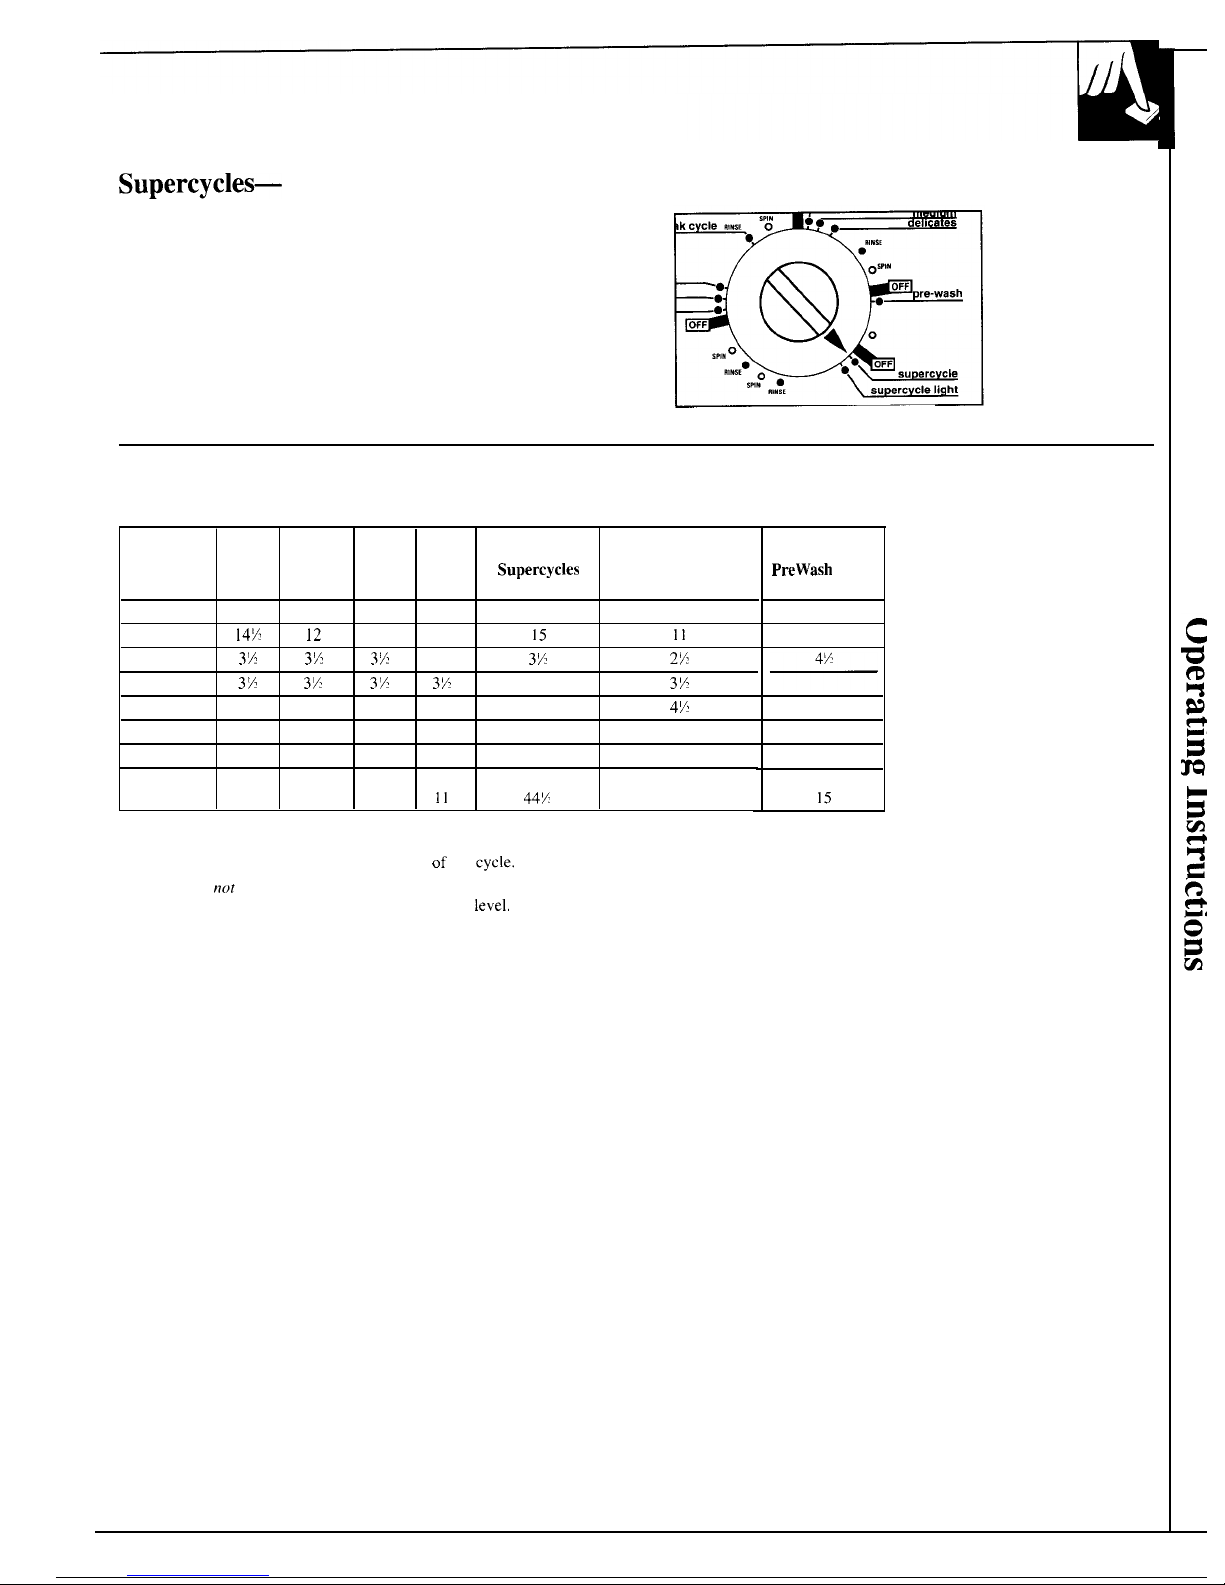
Permanent Press
Cycles—
For loads of synthetic
andor
delicate fabrics. A
perm. press - heavy
cold water cool-down helps prevent set-in wrinkles
SPt.
in permanent press shirts, blouses, dresses, and similar
apparel with normal soil.
s,,.
o
●
,!,$,
o
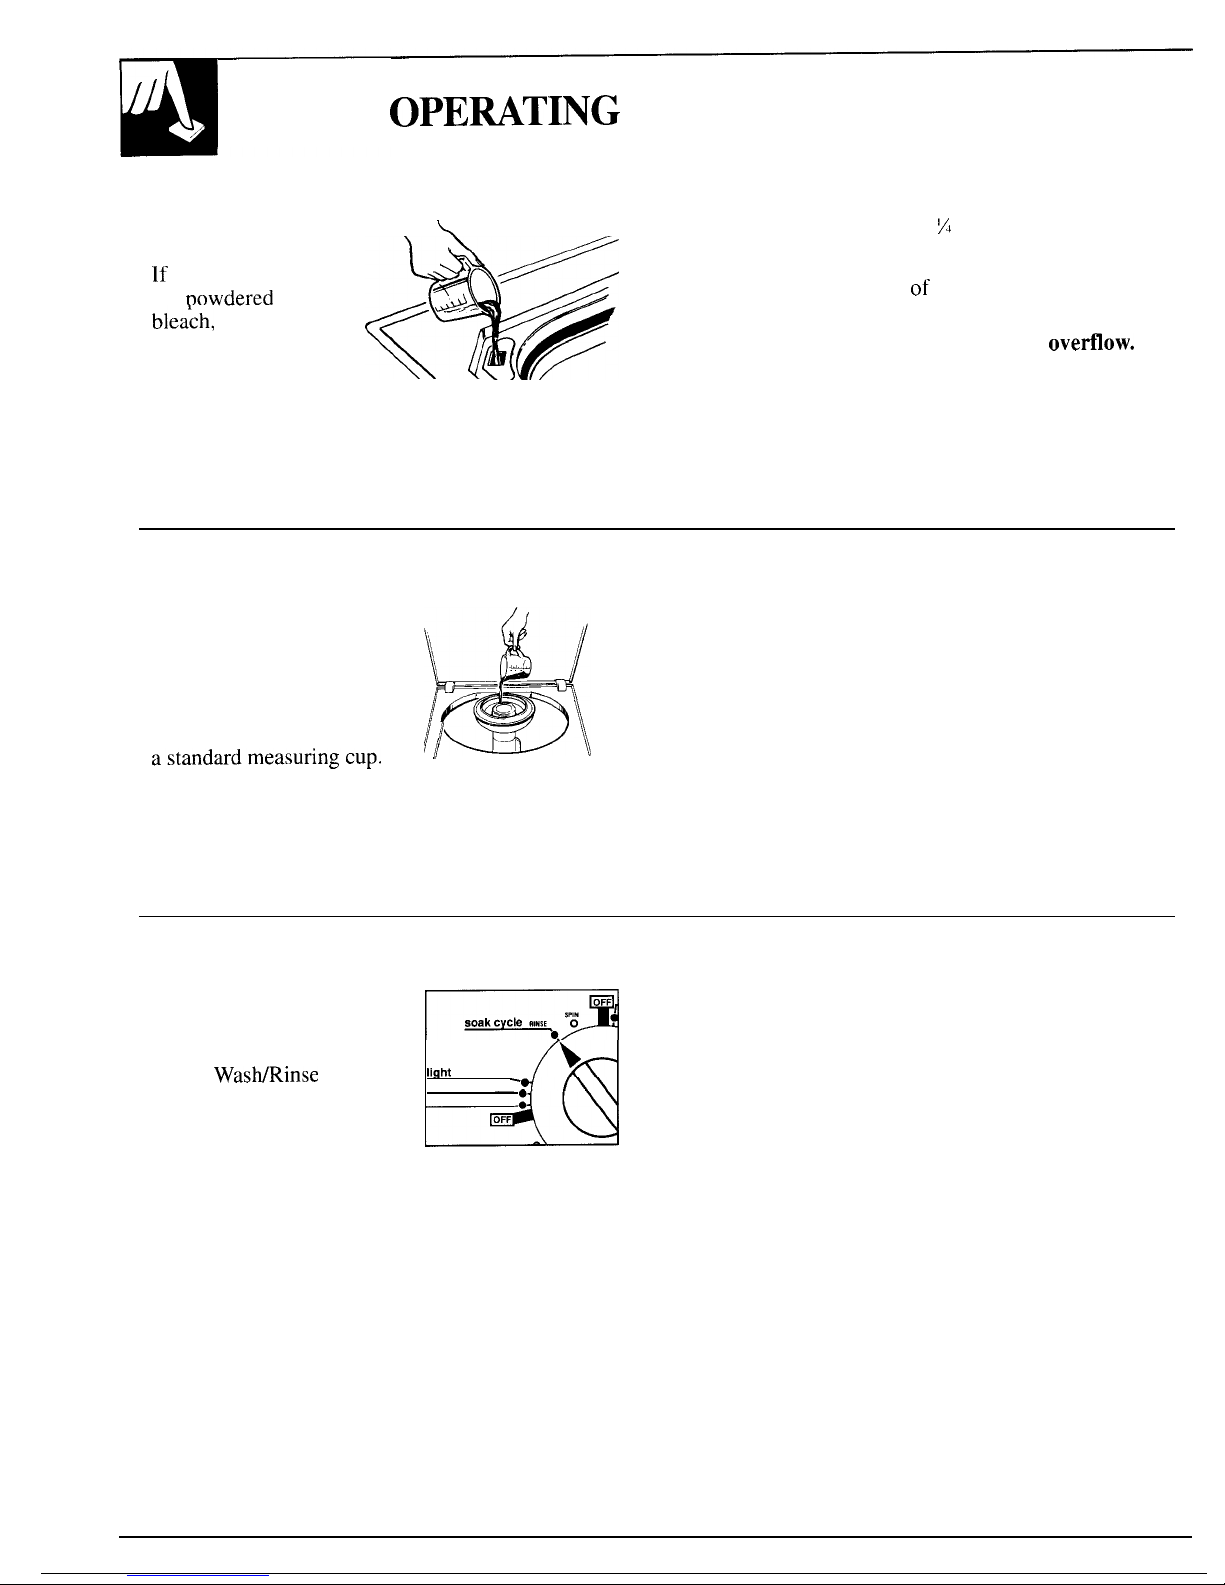
Pre-Wash Cycle—
For use when clothes are excessively soiled. Provides
agitated soak and a soak without agitation, followed
by agitation and spin. Washer must be reset for
desired wash cycle.
6
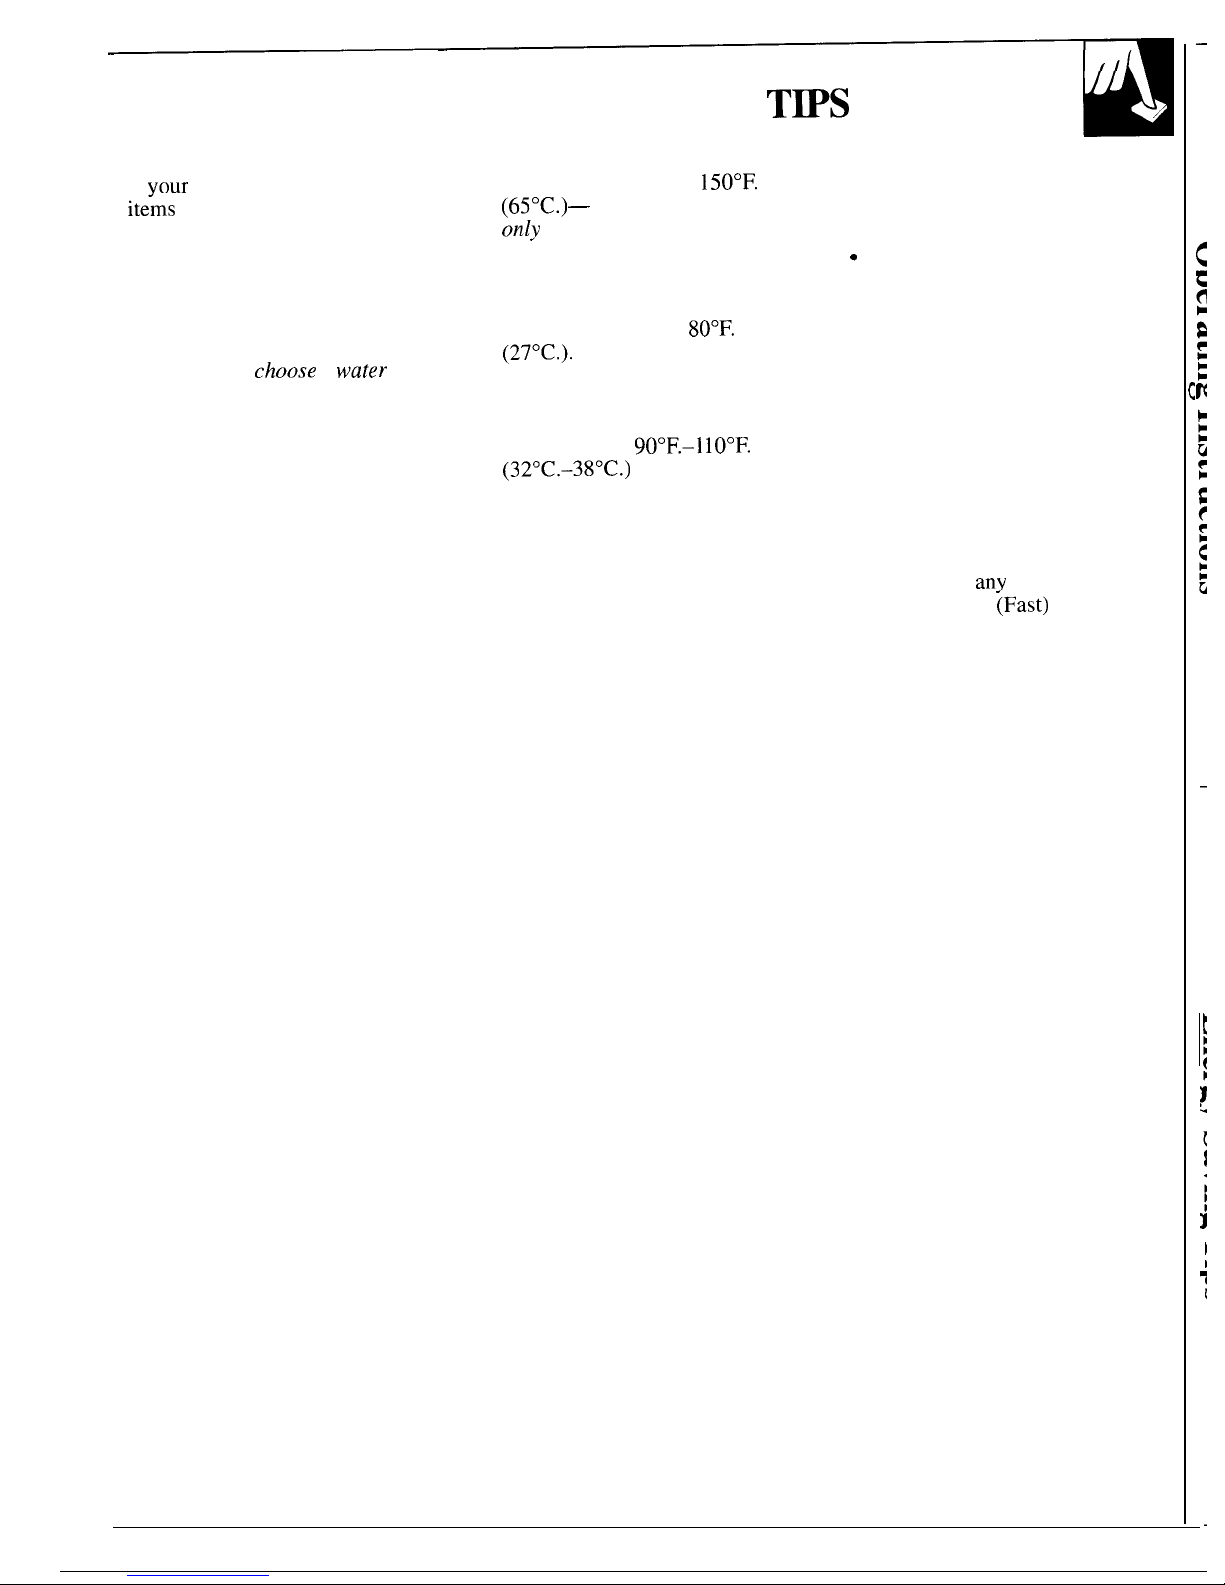
Supercycles—
For fabrics with heavy or oily soil. Agitation
with extra detergent loosens stubborn soils, and
an automatic extra rinse and spin help remove
any detergent left after the first rinse and spin.
What Happens in Each Setting (Approximate Minutes)
Cycle
Selector
Heavy
Medium
Light
Soak Supercycles
Permanent Press
Settings
Soil
Cycle
Cycles
Soak
Wash
14X
12
6
15
11
Spin
35
3%
3Z
3%
2ti
Rinse
3H
3%
3%
3Z
3
3%
Spin
7 7 7 7
3 4Y?
2nd Rinse
3
Spin
7
—
Total
Time
35
32
26 II
445
27
NOTES:
● Total time includes pauses between each phase of the
cycle.
● Total time does
not
include water till times. Fill times vary depending
on household water pressure and your selected water
level.
PreWash
Cycle
7
2
15
7
OPEMTING
INSTRUCTIONS
How to Use the Bleach
● Use this dispenser with
liquid bleach only.
If you prefer to
use
~owdered
(continued)
Dispenser
\
HIGH WATER LEVEL—1 k cup (310 ml) liquid
/
LOW WATER LEVEL—2/3 cup (170 ml) liquid
d-
● Pour measured amount of liquid bleach directly
blea;h, pour it
<w
into bleach dispenser.
into the wash
[/
● Do not overfill or allow dispenser to
ovefiow.
basket along with
Avoid splashing. Undiluted bleach can cause fabric
your detergent. Do
\\ \–~
damage.
not pour powdered bleach
● Never pour undiluted liquid bleach directly onto
into the bleach dispenser.
clothes or into the wash basket.
● Measure bleach carefully.
Here are some recommended amounts:
How to
Use the Fabric Softener Dispenser
● Position the Fabric
● Do not stop the washer during the first spin.
Softener Dispenser on
g+
‘\\
/
This will cause the dispenser to empty too soon.
the agitator.
*L
● Do not use the Fabric Softener Dispenser with
● Pour manufacturer’s
the Soak Cycle.
recommended amount
astandardmeasuringcup.
~
0
\
●
If the dispenser gets clogged, soak it in a solution of
of fabric softener into
1 cup (240 ml) water and 1 cup (240 ml) alcohol.
● Add enough water to fill the cup 1/2 full.
● Pour the diluted softener into the dispenser.
● The fabric softener will automatically be dispensed
at the proper time.
How to Use the Soak Cycle
● SOAK CYCLE temperature
will automatically be cold.
m
● For a hot or warm soak,
set the WasMRinse Temp.
Iiqht
medium
-0
control to HOT/COLD or
heavy soil
WARM/COLD and turn
the Cycle Selector knob
to MEDIUM cycle setting.
8
● Start the washer. After washer fills and begins to
agitate, push in the Cycle Selector knob and turn
to SOAK CYCLE. Pull out the Cycle Selector knob
to complete the cycle.
●
For an extended soak,
allow the washer to fill and
agitate for a few minutes to dissolve the soaking
agent. Then push in the Cycle Selector knob to stop
the washer (keep lid closed) and allow to soak for as
long as desired. After desired soak period, pull out
the Cycle Selector knob to complete the cycle.
ENERGY-SAVING
TWS
If
vour
clothes and household
ite”ms
don’t look clean and fresh
after washing, you will probably
rewash them.. and that means
you’ll waste energy. Remember
to sort your clothes carefully,
and load them properly, select
correct cycles, use enough
detergent and
choose
a
water
temperature warm enough to
release and get rid of soil.
● Use Hot Wash—up to
150°F.
(65°C.)— on a regular basis
only
when washing heavily soiled
articles—such as work and
play clothes.
● Under normal soil conditions,
wash in water above
80°F.
(27°C.).
This generally means
using the Warm Wash
temperature setting on your
washer—temperatures
approximately
90°F.–l
IO°F.
(32°C.-380C.) or hand
comfortable. If you notice
that soil has accumulated after
several consecutive washings,
use Hot Wash occasionally, if
safe for fabrics.
● Always rinse in cold water. The
temperature of the rinse does not
affect cleaning.
Q
Try to wash less often. Save
articles of the same type of fabric
until you have a full load.
● If you must wash smaller loads,
adjust the amount of water. Small
loads should have lower water
levels.
● Wash in off-peak utility hours.
Your local utility can tell you
which are the off-peak hours.
● Use Normal (Fast) Spin Speed
to remove more water and help
lessen drying time. The dryer
will remove
anv
wrinkles caused
by the Normal
~Fast)
Spin.
9
 Loading...