

Page 1
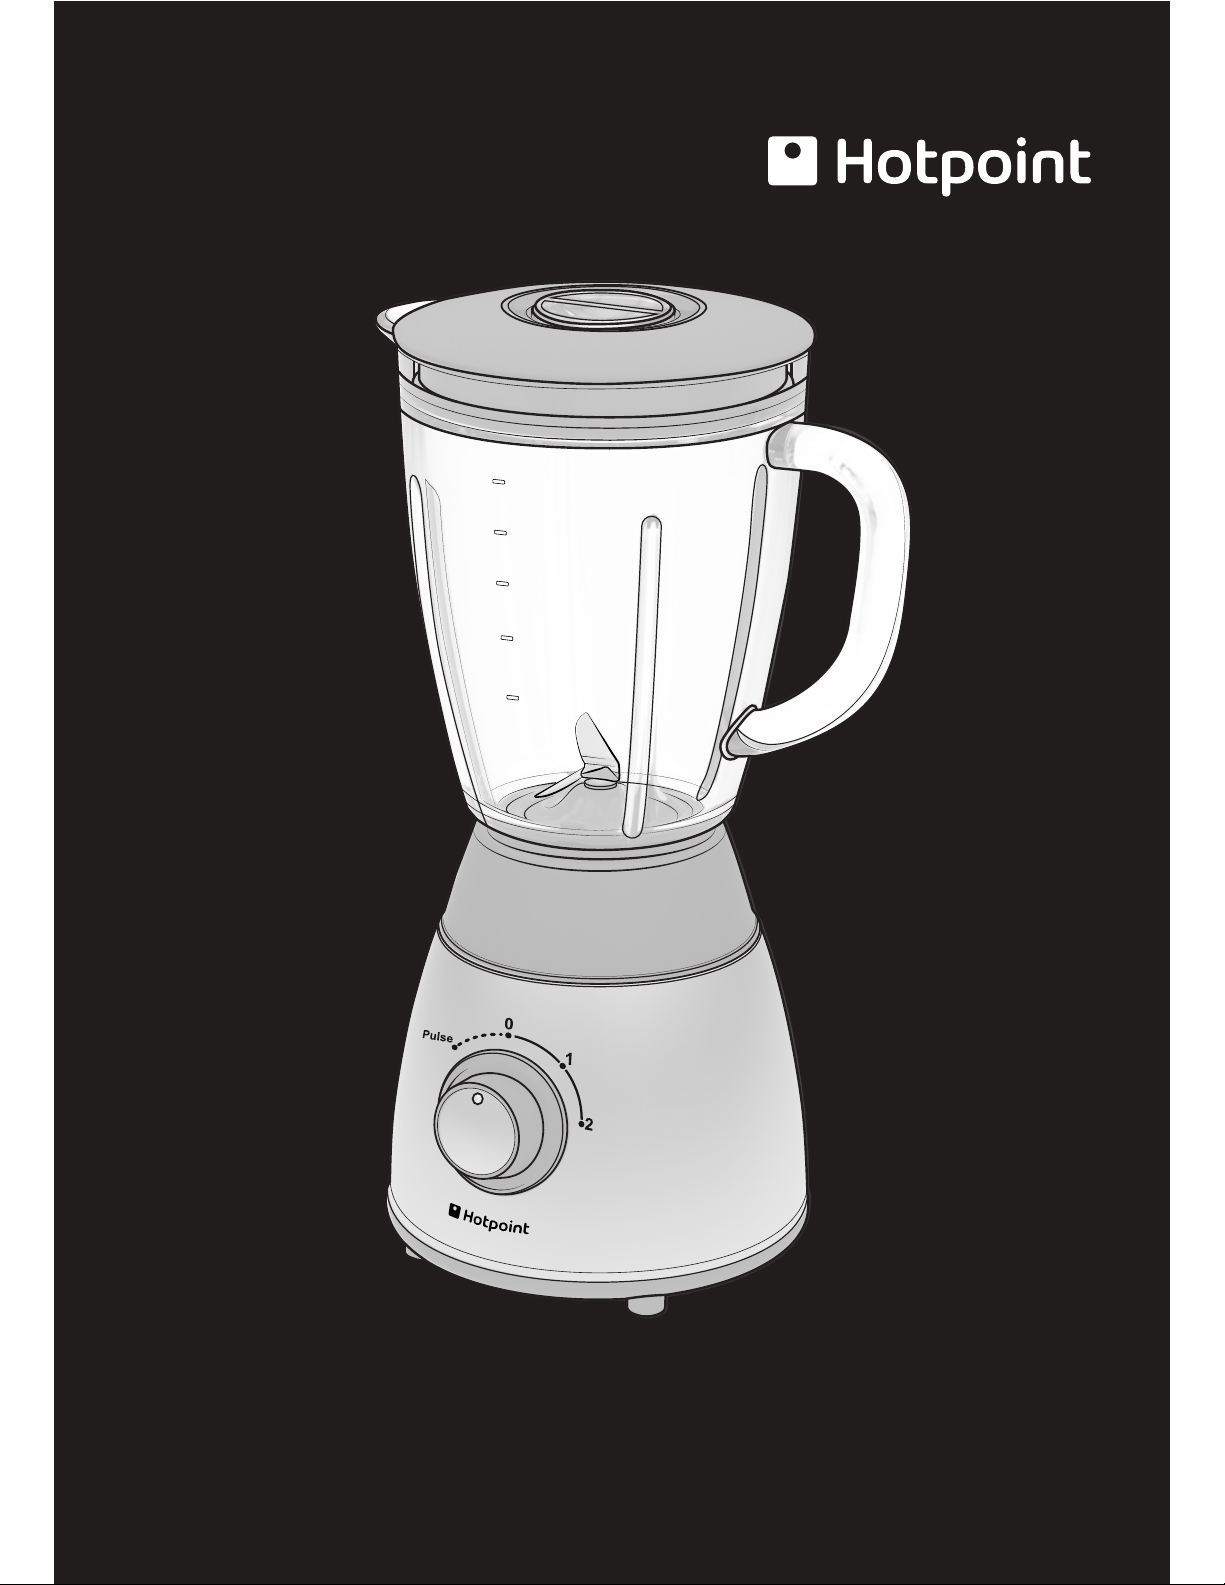
EN Operating Instructions
Page 2
TB 05 UK
Pulse
0
1
2
1
4
6
8
2
3
5
7
9
Page 3
Pulse
0
1
2
Fig. 1
Fig. 4 Fig. 4a
Fig. 2 Fig. 3
Page 4
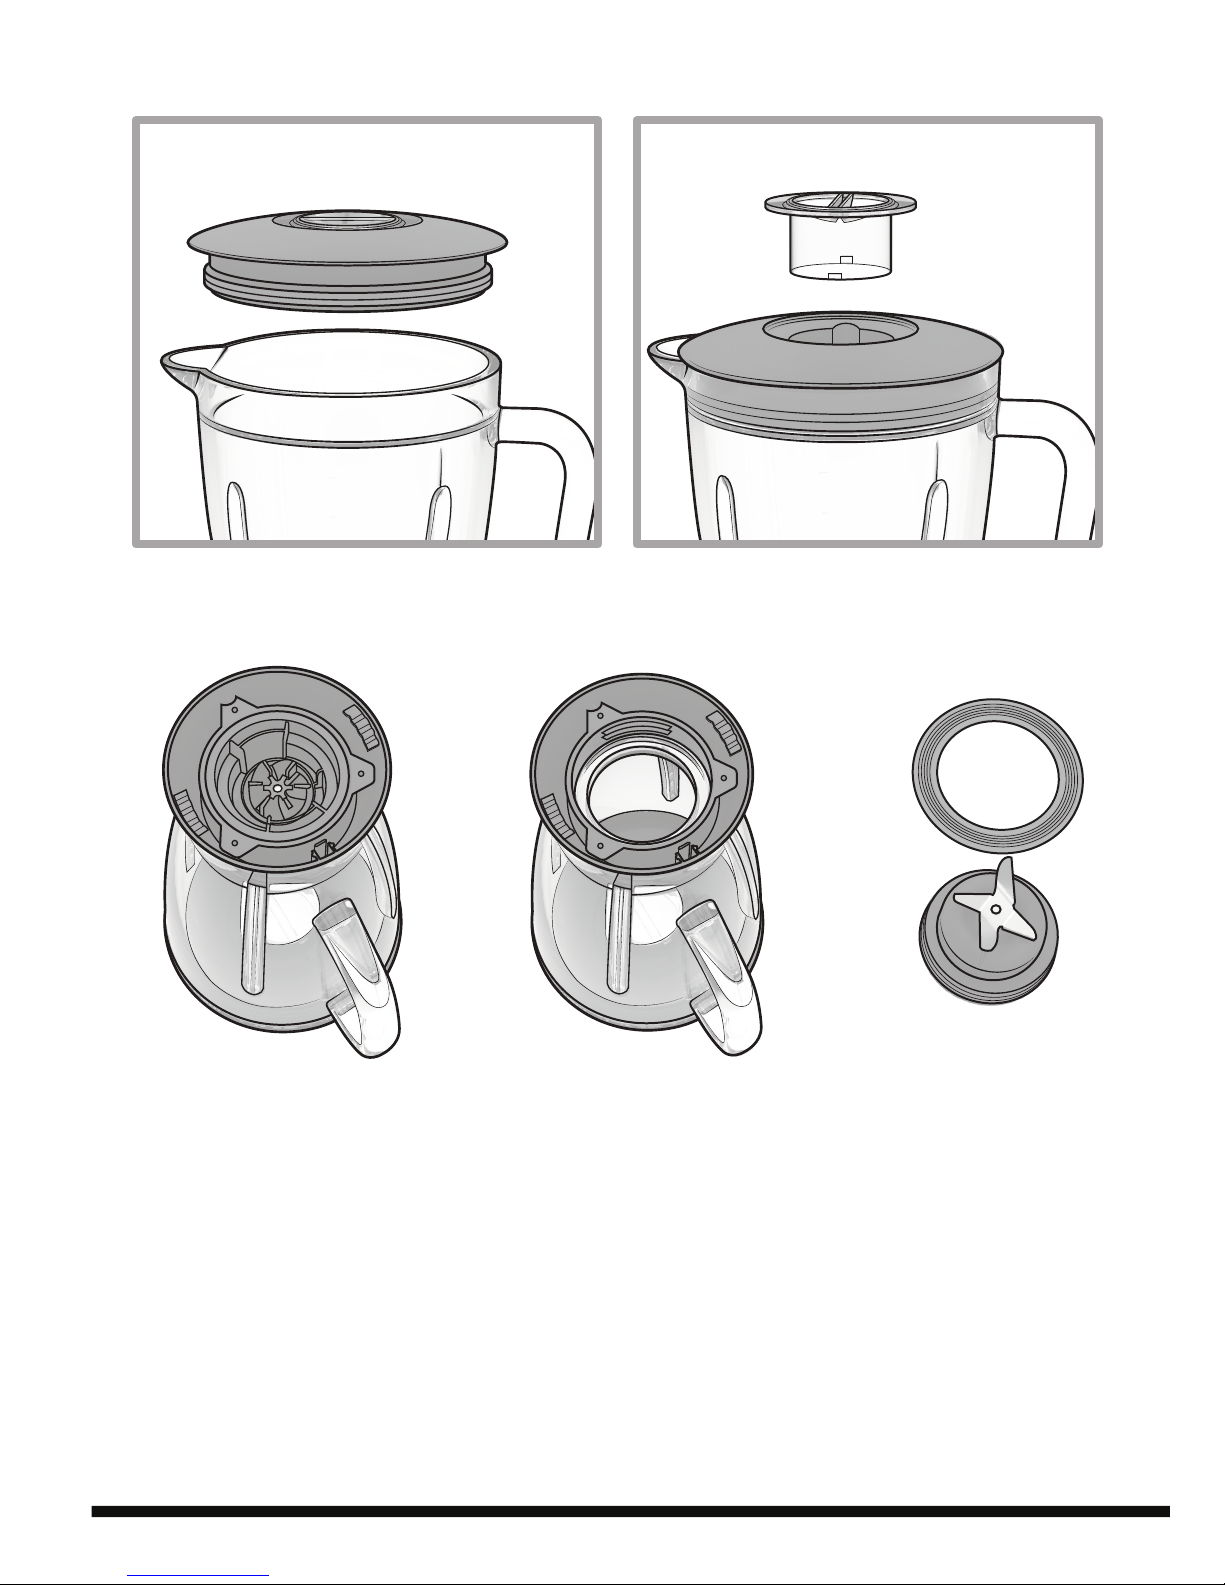
Fig. 5
Fig. 7
Fig. 6
Page 5

55
en
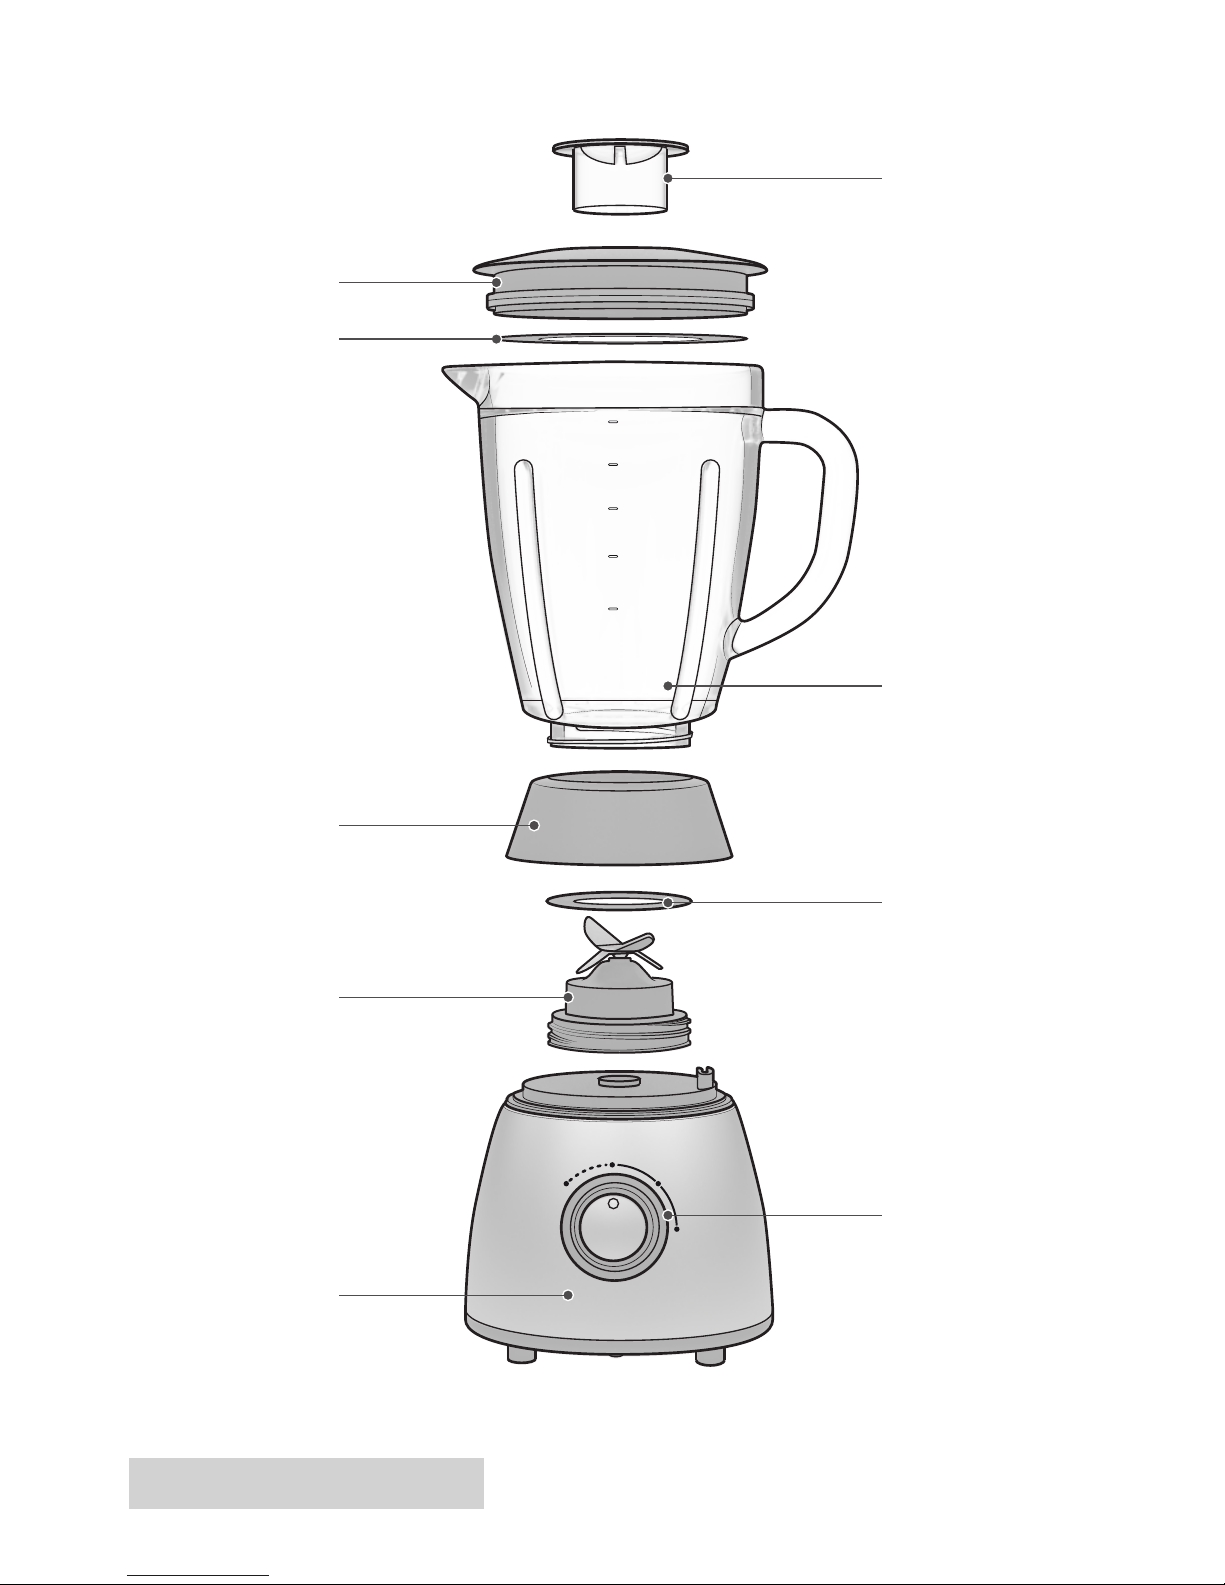
PARTS AND FEATURES
1. Measuring cup
2. Lid
3. Gasket 1
4. Jar
5. Jar base
6. Gasket 2
7. Blade assembly
8. Speed knob
9. Motor unit
be replaced by the
manufacturer or its
service agent or a
similarly qualied
person in order to avoid
a hazard.
6.
Close supervision is
necessary when any
appliance is used by or
near children.
7.
Avoid contacting the
moving parts.
8. Keep hands and utensils
out of container while
blending to reduce the
risk of severe injury to
persons or damage to
the blender. A scraper
may be used but must
be used only when the
blender is not running.
9. The use of attachments
not recommended or
IMPORTANT SAFEGUARDS
1. Read all instructions.
2. Before using check that
the voltage indicated on
the product corresponds
with the voltage of your
electrical outlet.
3. Do not let cord hang on
hot surface or over edge
of table or counter.
4. Do not operate any
appliance with a
damaged cord or plug
or after the appliance
malfunction or has
been damaged in any
manner. Return the
appliance to the nearest
authorized service
facility for examination,
repair or adjustment.
5. If the supply cord is
damaged, it must
Read this manual thoroughly before using and save it for future reference
Page 6

66
en
sold by manufacturer
may cause re, electric
shock or injury.
10. Unplug from outlet
when not in use, before
putting on or taking
off parts, and before
cleaning. To disconnect,
turn any control to “off”,
then remove plug from
wall outlet by grasping
the plug, not the cord.
11. To reduce the risk of
injury, never place blade
assembly on motor unit
without the jar properly
attached.
12. Do not leave the
machine on unattended.
13. When removing the
blender from the motor
unit, wait until the
blades have completely
stopped.
14. Always operate blender
with cover in place.
15. Always use the
appliance on a secure,
dry level surface.
16. Never place this
appliance on or near a
hot gas or an electric
burner or where it
could touch a heated
appliance.
17. Do not use outdoors.
18. Do not use appliance for
other than its intended
use.
19. Be care of potential
injury from misuse.
20. Care shall be taken
when handling the
sharp cutting blades,
emptying the bowl and
during cleaning.
21. Be careful if hot liquid
is poured into the food
processor or blender as
it can be ejected out of
the appliance due to a
sudden steaming.
22.
Always disconnect
the appliance from
the supply if it is
left unattended and
before assembling,
disassembling or
cleaning.
23. Switch off the appliance
and disconnect from
supply before changing
Page 7

77
en
accessories or
approaching parts that
move in use.
24. This appliance shall not
be used by children.
Keep the appliance and
its cord out of reach of
children.
25. Appliances can be used
by persons with reduced
physical, sensory or
mental capabilities or
lack of experience and
knowledge if they have
been given supervision
or instruction
concerning use of the
appliance in a safe way
and if they understand
the hazards involved.
26. Children shall not play
with the appliance.
OPERATING INSTRUCTIONS
BEFORE THE FIRST USE
1. Before the rst use, unpack the appliance and
place all parts on a horizontal surface.
2. The jar assembly (including measuring cup, lid,
gasket 1, jar unit, gasket 2 , blade assembly )
has already been assembled into the motor unit.
Disassemble to wash all detachable parts except
the motor unit. Refer to the chapter CARE AND
CLEANING.
3. Once all the pieces have been cleaned and dry
thoroughly, reassemble.
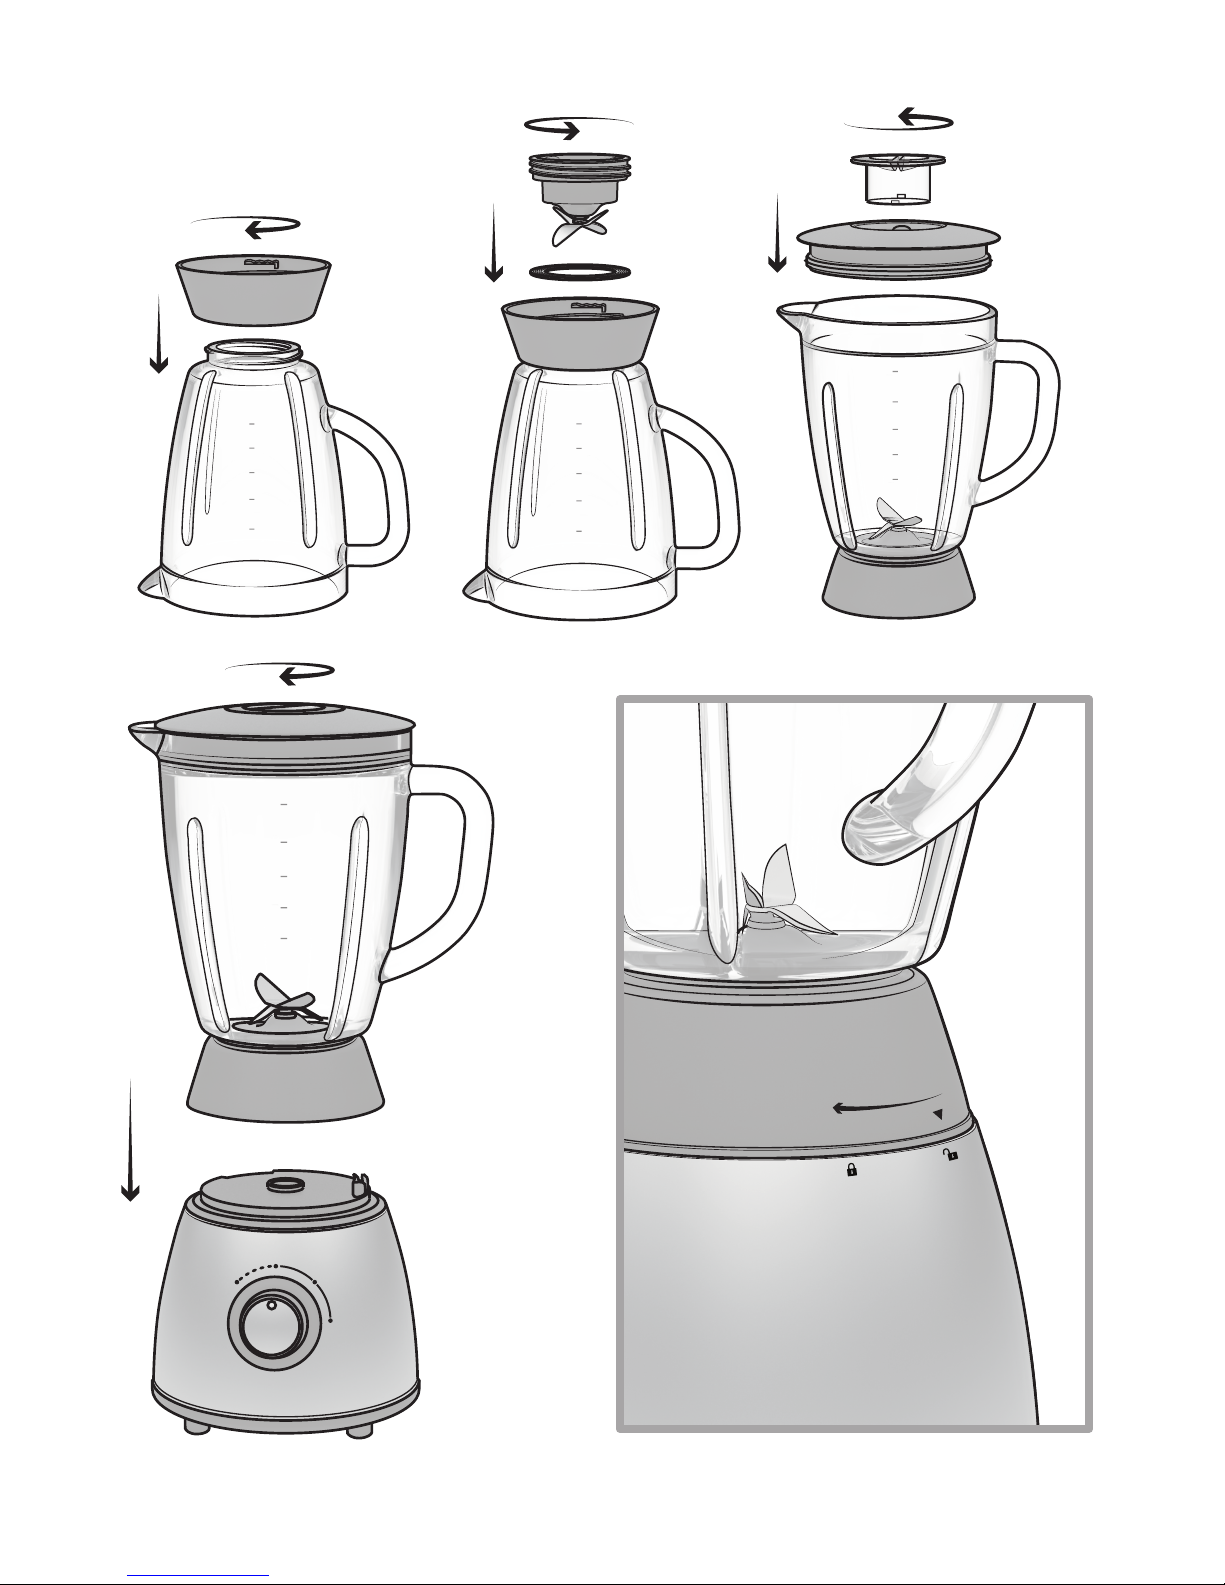
ASSEMBLING THE BLENDER
4. Holding the jar handle, invert the jar onto a level
surface, put the jar base onto the jar bottom and
secure the jar base by turning it clockwise until
tight (See Fig.1).
5. Place the gasket 2 and the blade assembly
onto the jar and secure the jar base by turning it
anticlockwise until tight (See Fig.2).
6. Place the jar assembly with its opening upwards.
Wrap the gasket 1 around the lid bottom and put
the lid onto the jar assembly. Place the measure
cup exactly into the lid by tting the small
projection on the both sides of the cup into the
slots of the lid and turning the cup clockwise until
tight. (See Fig.3)
7. Finally, place the assembled jar onto the motor
unit by aligning the arrow symbol on the jar
base to the unlock symbol on the motor unit and
turning the jar clockwise until tight. (See Fig.4
and 4a).
Attention: Do not try to twist the jar and jar base
onto motor unit.
USING THE BLENDER
1. Peel or pit fruit or vegetables and then cut it into
small dices.
2. Place the food to be blended into the jar (See
Fig.5).
Note: Usually, certain amount of puried water
has to be added to make the running of trhe
appliance smoother. The suggested proportion of the
food and water is 2:3.The amount of mixture should
not exceed the max level as indicated on the jar.
Attention: never use boiling liquids or run the
appliance empty.
3. Put the lid on the jar. Be sure the measuring cup
is in place.
4. Plug the power cord into a standard wall outlet.
5. Turn the speed knob to the selected speed.
6. For quick or delicate blending tasks, turn the
speed knob to P position and hold for a few
seconds and then release; the knob will reset to
0 position automatically. Operate several times
until the desired consistence.
7. If you want to add ingredients while the blender
is working, remove the measuring cup and place
through the lid opening. (See Fig.6)
8. When crushing ice or hard food, keep one hand
rmly on the lid.
9. When the consistence you desire is obtained,
Page 8

88
en
turn the knob to 0 position.
Note: For each use, the consecutive operation
time should not exceed 3 minutes. At least 10
minutes rest time must be maintained between two
continuous cycles. In any case, let the unit cool to
room temperature before performing next operation
cycle.
Note: If you want to stop the machine during
operation, turn the knob to O position anytime.
IMPORTANT OPERATING TIPS
Note: For best circulation of food that are to be
blended with some liquid, pour the liquid into
the jar rst, then add solids.
Note: Some of the tasks those cannot be
performed efciently with a blender are: beating
egg whites, whipping cream, mashing potatoes,
grinding meat, mixing dough, extracting juice from
fruit and vegetable.
Attention: The following items should never be
placed in the unit as they may cause damage:
bones, large pieces of solid, frozen food, or tough
foods such as turnips.
Note: To crush ice, add up to 6 ice cubes. If
more ice is needed, remove the cup and add
cubes one by one through the lid opening.
CARE AND CLEANING
This product contains no user serviceable parts. Refer
to qualied service personnel.
1. Before cleaning, unplug the blender.
2. Always wash immediately after use for easier
cleaning. Don’t let food dry on the jar assembly
as this will make cleaning difcult.
3. Pour a little warm soapy water into the jar and turn
the knob to P position for a few seconds and then
empty the jar. Disassemble all detachable parts.
Lift the jar assembly off the motor unit, detach the
blade assembly by turning it clockwise from the
jar base bottom , and remove the gasket 2 and
blade assembly (See Fig.7). In addition, detach
the jar cover gasket 1 from the jar cover.`
4. Rinse measuring cup, lid, gaskets, jar unit and
blade assembly by hands or into the dishwasher
and then dry. They are dishwasher safe
components, but the temperature setting shall
not exceed 65.
5. Brush the blades using warm soapy water, then
rinse thoroughly under the tap. Don’t touch the
sharp blades, handle carefully..
Attention: Don’t immerse the blade assembly in
water
Attention: Leave to dry upside down away from
children.
6. Wipe the motor unit with a damp cloth and dry
thoroughly. Remove stubborn spots by rubbing
with a non-abrasive cleaner. If liquids spill into
the motor unit; rst unplug the unit, then wipe
with a damp cloth and dry thoroughly.
Attention: Do not immerse the motor unit in
liquid to prevent the risk of electric shock.
Attention: Do not use rough scouring pads or
cleansers on parts or nish.
GUARANTEE
12 months Standard Guarantee
Enhanced to 3 years upon product registration
This certicate of guarantee represents the guarantee (“Guarantee”
hereinafter) offered by Indesit Company UK Limited with registered of-
ce at Peterborough PE2 9JB in relation to products purchased in the
United Kingdom and Indesit Ireland Limited with registered ofce in
Dublin 9, Ireland for products purchased in the Republic of Ireland. This
Guarantee does not affect your statutory rights.
Your product has the benet of our manufacturer’s Guarantee, which
covers the product for twelve months from the date of purchase.
This gives you the reassurance that if, within that time, your product
is proven to be defective because of either workmanship or materials,
we will, at our discretion, either repair or replace the product at no cost
to you.
This Guarantee is subject to the following conditions:
• Documentary proof of original purchase date is provided.
• Cosmetic damage must be reported within 14 days from the date
of purchase.
• The product has been installed and operated correctly and in accordance with our operating and maintenance instructions.
• The product is used only on the electricity supply printed on the
rating plate.
• The product has been used for normal domestic purposes only.
• The product has not been altered, serviced, maintained, disman-
tled, or otherwise interfered with by any person not authorised
by us.
• Any repair work must be undertaken by us or our appointed
agent.
• Any parts removed during repair work or any product that is replaced become our property.
• The product is used in the United Kingdom or Republic of Ireland.
The Guarantee does not cover:
• Damage resulting from transportation, improper use, neglect or
interference or as a result of improper installation.
• Accidental damage, this includes but is not limited to, damage
which occurs as a result of an external action.
Page 9

99
en
• Replacement of any consumable item or accessory. These include but are not limited to:
• plugs, cables, light bulbs, hoses, brushes, covers and lters.
• Replacement of any removable parts made of glass or plastic.
After Sales Service
No one is better placed to care for your Hotpoint product during the
course of its working life than us – the manufacturer.
Essential Contact Information
Advice Line
We have a dedicated team who can provide free advice and assistance
with your product if you experience any technical difculties. Simply call
our Hotpoint Service Hotline for telephone assistance.
UK: 03448 240 055
Republic of Ireland 0818 904 041
www.hotpointservice.co.uk
Please note:
Our advisors will require the following information:
Model number:
Serial number:
Consumables and Accessories
We supply a full range of consumables and accessories to keep your
product functioning efciently throughout its life.
UK: 03448 225 225
Republic of Ireland: 0818 313 413
parts.hotpoint.co.uk/shop
Recycling and Disposal Information
As part of Hotpoint’s continued commitment to helping the environment,
Hotpoint reserves the right to use quality, recycled components to keep
down customer costs and minimise material wastage.
Please dispose of packaging and old products carefully.
Register your new product and receive 2 additional year FREE!
As an additional benet of owning your Hotpoint product, we are offering
2 years additional free guarantee. To be eligible for this you will need
to contact us to register your product within 28 days of purchase. If you
do not register your appliance within the 28 days you will still be entitled
to 1 years manufacturer’s guarantee. To activate your 3 year guarantee
register online at www.hotpoint.co.uk. Please note that the extended
guarantee is only available in the UK and Ireland and is subject to the
same terms and conditions as the 1 year guarantee. Please refer to the
certicate of guarantee for more information.
DISPOSAL OF OLD ELECTRICAL
APPLIANCES
The European Directive 2012/19/EU on Waste Electrical
and Electronic Equipment (WEEE), requires that old
household electrical appliances must not be disposed of in
the normal unsorted municipal waste stream.
Old appliances must be collected separately in order to op-
timise the recovery and recycling of the materials they con-
tain and reduce the impact on human health and the envi-
ronment.
The crossed out “wheeled bin” symbol on the product reminds you of
your obligation, that when you dispose of the appliance it must be sepa-
rately collected. Consumers should contact their local authority or retail-
er for information concerning the correct disposal of their old appliance.
Page 10

1010
en
Page 11

1111
en
Page 12

Indesit Company UK Ltd
Morley Way,
Peterborough PE2 9JB
www.indesitcompany.com
Indesit Company UK Ltd
Morley Way,
Peterborough PE2 9JB
www.indesitcompany.com
TB 05 UK
03/2015 - ver.3.0
 Loading...