

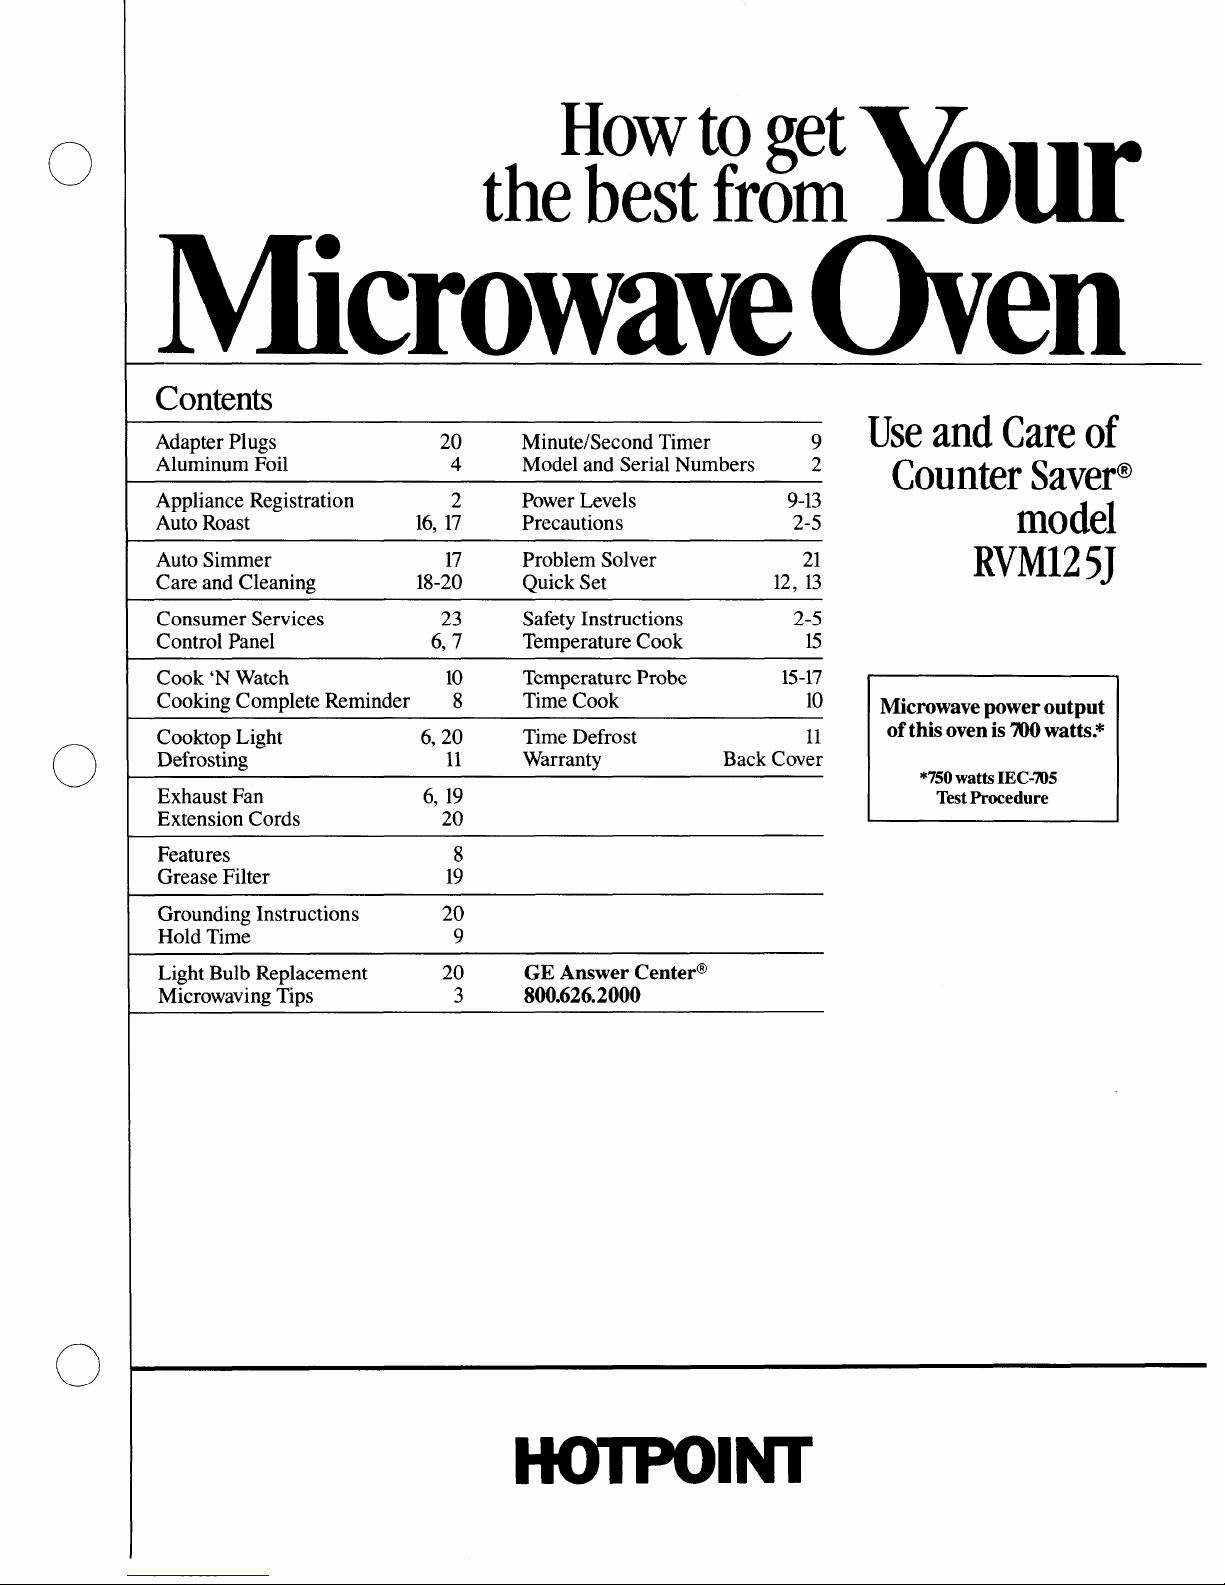
Hotpoint RVM125J Use And Care Manual
o
0
0
Howtoget
Y
thebestfrom OUI’
(hen
Contents
Adapter Plugs 20
Minute/Second Timer
9
Aluminum Foil 4 Model and Serial Numbers 2
Appliance Registration
2 Power Levels 9-13
Auto Roast 16, 17 Precautions 2-5
Auto Simmer 17
Problem Solver
21
Care and Cleaning
18-20 Quick Set 12, 13
Consumer Services 23 Safety Instructions 2-5
Control Panel
6,7 Temperature Cook
15
Cook ‘N Watch
10 Temperature Probe
15-17
Cooking Complete Reminder 8 Time Cook
10
Cooktop Light 6,20
Time Defrost
11
Defrosting
11
Warranty Back Cover
Exhaust Fan 6, 19
Extension Cords 20
Features 8
Grease Filter
19
Grounding Instructions
20
Hold Time 9
Light Bulb Replacement
20
GE Answer Center@
Microwaving Tips
3
800.626.2000
HmPolnrr
UseandCareof
CounterSaver@
model
RVM125J
Microwave power output
of this oven is 700 watts.*
*750wattsIEC-705
TestProcedure
Help us help you...
Before using your oven,
read this book carefully.
It is intended to help you operate
and maintain your new microwave
oven properly.
Keep it handy for answers to your
questions.
If you don’t understand something
or need more help, write (include
your phone number):
Consumer Affairs
Hotpoint
Appliance Park
Louisville, KY40225
Write down the model
and serial numbers.
You’ll find them on a label inside
the oven.
These numbers are also on the
Consumer Product Ownership
Registration Card that came with
your microwave oven. Before
sending in this card, please write
these numbers here:
Model Number
Serial Number
Use these numbers in any
correspondence or service calls
concerning your microwave oven.
Be sure your microwave
oven is registered.
It is important that we know the
location of your microwave oven
should a need occur for adjustments.
Your supplier is responsible for
registering you as the owner.
Please check with your supplier to
be sure he has done so; also send in
your Consumer Product Ownership
Registration Card. If you move, or
if you are not the original purchaser,
please write to us, stating model
and serial numbers.
This appliance must be registered.
Please be certain that it is.
Write to:
Hotpoint
Range Product Service
Appliance Park
Louisville, KY40225
If you received a
damaged oven...
Immediately contact the dealer (or
builder) that sold you the oven.
Save time and money.
Before you request service...
check the Problem Solver on page 21.
It lists causes of minor operating
problems that you can correct yourself.
All these things are normal
with your microwave oven.
● Steam or vapor escaping from
around the door.
● Light reflection around door or
outer case.
● Dimming oven light and change
in blower sound may occur while
operating at power levels other
than high.
● Dull thumping sound while oven
is operating.
● Some TV-Radio interference
might be noticed while using your
microwave oven. It’s similar to the
interference caused by other small
appliances and does not indicate a
problem with your oven.
If you need service ...
To obtain service, see the
Consumer Services page in the
back of this book.
We’re proud of our service and
want you to be pleased. If for some
reason you are not happy with the
service you receive, here are three
steps to follow for further help.
FIRST, contact the people who
serviced your appliance. Explain
why you are not pleased. In most
cases, this will solve the problem.
NEXT, if you are still not pleased,
write all the details-including
your phone number—to:
Manager, Consumer Relations
Hotpoint
Appliance Park
Louisville, Kentucky 40225
FINALLY, if your problem is still
not resolved, write:
Major Appliance
Consumer Action Panel
20 North Wacker Drive
Chicago, Illinois 60606
PRECAUTIONS
TO
AVOID
POSSIBLE
EXPOSURETo
EXCESSIVE
MICROWA~
(a) Do No+ Attempt to operate
this aven with the door open since
open-door operaticm can result in
harmful exposure to microwave
energy. It is important not to
defeat or tamper with the safety
interlocks.
(b) Do Not Place any object
between the oven fgont face and
the door or allow soil or cleaner
residue to accumulate cmsealing
surfaces.
[c) Do Not Operate the cwen
if it is damaged. It is particularly
important that the oven door ciose
properly and that there is nu
damage to the:
(1} door (bent)
(2) hinges and latches (broken or
loosened)
(3) door seals and sealing surfaces.
(d) The Oven ShmiId Not be
adjusted or repaired by anyone
except properly qualified serviee
2

Microwaving Tips
● Make sure all cookware used in
your microwave oven is suitable
for microwaving. Most glass
casseroles, cooking dishes,
measuring cups, custard cups,
pottery or china dinnerware which
does not have metallic trim or glaze
with a metallic sheen can be used.
Some cookware is labeled “suitable
for microwaving.”
If you are not sure if a dish is
microwave-safe, use this test:
Place in the oven both the dish you
are testing and a glass measuring
cup filled with one cup water—set
the measuring cup either in or next
to the dish. Microwave 1 minute at
high. If the dish heats, it should not
be used for microwaving. If the dish
remains cool and only the water in
the cup heats, then the dish is
microwave-safe.
c Paper towels, wax paper and
plastic wrap can be used to cover
dishes in order to retain moisture
and prevent spattering. Be sure to
vent plastic wrap so steam can
escape.
● Some microwaved foods
require stirring, rotating or
rearranging. Check the cookbook.
● Steam builds up pressure in
foods which are tightly covered
by a skin or membrane. Pierce
potatoes, egg yolks and chicken
livers to prevent bursting.
WARNING-TO ~ed~~~
servicf
the risk of bums, ekxtric shock,
persurxmw.. &vllMAvtHwaA*mL
fire, injury @personsor exposure
authorized service faci~ity for
to excessive microwave energy:
ex.aminatiari, repair or adjustment.
s ASVVitjIany appliance?ChM@
-’r ,.
●
==-—-.
-–-1–.m.-.sA–
...-.. -w* ,
0 To~1
*Readand fdknv thespecific
“PRECAUTIONSTOAVOID
the mm cavity:
POSSIBLEEXPOSURE TO
–Do nut overcookf@. CardiMv
EXCESSIVEMICROWAVE
ENERGY” on page 2.
* Thisappliance must be
pM4V%/%$A&&nLuuMAWWVWM
cooking*
grounded.Connect only to
–Remove V@
nmnerb cmwn~ed ~~~l~t. see
.4
I
‘iii&iiiiii-iiiSiiTJCiiiiNS
fifi
mama m
WIL J.qy Au.
–ml nutuseyourmicrowave
*TN ~i~ro~ve evenis
men@dry
newspapers.
specifically designed to heat or
cookfood, and is not intended
–-Do nutuse recycled~aper
furlaboratory orindustrial use.
products.J&x
napkins and wax paper can
* Fbrbest operation, plug this
contain metal flecks which may
applianceinto itsownelectrical
cause arcing or ignitiz. l?a~ex
mklet$topreventflickering of
lights, biowingof fuse or
produc$s containing Rylo~ UF
trippingof circuit breaker.
Eykmfilaments showld be
av~ided, as they may also igni%e.
* I@all or hate this appliance
–Do not pop popcornimyour
onlyin accordancewith the microwaveovenEnlessina special
provided InstallationInstructions. rnicrOwave popcorn aceess~ry or
* Do
not coverar Mockany
unlessyouusepopcorn labeled for
openingson the appliance.
use in microwave ovens.
–-Do
not operatethe oven while
● Do not use outdoors.
empty to avoiddamage tothe
* DOnotimmerse powercord
ovenand the dangerof fire. If
or plugin water.
byaccident the mm should rurI
I
● Keemowercordaway from . . ..
empty a minu
I
iwateiliiurfaces$
● Donut let uowercord hang
VIAAAWU *t. w- v WL7 V*.-*
overedge uf”tableor counte~
&Jmaw
prolongs the life ufthe oven.
*Do I@ operate this applianceif
—-Donot meremk TM&Ma.
it
hasadamaged powercurdor
plug,ifit isnotworkingproperIy,
...”. w--”...
w if it has been damaged or
@--”””-=”w“~~-.
drnnwd.
IPI---6J-..-.J -n..+..”-h
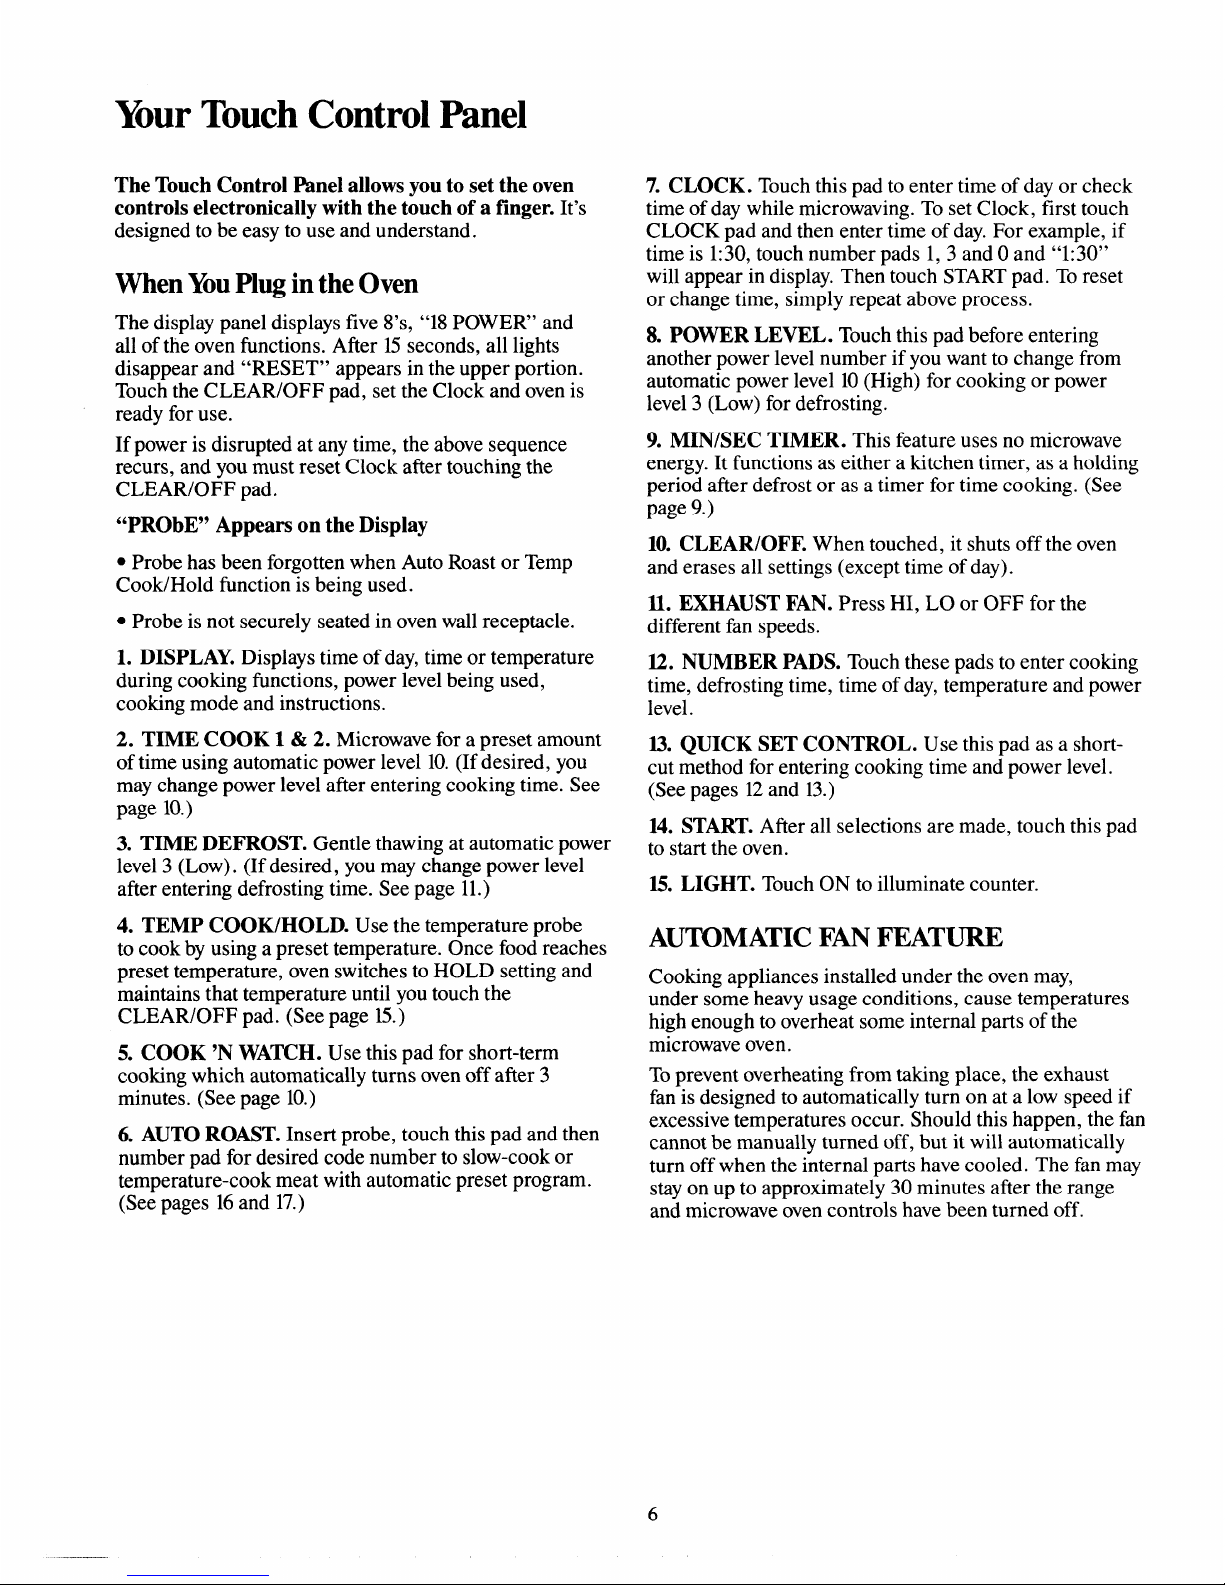
Your Touch Control Panel
The Touch Control Panel allows you to set the oven
controls electronically with the touch of a finger. It’s
designed to be easy to use and understand.
When YouPlug in the Oven
The display panel displays five 8’s, “18 POWER” and
all of the oven functions. After 15 seconds, all lights
disappear and “RESET” appears in the upper portion.
Touch the CLEAR/OFF pad, set the Clock and oven is
ready for use.
If power is disrupted at any time, the above sequence
recurs, and you must reset Clock after touching the
CLEAR/OFF pad.
“PRObE” Appears on the Display
● Probe has been forgotten when Auto Roast or Temp
Cook/Hold function is being used.
s Probe is not securely seated in oven wall receptacle.
1. DISPLAY. Displays time of day, time or temperature
during cooking functions, power level being used,
cooking mode and instructions.
2. TIME COOK 1 & 2. Microwave for a preset amount
of time using automatic power level 10. (If desired, you
may change power level after entering cooking time. See
page 10.)
3. TIME DEFROST. Gentle thawing at automatic power
level 3 (Low). (If desired, you may change power level
after entering defrosting time. See page 11.)
4. TEMP COOK/HOLD. Use the temperature probe
to cook by using a preset temperature. Once food reaches
preset temperature, oven switches to HOLD setting and
maintains that temperature until you touch the
CLEAR/OFF pad. (See page 15.)
5. COOK ‘N WATCH. Use this pad for short-term
cooking which automatically turns oven off after 3
minutes. (See page 10.)
6. AUTO ROAST. Insert probe, touch this pad and then
number pad for desired code number to slow-cook or
temperature-cook meat with automatic preset program.
(See pages 16 and 17.)
7. CLOCK. Touch this pad to enter time of day or check
time of day while microwaving. To set Clock, first touch
CLOCK pad and then enter time of day. For example, if
time is 1:30, touch number pads 1, 3 and Oand “1:30”
will appear in display. Then touch START pad. To reset
or change time, simply repeat above process.
8. POWER LEVEL. Touch this pad before entering
another power level number if you want to change from
automatic power level 10(High) for cooking or power
level 3 (Low) for defrosting.
9. MIN/SEC TIMER. This feature uses no microwave
energy. It functions as either a kitchen timer, as a holding
period after defrost or as a timer for time cooking. (See
page 9.)
10. CLEAR/OFF. When touched, it shuts off the oven
and erases all settings (except time of day).
11. EXHAUST FAN. Press HI, LO or OFF for the
different fan speeds.
12. NUMBER PADS. Touch these pads to enter cooking
time, defrosting time, time of day, temperature and power
level.
13. QUICK SET CONTROL. Use this pad as a shortcut method for entering cooking time and power level.
(See pages 12 and 13.)
14. START. After all selections are made, touch this pad
to start the oven.
15. LIGHT. Touch ON to illuminate counter.
AUTOMATIC FN FEATURE
Cooking appliances installed under the oven may,
under some heavy usage conditions, cause temperatures
high enough to overheat some internal parts of the
microwave oven.
To prevent overheating from taking place, the exhaust
fan is designed to automatically turn on at a low speed if
excessive temperatures occur. Should this happen, the fan
cannot be manually turned off, but it will automatically
turn off when the internal parts have cooled. The fan may
stay on up to approximately 30 minutes after the range
and microwave oven controls have been turned off.
6
e--0
:
(Q
‘@
(D
—,
Q
7
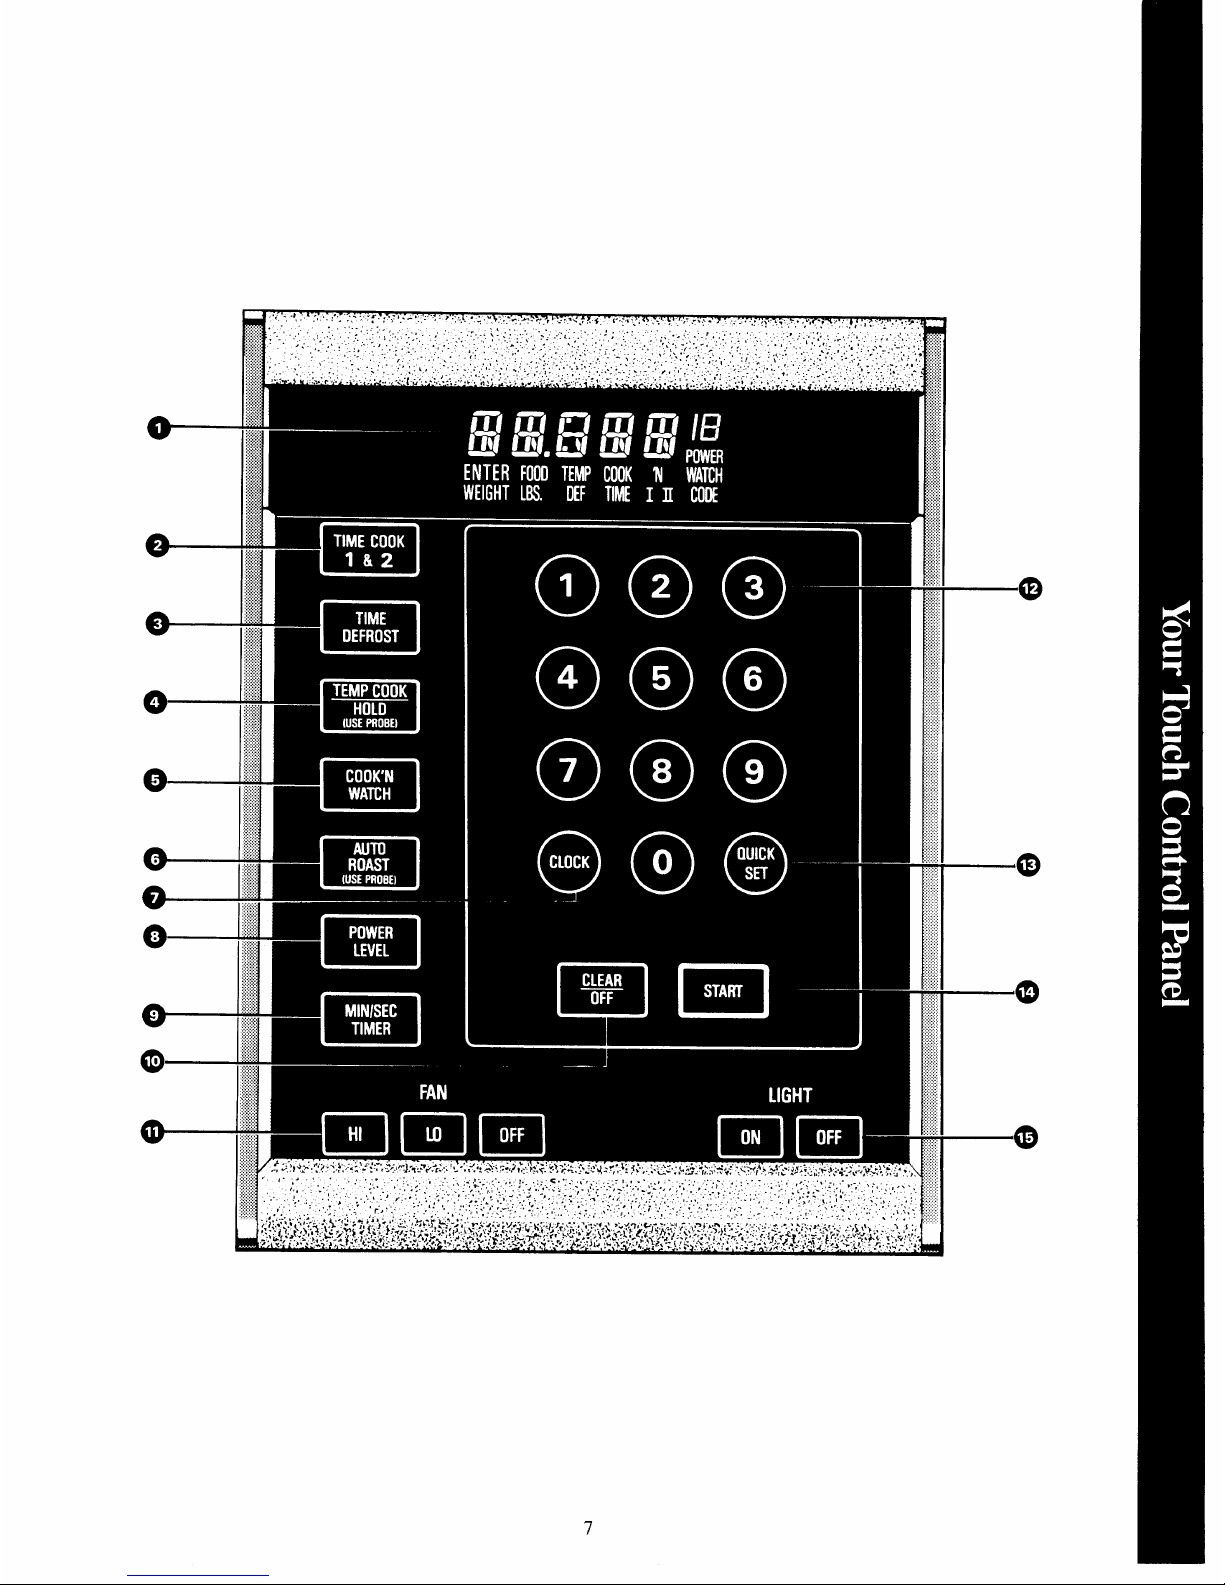
Features of Your Microwave Oven
Cooking Complete Reminder
(For all cooking features except Auto Roast Code 4.)
To remind you that you have food in the
oven, the oven will display “End” and beep
once a minute until you either open the oven
4 c
door or touch the CLEAR/OFF pad.
EEEl
~“
...........,
.“....’..”
</
/
1
1. Door Handle. Pull to open
door. Door must be securely
latched for oven to operate.
2. Door Latches.
ND
(
- - 1+
.;
:::;:
:,.....
,...:,,
,.
,1,!.
,. .!,,,
,.
.,,!.
. ...,,
II
::!.
~ :;;
u
—
\
6. Oven Light. Light comes on
when door is opened or when oven
is operating in any function.
7. Receptacle for Temperature
3. Whdow with Metal Shield.
Probe. Probe must be ~ecurely
Screen allows cooking to be viewed
inserted into receptacle before oven
will start any temperature or Auto
while keeping microwaves confined
Roast cookirw.
in oven.
4. Model and Serial Numbers.
5. Oven Vent.
8. MicroThermometerTM
Temperature Probe. Use with
Temp Cook/Hold and Auto Roast
functions only.
This is to certi~ that
this unit has been tested
in conformance with AMCA
Bulletin No. 210
C.F.M.
SONES
at 0.10 WG 5.5 Vert.
230 Vert. 6.7 Her.
237 Her.
9. Touch Control Panel and
Digital Display. For detailed
information on each feature,
see pages 6 and 7.
10. Hood Controls.
Fan. Press HI, LO or OFF.
Light. Press ON or OFF.
IL Grease Filters.
12. Cooktop Light.
13. Oven Floor.
8
 Loading...