

Hotpoint REM4H Use And Care Manual
How to
Y
thebestfr$~
OW
Mcrowave~en
ContenK
Adapter Plugs
27
Microwaving Tips
3
Aluminum Foil
4 Minute/Second Timer
9
Appliance Registration
2
Model
and Serial Numbers 2
Care and Cleaning
26
Power Levels
7-9
Control Panel
6
Precautions
2
Convenience Food Guide
14, 15
Problem Solver
28
Cooking
7
Program Cooking
6
Cooking Complete Reminder 5
Repair Service
31
Cooking Guide
16-25
Safety Instructions
3,4
Defrosting
8
Warranty
Back Cover
Defrosting Guide
12, 13
Delayed Cooking
9
Extension Cords
27
Features
5
Grounding Instructions
27
Heating or Reheating Guide 10, 11
Use and Care &
Coohng
Guide
Counter Saver
3
model
REM4H
The electric output
of this microwave oven
is 500 watts.
Hold Time
9
GE Answer
Center@
Light Bulb Replacement
26
800.626.2000
Help whelp you...
PRECAUTIONS
Before using your oven,
read this book carefully.
It is intended to help you operate
and maintain your new microwave
oven properly.
Keep it handy for answers to your
questions.
If you don’t understand something
or need more help, write (include
your phone number):
Consumer Affairs
Hotpoint
Appliance Park
Louisville, KY40225
Write down the model
and serial numbers.
You’ll find them on a label inside
the oven.
These numbers are also on the
Consumer Product Ownership
Registration Card that came with
your microwave oven. Before
sending in this card, please write
these numbers here:
Model Number
Serial Number
Use these numbers in any
correspondence or service calls
concerning your microwave oven.
Be sure your microwave
oven is registered.
It is important that we know the
location of your microwave oven
should a need occur for adjustments.
Your supplier is responsible for
registering you as the owner.
Please check with your supplier to
be sure he has done so; also send in
your Consumer Product Ownership
Registration Card. If you move, or
if you are not the original purchaser,
please write to us, stating model
and serial numbers.
This appliance
must be-red.
P1-
be certain
that it is.
Write to:
Hotpoint
Range Product Service
Appliance Park
Louisville,
KY40225
If you received a
damaged oven . . .
Immediately contact the dealer (or
builder) that sold you the oven.
Save time and money.
Before you request service . . .
check the Problem Solver on page 28.
It lists causes of minor operating
problems that you can correct yourself.
Optional Accessories
available at extra cost from your
Hotpoint supplier.
~26
Installation Kit
converts
this oven to a built-in wall oven.
4-AO~ Inshllation
Kit
allows this
oven to be mounted under a cabinet.
All these things are
norml
with your microwave oven:
● Steam or vapor escaping from
● Dull thumping sound while
around the door.
oven is operating.
● Light reflection around door or
●
Some TV-Radio interference
outer case.
might
be noticed while using your
●
Dimming oven light and change
rni~rowave
oven. It’s similar-~ the
in blower sound may occur while
interference caused by other small
operating at power levels other
appliances and does not indicate a
than high.
problem with your oven.
TO AVOID
POSSIBLE
EXPOSURE TO
EXC~SIVE
MICROWAW
ENERGY
(a) Do Not Attempt
to operate this
oven with the door open since
open-door operation can result in
harmful exposure to microwave
energy. It is important not to
defeat or tamper with the safety
interlocks.
(b) Do Not Place
any object
between the oven front face and
the door or allow soil or cleaner
residue to accumulate on sealing
surfaces.
(c) Do Not Operate
the oven
if it is damaged. It is particularly
important that the oven door close
properly and that there is no
damage to the:
(1) door (bent)
(2) hinges and latches (broken or
loosened)
(3) door seals and sealing surfaces.
(d) The Oven Should Not
be
adjusted or repaired by anyone
except properly qualified service
personnel.
2
● Make sure all
cookw~
your microwave oven is
microwaving. Most
glas
cooking dishes, measul
custard cups, pottery 01
dinnerware which does
metilic trim or
gla wj
sheen can be used. Son
is labeled
“sui~ble
for
n
If you are unsure, use
tl
Measure 1 cup water in
Place in oven on or
besi
Microwave 1 minute a
If water becomes hot, d
microwave safe. If dish
should not be used for r
● Paper towels, wax pal
plastic wrap can be
use[
dishes in order to retain
and prevent spattering.
●
Some microwaved
foc
stirring, rotating or real
Check the cooking
guid
specific instructions.
●
Steam builds up press
which are tightly
covert
or membrane. Pierce
p(
yolks and chicken
livers
bursting.
I~ORTANT
SAFETY INSTRUCTIONS
Read all instructions before using this appliance.
When using electrical appliances
basic safety precautions should be
followed, including the following:
WARNING–To reduce
the risk of burns, electric shock,
fire, injury to persons or exposure
to excessive microwave energy:
s
Use this appliance only for its
intended use as described in this
manual.
●
Read and follow the specific
“PRECAUTIONS
~
AVOID
POSSIBLE EXPOSURE
~
EXCESSIVE MICROWAVE
ENERGY” on page 2.
●
This appliance must regrounded.
Connect
ody to properly grounded
outlet. See “GROUNDING
INSTRU~IONS” on page 27.
●
This microwave oven is
specifically designed to heat or
cook food, and is not intended
for laboratory or industrial use.
●
For best operation, plug this
appliance into its own electrical
outlet, to prevent flickering of
lights, blowing of fuse or tripping
of circuit breaker.
●
Install or locate this appliance
only in accordance with the
provided
Hation
instructions.
●
Be certain to place the front
surface of the door three
inchm
or
more back from the countertop
edge to avoid accidental tipping
of the
apptiance
in normal
usage,
(If used on countertop.)
●
Do not cover or block any
openings on the appliance.
●
Do not use outdoors.
●
Do not immerse power cord
or plug in water.
●
Keep power cord away from
heated surfaces.
●
Do not let power cord hang
over edge of
bble
or counter.
3
●
Do not operate this appliance
if it has a damaged power cord
or plug, if it is not working
properly, or if it has been
damaged or dropped.
●
See
door surface cleaning
instructions on page 26.
●
This appliance should be
serviced
ordy
by
qtiified
service
personnel.
Contact nearest
authorized service facility for
examination, repair or adjustment.
Q
As with any appliance, close
supervision is necessary when
used by children.
●
To reduce the risk of fire in
the oven cavity:
–Do not overcook
food. Caretily
attend appliance if paper, plastic,
or other combustible materials are
placed inside the oven to facilitate
cooking.
–Remove wire twist-ties
from
paper or plastic bags before
placing bag in oven.
–Do not use your microwave
oven to dry newspapers.
–Do not use recycled paper
producti.
Recycled paper towels,
napkins and wax paper can
contain metal flecks which may
cause arcing or ignite. Paper
products containing nylon or
nylon filaments should be
avoided, as they may also ignite.
–Do not operate the oven
while
empty to avoid damage to the
oven and the danger of fire.
If
by accident the oven should run
empty a minute or two, no harm
is
done,
However, try to avoid
operating the oven empty at all
times–it saves energy and
prolongs the life of the oven.
I

IMPORTANT
SAFETY INSTRUCTIONS
(continued)
–Do not pop popcorn in your
microwave oven
udess
in a special
microwave popcorn accessory or
udess
you use popcorn labeled for
use in microwave ovens,
–Do
not overcook potatoes.
They could dehydrate and catch
fire, causing damage to your oven.
●
If materials inside oven should
ignite,
keep oven door closed, turn
oven off, and disconnect power
cord, or shut off power at
fise or
circuit breaker panel.
●
Some products such as whole
eggs and sealed containers-for
example,
closed glass jars—may
explode and should not be heated
in this oven.
●
Avoid heating baby food
in
glass jars, even without their lids;
especially meat and egg mixtures.
.
Don’t
defrost frozen
beverages
in narrow necked
boties
(especially
carbonated beverages). Even if the
container is opened, pressure
can build
up,
This can cause the
container to burst,
resuIting
in
injury.
●
Use
me~l
only
as
directed in
the cooking guides
TV dinners maybe microwaved
in foil trays less than 3/4” high;
remove top foil cover and return
tray to box. When using metal in
the microwave oven,
keep metal
at least 1 inch away from sides
of oven.
●
Cookware may become hot
because of heat
transferrti
from
the heated food. Pot holders may
be needed to handle the cookware.
Q
Sometimes, the glass cooking
tray can become too hot to
touch.
Be careful when handling
the cooking tray during and after
cooking.
Q Foods
cooked in liquids
(such
as pasta) may tend to boil over
more
rapidy
than foods containing
less moisture. Should this occur,
refer to page 26 for instructions on
how to clean the inside of the oven.
Q
Thermometer—Do not
use a thermometer in food you
are microwaving unless the
thermometer is designed or
recommended for use in the
microwave oven.
.
Plastic cookware—p]astic
cookware designed for microwave
cooking are very useful, but should
be used carefully. Even
microwave-
safe plastic may not be as tolerant
of overcooking conditions as are
glass or ceramic materials and
may soften or char if subjected to
short periods of overcooking. In
longer exposures to overcooking,
the food and cookware could
ignite. For these reasons: 1) Use
microwave-safe plastics
ody and
use them in strict compliance
with the cookware manufacturer’s
recommendations. 2) Do not
subject empty cookware to
microwaving. 3) Do not permit
children to use plastic cookware
without complete supervision.
●
When
cooking pork,
follow
the directions exactly and always
cook the meat to an internal
temperature of at least
170°F.
This assures that, in the remote
possibility that trichina may be
present in the meat, it will be
killed and meat will be safe to eat.
Q
Boiling eggs is not
recommended in a microwave
oven.
Pressure can build up
inside the egg yolk and may cause
it to burst, resulting in injury.
●
Foods with unbroken outer
‘%kin”
such as potatoes, sausages,
tomatoes, apples, chicken livers
and other giblets, and egg yolks
(see previous caution) should be
pierced to allow steam to escape
during cooking.
.
<<Boilable”
cooking
pouches
and tightly closed plastic bags
should be slit, pierced or vented
as directed in the cooking guide.
If they are not, plastic could burst
during or immediately after
cooking, possibly resulting in
injury, Also, plastic storage
containers should beat least
partially uncovered because they
form a tight seal. When cooking
with containers tightly covered
with plastic wrap, remove
covering carefully and direct
steam away from hands and
face.
●
Spontaneous boiling—Under
certain special circumstances,
liquids may start to boil during or
shortly after removal from the
microwave oven. To prevent burns
from splashing liquid, stir the
liquid briefly before removing the
container from the
rnicmve
oven.
SAVE THESE
INSTRUCTIONS
4

Features of Your Oven
Cooking Complete Reminder
(For TIME COOK and TIME DEFROST cycles)
To remind you that you have food in the
oven, the oven will beep once a minute until
you either open the oven door
or
touch the
CLEAR/OFF pad.
-=”-
~
,-
—
Q
Q
1. Door Handle. Pull to
open
4.
Oven Vent.
8. Glass Cooking Tray.
Tray must
door. Door must be
secure’ly
latched for oven to operate.
5. Oven Interior Light. Turns on
be in place when using the oven.
Cooking performance
will
be
when the door is opened or when
2. Door
btches.
the oven is operating.
unsatisfactory without the tray
in place. The tray may be removed
3. Door Screen. Metal screen
6. Model and
Serial
Numbers.
for cleaning.
permits viewing of foods and keeps
microwaves confined inside oven.
7.
Mode Stirrer Cover.
Protects
9.
Touch Control
Rnel
and
the microwave energy distributing
Display. See
next page for
system. Do not remove this cover.
instructions.
You will damage the oven.
When You Plug in the Oven
The display panel lights up. After 15 seconds, all lights disappear
and “RESET” appears. Touch the CLEAR/OFF pad and oven is
ready for use and the clock can be set.
If power is disrupted at any time, the above sequence reoccurs,
and you must reset Clock after touching CLEAR/OFF.
5
Your Touch Control
Rnel
The Touch Control Panel
allows you
to set the oven controls
electronically with the touch of a
finger.
It’s designed to be easy
to use and understand.
1. DISPLAY.
Displays time of day
and time counting down during
cooking functions, power level,
cooking mode and instructions.
2. TIME COOK 1 & 2.
Microwave for a preset amount of
time using automatic power level 10
(HIGH) (or change power level
after entering cooking time. See
page 7).
3. TIME DEFROST. Gentle
thawing at automatic power level 3
(LOW) (or change power level after
entering defrosting time. See page
8).
4. MIN/SEC TIMER. This
feature uses no microwave energy.
It functions as a kitchen timer, as a
holding period after defrost or as a
delay timer before time cooking
(see page 9.)
5. NUMBER PADS. Touch these
pads to enter cooking/defrosting
time, power level and time of day.
6. CLOCK.
Touch this pad to enter
time of day or check time of day
while microwaving.
To set clock, first touch CLOCK
pad and then enter time of day. For
example, if time is
1:30,
touch
number pads 1, 3 and O and
“1:30”
will appear in display. Touch
START pad. To reset or change
time, simply repeat above process.
7. POWER LEVEL. Touch this
pad before entering another power
level
number if you want to change
from automatic power level 10
(HIGH) for cooking or power
level 3 (LOW) for defrosting.
8. CLEAR/OFF. When touched, it
shuts off the oven and erases all
settings (except time of day).
9. START. After
all
selections are
made, touch this pad to start oven.
~ogmm
Cooting
Use your Touch Control Panel to Create your own programs to suit
Defrost and Cook by time using your individual cooking style. For
your choice of power
levels
from
example: use the Min/Sec Timer to
1
(lowest) to 10 (highest), time
delay the start of cooking or program
kitchen tasks with the Min/Sec
a hold time between defrosting and
Timer, and set the clock. cooking (see page 9). Set Time
Cook 1
&
2 for a two-stage program
using different times and Power
Levels (see page 7).
6
Cooting
The TIME COOK 1 & 2 feature
allows you to microwave for a
preset amount of time using
automatic power level 10
@igh),
or change power level
automatically.
Power level 10 (High) is
recommended for most cooking,
but you may change this for more
flexibility. See your cooking guide.
To become better acquainted with
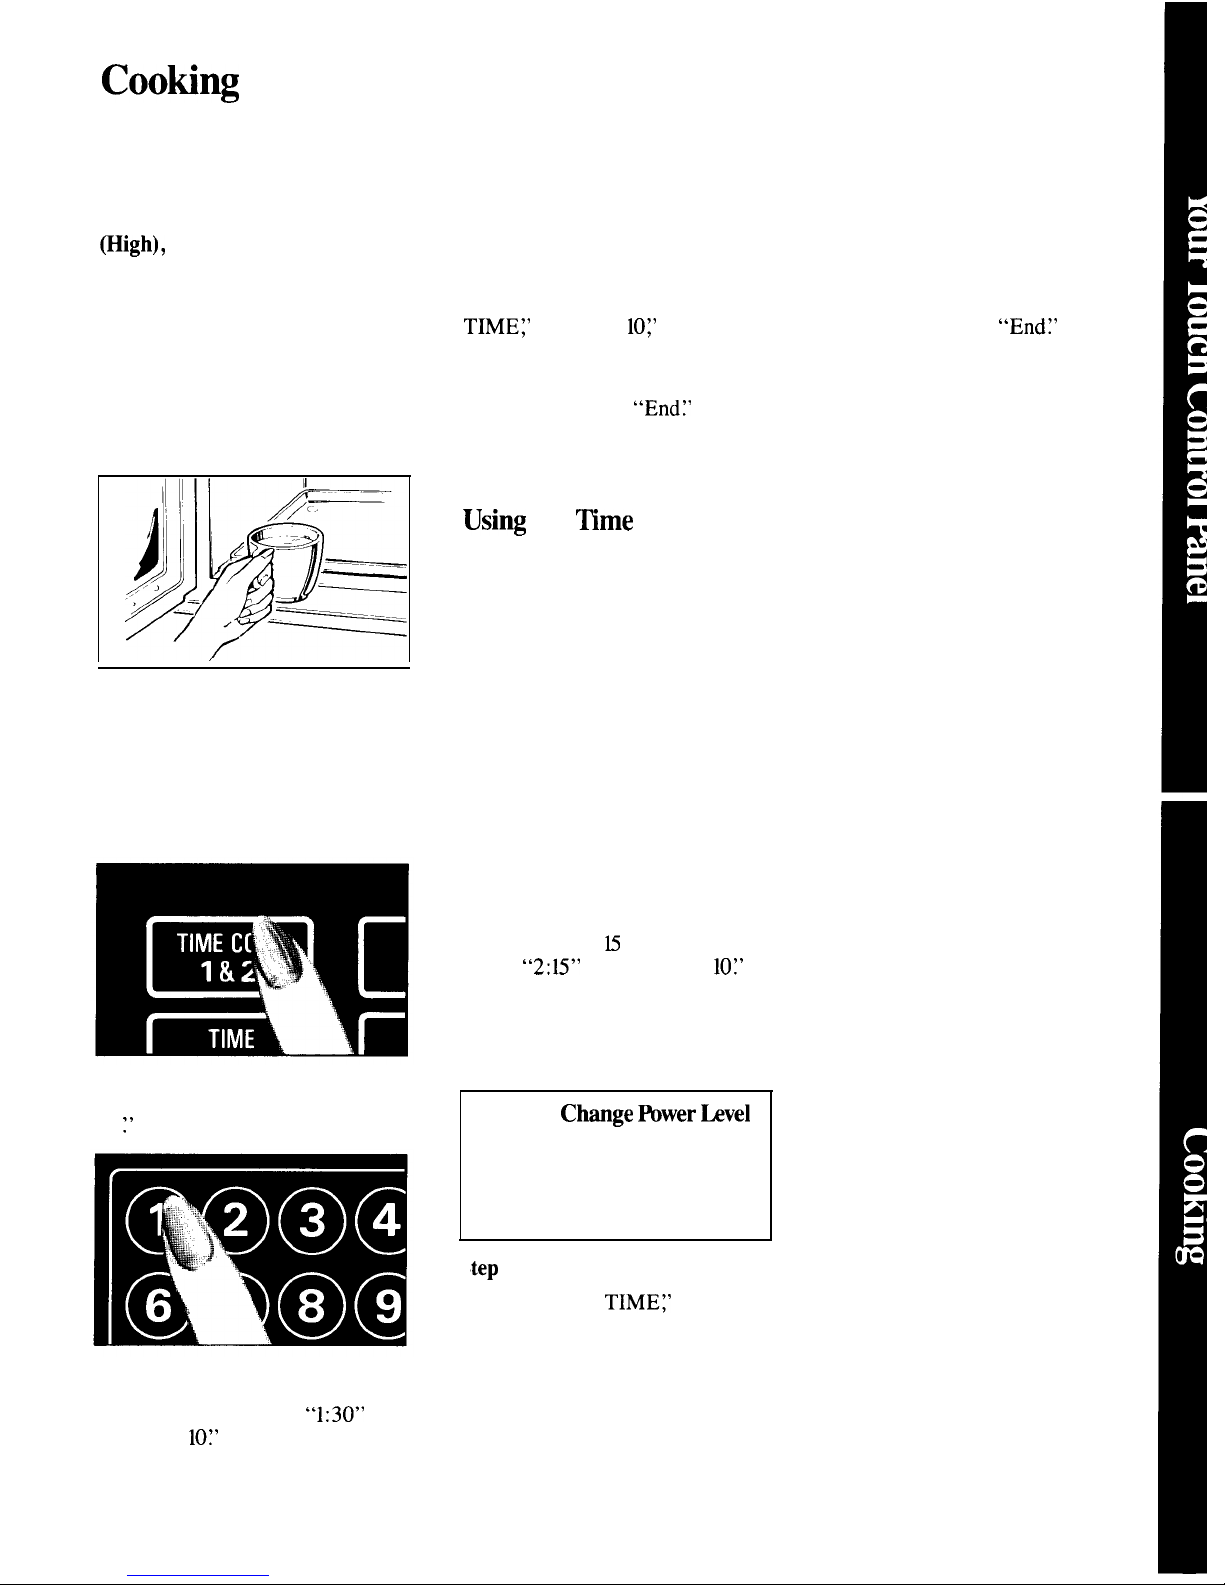
time cooking, make a cup of coffee
by following the steps below.
Step 1:
Fill a cup 2/3 full of
water, add 1 teaspoon of instant
coffee and stir to dissolve. Use a
cup that has no metal decoration
and is microwave safe (refer to
Microwaving Tips on page 3),
Place cup in oven and close door.
Step 2:
Touch TIME COOK 1 & 2
pad. Display shows “COOK” and
“1
~’
“ENTER TIME” is flashing.
Step 3:
Select your time. Touch
1, 3 and O for one minute and 30
seconds. Display shows
“1:30” and
“POWER
10:’
“COOK TIME”
flashes.
Because automatic power level 10
is recommended for this cup of
coffee, there is no need to change
the power level. (If power level 10
is not appropriate, see “How to
Change Power Level” below,)
Step
4: Touch START. “COOK
TIMEJ’
“POWER
10~’
and time
counting down show on display.
Step
5: When time is up, the oven
signals and flashes
“End?’
Oven,
light and fan shut off.
Step
6: Open the door.
Usi~
the
~me
Cook 2
Feature
The Time Cook 2 feature lets you
set two time cooking functions
within one program. This is ideal
if you want to change power levels
during your cooking operations.
Here’s how to do it.
Step 1:
Place food in oven in
microwave-safe container and close
the door.
Step
2: Touch TIME COOK 1 & 2
pad. Display shows “COOK” and
“l.” “
ENTER TIME” is flashing.
Step
3: Select your cooking time.
For example, touch 2, 1 and 5 for
two minutes and
b
seconds. Display
shows
“2:15”
and “POWER
10~’
“COOK TIME” flashes.
Step 4: Touch TIME COOK 1 &2.
Step
5: Set your cooking time.
How to
Chmge fiwer hvel
After setting cooking time,
touch POWER LEVEL pad,
then touch desired number for
new power level.
tep
6: Touch START.
Step 7: “COOK
TIME:’
the
selected power level and the first
programmed cook time, counting
down, show on the display.
Step
8: At the end of the first
programmed cook time, the next
selected power level, “COOK
TIME” and the second programmed
cook time, counting down, show on
the display.
Step
9: When time is up, the oven
signals and flashes
“End?’
The
oven, light and fan shut off.
Step 10:
Open the door.
Questions and Answers
Q.
I set my oven for the time
called for in the recipe, but at the
end of the time allowed, my food
wasn’t done. What happened?
A. Since house power varies due
to time or location many Time
Cook recipes give you a time range
to prevent overcooking. Set the
oven for minimum time, test the
food for doneness, and cook your
food a little longer, if necessary.
Q. I touched the number pads
and selected my power level. When
I touched START, however, my
oven didn’t come on. Why not?
A. The TIME COOK 1 & 2 pad
must be touched before setting the
number pads or else your oven will
not begin cooking.
Q.
I want to cook on a power
level other than High. What do
I need to do?
A.
To change the power level,
touch the POWER LEVEL pad.
“ENTER POWER” flashes on the
display panel. Enter new number.
Q. Can I interrupt my Time
Cook function to check the food?
A. Yes.
To resume cooking,
simply close the door and press
the START pad. The timer must be
reset for cooking to resume unless
time is remaining on timer.
Defrosting
The Defrost setting is designed
for speedy thawing of frozen food
and is one of the great advantages
of a microwave oven.
●
Power level 3 is automatically set
for defrosting, but you may change
this for more flexibility.
●
See your defrosting guide for
defrosting help.
To become better acquainted with
the defrost function, defrost frozen
pork chops by following the steps
below.
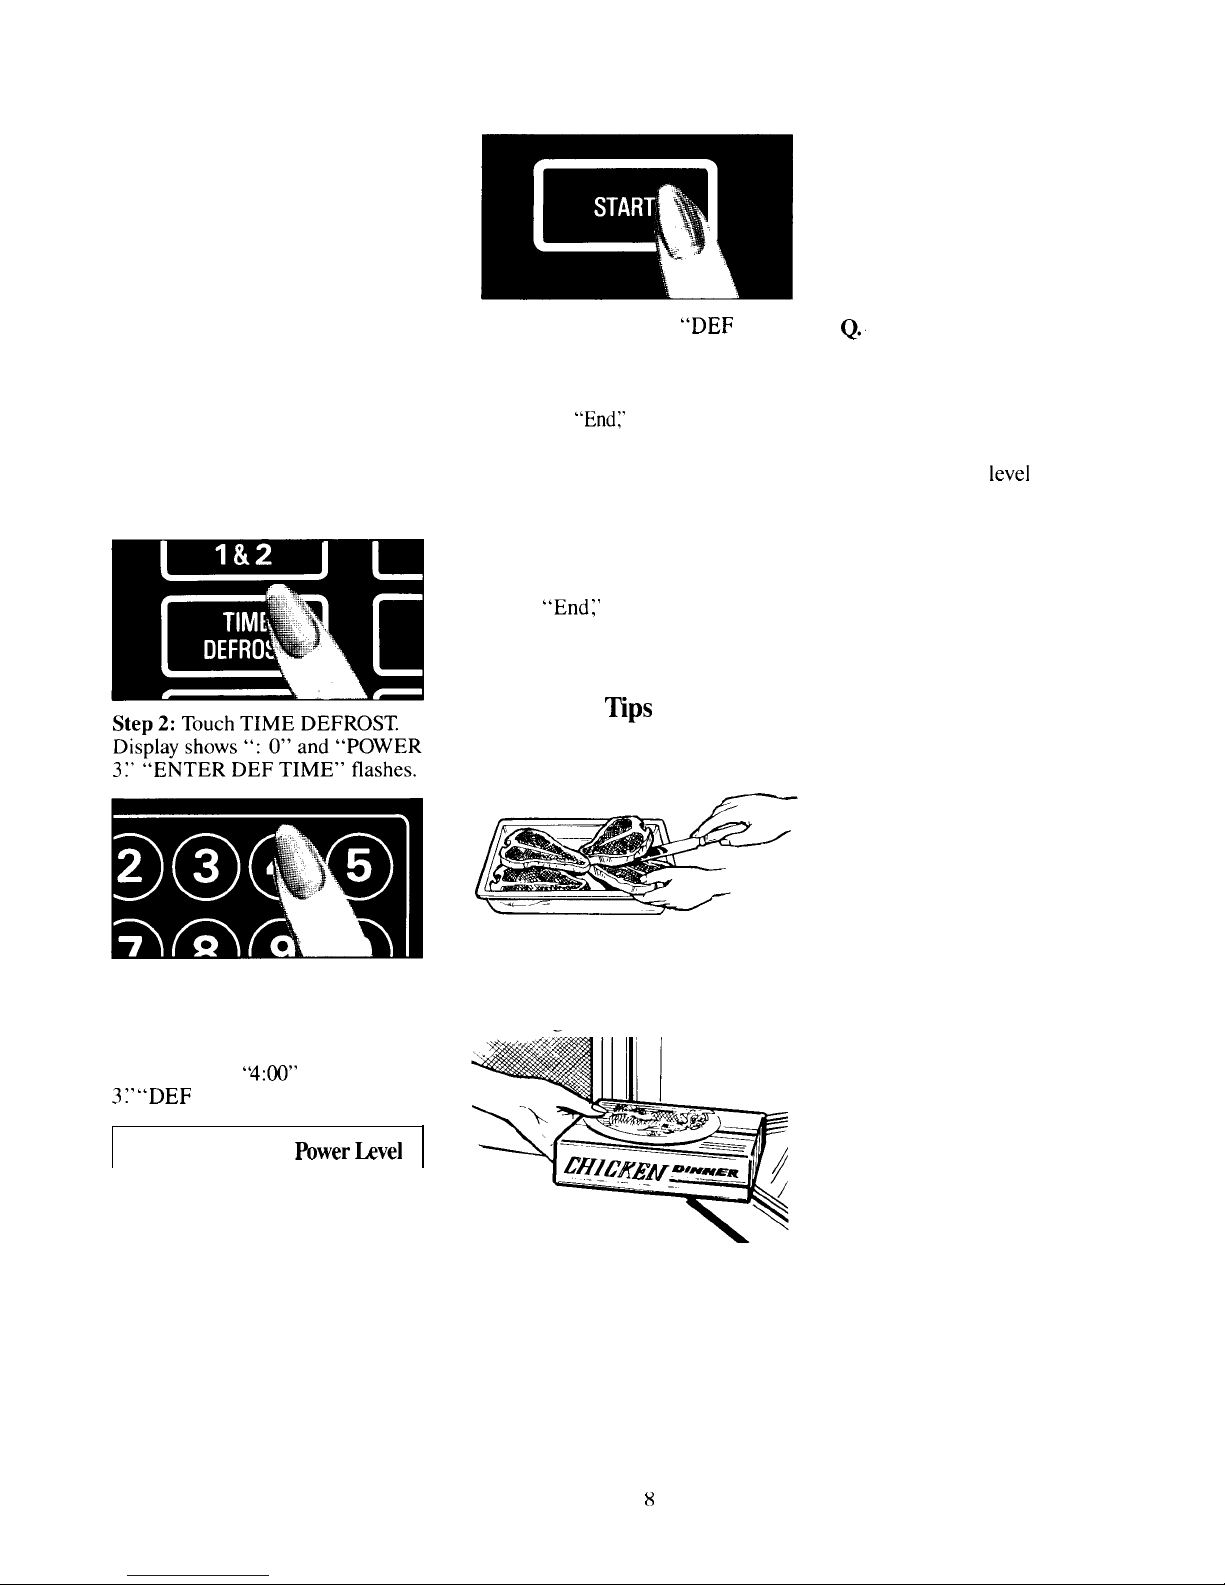
Step 1:
Place a l-lb. package of frozen
chops in the oven and close door.
Step 3:
Select one half of the total
defrosting time recommended in
your defrosting guide. For example,
touch 4, 0 and O for 4 minutes.
Display shows
‘4:00” and “POWER
3:’
“DEF TIME” flashes.
How to Change
Wwer bvel
k
After setting defrosting time,
Step 4:
Touch START.
“DEF
TIME” and “POWER 3“ show and
time counts down on display. When
cycle is completed, the oven signals
and flashes
“End~’
then automatically
shuts off.
Step
5: Turn package over, close
door and repeat Steps 2 and 3 to set
remaining half of defrosting time
and touch START.
Step
6: When oven signals and
flashes
“End~’
open door, remove
package and separate chops to
finish defrosting.
Defrosting
~ps
●
Foods frozen in paper or plastic
can be defrosted in the package.
●
For even defrosting, some foods
need to be broken up or separated
part of the way through the
defrosting time.
. Pre-packaged frozen dinners
can be defrosted and microwaved.
Be sure to remove any foil covers.
Keep metal trays at least 1“ away
from cavity walls.
Questions and Answers
Q. When I press START, I hear a
dull, thumping noise. What is it?
A. This sound is normal. It is
letting you know the oven is using a
power level lower than 10 (High).
Q.
Can I defrost small items in
a hurry?
A. Yes,
but they will need more
frequent attention than usual. Raise
the power level after entering the
time by touching the desired power
level pad. Power
level
7 cuts the
total defrosting time about in 1/2;
power level 10 cuts the total
defrosting time to approximately
1/3. During either, rotate or stir
food frequently.
Q.
Why don’t the defrosting
times in the defrosting guide
seem right for my food?
A. These times are averages.
Defrosting time can vary according
to the temperature in your freezer.
Set your oven for the time indicated
in your defrosting guide. If your
food is still not completely thawed
at the end of that time, reset your
oven and adjust the time accordingly.
Q. Should all foods be completely
thawed before cooking?
A.
Some foods should not be
completely thawed before cooking.
For example, fish cooks so quickly
it is better to begin cooking while
it is still slightly frozen.
Q. Can I open the door during
defrosting to check on the
progress of my food?
A. Yes.
You may open the door at
any time during microwaving. To
resume defrosting, close the door
and press START. The oven begins
operating if time is left on timer.
If not, reset timer.
●
Check your defrosting guide for
other defrosting tips.
8
How to Use the Minute/Second
~mer
The MIN/SEC TIMER has three
timing functions:
● It operates as a minute timer.
● It can be set to delay cooking.
● It can be used as a hold setting
after defrosting.
The MIN/SEC TIMER operates
without microwave energy.
How to Time a 3-Minute
Phone Call
1.
Touch MIN/SEC TIMER pad.
The display shows “: O“ and
“ENTER TIME” flashes.
2. Touch number pads 3, 0 and O (for
3 minutes and no seconds). Display
shows “3:00” and “TIME” flashes.
3. Touch START. Display shows
“TIME” and time counting down.
4. When time is up, oven signals,
flashes
“End:’
and
display shows
time of day.
Programming a
HOLD
TIME
The
Minute/Second Timer can
a]so
be used to program “hold time”
between microwave cooking
functions. The time can range from
one second to 99 minutes and 99
seconds. A HOLD, or “standing”
time may be found in some of your
own
recipes or in the cooking guide.
Programming Delayed
Cooking
To delay cooking up to 99 minutes,
touch TIME COOK 1 & 2 and enter
cooking time. Touch MIN/SEC
TIMER and enter number of
minutes to delay cooking. Touch
START. Timer will count down to
zero and cooking will begin.
How
to Defrost, Hold and
Time Cook
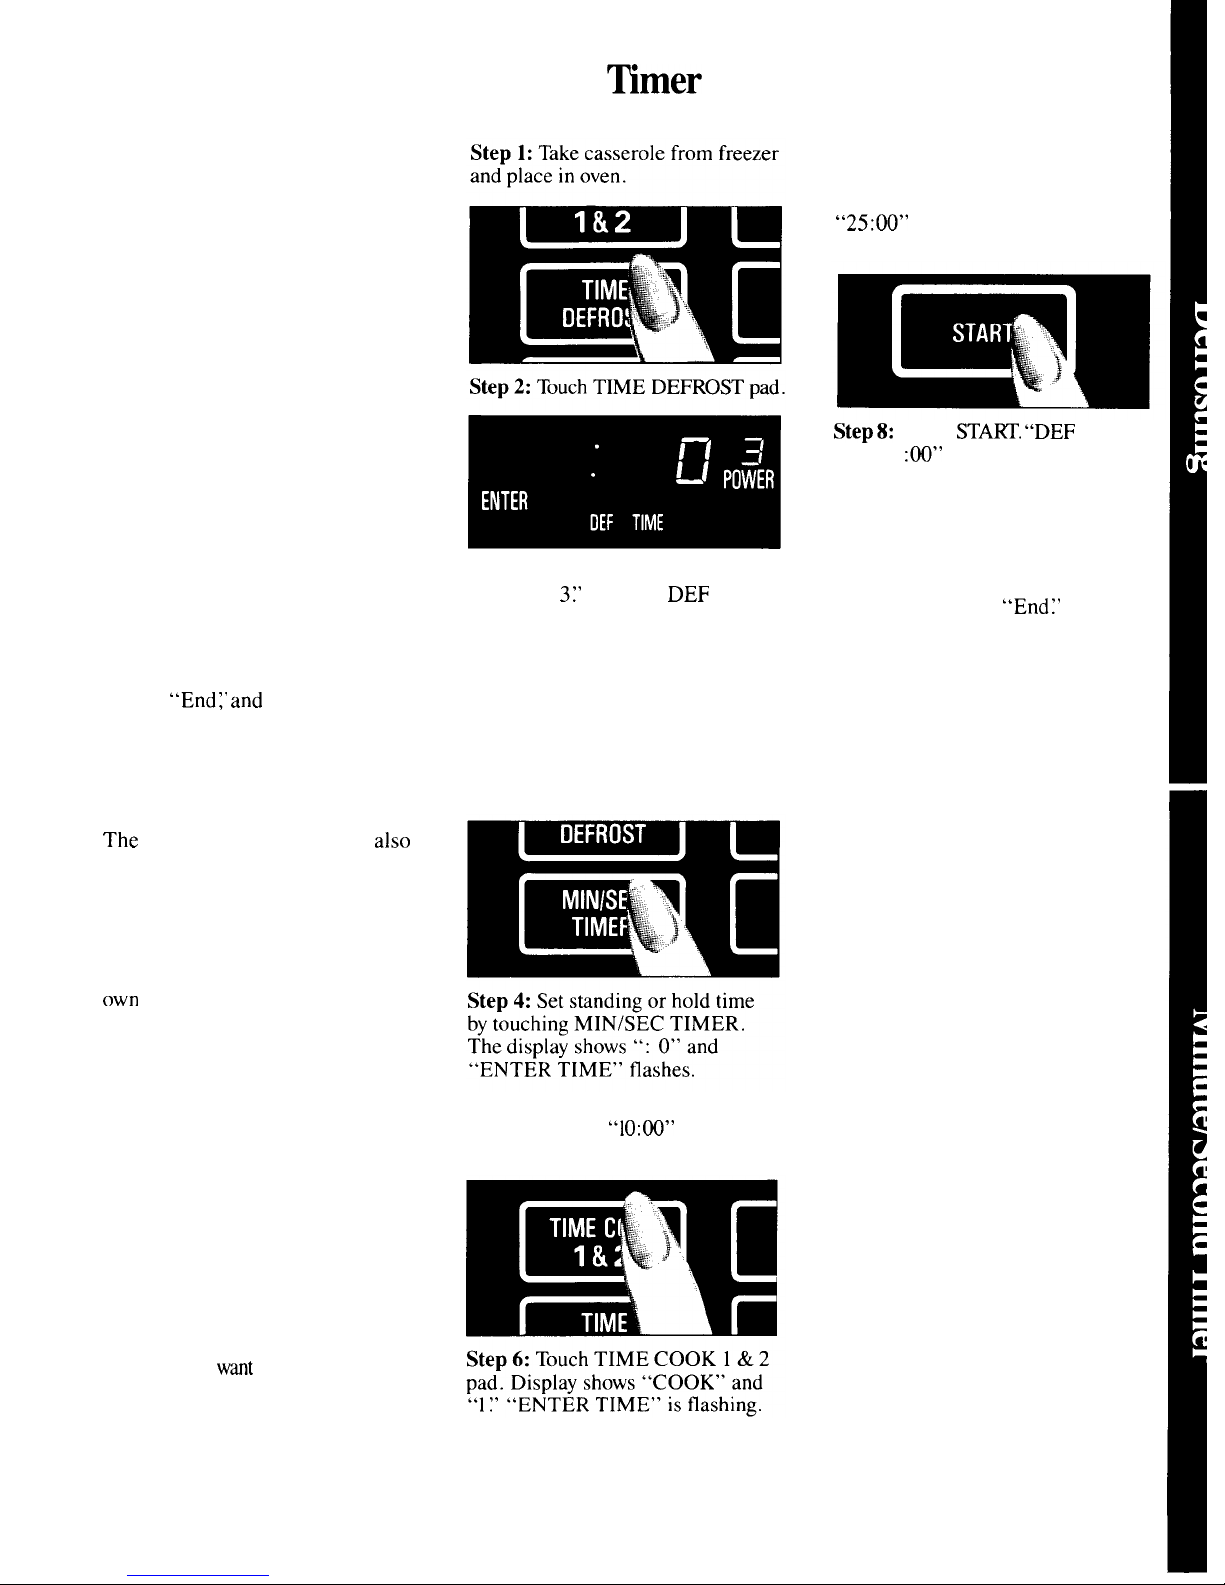
Let’s say you mt to defrost a frozen
casserole for 15 minutes, hold for
10 minutes and then Time Cook for
25 minutes. Here’s how to do it:
The display shows “: O“ and
“POWER
3!’
“ENTER
DEF
TIME”
flashes.
Step
3: Touch pads 1, 5,0 and O for
15 minutes defrosting time. “15:00’
appears on display. (Defrosting is
automatically set on power level 3
but can be changed by touching the
POWER LEVEL pad and the
desired power level.)
Step 5:
Touch 1,0,0 and O to hold
for ten minutes.
“10:00”
appears on
display and “TIME” flashes.
Step
7: Touch 2, 5,0 and O for
twenty-five minutes of cooking time.
“COOK TIME” flashes and
“25:00” and “POWER 10” appear
on display.
Step8:
Touch
STA~.
“DEF TIME”
and “15
:00”
counting down show
on display. As each function is
automatically performed oven
display shows instructions entered
and the function.
Step
9: When time is up, the oven
signals and flashes
“End~’
Questions and Answers
Q. What will happen if I
accidentally reverse my defrost,
hold and cook instructions?
A.
The oven will automatically
rearrange your program. Defrosting
m
will always come first, then hold,
and then the cooking function.
Q.
Can I defrost and hold only?
A. Yes.
Sometimes you may only
want to defrost a food, hold it, and
cook it later. All you need to do is
program in Defrost and amount of
time. Then program Hold and the
amount of time. Be sure to put the
thawed dish in the refrigerator
promptly.
NOTE: Let foods remain at room
temperature only as long as safe.
Times will vary.
Q.
I programmed my oven for a
specific defrosting time but it
defrosted longer than necessary.
What happened?
A. When instructions conflict,
the oven carries out the last
instruction. You may have set the
oven to Defrost for 4 minutes,
Hold/Time for 2 minutes, and then
Defrost for 6 minutes. In this case,
the oven would Defrost for 6 minutes
and Hold/Time for 2 minutes.
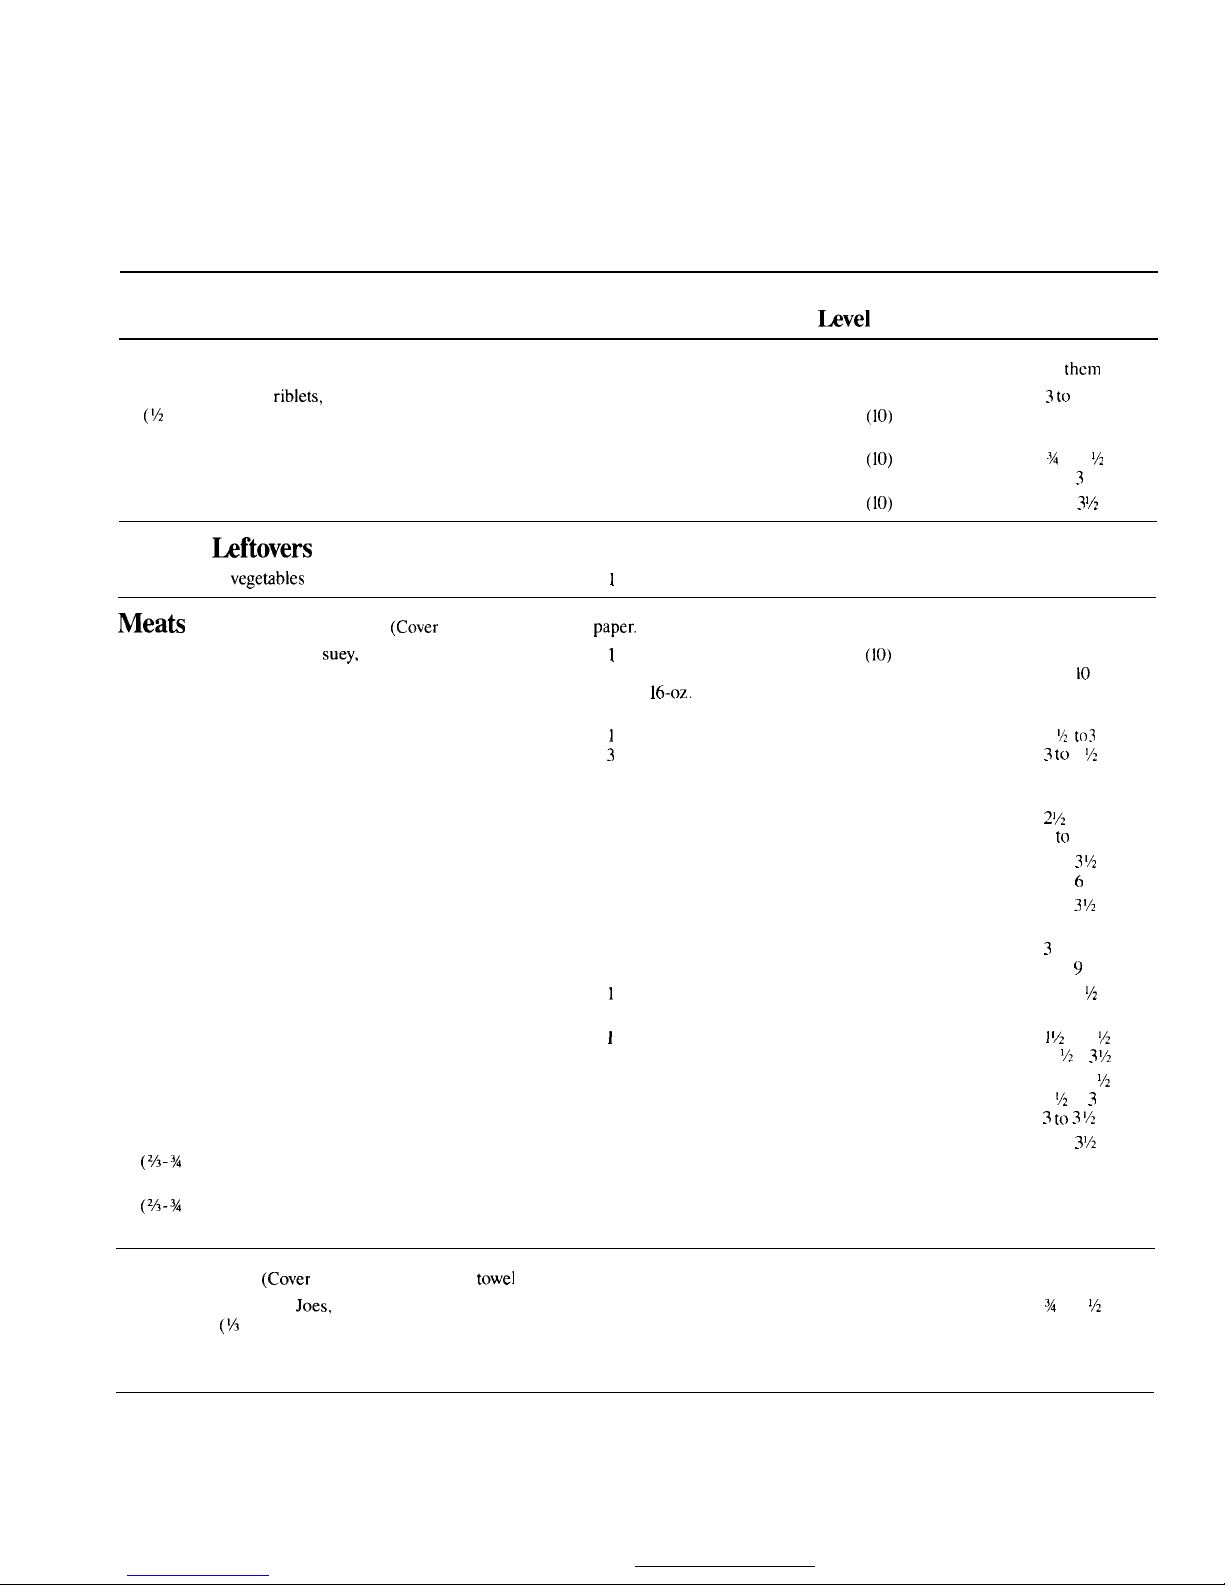
Heating or Reheating Guide
1. Directions below are for reheating already-cooked foods at
3.
refrigerator or room temperature, Use microwave safe utensils,
plastic or glass.
2. Cover most foods for faster heating. Exceptions are rare or
medium meats, some sandwiches, griddle foods like pancakes
and baked foods.
Be sure foods are heated throughout before serving. Steaming or
bubbling around edges does not necessarily mean food is heated
throughout. Stir food once or twice during heating, if possible, to
ensure even, thorough heating. As a general rule, hot foods
produce an area warm to the touch in center of underside of dish.
Power
Approximate
Item
Amount
hvel
Time, Min.
Appetizers
(Cover saucy appetizers with wax paper. Cover dips with plastic wrap. Do not cover pastry bites if you do not want thcm crisp.)
Saucy: meatballs, riblets, cocktail franks, etc.
1 to 2 servings
HIGH (10)
3 to
5
(%
cup/serving)
3 to 4 servings
HIGH
(10)
4 to 7
Dips: cream or process cheese
‘/2 cup
HIGH
(10)
3A
to 1
1/2
I cup
HIGH (10) 1 to
3
Pastry bites: small pizzas, egg rolls, etc.
2 to 4 servings
HIGH
(10)
2 to
3
Y2
Plate of
hftovers
Meat plus 2
vegembles
1
plate
HIGH (10) 4 to 5
Mea~
and Main Dishes
(Cover
main dishes with wax
paper.
Do not cover rare or medium rare meats. )
Saucy main dishes: chop
suey,
spaghetti,
1
to 2 servings
HIGH
(10)
creamed chicken, chili, stew, macaroni
3 to 4 servings
HIGH (10)
and cheese, etc.
1 can
16-oz.
HIGH (10)
(%-1 cup/serving)
Thinly sliced roasted meat:
1
to 2 servings
HIGH (10)
Rare beef roast, minimum time; Medium rare,
3
to 4 servings
HIGH (10)
maximum time
(3 to 4-oz./serving)
Well done: beef, pork, ham, poultry, etc.
I to 2 servings
HIGH (10)
3 to 4 servings
HIGH (10)
Steaks, chops, ribs, other meat pieces:
I to 2 servings
Rare beef steak
HIGH (10)
3 to 4 servings
HIGH (10)
Well done beef, chops, ribs, etc.
1 to 2 servings
HIGH (10)
3 to 4 servings
HIGH (10)
Hamburgers or meat loaf
1 to 2 servings
HIGH (10)
(4-oz./serving)
3 to 4 servings
HIGH (10)
Chicken pieces
1
to 2 pieces
HIGH (10)
3 to 4 pieces
HIGH (10)
Hot Dogs and sausages
1
to 2
HIGH (10)
3 to 4
HIGH (10)
Breakfast sausage links
2
HIGH (10)
4
HIGH (10)
8
HIGH (10)
Rice and pasta 1 to 2 servings
HIGH (10)
(2A-%
cup/serving)
Topped or mixed with sauce
1 to 2 servings
HIGH (10)
(2A-%
cup/serving)
3 to 4 servings
HIGH (10)
Tip:
When heating or reheating 3 to 4 servings of meat slices or pieces, rotate utensil 1/2 turn after half of time.
Sandwiches
(Cover sandwiches with paper
towe]
or napkin.)
Moist filling: Sloppy
Joes,
barbecue, ham salad,
1 to 2 servings
HIGH (10)
etc. in bun (M cup/serving)
3 to 4 servings
HIGH (10)
Thick meat-cheese filling; with firm bread
I to 2 servings
HIGH (10)
Tip:
Use paper towel or napkin to cover sandwiches.
3 to 6
8(0
10
6 to 8
1
‘A
to
3
3 to
4
1/2
2 1/2
to 4
5 to 7
2 to
3 ‘A
4 to
6
2 to 3
%
4 to 6
3
to 6
7 to
9
2 to 3
Y2
4 to 6
1 M
to 2
%
2
V2
to 3 %
172 to
2
Y2
2 k to
3
3 [(> 3 ‘/2
2 to
3
Y2
5 to 7
7 to 9
M to I !/2
2 to 4
2 to 3
10
 Loading...