

Hotpoint RB798WC3WW, RB798WC2WW, RB798BC3BB, RB798BC2BB, RB797WC1WW Owner’s Manual
...
vvvvvv.GEAppliances.com
Safety h_orrnation
Anti-Tip Device ............ 2
Oven ..................... 4
Safety Precautions ....... 3, 4
Self Cleaning Oven ........ 5
Surface Units ........... 5, 6
Operating Instructions
A(!just the Oven
Thermostat .............. 19
CircuWave TM .............. 15
Clock and Timer .......... 16
Oven ................. 12-14
Oven Controls ......... 10, 11
Sabbath Feature ............. 18
Selecting Types of Cookware . .9
Self'Cleaning ............. 20
Surface Units ........... 7, 8
Timed Baking & Roasting .. 17
Care and Cleaning... 20-27
Glass Cooktop ......... 26, 27
Self'Cleaning Oven ........ 20
Installation Instructions
Anti-Tip Device ........... 34
Before You Begin ......... 28
Electrical Connection . .30-33
Leveling ................. 34
Prepare the Opening ...29, 30
TJvubleshootil N Tips.. 35-39
Consumer Support
Consumer
Support .......... Back Cover
Product Registration ... 41,42
Warrant}, ................ 43
Coil 7"@ and
Radiant Top
Modds
Writethemodelandserial numbershere:
Model #
Serial #
You can find them on a label, behind
the open oven door, on the flont th(e.
183D6379P010 49-88003 04-01JR
iMPORTANTSAFETYiNFORMATiON.
READALLiNSTRUCTIONSBEFOREUSING.
m
For your safety, the information in this manual must be followed to minimize the risk of fire or explosion,
electric shock, or to prevent property damage, personal injury, or loss of life.
,P,WARNINGANTI-TIPDEVICE
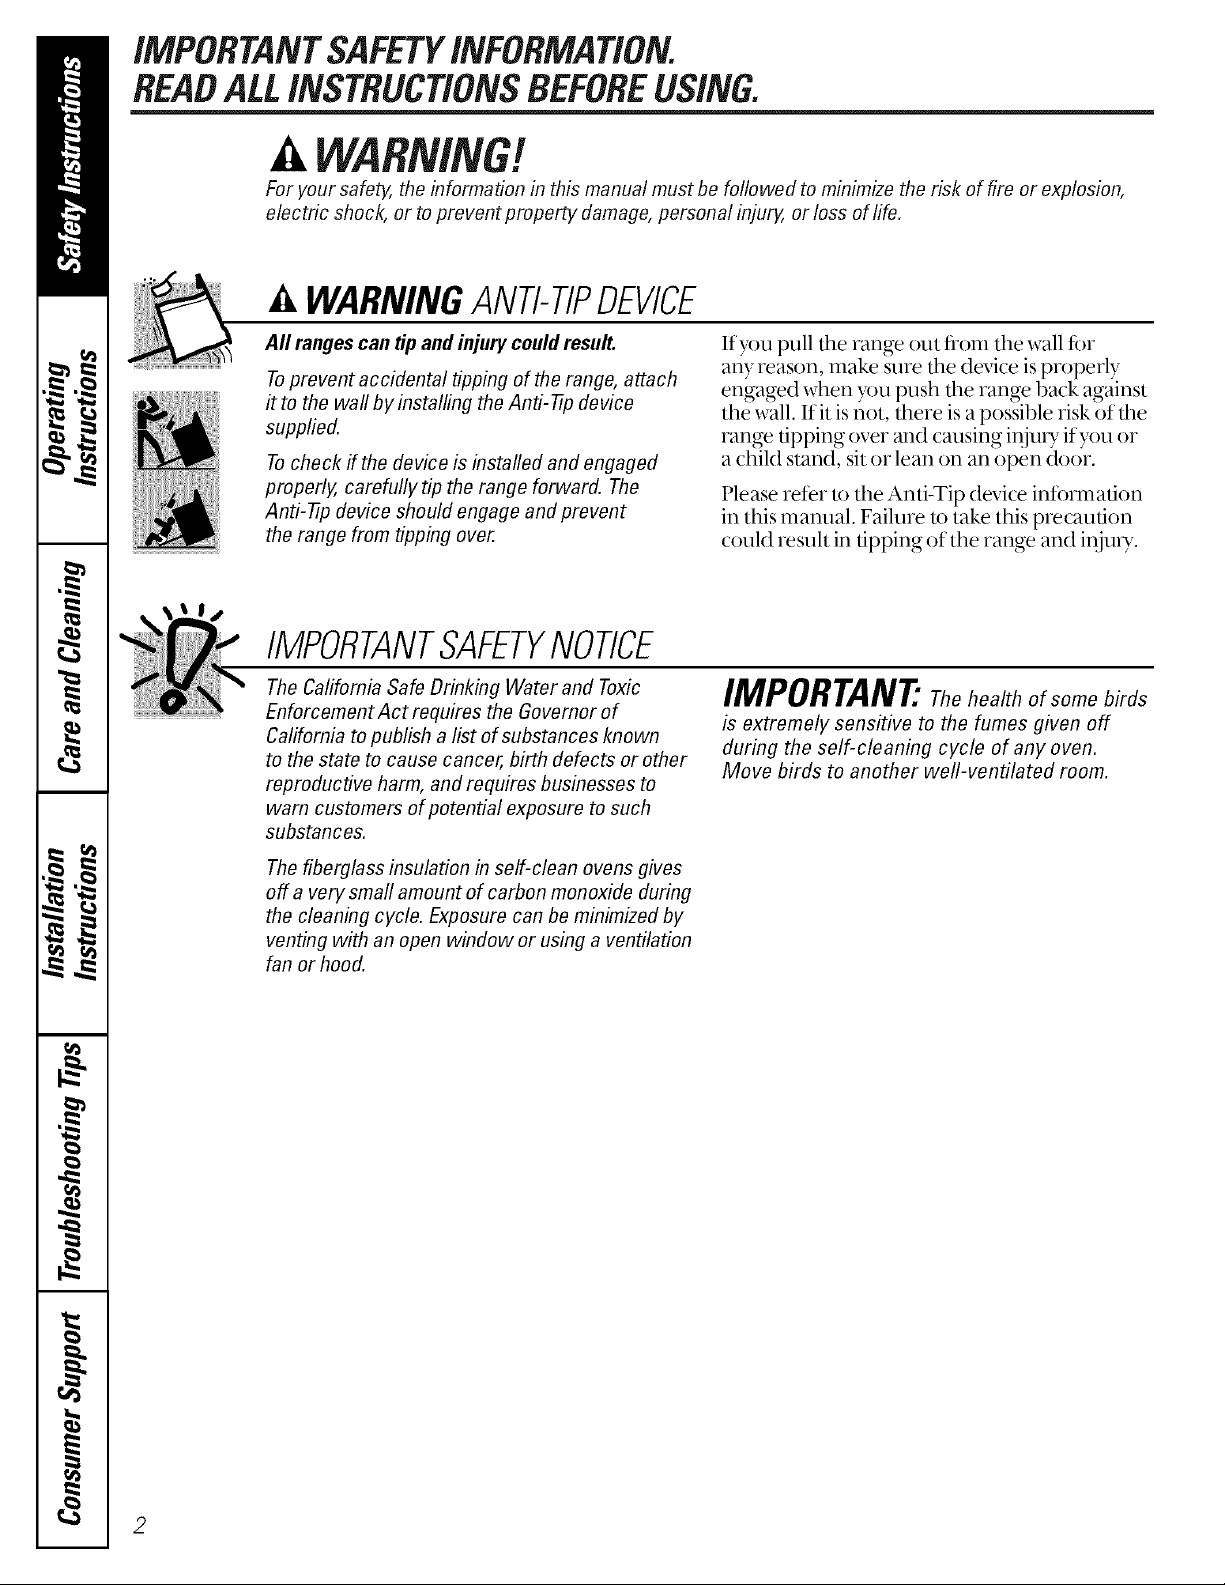
All rangescan tip and injury couldresult.
Toprevent accidental tipping of the range, attach
it to the wa# by installing the Anti--tip device
supplied.
Tocheck if the device is installed and engaged
properly, carefully tip the range forward. The
Anti--tip device should engage and prevent
the range from tipping over.
IMPORTANTSAFETYNOTICE
The California Safe Drinking Water and Toxic
Enforcement Act requires the Governor of
California to publish a list of substances known
to the state to cause cancer, birth defects or other
reproductive harm, and requires businesses to
warn customers of potential exposure to such
substances.
The fiberglass insulation in self-clean ovens gives
off a very smafl amount of carbon monoxide during
the cleaning cycle. Exposure can be minimized by
venting with an open window or using a ventilation
fan or hood.
If you pull dm range out from tile wall for
any reason, make sine dm device is properly
engaged when you push file range back against
the wall. Ifit is not, there is a possible risk of the
range tipping over ml(1 causing inju U if you or
a child stand, sit or lean on an open door.
Please refer to the Anti-Tip device infb,mation
in this manual. Failure to take this precaution
could result in tipping of the range and injuU.
IMPORTANT"Thehealthofsomebirds
is extremely sensitive to the fumes given off
during the self-cleaning cycle of any oven.
Move birds to another well-ventilated room.
2
vvww.GEAppliances.com
SAFETYPRECAUTIONS
When using electrical appliances, basic safety precautions should be foflowed, including the following:
iJ_i:_Use this appliance only fi)r its inmnded
purpose as described in this Oxmer's
Manual.
Y_;Be sure your appliance is properly installed
and g¢_mnded by a qualified technidan in
acco_,lance with the provided installation
instructions.
_ Do not attempt to repair or replace any
part of your range unless it is specifically
recommended in this manual. All other
se,_'icing should be ,eter,ed m a qualified
technician.
iJ_i:;Befbre pe_fbmfing any sets'ice, disconnect
the range power supply at the household
distribution panel by removing the fllse or
switching off the cirodt breaker.
iJ_i:;Do not leave children alone-children should
not be left alone or unattended in an area
where an appliance is in use. They should
never be allowed to sit or stand on any part
of the appliance.
iJ_i:;Do not allow anyone to climb, stand or hang
on the door, storage (kawer, or cooku)p.
They could damage the range and even tip
it over, causing severe personal in,juU.
_; Do not sto[> flamrnable materials in an oven
or near the cooktop.
!;_CAUTION:Itemsof interest to children
should not 1)esto*ed in cabinets above a
range or on the backsplash of a range-
children climbing on the range to reach
items could be seriously injured.
COOKMEATANDPOULTRYTHOROUGHLY...
Cookmeat andpoultry thoroughly--meat to atleast aniNTERNALtemperatureof 160°Eandpou/tryto at leastan
iNTERNALtemperatureof 180°ECookingto thesetemperaturesusuallypmtects againstfoodbomeillness.
iMPORTANTSAFETYiNFORMATiON.
READALLiNSTRUCTiONSBEFOREUSING.
WARNING!
SAFETYPRECAUTIONS
iJ_i:_Never wear loose-fitting or hanging g_uments iJ_i:_
while using the appliance. Be careful when
reaching for items stored over the range.
Flammable material could be ignited if
brought in contact with hot stnihce units
or heating elemenLs and may cause severe
bums.
Use only (h-v pot holders-moist or damp pot
holders on hot smiaces may result in burns
from steam. Do not let pot holders touch hot
smlace uniLs or heating elements. Do not use
a towel or other bulky doff1.
_; For your safety, never use your appliance
for wamdng or heating the morn.
_; Do not let cooldng g_ease or other flammable
materials accumulate in or near the range.
_; Do not use water on g_ease fires. Never pick
up a flaming pan. Turn the controls off.
Smother a flaming pan on a stntace unit by
covering the pan completely with a well-
fitting lid, cookie sheet or flat u W. Use a
multi-purpose d U chemical or foam-type
fire exting_|isher.
Flaming g_xmseoutside a pan can be put
out by covering it with baking soda or,
if available, by using a multi-purpose d U
chemical or fimm-t}_)e fire exfingldsher.
Flame in the oven can be smothered
completely by closing the oven door and
ulrning the ox>n off or by using a nmlti-
purpose d U chemical or fbam-t)l)e fire
exting_|isher.
Do not touch dm smihce units, dm heating
elements or the interior smiace ofthe oven.
These smiaces may be hot enough m btlrn
even though they are dad< in color. During
and after use, do not touch, or let dothing
or other flammable materials contact, the
smiace units, areas neaH)y the su_iace unil_s
or any interior arx_aof the oven; allow
sufficient time for cooling first.
Potentially hot smihces include the cooktop,
areas facing the cooktop, oven vent opening,
smiaces near the opening, crevices around
the oven door and metal trim parts above
the door.
REMEMBER:The inside smihce of the oven
may be hot when dm door is opened.
@
Do not store or use combustible materials,
gasoline or other flammable vapors and
liquids in the vicinity of this or any other
appliance.
@
Keep die hood and g_ease filters clean
to maintain good venting and to avoid
grease fires.
OVEN
_; Stand away from the range when opening the
oven door. Hot air or steam which escapes
can cause burns u) hands, face and/or eyes.
_; Do not lmat unopened food containers.
Pressure could build up mid dm container
could burst, causing an it!juU.
_i_Keep the oven vent unobstructed.
!i;:_Keep the oven flee from g_ase buildup.
@ Place the oven shelf in the desired position
while the oven is cool. If shelves must be
handled when hot, do not let pot holder
contact the heating elements.
4
Pulling.out the shelf to the stop-lock isa
convemence in lifting heaxT foods. It is also
a precaution against burns tiom touching
hot surfaces of the (Mot or oven walls.
i_i:;gqaen using cooking or masdng bags in the
oven, follow the manuthcu|rer's directions.
i_hi:;Do not use tim oven to dU newspapers.
If overheated, flmy can catch on fire.
_; Do not use dm oven fi)r a storage area.
Items sto,ed in an oven can ignite.
i_i:;Do not leave paper products, cooking
utensils or %od in lhe oxen when not in use.
SELF-CLEANINGOVEN(onsomemodelsJ
www.GEAppliances.com
_; Do not dean fire door gasket. The door
t
gasket is essential f()r a good seal. Car,e
should be taken not to rob, damage or
move the gasket.
iJ_i:_Clean only parts listed in this Owner's
Manual.
_;lk_f()r,esell:cleaning the oven, remove the
broiler pml, gTid and other cookwar,e.
iJ_i:_l',e sure to wipe up excess spillage befi)r,e
starting file selt:demling operation.
_ Iffile self:cleaning mode malflmctions,
turn tim oven off and disconnect tim power
iJ_i:_Do not use oven cleaners on sell:clean
nrodels. No conmrercial (wen cleaner or
oven liner protective coating of any kind
should be used in or around any part of
the oven. Residue fionr oven cleaners will
danrage the inside of the oven when the
sell:clean cycle is used.
supply. Have it serviced by a qualified
technician.
SURFACEUNITS-ALLMODELS
Use proper pan size--select cookware having flat bottoms large enough to cover the surface unit
heating element. The use of undersized cookware will expose a portion of the surface unit to direct
contact and may result in ignition of clothing. Proper relationship of cookware to surface unit will also
improve efficiency.
iiii:Never leave tim sudace units unattended at
high heat settings, l_filovers cause smoking
and g_,easyspillovers that may catcll on fire.
_; Only certain types of glass, glass/ceramic,
earthenware or other glazed containers are
suitable f()r cooktop sets'ice; others m W
break because of the sudden clmnge in
temperamr,e.
iJ_i:;To minimize the possibility of burns,
ignition of flammable materials and spillage,
the handle ofa container should be turned
towar_l tim (:enter of tim rang,e without
extending over neafl)y sudhce units.
iJ_i:;Always turn the snrla(:e units oft bef()re
removing (:ookware.
_; When preparing flaming foods under tim
vent hood, mm tim fan on,
iiii:Keep an eye on foods being flied at high or
medium high heat settings.
_; Foods f()r fiTing should be as d U as possible.
Frost on fi_)zen toods or moismr,e on fresh
foods can cause hot fat to bubble up and over
tim sides of the pan.
iJ_i:;Use little fat fi)r effective shallow or deep fat
flying. Filling the pan too fifll of fat can cause
spillovers when food is added.
_; Ira combination of oils or fats will be used in
flying, stir together befbr,e heating, or as fats
melt slowly.
_; Always heat fat slowly, and watch as it heats.
iJ_i:;Use adeep fat tlmrmometer whenever
possible to prevent overheating fat beyond
the smoking point.
iMPORTANTSAFETYiNFORMATiON.
READALLiNSTRUCTiONSBEFOREUSING.
WARNING!
RADIANTSURFACEUNITS_onsomemodefsI
Use care when touching the cooktop. Theglass surface of the cooktop will retain heat afterthe controls
have been turned off.
_ Avoid scratching die glass cooktop. The
cooktop can be scratched with items such as
sharp instruments, rings or other jewel U and
riveLson clothing.
iJhi:;Do not operate tile radiant smiace units if
the glass isbroken. Spillovers or cleaning
solution may penetrate a broken cooku)p
and create a risk of electrical shock. Contact
a qualified teclmician immediamly should
tour glass cookmp become broken.
Never use tile glass cooktop stniace as a
cutting board.
Do not place or store items that can melt or
catch fire on tile glass cooktop, even when it
is not being used.
_; l',e careful when placing spoons or odmr
stining utensils on glass cooktop smihce
when it is in use. They may become hot and
could cause burns.
_; (]lean tile cooktop with caution. Ira wet
sponge or cloth is used m wipe spills on a hot
smtace unit, be careful to avoid steam burns.
Some cleaners can produce noxious fumes if
applied u) a hot smiace.
NOTE:We recommend that you avoid wiping
any surface unit areas until they have cooled
and the indicator light has gone off. Sugar
spills are tile exception to this. Please see
Cleaning the glass cooktop section.
V_mn dm cooktop is cool, use only dm
recommended cleaning cream to clean the
cooktop.
To avoid possible damage to tile cooking
smihce, do not apply cleaning cream u) tile
glass smiace when it is hot.
!;_After cleaning, use a (h T clodl or paper towel
U_remove all cleaning cream residue.
_:_Read and follow all instructions and warnings
on the cleaning cream labels.
A WARNING?
COILSURFACEUNITS_o__om_mod_/_I
iJhi:;(;lean tile cooktop wifll caution. Ira
wet sponge is used to wipe spills on a hot
cooktop, be careful to avoid steam burns.
To avoid die possibility of a burn or electric
shock, always be certain that tile controls ff)r
all smtace units are at tile OFFposition and
all coils are cool before attempting m lift or
remove a unit.
Do not immerse or soak tile removable
stniace units. Do not put them in a
dishwasher.
READANDFOLLOWTHISSAFETYINFORMATIONCAREFULLY.
SAVETHESEINSTRUCTIONS
Be sure tile drip pans and tile vent duct me
not cover>d and are in place. Their absence
(luring cooking could damage range parts
and wiring.
Do not use aluminum foil to line dm drip
pmls or an_-ber_ in tile oven except as
described in this manual. Misuse could
result in a shock, fire hazard or damage
to tile range.

USing the surface units. .CEAppliancos.co,n
Throughout this manual, features and appearance may vary from your model.
How to Set
Be sure you turn the control knob
to OFF when you finish cooking.
SURFACE
UNIT
O
Push tile knob in _md mrn in either
direction to the setting you wnnt.
O0
REAR
OFF
HOT
SURFACE
o0
FRONT
OFF
At bod_ OFF_md H/tile conuol clicks into
position. You m_y he_ slight clicking
sounds during (ooking, indi(ating the
(OlltrO1 is keeping tile power le-_el you set.
IndicatorLights(onrad&nt g/ass modelson/y)
A HOT SURFACEindicator light x_411glow when _my
r_(li_mt element is turned on, _md will remnin on until
tile sin%ice is (ool enough to tout h.
A SURFACEUNITon indic_mw light-,,,ill glow when _my
sl]_3_it(e unit is otl.
NOTE:TheSURFACEUNITonindicator//_?htmayg/owbetween
thesurfacecontro/sett/bgsof tO andOFF,butthereisnopower
tothesurfaceunits.
7
Usingthe radiant surfaceunits.(onsomemodefsl
About the radiant surface units...
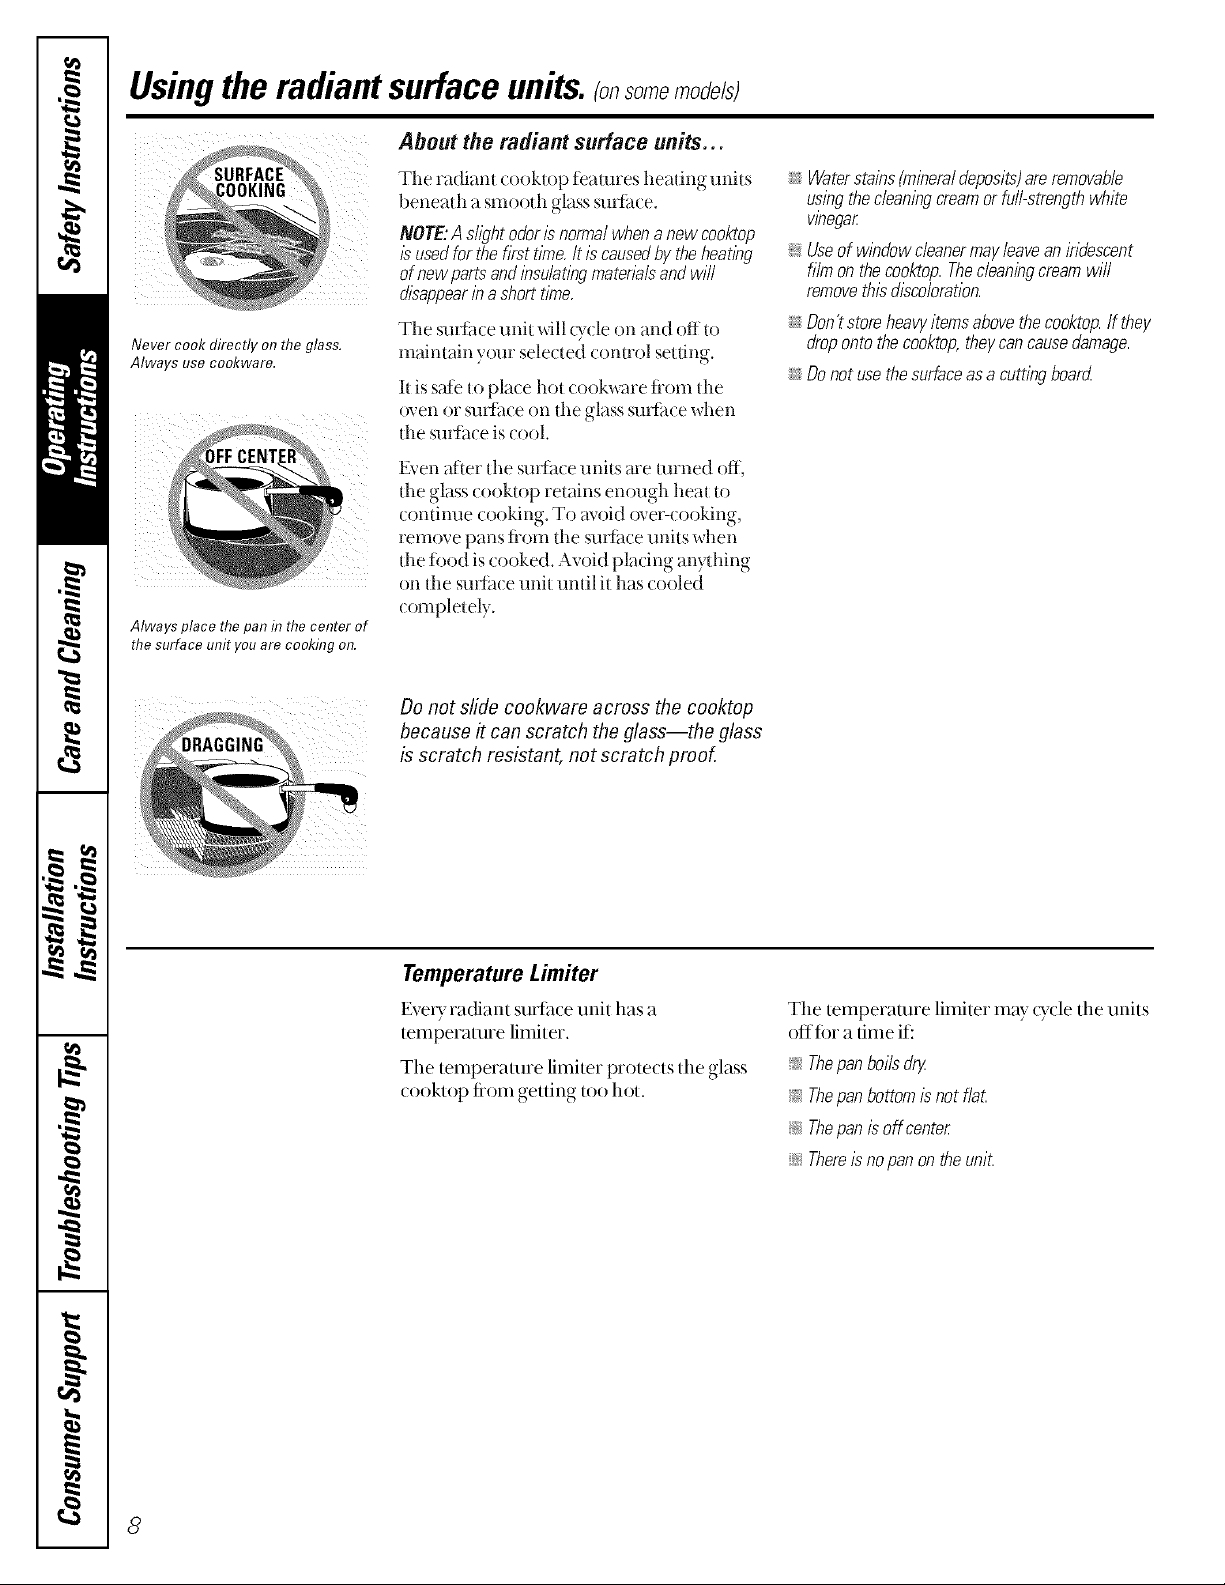
Never cook directly on the glass.
Always use cookware.
Always place the pan in thecenter of
the surface unit youare cooking on.
The radiant cooktop features heating units
beneath a smooth glass smthce.
NOTE:Asfl)ht odorIsnormalwhenanewcoo/d:op
/susedforthefksttinTe./t/scausedby theheating
ofnewpartsandinsulatingmaterialsandwill
disappearinashorttinTe.
The surtitce unit _dll O_cle on and off to
maintain your selected (onuol setdng.
It is saR_t() place hot cookware fiom tl_e
o_en or sm_hce on tl_e glass smlh( e when
the smtit(::eis(ool.
Even after the smthce units _ue turned off,
the glass cooktop retains enough heat to
continue cooking. To avoid over-(ooking,
remove pans fiom d_e smthce units when
the tbod is cooked. Avoid plating anydfing
on tile smth( e unit until it has cooled
(ompletely.
Do not sfide cookware across the cooktop
because # can scratch the glass--the glass
is scratch resistant, not scratch proof.
i2 Waterstains(mineral deposits)are removable
usingthe cleaningcream or full-strength white
wnegar
:i_Useof window cleanermay &ave aniridescent
film on the cooktop.Thecleaningcream will
removethis discoloration.
i2 Don't storeheavy itemsabove thecooktop. If they
droponto the cooktop,theycan causedamage.
i2 Donot usethe surfaceas a cutting board
Temperature Limiter
EveD_radiant sudilce unit has a
temperature limiter.
The temperature limiter protects the glass
cooklop fiom getting too hot.
Tile temperature limiter may {Tcle the units
offli)r a time if:
>: Thepan boilsdry
:i_ Thepan bottomis not f/a£
>: Thepan isoff center
i2 Thereisno panon theunit.
8
Selecting types of cookware.
The following information will help you choose cool<ware which will give good performance on glass cooktops.
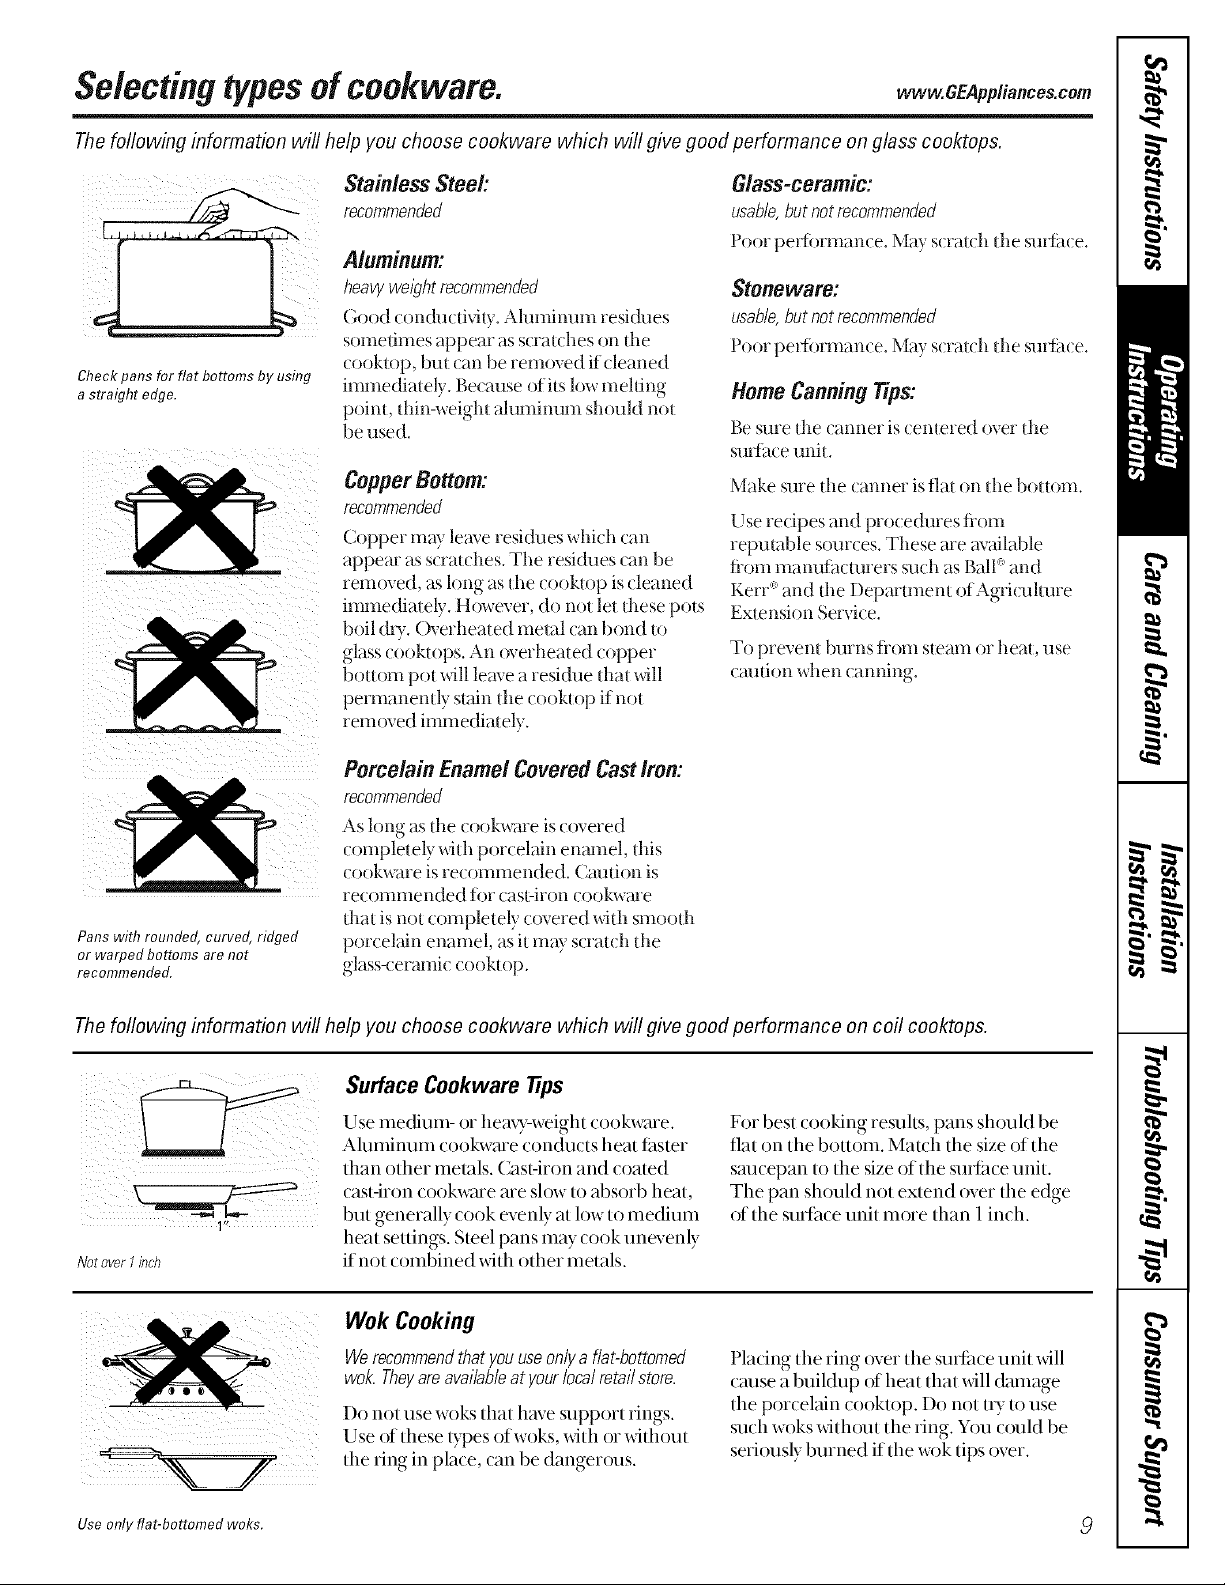
Check pans for flat bottoms by using
a straight edge.
Stainless Steel:
recommended
Aluminum:
heavywe/_?htrecommended
Good conductMty. Aluminum residues
sometimes appear as scratches on tl_e
cooktop, but (an be rem_wed ifcleaned
immediately. Because of its low mehing
poinL thin-weigh! aluminum should not
be used.
Copper Bottom:
recommended
Copper may leave resi&ms whith can
appear as st ratches. The resi&les can be
rein(wed, as long as die tooktop is cleaned
immediately. However, do not let these pols
boil &T. Overheated metal tan bond to
glass cooktops. An overheated copper
bottom pot _dll leave a resi&m that _4ll
permanendy slain the ( ooktop ifnol
rem_wed immediat ely.
Glass-ceramic:
usable,butnotrecommended
Poor performance. May scratch the stab:ace.
Stoneware:
usable,but not recommended
Poor pefforman( e. May s(rat( h die smi:a( e.
Home Canning Tips:
Be st]re the (anner is (emered over dm
sl]F{_tce unik
Make sure [lie (anner is fla[ on [lie boHom.
Use recipes and proce&lres fiom
reputable sour( es. These me available
tiom mam_immrers such as Ball: and
Kerr: and the Depamnent of Ag_it:ulmre
Extension Service.
To prevent burns flom sleam or heal use
( alllion when tanning.
Porcelain EnamelCovered Cast Iron:
recommended
As long as lhe cookwme is c(}vered
completely xdth porcelain enmnel, this
(ookware is recommended. Creation is
re( ommended ior (astriron (ookware
that is not completely (:_wered _dth smooth
Pans with rounded, curved, ridged
or warped bottoms are not
recommended.
port elain enamel, as it mW scrat( h the
glass-ceramit t ooktop.
The foflowing information will help you choose cookware which will give good performance on coil cooktops.
Surface Cookware tips
Notever I inch
Use me(fium- or heax_weight cookwme.
Aluminum cookwme conducts heat t_}ster
than other metals. Cast-iron and coated
cast-iron cookwzue are slow to absorb heat,
but generally cook evenly at h)w to medium
heat settings. Smel pans m W cook unevenly
if not combined xdth other metals.
For best (:{}{}kingresults, pans shouM be
fiat on tile bottoln. Match tile size of tim
sau( epan to tile size oftile surf_tce unit.
The pan should not extend over tlle edge
of the sudilce unit more than 1inch.
Wok Cooking
Use only flat-bottomed woks.
Werecommendthatyouuseonlyafiat-bottomed
wok.Theyareavailableat yourlocalretailstore.
Do not use woks that have support rings.
Use of tllese types ofwoks, _dth or _dthout
the ring in place, can be dangerous.
Pladng the ring over the sudilce unit will
cause a buiMup of heat that xdll damage
the porcelain cooktop. Do not tU to use
such woks _dtllout the ring. You could be
seriously burned if the w{)ktips over.
Usingtheovencontrols.
Throughout this manual, features and appearance may vary from your model
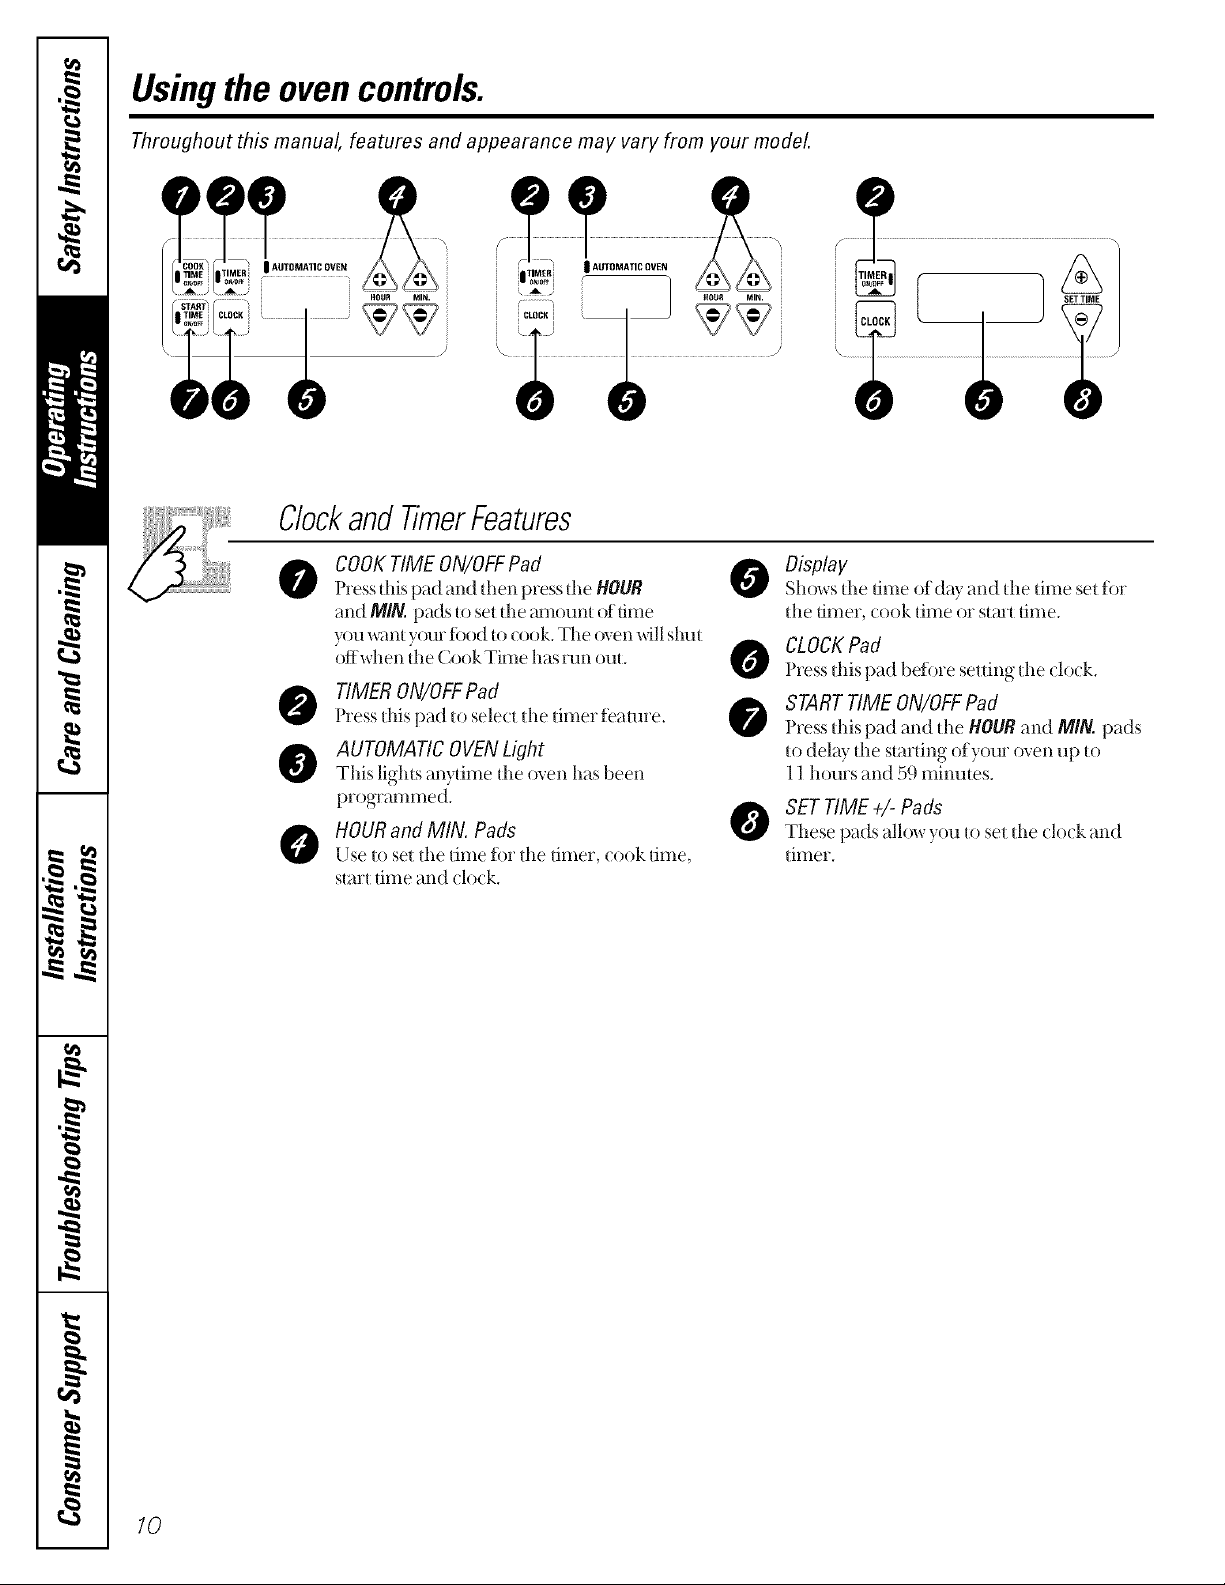
Clockand TimerFeatures
)
COOKTIME ON/OFFPad
0
Press this pad and then press the HOUR
and M/N. pads to set the mnount of dine
you want your fix)d to (ook. The ()yenxdll shut
offwhen the Cook Time has nm out.
TIMER ON/OFFPad
Press this pad to sele(t the timer feature.
AUTOMATIC OVENLight
This lights anytime the oven has been
programmed.
HOURand MIN. Pads
Use to set the time ibr the timer, (ook time,
start dine and ( lo(k.
Display
Shows the time of(lay and the time set for
the timer, cook time or start time.
CLOCKPad
Press this pad befi)re setting the (lo( k.
STARTTIME ON/OFFPad
Press this pad and the HOURand M/N. pads
to delay the starting of your oven up to
11 hours and 59 minutes.
SET TIME ÷/- Pads
These pads allow you to set the (lo(k and
timer.
10
Usingthe ovencontrols,ronsomemodels; www.GEAppliances.com
Throughout this manual, features and appearance may vary from your model.
OFF
0
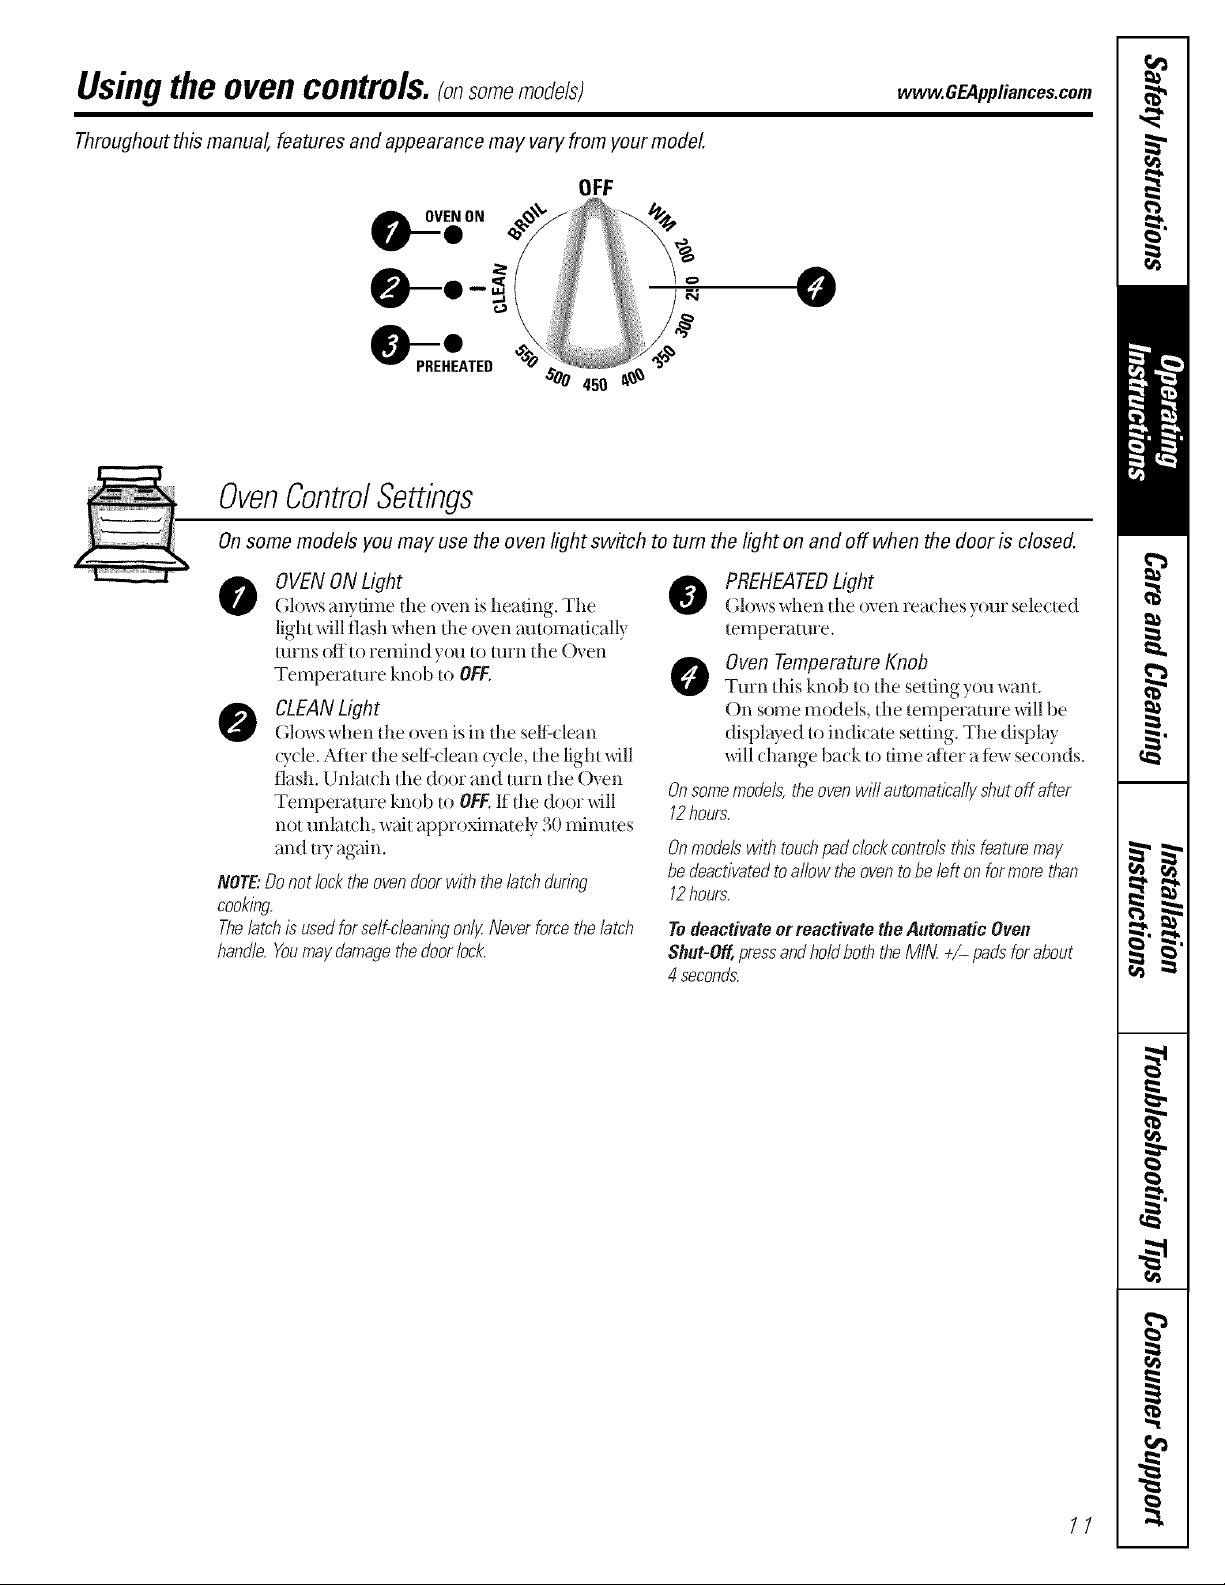
OvenControlSettings
Onsome models you may use the oven light switch to turn the lighten and off when the door is closed.
OVEN ONLight
0
Glows anydme tile oven is headng. The
lighl will flash when dm oven amomad( ally
turns off to remind you to turn dm Oven
Temperature knob Io OFF.
CLEAN Light
O
Glows when tl_e oven is in tlle sell:clean
Q't:le. After dm sell:clean ()'tie, dm light will
flash. Unlat( h die door and turn die Oven
Temperature knob to OFF.If the door will
not unlatch, wait approximately 30 minmes
and IU again.
NOTE:Donotlocktheovendoorwith thelatchdunbg
cooklbg
Thelatch/susedforse/f-c/ean/bgon/gNeverforcethelatch
hand/e.Youmaydamagethecloor/ock.
PREHEATEDLight
(;lows when the oven rea(hes your sele(ted
temperature.
Oven Temperature Knob
Turn this knob to the setting you want.
On some models, the temperature _dll be
displwed 1oindi( ate selfing. The display
_dll change back to dine atier a tow seconds.
& some nTo&ls, the ovenwill automaticallyshut off after
12hours.
Onmodelswith touchpadclock controls thisfeature may
be deactivatedto allow theoven to beleft on for morethan
12hours.
TodeactivateorreactivatetheAutomaticOven
Shut-Oil,pressandho/clboththeMIN +/- paclsforabout
4 seconds.
11
Usingthe oven.
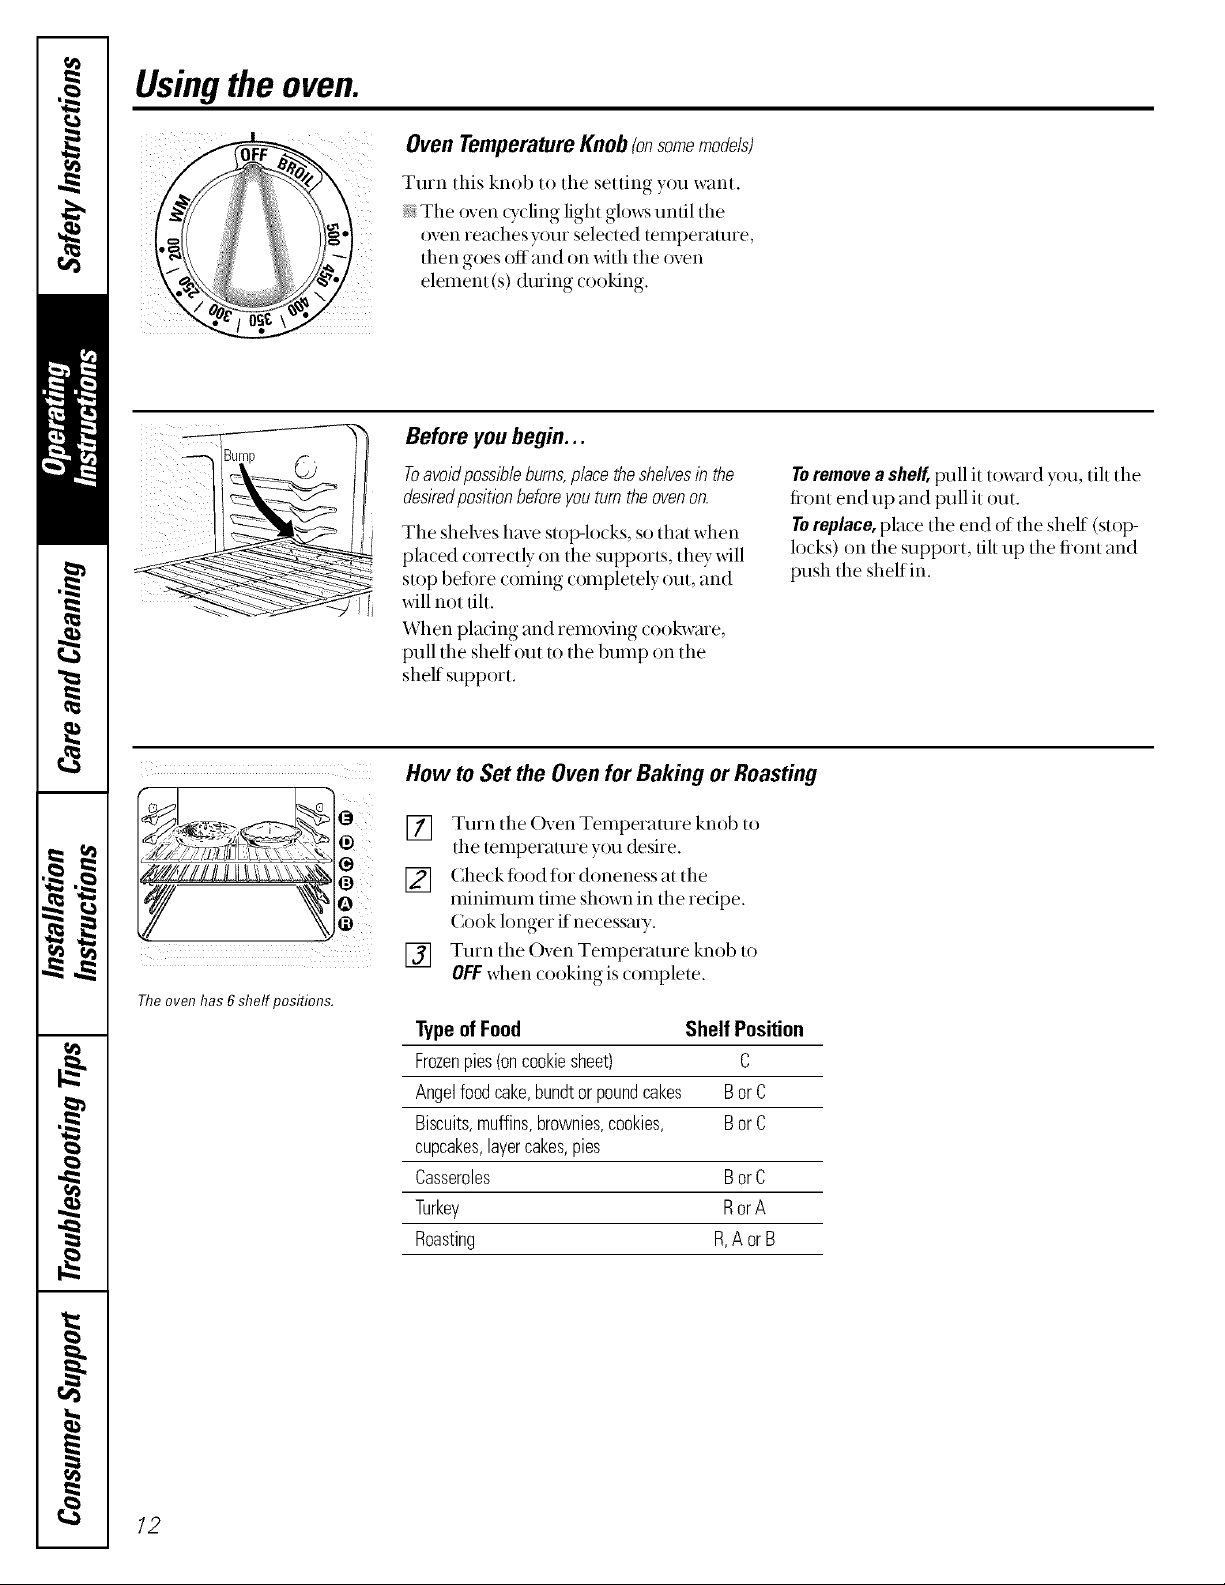
OvenTemperatureKnob (onsomemodels)
Turn this knob to the setting you want.
The oven _ycling light glows until tile
)yen reaches y_nn selected temperature,
then goes off and on with tile oven
element (s) during cooking.
Before youbegin...
C_ ®"
Y
Theoven has 6 shelf positions.
Toavoldposslble burns,place the shelvesIb the
desiredposifion beforeyou turn the ovenon.
The shelves have stop-locks, so that when
placed correctly on the supports, they will
stop betore coming completely out, and
will not flit.
When plating and rem(Mng cookwme,
pull the shelf out m the bump on the
shelf support.
How to Set the Oven for Baking or Roasting
[] Turn tile Oven Temperature knob to
the temperature y{)u desire.
[] Checkloodli)r doneness at the
mininmm time shown in the recipe.
Cook longer if necessmy.
[] Turn the Oven Temperature knob to
OFFwhen cooking is complete.
Typeof Food Shelf Position
Frozenpies(oncookiesheet) C
Angelfoodcake,bundtor poundcakes Bor C
Biscuits,muffins,brownies,cookies, Bor C
cupcakes,layercakes,pies
Casseroles BorC
Turkey RorA
Roasting R,A orB
Toremovea shelf,pull it toward you, tilt tile
fiont end up and pull it out.
Toreplace, place the end of the shelf (stop-
locks) on the support, flit up the fiont and
push the shelf in.
12
Preheating and PanPlacement
vvww.GEAppliances.com
ii i i !
Preheat tile oven if the recipe calls fi)r it.
To preheat, set dm oven at the correct
temperature. Preheating is necessmy tbr
good results when baking cakes, cookies,
past*)' and breads.
Forovenswithoutapreheat/h&cator//_Thtortone,
preheat10minutes.
Aluminum Foil
Do not use ahmfinuIn fi)il to catch
spillovers when using tile ( ircuWave tim.
Tile fi)il _dll be sucked towmd tile
convection filn. Also, covering an entire
shelfxxdth alulninuln fi)ilxdll distufl) tile
heat (:irculation and resuh in poor baking.
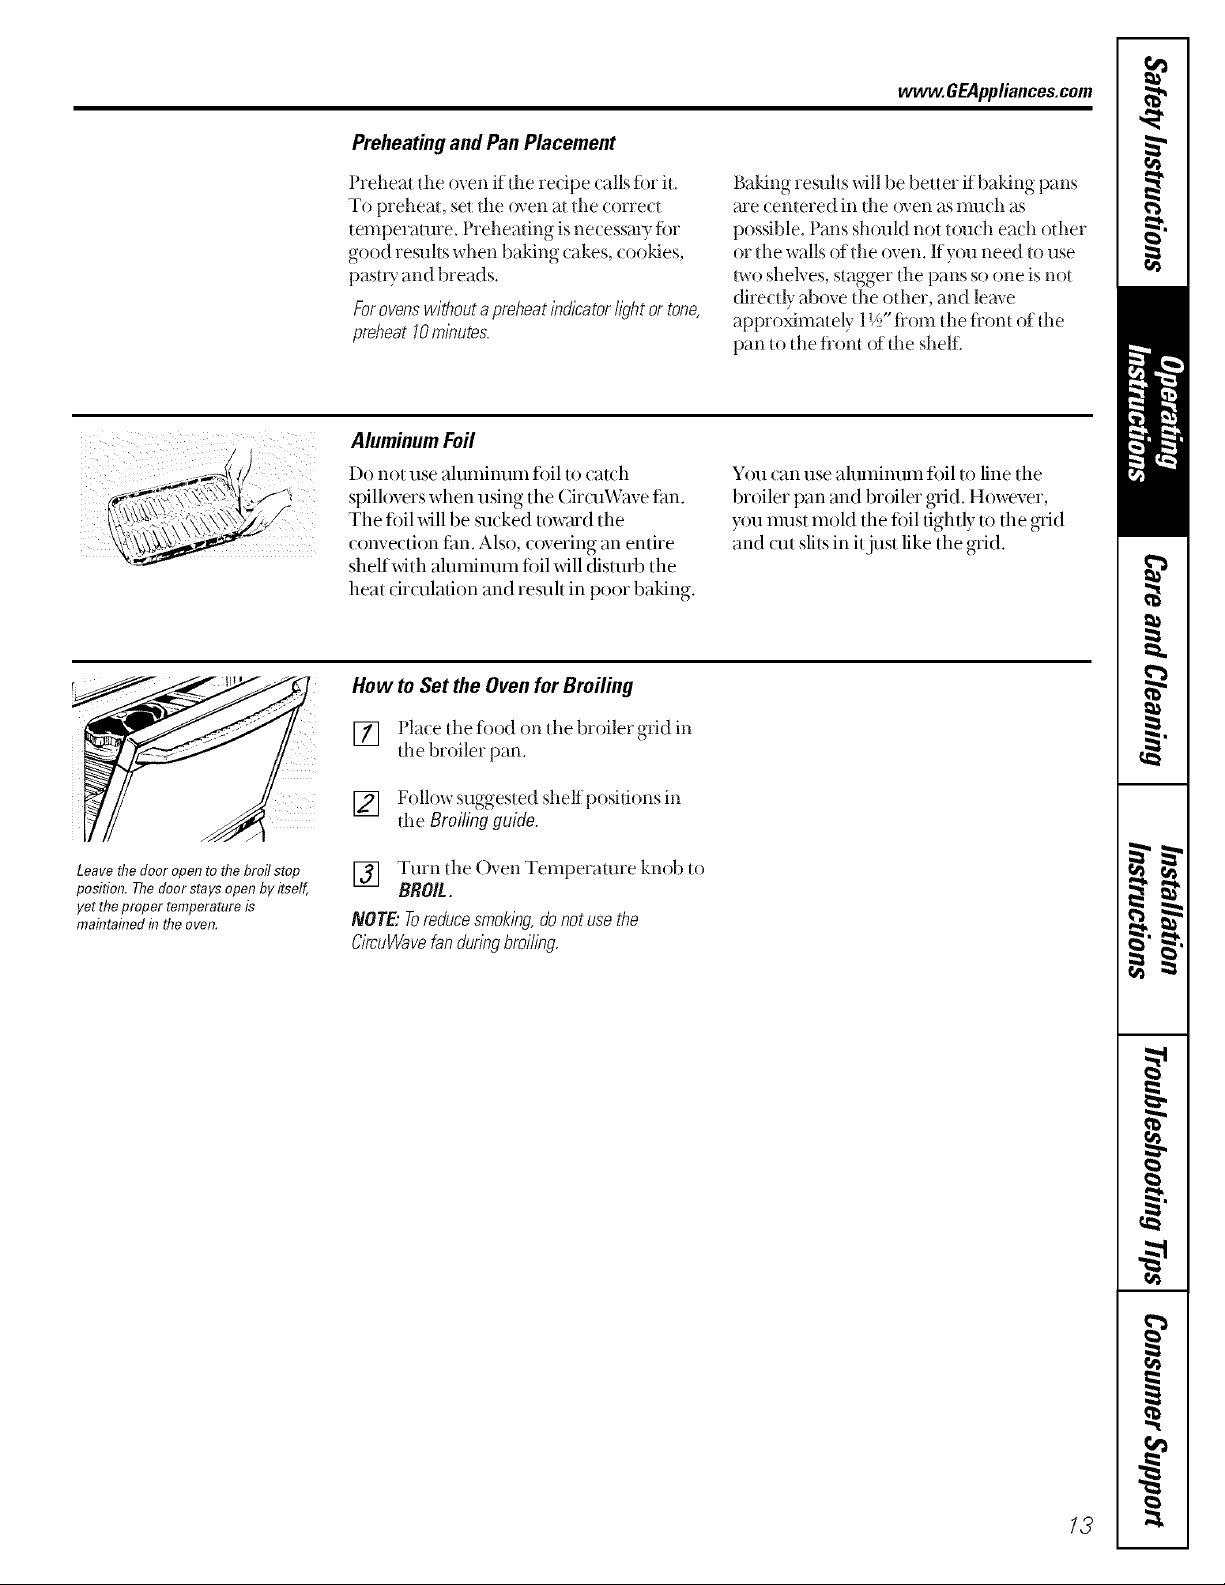
How to Set the Ovenfor Broiling
[] Pla(e tile fi)od on tim broiler grid in
tile broiler pan.
Baldng results will be better if baking pans
are (entered ii1the ovei1as ITtlllcbas
possible. Pans should not u)uch each other
or tile walls of the oven. If you need to use
mo shelves, stagger die pans so one is not
direcdy above tile other, and leave
approximately 1V,_,"tiom tile flom of tile
pan to tile flont of tile shel£
You can use ah]minum fi)il to line tile
broiler pan and broiler grid. However,
you inust inold tile fi)il tightly to tile grid
and cut slits in itjust like the grid.
Leavethedoor opento thebroil stop
position. Thedoor stays open by itself,
yet theproper temperature is
maintaflTedintheoven.
[] Follox_ suggest ed shelf posidons in
tile Broilingguide.
[] Turn tile Oven Temperature knob t()
BROIL.
NOTE."Toreducesmokingdonotusethe
C/rcuWavefandunngbroiling.
13
Usingtheoven.
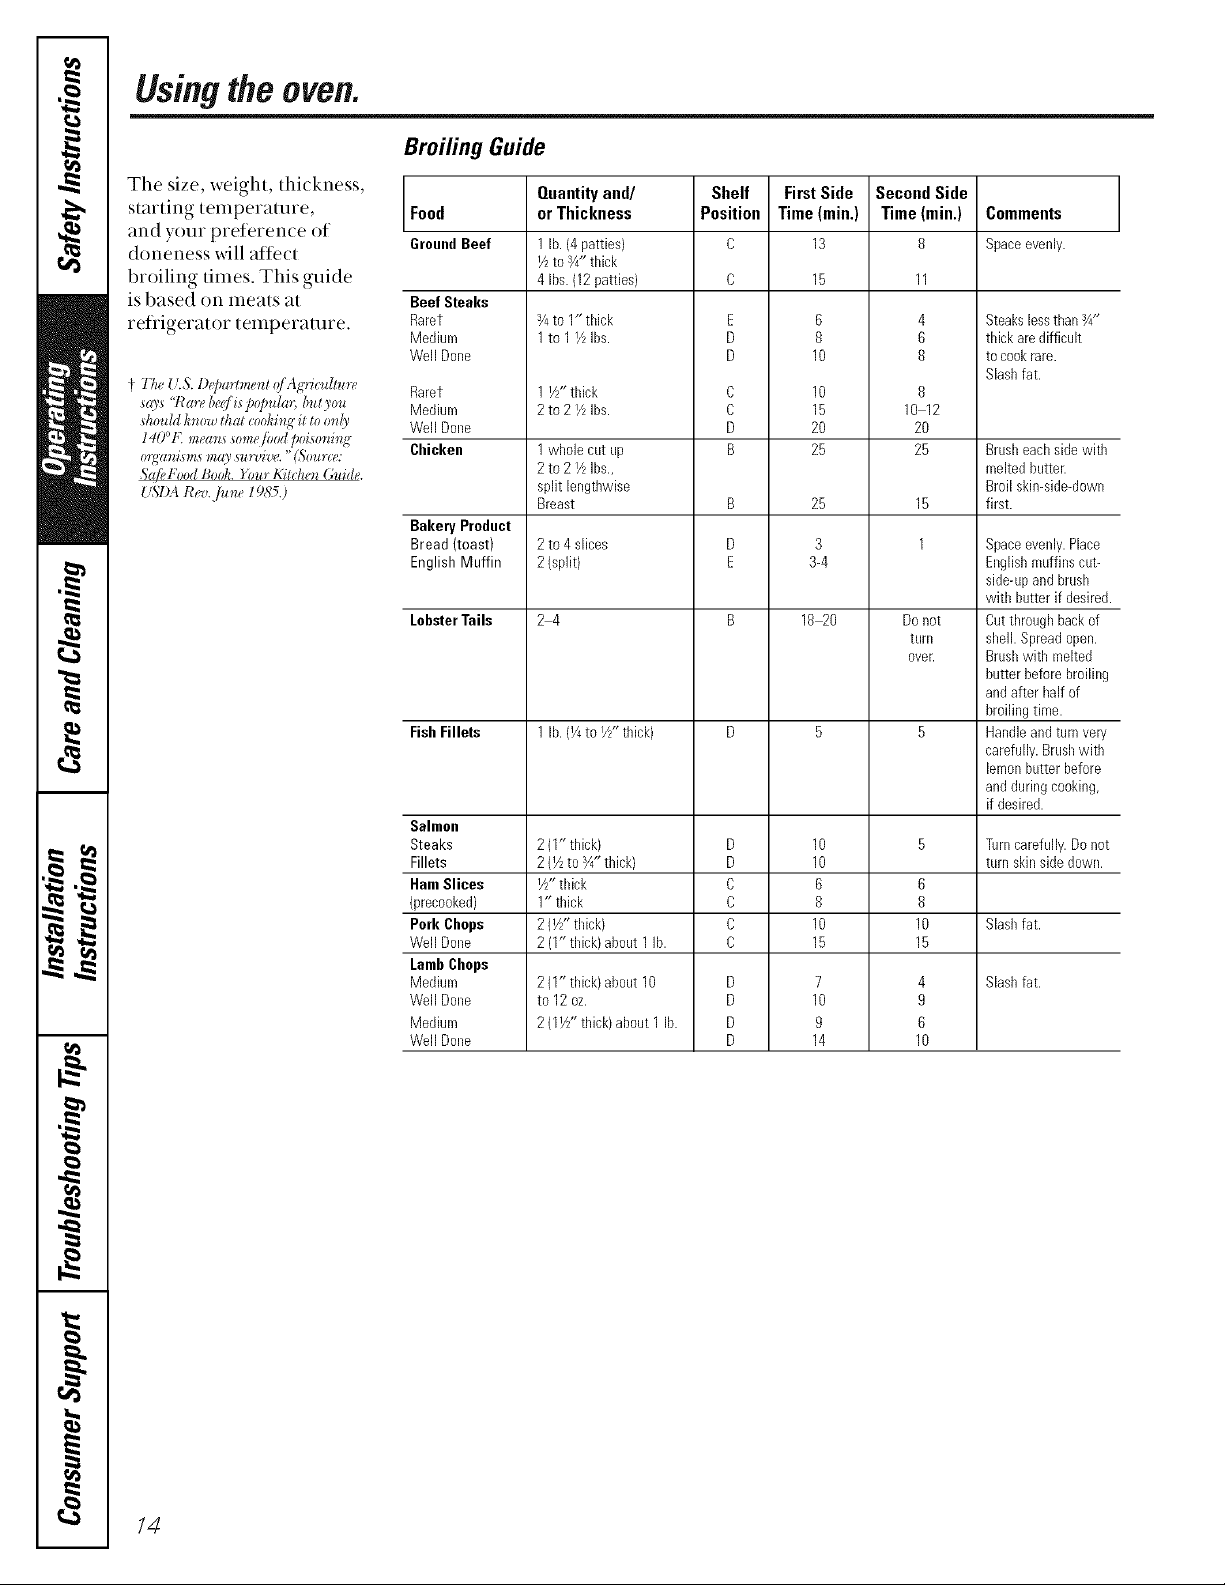
Broiling Guide
The size, weight, thickness,
starting temperature,
and your preferen(e of
doneness _dll affect
broiling times. This guide
is based on meats at
refligerat or temperamre.
q Th( U.S. Depadmenl o/'Agricultun,
says '!Rare be_fispo]mlm, bulyo_
sho_dd h,ow that cooking it to o_dy
140°I( meam some/bed poi,_mmL<
m;ganisms may sun@e. "L%urc_:
Sa!H"ood Boeli. }'bur AYtchenGuide.
Food
GroundBeef
Beef Steaks
Raret
Medium
WellDone
Raret
Medium
WellDone
Chicken
Bakery Product
Bread (toast)
English Muffin
LobsterTails
FishFillets
Salmon
Steaks
Fillets
HamSlices
")recooked)
Pork Chops
WellDone
LambChops
Medium
WellDone
Medium
WellDone
Quantityand/
or Thickness
1 lb. (4patties)
I/zto s/4"thick
4 Ibs.(12patties)
3/4to 1"thick
1to 1I/LIbs.
1 I//' thick
2to 2 I/LIbs.
1 whole cut up
2 to 2 Y_Ibs.,
split lengthwise
Breast
2to 4 slices
2{split)
24
1 lb. (¼to i//, thick)
2(1" thick)
2(½ to _4"thick}
i/j thick
1" thick
2(1//,thick)
2 (1" thick} about 1lb.
2(1" thick)about 10
to 12 oz.
2(1½" thick)about 1 lb.
Shelf First Side
Position Time(rain.)
C 13
E
D
D
C
C
D
B
B
D
E
D
D
C
C
C
C
D
D
D
D
6
8
10
10
15
20
25
25
3
3-4
18_0
10
10
6
8
10
15
7
10
9
14
Second Side
Time (rain.)
8
4
6
8
8
10 12
20
25
15
1
Donot
tunl
oveE
6
8
10
15
4
9
6
10
Comments
Spaceevenly.
Steakslessthan¾"
thick aredifficult
tocookrare.
Slashfat.
Brusheachsidewith
meltedbutter.
Broil skin-side-down
first.
Spaceevenly.Place
Englishmuffins cut-
side-upandbrush
with butter if desired.
Cutthroughback of
sheik Spreadopen.
Brushwith melted
butter beforebroiling
andafter halfof
broilingtime.
Handleandturnvery
carefully.Brushwith
lemonbutterbefore
andduringcooking,
if desired.
Turncarefully.Do not
turn skinsidedown.
Slashfat.
Slash fat.
14
 Loading...