

Hotpoint RB787WC1WW, RB787BC1BB, JBS27DM1WW, JBS27DM1BB, JBS15M1WW Owner’s Manual
...
Owner's Manual
Safety Instructions ............. 2-7
Operating Instructions ........ 8-39
12 Hour, 24 Hour or
Clock Black-Out ................ 23
Adjust the Oven Thermostat ....... 37
Clock and Timer . ............ 26, 27
Convection ()yen ............. 30-32
()yen ....................... 24, 25
()yen Control, Clock and
Timer Features .............. 15-19
Probe .......................... 29
Proofing and _\arming Features .... 35
Selecting Cookware ........... 13, 14
Self:Cleaning Oven ........... 38, 39
Special Feamies .............. 20-22
Surti_ce Units ................. 8-12
Timed Baking and
Roasting Feamies ................ 28
Timed Features fbr
Convection Baking ............ 33, 34
_\anning Drawer ................ 36
Care and Cleaning .......... 40-50
(;lass Cooktop ............... 49, 50
I,ift-Off ()yen Door ........... 42, 43
()_'en i,ight Replacement ...... 45, 46
Removable _J\anning Drm._>r Pan . . .44
Storage Drawer Removal ......... 47
CoilTopand
fladiant TopModels
Troubleshooting Tips ........ 51-55
Write the model and serial numbers here:
Model #
Serial #
You can find them on a label on the fi'ont
of the range behind the storage drawer or
behind the range door.
16404290P373 49-80221-1 12-05JR

IMPORTANTSAFETYINFORMATION.
READALL INSTRUCTIONSBEFOREUSING.
m
Foryour safety, the information in this manual must be followed to minim)e the risk of fire, electric shock, or
to prevent properly damage, personal injurg or loss of fife.
WARNINGANTI-TIPDEVICE
Aft ranges can tip and injurgcould result.
Toprevent accidental tipping of the range, attach #to the wall and floor by installing the Anti-tip device supplied.
If the Anti-tip device supplied with the range does not fit this application, use the universal Anti- tip device
WB2X7909.
Make sure the device is installed and engaged properly.
If you pull the range out fl'om the wall fiw any reason, make sure the device is properly engaged when you push
the range back against the wall. If it is not, there is a possible risk of the range tipping over and causing iqjury if
VO/I 0I" [I child stand, sit or lean on [lIl open door.
Please reter to the Anti-Tip device inflmnation in this manual. [_ailure to take this precaution could result in
tipping of the range and iqiury.
IMPORTANTSAFETYNOTICE
The fiberglass insulation in self-clean ovens gives off a very small amount of carbon monoxide during the
cleaning cycle. Exposure can be minimized by venting with an open window or using a ventilation fan or hood.
Fluorescent light bulbs contain mercury. If your model has a surface light, you must recycle the fluorescent light
bulb according to local, state and federal codes.
SAFETYPflECAUTIONS
When using electrical appliances, basic safety precautions should be followed, including the following:
• Use this appliance only for its intended pml_ose as • Do not leave children alone--children should not
described in this Owner's Manual.
• Be sure your appliance is properly installed and
grounded by a qualified inst;fller in accordance with
the provided installation instructions.
• Have the installer show you the location of the circuit
breaker or filse. Mark it tar easy reference.
• Do not attempt to repair or replace any part of yot:u"
range unless it is specifically recolnlnended in this
manual. All other servicing should be referred to
a qualified technician.
be left alone or unattended in an area where an
appliance is in use. They should nevei" be allowed
to sit or stand on any part of the appliance.
• Do not allow anyone to climb, stand or hang on
the (loo_; storage drawer or cooktop. They could
damage the range and even tip it ove_; causing
severe personal iqiur>
• I,mge scratches or impacts to glass doo_ can lead to
broken or shattered glass.
• Before pe_timning any se_','ice, disconnect the range
power supply at the household distribution panel bv
removing the fllse or switching off the circuit breaker:
2

SAFETYPflECAUTIONS
Do not operate the oven or cooktop controls ff the glass is broken. Food splatter or cleaning solution may
penetrate a broken control panel and create a risk of electrical shock. Contact a qualified technician immediately
should your glass control panel become broken.
[] Do not store flammable materials in an oven or
near the cooktop.
[] For your safbb', never use your appliance fiw
warming or heating tile room.
[]CAUTION: l,en,sof,h,eree,,och,dreneho./ no,
be stored Ib ca&bets abovearange or on thebacksplashof
a range--children chbTb/bgon therangeto reachitemscould
be seriously bjureci
[] Never wear loose-fitting or hanging gam_ents while
using the appliance. Be careful when reaching fl)r
items stored o_er the range. Flammable material
could be ignited if brought in contact with hot
smfime traits or heating elements and may cause
severe bHrsIs.
[] Use only dry pot hokle*_--moist or damp pot
hokle_ on hot sm'fiwes may result in burns flora
steam. Do not let pot holders touch hot smti_ce
milts 05"heating elements. Do not use a towel or
other bulky cloth in place of pot hoklel_.
[] Do not use water on grease fires. Never pick up
a flaming pan. Turn the controls off. Smother a
flaming pan (m a surfime trait by coveting tile pan
completely with a well-fitting lid, cookie sheet or fiat
tra\. Llse a mulfi-pml)ose chy chemical or loam-type
fire extinguishel:
Flaming grease outside a pan call be put out by
coveting it with baldng soda 05; if a_zfilable, by using
a multi-propose (hy chemical or loam-type fire
extinguisher.
Flame in tile oven can be smotheied completely
by closing tile oven door and tm'ning tile oven off or
by using a multi-l)m])ose d D' chemical o_ fl)am-type
fire extinguishes:
[] Do not let cooking grease or other flammable
materials accmnulate in or near the range.
[] Do not touch tile smfime traits, tile heating elements
or tile interior smihce of the oven. These sm'fimes
may be hot enough to bm'n e\ en though tile}' are
dark ill colos: Dining and after use, do not touch, or
let clothing or other flammable materials contact tile
suHhce traits, areas nearby tile surfime units or any
interior area of tile oven; allow suflident time tbr
cooling filet.
Potentially hot sm_hces include tile cooktop, areas
lilting the cooMoi), oven vent opening, smthces near
tile opening, crevices arotmd tile oven doo,:
REMEMBER: The/hs/desurface of the ovenmay be hotwhen
the door/_ openec_
[] Do not store or use combustible materials, gasoline
or other flammable _q)o_ and liquids in tile vicinity
of this or ally other appliance.
[] Keep tile hood and grease filters clean to maintain
good _vnting and to avoid grease fires.
[] Teach children not to play with tile controls 05"any
other pal_ of tile range.
[] _Mwm:skee I) dish towels, dish cloths, pot holdes_ and
other linens a satb distance fi'om your range.
[] _M_tys kee I) wooden and plastic utensils and canned
fi)od a satb distance fi'om yore" range.
[] Alw;ms kee I) combustible wall co\vfings, curtains or
drapes a sale distance ii'om yore" range.
IMPORTANTSAFETYINFORMATION.
READALL INSTRUCTIONSBEFOREUSING.
COOKMEATANDPOULTRYTHOROUGHLY...
Cook meat and poultry thoroughly--meat to at least an INTERNAL temperature of 160°Eand poultry to at least
an INTERNAL temperature of 180°ECooking to these temperatures usually protects against foodborne illness.
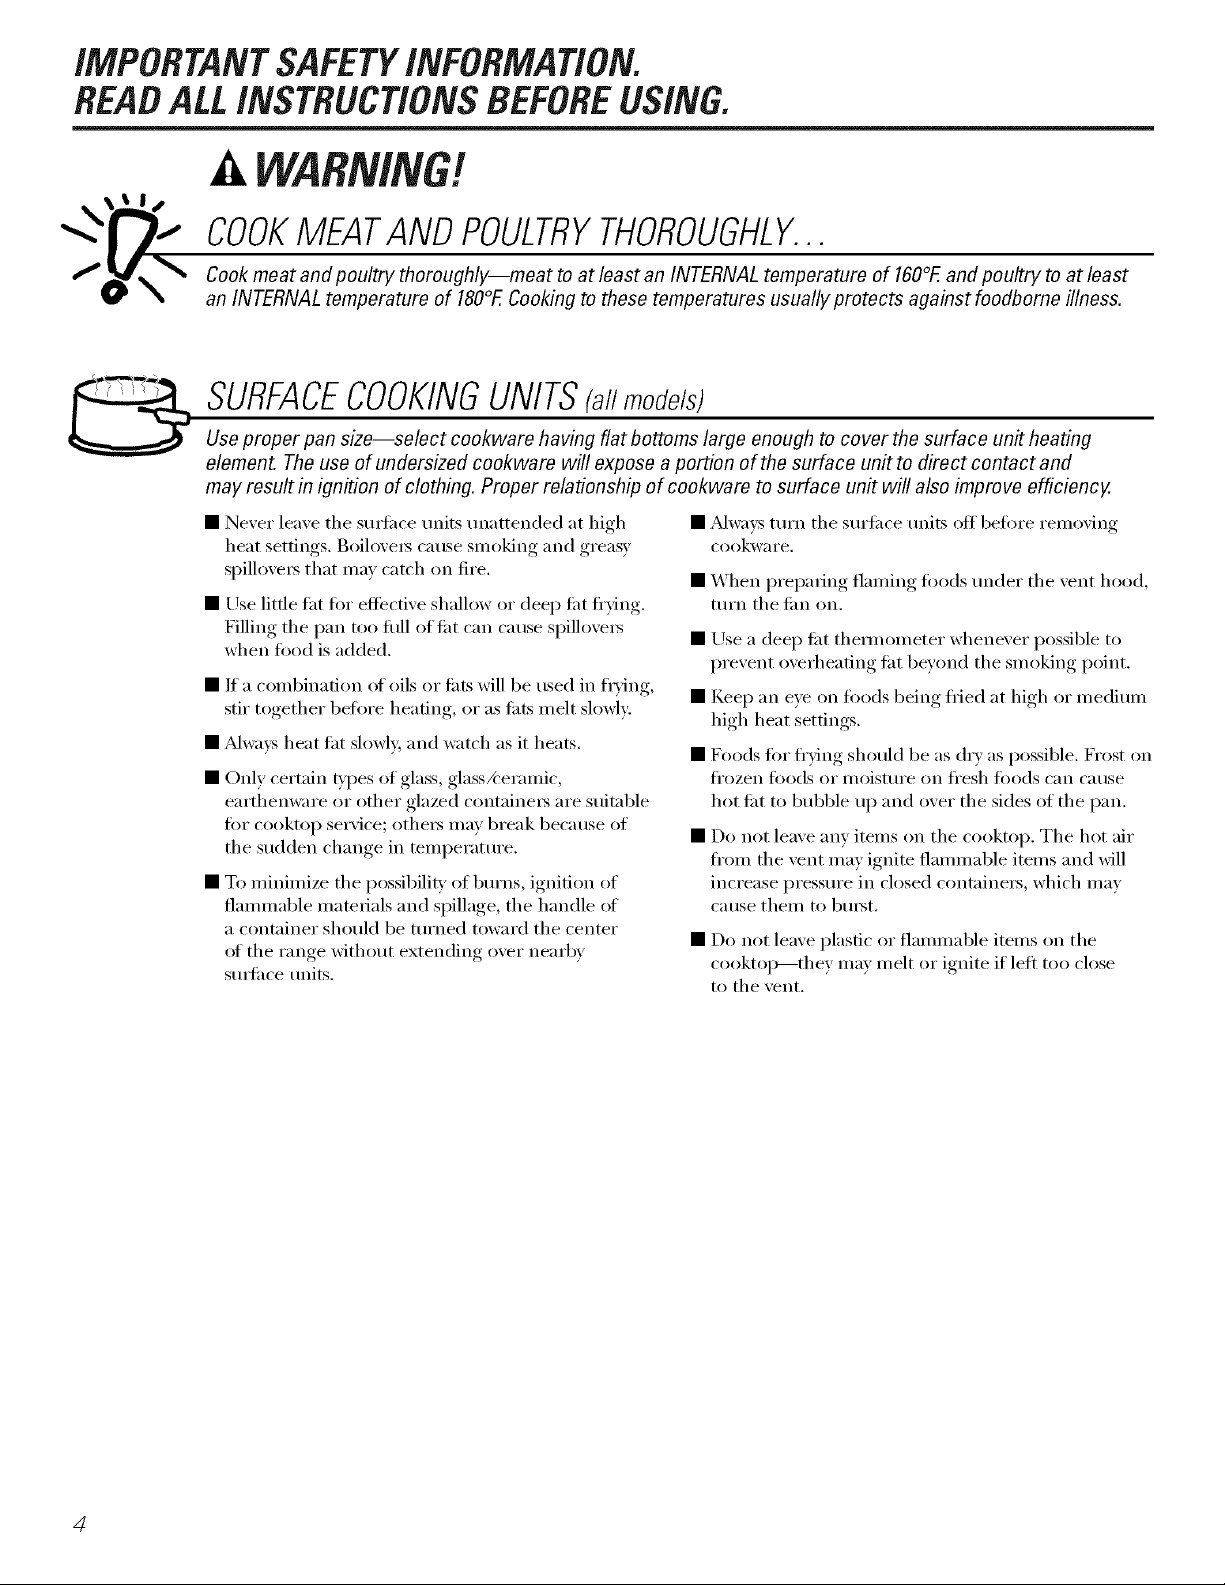
SURFACECOOKINGUNITSfa//mode/s)
Use proper pan size--select cookware having flat bottoms large enough to cover the surface un# heating
element. The use of undersized cookware will expose a portion of the surface unit to direct contact and
may result in ignition of clothing. Proper relationship of cookware to surface unit will also improve efficiency.
• Never leave the sm_fi_ce units unattended at high
heat settings, goilove_s cause smoking and greasy
spillove_ that may catch on fire.
• Use little tilt fi_r effective shallow or deep lilt flTing.
Filling tile pan too flfll of tilt c[lIl c[Itlse spillove_
when food is added.
• If a combination of oils or tilts will be used in flTing,
stir together befl)re heating, or as lilts melt slowly:
• _Mwa_:s heat tilt slowl}; and watch as it heats.
• Only certain types of glass, glassX eramic,
earthenware or other glazed containers are suitnble
for cooktop service; othei_ inay break because of
tile sudden change in temperature.
• To minimize tile possibility of bm'ns, ignition of
flammable materials and spillage, tile handle of
a container should be turned toward tile center
of the range without extending over nearby
smbfilce units.
• _Mwavs tm'n tile surtilce milts off heft)re removing
cookw_li'e.
• X4hen I)reI)aring, flaming, fi)ods trader tile vent hood,
mrn tile tim on.
• Use a deep Iilt them/ometer whenever possible to
prevent overhearing lilt beyond the smoking point.
• Keep an eve on foods being flied at high or medimn
high heat settings.
• Foods fl)r fl')ing should be as dry as possible. Frost on
fl'ozen fi)ods or moisture on fl'esh fi)ods can cause
hot lilt to bubble up and over tile sides of tile pan.
• Do not leave any items on the cooktop, The hot air
fl'om the vent may ignite flammable items and will
increase pressm'e in closed contnine_5, which may
cause them to bm_t.
• Do not leave plastic or flammable items on tile
cooktoI)---they ma) melt or ignite if left too close
to tile _,eIlt.
4
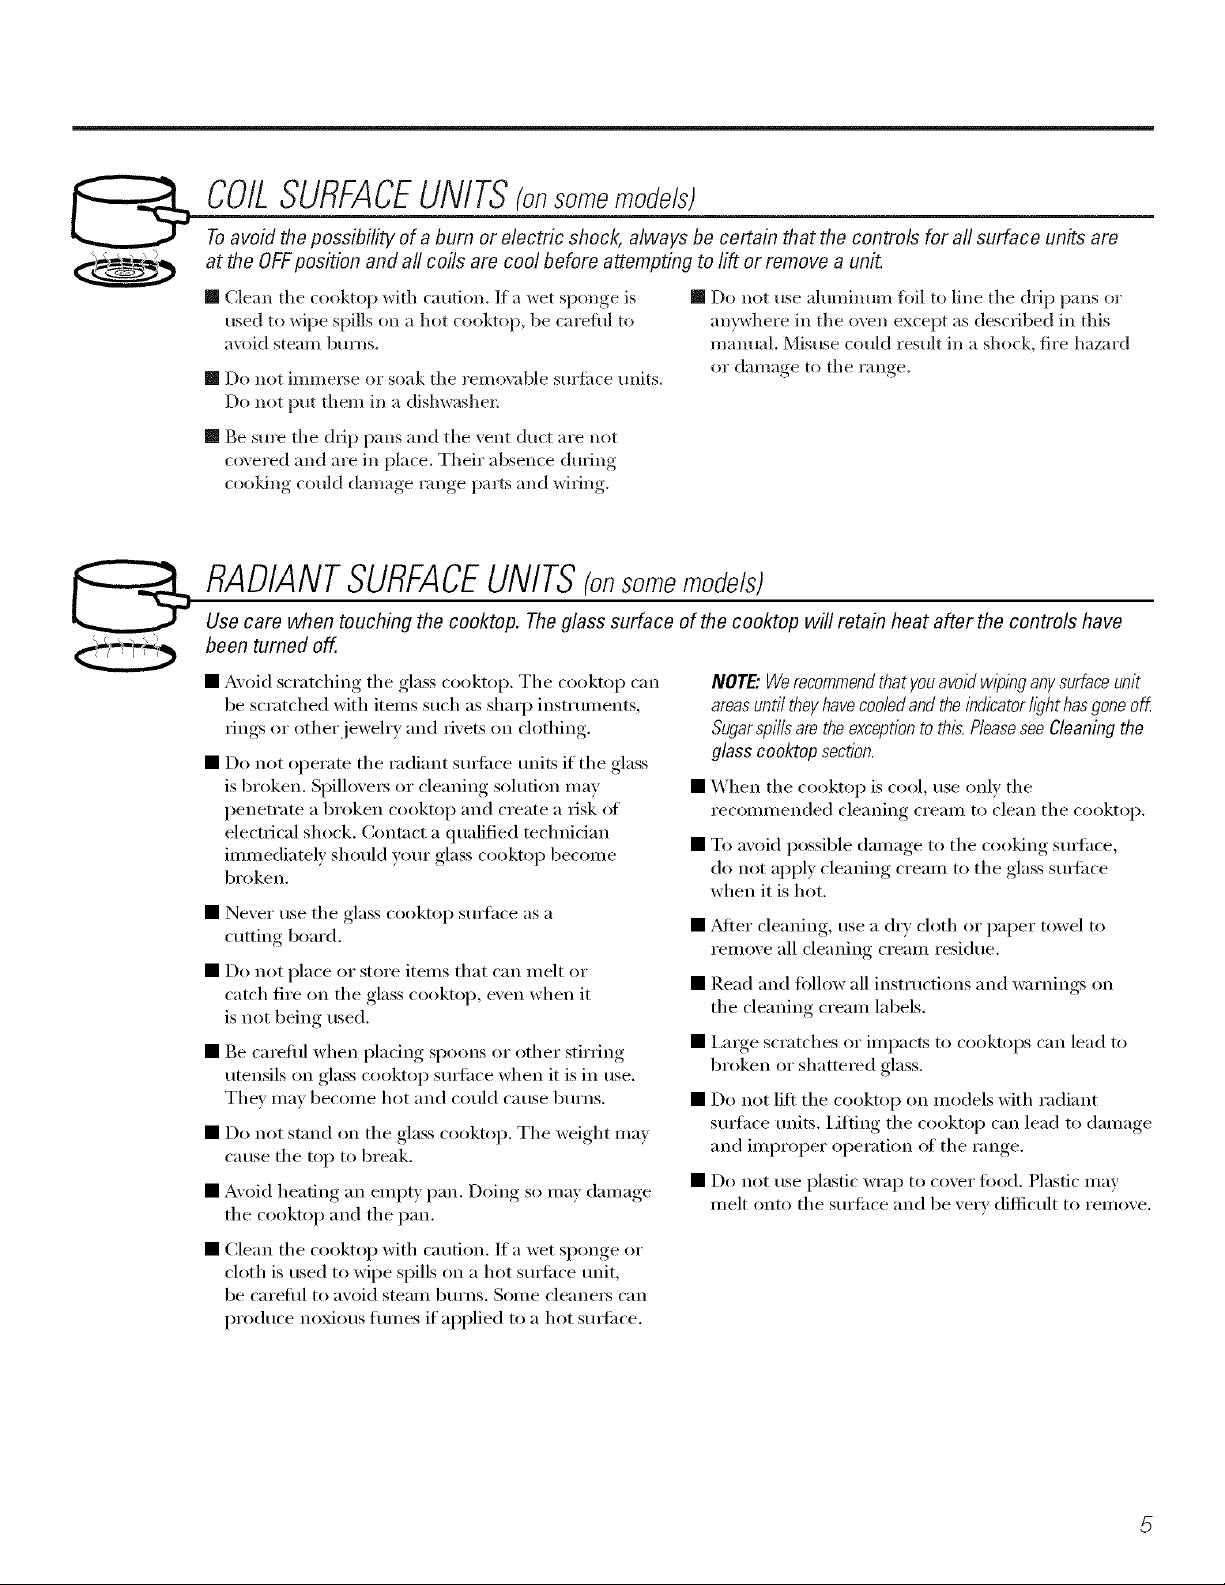
COILSURFACEUNITS(onsomemode/s)
To avoid the possibility of a burn or electric shock, always be certain that the controls for aft surface units are
at the OFF position and all coils are cool before attempting to lift or remove a unit.
[] Clean the cooktop with caution. If a wet sponge is
used to wipe spills on a hot cooktop, be carefld to
a\_id steam burns.
[] Do not imme*_e or soak the remo\;lb]e surlime units.
Do not put them in a dishwasher:
[] Be sure the drip pans and the vent duct are not
covered and are in place. Their absence during
cooldng could damage range pm_s and wiring.
RADIANTSURFACEUNITS(onsomemode/s)
Use care when touching the cooktop. The glass surface of the cooktop will retain heat after the controls have
been turned off.
• Avoid scratching the glass cooktop. The cooktop can
be scratched with items such as shaq) instruments,
rings or otherjeweh T and rivets on clothing.
• Do not operate the radiant stm'i_ce units if the glass
is broken. Spillove_ or cleaning solution may
penetrate a broken cooktop and create a risk of
electrical shock. Contact a qualified technician
immediately should your glass cooktop become
broken.
• Never use the glass cooktop stm'hce as a
cutting board.
• Do not place or store items that can melt or
catch fire on the glass cooktop, even when it
is not being used.
• Be carefld when plating spoons or other stirring
utensils on glass cooktop stm'hce when it is in use.
They may become hot and could cause 1)urns.
• Do not stand on the glass cooktop. The weight may
cause the top to break.
• Avoid heating an empty pan. Doing so may damage
the cooktop and the pan.
[] Do not use aluminum fi_il to line the drip pans or
anDxhere in the oven except as described in this
manual. Misuse could result in a shock, fire hazard
or damage to the range.
NOTE."Werecommendthat youavoid wiping any surfaceunit
areasuntil theyhave cooledand the indicator light hasgoneoff.
Sugarspills are the exceptionto this.Pleasesee Cleaning the
glass cooktop section.
• When the cooktop is cool, use only the
recommended cleaning cream to clean the cooktop.
• To avoid possible damage m the cooking StlI_;Ice,
do not apply cleaning cream to the glass suil'ilce
when it is hot.
• _Mier cleaning, use a d_T cloth or paper towel to
remove all cleaning cream residue.
• Read and tollow all instructions and warnings on
the cleaning cream labels.
• I,a_ge scratches or impacts to cooktops can lead to
broken or shattered glass.
• Do not lilt the cooktop on models with radiant
SUll'hce units. Lifting the cooktop can lead to damage
and improper operation of the range.
• Do not use plastic wrap to cover food. Plastic may
melt onto the surti_ce and be very difficult to remove.
• Clean the cooktop with caution. If a wet sponge or
cloth is used to wipe spills on a hot surlilce unit,
be careful to avoid smam burns. Some cleane_ can
produce noxious tirades if applied to a hot stm'i_ce.

IMPORTANTSAFETYINFORMATION.
READALL INSTRUCTIONSBEFOREUSING.
i
OVEN
Stand away from the range when opening the oven door. Hot air or steam which escapes can cause bums to
hands, face and/or eyes.
[] Do not heat unopened food containers. Pressure
could build up and tile container could bm_t,
causing an il_jury.
• Keep tile oven vent unobstructed.
• Keep tile o',en five fl'om grease buildup.
•Hace tile ox ell shelf in tile desired position while
tile (yen is cool. If shelves must be handled when
hot, do not let pot holder contact tile heating
dements.
Pulling out tile shelf to tile stop-lock is a convenience
ill lifting heavy foods. It is also a precaution against
btll'ns fl"oI//totlching hot stllfhces _g tile door or
oven walls.
• Do not use tile oven to chy newspapers. If o\vrheated,
they call catch on fire.
• Do not use tile oven for a storage area. Items stored
in all o\vn call ignite.
• Do not leaxv paper prodtlcts, cooldllg utensils or
food ill tile oven when not in use.
• \\lien using cooking or roasting bags in tile oven,
follow tile manufimturer's directions.
Do not use almninmn foil to lille oven bottoms,
except as suggested in this manual. Improper
installation of ahmfinmn dill may result in a risk of
electric shock or fire.
SELF-CLEANINGOVEN(onsomemode/s)
Donot use oven cleaners. No commercial oven cleaner or oven liner protective coating of any kind should be
used in or around any part of the oven. Residue from oven cleaners will damage the inside of the oven when the
self-clean cycle is used.
• Do not clean tile door gasket. Tile door gasket is
essential for a good seal. Care should be taken not
to rub, dalnage or inove tile gasket.
• Bed)re self'cleaning tile oven, relnove tile broiler
pan, grid and other cookware.
• Be sure to wipe up excess spillage before starting
the self'cleaning operation.
• If tile sellk'leaning mode inalflnlcfions, turn tile oven
off and disconnect tile power supply: Have it serviced
by a qualified technician.
• Clean only parts listed ill this Owner's Manual.
• Take the shelves out ot the oven befiwe you begin
the sel6clean cycle or thev inav discoloi:
WARMINGDRAWER(o,somemode/s)
• Tile pulI)ose of tile wanning drawer is to hold hot
cooked fl)ods at sei_'ing tenq)erature. Pdwa)_s start
with hot fbod; cold food cannot be heated or cooked
ill the wamfing drawei;
• Do not use tile drawer to di T newspapei_.
If overheated, they can catch on ili'e.
• Do not lea;'e paper products, plastics, canned fi)od
or combustible inaterials ill tile drawei:
• Never leavejai_ or cans of fat drippings in or near
YO/lI" drawei;
• Do not W_llIll too(l in tile dI'aweI" t0i" illoi'e than
two houi_,
• Never place, use or self'clean tile lower oven drawer
pan ill the upper oven.
• Do not touch the heating element or the interior surface
of thedrawer. These sml%ces may be hot enough
to b/lYn.
REMEMBER:Tile inside surlhce of tile drawer inav be
hot when the drawer is opened.
• Use care when opening the drawei: Open the drawer
a crack and let hot air or steam escape before
removing or replacing food. Hot air or stealn which
escapes can cause burns to hands, ti_ce and/or eyes.
• Do not rise ahllllintllll dill to lille tile lower oven
drawei: Foil is an excellent heat insulator and will
trap heat beneath it. This will upset tile pell'Ommnce
of tile drawer and it could damage tile interior finish.

Yourrange, like many other household items, is heavy and can settle into soft floor coverings such as cushioned
vinyl or carpeting. When moving the range on this type of flooring, use care, and it is recommended that these
PREPARATION
simple and inexpensive instructions be followed.
Installing
The range should be installed on a 1/4inch thick sheet of
plywood (or similar material) as foflows:
\'\]_en the floor coveting ends ;it the fi'ont of the range,
the area that the range will rest on should be built up
with plywood to the same le\ el or higher than the floor
co\vfing. This will allow the range to be Fno; ed for
cleaning or selaidng.
Leveling
Leveling screws are located on each corner ot the base
of the range. Remove the bottom drawer and _)tl can
level the range on an tllle;'ell floor with the rise of
a nutdfi_vr or cham_el locks.
To remo_v the drawel, pull the drawer out all the way,
tilt up the fl'ont and take it out. To replace the draweI;
insert glides at back of the drmver beyond stop on the
range glides. Liii drawer if necessary to insert easily.
Let the ti'ont of drawer down, then push in to close.
One of the rear ]e\ eling screws will engage the Anti-Tip
device. _Mlow for some side to side ac!iustment, _Mlow
a minimum clearance of 1/8" between the range
and the le\ eling screw that is to be installed into the
Anti-Tip device.
READANDFOLLOWTHISSAFETYINFORMATIONCAREFULLY.
SAVETHESEINSTRUCTIONS
7
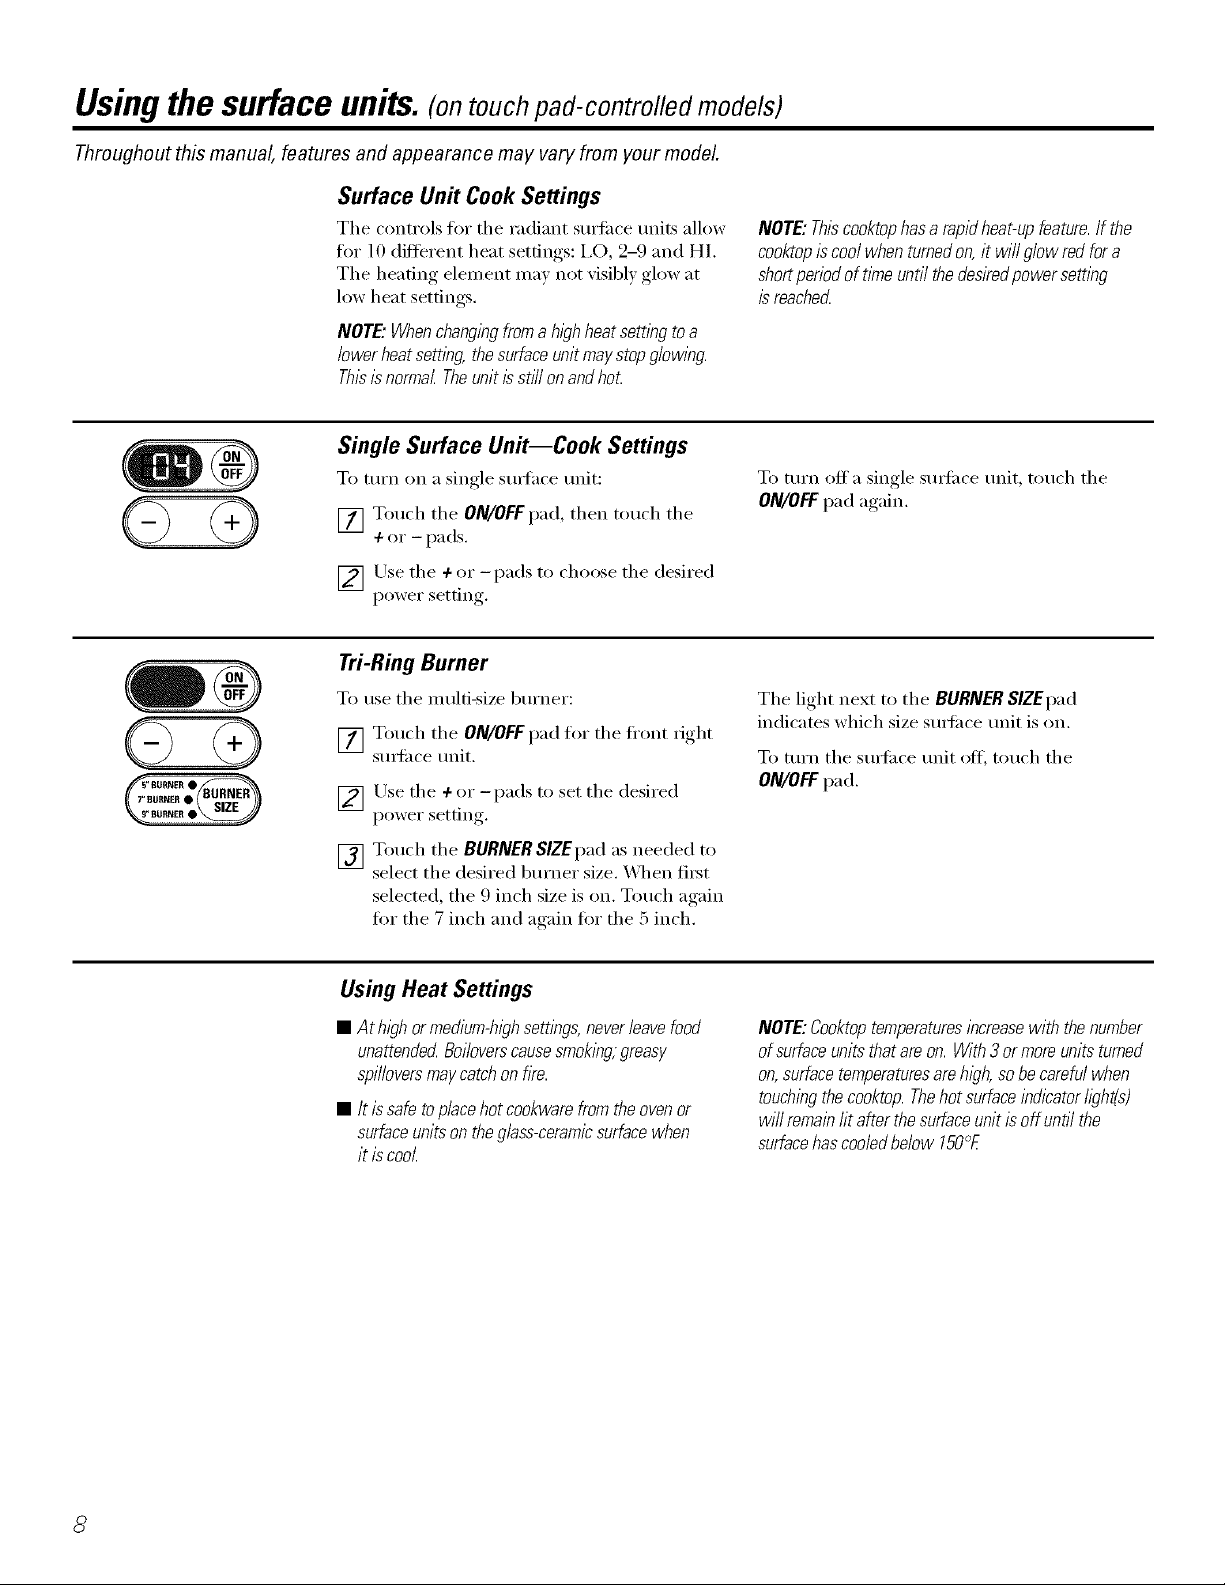
Usingthe surface units.(ontouch pad-controlledmodels)
Throughout this manual, features and appearance may vary from your model.
Surface Unit Cook Settings
The controls fin" the radiant surli_ce units allow
ti)r 10 different heat settings: i,O, 2-9 and HI.
The heating dement may not visibly glow at
low heat settings.
NOTE" Whenchang/bgfroma high heatsettlbg to a
lower heatsettlbg, thesurface unit maystop glowlbg.
Thisisnormal Theunit isstiff onandhot.
Single Surface Unit--Cook Settings
To mrn on a single sm_hce unit:
[] Touch the ON/OFFpad, then touch the
+ or - pads.
[] Use the +or -pads to choose the desired
power setting.
Tri-Ring Burner
To use the multi-size 1)urner:
[] Touch the ON/OFFpad for the fl'ont right
surli_ce unit.
]Use the +or -pads to set the desired
l)ower settiil ,
NOTE:Thiscooktophasarapidheat-upfeature.Ifthe
cooktopiscoolwhenturnedon,it will glowredfora
shortperiodof timeuntilthedesiredpowersettlbg
isreached
To turn off a single sm_li_ce unit, touch the
ON/OFFpad again.
The light next to the BURNER SIZEpad
indicates which size sm_i_ce unit is on.
To turn the surli_ce unit ott; touch the
ON/OFFpad.
[] Touch the BURNERSIZEpad as needed to
select the desired bm'ner size. X4q_en fi_t
selected, the 9 inch size is on. Touch again
fin" the 7 inch and aoain fin" the 5 inch.
Using Heat Settings
• Athl_zhorrnediurn-hlghsettings,neverleavefood
unattendedBelieverscausesmoklbg/greasy
spilloversmaycatchonfire.
• It issafetoplacehotcookwarefromtheovenor
surfaceunitsontheg/ass-ceremicsurfacewhen
it iscool
NOTE:Cooktoptemperaturesibcrease with the number
ofsurface units that are on. With 3 or moreunits turned
on.surfacetemperaturesare.high.so be careful when
touchingthecooktop. Thehot surface indicator@ht(s)
will remainfit after the surface unit is off until the
surfacehas cooledbelow 150°E
8

Precise Warm Feature
To mrn on the precise warm feature:
[] Touch the ON/OFFpad, then touch the
PRECISE WARMpad. The stmti_ce unit will
turn on to warmer setting W3 (medium
setting).
[] Lrse the +or -pads to choose additional
settings between _,_1 (lowest setting) and
X,_T)(highest setting),
To change fl'om the wm_ner settings to regular
cooking settings, press the PRECISEWARM pad
again. The surli_ce trait will be on power setting
I,O. The stul'hce trait may then be set to the
desired regular cooking setting using the
÷ or -pads. To [tlrn oft the s/Irl_ilce tlnit,
whether using regular cooking settings or
wmmer settings, touch the ON/OFF pad.
11/1_1.1UTION: DOnot warm food on a PRECISE
WARM surface unit setting formore than 2 hours.
Donotuse plastic wrap to coverfood Plastic may melt
ontothe surfaceand be verydi_cult to remove.
Useonlycookware recommendedfortop-of-range
cooking.
CAUTION:Alwayssta withhotfood
Donotuse toheat cold food Placing uncooked or
coldfood ona precise warm setting could result
in foodbome illness.
For best results, all fi)od on PRECISEWARM
should be coxered with a lid or aluminum foil.
_Mwaxs use pot holders or oven mitts when
reii/ox, ing lood ][i'Olll _1 precise Ig_lIIl/ St/IS{ilce
trait as cookware will be hot.
A hot sur)hce indicator light will glow when the
glass surfi_ce is hot and will remain on until the
surli_ce has cooled below 150°E
Usingthe surface units.(onknob-controfled models)
Throughout this manual, features and appearance may vary from your model.
How to Set
Push tile knob in and turn in either direction
to tile setting you want.
At both OFF and HI tile control clicks into
position. You may hear slight clicking sotmds
dm_ing cooking, indicating the control is
keeping the power level you set.
Be sm'e you tm'n tile control knob to OFFwhen
you finish cooking.
OFF
Warmer Burner (on some models)
Tile WARM or WM (wam_) setting (on some
models) on tile right REARsm_hce trait keeps
ah'eadv heated food wamx tmfil ready to sex_'e.
REAR
BURNER
HI
FRONT
OFF
BRIDGE
BUBNEB
HI
Using the Bridge Burner (onsome models)
To use tile bridge burnex; tm'n tile control
knob to tile BRIDGEBURNERsettings.
8
6
LO LO
8
Fox" flfll bridge bHI'neI" operation, ttxi'n on tile
I'e_l I" b/ll'neI;
6
To use only tile front bm'nex; turn tile control
z
knob to tile FRONTBURNERsettings.
10
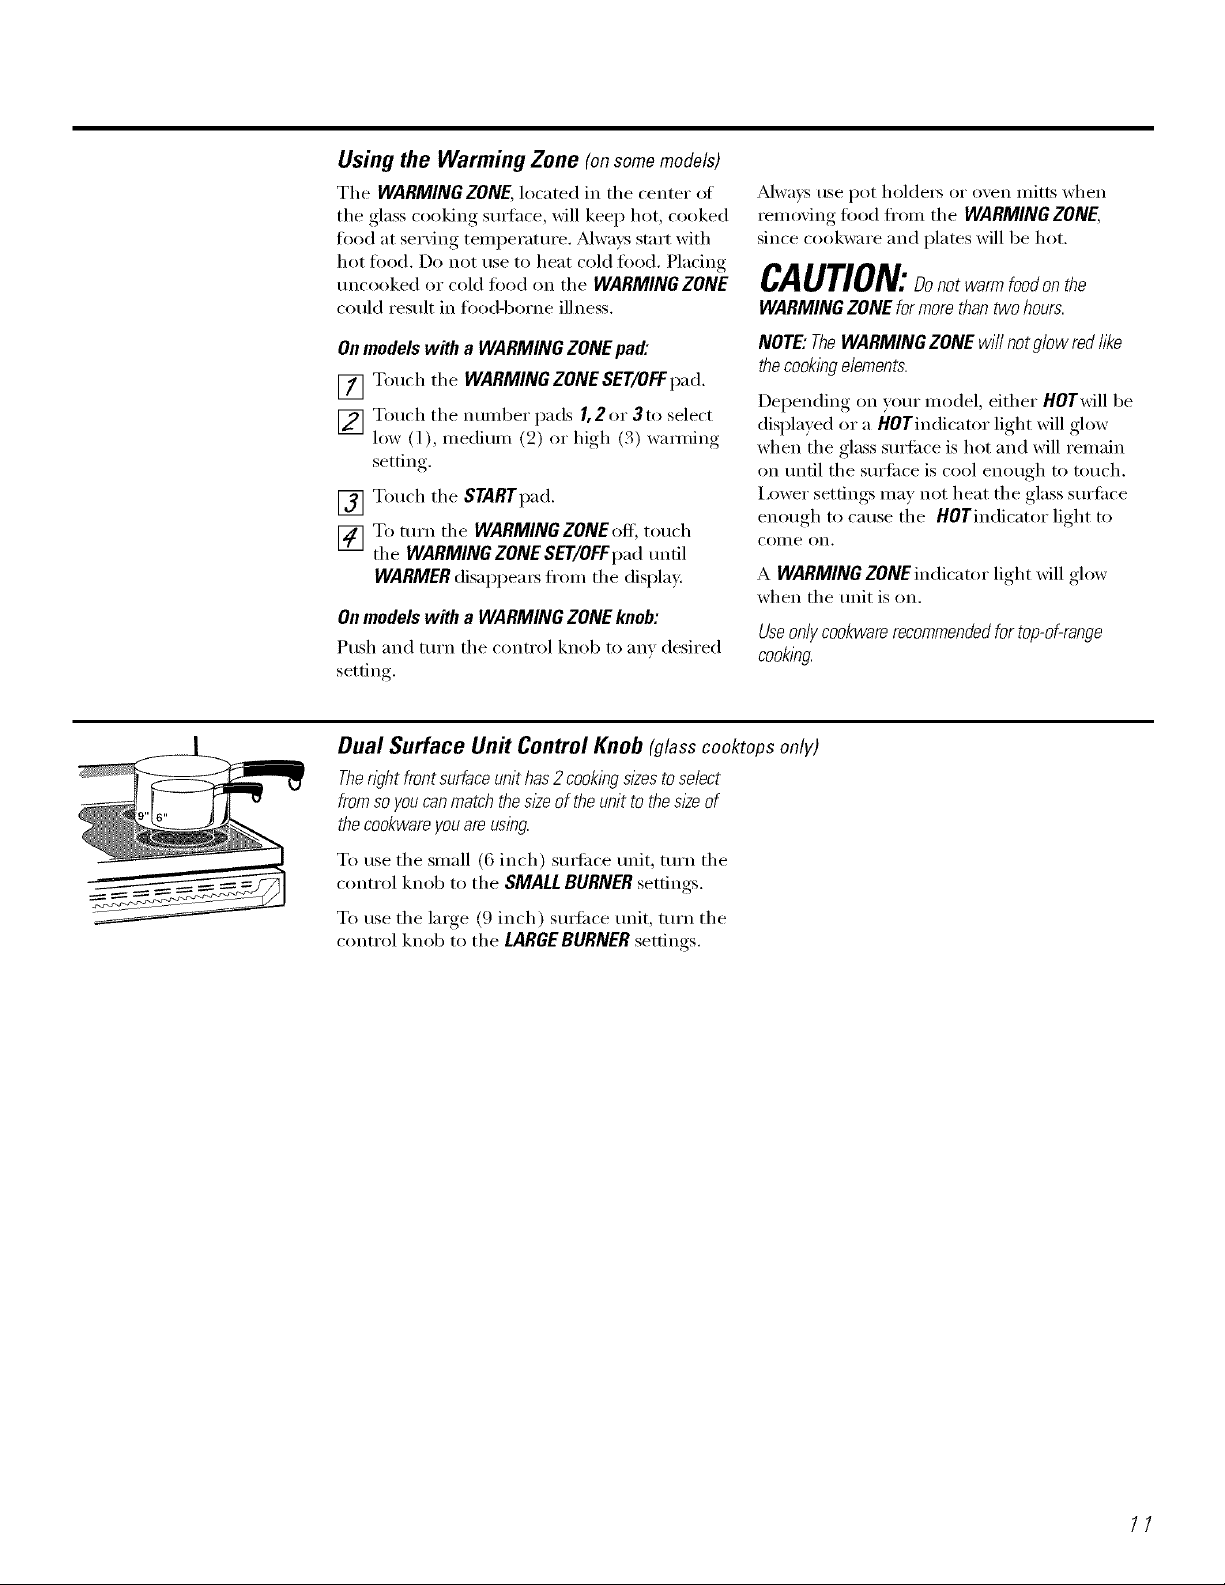
Using the Warming Zone (onsomemodels)
The WARMING ZONE, located in the center of
the glass cooking sm_hce, will keep hot, cooked
fi)od at se_Mng temperature, Mwavs start with
hot food. Do not use to heat cold food. Placing
tmcooked or cold fi_od on the WARMING ZONE
could result in food-borne illness.
Mwm:s use pot holde_ or oven mitts when
reInoving food fl'oIn the WARMING ZONE,
since cookware and plates will be hot.
CAUTION:Oonotwarmfoodonthe
WARMING ZONE formorethan two hours.
Onmodels with a WARMING ZONE pad:
[] Touch the WARMING ZONE SET/OFFpad,
[] Touch the number pads 1,2or 3to select
low (l), medimn (2) or hi,,h (3) wamdn,,
settin ,
[] Touch the STARTpad.
[] To mrn the WARMING ZONE off, touch
the WARMING ZONE SET/OFFpad tmfil
WARMER disappea_ from the displa):
Onmodels with a WARMING ZONE knob:
Push and mrn the control knob to am' desired
setting.
NOTE:TheWARMING ZONE will notglow red like
thecookl))gelements.
Depending on yore" model, either HOTwill be
displayed or a HOTindicator light will glow
when the glass surfilce is hot and will remain
on tmtil the sm'fi_ce is cool enough to touch.
I,ower settings may not heat the glass sm'ii_ce
enough to cause the HOTindicator light to
COiile Oil.
A WARMING ZONE indicator light _dll glow
when the trait is on.
Useonlycookwarerecommendedfortop-of-range
cookl?)g.
Dual Surface Un# Control Knob (g/asscooktopsonly)
Thewht front surface unit has2 cookingsizesto select
fromsoyou canmatch thes/keof theunit to thes/keof
thecookwareyou are using.
To use the small (6 inch) sm_i_ce refit, mrn the
control knob to the SMALL BURNERsettings.
To use the large (9 inch) sm_i_ce refit, tm'n the
control knob to the LARGEBURNER settings.
//

Usingthe radiant surfaceunits.(glasscooktopsonly)
About the radiant surface units...
Tile radiant cooktop features heating units
beneath a smooth glass stm'hce.
NOTE"A sh)ht odorIsnormal when a new cooktop
is used for the fkst t/_ne.Itis causedby the heatingof
new parts andinsulatingmatena/s andwill disappear
in ashort time.
Never cook directly ontlTeglass.
Always useco&ware.
Always place tlTepan f17the center of
tlTesurface unit you arecookflTgon.
Tile surli_ce unit will cycle on and off to
maintain your selected control setting.
It is safe to place hot cookware on tile glass
S/li'J[ilce even when tile cooktop is cool.
Even alter tile sure_ce units are turned off, tile
glass cooktop retains enough heat to continue
cooking. To avoid eve>cooking, remove pans
fl'om the surti_ce units when the toed is cooked.
Avoid placing anything on tile surtilce unit
until it has cooled completel}:
• Waterstains (mineraldeposits)areremovable using
thecleaningcream or furl strengthwhite wbegar
• Useof window cleaner may leavean indescentfilm
on the cooktop. Thecleaning cream wi// removethis
discoloration.
Donot slide cookware across tlTe
cooktop because it can scratch tlTe
glass theglass is scratch resistant,
not scratch proo_
• Don't storeheavyitemsabovethe cooktop.If they
drop ontothe cooktop,theycancause damage.
• Donotusethesurfaceasa cuttingboard
Indicator Lights
On glass cooktops, HOT indicator light will
glow when an) radiant element is turned on,
and will remain on until tile s/m'i_ce is cooled
to approximatel) 150°E
Indicator light will:
• come on when the unit is hot to the touch.
• stay onevenafter the unit is turnedoff
• glow until the unit is cooledtoapproximately 150°£
Temperature Limiter (glass cooktops only)
Exer_ radiant s/mfhce unit has a temperature
limiter
Tile temperature limiter protects tile glass
cooktoi ) fl'om ,getting, too hot.
A surlime units ON indicator light _fill glow
when _lIIV st/i'l[ilce t/nit is on.
NOTE:ThesurfaceunitsONindicatorh)htmayglow
betweenthesurfacecontrolsettingsofLOandOFF,
butthereisnopowertothesurfaceunits.
The temperature limiter may cycle tile units off
fi)r a time if:
• Thepanboils dr)z
• Thepanbottom is not fiat.
• Thepan is offcenter
• Thereis nopan on the uni_
12
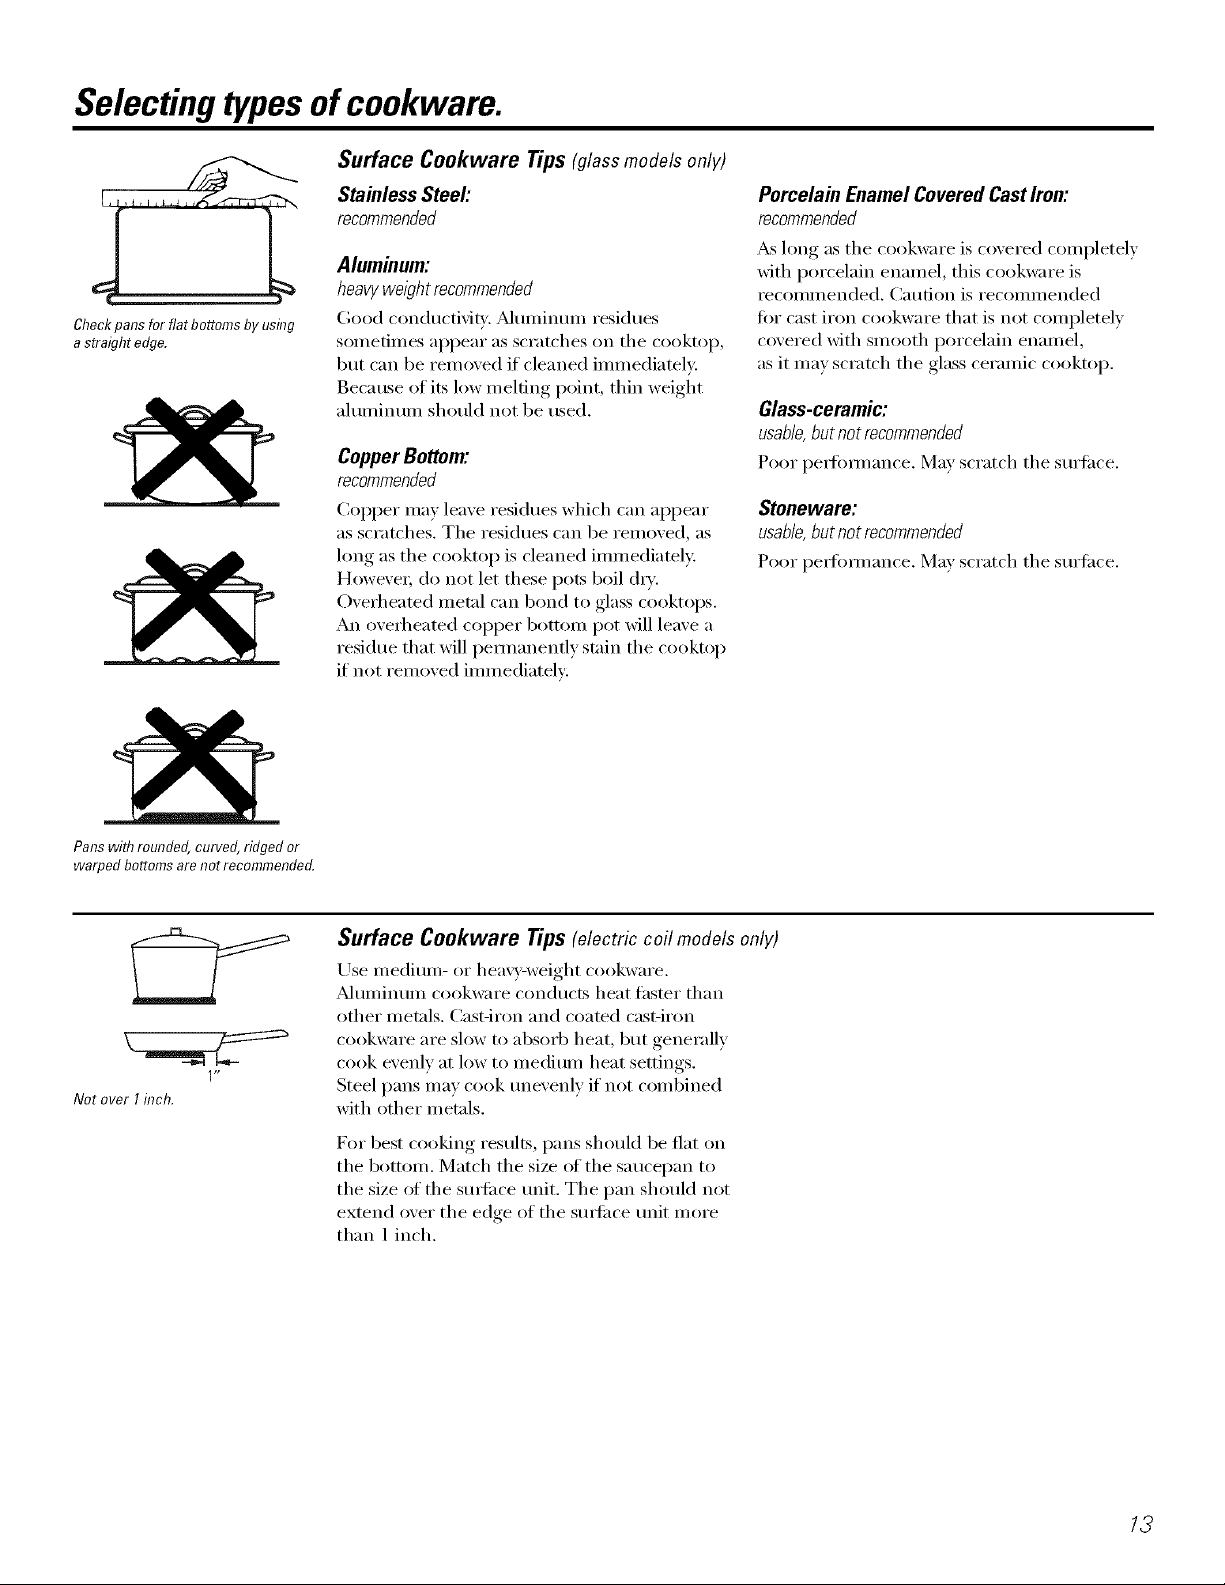
Selectingtypesof cookware.
Surface Cookware Tips(glassmodelsonly)
Stainless Steel:
recommended
J, L
Checkpansforflatbottomsbyusing
astraightedge.
Aluminum:
heavyweight recommended
Good conducti\iq:. _Muminun_ residues
sometimes appear as scratches on the cooktop,
but can be removed if cleaned immediately.
Because of its low melting point, thin weight
aluminum should not be used.
CopperBottom:
recommended
CoI)I)er may leave residues which (an appear
as scratches. The residues can be removed, as
long as the cooktop is cleaned immediatel*:
Howe\'e_; do not let these pots boil (hT.
Oved/eated metal can bond to glass cooktops.
An ove_t/eated copper bottom pot will leave a
residue that will permanently stain the cooktop
if not removed immediately:
Porcelain Enamel Covered Cast Iron:
recommended
_&slong as the cookware is covered completely
with porcelain enamel, this cookware is
recommended. Caution is recommended
fin" cast iron cookware that is not completely
covered with smooth porcelain enamel,
as it may scratch the glass ceramic cooktop.
Glass-ceramic:
usable,butnotrecommended
Poor l)e_fimnance. May scratch tile surli_ce.
Stoneware:
usable,butnotrecommended
Poor l)e_fimnance. May scratch tile surli_ce.
Pans with rounded,curved,ridged or
warped bottomsarenot recommended.
C2
1"
Notover I inch.
Surface Cookware Tips (electric coil models only)
Use inediuin- (:,r hea',T-weight cookware.
Muminum cookware conducts heat fhsmr than
other metals. Cast-iron and coamd cast-iron
cookware are slow to absorb heat, but generally
cook evenly at low to medium heat settings.
Steel pans may cook unevenly if not combined
with other metals.
For best cooking results, pans should be fiat on
tile bottom. Match the size of tile saucei)an to
the size of the surfi_ce unit. The pan should not
extend over the edge of the s/mfi_ce unit more
than 1 inch.
13

Selecting typesofcookware.
Wok Cooking (electric coil models only)
Werecommend thatyou use onlya flat-bo_omedwok.
Theyareavailable at yourlocalretail store.
Do not use woes that have support rings.
Use of these t,/pes of woes, with ()r without
the ring in place, can be dangerous.
Use only flat-bottomed woks.
Deep Fat Frying
Do not ovedill cookware with tilt that may
spill over when adding food. Frost' foods
bubble vigorously. Watch food ti'ying at high
temperatures. Kee I) range and hood clean
fYOlil grease.
Home Canning Tips
Be sure the canner is centered over the
surlilce unit.
Make sure the canner is fiat on the bottom.
Placing the ring over the sm_hce unit will
cause a build-u I) of heat that will damage the
po_velain cooktop. Do not t_y to use such
woks without the ring. _m could be seriously
burned if the wok tipped over.
Use recipes and procedures fl'om reputable
SOtlI'Ces, Flat-bottollled CalllleI3 aI'e
recommended. Use of water bath canne_
with ill)pied bottoms may extend the time
required to bring the wamr to a boil.
To l)I'event btlI'ns J[i'Olll stealll or heat, rise
caution when canning.
/4
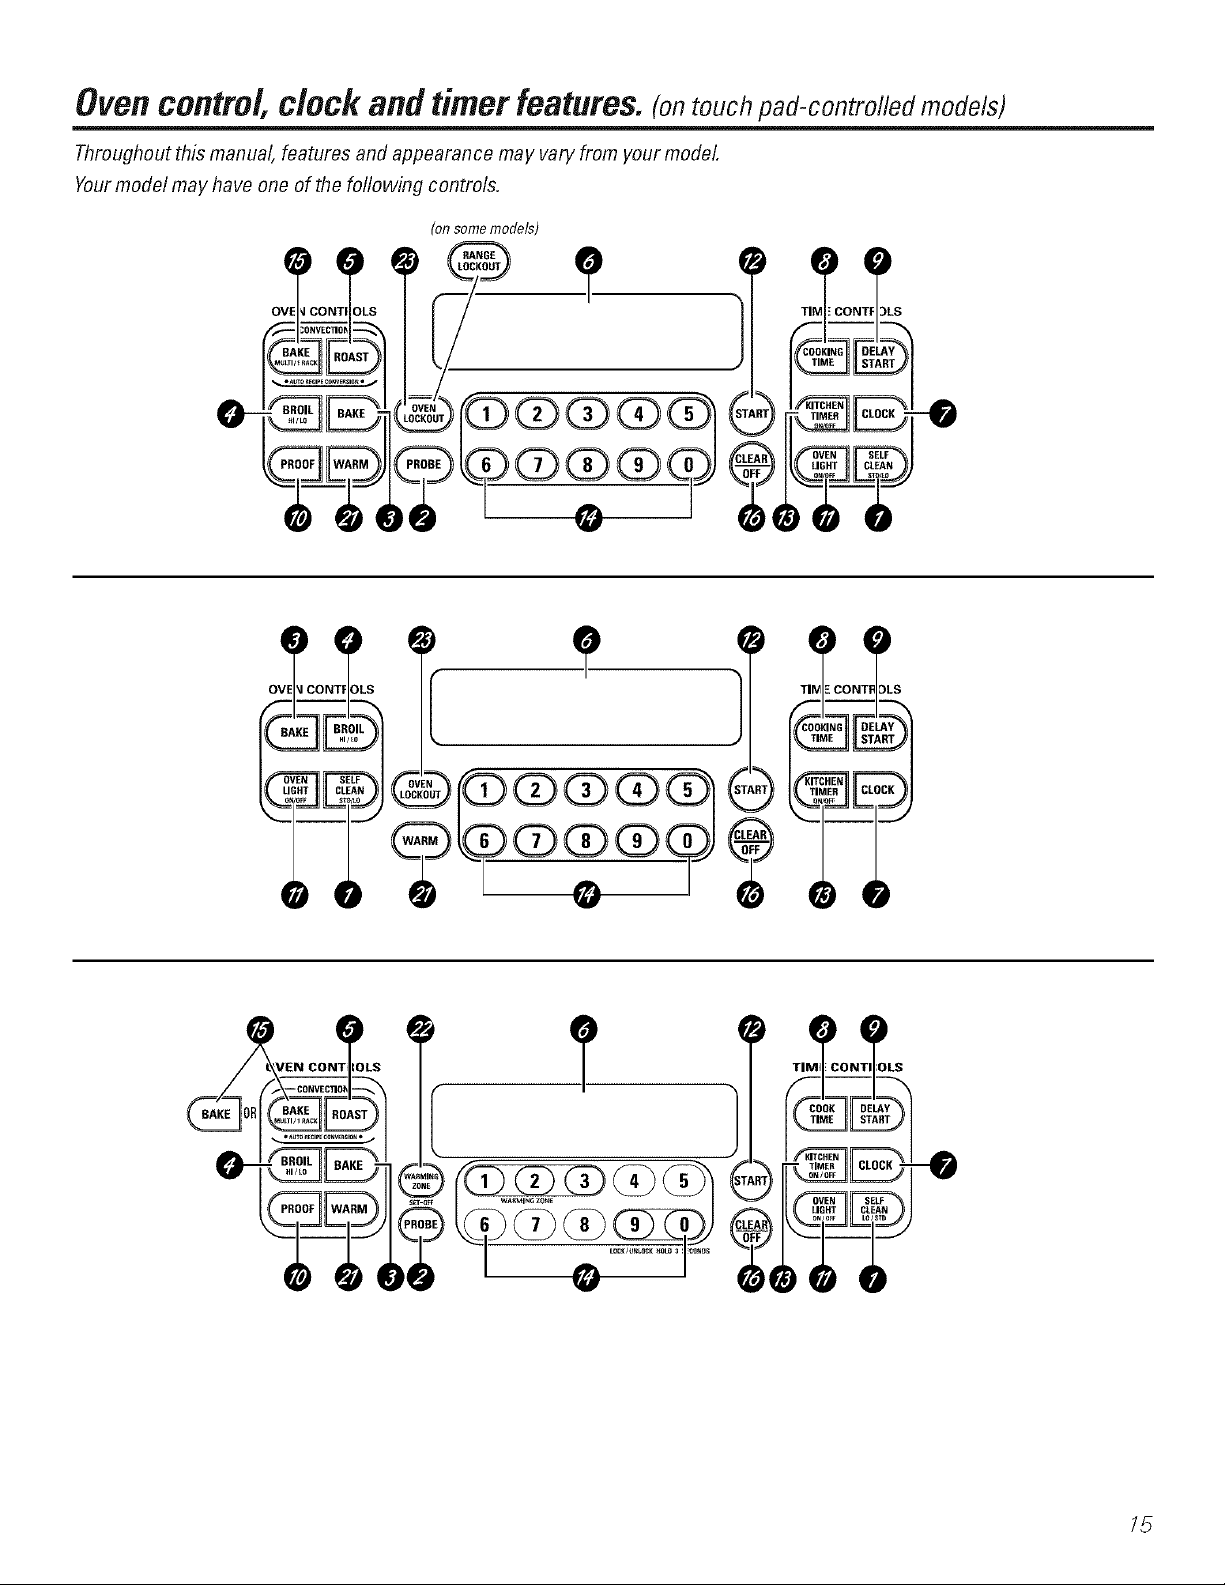
Oven contro/, c/oc_ and timer features, (ontouch pad-controlled models)
Throughout this manual, features and appearance may vary from your model.
Yourmodel may have one of the following controls.
(on some models)
OVE
)LS
O-
_VEN CONT_IOLS
OLS
15

Oven contro/, c/oc_ arid timer features, (ontouch pad-controlled models)
Throughout this manual, features and appearance may vary from your model.
Yourmodel may have one of the following controls.
16

Overt corttro/, clock artd timer features, (ontouch pad-controlled models)
Throughout this manual, features and appearance may vary from your model
Yourmodel may have one of the following controls.
CONTRC_LS
\ON)
O-
SETWARMING DRAWER
@
LIGHT CLEAN
CONTROL LOCKOUT
;'7
 Loading...