

Hotpoint RB790CK1CC, RB757BH6WH, RB526K1BB, JBS27CH2CC, JBP15WJ1WW Owner’s Manual
...
©
_e.com
Safety Information .......... 2-6
Operating Instructions
Adjust the Oven
Thei_nostat ................... 21
Clock and Timer . .......... 15, 16
Oven ..................... 12-14
Oven Controls ............. 10, l l
Sabbafl) Feaulre ............ 19, 20
Selecting Types of Cookware ..... 9
Self Cleaning .............. 24, 25
Special Features ............... 18
Surfi_ce Units ................ 7, 8
Timed Baking and Roasting ..... 17
_\anning Drm,_r. .......... 22, 23
Care and Cleaning ........ 24-33
Glass Cooktop .............. _2, 33
Self:Cleaning O_en ......... 24, 25
Coil 7@ and
Radiator T@ Mo(tds
Star_dard 5?_:Clear_
Clear_Medals Medals
#eso3 je6oo
jeso7 jePz5
JBS l 5 JBP21
JBS2 7 JBP22
RB525 JBP60
RB526 RB740
RB536 RB757
RB 540 RB 78 7
RB790
RB800
Installation Instructions
Anti-Tip Device ............ 34, 40
gefbre You Begin ............. 34
Elecu_ical Connections ....... 36-39
Leveling .................. 40, 41
Troubleshooting Tips ...... 42-46
Accessories .................. 47
Consumer Support
Consumer Support ..... Back Cover
Product Registration ........ 49, 50
_\.manty .................... 51
Write the model and serial
numbers hem:
Model #
Serial #
You can find them on a label,
behind the storage drawer or
warming drawer on the (Well
i]'al//e.
18306379P028 49-88022 08-05 dR

iMPORTANTSAFETYiNFORMATION.
READALLiNSTRUCTiONSBEFOREUSING.
?:7 2111
iillili!lii{!
r.J
w
For your safety, the information in this manual must be followed to minimize the risk of fire or explosion,
electric shock, or to prevent property damage, personal injury, or loss of life.
WARNINGANti-TIPDEVICE
All ranges can tip and injury couldresult.
Toprevent accidental tipping of the range, attach
# to the waft by installing the Anti-77p device
supplied.
If the Anti--tip device supplied with the range does
not fit this application, use the universal Anti-7ip
device WB2X7909.
Tocheck ff the device is instated and engaged
properly, carefully tip the range forward. The
Anti--tip device should engage and pravent
the range from tipping over.
If you pull d_e range out flom d_e wall fbr
any reason, make sure fl_e device is propedy
engaged when you push the range back against
the wall. If it is }_ot, there is a possible _isk of fl_e
range tipping over and cruising iqjury if you or
a child stand, sit or lean on an open doo_:
Please refbr to the Anti-Tip device in%_3nation
in this manual. Failure to take this precaution
could result in tipping of the range and injury.
IMPORTANTSAFETYNOtiCE
The Californb Safe Drinking Water and Toxic
Enforcement Act requires the Governor of
Californb to publish a list of substances known
to the state to cause cancer, birth defects or other
reproductive harm, and requires businesses to
warn customers of potential exposure to such
substances.
The fiberglass insulation in self-clean ovens gives
off a very small amount of carbon monoxide during
the cleaning cycle. Exposure can be minimized by
venting with an open window or using a ventilation
fan or hood.
m
w
m
1=
SAFETYPRECAUtiONS
When using electrical appliances, basic safety precautions should be followed, including the following."
iiiiiiiii_i;_ii_i
Use this appliance only for its intended
purpose asdescribed in this ()wrier s Man ual.
iiiiiiiii_i;_ii_i
Be sure your appliance is properly installed
and grounded by'a qualified technician in
accordance with the provided installation
instructions.
iiiiiiii;_ii_;_i;_;i
Do not attempt to repair or replace any
part of your range tmless it is specificaliy
recommended in this manual. All other
servicing should be referred to a qualified
technician.
iiiiiiii;_ii_;_i;_;i
Be%re per%rming any' service, disconnect
the range power supply at the household
disnJbution panel by removing the fl_se or
switching off the circuit breaker.
Do not lem_e children alone---<hildren
should not be left alone or unattended in
an area where an appliance is in use. They
should never be allowed to sit or stand on
any part of the appliance.
Do not allow anyone to climb, stand or
hang on the do(m storage drawe_; wanning
drm,_; or cooktop. They' could damag_ the
range and even tip it o_[; causing severe
personal injury.
Do nOt store flammable materials in an o_n
or near the cooktop.
CA UTION: Items of interest to
children should not be stored in cabinets
above a rang_ or on the backsplash of a
range--children climbing on the range to
reach imms could be seriously i_iured.
2

_e.COITI
COOKMEATANDPOULTRYTHOROUGHLY,,,
Cookmeat andpoultrythoroughly--meat to atleast an INTERNALtemperatureof 160°Fandpoultry to at leastan
INTERNALtemperatureof 180°ECookingto thesetemperaturesusuallypmtects against foodbomeillness.
SAFETYPRECAUTIONS
iiiiiiiii+++++i+ii+i
Never wear loose-fitting or hanging garments
while using the appliance. Be carefifl when
reaching for imms stored over the range.
Flammable material couM be ignimd if
brought in contact with hot surfi_ce units
or heating elements and may cause se_re
bums.
iiiiiiiii+++++i+ii+i
Use only di T pot holders--moist or damp
pot holders on hot surfi_ces may result in
burns from smam. Do not let p(>t holders
touch hot surfime units or heating elements.
Do not use a towel or other bulky' cloth.
iiiiiiii;_ii+_;i
For your safety, hexer use your appliance
fbr wanning or heating the room.
Do not let cooking grease or other flammable
materials accumulate in or near the range.
iiiiiiiii+++++i+iiii
Do not use wamr on grease fires. Never pick
up a flaming pan. Turn the controls ott:
Smother a flaming pan on a surfime unit by
covering the pan complemly with a well-
fitting lid, cookie sheet or fiat tray. Use a
multi-purpose dry chemical or fbam-b,'pe
fire extinguishen"
Flaming grease outside a pan can be put
out by covering it with haking soda or,
if m ailable, by using a multi-purpose di T
chemical or fbam-type fiIe extinguisher
Flame in the o_n or wanning drawer
can be smothered complemly by' closing the
door and mining the o\_n offor by using a
muhi-purpose dry chemical or fbam-ty'pe fire
extinguisher.
Do not touch the surfi_ce units, the heating
elements or the inmrior surfi_ce of the oven.
These surfi_ces may he hot enough to burn
even though they _re dark in colon During
and alter use, do not touch, or let clothing
or oilier flammable materials contact, the
surfime units, areas nearby the surfime units
or any' inmrior aiea of the OXeIl; allow
sufficient time fbr cooling first.
Pomnfiallv hot surfimes include the cooktop,
areas timing the cooktop, oxen vent opening,
surfi_ces near file opening, crevices around
the o\>n door and metal trim parts above
the door
REMEMBER:The inside surfime of the o_en
may be hot when the door is opened.
Do not store or use combustihle mamrials,
_tso]ine or other flammable xapors and
liquids in the vicinity' of this or any other
appliance.
Keep the hood and grease filters clean
to maintain good _enting and to mold
grease fires.
Never block die vents (air openings) of the
range. They provide the air inlet and outlet
that are necessary fbr the range to operate
properly with correct combustion. Air
openings are locamd at the rear of the
cooktop, at the top and bottom of the oxen
door, and at the bot/om of the range trader
the v_rming drav_>r or storage drav_>n
+i!i:2!+iii+++++[
!li+_++ii;i{i+iiiili
= u
m
g
m
3
iMPORTANTSAFETYiNFORMATION.
READALLiNSTRUCTiONSBEFOREUSING
?:2 2111
iillili!lili!
r.J
w
m
w
OVEN
Stand away flom the range when opening
the o_en door Hot air or steam which
escapes can cause bums to hands, face
and/or eyes.
Do not heat unopened food containers.
Pressure could build up and the container
could burst, causing an i_iury.
Kee I) the oven vent unobstructed.
Keep the o_n flee flom grease buildup.
Place the oven shelf in the desired position
while the o\>n is cool. If shelves must be
handled when hot, do not let pot holder
contact the heating elements.
SELF-CLEANINGOVEN
Do not clean the door gasket. The door
gasket is essential %r a g_)od seal. Care
should be taken not to rub, damage or
mo,_ the gasket.
Clean only parts listed in this Owner's
Manual.
Do not use oxen cleaners on selfklean
models. No commercial oven cleaner or
o_n liner protective coating of any kind
should be used in or around any part of
the oven. Residue flom oven cleaners will
damage the inside of the o_n when the
selfklean cycle is used.
Pulling out the shelf to the stop-lock is a
comenience in lifting heavv fbods. It is also
a precaution against burnsflom touching
hot surfi_ces of the door or o_en walls.
_\3_en using cooking or roasting bags in the
oven, follow the manufhcturer's directions.
Do not use the oven m dry newspapecs.
If overheated, they can catch on fire.
Do not use fl_e oven ff)r a storage area.
Items stored in an oven can ignite.
Do not lem'e paper products, cooking
umnsils or fbod in the o_>n when not in use.
Be%re selfkleaning the o_en, remo_e the
broiler pan, grid and other cookware.
Be sure to wipe up excess spillag_ be%re
starting the selfkleaning operation.
If the selfkleaning mode malflmctions,
turn the oven off and disc(mnect the power
supply. Hme it serviced by a qualified
technician.
• _ke the sheh.'es out of the oven be%re
you begin the selfklean cycle or they
may discolor.
m
4
WARMINGDRAWER(onsomemode/s)
The puq)ose of the wanning drm,ver is DOnot touch theheating element or the interior
to hold hot cooked fbods at serving surface ofthe warming drawer. These surfi_ces
temperature. ,Mways start wifll hot _od; may' be hot enough to bum.
cold fbod cannot be healed or cooked
in tl/e wanning drawer.
iiiiiiiii_i;_ii_i
Do not use tile wanning drmver to dry
newspapers. If o_erheated, they can catch
Oil flre.
Do not ]eme paper products, cooking
mensils or fbod in tile warming drawer
when not in use.
Nexer leave jars or cans of fi_t drippings in
or near your wanning drmver
Alwavs, keep wooden and plastic utensils
and canned fbod a safe distance away flom
your wanning drinker.
Do not warm %od in the wam_ing drmver
fbr more than two hours.
REMEMBER:Tile inside surfime of the
wanning drawer may be hot when the
drawer is opened.
iiiiiiiii_i_i_iiiiii
Use care when opening die drays>i: Open
the drawer a crack and let hot air or steam
escape befbre removing or replacing fbod.
Hot air or smam which escapes can cause
burns to hands, fi_ce and/or eyes.
iiiiiiiii_i;_ii_i
Do not use aluminum fbil to line the drawer
Foil is an excellent heat insulator and will
trap heat beneath it. This will upset tile
perfbrmance of tile drawer and it could
damage tile interior finish.
ge.com
SURFACEUNITS--ALLMODELS
Use proper pan size-select cookwaro having fiat bottoms largo enough to cover the surface unit
heating element. The use of undersized cookwaro will expose a portion of the surface unit to direct
contact and may result in ignition of clothing. Proper relationship of cookwaro to surface unit will also
improve efficiency.
Never leave tile surfi_ce units unattended at
high heat settings, goilo_ers cause smoking
and greasy spillo_ers that may catch on fire.
iiiiiiiii_i_i_iiiiii
Only certain types of glass, glassXeramic,
earthem._;_re or oilier gtazed containers are
suitable fbr cooktop service; others may
break because of the sudden chang> in
temperature.
iiiiiiiii_i_i_iiiiii
To minimize d_e possibility' of bums,
ignition of flammable mamrials and spillage,
the handle of a container should be mined
toward the center of the range without
exmnding o_r nearby surfime units.
Alwavs turn the surfi_ce traits off belL)re
remo_qng cookware.
Do not flame fbods on the cooktop, lfvou
do flame fbods under tile hood, turn tile
fill/ Oil.
Keep an eye on %ods being flied at high or
medium high heat settings.
Foods %r flTing should be as dry as possible.
Frost on flozen %ods or moisture on flesh
fbods can cause hot fi_tto bubble up and
over the sides of the pan.
Use little fi_t%r effectixe shallow or deep fi_t
fl?ing. Filling the pan too fldl of fi_t can
cause spillo_ers when food is added.
K a combination of oils or fi_ts will be used in
flying, stir together befbre heating, or as fi_ts
meh slowly.
Always heat fi_t slowly, and watch as it heats.
Use a deep fi_t them_ometer whenexer
possible to prevent o_erheating fi_t beyond
the smoking point.
= u
m
g
m
m
m
iMPORTANTSAFETYiNFORMATION.
READALLiNSTRUCTiONSBEFOREUSING
?:,7 ,',"2111
iillili!lii{!
r.J
RADIANTSURFACEUNITSron
Use care when touching the cooktop. Theglass surface of the cooktop will retain heat after the controls
have been turned off.
Avoid scratching the glass cooktop. The
cooktop can be scratched with imms such as
sharp insuuments, rings or other jewel U and
rivets on clothing.
Large scratches or impacts to glass doors
or cooktops can lead to hroken or shattered
glass.
Do not operam fl_e radiant surfitce units if
the glass is broken. Spi]lo_rs or cleaning
solution may penetram a broken cook/op
and creak a risk of electrical shock. Contact
a qualified mchnician immediam]y should
your glass cooktop become broken.
iiiiiiiii_i;_ii_i
Clean the cook/op with caution. If a _._>t
spong> or cloth is used to wipe spills on a
hot surfi_ce unit, be carefld to a\_id steam
burns. Some cleaners can produce noxious
fmnes if applied to a hot surfime.
NOTE" _\_ recommend that you avoid wiping
any surfime unit areas m_fil they hax_ cooled
and the indicator light has gone off. Sugar
spills are the exception to this. Please see
Cleaning the glass cooktop section.
*¢\_en the cooktop is cool, use only the
recommended cleaning cream to clean
the cooktop.
Nexer use the glass cooktop surfi_ce as a
cutting board.
Do not place or store items that can melt or
catch fire on the glass cooktop, e_en when it
is not being used.
Be carefld when placing spoons or other
stirring utensils on the glass cooktop surfi_ce
when it is in use. They may become hot and
w
m
w
could cause bums.
To axoid possible damage to the cooking
surfi_ce, do not apply cleaning cream to the
glass surfime when it is hot.
After cleaning, use a dry cloth or paper towel
to remoxe all cleaning cream residue.
Read and follow all inst, uctions and
warnings on the cleaning cream lahels.
Do not lift the cooktop. Lifting the cooktop
can lead to damage and improper operation
of the range.
COILSURFACEUNITSfort
m
r4_
iiiiiiiii_i_i_iiiiii
Clean the cooktop with caution. If a
wet sponge is used to wipe spills on a hot
cooktop, be carefid to avoid steam bums.
iiiiiiiii_i;_ii_i
To avoid the possibility' of a bum or electric
shock, ah.vays be certain that the controls for
all surfime units are at the OFFposition and
all coils are cool before attempting to lift or
remo_ a unit.
iiiiiiiii_i;_ii_i
Do not immerse or soak the remox ahle
surfi_ce units. Do not put them in a
dishwasher
iiiiiiiii_i_i_iiiiii
Be sure the drip pans and the _,>nt duct are
not covered and are in place. Their absence
during cooking could damag> range parts
and wiring.
iiiiiiiii_i_i_iiiiii
Do not use aluminum foil to line d_e drip
pans or anw.vhere in the oven except as
described in this manual. Misuse could
_esult in a shock, fi_e hazard or damag>
to the rang>.
READANDFOLLOWTHISSAFETYINFORMATIONCAREFULLY.
SAVETHESEINSTRUCTIONS
Usingthe surface units. Re.co,,
=.
Throughout this manual, features and appearance may vary from your model.
OFF
6
Be sure you turn the control knob
to OFFwhen you finish cooking,
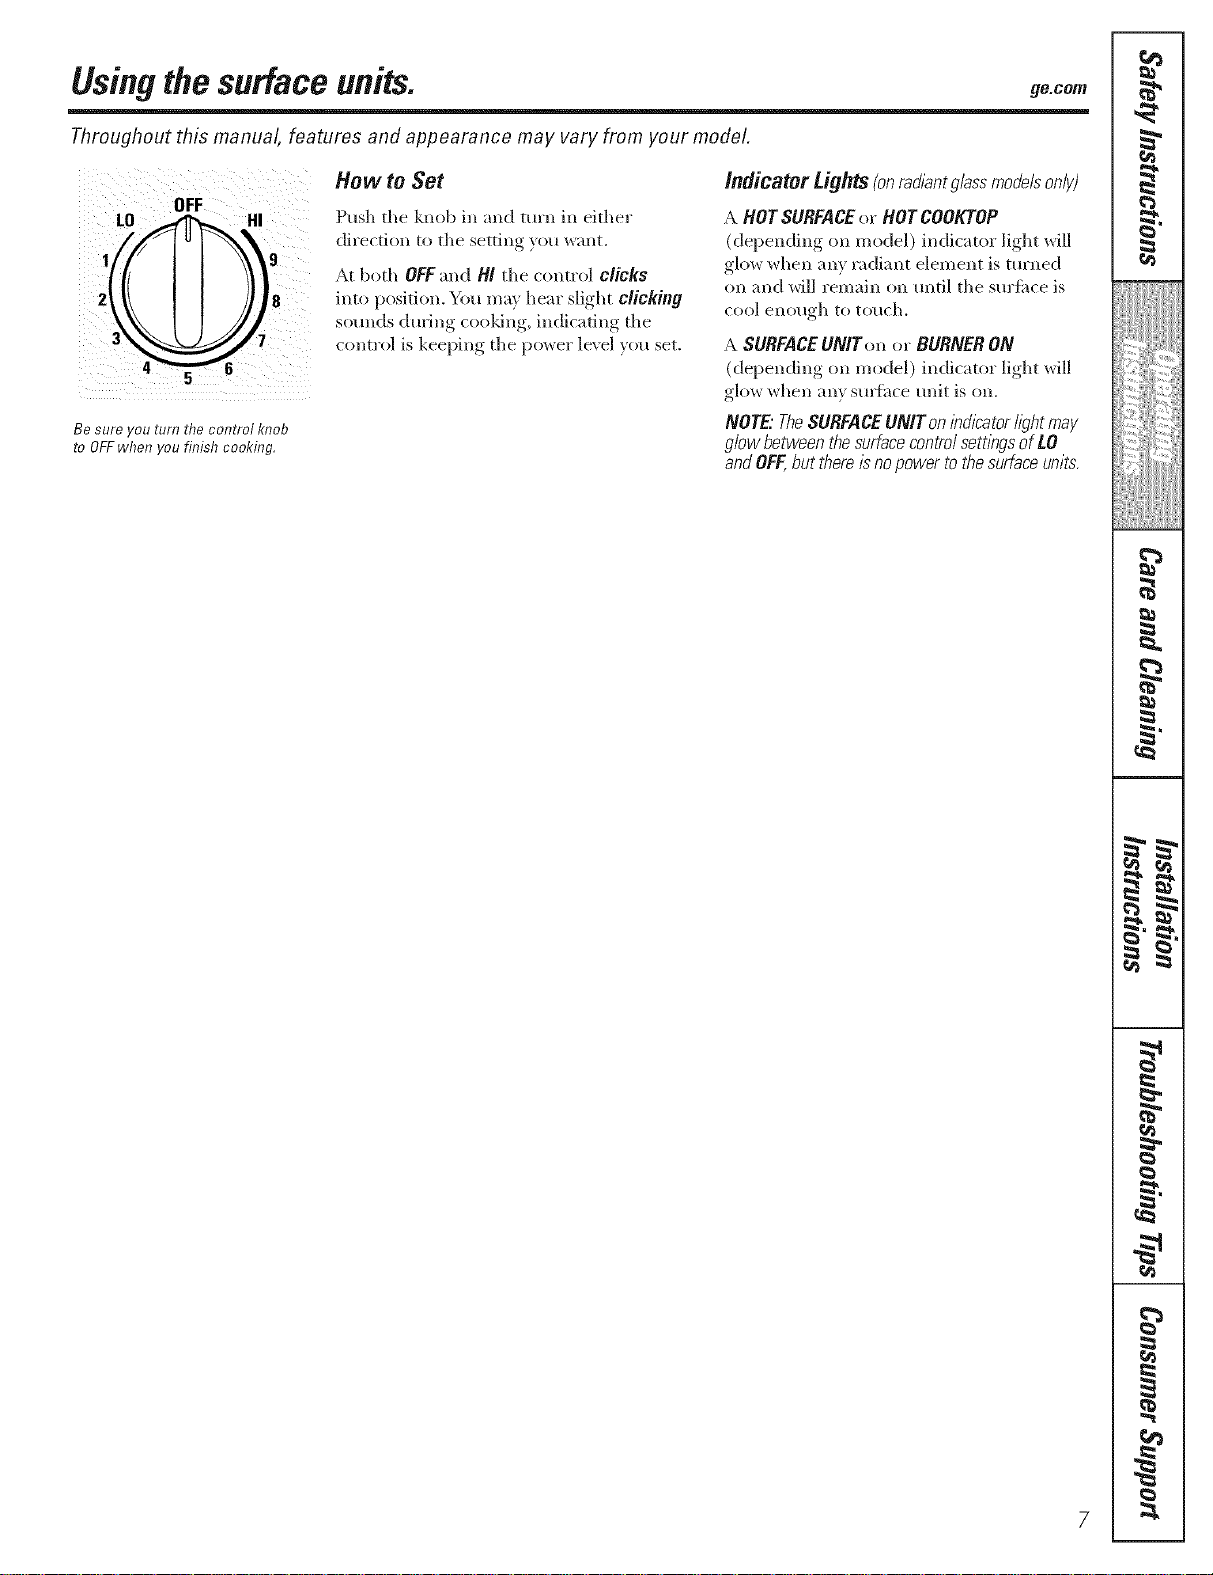
How to Set
Push the knob in and turn in either
direction to the setting you want.
At both OFFand Hi tile control clicks
into position. You may hear slight clicking
sounds during cooldng, indicating the
control is keeping tile power ]e\ el you set.
indicatorLights(onrad/antglassmodelsonly)
A HOT SURFACEor HOT COOKTOP
glow when ally radiant element is turned
on and will remain on until tile surtime is
COOlenough to touch.
A SURFACEUNtron or BURNER ON
glow when ally sulihce unit is on.
NOTE"TheSURFACEUNtr on/bd/2atorI/_?htmay
glow between the surfacecontrol sett/bgsof LO
andOFF,but there/2 no power tothe surface units.
_4
(depending on model) indicator light will
(depending on model) indicator light will
€
=.
=.
€
{1
i
w
m
€
€
i
€
€

Usingtheradiantsurface units, somemode/sI
About the radiant surface units...
Tile radiant cooktop featm'es heating units
beneath a smooth glass surfime.
M
NOTE:Ash_?htodor/snormalwhenanewcooktop
/susedforthe firsttbTe./t /scausedbytheheatbg
ofnewpartsand/bsu/at/bgrnatena/sandwill
disappearb ashortt/riTe.
The sm{i_ce unit will cxcle on and off to
Never cook directly on the glass.
Always use co&ware.
maintain }ore" selected control setting.
It is safe to place hot cook_<u'e from tile
oven o1" S[ll'fitce Oil tile glass S[ll',4ilce xdlen
Watersta/bs(rn/beraldeposits)are removable
us/bgthe clean/hgcream or full-strength white
wnegar
Useof w/bdow cleanermay leavean/bdescent
filrn on thecooktop. Theclean/bgcmarn w#l
removethis discoloration.
Don?storeheavy/ternsabovethecooktop.If they
dropontothecooktop,theycancausedamage.
Donotusethesurfaceasa cutt/hgboar(Z
tile suHhce is cool.
Even after tile sm'fime units are turned ofl_
tile glass cooktop retains enough heat to
continue cooldng. To avoid ove>cooldng,
remove pans fi'om tile surfitce tlnits when
tile fbod is cooked. A\oid plating anprhing
on the surfime unit until it has cooled
completel>
Always place the pan in thecenter of
the surface unit you are cooking on.
Do not slide cookware across the cooktop
because it can scratch the glass--the glass
is scratch resistant, not scratch proof.
8
Temperature Limiter
E_vIy radiant sm_ilce unit has a
temperature limited:
The temperature limiter protects tile glass
cooktop fi'om getting too hot.
The temperature limiter may cycle tile
units ()if fi)r a time ifi
Thepan boilsdr/
Thepan bottom/s not flat.
Thepan /L_off center
There/sno pan on the unit.

Selectingtypesofcookware, ge.co,,
Thefollowing information will help you choose cookware which will give good performance on glass cooktops.
q
6
m
m
iiii il; i / ii i
Check pans for flat bottoms by using
a straight edge.
Pans with rounded, curved,
ridged or warped bottoms are
not recommended,
Stainless Steel:
recommended
Aluminum:
heavy weli?ht recommended
Good conductivity. _duminum residues
sometimes appear as scratches on tile
cooktop, bill can be I'el/l()\ ed if cleaned
immediately. Because ot its low melting
point, thin-weight ahm/inum should not
be used.
Copper Bottom:
recommended
Copper may leave residues which can
appear as scratches. Tile residues call be
iemoved, as king as tile cooktop is cleaned
immediately. HoweveL do not let these pots
boil d_'. Ovei'heated metal can bond to
glass cooktops. All overheated copper
bottom pot will leave a l'esidue that will
permanently stain tile cooktop if not
rein o\vd imm ediatel>
Porcelain Enamel Covered CastIron:
recommended
_s long as tile cookware is coveled
completely with porcelain enamel, this
cook\vai'e is i'ecolllI/lended. Catltion is
I'eCOlllI/lended IS)l" casviron cookwai'e
that is not completely covered with smooth
porcelain enamel, as it may scratch the
glass-ceramic cooktop.
Glass-ceramic:
usable,butnot recommended
Poor pe_fbl_nance. Ma_ scratch tile sm'fi_ce.
Stoneware:
usable,but not recommended
Poor pe_tkmnance. Ma,_scratch tile sm'tilce.
Home Canning Tips:
Be Stll'e tile (;lllllel" is Celltel'ed ovel" tile
sm'titce unit.
Make sm'e tile caroler is fiat on tile bottom.
Ijse recipes and procedures ti'om
repntable somces. These are available
Kom manuti|cturers such as gall <_and
Ke*F _ and tile Depamnent of Ag*{culture
Extension Sel_'ice.
To pi'e_ent btLl'llS fl'()lll stean/of heat, use
carillon vvhell C'lllllill *
t
m
q
m
I
m
q
I
{a
The following information will help you choose cookware which will give good performance on coil cooktops.
Surface Cookware Tips
Not over I inch
IJse medium- (>r hea\rv-weight cookware.
A]tllllintllll cookware condtlcts heat fi_ster
than other metnls. Cast-iron and coated
cast-iron cookware are slow to absoi'b heat,
1"
but geneivdly cook evenly at low to medium
heat settings. Steel pans may cook une\ enly
if not combined with other metals.
For best cooldng results, pans should be
fiat on tile bottom. Match tile size ot tile
saucepan to tile size (fftile sm_ime unit.
Tile pan should not extend over tile edge
(ff tile smfi_ce unit more than 1 inch.
Wok Cooking
Werecommendthatyouuseon/j/afiat-bottomed
wok. Thej/ are available at j/our local retail store,
Do not use woks that have suppolq_ l_ings.
rise of these t}l)es of woks, with (',r without
tlle _ing ill place, call be dangerous.
Use only flat-bottomed woks,
Placing tile ring o\el" tlle sulthce unit will
cause a buildup of heat that will damage
tile porcelain cooktop. Do not t W to use
such wol<s without tlle ;ing. You could be
sel_ionsly bm'ned if tile wok tips ovel:
m
=
d
=
=
q
I

.g
Usingtheoven controls. (onsomemode/st
Throughout this manual, features and appearance may vary from your model
OVEN CONTROLS
ONTROLS
OvenControl,ClockandTimerFeaturesandSettings
w
m
I
r4_
#.
o AKE/TEMP RECALLPad 0
To/uh this pad to select tile bake function.
BAKELight
F]ashes _]lile ill edit Illode--}oH (}lIl (}l}lI_ge
tile ()veil temperature at this point. Glows when
the oven is h_ bake mode.
or TIMER ON/OFFPad
T(_uch this pad to select tile timer feature.
Then touch tile ÷ and -pads to a(!just tile
timel:
TIMER Light
Flashes \dfile ill edit mode--y()u can change
KITCHEN TIMERON/OFF
START/ONPad
h
Must be touched to start any cooking or
cleaning function.
O Display
Shows tile time (ff day, o_en temperatm'e,
whether the oven is ill tile bake, broil or
sell:cleaning mode and tile times set for
tile tiI/ler el atltOlllatic ()veil opel';ltions.
the set time at this point. Glowswhen the timer
has been activated. Flashes again when the time
has mn out tmtil the control is reset.
CLOCKPad
To set tile clock, press this pad twice m_d then
press the ÷ and -pads. Tile time of day will
flash ill the display when tile ()','ell is first
ttlrlled on.
The display will sh()_rPREwhile preh eating.
\'\qlen tile oxen ieaches the selected
temperature, tile oxen control will beep and
tile display will show tile o\ ell tempemtm'e.
/f "F-anda numberorletter"flashInthed/splayandthe
ovencontrolsignals,th/2bd/?atesafunctionerrorcode.
If yourovenwassetforatithedovenoperationand
apoweroutageoccurred,theclockandallprogrammed
functionsmustbereset.
Thet/Theofdaywill flash/bthed/splaywhentherehasbeen
apoweroutage.Resettheclock.
If thefunctionerrorcodeappearsdunngtheself-clean/by
cycle,checktheovendoorlatch.Thelatchhandlemayhave
beenmoved,evenif onlyslightly,fromthelatchedposit/on.
Makesurethelatch/smovedtothenghtasfaras it willgo.
TouchtheCLEAR/OFFpad.Allow theoventocoolfor
onehourPuttheovenbackbto operation,ff thefunction
errorcoderepeats,disconnectthepowertotherangeand
callforsorvlco.
STARTTIME Pad (on some models)
_gJ
Use along with tile COOKINGTIMEor
SELFCLEANpads to set tile oven to start
and stop automatically at a time you set,
START TIME Light
Flashes \dfile ill edit mode--y()u can change
the start time at this point. Glo_vs_d_en tile
flmcfion has been activated.
COOKINGTIME Pad (on some models)
Touch this pad and then touch tile + or -
pads to set tile ;lillOtlllt (1[ time you w;|nt VO/lr
filed to cook. Tile oven will shut off when tile
¢()()killg tillle has r[lll gilt.
COOKINGTIME Light
Flashes \dfile ill edit mode--y()u can change
the set time at this poim. Glows _d_en the
flmction has been activated. Flashes again when
tile time has run out until tile control isreset.
10

_e.com
q
1
6
m
m
OvenControl,ClockandTimerFeaturesandSettings
AUTOMATIC OVEN Light (on some models)
@
This lights am¢inle tile ()veil has been
l)I°graramed, usino,,_tile COOKINGTIMEor
START TIME itm ctions.
OVENLIGHT or "+': Pad
0
Touch this pad to turn tile oven light on or off.
-Pad
Short taps to this pad will decrease tile time
or temper;|mre by small amounts. Touch
and hold the pad to decrease tile time or
temperature 1U larger amounts.
+ Pad
0
Short taps to this pad will increase tile time
or tempeiamre by small amounts. Touch
and hold tile pad to increase tile time or
teI//per;fft/re by largel" aI//(s/lnts.
SELFCLEAN Pad
Touch this pad to select the self:cleaning
function. See tile Using the self-cleaning even
sectioll.
CLEANLight
Flashes while in edit mode--you can change
tile length of time tbr the seltklean c}vle at this
point. Glo_:s when tile (_Xre*_iS i*_the self:_lean
wcle. _M_er the selt_lean wcle, dae light will
turn of*_Unlatch the dool:
Indicator Lights (on some pads)
EOITmode lasts several seconds after the last
padpl'ess.STARTTIMEON/OFFand COOKING
rIME ON/OFFwill be the only pads lit if either
of these options is selected. (Example: START
rlMEis selected with BAKE the STARTTIME
pad will remain lit until the clock reaches tile
proglammed time, at which point it will turn
off and the BAKE/TEMPRECALLpad ligtlt will
light up).
t
m
q
1
m
I
m
q
I
m
N
m
CLEAR/OFFPad
Touch this pad to cancel ALL o\vn operations
except tile clock and timer.
BROIL HI/tO Pad
Touch this pad to select tile broil fim(tion.
BROIL Light
Hashes while ill edit Illo(te--}_stl call swJtc}l
fi'om HI to tO BROIL at this point. Glo_:s _daen
tile ()veil is ill broil mode.
m
m
I
=
N
d
=
=
q
N
I
77
Usingtheoven.
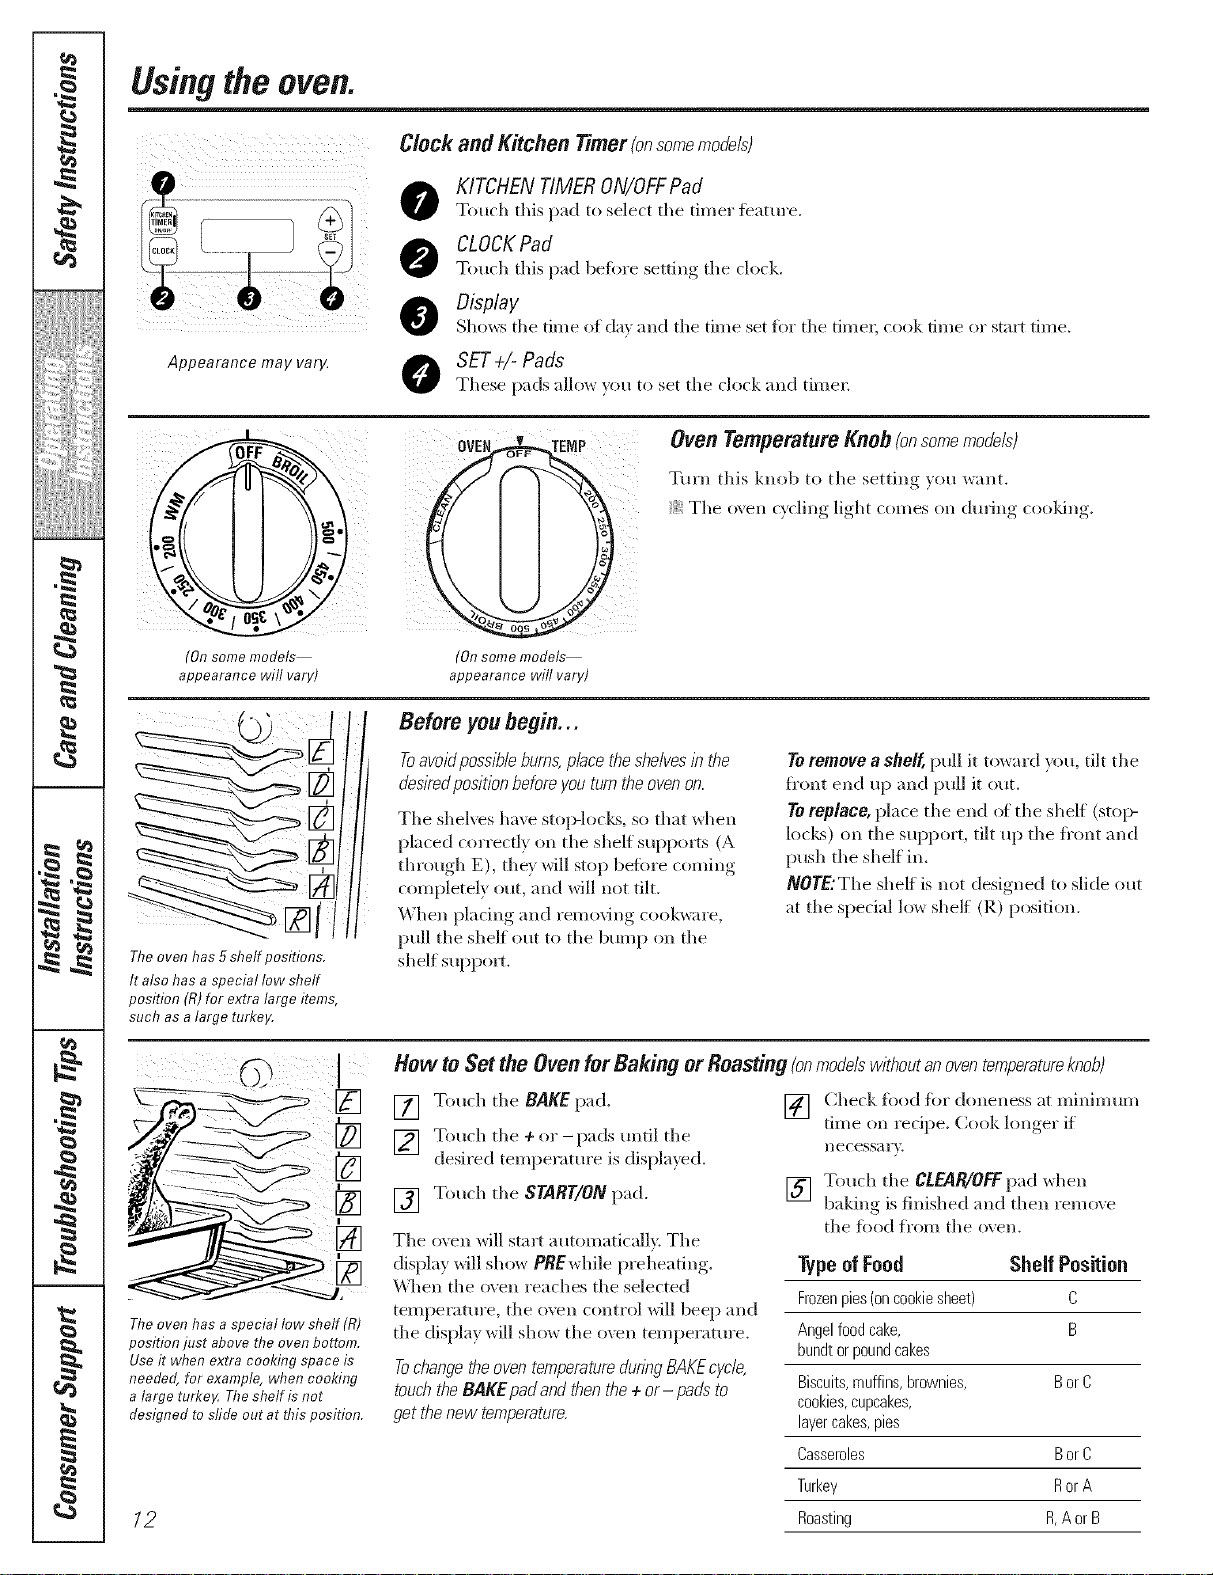
Clock and Kitchen _':---- - -- ' _Hm_rlonsomemoaelst
Touch this pad to select the timer featm'e.
M
CLOCKPad
KITCHEN TIMERON/OFFPad
Touch this pad before setting tile clock.
Display
O Shows tile time of da} and tile time set for tile time_; cook time or start time.
Appearance may vary.
(On some models
appearance will vary)
h
Theoven has 5shelf positions.
It also has a special low shelf
position (R)for extra large items,
such as a large turkey,
SET÷t-Pads
These pads allo_ )ou to set the dock and time_:
Oven Temperature Knob (onsomemodels)
i i
(Onsome models
appearance will vary)
Turn this knob to the setting you want.
i_i ii
Tile o\en c}cling light comes on during cooldng.
Before you begin...
Toavoid poss/7_/eburns, p/ace the she/ves /b the
des/red pos/t/on before you turn the oven on.
Tile shelves have stop-locLs, so that when
placed correctly on tile shelf supports (A
through E), tile}' will stop befbre coming
completely out, and will not tilt.
When placing and removing cool<ware,
pull tile shelf out to tile bump on tile
shelf suppox_.
To remove a shelf, pull it toward you, tilt the
fl'ont end up and pull it out.
TO replace, place tile end of tile shelf (sto}>
loci<s) on tile suppo_% tilt up tile fl'ont and
push tile shelf ill.
/VOYE:The sheff is not designed to slide out
at tile special low shelf (R) position,
B_
1=
I
m
Hew to Set the Oven for Baking or Roasting (onmodelswithoutanoventemperatureknob)
[] Touch the BAKE pad.
] Touch tile + or-pads tmtil tile
desired temperature is displa}ed.
[] Touch tile START/ON pad.
[] (]heck filed fiw doneness at minim um
time on recipe. Cook longer if
Ilecessarv.
[] Touch tile cLEAR/OFFpad ",dlen
baking is finished and then remove
tile food Kern tile oven.
The oven will start automatically. Tile
display will show PBEwhile preheating.
Type ofFood Shelf Position
\\]len tile oven reaches the selected
Frozenpies (oncookie sheet) C
Angel food cake, B
bundt orpound cakes
Biscuits,muffins, brownies, Bor C
cookies,cupcakes,
layercakes, pies
Casseroles Bor C
Turkey Ror A
Roasting R,A or B
Theoven has a special low shelf (R)
position just above the oven bottom,
Useit when extra cooking space is
needed, for example, when cooking
a large turkeF The shelf is not
designed to sfide out at this position,
12
temperature, tile oven control will beep and
the display will show the oxvn temperature.
Tochangetheoven temperaturedunbg BAKEcyc/e,
touchthe BAKE pad and thenthe ÷ or- padsto
get thenew temperature.
Typeof Margarine Wi// Affect Baking Performance!
ge.com
Most recipes for baking have been
developed using high fat products such
as butter or margarine (80%fat). If you
decrease the fat, the recipe may not
give the same results as with a higher
fat preduct.
Recipefailurecanresultffcakes,pies,pastries,
cookiesorcandiesaremadewithlowfatspreads.
Thelowerthefatcontentera spreadproduct,the
morenot/2eab/ethesedifferencesbecome.
Preheating andPan Placement
Preheat the oven if the redpe calls fiw it.
To preheat, set the o\vn at the correct
temperature. Preheating is necessaiw fllr
good results when baldng cakes, cookies,
past U and breads.
Forovenswithout a preheat/hd/kator I/_Thtortone,
preheat 10mlbutes.
Onsome models,the display will show "PRE"
while preheatlbg. When the ovenreachesthe
selected temperature,the ovencontrol will beep
and thedisplaywill show the oventemperature.
Federal stnndards require products labeled
"margarine" to contain at least 80% fi_t by
weight. Low-fia spreads, o1, the other band,
contain less ti_t and more water. The high
moisture content of these spreads affects
the texture and flavor of baked goods. For
best results with your old fiivofite recipes,
use maigafine, butter or stick spreads
containing at least 70% _vgetable oil
Baking results will be better if baking pans
are centered in the o_ en as llltlch as
possible. Pans sh(mld not touch each other
or the walls el the o\vn. If v(/u need to use
two shelves, stagger the pans so ()lie is not
direcdy abo\v the ethel; and leave
appro_mately 1½" Kern the fl'ont of the
pan to the fl'ont of the shell
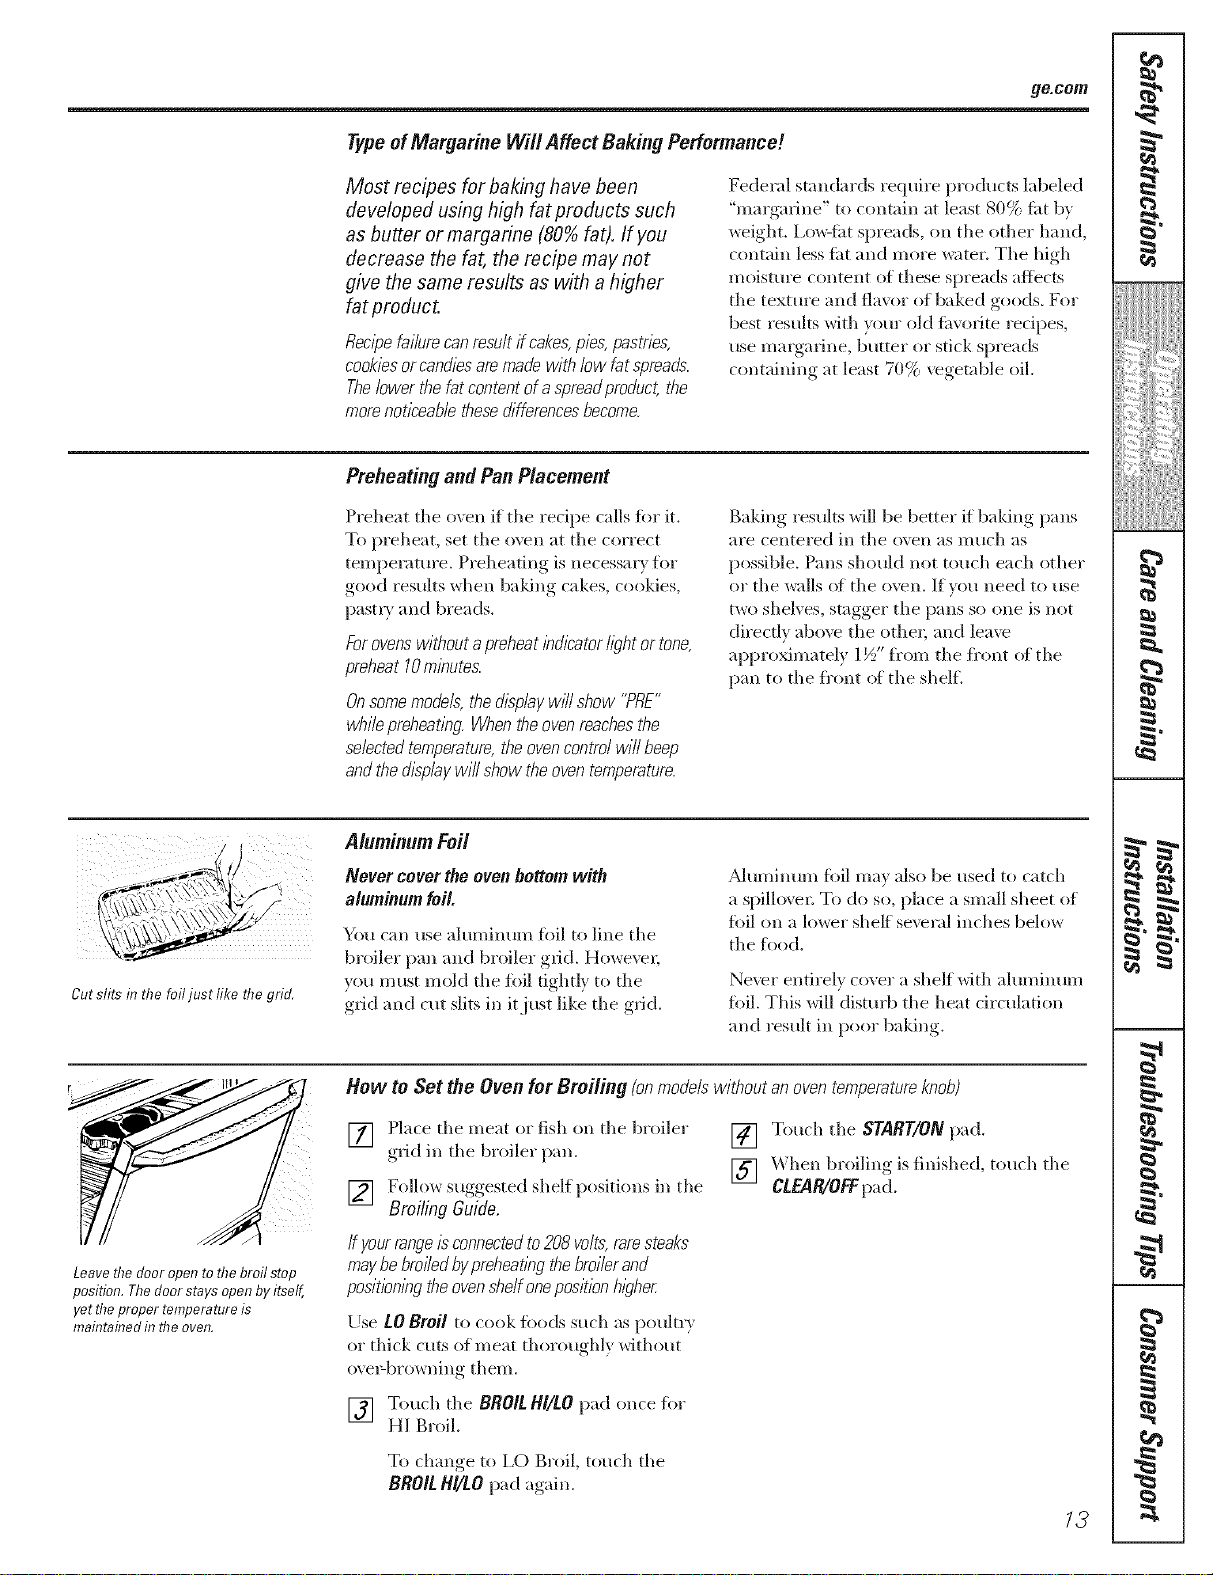
Cut slits in the foiljust like risegrid.
Leave the door open to the broil stop
position. The door stays open by itself,
yet the proper temperature is
maintained in the oven,
Aluminum loft
Never cover the oven bottom with
aluminum foil.
You can use aluminum fidl to line the
broiler pan and bH)iler grid. Howe\vl;
you must mokl the filil tightly to the
grid and cut slits in it just like the grid.
_Mmninmn fi)il may also be used to catch
a spillovel: To do so, place a small sheet (If
fi)il on a lower sheff several inches below
the fl)od.
Never entirely cover a shelf with aluminum
fi)il. This will distt/rb the heat drculation
and result in pool baking.
How to Set the Oven for Broiling (onmodelswithoutanoventemperatureknob)
[] Place the meat or fish (m the broiler
grid in the broiler pan.
[] Foll(/w suggested shelf positions in the
Broiling Guide,
/f yourrange/s connectedto 208 volts,raresteaks
maybe broiledby preheat/bgthebroilerand
pos/t/on/bgthe ovenshelfone positionh/_lher.
Use LOBroil to cook fl)ods such as poultl 3
or thick cuts (If meat thoroughl)without
o_e>browning them.
[] Touch the BROILHI/LOpad ()lice fi)r
HI Broil.
[] Touch the START/ON pad.
[] _ben broiling is finished, touch the
CLEAR/OFFpad.
To change, to 1,0 Broil, touch the
BROIL HI/tO pad again.
73
Usingtheoven.
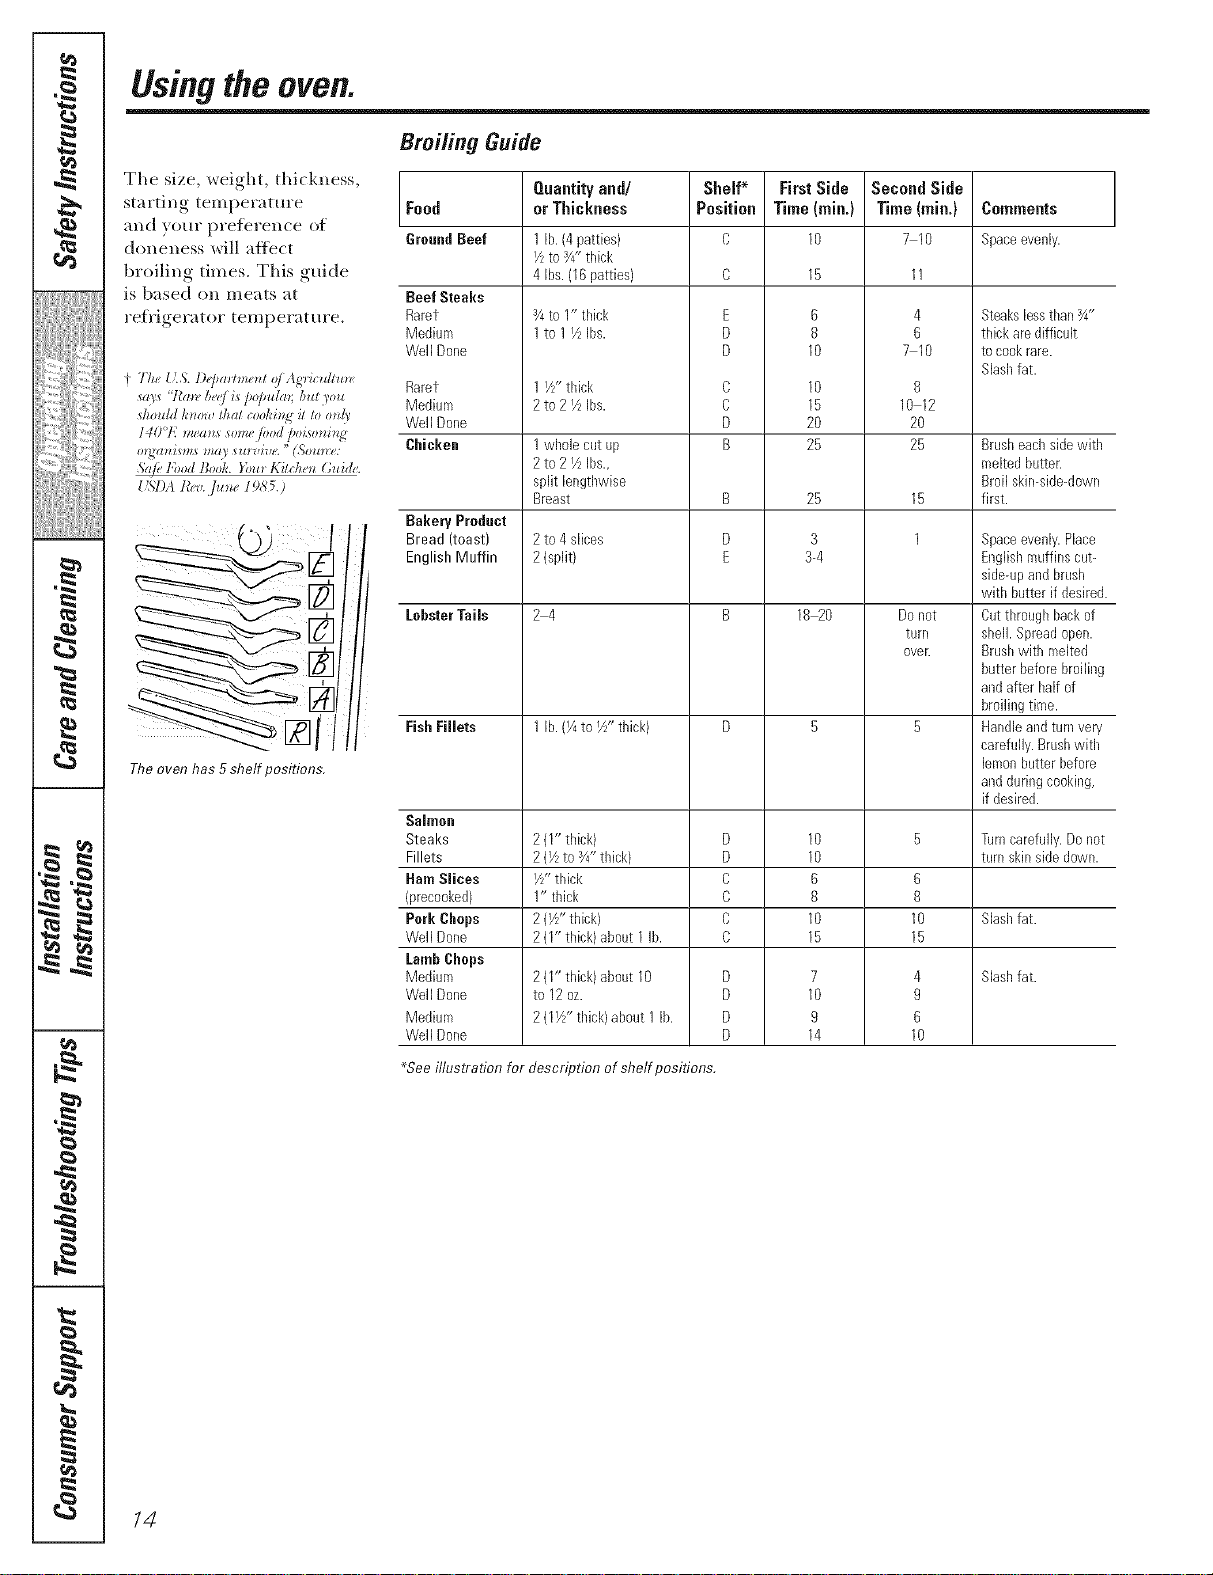
Broifing Guide
The size, weight, thickness,
starting tempei'ature
and your prderence of
doneness will affect
Food
GroundBeef
broiling times. This guide
is based (m meats at
retHgerator temperature.
Tireoven has 5shelf positions,
h
w
Beef Steaks
Raret
Medium
Well Done
Rarer
Medium
Well Done
Chicken
Bakery Prodact
Bread (toast)
English Muffin
Lobster Tails
FishFillets
Salmon
Steaks
Fillets
HamSlices
(precooked)
Perk Gimps
Well Done
LambChops
Medium
Well Done
Medium
Well Done
*See illustration for description of shelf positions.
Quantity and/
or Thickness
1 lb. (4patties)
IZ to3/4"thick
4 Ibs.(16patties)
_/4to I" thick
1to 1IZ Ibs.
1 I/Z'thick
2to21Z Ibs.
1wl_olecut up
2to 2 IZIbs.,
split lengtl_wise
Breast
2to 4 slices
2(split)
24
1 lb. (I/4to I/Z' thick)
211" thick)
2(Vzto Y4"tNck}
I/z"thick
1" thick
2(Yz"thick)
2(1" thick) about 1 lb.
2(1" thick) abeut 10
to 12 oz.
2(11/Z' thick)aboutI lb.
Shelf* First Side
Position Time(rain.)
O 10
E
D
D
C
C
D
B
B
D
E
D
D
C
C
C
C
D
D
D
D
6
8
10
10
15
20
25
25
3
3-4
18 20
10
10
6
8
10
15
7
10
9
14
Second Side
Time(rain.)
710
4
6
710
8
10 12
20
25
15
1
Donot
turn
over.
6
8
10
15
4
9
6
10
Ce|nraents
Spaceevenly.
Steakslessthan¾"
thick are difficult
tocookrare.
Slashfat.
Brusheachsidewith
meltedbutter.
Broil skin-side-down
first.
Spaceevenly.Place
Englishmuffins cut-
side-upandbrush
with butter if desired.
Cutthroughback of
shell. Spreadopen.
Brushwith melted
butter beforebroiling
andafter half of
broilingtime.
Handleandturnvery
carefully.Brushwith
lemonbutterbefore
andduringcooking,
if desired.
Turncarefully.Do not
turn skinsidedown.
Slashfat.
Slashfat.
tz
m
I
/4
q
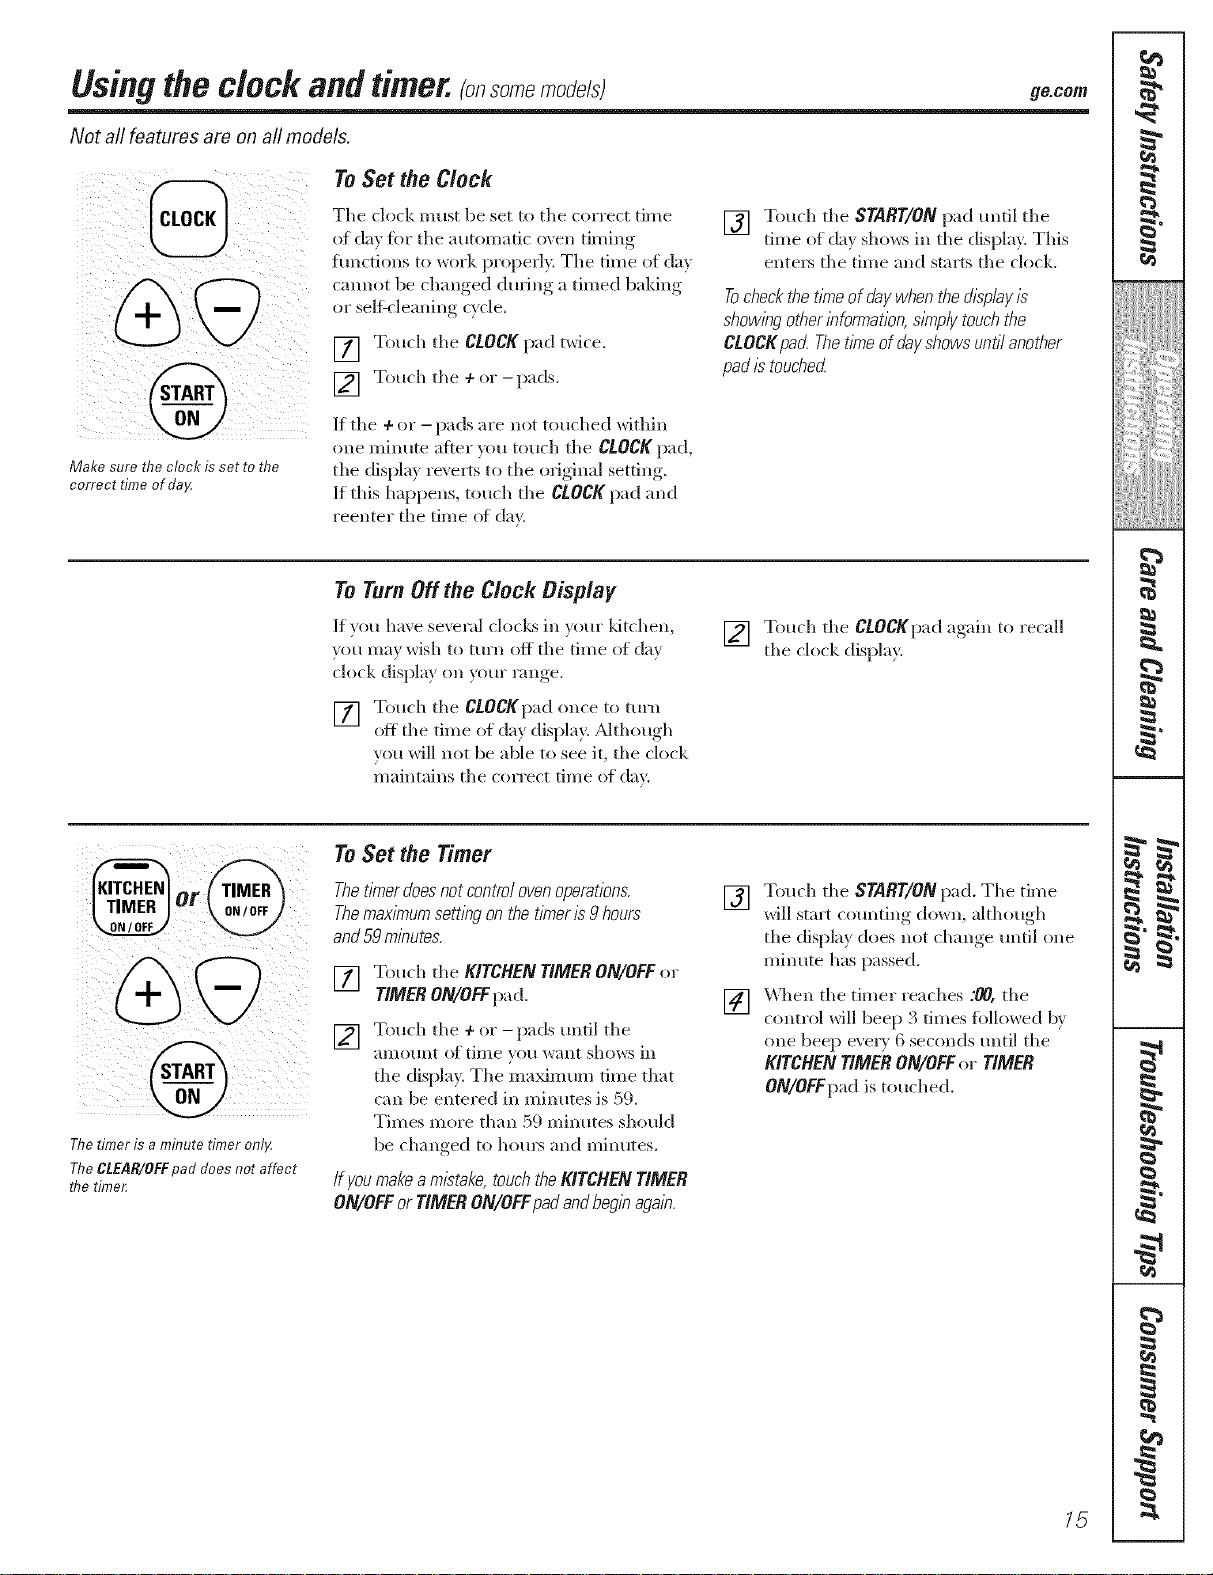
Usingthe dock andtimer, somemodels; 9e.oo,,
Not aft features are on all medals.
To Set the Clock
Make sure the clock is set to the
correct time of daI4
The clock mils( be set to the correct time
of da} for the automatic oven (lining
iuncfions to work properly. The time of da_
cannot be changed during a timed baking
o_ self-cleaning c}cle.
[] Touch the CLOCK pad twice.
[] Touch the + or-pads.
If the ÷ or - pads are not touched within
one minute a4,ter you touch the CLOCK pad,
the display revells to the original setting.
If this happens, touch the CLOCK pad and
reenter the time ot day.
To Turn Off the Clock Display
If you have severid clocks in v()(lI" ldtchen,
you may wish to turn off the time of day
clock display on ',_mr range.
[] Touch the CLOCKpad ()lice tO ttlFII
off the time of da} display. ;dthough
you will not be able to see it, the clock
maintains the correct time of day.
[] Touch the START/ONpad until the
time of da_ shows in the display This
elIte_ the (line and starts the clock.
Tocheckthet/kneof daywhenthedisplay/s
show/))gotherbfomTation,s/?nplytouchthe
CLOCKpad.Thet/riTeof dayshowsuntilanother
pad/2touched.
[] Touch the CLOCKp',|d again to recall
the clock display.
6
m
m
t
m
q
m
I
m
q
I
m
N
m
r TIVlER
0 _ /OFF
I
The timer is a minute timer onllz
The CLEAR/OFF pad does not affect
rive time_
To Set the Timer
Thet/?nerdoesnotcontrolovenoperations.
Themax/nTumsett/))gonthet/?ner/s9hours
and59rn/))utes.
[] Touch the KITCHENTIMERON/OFFor
TIMERON/OFFpad.
] T(luch the ÷ or - pads mItil the
amomit ot time you want shows in
the display. The ma_lmmi time that
can be entered in minutes is 59.
Times more than 59 lninutes should
be changed to hom_ and minutes.
/f you make a m/stake,touch the KITCHEN TIMER
ON/OFFor TIMER ON/OFFpadandbeg/))aga/)7
[] Touch the START/ON pad. The time
will start countil_g do_,_li, although
the display does not change until one
minute has passed.
[] \'\q_en the tinier reaches :_, the
control will beep 3 times iollowed by
one bee}) eveI T 6 seconds until the
KITCHEN TIMERON/OFF o_ TIMER
ON/OFFpad is touched.
i
m
I
=
d
=
=
"I
q
15
I
"1
"I
,g
Using the clock andtimer._ so_e_o_e/st
Not all features are on a// models.
To Reset the Timer
@
OV
@
or
If the display is still showing tile time
remaining, you may change it b v touching
tile KITCHEN TIMER ON/OFFor TIMER
ON/OFFpa d, then toll(h th e + or - pa ds
until tile time _m want aI/pea_ in tile
display.
To Cancel the Timer
Touch tile KITCHEN TIMER ON/OFF
or TIMER ON/OFFpad _wire.
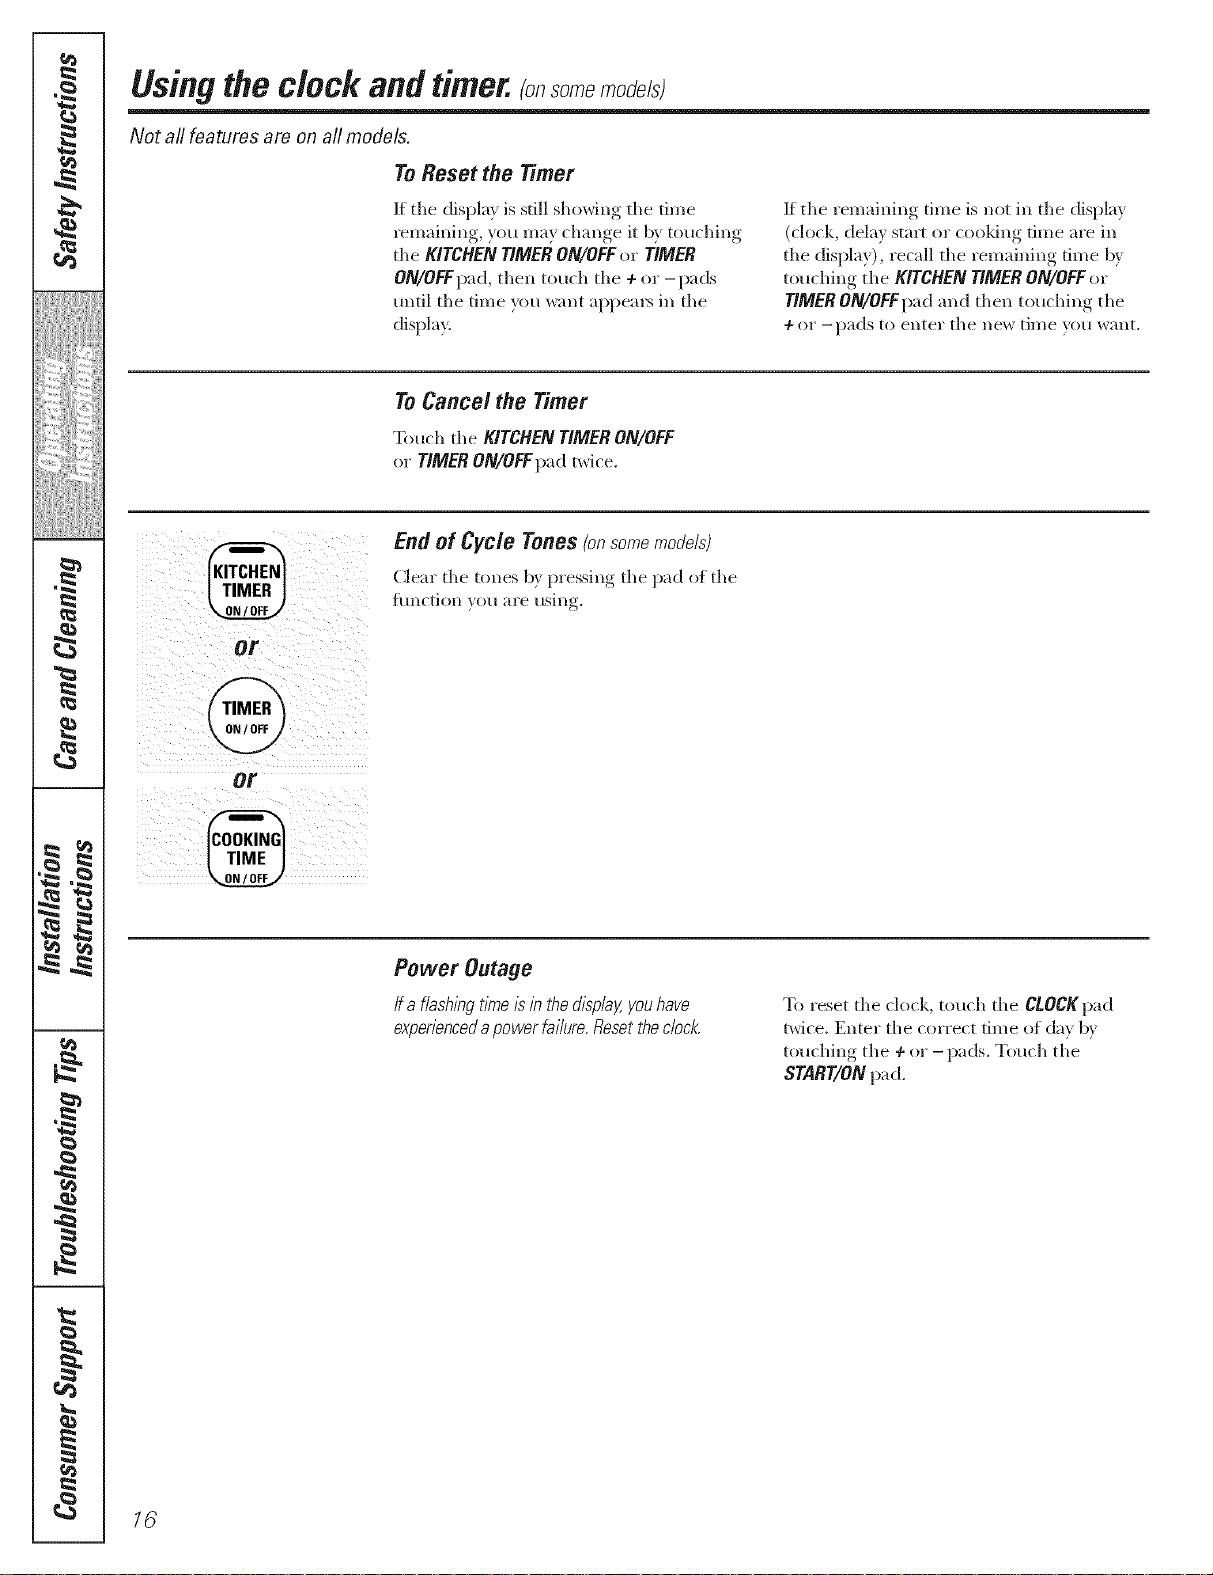
End of Cycle Tones(onsomemodels)
Clear tile tones b} pressing tile pad of tile
ftlnction VO/i "_l'e [ISill r
If tile remaining time is not ill tile display
(clock, delay stm_ or cooldng time are ill
tile display), recall tile remaining time by
touching the KITCHEN TIMER ON/OFF or
TIMER ON/OFFImd and then touching tile
÷ or - pads to enter tile IleW til//e yell want.
w
m
I
r4_
#.
rj_
h
@
Power Outage
/f a f/ashln9tlnTeisin the&splaY,youhave
experienceda powerfa//ure Resetthe dock
To reset tile ch)ck, touch the CLOCKpad
twice. Enter the correct time of da} b}
t(_uching tile 4-or - pads. Touch tile
START/ON pad.
76
 Loading...