

Hotpoint RS46J, RS47GJ, RB536J, RB525GJ, RA511J User Manual
...
Howto
g thebestfrom
AluminumFoil
Anti-TipBracket
ADDlianceRegistration
C~hningTips-
Care and Cleaning
Clock/Timer
Energy-SavingTips
Features
InstallationInstructions
I
1 Leveling
Modeland SerialNumbers
Oven
Baking, Baking Guide
~roi]ing, BroilingGuide ~o>z!
Control Settings
Door Removal
Light; Bulb Replacement 15,22
Roasting,RoastingGuide 18>19
Thermos@tAdjustment
VentDuct
———
20
3,5
22-24
14
6-9
15-21
16,17
15
22
23
22
useandcareof
—
2
5
5
5
2
models
—.._
‘; -)
Problem Solver
ReDairService
Safety Instructions
Sur-faceCooking
25
27
3,4
10-13
Readthisbookcarefully.
Itisintendedtohelp youoperate
andmaintainyour new ra~lge
properly.
Immediatelycontactthe dealer (or
builder)d~atsoldyoutilerange.
Keepithandy
for answersto your
questions.
If youdon’tunderstandsomething
or needmore help, write (include
yourphonenumber):
ConsumerAffairs
Hotpoint
AppliancePark
Louisville,KY 40225
writedownthemodel
YOU’11findthem on a label on
the front ofthe range behindthe
ovendoor.
These numbers are also on the
Consumer Product Ownership
RegistrationCard that came with
yourrange. Beforesendingin this
card, please write these numbers
here:
Checkthe Problem Solveron
page25.It listscausesof minor
operatingproblemsthatyoucan
correct yourself.
Model Number
Serial Number
Use these numbers in any
correspondence or service calls
concerning your range.
,
I
2
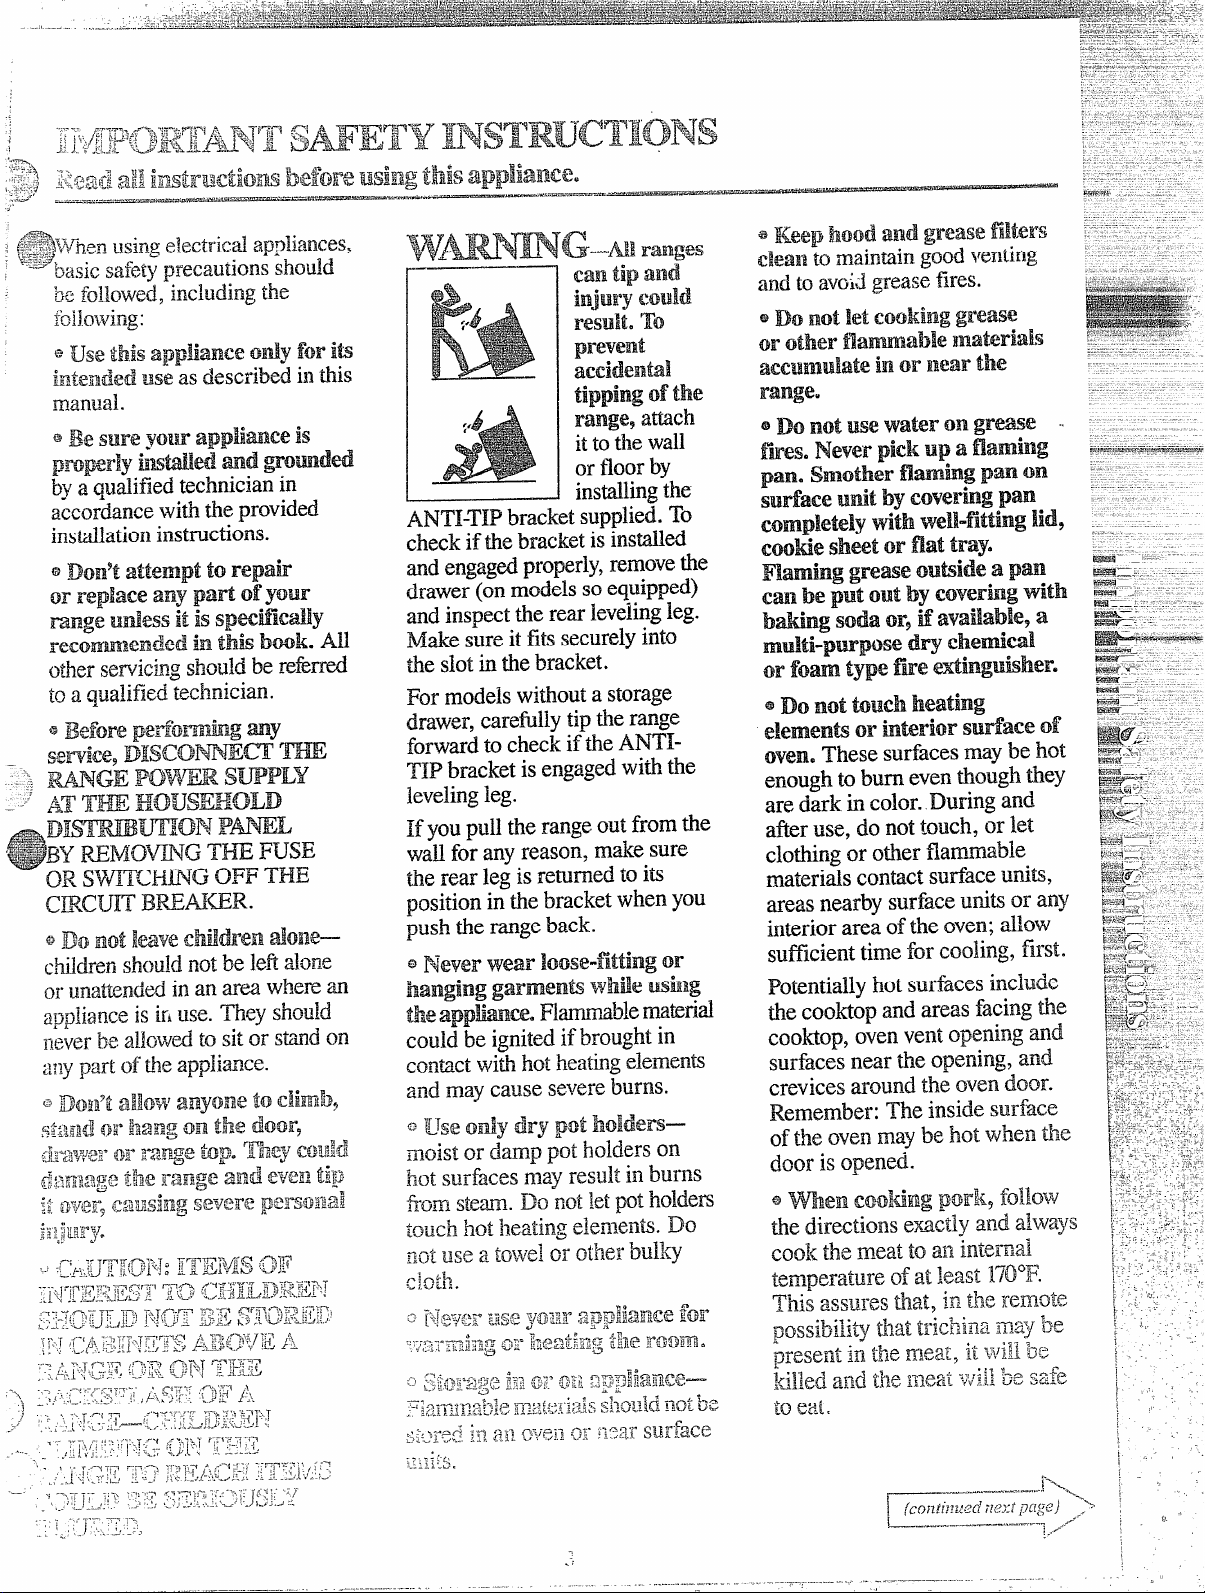
ANTI-TIPbracketsuppli~. To
.._.-—-—... ... --
..————-----.
check if tie bracketis inswd
andengagedproperly,removetie
drawer (on modelssoequipped)
and inspecttie rear levelingleg.
Make sure it fits securelyinto
tie slotintie bracket.
For modelswithouta storage
drawer,carefilly tip @erange
forwardto checkif tie ANTITIP bracket is engaged witi tie
Ievelhg leg.
If you pull the rangeoutfrom tie
waflforany reason, makesure
tie rear leg is re~rned toits
positionin tie bracket when you
push he rangeback.
.
..
.,
.-

.
.--—----.-—.-.—.-.—-...... . ..
-.
_..
. .
...
call Setfle intoSoitfloor ioverings
such as !cushion@d vinylor
{:arpeting.
When movingthe range
on thistypeof flooring, use care,
andit is recommended that these
simple and inexpensiveinstructions
be followed.
The rangeshouldbe installedon
a sheetofplywood (or similar
material)as follows:men the
floor coveting endsat $hefront of
the mnge, the area that the range
willreston shouldbe built up with
pIywoodto the samelevelor higher
thanthe floor covering.This will
allowthe rangeto be moved for
cleaningor servicing.
~~~ velingscrewsare located on
‘-ach corner of the base of the
Q
range. Removethe bottom drawer
(onmodels so equipped) and you
can levelthe range on an uneven
floor with the use ofa nutdriver.
To
remove drawer, pull dra’wer-
Qzlt all the way, tilt up the front
and talfe it out.ToK’eplaee
drawer, insert gliciesat back of
~~r~lverbeyondstop on range glides,
Ljft drawer if necessary to insert
easily.I.et front of drawer down,
then “push in to close.
* Use cookwareofmediumweight
alumIinum,with tight-fittii~gcovers,
andflat bottomswhich completely
covertheheatedportionofthe
surfaceunit.
@Cook fresh vegetableswith a
minimum.amountofwaterin a
coveredpan.
@Watchfoodswhenbringingthem
quicklyto tooting temperaturesat
HIGH heat. When foodreaches
cookingtemperature, reduceheat
immediatelyto lowestsettingthat
willkeep it cooking.
* Use residud heat with surface
tooting wheneverpossible. For
e-pie, w-hencookingeggsin the
shell, bring water and eggsto boil,
thenturn to OFF positionand
coverwith lid to completethe
cooking.
@Use correct heat for cookingtask:
HIGH—tostart cooking (iftime
allows,do not useHIGH heat to
start).
MEDIUM HI—quickbrowning.
MEDIUM—slowfrying.
LOW—finishcooking most
quantities, simmer—double
boiler
heat, finish cooking, and special
for small quantities.
WARM—tomaintain serving
temperature of most foods.
*Whe~Iboiling water for tea or
coffee, heat only amount needed.
1$is not economical to boil a
container full of water for one
or two cups.
OveaCoo]iimg
Preheatoven o131ywhen
@
necessary.Idost foods will cook
satisfactorilywithoutpreh~ating.
if youfindpreheatingis ncc~ssary,
watchthe indicatorIight,and put
foodinovenpromptlyafterthe
lightgoesout.
@Alwaystirn ovenOFF before
removingfood.
@During baking, avoid frequent
door openings.Keep door open as
shorta time as possibleifit is
opened.
@Cook completeovenmeals
insteadofjust one fooditem.
Potatoes,othervegetables,and
somedessertswill cooktogether
with a main-dish casserole,~meat
loaf, chickenor roast. Choose
foodsthatcook at the same
temperature and in approximately
the same time.
@Use residual heat inthe oven
wheneverpossibleto finish
tooting casseroles, ovenmeals,
etc. Also add.rollsoxprecooked
desserts to warm oven, using
residualheat to warm them.
..
-
—-—--—-—-
—-——.—v....
r_——
..O 1
“..-
.
o
*
**
+
.,
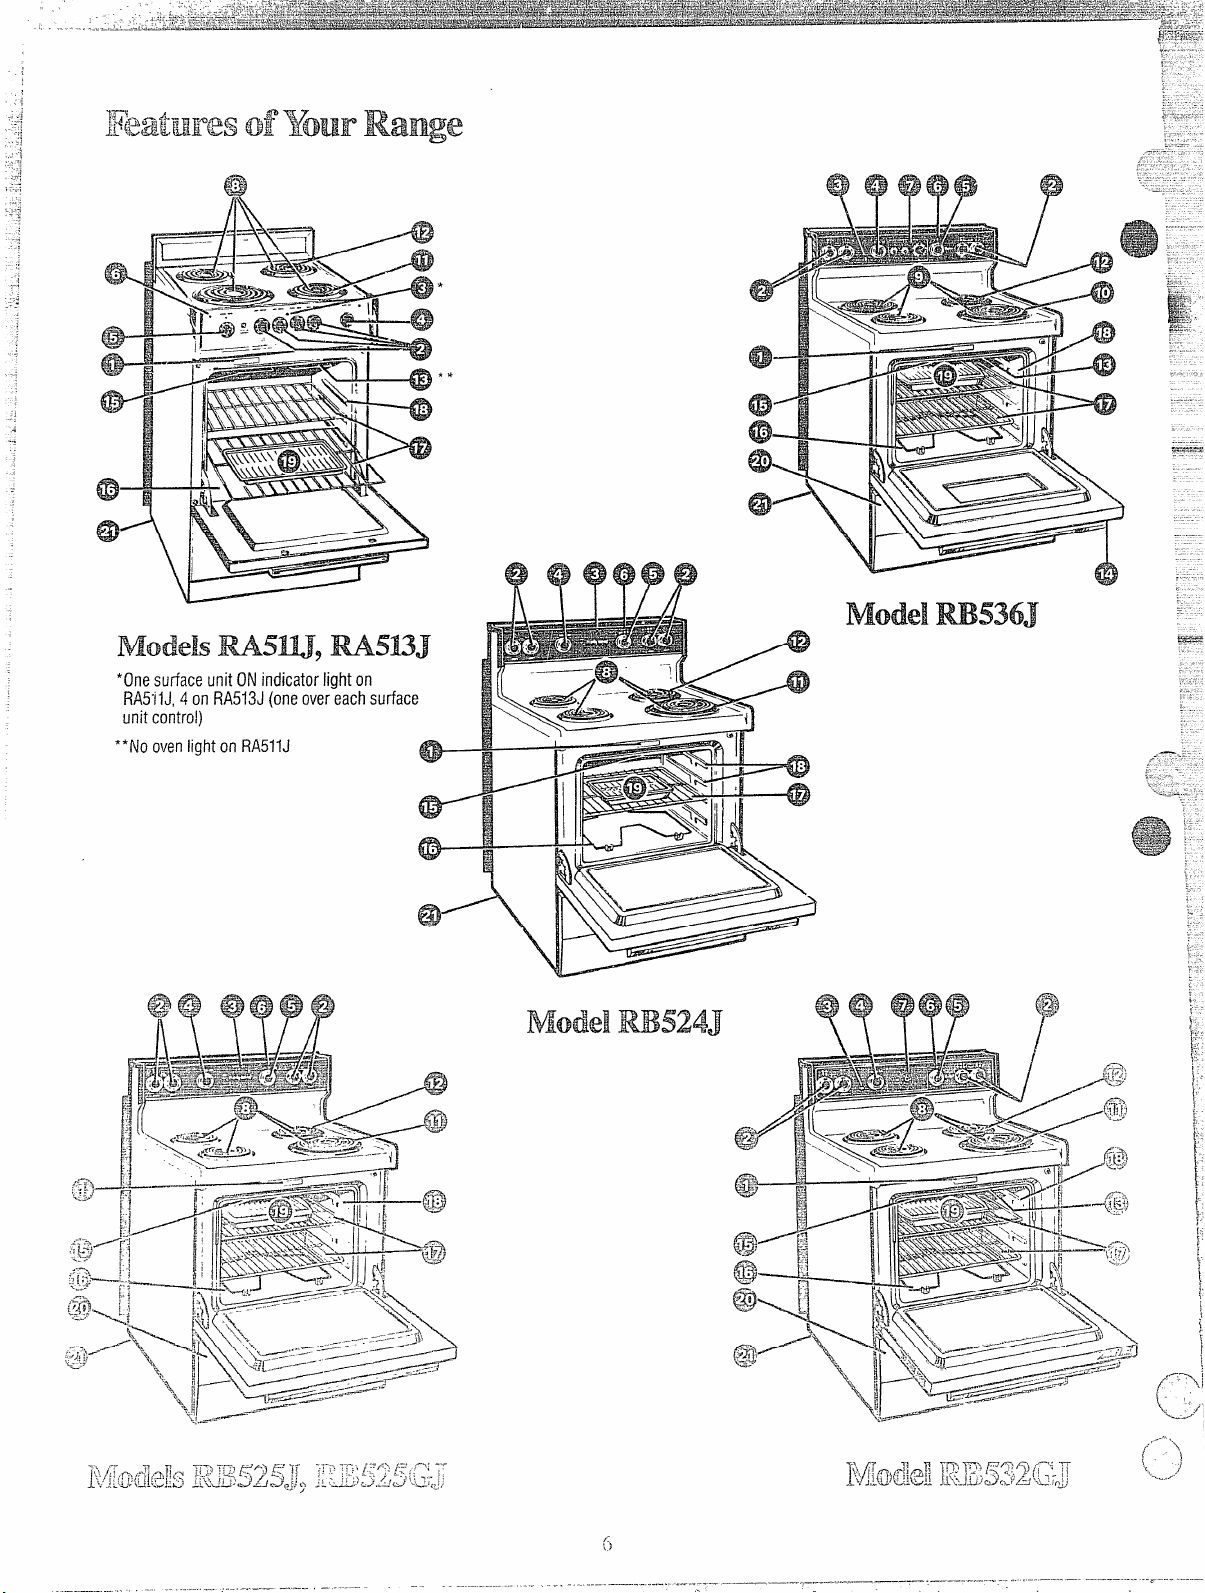
Modelsm5m, M5UJ
*One su~ace unit ON indicator light on
Rfi5-ilJ, 4
unit control)
*“No oven light on RA511J
onRA513J(one over each surface
,/
@

1 Modeland SerialNumbers
2 SurfaceUnitControls
3 “ON” IndicatorLight/Lights
forSurfaceUnits
4 OvenSetControl
5 OvenTernpControl
6 OvenCyclingLight
Model
RB524J
@
e
i
7 AutomaticOven Timer,
Clockand MinuteTimer
8 Stay-UpCalrod@SurfaceUnit
(,Mayberaisedbutnotremoved
whencleaningunderunit.)
9 Plug-InCalrod@SurfaceUnit
(May
be removedwhencleaning
underunit.)
10 Chrome-PlatedTrimRings
andPorcelainDripPans
11 Chrome-PlatedTrimRingsand
AluminumDripPans
I
12 OvenVentDuct(Locatedunder
rightrearsurfaceunit.)
I
13 OvenInteriorLight(Comeson
automaticallywhendooris opened.)
I
14 OvenLight Switch
I
15 BroilUnit
I
16 l~akeUnit(Maybe liftedgently
forwipingovenfloor.)
I
14
23 ] 3 6-in. 36-in.
23
22
22
22
22
15
4
@ @
4
e
36-in.
18-in.18-in. 18-in.
4
Q
3 6-in.
18-in.
e @
Clock&
MinaTlrner
3 6-in.
18-in.
2 6-in.
2 8-in.
Q
@
/ 17 OvenShelves
I 18 Ovei~SheifSup~~orts(LettersA, B, C and ‘
D
indicalecookingpositionsfor shelvesas
z-ecommcndedoncookingguides.)
1
20 StorageDrawer
I
I
j ~~
I
I I
2
Q
2
I
Q
I
—:
,
..
.
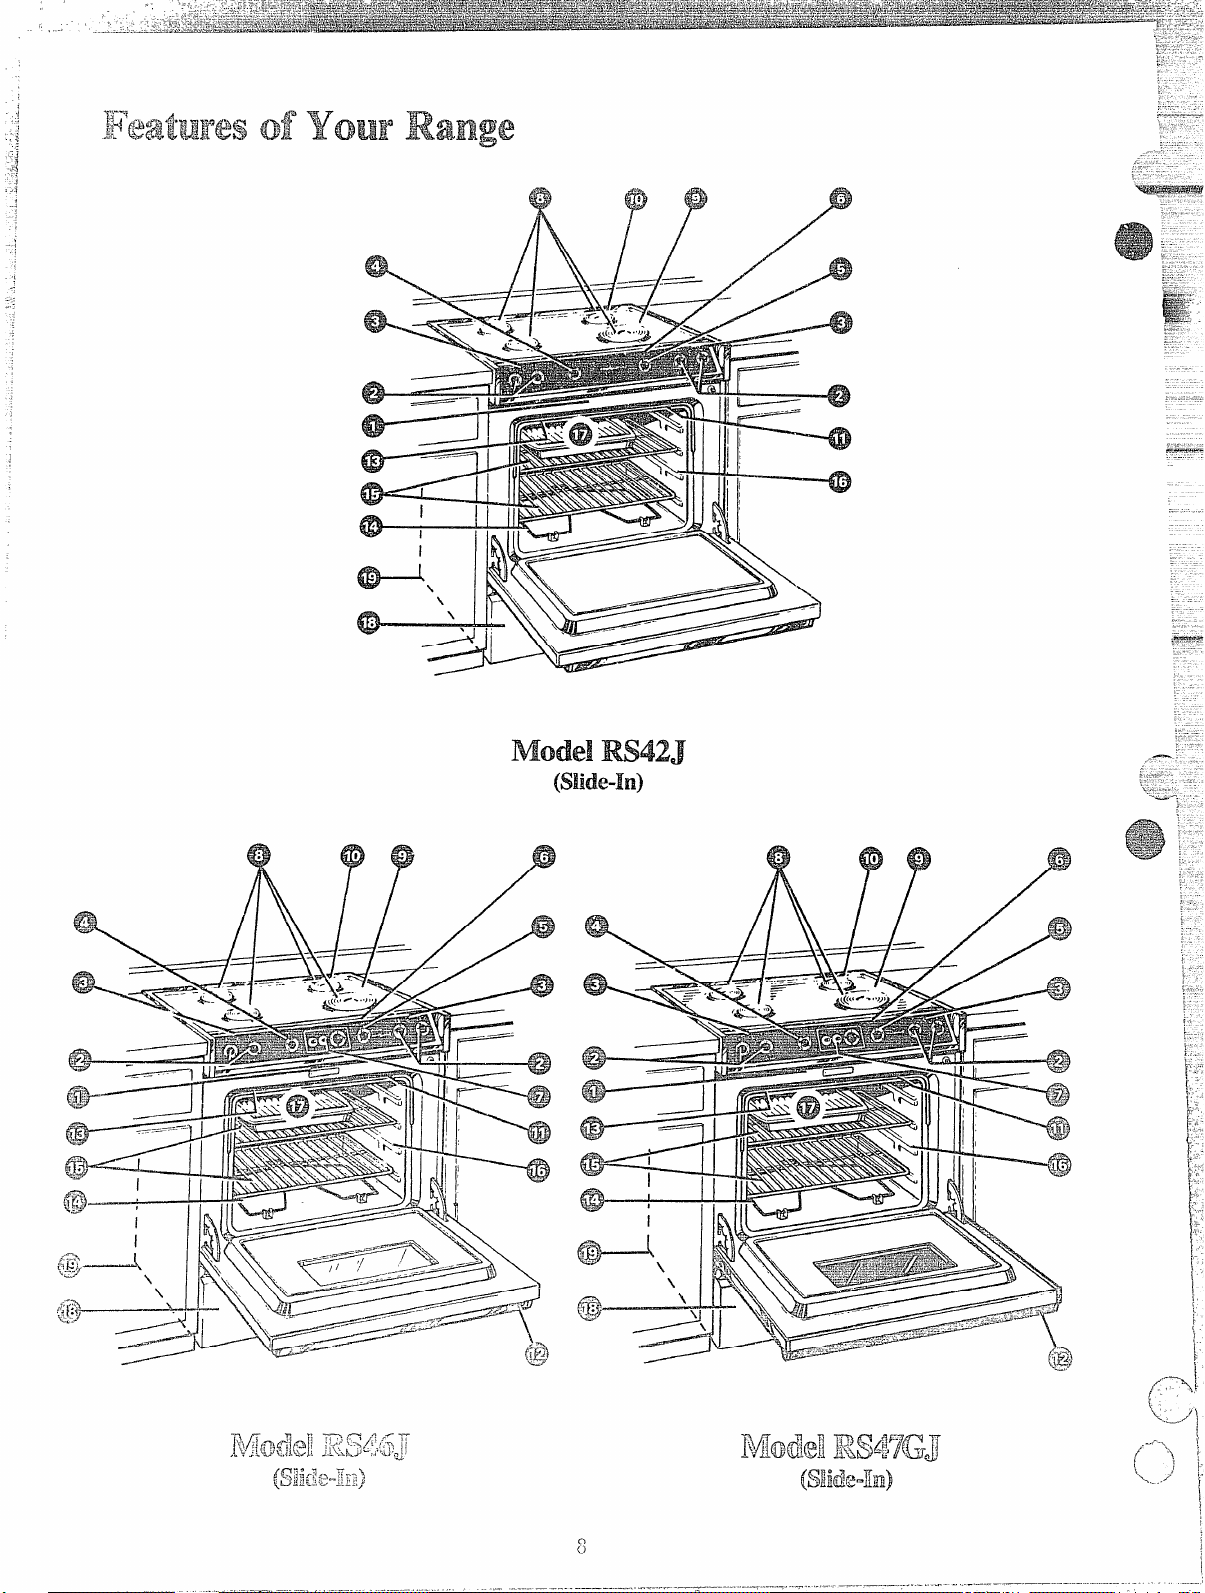
Model RS42J
(slide-In)
e
..
.
..
7
 Loading...