

Hotpoint RA724K4WH, RA724K3WH, RA724K2WH, RA720K4WH, RA720K4CT Owner’s Manual
...
ge.com
Safety Instru_tions ........ 2-4
Operating Instructions
O_en .................... 6-9
Surface Units ................ 5
Care and Cleaning
Broiler Pan and Grid ........ l l
Cooktop ............... 10, 11
Knobs .................... 12
Oven Door . ............... 11
Oven Heating Elements ...... 11
Oven Interior .............. 12
Painted Surfaces ............ 19
Shelves ................... 10
Surface Units and Drip Pans ...10
HOTPOINT
t7,4720
17A724
Installation Instruc_tions
Anti-Tip Device .......... 13, 19
Dimensions and Clearances ... 14
Electrical Connections ..... 15-18
Flooring .................. 14
Leveling .................. 19
Preparation ................ 14
Tools You Will Need ......... 14
Troubleshooting Tips ....... 20
Consumer Support
Consumer Support... Back Cover
Product Registration ...... 21,22
Warranty .................. 23
Write the model and serial
numbers here:
Model #
Serial #
You can find them on a label
under the cooktop. See the
I,ift-Up Cooktop section in this
tl/aIltlal for ilIstItlctiolls oi1 how
to lift the cooktop.
183D9541PO02
49-88025-7 05-07 J17

IMPORTANTSAFETYINFORMATION.
READALLINSTRUCTIONSBEFOREUSING.
A WARNING'!
For your safe_ the information in this manual must be followed to minimize the risk of fire or
explosion, electric shock, or toprevent property damage, personal injury, or loss of fife.
ANti-TIPDEVICE
All rangescan tip and injury could result.
Topra vent accidental tipping of the range, attach # to the waft by installing the Anti-tip
device supplied.
If the Anti-tip device supplied with the range does not fit this application, use the universal Anti- tip
device WB2X7909.
Tocheck if the device is installed and engaged properly, carefully tip the range forward. The Anti-tip
device should engage and prevent the range from tipping over.
If yon pull d)e Iang_ ont from tim wall for any reason, n/aLe snre file devke is properly
engaged when yon push tile range back against tile wall. If it is not, there is a possible risk of
the range tipping over and causing ii_tn T if yon or a child stand, sit or lean on an open door
Please refer m tile And-Tip device information in this mamlal. Failure m rake this piecaufion
could resnh in tipping of tile rang> and inju U.
SAFETYPRECAUtiONS
When using electrical appflances, basic safety pracautions should be foflowed, including the following:
• Use this appliance only for its intended • Don t allow anyone to climb, stand or
use as described in this n/anna], hang on tile door or range top. They
• Be snre yonr appliance is properly
installed and grounded by a qualified
mchnician in accordance wifll tile
i)rovided installation insunctions.
• Don't attempt m repair or ieplace any
part of your rang_ unless it is specifically
iecommended in this manual. All other
servicing should be refeITed m a qualified
mchnician.
• Before performing any service
reconm/ended in d)ese instrucuons,
DISCONNECT THE RANGE PO_&:ER
SUPPI,Y AT THE HOUSEHOI,D
DISTRIBUTION PANEL BY REMOVING
THE FUSE OR SWITCHING OFF THE
CIRCUIT BREAKER.
• Do not ]eme children alone---dlildren
should not be left alone or unattended in
an area where an appliance is in use. They
should nexer be allowed to sit or stand on
any part of the appliance.
could damag_ die range and exen tip it
ox>i; causing sex>re personal iioury.
• CAUTION: ITEMS OF INTEREST TO
CHILDREN SHOULD NOT BE STORED
IN CABINETS ABOVE A RANGE OR
ON THE BACKSPIASH OF A RANGE--
CHILDREN CLIMBING ON THE
RANGE TO REACH ITEMS COUI,D
BE SERIOUSI,Y INJURED.
• Nexer wear loose-fitting or hanging
garments while using tile appliance.
Flammable material could be ig_ited
if brought in contact wifll hot heating
elements and may cause sex,re bniTls.
• Use only dry pot holders--moist or damp
pot holders on hot snrPaces may result in
bums from steam. Do not let pot holders
touch hot headng elen/ents. Do not use a
towel or other bulky cloth.
For your safety, never use your appliance
for wmaning or heating tile room.
• Storage in or on appliance--Flanmml)le
2
materials should not be stored in an oxen
or Ileal snit_ace nnits,
x A WARNING!
2 'T. SAFETYPRECAUTIONS
2.-,__ • Kee I) hood and grease fihers clean to
/_'r_ _ maintain good ,enting and to axoid
grease fires.
• Do not let cooking grease or other
flammable mamfials accunnflate in or
near tile rang_.
• Do not use wamr on gxease fires. Nexer
pick up a flaming pan. Smother flaming
pan on surface unit by covering pan
completely with well-fitting lid, cookie
sheet or fiat tray. Flaming grease outside a
pan carl be put ont by co\Piing XVJfl/
baking soda oI; if available, a multi-
purpose drT chemical or foam-wpe fire
extinguisher
ge.com
Do not touch heating elements or inmi-ior
surtZace of oven. These surt_aces m W be hot
enough to bum exen though they are dark
in color During and after use, do not
touch, or let clothing or other flammable
mamfia]s contact surthce units, areas
nearby the surface units or any interior
area of rile oven; allow sufficient time for
cooling first.
Pomnfially hot s/lrP, tces include tile
cookmp and areas facing file cookmp,
o\>n vent opening and surt_aces near file
opening, and crevices around file oven
door Remember: Tile inside surt_ace of rile
ox>n m W be hot when rile door is opened.
COOKMEATANDPOULTRYTHOROUGHLY...
Cookmeat andpoultry thoroughly--meat toat least an INTERNALtemperatureof 160°Fandpoultry
toat least an INTERNALtemperatureof 180°ECookingto thesetemperaturesusuallypretects against
foodbomeillness.
OVEN
Stand away from range when opening oven door. Hot air or steam which escapes can cause bums
to hands, face and/or eyes.
• Don't heat unopened food conminei3 in
tile oven. Pressure could build up and tile
container could bnrst, causing an injury.
• Kee I) oven free fiom giease buildup.
• Place oven shelf in desiied po0tion while
oxen is cool. If shehes mnst be handled
when hot, do not let pot holder contact
heating elements in file ox>n.
• Pulling ont shelf to tile shelf stop is a
com>nience in lifting hemy' foods. It
is also a precaution against bums flom
touching hot surfaces of rile door or
OXPI1 walls.
• When using cooking or roasdng bags in
ox>n, tbllow tile manufi_cturer's directions.
• Do not use your ox>n to drT newspapers.
If oveflmamd, they can catch fire.
• Kee I) tile oxen x_nt ducts unobstrucmd.
3
IMPORTANTSAFETYINFORMATION.
READALLINSTRUCTIONSBEFOREUSING.
SURFACECOOKINGUNITS
Use proper pan size--This appfiance is equipped with one ormore surface units of different size.
Select cookware having fiat bottoms large enough to cover the surface unit heating element. Theuse
of undersized cookware will expose a portion of the heating element to direct contact and may result
in ignition of clothing. Proper relationship of cookware to surface unit will also improve efficiency.
• Nex_r leax_ surl_ace units unattended at
high heat settings. Boilox>r causes smoking
and g_easy spillox_rs that may catch on
fl re.
• Be sure dlJp pans axe in place. Their
absence dining cooking could damag>
range parts and wiring.
• Don't use aluminuna foil m line &ip
pans oi anywhere in file o_>n except as
described in this guide. Misuse could
resuh in a shock, fire hazard or damag>
m the rang>.
• Only certain types of glass, glass/ceramic,
earthenware or oilier glazed containers are
suitable for rang>-mp seIMce; others may
break because of the sudden change in
temperature.
• To minimize the possibility of burns,
ig_ifion of flammable materials and spillage,
the handle of a container should be turned
toward the cenmr of the range withotlt
exmnding ox>r nearby smfitce units.
• A]wws tux_l surface unit to OFFbefore
renlo\'ing cookware.
• Keep an eye on foods being tided at HI or
MEDIUM HIGH heats.
• To axoid die possibili U of a bum or
electric shock, always be certain that the
controls for all suri_tce units are at OFF
position and all coils are cool before
attempting to ]ift oi remo\> the unit.
• Don't immerse oi soak removable surface
units. Don't put fllem in a dishwasher
• Do not flame foods on die cookmp. If you
do flame foods under the hood, mm file
fail Oil.
• Foods for flTing should be as &w as
possible. Frost on frozen foods or moisul_e
on fiesh fbods can cause hot fat to bubble
11I) and ox>r sides of pan.
• Use little flit for efl>ctive shallow or deep-
fat flTing. Filling the pan mo fldl of i_atcan
cause spilloxers when tbod is added.
• If a combination of oils or fats will be used
in flTing, sot togedler befoie headng, or as
fats melt slowly.
• Alwws heat fat slowl> and watch as it heats.
• Use a deep-flit dlennomemr whenexer
possible to prexent ox>dleating fat beyond
the smoMng point.
• Use exneme caudon when mo_ing a grease
filled pan or disposing of hot g_ease.
READANDFOLLOWTHISSAFETYINFORMATIONCAREFULLY.
SAVETHESEINSTRUCTIONS
4
Usingthe surfaceunits, ge.com
Throughout this manual, features and appearance may vary from your model.
Surface Cooking Controls
Yoursurfaceunitsandcontrolsarefleslgned
togiveyoua varietyof heatsettingsforsurface
unitcooking.
M both LO and HI positions, there is
a slight niche so control clicks at those
positions; HI marl_s tile highest setting;
tO, the lowest setting.
In a quiet kitchen, you may hear
slight clicking sounds during cooking,
indicadng heat settings selected are being
maintained.
Sxfitching heats to higher settings always
shows a quicker change in temperature
than switching to lower settin *s
How to Set the Controls
[] Push tile control knob in.
[] Turn either clockwise or
counterclockwise to desired
heat setting.
Control n/list be pushed in to set only
fl'om tile OFFposition.
OFF
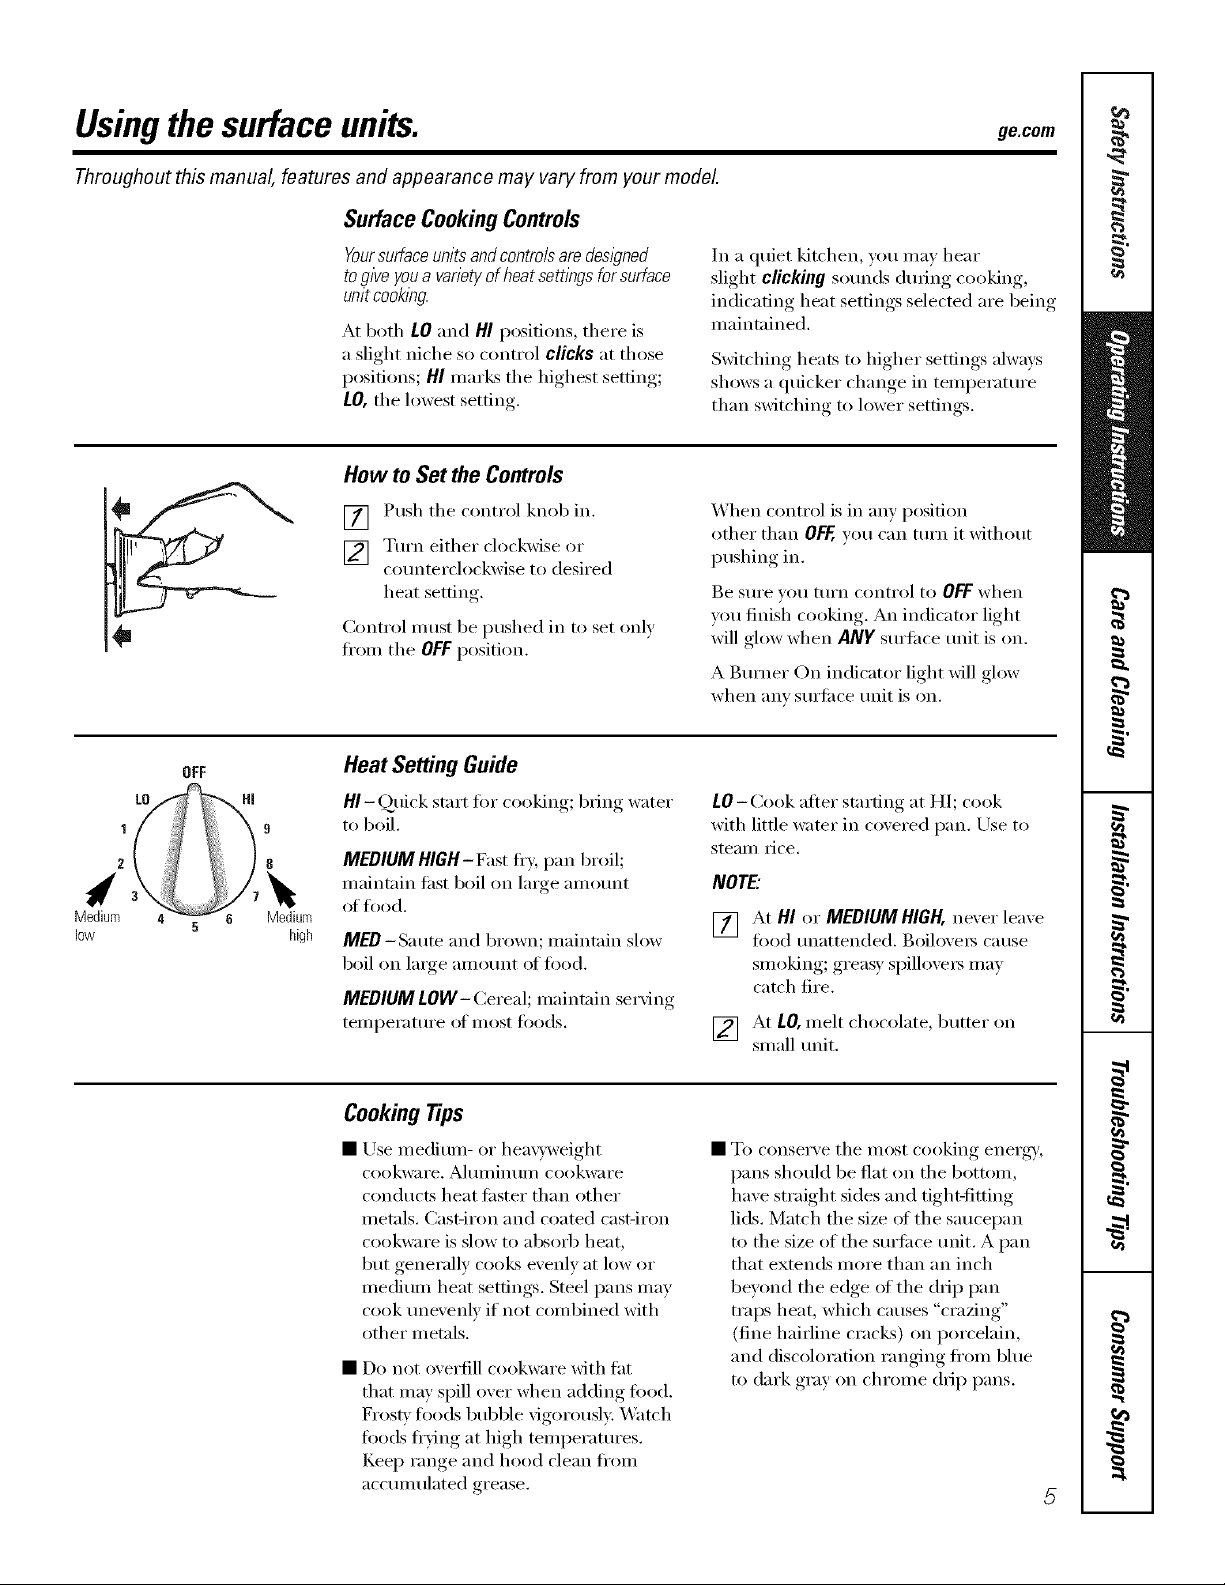
Heat SettingGuide
HI -Quick start fi)r cooking; bIing water
to boil.
MEDIUMHIGH-Fast fl% pan broil;
maintain ti_stboil on large amount
low
Medium
of food.
high
MED- Saute and brown; maintain slow
boil on lmge amount of food.
MEDIUM LOW- (_ereal; maintain seiMng
temperature of most fi_ods.
X,_hen control is in any position
other than OFF,you can ttlrn it without
/ushin * in
Be StlI'e x,Otl ttlrn conti'ol to O_ when
xou finish cooking. An indicator light
will glow when ANY surti_ce unit is on.
A Burner On indicator light xfill glow
when any surli_ce unit is on.
LO- C,ook after starting at HI; cook
with little water in coxered pan. Use to
steam rice.
NOTE."
At HI or MEDIUM HIGH, never leave
i¢1
fi)od unattended, goiloxeis cause
smoking; greas) si)illoxei_ may
catch fire.
[_] At LO,melt chocolate, butter on
small unit.
Cooking tips
• Use medium- or hea\3_veight
cookware. Ahiillinuil/cookware
conducts heat tipster than other
metals, Cast-iron and coated cast-iron
cookw;li'e is slow to [IbsoI'b heat,
but generally coo!<s evenly at low or
medium heat settings. Steel pans may
cook unevenly if not combined with
other metals.
• Do not overfill cookware with tilt
that may spill over when adding t0od.
Frosty foods bubble vigorousl> Watch
foods fl')ing at high temperatures.
IZeep range and hood clean fl'om
accumulated grease.
• To conserve tile nlost cooking energry;
pans should be fiat on tile bottom,
have straight sides and tight-fitting
lids. Match the size ot the saucepan
to tile size of tile surti_ce unit. A pan
that extends more than an inch
beyond tile edge of tile dxiI) pan
traps heat, which causes "crazing"
(fine hairline cracks) on porcelain,
and discoloration ranging fl'om blue
to dark gray on chrome (hi I) pans.

Usingthe oven.
The OVEN TEMPknob is located on the control panel on the front of the range.
OVEN ® TEMP
Bump
Oven TemperatureControl
To use the oven, simply mrn the knob
to the desired cooking temperatures,
which are marked in 25°F increments
on the dial. OVEN TEMP maintains the
teini)erature you set, ti'oin 200°1:t(> BROIL.
Oven Shelves
The shelves are designed with stop-locks
so when placed correctly on the shelf
supports, they will stop beflwe confing
conq)lemly Otlt of the oven and will not
tilt when p)tl are removing fi)od ti'om
them or placing fi)od on them.
When plating cookware on a shelf, pull
the shelf out to the bunq) on the shelf
suI)port. Place the cookware on the
shelf, then slide the shelf back into the
()veil. This will eliminate reaching into
the hot ()veil.
TheOvenCyc/i)_gbghtg/owsuntiltheoven
reachesyourselectedtemperature,thengoesoff
andonwith theovenunit(s)dun?)gcookl?)g.
Toremove the shelves from the oven, pull
tl_em toward you, tilt fl'ont end upward
and pull them ()tit.
Toreplace, place shelf oil shelf suI)port
with stoI>locLs (curved extension of
sheff) fitting up and toward back of oven.
Tilt up ti'ont and push shelf toward back
(ff ()veil until it goes past the lxunp on
the shelf sui)port. Then lower ti'ont of
sheff and push it all the way back.
Theovenhas4shelfpositions.
OvenShelf Positions
The oven has fi)ur shelf supports_
(botton_), B, C and O (top).
Shelf positions fi)r cooking are suggested
oil Baking and Roasting pages.
k"
Useof AluminumFoil
• H desired, a sheet oI _lhII/lintIIll
toil may be used on the floor of the
()veil trader the bake element.
Be certain foil does not touch bake
element Ahunimun fi)il used in this
way may slightly afli_ct the browning
of some foods. Change fi)il when it
becon/es soiled.
• DONOT place a sheet of almninun_
ff)il on the shelf. To do so may result
in iml)ropedy cooked fiiods, dan/age
to oven finish and increase in heat
on outside surtilces of the ()veil.
You may use altuninun_ fi)il to line the
broiler pan and broiler grid. HoweveI;
you must mold the fi)il tightly to the
grid and cut slits in it just like the grid.
Usingthe ovenforbakingor masting, gecom
Toavoid possible bums, place the shelves in the desired posifion before you turn the oven on.
How to Set Your Oven for Baking or Roasting
Position the sheff or shelves in the
[]
oven. If cooking on two shelves at
the same time, stagger the pans for
best heat circulation.
Close o_,en dooi: mlli'n
[]
OVEN TEMP kabob clock_ise to
desired temperature. Preheat oxen
for at least 10 minutes if I)reheating,
is necessa i5',
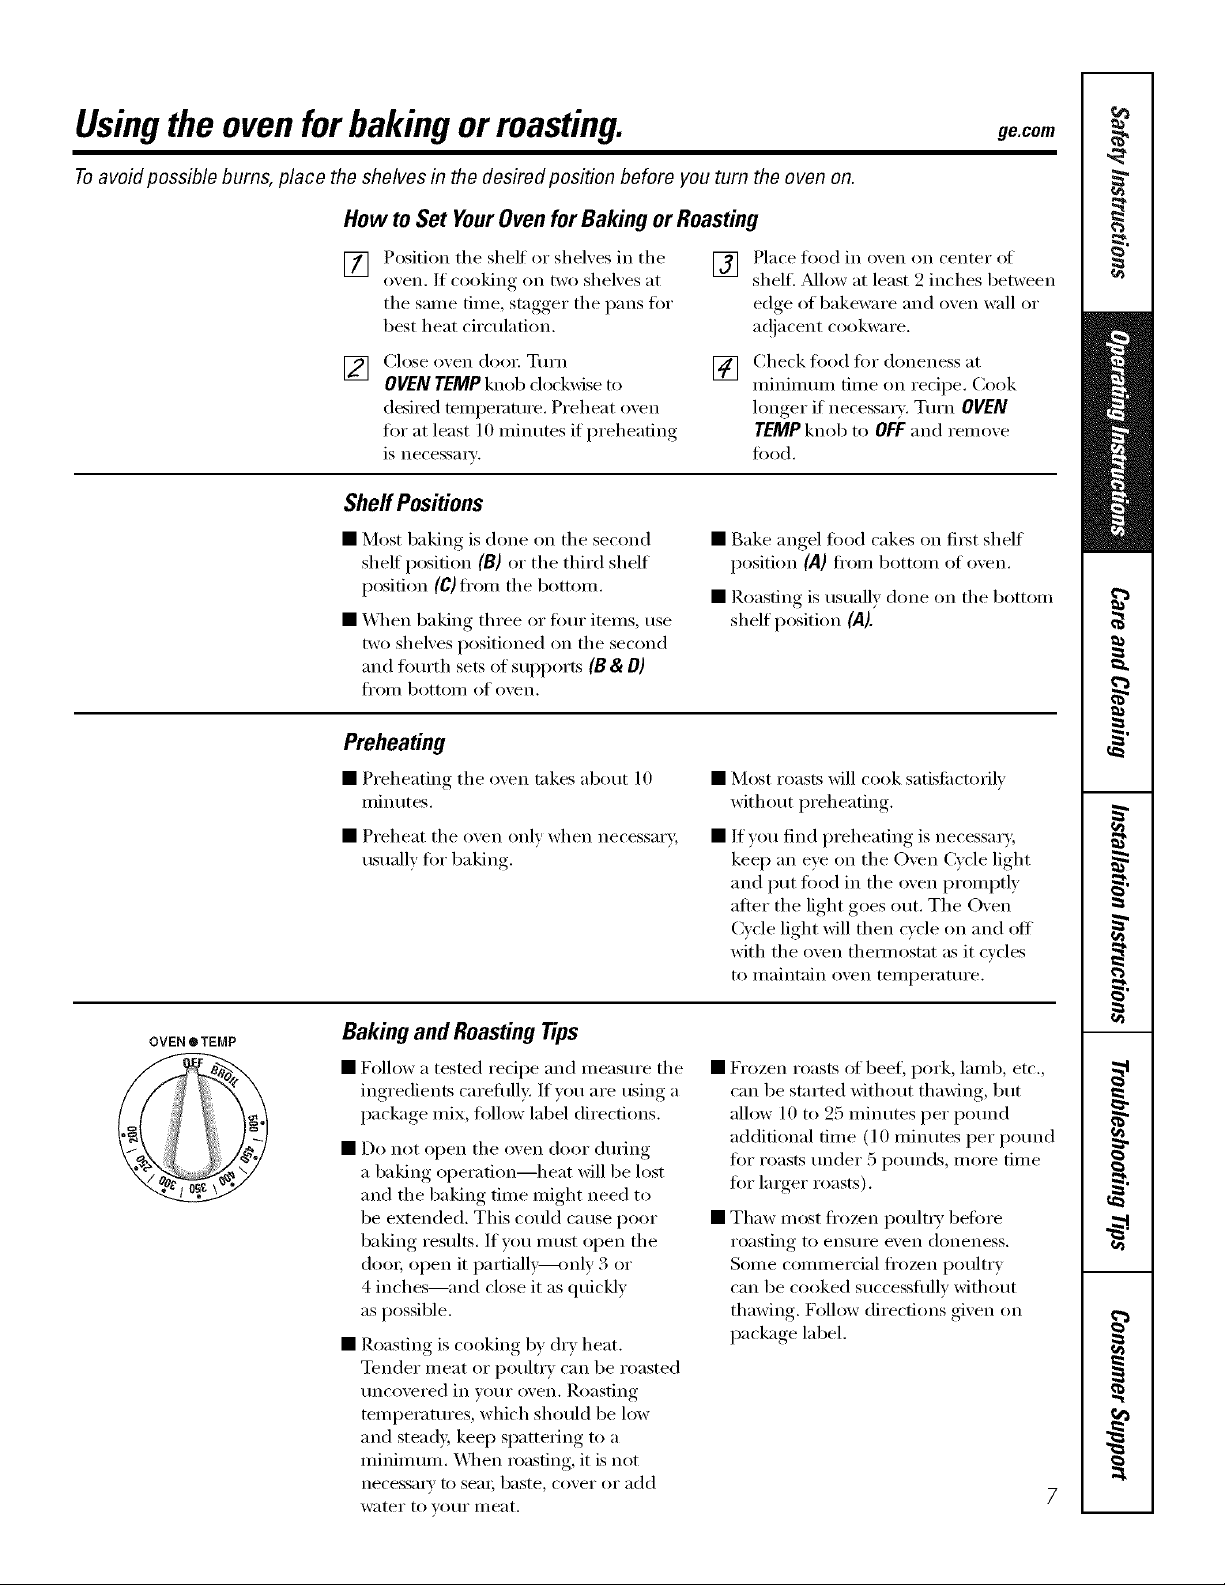
Sheff Positions
] Place I(:,(:,(l in o_en on center of
shelf. _Mlow at least 2 mche_ between
edge of bakeware and oven wall or
ac!iacent cookware.
[] Check food for doneness at
minimmn time on redpe. Cook
longer if necessm_'. Tm'n OVEN
TEMPknob to OFF and renlove
food.
OVEN ® TEMP
• Most baking is done on the second
shelf position (B) or the third shelf
position (C) ti'om the bottom.
• _q_en baking three or fimr items, use
two shelxes positioned on the second
and tom'th sets of supports (B & D)
ii'OI// bottoI// (:,_'o'_en.
Preheating
• Preheating the o_en takes about 10
mimKes.
• Preheat the oven only when necessary,
usually fin" baking
Bakingand RoastingTips
• Follow a tested recipe and measure the
ingredients careflflly: If you are using a
package mix, follow label directions.
• Do not open the oven door (hwing
a baking operation--heat will be lost
and the baking time might need to
be extended. This could cause poor
baking results. If you must open the
doo_; open it i)artially---_mly 3 or
4 inches--and ('lose it as quickly
as possible.
• Roasting is cooking by (hT heat.
Tender meat or I)oult_T can be roasted
tmcovered in your oven. Roasting
temperatures, which should be h)w
and steady, kee I) spattering to a
minimum. _,_]_en roasting, it is not
necessai'_' to seal; baste, cover or add
water to VO/li" illeat.
• Bake angel fi)od cakes on fi_t shelf
position (A] fl'om bottom of o'_en.
• Roasting is usually done on the bottom
shelf position (A).
• Most roasts will cook satisfi_ctorilv
without preheating.
• If you find preheating is necessary,
keep an eve on the Oven Cycle light
and put food in the oven promptly
after the light goes out. The Oven
Cycle light will then cycle on and off
with the oven them/ostat as it cycles
to i//aintain {)veil tei//pei'attli'e.
• Frozen roasts of beef, pork, lamb, etc.,
can be started without thawing, but
alh)w l 0 to 25 minutes per potmd
additional time (10 minutes per pound
for roasts trader 5 pounds, more time
lot larger roasts).
• Thaw most fl'ozen poult_ T heft)re
roasting to eIlStlI'e even doneness.
Some comme_vial fl'ozen poult_ T
can be cooked successfifllv without
thawing. Folh)w directions given on
package label.

Adjusttheoventhermostat--Easy todoyourself!
Youmay find that your new oven cooks differently than the one it replaced. Use your new oven for a few weeks to
become more familiar with it. If you still think your new oven is too hot or too cold, you can adjust the thermostat
yourself.
Donot use thermometers, such as those found in grocery stores, to check the temperature setting of your oven.
These thermometers may vary 20_40°F.
NOTE: This adjustment will not affect the broiling temperatures. The adjustment will be retained after a power failure.
OVEN • TEMP
.;7
Frontof OVENrEMPknob
(knobappearancemayvary)
@
BackofOVENTEMPknob
ToAdjustthe Thermostatwith this TypeofKnob
Pull the OVEN TEMP knob off the range
[]
and look at the back side.
To make an a(!jusm_ent, loosen
(al)l)ro_mately one turn), but do
not completely remove, tile two
scre_:s on tile back ot tile knob.
With tile back of tile knob fi_cing
[]
you, hold tile outer edge of the knob
with one hand and mrn tile fl'ont ot
the knob with the other hand.
To increase tile oven temperatm'e,
move tile top screw toward tile right.
You'll hear a click tot each notch wm
move the knob.
To decrease tile oven temperature,
moxe tile top screw toward tile left.
Each click will change tile oven
temperature approximately l 0°E
(Range is l)lus or minus 60°F fl'om
tile anxm:) _4'e suggest that you make
tile a(!justment one click ti'om tile
original setting and check oven
perfommnce before making any
additional a(!jtlstments.
After the adjustment N made, retighten
[]
screws so the_ are smlg, but be
carefifl not to overtighten.
Replace the knob, matching the fiat
[]
area of the knob to the shaft, and
check perlimnance.
Thetype ofmargarine will affectbakingperformance!
Most recipes for baking have been
developed using high-fat products such
as butter or margarine (80%fat). If you
decrease the fat, the recipe may not
give the same results as with a higher
fat product.
Recipefailurecanresultifcakes,pies,pastries,
cookiesorcandiesaremadewithlow-fatspreads.
Thelowerthefatcontentofa spreadproduct,the
morenoticeablethesedifferencesbecome.
8
Federal standards require products
labeled "margarine" to contain at least
80% tilt by weight. Ixmqht spreads, on the
other hand, contain less fat and more
water: Tile high moisture content ot these
spreads affects tile texture and flavor of
baked goods. For best results with w_m" old
fhvoiJte recipes, use inargaiJne, butter or
stick spreads containing at least 70%
vegetable oil.
 Loading...