How it Works
Log In / Sign Up
Buy Points
How it Works
FAQ
Contact Us
Questions and Suggestions
Users
Hotpoint
Loading...
L
LDFA12H14
LDQ 228 ICE/HA
LDZ 226 A IX/HA
LEB316
LEB326
LEB327
LEB356
LECO7FF2
LECO7 FF2 NH
LECO7 FF2 W
LECO7 FF2 WH
LECO8
LECO85 FF2 W
LECO85 XXX X
LECO8 FF2 KH
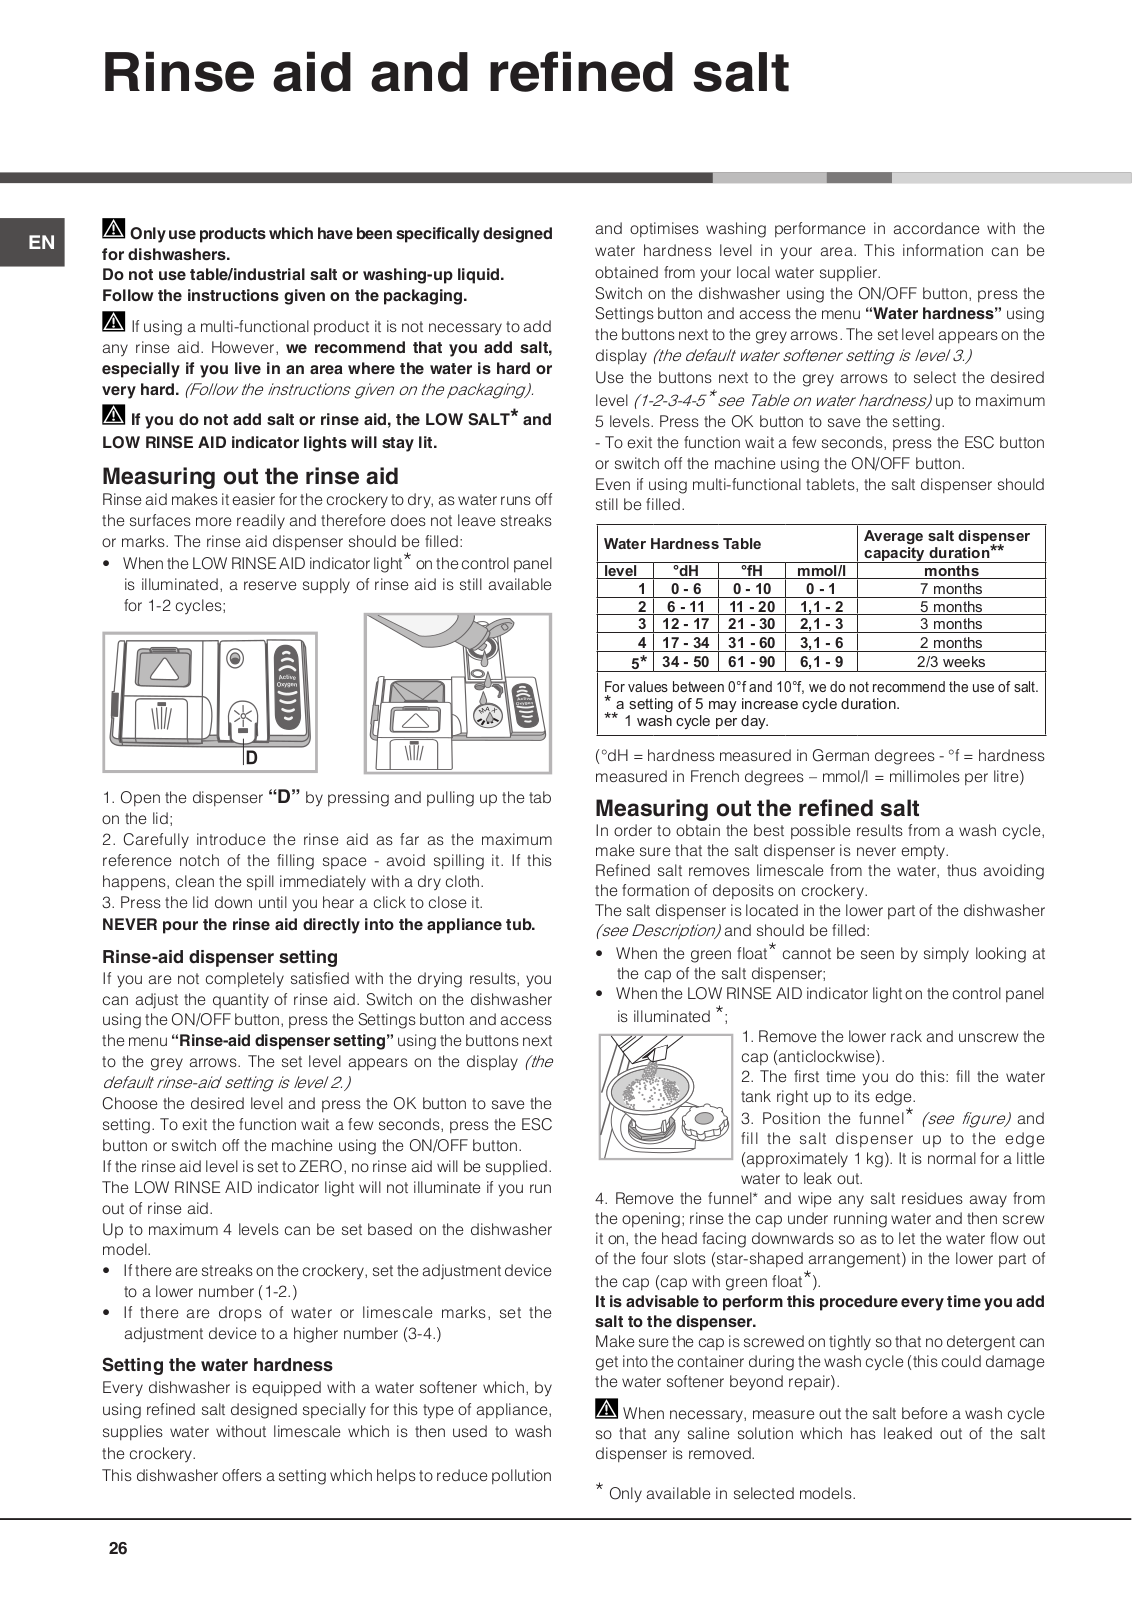
LECO8 FF2 WH
LEX85 N1 G
LEX85 N1 W
LEX85 XX X
LF 6070
LF 6070 X
LF 69 FR
LF 70 EU
LF 70 FR
LF 70 IT
LF 70 X EU
LF 70 X FR
LF 70 X IT
LFB 3B010 TK
LFB 4M010
LFB 5B010 EX
LFB 5B010 X EX
LFB 5B019
LFB 5B019 A EU
LFB 5B019 B FR
LFB 5B019 DE/SK
LFB 5B019 EU
LFB 5B019 FR
LFB 5B019 X EU
LFB 5B019 X FR
LFB 5M010 TK
LFB 5M019 X TK
LFD 11H133 DE/SK
LFD 11H133 X DE/SK
LFD 11M121 B EU
LFD 11M121 CX EU
LFD 11M121 OC EU
LFD 11M121 OGBX EX
LFD 11M132 EU
LFD 11M132 OCIX EU
LFD 11M132 OCX EU
LFD 11M133 DE/SK
LFD 11M133 X DE/SK
LFD 11P123 X DE/SK
LFD 11P123 X EX
LFD 11S123 OX AUS
LFF 7146 FR
LFF 7146 FR.R
LFF 7146 X FR
LFF 78 H 14 EX
LFF 8114 AG.R
LFF 816 EU/HA.R
LFF 81 AG
LFF 8214 EU/HA
LFF 8214E X
LFF 8214E X IB
LFF 8214 IT/HA
LFF 8214 IT/HA.R
LFF 8214 X AG.R
LFF 8214 X IB/HA.R
LFF 8214 X IT/HA
LFF 8214 X IT/HA.R
LFF 8251 IT/HA
LFF 8254 EX.R
LFF 8254 X EX.R
LFF 825 A IT/HA
LFF 825 A IT/HA.R
LFF 825 IT/HA
LFF 825 IT/HA.R
LFF 825 SK/HA
LFF 825 X AG
LFF 825 X AUS.R
LFF 825 X IT/HA
LFF 825 X IT/HA.R
LFF 8314 A IT/HA
LFF 8314 A IT/HA.R
LFF 8314 B EU
LFF 8314 B EU.R
LFF 8314 FR
LFF 8314 X EU/HA.R
LFF 835 A IT/HA
LFF 835 IT/HA
LFF 835 IT/HA.R
LFF 8B019 EU
LFF 8B116 FR
LFF 8B116 X FR
LFF 8B5 EU/HA.R
LFF 8H54 X EX.R
LFF 8M019
LFF 8M019 EU
Loading...
Loading...
Nothing found
LFD 11M132 OCX EU
User Manual
84 pgs
12.1 Mb
0
Table of contents
Loading...
Hotpoint LFD 11M132 OCX EU User Manual
...
Hotpoint User Manual
Download
Specifications and Main Features
Frequently Asked Questions
User Manual
Download
Loading...
+
58
hidden pages
Unhide
You need points to download manuals.
1 point = 1 manual.
You can buy points or you can get point for every manual you upload.
Buy points
Upload your manuals
 Loading...