

Hotpoint HTS18JCPARWW, HTS18JCPARCC, HTS18JBPARWW, HTS18JBPARCC, HTS18CCSARWW Owner’s Manual
...
vvwvv.Hotpoint.com
Safely Instructions .......... 2-4
Operating Instructions
Additional Features ............ 9
Automatic Icemaker .......... 10
Controls ..................... 5
Crispers and Pans ........... 8, 9
Shelves and Bins ............ 6, 7
Care and Cleaning ....... 11, 12
Replacing the Light Bulbs ...... 12
Installation Instructions
Preparing to Install
the Refrigerator .............. 13
Reversing the Door Swing ...18-22
Water Line Installation ..... 14-17
Models 18& 19
Troubleshooting Tips ...... 23-26
Normal Operating Sounds ..... 23
Consumer Support
Consumer Support .... Back Cover
Product Registration ....... 27, 28
Warranty ................... 31
Write themodeland serialnumbershere:
Model #
Serial#
Find these numbers on the gray label
on the left side, near the top of the
refi'igerator compartment.
162D6747PO04 39-60246 02-03JR
IMPORTANTSAFETYINFORMATION.
READALLINSTRUCTIONSBEFOREUSING.
WARNING#
Use this appliance only for its intended purpose as described in this Owner's ManuaL
SAFETYPRECAUTIONS
When using electrical appliances, basic safety precautions should be followed, including the following:
{ This refrigerator must be properly installed
and located in accordance with tile Installation
Instructions before it is used.
{_ Do not allow children to climb, stand or hang
on @e shelves in the refrigerator. They could
damage @e refiigerator and seriously injure
themselves.
{ Do not touch tile cold surfaces in tile freezer
compartment when hands are damp or wet.
Skin may stick to these extremely cold surfaces.
{_ Do not store or use gasoline or other flammable
vapors and liquids in the vicinity of this or any
o@er appliance.
{ In refiigerators with automatic icemakers,
avoid contact with tile moving parts of the
ejector mechanism, or with tlle heating element
located on tlle bottom of the icemake_: Do
not place fingers or hands on tlle automatic
icemaking mechanism while the refiigerator
is plugged in.
@ Keep fingm.-sout of the "pinch point" areas;
clearances between tlle doors and between
the doors and cabinet are necessarily small.
Be care{hi closing doors when children are
in tlle area.
_ Unplug the refiigerator be{bre cleaning and
making repairs.
NOTE:Westronglyrecommendthatanyservicingbe
performedbyaqualifiedindividual
_ Setting either or tsoth controls (some models
only have one control) to the 0 (Off) position
does not remove power to the light circuit.
@ Do not refreeze frozen foods which have
thawed completely.
2
ww_.Ho_point.com
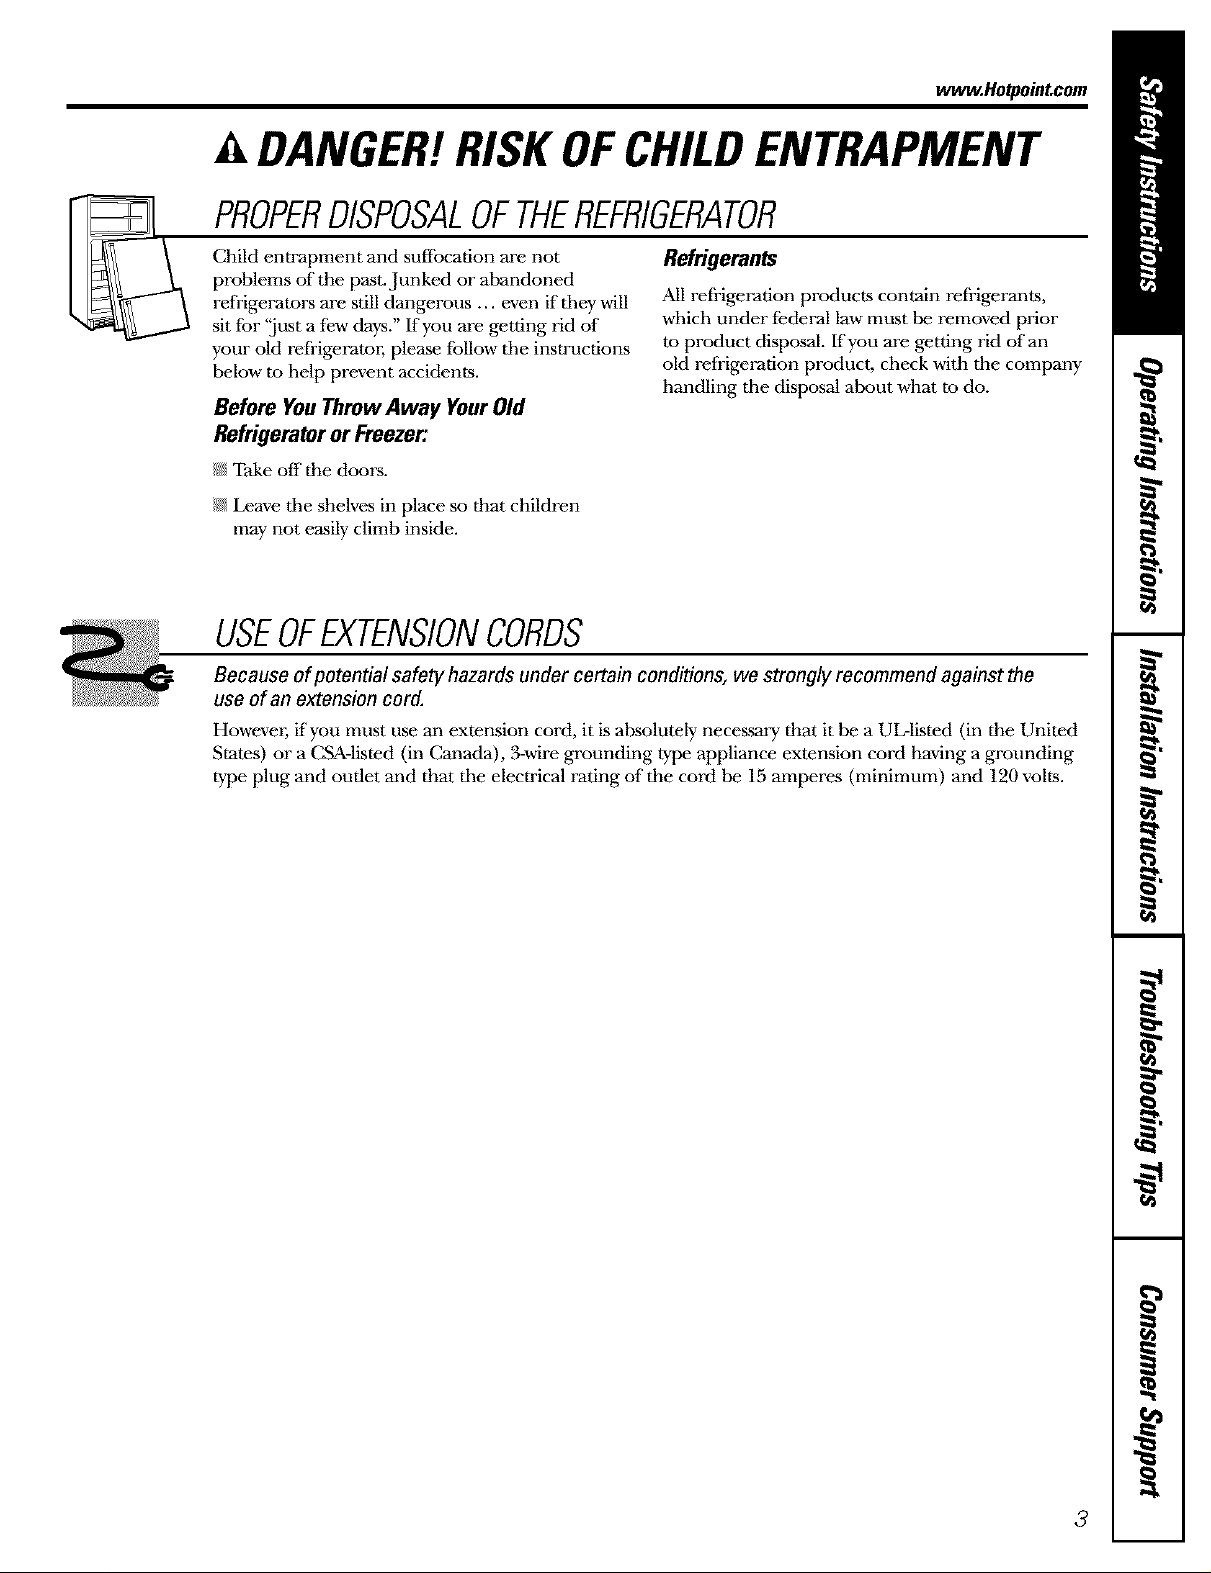
A DANGER!RISKOFCHILDENTRAPMENT
PROPERDISPOSALOFTHEREFRIGERATOR
Child entrapment and suffocation are not
problems of"the past. Junked or abandoned
refrigerators are still dangerous ... even if they will
sit for 'just a few days." If you are getting rid of
your old refiigerato_; please fbllow the instructions
below to help prevent accidents.
Refrigerants
All refrigeration products contain refrigerants,
which under federal law must be removed prior
to product disposal. If you are getting rid of an
old refrigeration product, check with the company
handling the disposal about what to do.
Before YouThrew Away YourOld
Refrigeratoror Freezer.
N Take off the doors.
/;55Leave tile shelves in place so that children
may not easily climb inside.
USEOFEXTENSIONCORDS
Because of potential safety hazards under certain conditions, we strongly recommend against the
use of an extension cord.
However; if you must use an extension cord, it is absolutely necessary that it be a UL-listed (in the United
States) or a CSA-listed (in Canada), 3-wdre grounding type appliance extension cord having a grounding
type plug and outlet and that the elecnical rating of the cord be 15 amperes (minimum) and 120 volts.
3
IMPORTANTSAFETYINFORMATION.
READALLINSTRUCTIONSBEFOREUSING.
A WARNING!
HOWTOCONNECTELECTRICITY
Do not, under any circumstances, cut or remove the third (ground) prong from the power cord.
Forpersonal safe_ this appfiance must be properly grounded.
The power cord of this appliance is equipped with
a 3-prong (grounding) plug which mates with
a standard 3-prong (grounding) wall outlet to
minimize the possibility of electric shock hazard
from this appliance.
Have tile wall outlet and circuit checked by
a qualified electrician to make sure tile outlet
is properly grounded.
Where a standard 2-prong wall oudet is
encountered, it is your personal responsibility
and obligation to have it replaced with a properly
grounded 3-prong wall outlet.
The refrigerator should always be plugged into its
own individual electrical oudet which has a voltage
rating that matches the rating plate.
This provides tile best performance and also
prevents overloading house wiring circuits which
could cause a fire hazard from overheated wires.
Never unplug your refrigerator by pulling on the
power cord. _Mwaysgrip plug firmly and pull
sn'aight out from tile outlet.
Repair or replace immediately all power cords that
have become frayed or odmrwise damaged. Do not
use a cord tllat shows cracks or abrasion damage
along its lengtll or at ekher end.
When moving dm refiigerator away from tile
wall, be careful not to roll over or damage the
power cord.
USEOFADAPTERPLUGSgAdapterpl,gsnotpermittedinCanada)
Because of potential safety hazards under certain conditions, we strongly recommend against the
use of an adapter plug.
Howevm; if you must use an adapter, where local
codes permit, a temporary connection may be made
to a properly grounded 2-prong wall outlet by use
era UL-listed adapter a'_ailable at most local
hardware stores.
The larger slot in tile adapter must be aligned wkh
tile larger slot in dm wall outlet to provide proper
polarity in the connection of the power cord.
When disconnecting tile power cord from the
adapter, al,a-ayshold tile adapter in place with one
hand while pulling tile power cord plug with tile
other hand. If this is not done, tile adapter ground
terminal is very likely to break with repeated use.
If the adapter ground terminal breaks, DO NOT USE
tlle refrigerator until a proper ground has been
established.
Attachingtheadaptergroundterminaltoa wall outlet
coverscrewdoesnotgroundtheapplianceunlessthe
coverscrewis metal,not insulated,andthewalloutlet is
groundedthroughthehousewiring. Youshouldhavethe
circuitcheckedbya quafifiedelectricianto makesurethe
outletisproperlygrounded.
READANDFOLLOWTHISSAFETYINFORMATIONCAREFULLY.
SAVETHESEINSTRUCTIONS
4
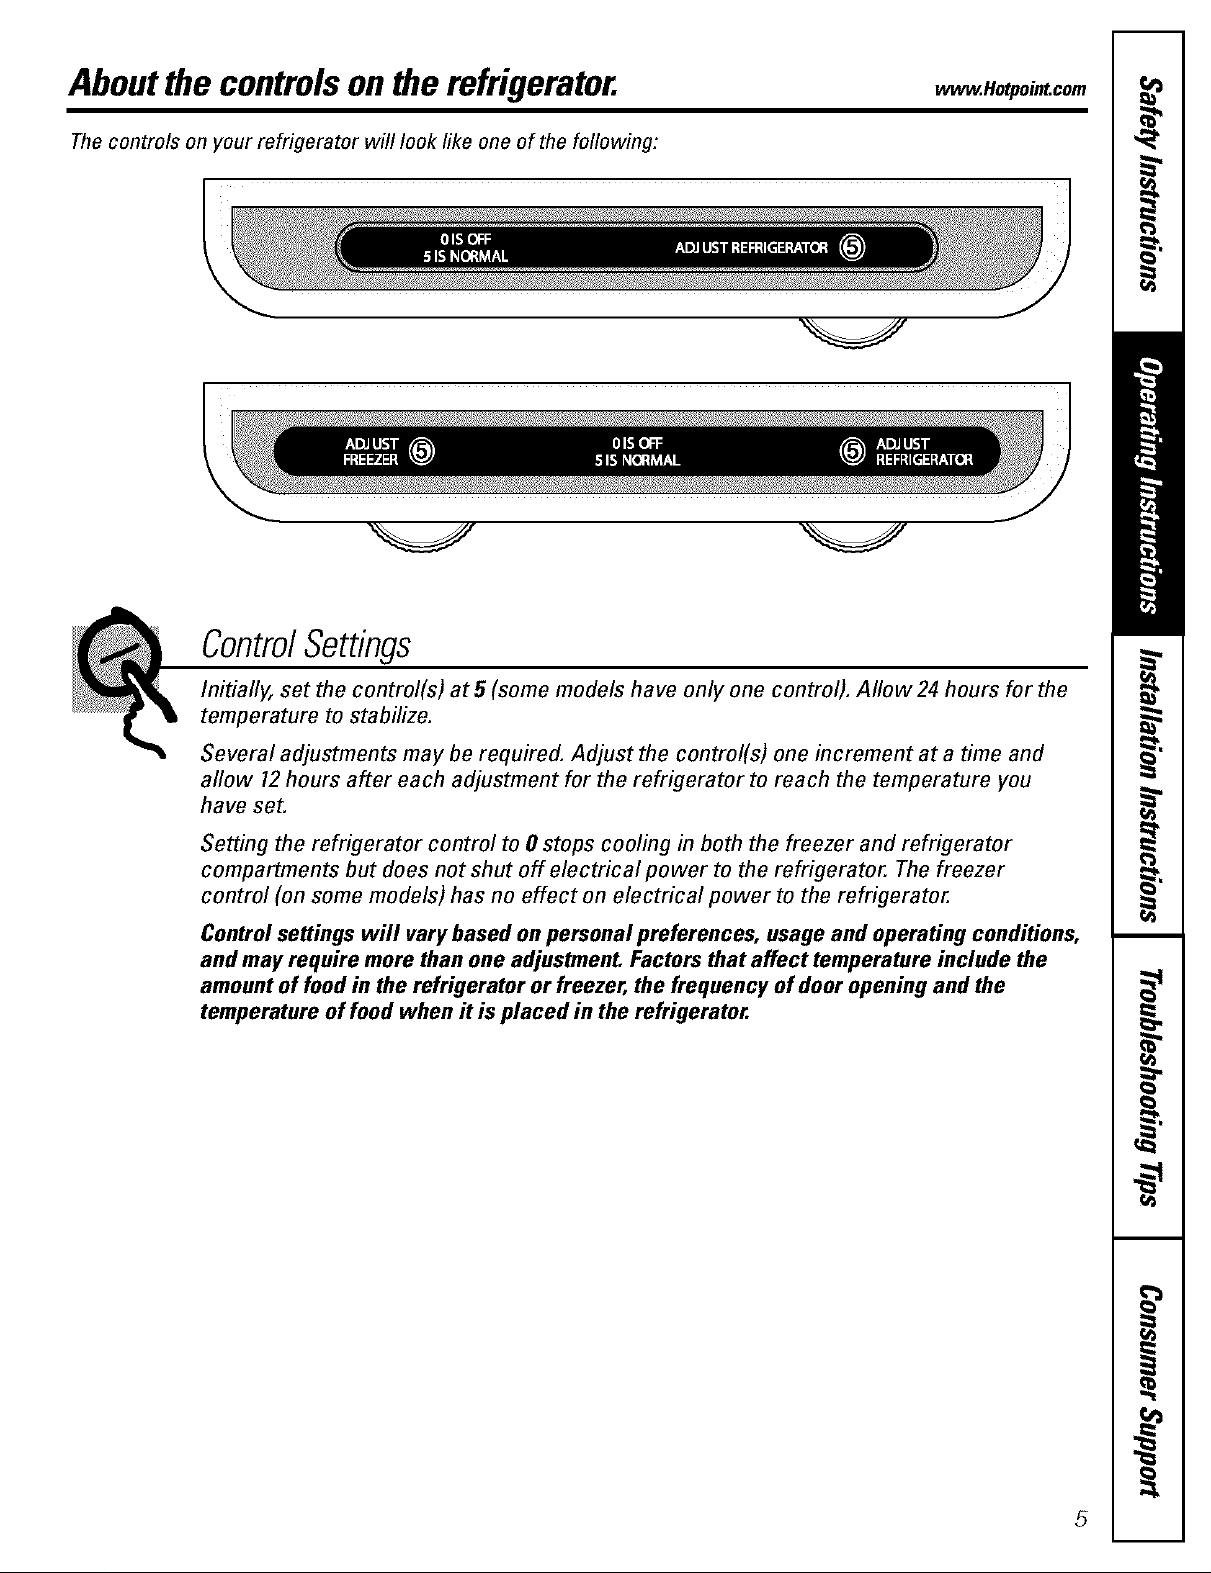
Aboutthe controlson therefrigerator.
Thecontrols on your refrigerator will look like one of the following:
ControlSettings
www.Ho_omLcom
Initially, set the control(s) at5 (some models have only one control). Allow24 hours for the
temperature to stabilize.
Several adjustments may be required. Adjust the control(s) one increment at a time and
allow 12hours after each adjustment for the refrigerator to reach the temperature you
have set.
Setting the refrigerator control to 0 stops cooling in both the freezer and refrigerator
compartments but does not shut off electrical power to the refrigerator. The freezer
control (on some models) has no effect on electrical power to the refrigerator.
Control settings will varybased onpersonal preferences, usage and operating conditions,
and may require more than one adjustment. Factors that affect temperature include the
amountof food in the refrigerator or freezer, the frequency of door opening and the
temperature of food when it is placed in the refrigerator.
5
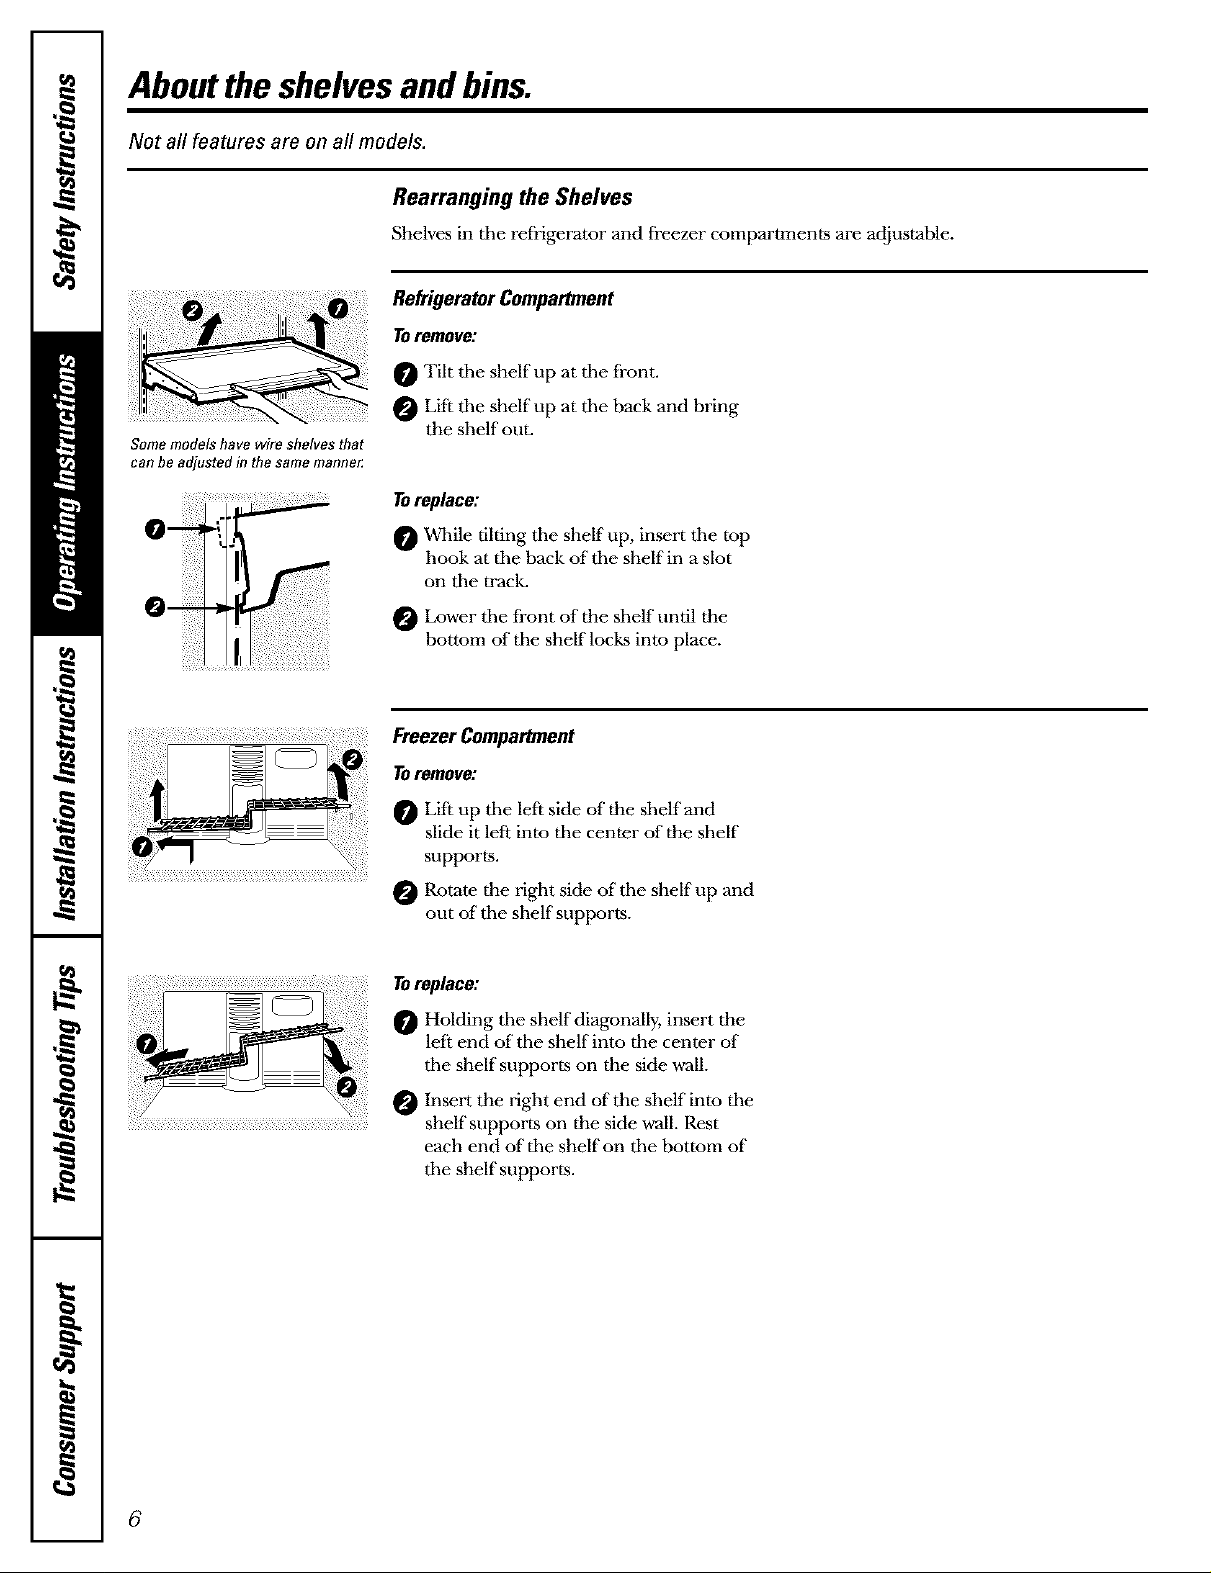
Abouttheshelvesand bins.
Not all features are on all models.
Rearranging the Shelves
Shelves in tbe refrigerator and freezer compartments are adjustable.
Refrigerator Compartment
Toremove:
0 Tilt tbe shelf up at tbe front.
Lift tbe shelf up at tbe back and bring
Somemodels have wire shelves that
can be adjusted in the same manne_
¸5¸¸5¸¸5¸
the shelf out.
Toreplace:
L.
0 *While tiltin g tbe shelf up, insert tbe top.
hook at tile back oftbe shelf in a slot
on tbe track.
Lower tbe front of the shelf until the
bottom of tbe shelf locks into place.
Freezer Compartment
Toremove:
0 Lift up tile left side of the sbelfand
slide it left into tbe center of the shelf
supports.
Rotate the rigbt side oftbe shelf up and
out of"tbe shelf supports.
Toreplace:
0 Holding tbe shelf diagonally, insert the
left end of tbe shelf into the center of
tbe shelf supports on the side wall.
Insert the right end of the shelf into tim
shelf supports on tim side wall. Rest
each end oftbe shelf on tim bottom of
tim shelf supports.
6
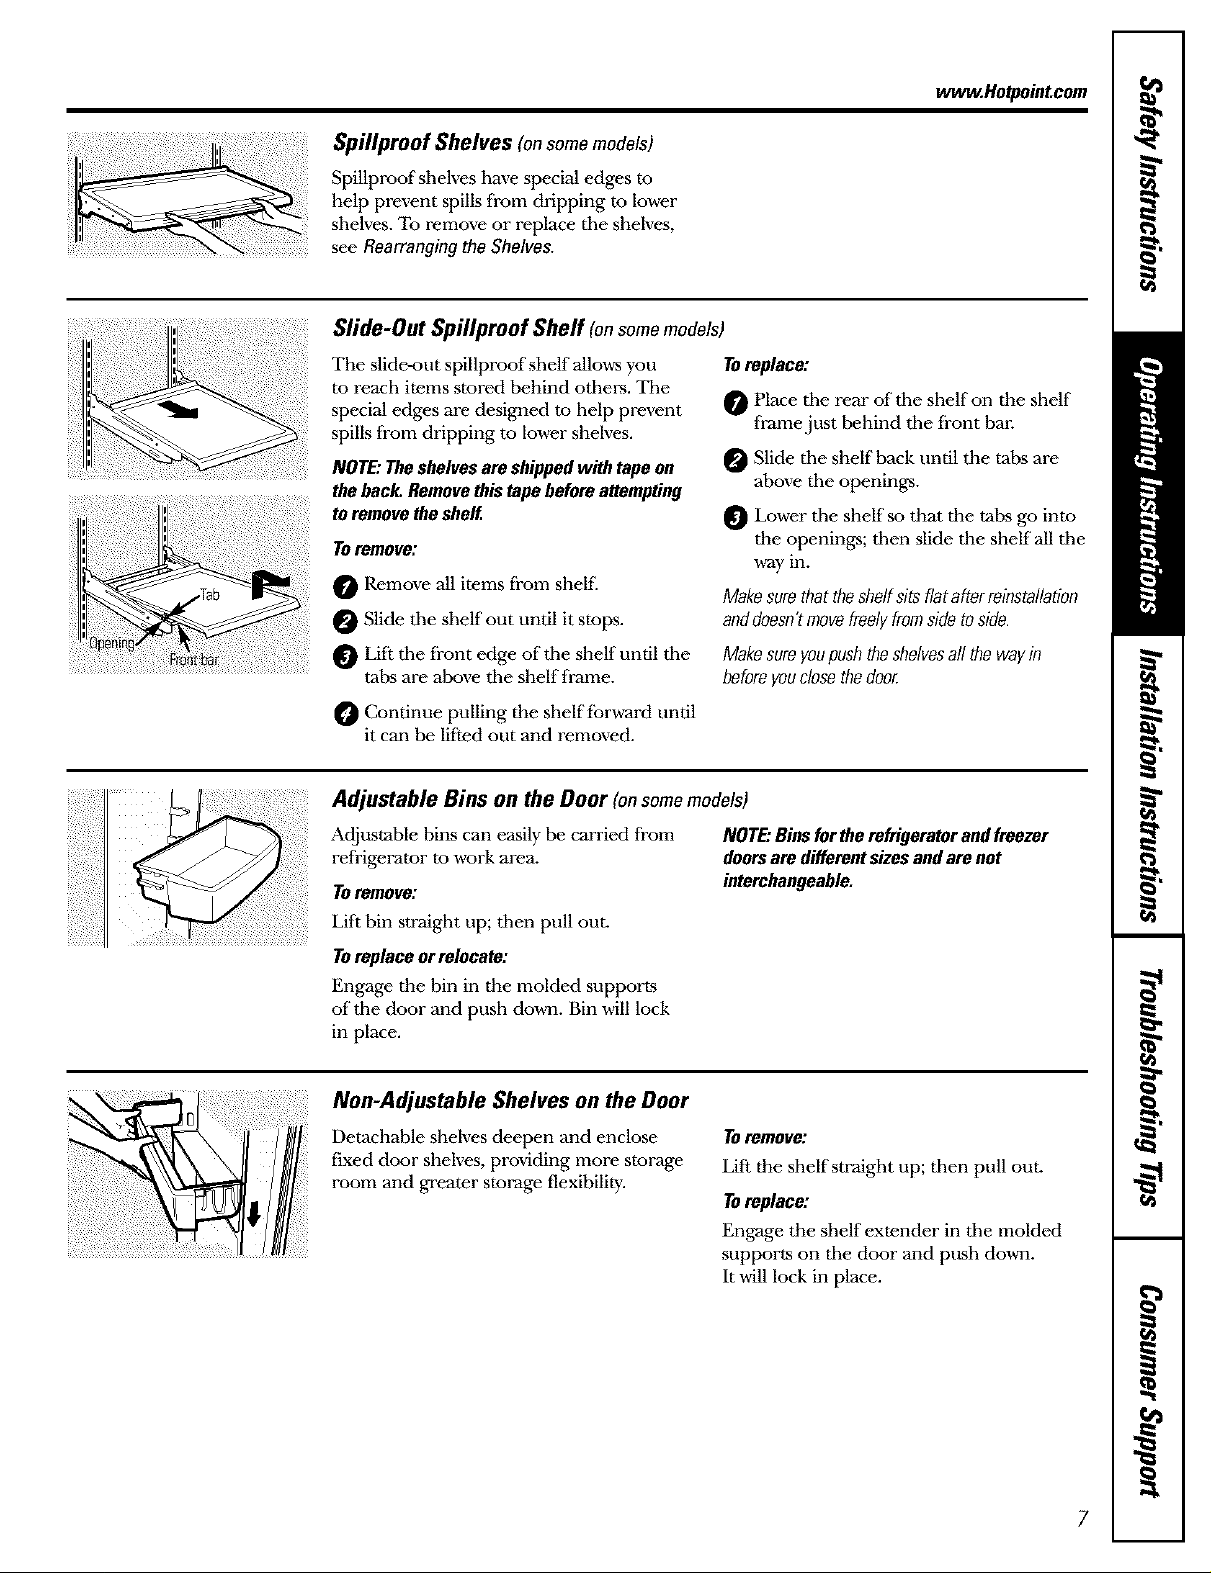
, Spillproof Shelves (onsomemodels)
' Spillproof shelves have special edges to
help prevent spills fronl dripping m lower
shelves. To remove or replace tile shelves,
see Rearrangingthe Shelves.
Slide-Out Spillproof Sheff (onsomemodels)
The slide-out spillproof shelf allows you
to reach items stored behind otllel.-s.Tile
special edges are designed to help prevent
spills fronl dripping to lower shelves.
NOTE:Theshelvesareshippedwith tapeon
theback.RemovethistapebeforeaUempting
toremovetheshelf.
TOremove:
O Remove all items from shel£
Slide tile shelf out until it stops.
Lift tile front edge of the shelf until tile
tabs are above tile shelf frame.
ww_.Ho_point.com
Toreplace:
Place tile rear of the shelf on the shelf
O
frame just behind the fi'ont bal:
Slide the shelf back until the tabs are
above the openings.
Lower the shelf so that the tabs go into
the openings; then slide the shelf all the
way in.
Makesurethattheshelfsitsflatafterreinstallation
anddoesn'tmovefreelyfromsidetoside.
Makesureyoupushtheshelvesall thewayin
beforeyouclosethedoor.
Continue pulling the shelf fbrward until
it can be lifted out and removed.
Adjustable Bins on the Door (onsomemodels)
Adjustable bins can easily be carried from
refrigerator to work area.
Toremove:
Lift bin st_'aight up; then pull out.
Toreplaceorrelocate:
Engage the bin in the molded supports
of the door and push down. Bin will lock
in place.
NOTE:Binsfortherefrigeratorandfreezer
doorsare differentsizesandarenot
interchangeable.
Non-Adjustable Shelves on the Door
Detachable shelves deepen and enclose
fixed door shelves, providing more storage
room and greater storage flexibility.
TOremove:
Lift the shelf st_'aight up; then pull ouL
TOreplace:
Engage the shelf extender in the molded
supports on the door and push dov_ql.
It will lock in place.
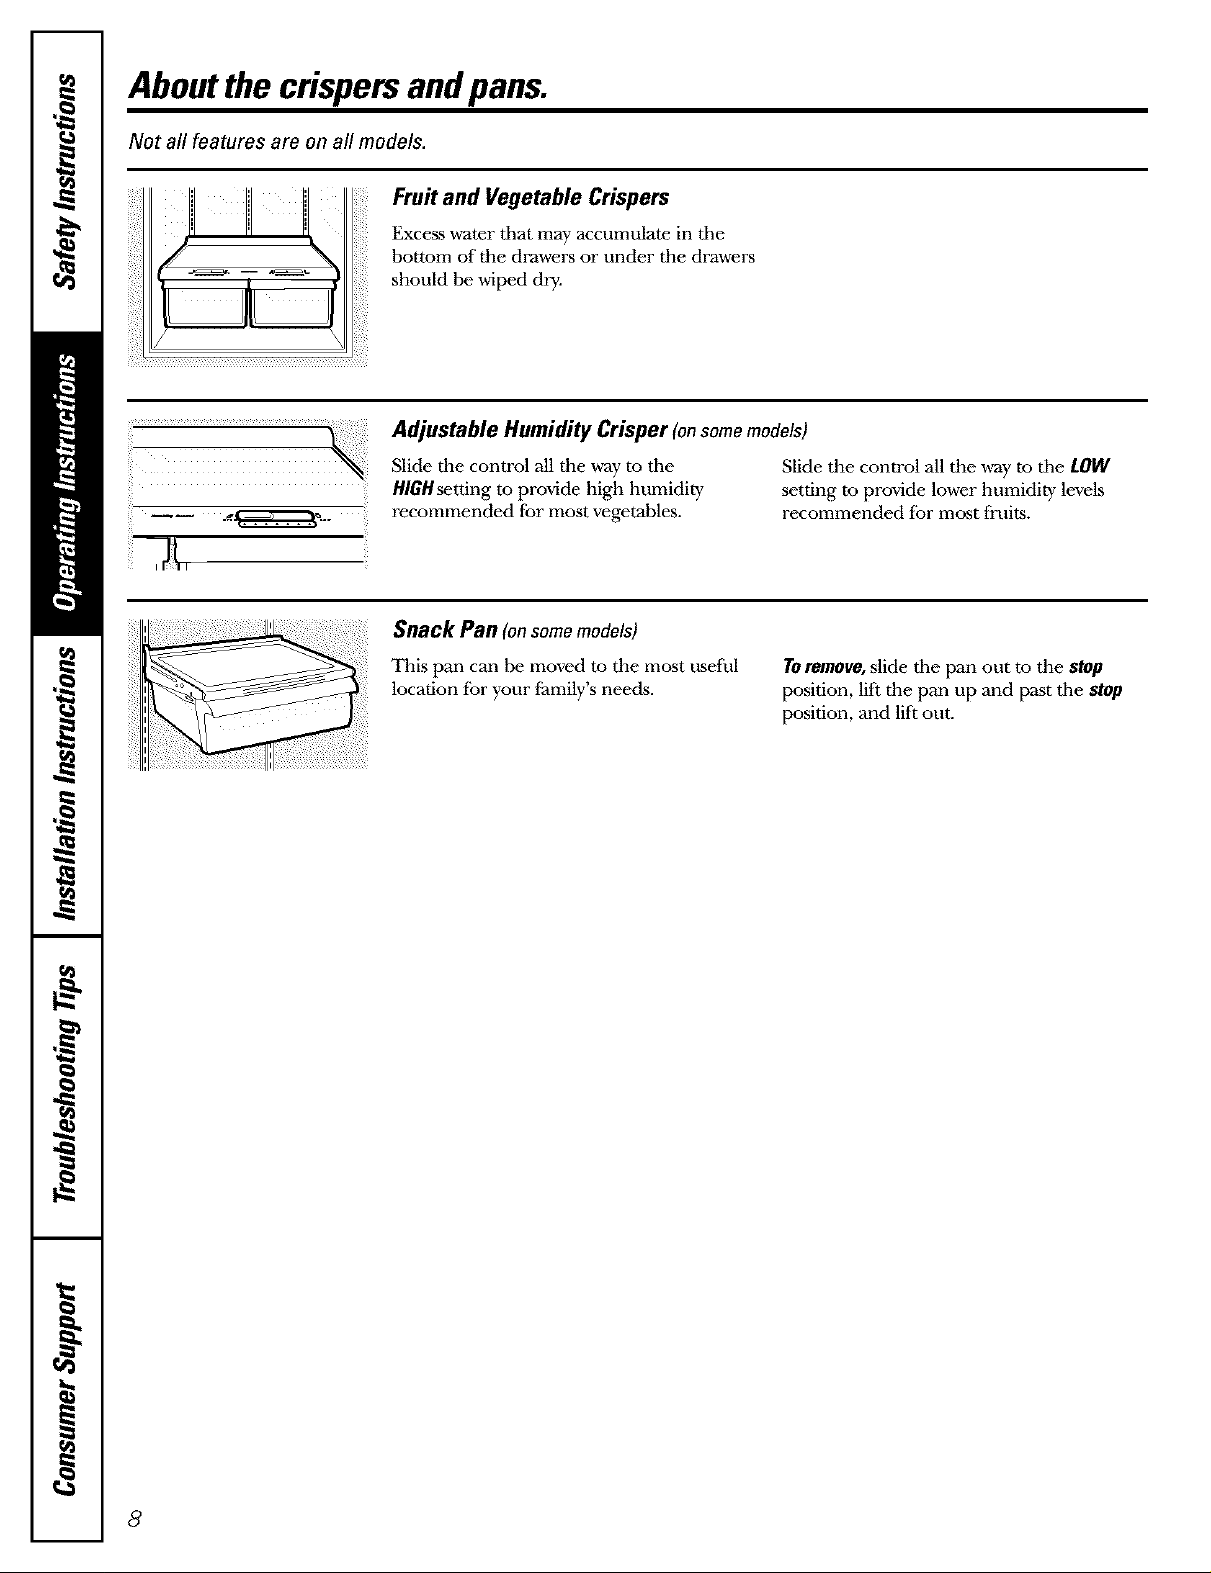
Aboutthe crispersandpans.
Not all features are on all models.
Fruit and Vegetable Crispers
Excesswater that may accumulate in the
bottom of the drawers or under the drawers
should be wiped dry.
Adjustable Humidity Crisper (onsomemodels)
Slide the control all the way to tile
HIGHsetting to provide high humidivy
recommended for most vegetables.
Snack Pan (on somemodels)
This pan can be moved to the most useful
location for your i_amily'sneeds.
Slide the control all the way m tile LOW
setting m provide lower humidity levels
recommended for most fruits.
TOremove, slide tile pan out to the stop
position, lift the pan up and past the stop
position, and lift out.
8
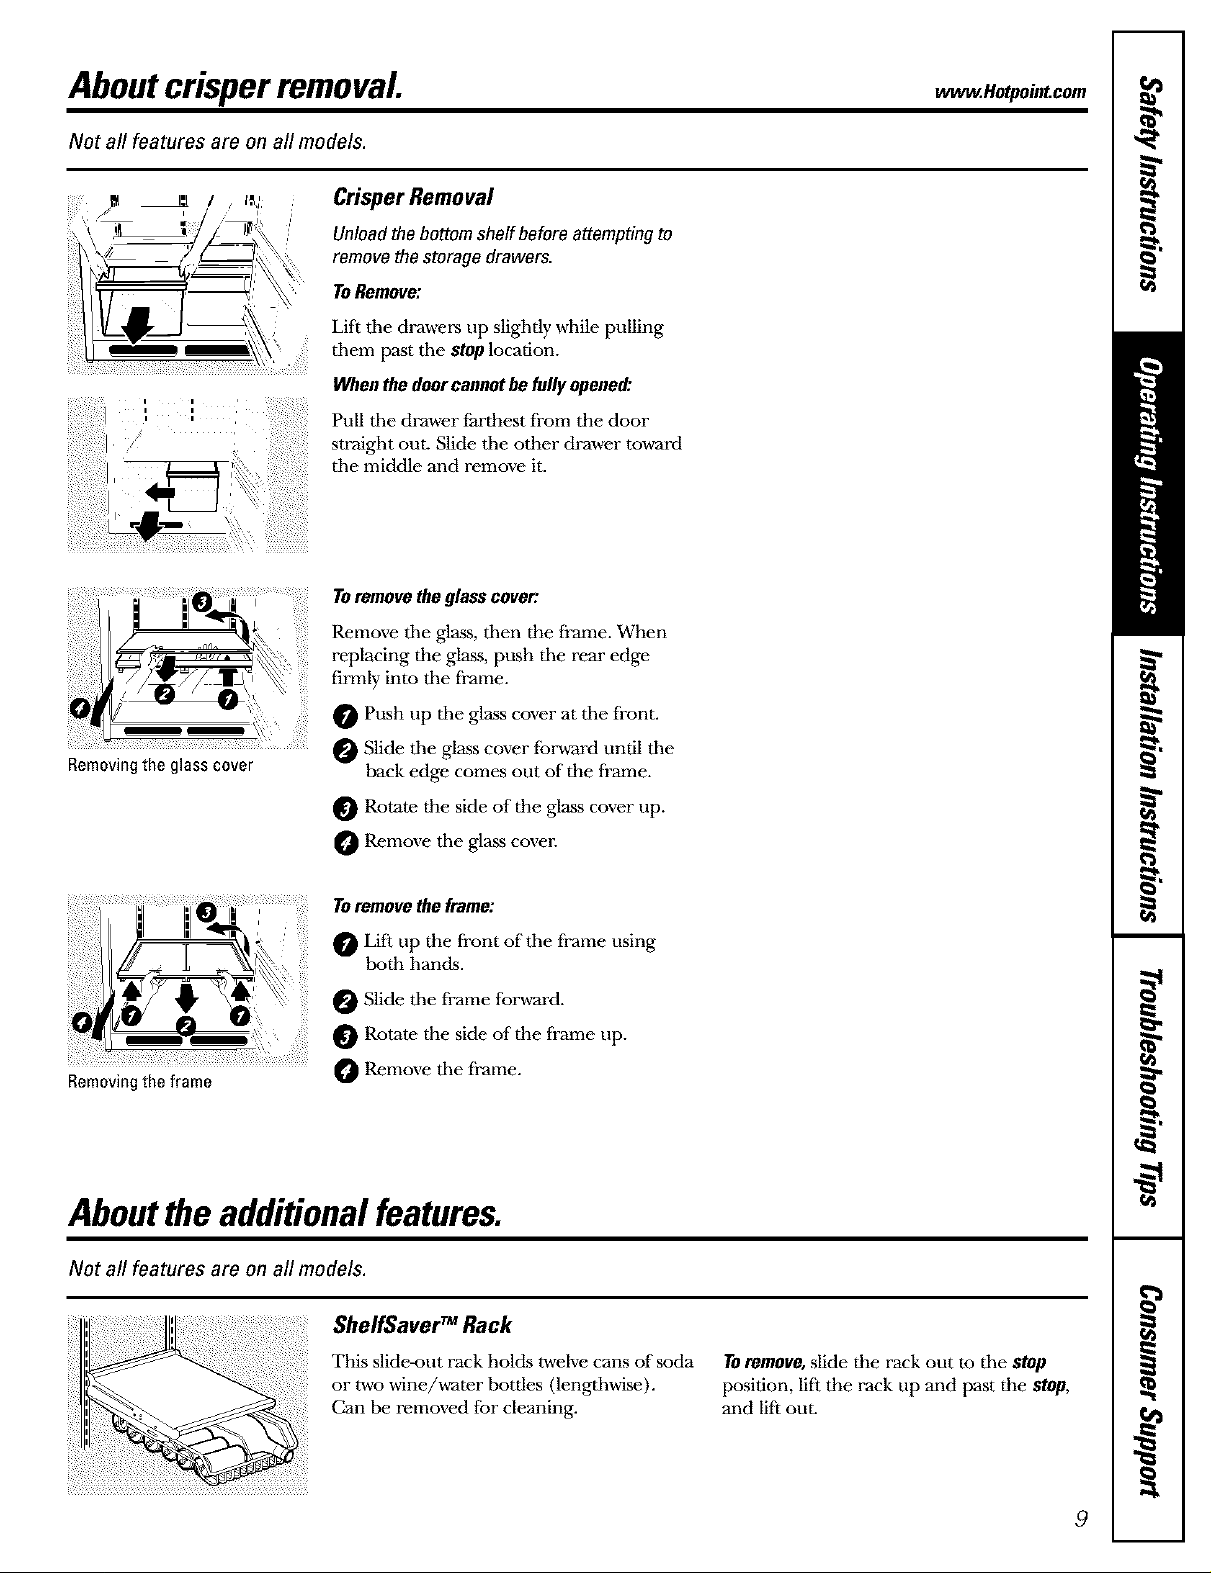
Aboutcrisperremoval. eotpointcom
Not all features are on all models.
i'l/ <,
Removingthe glass cover
Crisper Removal
Unloadthe bottom shelf beforeattemptingto
removethestoragedrawers.
ToRemove:
Lift tile drawers up slightly while pulling
them past tile stoplocation.
Whenthedoorcannotbefullyopened:
Pull the drawer farthest from the door
straight out. Slide tile other drawer toward
tile middle and remove it.
Toremovetheglasscover:
Remove tile glass, then the frame. When
replacing the glass, push tile real" edge
firmly into tile frame.
O Push up tile glass cover at tile front.
Slide tile glass cover f;_rward until tile
back edge comes out of the frame.
Rotate the side of the glass cover up.
Remove the glass cover.
Toremovetheframe:
Lift up the front of the frame using
both hands.
Slide the frame forvcard.
Rotate the side of the frame up.
Removingthe frame
Remove the frame.
Aboutthe additionalfeatures.
Not all features are on all models.
ShelfSaver TM Rack
This slide-out rack holds twelve cans of soda
or two wine/water t>ottles (lengthwise).
Can be removed for cleaning.
TOremove,slide the rack out to the stop
position, lift the rack up and past the stop,
and lift out.
9
Aboutthe automaticicemaker.
A newly-installed refrigerator may take 12-24 hours to begin making ice.
Automatic Icemaker (onsomemodels)
There are 2types of icemakers:
Power switch model
Feelerarm model
The icemaker will produce approximately
3 to 3½ lbs. of ice in a 24-hour period,
depending on the freezer compartment
temperature, room temperature, number
of door openings and other use conditions.
There are two types of icemakers: power
switch models and feeler arm models.
If the refrigerator is operated hefbre the
water connection is made to tile icemakm;
set tile power switch to 0 (06*)or move the
feeler arm ro the STOP (tip) position.
When the refrigerator has been connected
to the v_-ater supply, set the power switch to
the/(0n)position or move the fizeler arm to
the ON (down) position. On power switch
models, the green light will come on.
The icemaker will fill with water when it
cools to 15°E A newly-installed refrigerator
may take 12 to 24 hours to begin making
ice cubes.
Once the icemaker starts to make ice,
it may take tip to 48 hours to fill the bin,
depending on the temperature settings
and number of door openings.
You will hear a buzzing sound each time
the icemaker fills with water.
Throw away the first few batches of"ice
to allow the water line to clear.
Be sure nothing interferes with the sweep
of the fizeler arm.
When the bin fills to the level of the fizeler
arm, the icemaker will stop producing ice.
It is normal for several cubes to be joined
together.
If ice is not used frequently, old ice cubes
will become cloudy, taste stale, shrink or
fhse together.
On power switch models, the green power
light will blink if ice cubes get stuck in the
icemaker. To correct this, set the power
switch to 0 (Off)and remove the cubes.
Set the power switrh to I(on)to restart the
icemakm: After the icemaker has been
turned on again, there will be a delay of"
about 45 minutes before the icemaker
resumes operation.
NOTE:Inhomeswithlower-than-averagewater
pressure,youmayheartheicemakercyclemultiple
timeswhenmakingonebatchofice.
Icemaker Accessory Kit
lfyour refrigerator did not already come
equipped with an automatic icemakm;
an icemaker accessory kit is a'_ailable at
extra cost.
Water Filter Accessory
The water filter is an option at extra cost
and is available from your dealm: Specify
WR97X0214. It has complete installation
insrructions and installs on 1/4" O.D.
copper water line or plastic tubing that
is included in a GE SmartConnect '"
Refrigerator Tubing kit. When using the
....................................................................................plastic tubing, an additional piece of plastic
tubing (WX08X10002) must also be
ordered since the plastic tubing should
not be cut.
10
Check the back of the refrigerator for the
specific icemaker kit needed for your model.
NOTE:TheonlyGEapprovedplastictubingisthat
suppliedinGESmartConnecf_RefrigeratorTubing
kits.Denetuseanyotherplasticwatersupplyline
becausethelineisunderpressureatall times.
Certaintypesefplasticwillcrackorrupturewith
ageandcausewaterdamageto yourhome.
 Loading...