How it Works
Log In / Sign Up
Buy Points
How it Works
FAQ
Contact Us
Questions and Suggestions
Users
Hotpoint
Loading...
H
HR 7011 B H
2
HR 724 B H
2
HR 86 T.1 IX
HR 86 T.1 IX/HA
HR 87.1 IX
HR 87.1 T IX
HR 87 P.1 IX
HRF3114UK
HRP 6.5 CM
HRP 6.5 CM AN/HA
HRP 6.5 CM /HA
HRP 6.5 CM OW/HA
HRP 6.5S CM AN/HA
HRP 6.5S CM /HA
HRP 6.5S CM OW/HA
HRP 9.6 CM
HRP 9.8 CM
HRP 9.8 CM AN/HA
HRP 9.8 CM /HA
HRP 9.8 CM OW/HA
HS 110
HS12
HS 12 A1 D.UK.1
6
HS16
HS1621
HS16XX
HS 18011 UK
HS 1801 AA.UK.1
3
HS2321L
2
HS2322L
2
HS3022VL
HS 6
HS62X
HS63X
HS6EIX
HS 7
HS70X
HS73X
HS 9
HS92X
HS93I
HS93X
HS9EIX
HS B10 BAB
HS B10 BDB
HS B10 BEB
HS B16 AA0
HSB 7M124 B EU
HSB 7M124 X EU
HSD6EIX
HSD7EIX
HSD92 I
HSD9EIX
HSFC 3M19 C UK
HSFC 3M19 C UK N
HSFCIH 4798 FS UK
HSFE 1B19 B UK N
HSFE 1B19 S UK
HSFE 1B19 UK
HSFE 1B19 UK N
HSFO 3T223 W
HSFO 3T223 W UK
HSFO 3T223 W UK N
HSFX.1
2
HSFX.1/1
HSH22IFTABB
2
HSH22IFTACC
2
HSH22IFTAWW
2
HSH22IFTCBB
2
HSH22IFTCCC
2
HSH22IFTCWW
HSH22IFTDBB
2
HSH22IFTDCC
HSH22IFTDWW
2
HSH22IFTEBB
HSH22IFTECC
2
HSH22IFTEWW
2
HSH25GFB
2
HSH25GFBBB
2
HSH25GFBBBB
HSH25GFBBSA
HSH25GFBWW
2
HSH25IFTABB
2
HSH25IFTACC
HSH25IFTASA
HSH25IFTAWW
2
HSH25IFTDBB
2
HSH25IFTDCC
HSH25IFTDWW
2
HSH25IFTEBB
2
HSH25IFTECC
2
HSH25IFTEWW
2
HSH25IFTFBB
2
HSH25IFTFCC
2
HSH25IFTFWW
2
HSIC 3M19 C UK
HSIC 3M19 C UK N
4
HS MC 07A ZO UK
HS MR 2A ZU B UK
2
HS MR 4A ZO UK
2
Loading...
Loading...
Nothing found
HSB 7M124 B EU
User Manual
28 pgs
8.76 Mb
0
Table of contents
Loading...
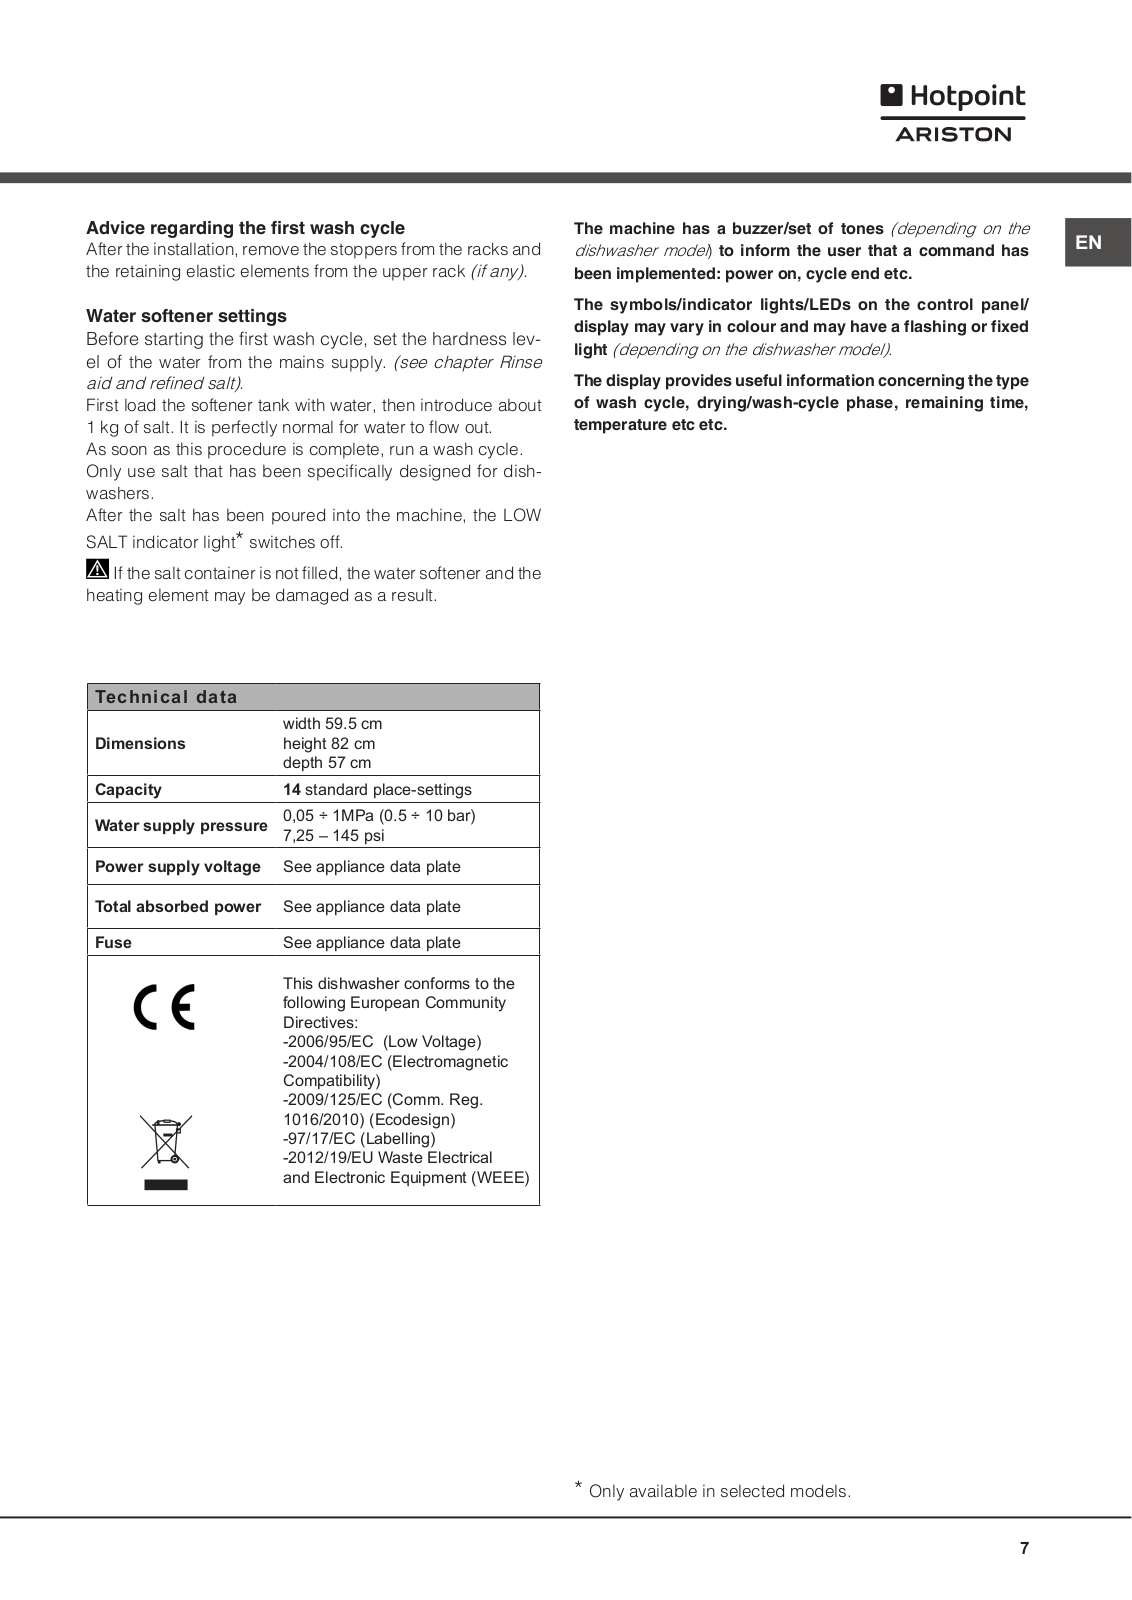
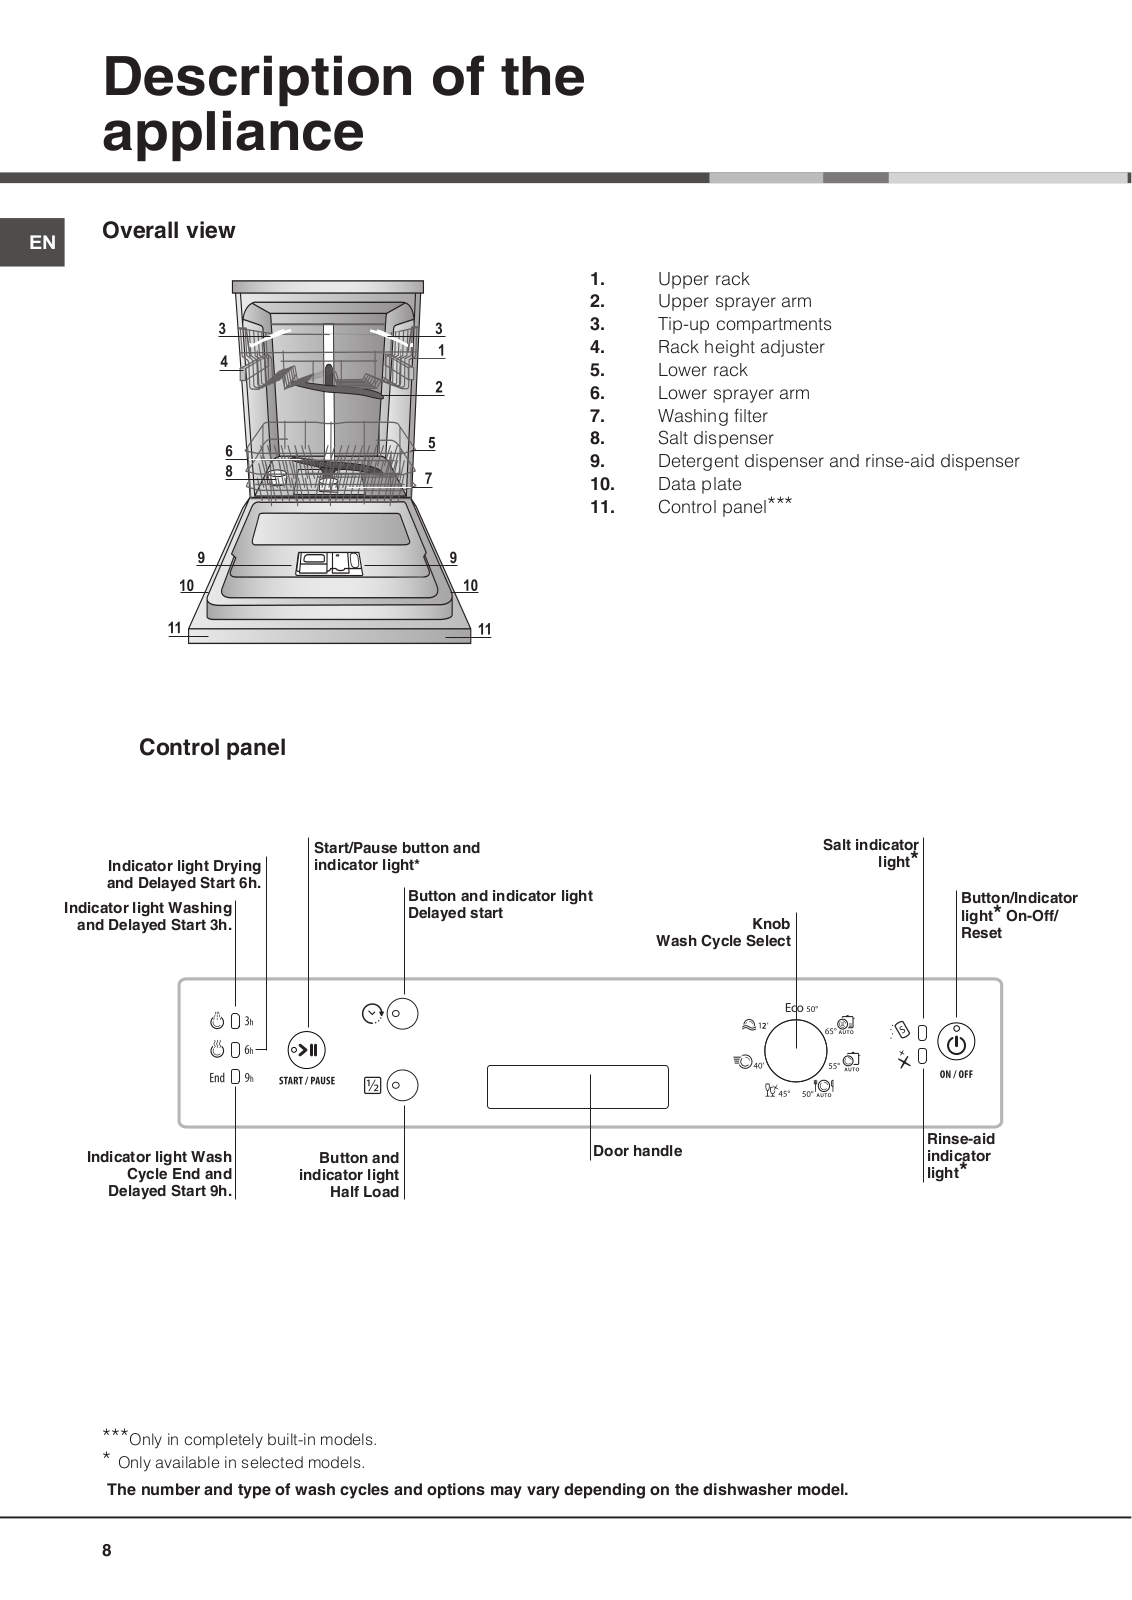
Hotpoint HSB 7M124 B EU, HSB 7M124 X EU User Manual
...
Hotpoint User Manual
Download
Specifications and Main Features
Frequently Asked Questions
User Manual
Download
Loading...
+
19
hidden pages
Unhide
You need points to download manuals.
1 point = 1 manual.
You can buy points or you can get point for every manual you upload.
Buy points
Upload your manuals
 Loading...