

Page 1
FREEZER - MODEL FZA30
INSTRUCTIONS FOR INSTALLATION & USE
GETTING STARTED:
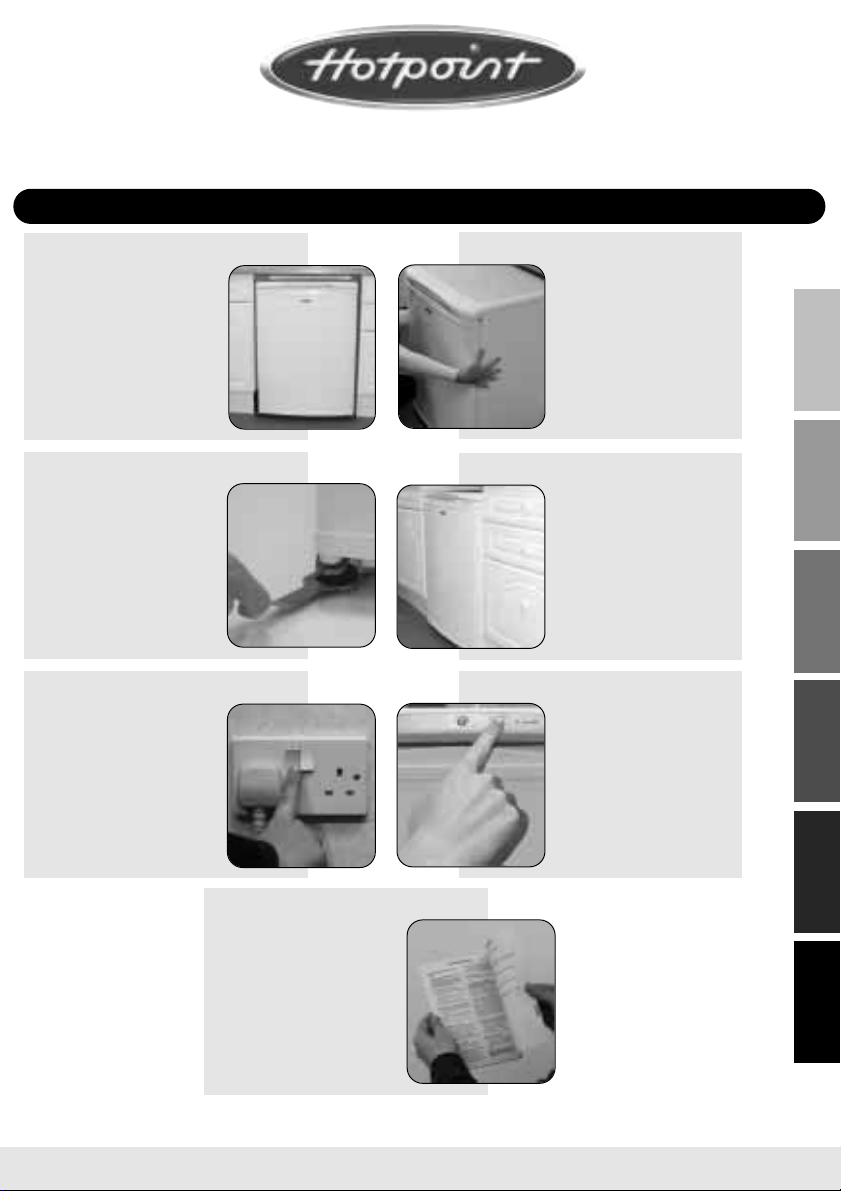
STEP 1
Choose a location for your
freezer,away from any
heat sources and allow
adequate ventilation -
30mm (11/4 inches)
gap above.
To ensure that your freezer runs reliably and efficiently follow these steps.
STEP 2
STEP 3 STEP 4
Level the freezer by
adjusting the front feet.
This will stop rocking or
vibration and keep the
NB.The spanner is for illustration
only and is not supplied with the
door aligned.
freezer.
STEP 5 STEP 6
Plug in and switch on.
Allow the freezer to cool
before placing food
The high temperature
light will stay on until the
freezer has cooled down.
All food in the freezer
should be covered.
inside.
Move the freezer into
position, using the sides
of the cabinet. Take care
to avoid damaging the
refrigerant circuit pipe
work on the rear.
Before plugging in and
switching on, leave the
freezer in its final
location for at least 15
minutes to allow it to
settle.
If you are freezing fresh
food,turn on fast freeze by
pressing the switch 24
hours before placing the
food inside.
Place the fresh food
inside.
Remember to turn fast freeze off
after 24 hours, however if you
forget to do so it will automatically
cancel after 48 hours.
INSTALLATION
SAFETY &
CONTROLS USEFUL ADVICE
MAINTENANCE
CLEANING &
TROUBLESHOOTING
STEP 7
Your freezer is now
working.
If after 24 hours your
freezer is not operating as
you want, refer to the
TROUBLESHOOTING
section.
Read the rest of these instructions to get the best from your appliance
and remember to fill in your guarantee registration.
Keep this Book in a safe place for quick reference.
GUARANTEE
SERVICE &
Page 2

For Your Safety
For your safety, read the following advice:
The freezer cooling system contains a small amount of gas which is environmentally
friendly but flammable. To avoid any risk :-
● Install the freezer following the installation instructions and ensure
that ventilation openings are kept clear of obstruction.
● Take care when installing or moving the freezer to avoid damaging
the pipes on the rear.
● If you suspect a leak, do not switch on the freezer,but open the
windows and doors to ventilate the room.
● Do not use any electrical devices inside the freezer, for instance for
SAFETY &
INSTALLATION
● Do not use any mechanical devices for defrosting other than any which may
● Only use this freezer for storing domestic foodstuffs.
When installing your freezer :-
● Ensure that the mains cable is not trapped underneath or behind the freezer
● Do not stack any other appliance on top of this freezer as they may
defrosting.
have been supplied with the freezer, as they may cause damage.
when you install or move it.
damage the freezer or become unstable.
When using your freezer :-
● Do not sit or stand on top of your freezer.
● Do not store poisonous, flammable or dangerous substances in your freezer.
● Do not use aerosol sprays for defrosting or cleaning your freezer.
If you sell the freezer, pass on this booklet to the new owner.
2
Page 3
Installation
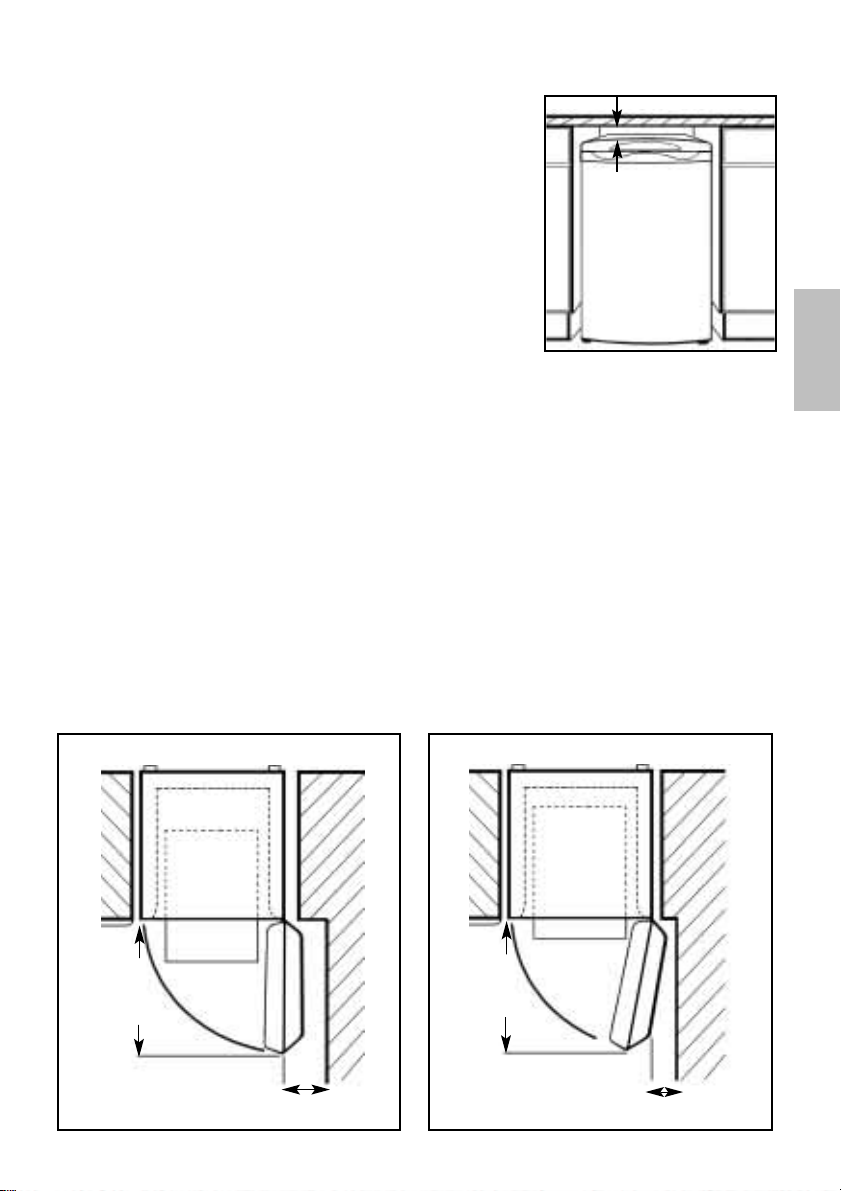
Location & Air Circulation
30mm (11/4 inches)
Locate your freezer away from sources of heat e.g.
cookers, radiators, direct sunlight as extreme temperature
will affect its performance.
Allow a minimum 30mm (11/4
inches) between the top of
the freezer and the underside of the worktop.
Providing you follow the recommended ventilation requirements you will :-
● Prolong the life of the freezer.
● Minimise the risk of condensation on the outside of the freezer.
● Minimise the running costs.
● Minimise operating sounds caused by vibration.
Minimum space required to open door
The freezer needs a space of 600mm (24 inches) in front to allow the door to
open.
When positioning the freezer next to a unit, a gap of 30mm (1
1
/4inch) can be left
at the hinge side of the door to allow the easy removal of furniture.If preferred
the freezer can be positioned so that a gap is not left.This will restrict how far the
door can be opened but the furniture can still be removed (see diagrams below).
The door hinge side can be changed to make it easier to open (see ‘Door Reversal’
in the CLEANING & MAINTENANCE section).
INSTALLATION
SAFETY &
600mm
TOP VIEW
30mm or more
TOP VIEW
600mm
less than 30mm
3
Page 4

Installation
Levelling:
Level the freezer when it is in its final location by adjusting the front feet, until firm
contact is made with the floor. This will stop rocking or vibration and keep the door
aligned which helps the freezer run reliably and efficiently.
Note: Before plugging in and switching on,leave the freezer standing in its
final location for at least 15 minutes to allow it to settle.
Fitting a Freezer under a Work Top
To minimise running costs Hotpoint recommend fitting a vent to the rear of your
SAFETY &
worktop,which is available from Hotpoint Genuine Parts & Accessories Mail Order
INSTALLATION
Hotline (see KEY CONTACTS,back page).
WARNING:If there is less than 30mm (11/4 inches) clearance above the freezer,a
Vent must be fitted to provide adequate ventilation above your freezer.
4
Page 5
Installation
Electrical Supply
WARNING:This appliance must be earthed.
The appliance must be positioned so that the plug is accessible after
installation.
Fuses
Your appliance comes fitted with a plug and a 13A fuse. If you need to replace the
fuse, only use those rated at 13A and ASTA approved to BS1362.
Changing the Plug
Cut off and dispose of the supplied plug if it does not fit your socket.
WARNING:To avoid a shock hazard do not insert the discarded plug into a socket
anywhere else.
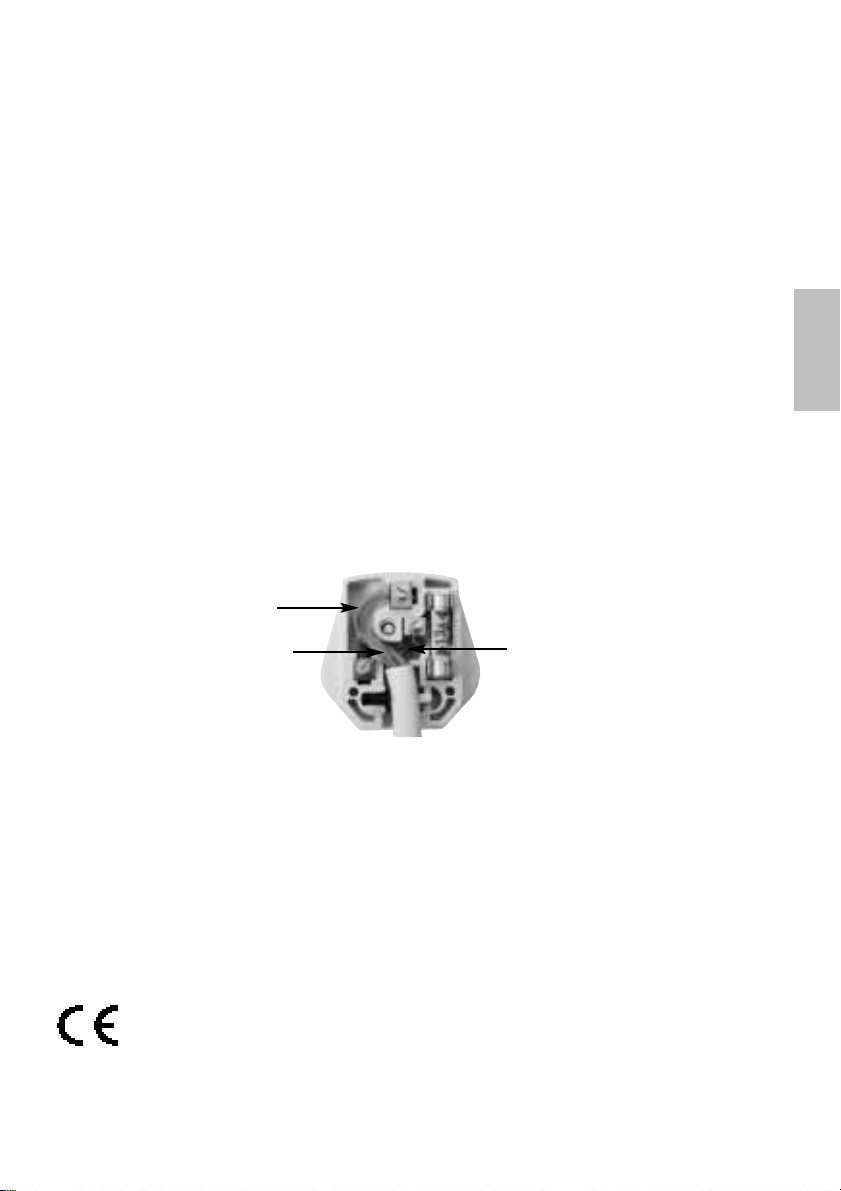
IMPORTANT WIRES IN THE MAINS LEAD ARE COLOURED IN ACCORDANCE WITH THE
FOLLOWING CODE :
Green/Yellow - Earth
INSTALLATION
SAFETY &
Blue - Neutral Brown - Live
If you change the plug, the colour of wires in the mains lead may not correspond with
the colour of the markings identifying terminals in the plug. You should therefore wire
it as shown above.
Changing the Mains Lead
This appliance is fitted with a special mains lead. If you need to replace the mains lead
due to damage or require a longer lead,one can be bought from Hotpoint Service (see
KEY CONTACTS,back page). It is strongly advised that this work is carried out by a
qualified electrician.
CE Marking certifies that this appliance conforms to the following EEC
directives : Low Voltage Equipment - 72/23/EEC & 93/68 EEC
Electromagnetic Compatibility 89/336/EEC, 92/31/EEC & 93/68/EEC
5
Page 6
Controls
Controlling the Temperature of the Freezer Compartment
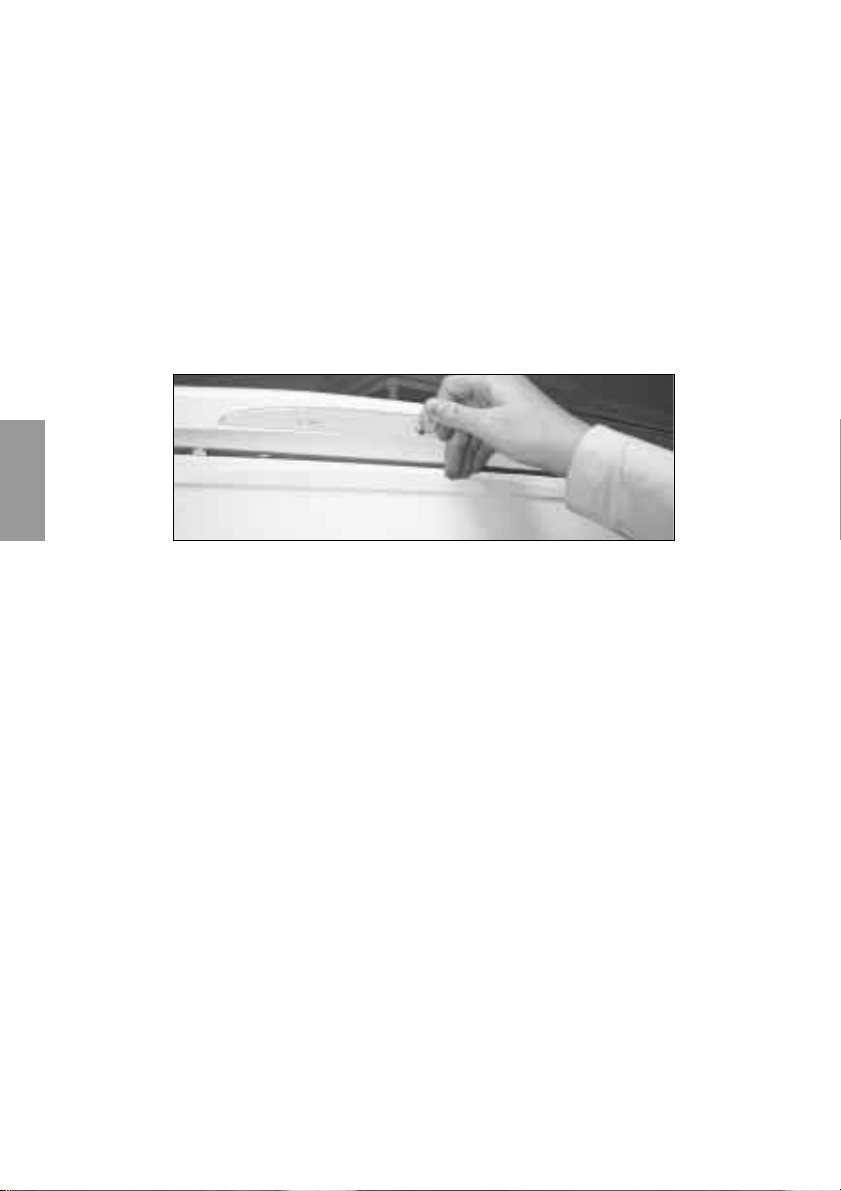
The control wheel on the front panel adjusts the internal freezer temperature.
The internal freezer temperature should be -18˚C or colder.
The setting of the control wheel will depend on the location of the freezer, the room
temperature and how often the door is opened. The normal set point (marked by a 3
on the dial) is usually suitable. If you need to adjust the temperature turn the control
wheel using a coin to avoid damage:
Clockwise (higher number) - Colder
Anti-clockwise (lower number) - Warmer
CONTROLS
You can check the temperature of the freezer compartment by using a Fridge Freezer
Thermometer available from Hotpoint Genuine Parts and Accessories Mail Order
Hotline (see KEY CONTACTS back page).
WARNING: Do not use a mercury filled thermometer,as breakage would cause a
health hazard.
Your freezer must NOT be placed in a room where the temperature goes below 6˚C or
above 32˚C for prolonged periods,as the internal freezer temperature will not be
maintained.
6
Page 7
Controls
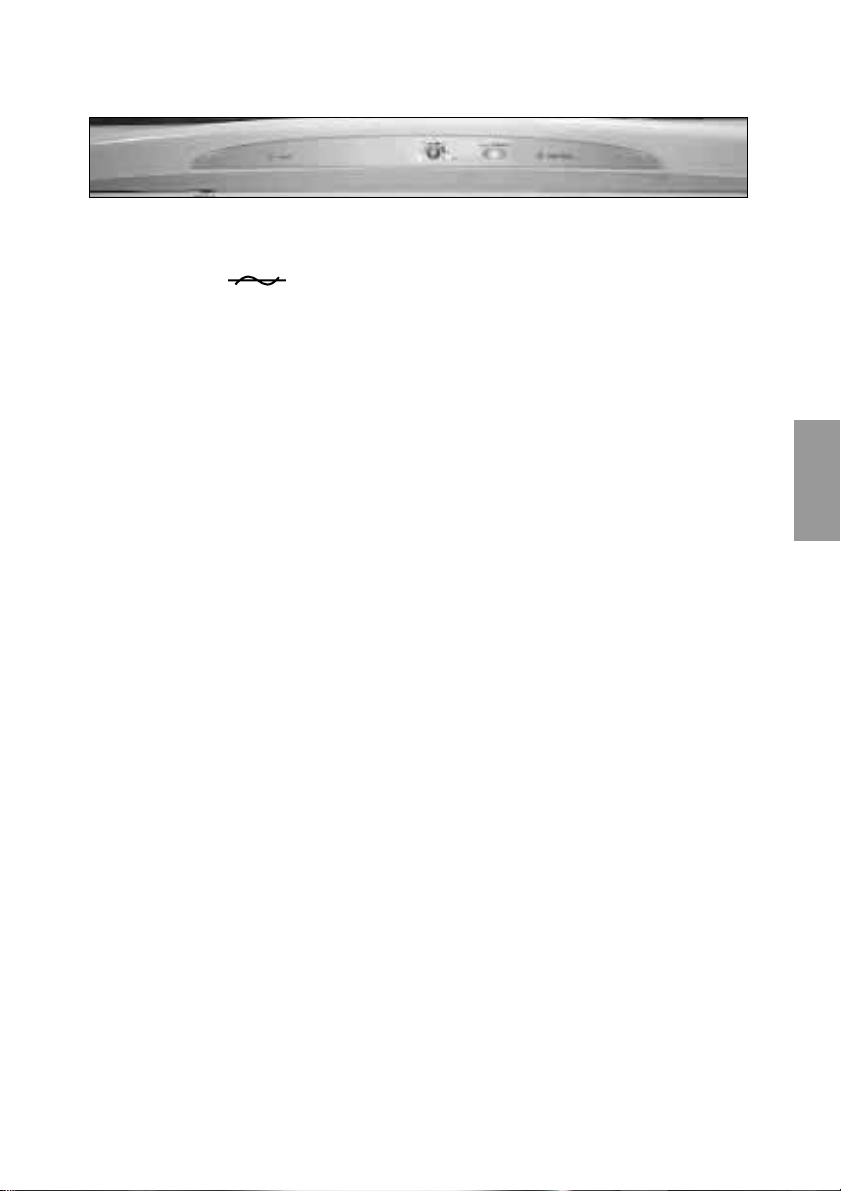
Indicator Lights
Green Mains Light
The green mains light will stay on as long as the electricity supply is not interrupted.
Amber Fast Freeze Light
The amber fast freeze light indicates that the fast freeze button has been pressed on.
By pressing this button ON, the freezer motor will run continuously for extra cooling.
Red High Temperature Warning Light
The red temperature warning light will come on when the freezer is first switched on
or when the temperature inside the compartment rises above the correct storage
temperature. Check the TROUBLESHOOTING section before calling for advice. The
red light may come on for a short period when opening the freezer door to load or
unload food,in this case storage times will not be affected.
CONTROLS
7
7
Page 8
Controls
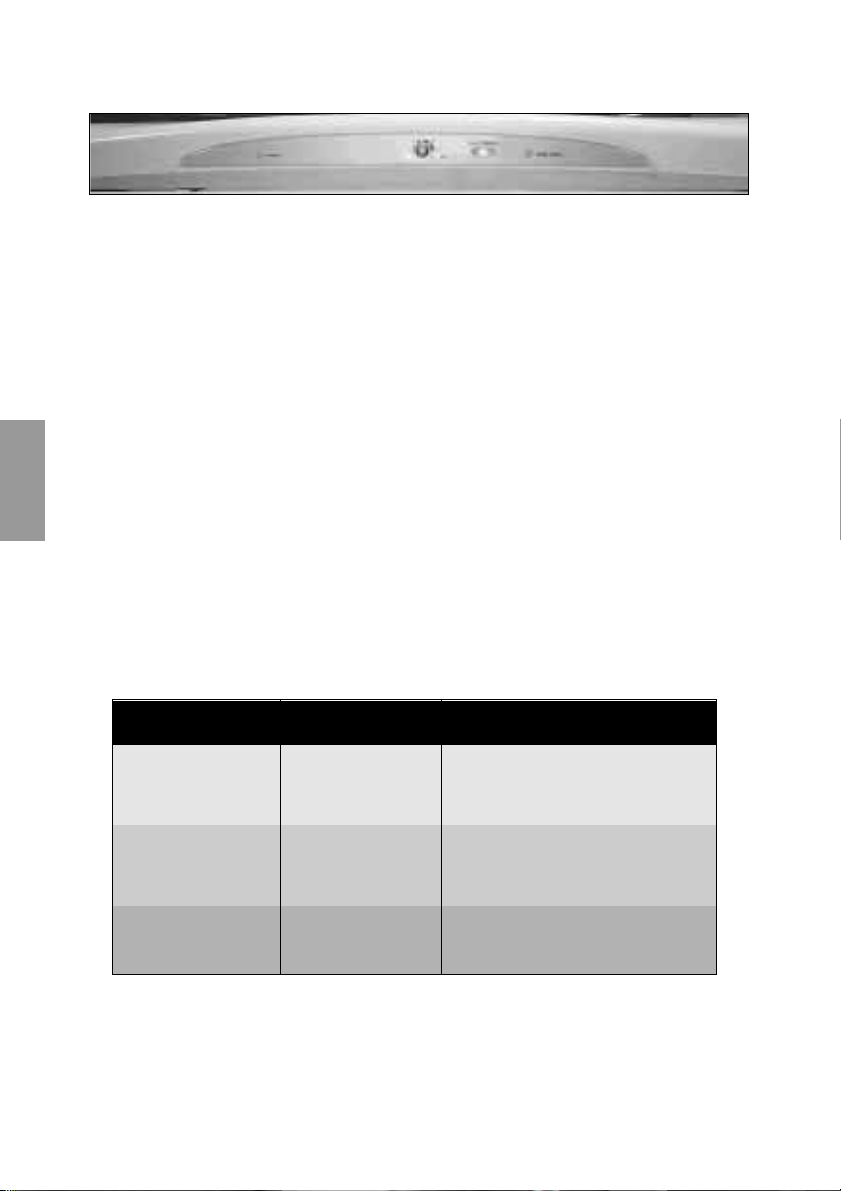
Fast Freeze Button - Freezing Fresh Food
The bottom compartment drawer should be used to freeze fresh food.
Transfer already frozen food to one of the upper drawers.
- Before loading 2kg or more of fresh food select fast freeze for the required
pre-freeze time (see chart below).
- If freezing up to 2kg of fresh food just select fast freeze when loading.
Once the fresh food is loaded leave fast freeze on for 24 hours to freeze the food as
quickly as possible.
Maximum freezing capacity in 24 hours: 8kg
CONTROLS
Note : Don’t forget to turn fast freeze off after 24 hours from the introduction of
fresh food to be frozen.
However fast freeze will turn off automatically after 48 hours if you do forget.
Pre-Freeze chart when selecting Fast Freeze:
Load for freezing Pre-freeze time Load position
5 to 8kg 24 hours in the bottom drawer.
2 to 5kg 12 hours as above.
up to 2kg not required as above.
8
Page 9
Useful Advice
FAST FREEZE
Note:
The Rating Plate,which lists the appliance Model Number and Serial
Number can be found near the bottom of the interior wall.
USEFUL ADVICE
Frozen Food Storage Capacity 25kg
Maximum Freezing Capacity in
24 hours 8kg
Maximum Conservation Time
from Failure 16 hours
9
Page 10
Useful Advice
How Frost Free works
The frost free system completely eliminates the need for defrosting.
A fan circulates air around the freezer. This helps to remove moisture from the
compartment, therefore preventing the build up of ice.
It is normal to hear the fan when the freezer is cooling.
Additional benefits of the frost free system include:
● More even temperatures throughout the freezer.
● Faster cooling times.
Making the best use of your Freezer
To ensure that your freezer operates as efficiently as possible :
● Follow food packaging “best before/use by”instructions or your suppliers
advice on a suitable maximum storage time.
● Keep foods tightly covered to retain moisture and prevent flavour/odour
transference. Plastic bags, aluminium foil, plastic stretch wrap and containers
with lids are ideal.
● Select chilled and frozen food last when shopping,transport in a ‘cool bag’
and place in freezer as soon as possible after arriving home.
● Avoid opening the door unnecessarily or for longer than needed.
● Allow hot or warm food to cool down in covered containers before placing in
USEFUL ADVICE
● Prepare fresh foods for freezing in small quantities to ensure that the food
● Ensure that packets/containers of food are dry before freezing otherwise
the freezer, as placing hot food inside reduces efficiency.
freezes quickly and so that its quality does not deteriorate.
they may freeze together.
10
Page 11
Useful Advice
Storing Food in a Freezer
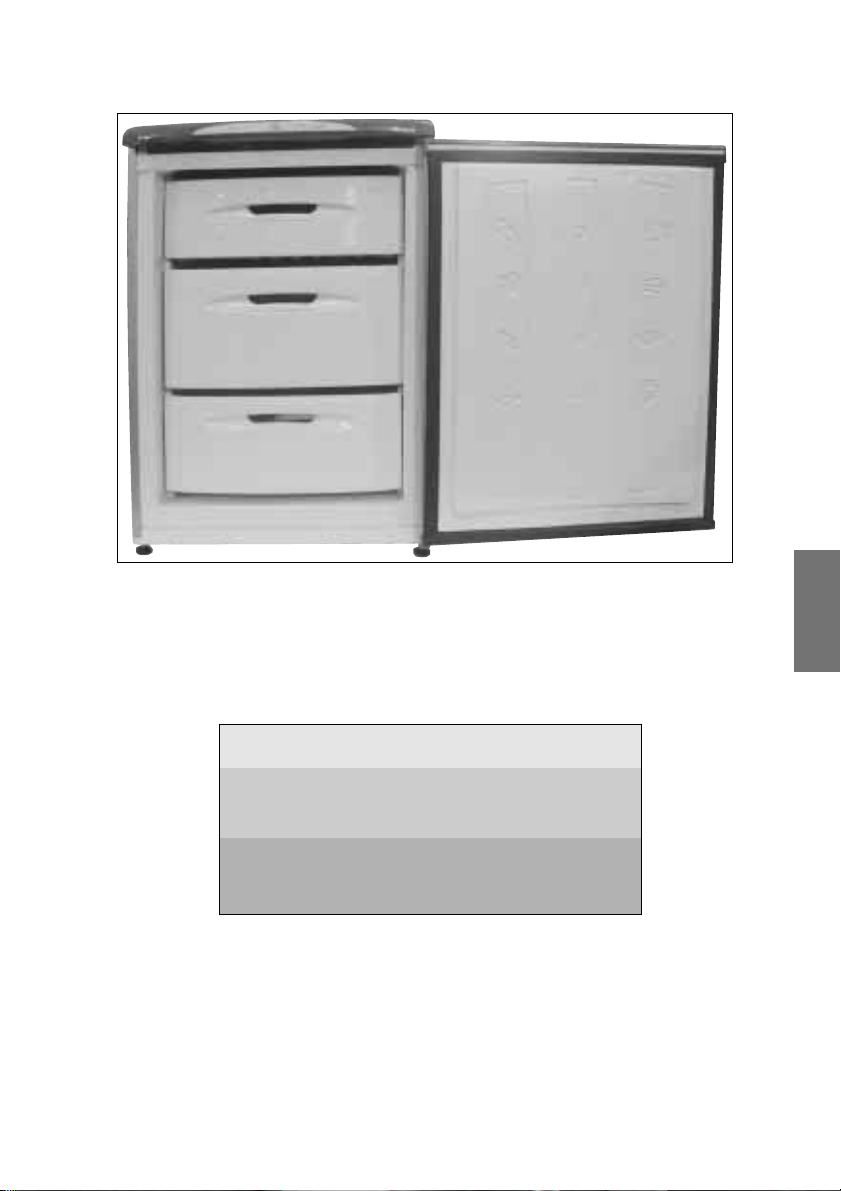
● Freeze and store either fresh food or long
term commercially frozen foods.
● Generally speaking long term storage means
up to 3 months but this can vary,so always
follow your supplier’s recommendations
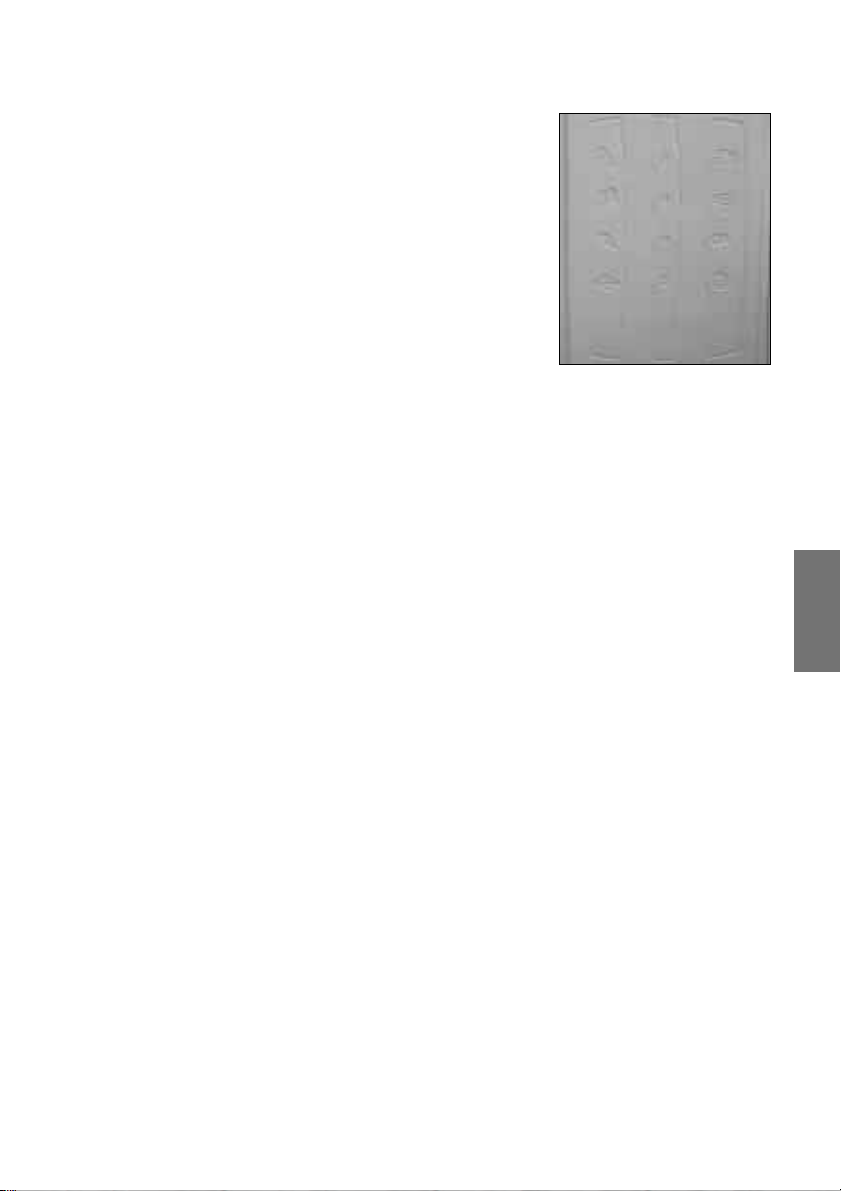
otherwise refer to the pictorial guide on the
door liner (as shown).
● Place frozen food in the freezer
compartment as soon as possible after
buying it.
● Liquid-filled bottles or sealed fizzy drinks must not be stored in freezer,as
they may burst.
● Lollipops and water ices should not be given to children directly from the
freezer the low temperature may cause ‘freezer burns’.
● Store ice cream towards the top front of the freezer and remove from freezer
15-30 minutes before serving.
● Ensure food is labelled and dated before placing in freezer.
● When freezing fresh food follow the instructions for using fast freeze (see
CONTROLS section).
● Do not allow fresh food to come into contact with food already frozen, the
frozen food could start to defrost.
● Once thawed,food should be cooked and eaten within 24 hours or cooked
and refrozen.
USEFUL ADVICE
11
Page 12
Useful Advice
Advice on Using Freezer Drawers
The freezer compartments must be used with the drawers.
The storage drawers can be easily removed. Pull the drawer towards you until it
reaches it’s stop position. Hold securely on both sides, lift the front of the drawer to
release and remove. For cleaning advice see CLEANING & MAINTENANCE section.
Ensure that the frozen food storage drawer are pushed back fully before closing the
door.
Food can be separated into different storage drawers for easy identification.
When lifting or removing the large deep drawer it is important to hold the side
handles and not the front handle.
WARNING: The freezer drawers can become heavy when fully loaded with food. Care
must be taken if attempting to lift or carry a full freezer drawer. It is recommended to
remove the required food, rather than the whole freezer drawer.
Note : It is important not to touch or move any of the freezer drawers/parts
with wet hands as it may cause freezer burn or discomfort.
Ice Tray
When making ice, always use the tray with the lid provided. Take care not to overfill
with water.
USEFUL ADVICE
Uncovered food should not be placed near the ice tray as it can affect the flavour of
the ice.
Note : Empty,wash and refill the ice tray periodically to ensure freshness.
12
Page 13
Cleaning
Cleaning
WARNING:Switch off electrical supply and pull out mains plug before cleaning.
Interior
WARNING:Do not use abrasive powder,household cleaner, bleach or wax
polish to clean the interior, they will leave a smell in the freezer.
1. Remove stored food,wrap or cover it and place into insulated containers to
keep frozen whilst cleaning.
2. Remove drawers from each compartment. Wash in warm water and washing
up liquid using a soft cloth, dry thoroughly.
3. Wipe the interior and fittings with a clean cloth wrung out in a solution of
either one teaspoon of bicarbonate of soda to one pint of water or Milton™
sterilising fluid, diluted according to the manufacturer’s instructions.
4. Dry the interior thoroughly with a clean cloth before replacing fittings and
food.
Note : It is important to ensure that cleaned drawers are thoroughly dried
before refitting into the freezer compartment.
Exterior
WARNING: Do not use abrasive powder, household cleaner or bleach,they
can damage the exterior of your freezer.
1. Use a clean soft cloth wrung out in warm water and washing up liquid to
wipe the exterior surface, dry thoroughly.
2. Use a soft brush or vacuum cleaner to remove dust from underneath the
freezer and from the compressor and condenser situated at the back
of the freezer.
WARNING: Do not damage the pipework.
Door Seal
Use warm water and a clean soft cloth to wipe along and in between the creases of
the door seal, dry thoroughly. Take care not to damage the seal and avoid using
sharp objects.
WARNING: Do not use detergent, it will damage the seal.
Going Away
If you are going away and don’t want to use your freezer,switch off the electricity
supply and pull out the mains plug. Remove food and follow the cleaning
instructions above.
Note : Leave the door ajar to prevent an accumulation of odours.
13
MAINTENANCE
CLEANING &
Page 14
Door Reversal
You will need a cross head screwdriver to carry out this procedure.
Our Service Department can arrange for an Engineer to do the conversion for you but
a charge will be made.
WARNING:Switch off electrical supply and pull out the mains plug.
Remove loose items/fittings from inside the freezer.
If you have previously set up and used the freezer and since decided to reverse the
doors, you must remove stored food, wrap or cover and place into insulated
containers to keep frozen whilst carrying out this operation.
1. Open the door as wide as possible.
Note : You may require assistance to do this:
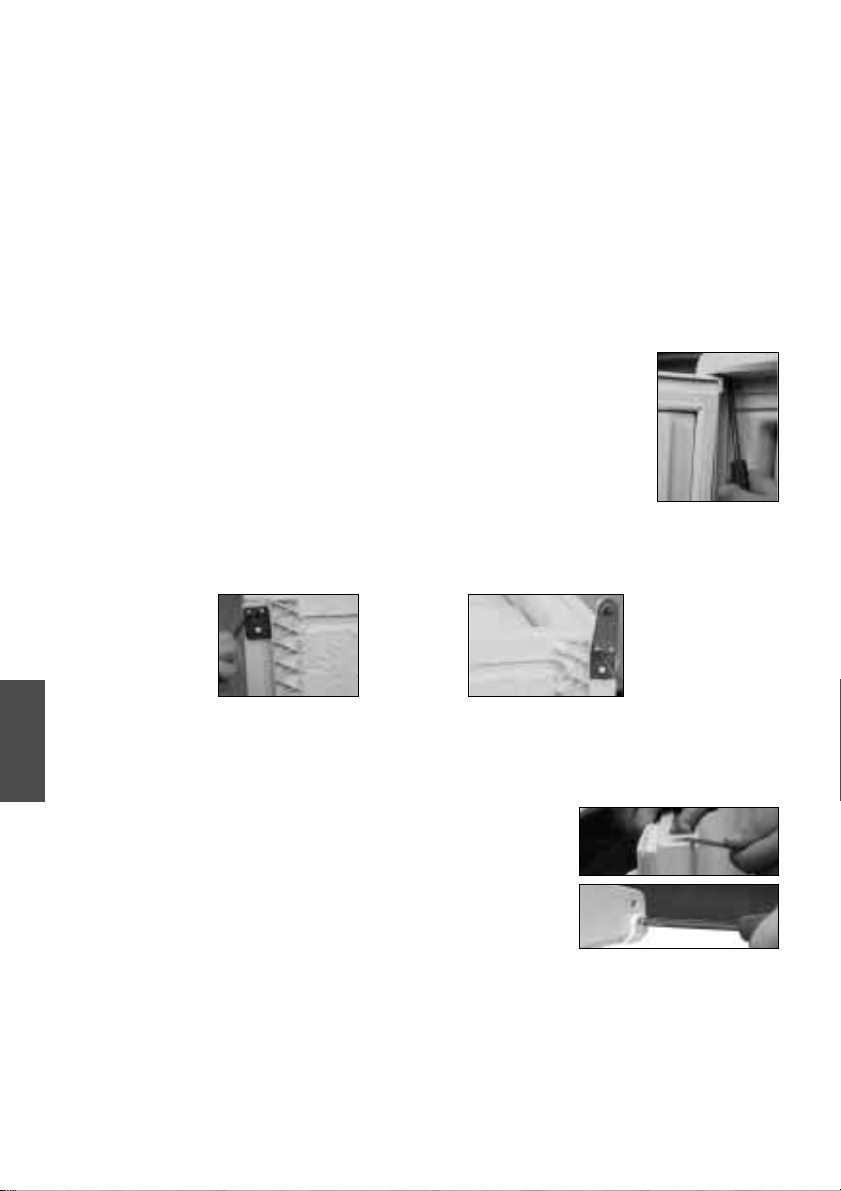
2. Support the door and using a screwdriver,remove the screw
securing the top hinge
3. Carefully tilt the door to remove the hinge from the cabinet
and lift the door off the bottom hinge.
4. Remove the top hinge from the door and remove the spacing
washers from the bottom hinge.
Note : You may require assistance to do this:
5. Carefully lay the freezer on its back,onto a suitable protective material
(ie. the original packaging).
6. Remove the foot bracket and the hinge/foot bracket by removing their fixing
screws.
hinge / foot
bracket
foot bracket
7. Refit the foot bracket and hinge/foot bracket on the opposite sides using
their fixing screws.
Note : You may require assistance to do this:
CLEANING &
8. Carefully lift the freezer upright and replace the spacing washers onto the
MAINTENANCE
bottom hinge pin.
9. Using a thin blunt instrument, remove the hinge
bush cap from the top left of the door and refit on
the top right.
10. If applicable - Use a screwdriver to remove the door
stop from the bottom right of the door and refit on
the bottom left, if fitted to your model.
Note : You may require assistance to do this:
11. Replace the top hinge onto the door,slide the door onto the bottom hinge
pin and support the door whilst screwing the top hinge into position. Ensure
that the top hinge bracket is positioned correctly.
12. Adjust the front feet (see ‘Levelling’SAFETY & INSTALLATION section).
Note : Let the freezer stand upright in it’s final location for at least 15
minutes before plugging in and switching on the electricity supply.
14
door stop
Page 15

Troubleshooting
IS THE FREEZER WORKING AS YOU
WANT?
Have you read through the
instruction book ?
If you still have a problem,before
calling our service organisation see if
any of the tips below help.
The freezer will not work
1. Check plug is firmly positioned in the
socket outlet and the power supply is
switched on.
2. Check power supply with another
appliance.
3. Check fuse/circuit breaker.
4. Check the door is closed properly.
The freezer is making a lot of noise
1. Check that the rear pipe work is clear
of the wall, skirting board and other
obstacles.
2. Check that all four feet/wheels are
firmly in contact with the floor and
the freezer is level.
3. See ‘OPERATING SOUNDS’ overleaf.
The freezer is too warm
1. Turn the control wheel to a higher
number. See CONTROLS section.
2. If the freezer is close to a heat source,
move it to another location.
3. Check that there is enough
ventilation around the freezer.
4. Check door has been closed properly.
The freezer is too cold
Turn the control wheel to a lower
number. See CONTROLS section.
The red warning light will not go out
1. Has the freezer just been installed.?
If so, this is normal and the light will
go out when the correct temperature
has been reached.
2. Has the freezer just been loaded with
a large quantity of food? If so,the
light will go out when the correct
temperature has been reached.
3. Check door has been closed properly.
The amber light is on
Fast freeze is selected. Remember to turn
fast freeze off after 24 hours from the
introduction of fresh food to be frozen.
However, if you forget, it will
automatically cancel after 48 hours.
The freezer door is difficult to open
A well sealed freezer door can be difficult
to open. This is partly due to the
difference in temperature between the
room and internal freezer compartment.
If you have just closed the freezer door, it
maybe particularly difficult to open again
immediately. Wait 5 minutes for the
internal and external pressure to equalise
and try again.
There has been a power failure
WARNING:Do not open the freezer
door.
If power failure lasts longer than the
maximum conservation time (see
USEFUL ADVICE section), food should
either be cooked and eaten with 24
hours or cooked and refrozen.
TROUBLESHOOTING
The front of the cabinet feels warm
You may notice the cabinet front is
sometimes warm, this is normal and part
of the refrigerant circulating system
designed to help prevent condensation
on the door seal.
If there is still a problem contact
Hotpoint Service (see KEY CONTACTS
back cover).
15
Page 16

Troubleshooting
OPERATING SOUNDS OF A FREEZER
These are the normal types of sound that your freezer will make.
●
●
●
●
The motor (compressor) makes a buzzing or humming sound when it is
running. This can be louder when it first switches on. This sound will
reduce over the first few months.
Gases flowing through the pipes can produce gurgling,bubbling,
roaring or humming noises.
Expansion and contraction of parts inside the freezer can produce a
cracking noise as they rapidly change temperature.
The circulating fan in the freezer can make a whirring or buzzing sound
as it blows cold air around the compartment.
TROUBLESHOOTING
16
Page 17

Notes
17
Page 18
Hotpoint guarantee
“Satisfaction guaranteed or your money back”
We give you a unique ‘satisfaction guaranteed’promise - valid for 90 days - after you have
purchased your Hotpoint appliance. If there is a technical problem simply call Hotpoint
Repair service or visit our web-site at www.theservicecentre.co.uk and where necessary, we
will arrange for an engineer to call. If the technical problem is not resolved under this
guarantee, we will replace your machine or,if you prefer,give you your money back.
All Hotpoint appliances carry a fully inclusive 12 month parts and labour guarantee as well
as free replacement parts for the first 5 years (except microwaves, selected integrated
appliances and cooker hoods, which have a one year guarantee) provided that they are
fitted by a Hotpoint engineer.
Guarantee terms and conditions
Your guarantee is only applicable in the United Kingdom or Republic of Ireland
and is subject to the following provisions that your appliance:
●
●
●
●
Has been installed and used correctly in accordance with this instruction booklet.
Has been used solely for domestic purposes and is located on domestic
premises (ie. not for commercial or trade use).
Has been properly connected to a suitable electrical supply voltage as stated on
the appliance rating plate.
Has not been subject to misuse, accident, modified or repaired by anyone other
than one of our own service engineers.
For pre purchase information on any other Hotpoint product call: 08701 50 60 70
or visit: www
.hotpoint.co.uk
Recycling & Disposal Information
As part of Hotpoint’s continued commitment to helping the environment, Hotpoint reserves
the right to use quality recycled components to keep down customer costs and minimise
material wastage.
Please dispose of packaging and old appliances carefully. Old refrigerant and oil must be
disposed of in a safe and environmentally friendly manner, using suitably qualified
SERVICE &
GUARANTEE
personnel.
To minimise risk of injury to children, remove the door, plug and cut mains cable off flush
with the appliance. Dispose of these parts separately to ensure that the appliance can no
longer be plugged into a mains socket, and the door cannot be locked shut.
18
Page 19
After Sales Service
“No company is better positioned to offer an after sales service on a
As part of our commitment to you, all Hotpoint appliances have the added benefit of a fully
inclusive parts and labour guarantee for the first 12 months. In addition to this you also have
the advantage of free replacement parts for the first 5 years when fitted by a Hotpoint
engineer. When the 12 months parts and labour guarantee expires we offer the following after
Note: Our operators will require the Model number and the Serial number of your appliance
Available 364 days a year with a fast, effective and value for money service.We have the largest
white goods repair service in the UK with over 1200 of our own fully trained engineers. All
repairs include a parts and labour guarantee for 12 months from the date of the repair.
If you require any information or have any questions about your appliance, our operators are on
All this ensures that you will receive the best available after sales service possible.
Whether you have just one or a number of Hotpoint appliances in your kitchen,we offer two
●
Repair Protection Plan - FREE service repairs for a single Hotpoint appliance during the
●
Kitchen Cover - FREE service repairs for all your Hotpoint appliances less than 8
Hotpoint appliance than us - the manufacturer”
sales service options:
Repair Service and Information Help Desk
(see USEFUL ADVICE SECTION for rating plate position).
service cover plans to give you total peace of mind.
period of cover.
years old.
UK: 08709 066066
www.theservicec
Republic of Ireland: 1850 302 200
hand with help and advice.
Extended Warranties
UK: 08709 088 088
www.theservicecentre.co.uk
Republic of Ireland: 1850 502 200
entre.co.uk
Genuine Parts and Accessories
UK: 08709 077 077
www.theservicecentre.co.uk
Republic of Ireland: (01) 842 6836
A wide range of genuine parts and accessories are available from our hotline or through
our web site.
Genuine parts and accessories, extended warranties and service repairs are all
available on our web-site at:
www.theservicecentre.co.uk
19
GUARANTEE
SERVICE &
Page 20
Key Contacts
After Sales Service
Over 1200 trained specialists, directly employed by us, ensure that you can have
complete confidence in both the appliances and services we offer.
Repair Service and Information Desk
(Open 8 to 8 Mon - Fri, 8 to 6 Sat, 10 to 4 Sun & Bank Holidays)
Note: Our operators will require the following information:
See USEFUL ADVICE SECTION for rating plate position
UK: 08709 066 066
www
.theservicecentre.co.uk
Republic of Ireland: 1850 302 200
Model number:
Serial number:
Extended Warranties
UK: 08709 088 088
(Open 8 to 8 Mon - Sun)
www.theservicecentre.co.uk
Republic of Ireland: 1850 502 200
Genuine Parts and Accessories
(Open 8-30 to 5-30 Mon - Fri & 9 to 12 Sat)
General Domestic Appliances Limited,Morley Way, Peterborough,PE2 9JB.
PRINTED BY SIMLEX.FOUR ASHES,WOLVERHAMPTON. September 2002 2766200013 - 02
UK: 08709 077 077
www.theservicecentre.co.uk
Republic of Ireland: (01) 842 6836
 Loading...