


FRIDGE FREEZER - MODELS FFA90, FFS90 & FFM90 INSTRUCTIONS FOR INSTALLATION & USE
GETTING STARTED: To ensure that your fridge freezer runs reliably and efficiently follow these steps.
STEP 1
Choose a location for your fridge freezer, away from any heat sources and allow adequate ventilation - 100mm (4 inch) gap above.
STEP 3
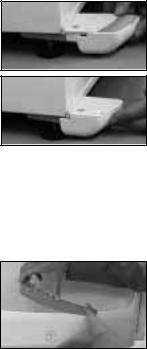
Level the fridge freezer by adjusting the front feet.
This will stop rocking or vibration and keep the door aligned.
NB. The spanner is for illustration only and is not supplied with the fridge freezer.
STEP 2
Move the fridge freezer into position, using the sides of the cabinet.
Take care to avoid damaging the refrigerant circuit pipe work on the rear.
STEP 4
After the front feet have been adjusted and the fridge freezer is level, fit the left and right hand bottom hinge covers supplied. Align with the cover plate slots and push into position.
STEP 5
Before plugging in and switching on, leave the fridge freezer in its final location for at least 15 minutes to allow it to settle.
STEP 6
Plug in and switch on. Allow the fridge freezer compartments to cool before placing food inside.
All food in the fridge freezer should be covered.
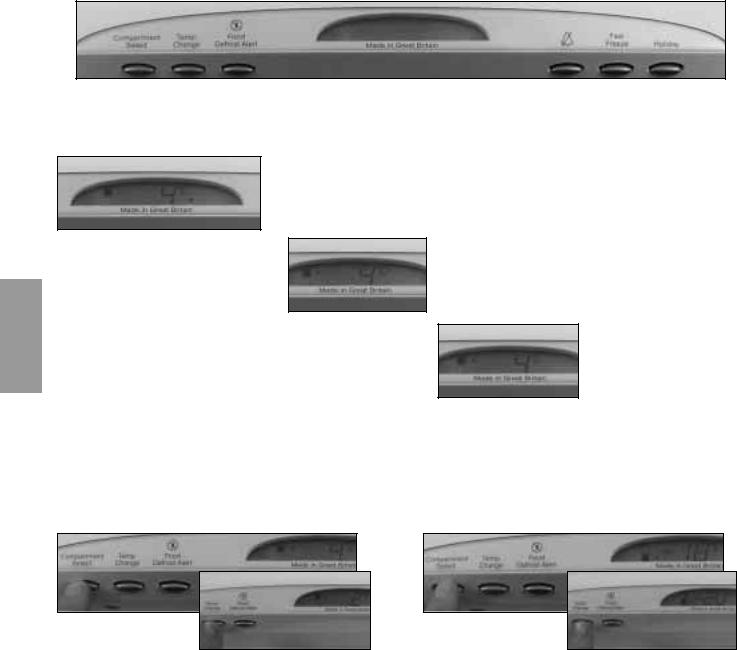
What the display will show as both compartments cool:
Stage 1: Freezer
The display will show temperature reading with the freezer High Temperature symbol on.
The freezer High Temperature symbol on until the freezer compartment
to its factory
Stage 2: Freezer
The display will show arrow indicating the temperature is cooling down, until -18˚C is reached, the arrow then turns off.
Stage 3: Fridge
The display will show temperature reading with arrow indicating the fridge compartment is cooling to its factory setting (4˚C). When 4˚C is reached the arrow turns off.
food, turn the
placing
Place the fresh food inside.
Fast freeze will automatically cancel after 48 hours.
What the display will show as the Freezer compartment cools if Fast Freeze is pressed:
Stage 1:
When Fast Freeze is pressed.
Stage 2:
After 8 seconds the display will show temperature reading with the freezer High Temperature symbol on.
Stage 3:
Freezer compartment is set to Fast Freeze.
The freezer High Temperature symbol has turned off.
NOTE:
See CONTROLS section to find out how to change the display or change compartment temperatures.
STEP 8
Your fridge freezer is now working.
If after 24 hours your fridge freezer is not operating as you want, refer to the Troubleshooting section.
INSTALLATION |
& SAFETY |
|
|
|
|
CONTROLS |
|
|
|
|
|
ADVICE USEFUL |
|
|
|
|
|
MAINTENANCE |
& CLEANING |
|
|
|
|
TROUBLESHOOTING |
|
|
|
|
|
GUARANTEE |
& SERVICE |
|
|
Read the rest of these instructions to get the best from your appliance and remember to fill in your guarantee registration.
Keep this Book in a safe place for quick reference.
For Your Safety
SAFETY & |
INSTALLATION |
|
|
For your safety, read the following advice:
The fridge freezer cooling system contains a small amount of gas which is environmentally friendly but flammable. To avoid any risk :-
●Install the fridge freezer following the installation instructions and ensure that ventilation openings are kept clear of obstruction.
●Take care when installing or moving the fridge freezer to avoid damaging the pipes on the rear.
●If you suspect a leak, do not switch on the fridge freezer, but open the windows and doors to ventilate the room.
●Do not use any electrical devices inside the freezer, for instance for defrosting.
●Do not use any mechanical devices for defrosting other than any which may have been supplied with the freezer, as they may cause damage.
●Only use this fridge freezer for storing domestic foodstuffs.
When installing your fridge freezer :-
●Ensure that the mains cable is not trapped underneath or behind the fridge freezer when you install or move it.
●Do not stack any other appliance on top of this fridge freezer as they may damage the fridge or become unstable.
When using your fridge freezer :-
●Do not sit or stand on top of your fridge freezer.
●Do not store poisonous, flammable or dangerous substances in your fridge freezer.
●Do not use aerosol sprays for defrosting or cleaning your fridge freezer.
If you sell the fridge freezer, pass on this booklet to the new owner.
2

Installation
Location & Air Circulation
Locate your fridge freezer away from sources of heat e.g. 100mm
cookers, radiators, direct sunlight as extreme temperature will affect its performance.
(4 inches)
Allow a minimum 100mm (4 inches) between the top of the fridge freezer and the ceiling or the underside of a wall cupboard.
Providing you follow the recommended ventilation requirements you will :-
●Prolong the life of the fridge freezer.
●Minimise the risk of condensation on the outside of the fridge freezer.
●Minimise the running costs.
●Minimise operating sounds caused by vibration.
Minimum space required to open door
The fridge freezer needs a space of 600mm (24 inches) in front to allow the door to open.
When positioning the fridge freezer next to a unit, a gap of 30mm (11/4 inch) can be left at the hinge side of the door to allow the easy removal of furniture. If preferred the fridge freezer can be positioned so that a gap is not left. This will restrict how far the door can be opened but the furniture can still be removed (see diagrams below). The door hinge side can be changed to make it easier to open (see ‘Door Reversal’ in the CLEANING & MAINTENANCE section).
TOP VIEW |
TOP VIEW |
|
|
|
|
|
|
|
|
600mm |
600mm |
||
|
|
|
|
|
|
|
|
|
|
|
|
30mm or more |
less than 30mm |
INSTALLATION |
& SAFETY |
|
|
3
Installation
Levelling:
Level the fridge freezer when it is in its final location by adjusting the front feet, until firm contact is made with the floor. This will stop rocking or vibration and keep the door aligned which helps the fridge freezer run reliably and efficiently.
Note: Before plugging in and switching on, leave the fridge freezer standing in its final location for at least 15 minutes to allow it to settle.
SAFETY & |
INSTALLATION |
|
|
Hinge Cover Mouldings:
After the front feet have been adjusted and the fridge freezer is level, fit the left and right hand hinge cover mouldings supplied.
To fit:
Align the bottom hinge cover moulding onto the cover plate slots.
Push until the part clicks into place.
Bottle Retainer:
To fit the bottle rack retainer:
Locate the retainer groove at one end of the bottle rack and then gradually press down along the top edge until the retainer is fully in the home position.
4
Installation
Electrical Supply
WARNING: This appliance must be earthed.
The appliance must be positioned so that the plug is accessible after installation.
Fuses
Your appliance comes fitted with a plug and a 13A fuse. If you need to replace the fuse, only use those rated at 13A and ASTA approved to BS1362.
Changing the Plug
Cut off and dispose of the supplied plug if it does not fit your socket.
WARNING: To avoid a shock hazard do not insert the discarded plug into a socket anywhere else.
IMPORTANT WIRES IN THE MAINS LEAD ARE COLOURED IN ACCORDANCE WITH THE FOLLOWING CODE :
Green/Yellow - Earth 
Blue - Neutral |
|
|
|
Brown - Live |
|
|
|
||
|
|
|
|
INSTALLATION |
& SAFETY |
|
|
If you change the plug, the colour of wires in the mains lead may not correspond with the colour of the markings identifying terminals in the plug. You should therefore wire it as shown above.
Changing the Mains Lead
This appliance is fitted with a special mains lead. If you need to replace the mains lead due to damage, one can be bought from Hotpoint Service (see KEY CONTACTS, back page). It is strongly advised that this work is carried out by a qualified electrician.
CE Marking certifies that this appliance conforms to the following EEC directives : Low Voltage Equipment - 72/23/EEC & 93/68 EEC Electromagnetic Compatibility 89/336/EEC, 92/31/EEC & 93/68/EEC
5
Controls
CONTROLS
What the display shows during normal operation:
Fridge (top compartment): with temperature setting at 4˚C
Flashing downwards arrow shows the fridge compartment is warming to reach 4˚C.
Flashing upwards arrow shows the fridge compartment is cooling to reach 4˚C.
No arrow shows the fridge compartment is at 4˚C.
Note: The temperature displayed is the average temperature for the compartment, some sections will be slightly warmer or colder.
The arrows will only be displayed if the temperature drifts, possibly due to the door being opened, warm food being placed inside or a selected change in the temperature setting.
Controlling the Temperature of the Fridge or the Freezer Compartment
●Use the Compartment Select button to choose either the fridge compartment or the freezer compartment.
●Press the Temp Change button to select a different temperature for the compartment. The temperature will decrease, getting 1˚C colder for each press of the button, until the required setting is reached or the coldest possible setting is reached (2˚C for the fridge compartment and -25˚C for the freezer compartment).
●Once the coldest possible setting is reached, pressing the Temp Change button again will return the temperature selection to the maximum setting (6˚C for the fridge compartment and -18˚C for the freezer compartment).
Note: The display light will come on when you press any button and it will stay on for 12 seconds.
You can check the temperature of the fridge freezer compartments by using a Fridge Freezer Thermometer available from Hotpoint Genuine Part and Accessories Mail Order Hotline (see KEY CONTACTS back page).
WARNING: Do not use a mercury filled thermometer, as breakage would cause a health hazard.
Your fridge freezer must NOT be placed in a room where the temperature goes below 6˚C or above 38˚C for prolonged periods, as the internal fridge temperature will not be maintained.
6
Controls
Holiday Function
This feature allows you to set your fridge compartment to a warmer setting while you are away on holiday, to reduce running costs without affecting the freezer..
To set up holiday mode:
1.Remove any food from the fridge compartment that will deteriorate while you are away. Make sure the fridge is clean, see ‘Cleaning’ in the CLEANING & MAINTENANCE section.
2.Close the door.
3.Press the holiday button and the holiday ‘Hd’ symbol and the suitcase symbol will show in the display window.
To reset to normal operation:
1.Press the holiday button OR open the fridge door. Both holiday symbols will go out, to show holiday mode is cancelled.
2.The fridge compartment will return to the temperature setting.
Note : Opening the door, pressing the holiday button or pressing any other button at any time after holiday mode has been set will turn the function off.
CONTROLS
Fast Freeze Button -
Freezing Fresh Food
The bottom compartment drawer, should be used to freeze fresh food. Transfer already frozen food to one of the upper compartment drawers.
During the fast freeze process the two chiller bleed restrictors (refer to page 12 for illustration) should be inserted into the chiller bleed openings. This will prevent the chiller drawer and salad bins from going below their ideal storage temperatures. At the end of the fast freeze process, these restrictors are to be removed and kept until required.
-Before loading 2kg or more of fresh food, select fast freeze for the required pre-freeze time (see chart below).
-If freezing up to 2kg of fresh food just select fast freeze when loading.
Once the fresh food is loaded leave fast freeze on for 24 hours to freeze the food as quickly as
possible. |
|
Maximum freezing capacity in 24hrs: |
10kg |
Note: Don’t forget to turn fast freeze off after 24 hours from the introduction of fresh food to be frozen.
However, fast freeze will turn off automatically after 48 hours if you forget.
Pre-Freeze chart when selecting Fast Freeze:
Load for freezing |
Pre-freeze time |
Load position |
|
|
|
8 to 10kg max. |
24 hours |
In the bottom drawer. |
|
|
|
6 to 8kg |
12 hours |
In the bottom drawer. |
|
|
|
2 to 6kg |
6 hours |
In the bottom drawer. |
|
|
|
up to 2kg |
not required |
In the bottom drawer. |
|
|
|
7
CONTROLS
Controls
Check the TROUBLESHOOTING section if you have any problems with these warning symbols.
Freezer High Temperature Warning symbol and buzzer
The freezer High Temperature warning symbol will come on when the fridge freezer is first switched on, or when the temperature inside the compartment rises above the correct storage temperature. It will go out as soon as the compartment returns to its normal storage temperature.
The symbol may come on for a short period when opening the freezer door to load or unload food, in this case storage times will not be affected.
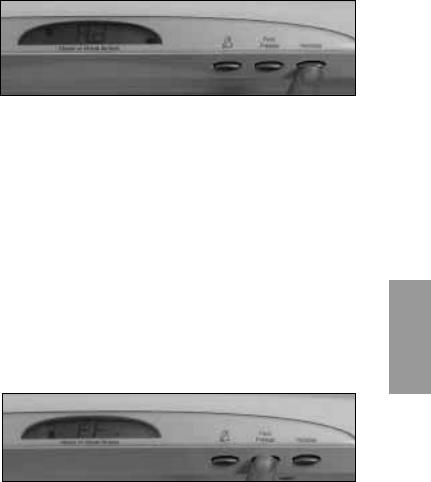
A buzzer will sound when the freezer High Temperature warning symbol comes on. You can silence the buzzer by pressing the cancel button and the bell symbol will go out on the display. The freezer High Temperature warning symbol will remain on the display until the compartment returns to its normal storage temperature.
Note: To avoid unnecessary concern the buzzer is automatically silenced the very first time you switch the fridge freezer on.
If there has been a power cut resulting in a rise in freezer compartment temperature, the freezer High Temperature warning symbol will come on as soon as the mains power returns. It will go out as soon as the compartment returns to its normal storage temperature.
Avoid opening compartment doors during a power cut, the freezer insulation will continue to protect your food. However, if the power cut continues there is a risk of your frozen food beginning to defrost due to the rise in temperature (see FOOD DEFROST ALERT below).
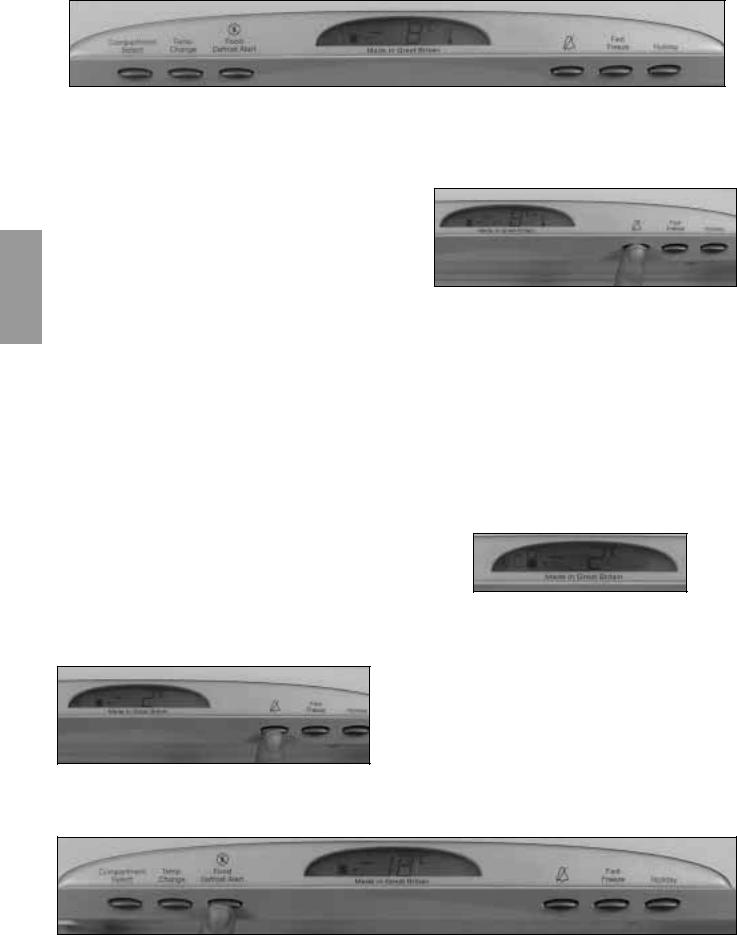
Food Defrost Alert symbol and buzzer
The Food Defrost Alert symbol will come on when the mains power has been restored after a power cut and the freezer compartment has returned to its normal storage temperature.
The Food Defrost Alert symbol will be on the display, along with a reading of the temperature the freezer compartment had risen to eg. -2˚C
This warns you that there has been a power cut, during which the freezer compartment temperature rose to an unsafe level, allowing partial defrosting of stored food.
If this symbol is on the display, food should be either cooked and eaten within 24 hours, cooked and refrozen or thrown away.
A buzzer will also sound. You can silence the buzzer by pressing the cancel button and the bell symbol will go out on the display.
The Food Defrost Alert symbol is a particularly useful warning if you were out at the time of the power cut. The symbol will remain on until cancelled manually by pressing the Food Defrost Alert button. On cancelling the Food Defrost Alert symbol, the display will revert to the normal storage temperature.
8
 Loading...